
Pulling the motor

Thread Starter
Registered User
Joined: Aug 2013
Posts: 3,900
From: Central Illinois
Thought since I had the front this far apart I MAW paint the grills. That Krylon metallic is pretty good stuff. Goes on nice without the tendency to run and it actually looks good; not like "I want it to look like metal so I'll use this crappy silver paint", but smooth with an even finish.
The hardest part, and there were many, was taping them up and doing it well...which I didn't.
[IMG]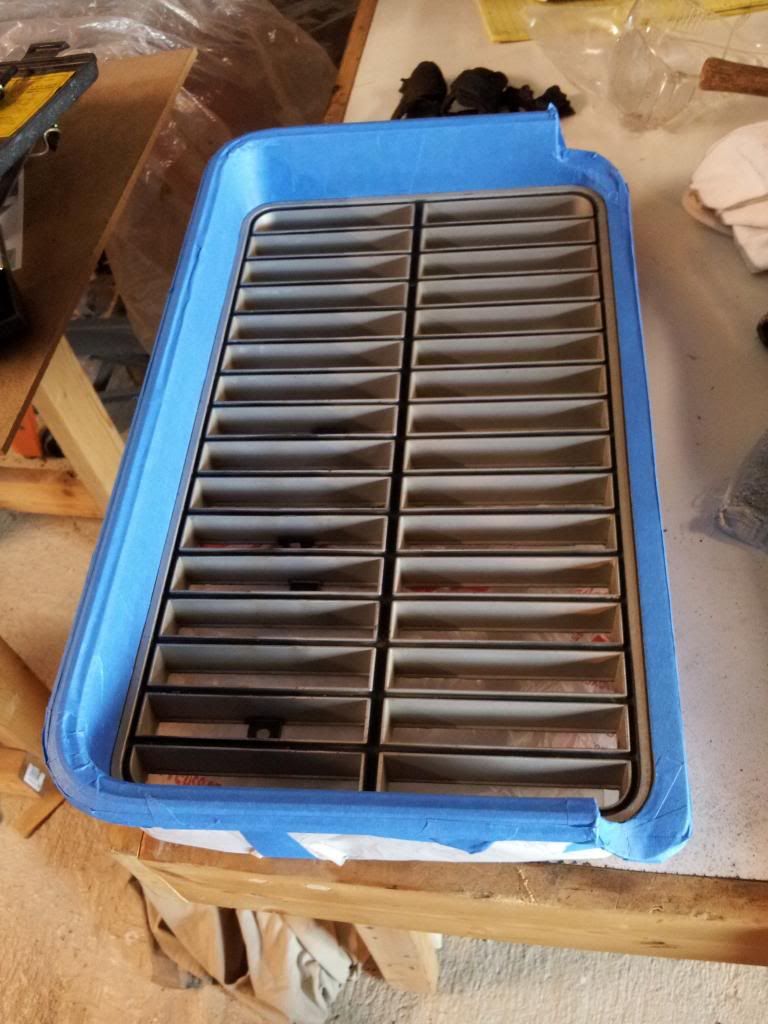 [/IMG]
So after painting the inside black it came time to tape that and spray the krylon metallic silver. I had a heckuva time getting the tape just where I wanted it so I used something called masking fluid (sometimes spelled masquing). It's a liquid rubber resist used for watercolor painting, available at any arts and crafts store. I had it laying around so I thought what the hey. It worked well but I have a pretty steady hand when it comes to using a brush (I used a small artist's chisel brush). You can kind of see the gap between the tape and the area to be painted. First I painted on the mask and then I taped, partly covering the masking fluid. So, to be clear, I painted masking fluid over the black paint just along the edges.
[IMG]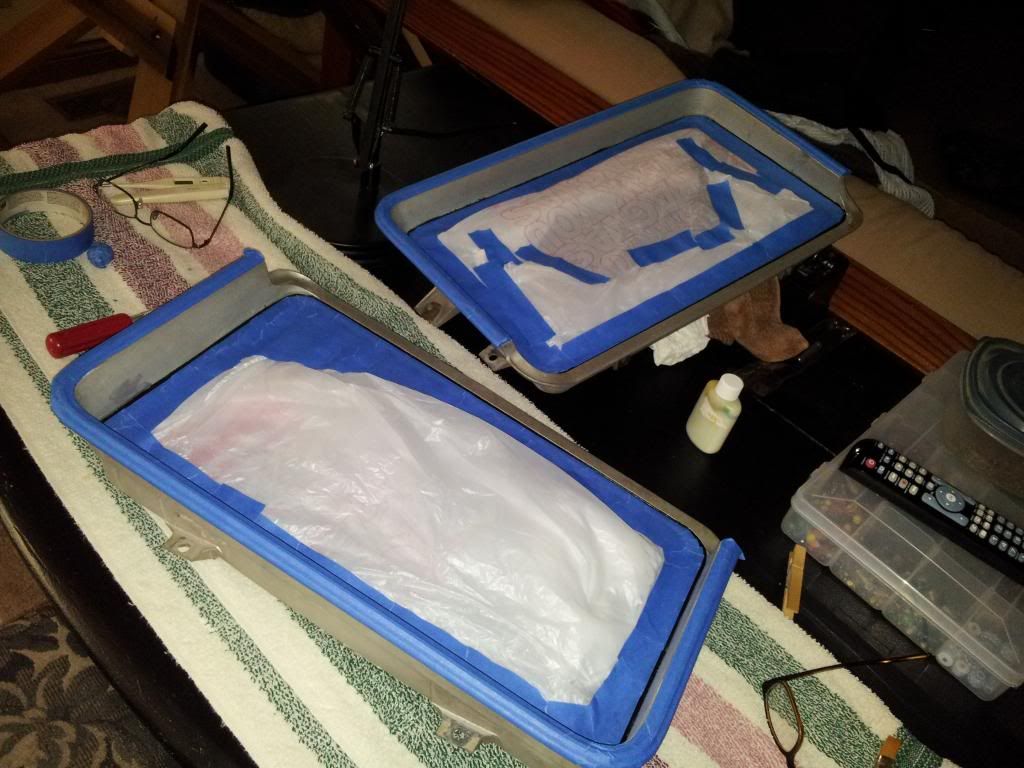 [/IMG]
Now for the fun part. It takes a specialized tool to remove the masking fluid and I couldn't find mine. It looks like a small paint brush but with each end having a rigid rubber nub, each a different shape. I did however find my sharpen-able eraser. It looks like a pencil but with eraser material instead of graphite. That made quick work of the masking fluid. I kept a stiff brush nearby and a pair of very sharp tweezers for removing the balled up rubber.
Obviously I missed a spot on the lower right with the mask but a little touch up with a brush and I think they'll look pretty good
[IMG]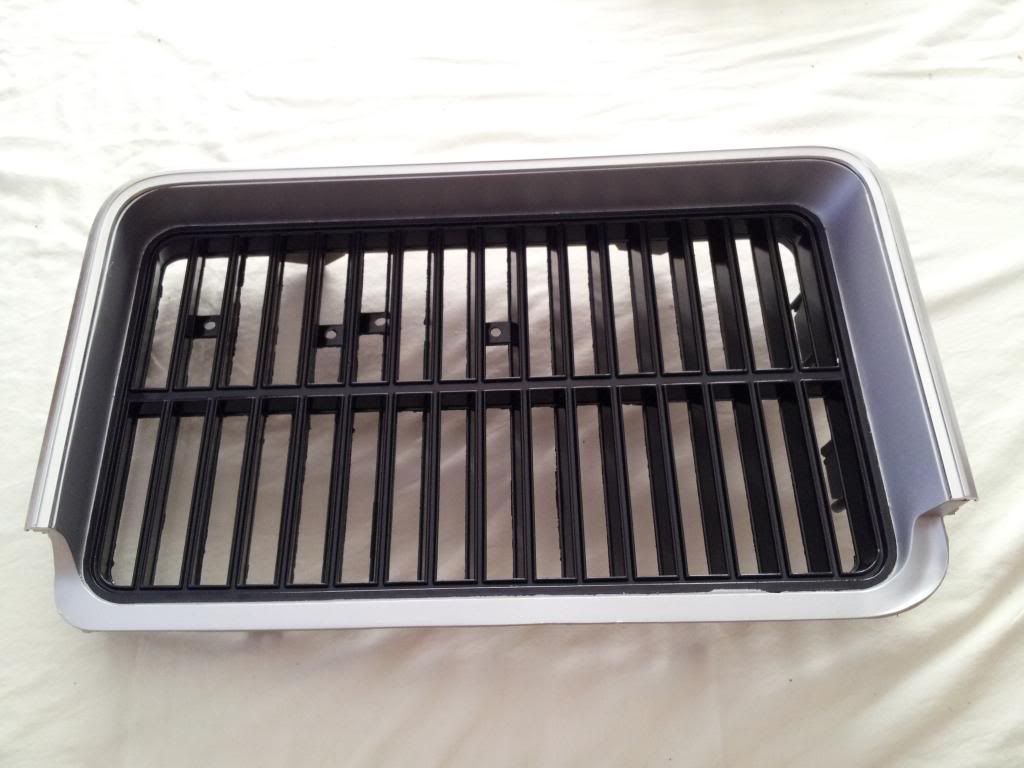 [/IMG]
The hardest part, and there were many, was taping them up and doing it well...which I didn't.
[IMG]
 [/IMG]
So after painting the inside black it came time to tape that and spray the krylon metallic silver. I had a heckuva time getting the tape just where I wanted it so I used something called masking fluid (sometimes spelled masquing). It's a liquid rubber resist used for watercolor painting, available at any arts and crafts store. I had it laying around so I thought what the hey. It worked well but I have a pretty steady hand when it comes to using a brush (I used a small artist's chisel brush). You can kind of see the gap between the tape and the area to be painted. First I painted on the mask and then I taped, partly covering the masking fluid. So, to be clear, I painted masking fluid over the black paint just along the edges.
[IMG]
 [/IMG]
Now for the fun part. It takes a specialized tool to remove the masking fluid and I couldn't find mine. It looks like a small paint brush but with each end having a rigid rubber nub, each a different shape. I did however find my sharpen-able eraser. It looks like a pencil but with eraser material instead of graphite. That made quick work of the masking fluid. I kept a stiff brush nearby and a pair of very sharp tweezers for removing the balled up rubber.
Obviously I missed a spot on the lower right with the mask but a little touch up with a brush and I think they'll look pretty good
[IMG]
 [/IMG]
Hookers under Hood
Joined: Nov 2013
Posts: 3,543
From: Ontario, Canada
Holy jumpin your certainly covering a lot of MAW's, Pfffft and the list just keeps growing oh I know that feeling. I just haven't got the feeling to do all of my MAW's. Man your going to have a NEW 71 cutlass before you know it, looking good !!!

Thread Starter
Registered User
Joined: Aug 2013
Posts: 3,900
From: Central Illinois
The grills have four attaching points but I can only find two of the screws. I've maintained excellent organization and I can't find them. Am I missing something? Do the other two screws hold on another component maybe?
[IMG] [/IMG]
[IMG]
 [/IMG]
Thread Starter
Registered User
Joined: Aug 2013
Posts: 3,900
From: Central Illinois
Finished the AC box this morning, thanks to Rob's thread. Getting ready to install it. Also, I put the grills back in yesterday. I think they look pretty awesome.
[IMG]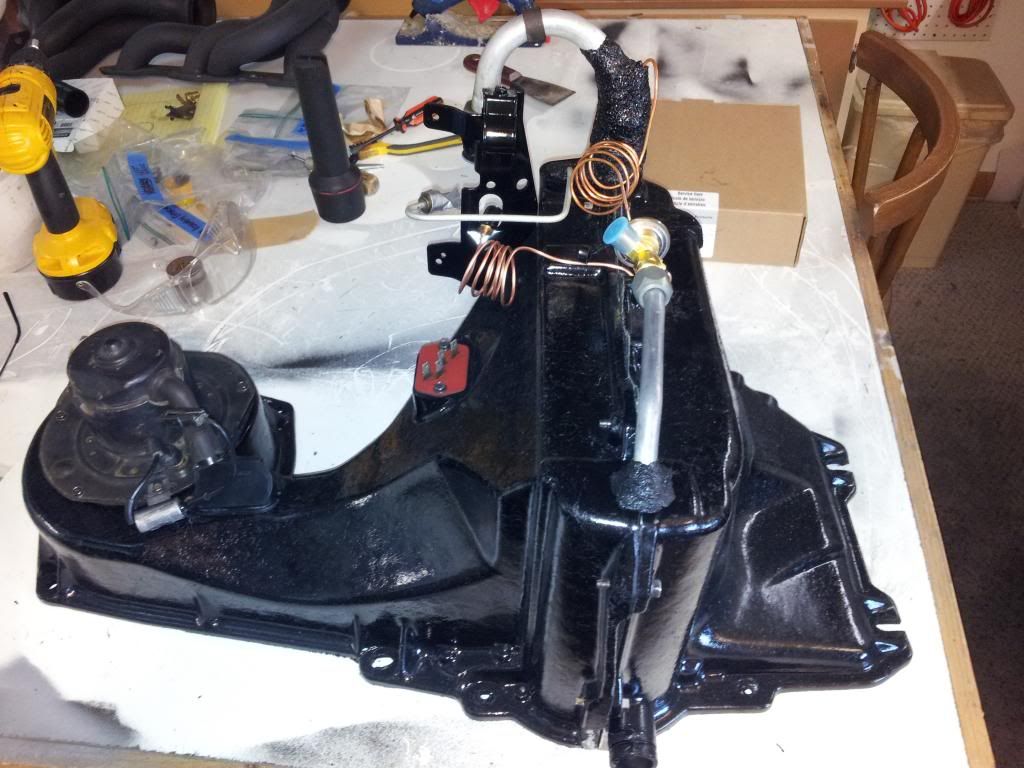 [/IMG]
[IMG]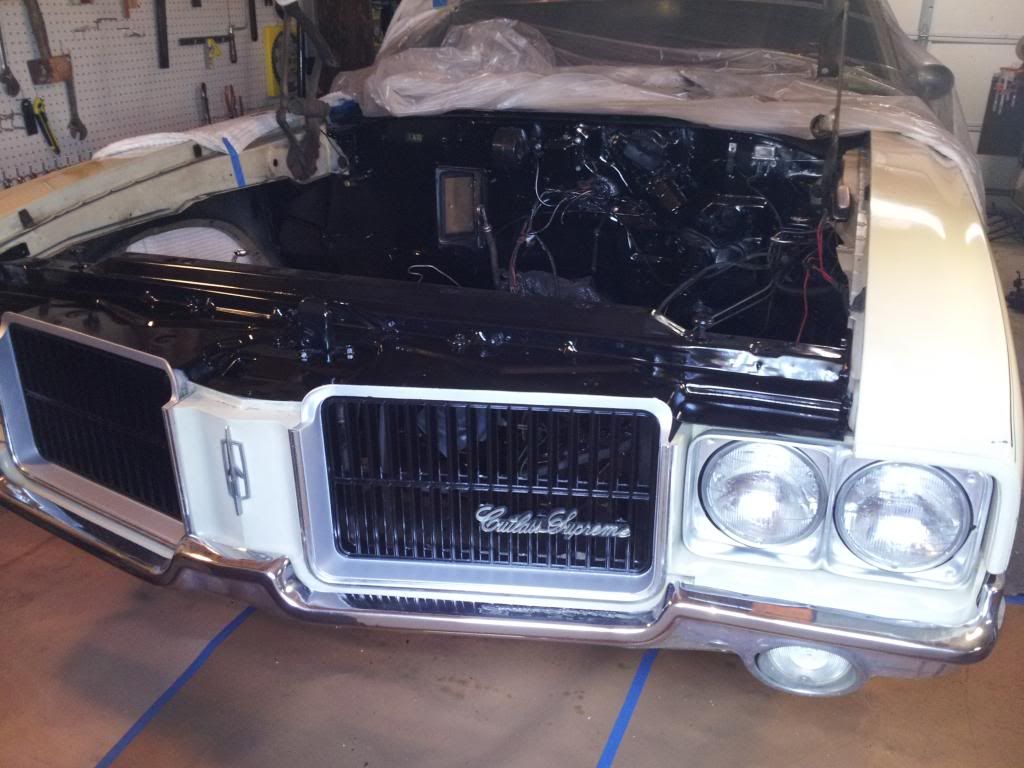 [/IMG]
Putting stuff back together is way more fun that taking it apart and cleaning. But it certainly has a "Uhh..did I remember to put that doohicky back in there" anxiety component.
[IMG]
 [/IMG]
[IMG]
 [/IMG]
Putting stuff back together is way more fun that taking it apart and cleaning. But it certainly has a "Uhh..did I remember to put that doohicky back in there" anxiety component.
Last edited by Macadoo; May 10, 2014 at 09:48 AM.
Thread Starter
Registered User
Joined: Aug 2013
Posts: 3,900
From: Central Illinois
I'd rather rebuild another motor...or two. Engine bay is a rather miserable job. Just so much cleaning! But thank Justin, I'm getting there.
Thread Starter
Registered User
Joined: Aug 2013
Posts: 3,900
From: Central Illinois
Don't forget the caulk, don't forget the caulk, don't forget the caulk. I forgot the caulk. Lol, at least the bolts weren't all tightened. Pulled it once more and added the caulk. It's all on and clean and tight.
[IMG]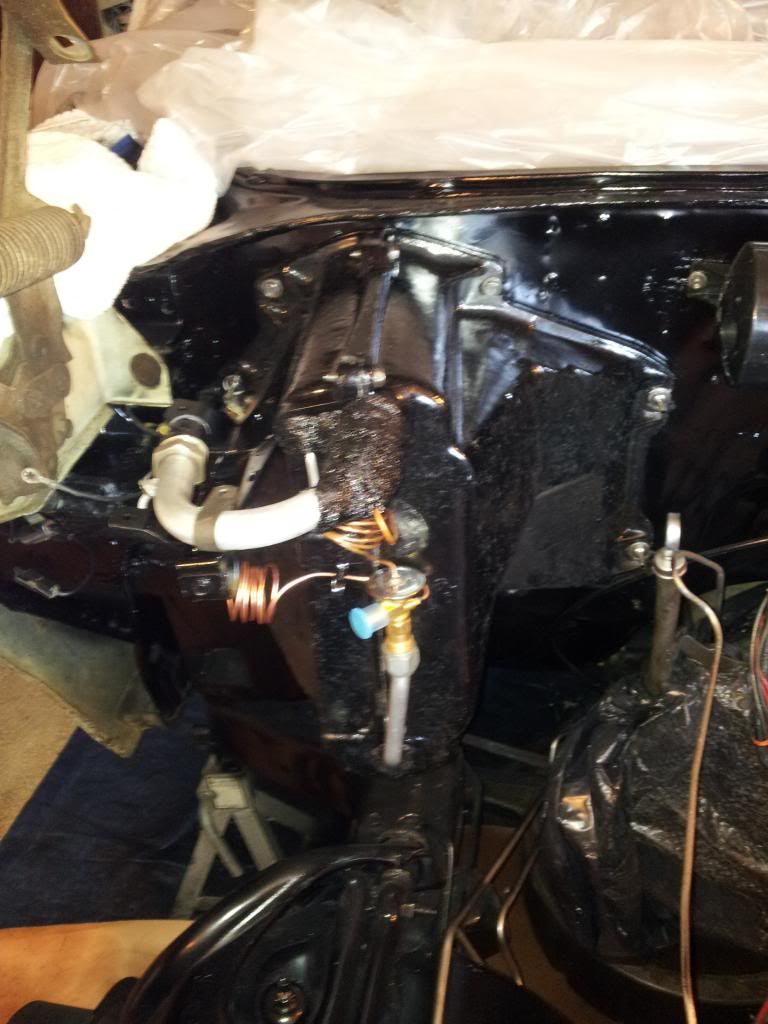 [/IMG]
Now, wheel wells, brakes, clean/re-wrap the wiring harnesses, install the condenser....I think that's it. I'll be ready to drop my motor in!
[IMG]
 [/IMG]
Now, wheel wells, brakes, clean/re-wrap the wiring harnesses, install the condenser....I think that's it. I'll be ready to drop my motor in!
Thread Starter
Registered User
Joined: Aug 2013
Posts: 3,900
From: Central Illinois

Thread Starter
Registered User
Joined: Aug 2013
Posts: 3,900
From: Central Illinois
Snuck out of work early (on time) and decided to spend some quality time under the dash. I needed to run the power wire for the HEI and yank out some of the toggle switches and poorly installed wiring for that triple electric fuel pump rig that was on there. Oh, and the FM tuner and some other sketchy stuff.
[IMG]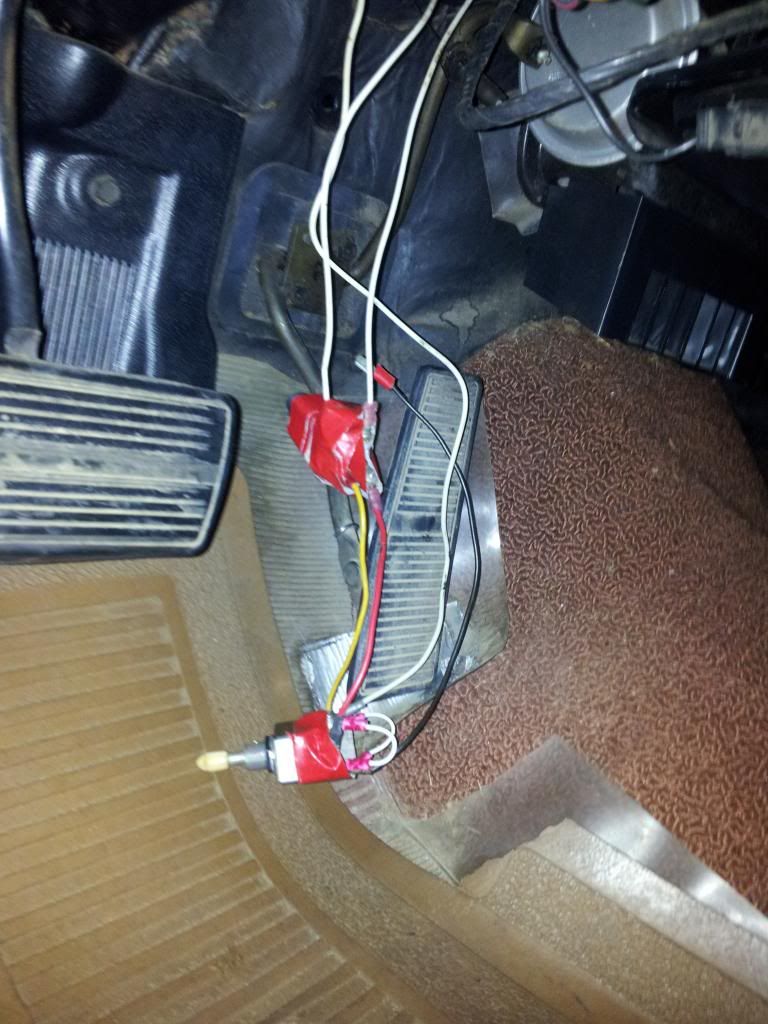 [/IMG]
[IMG]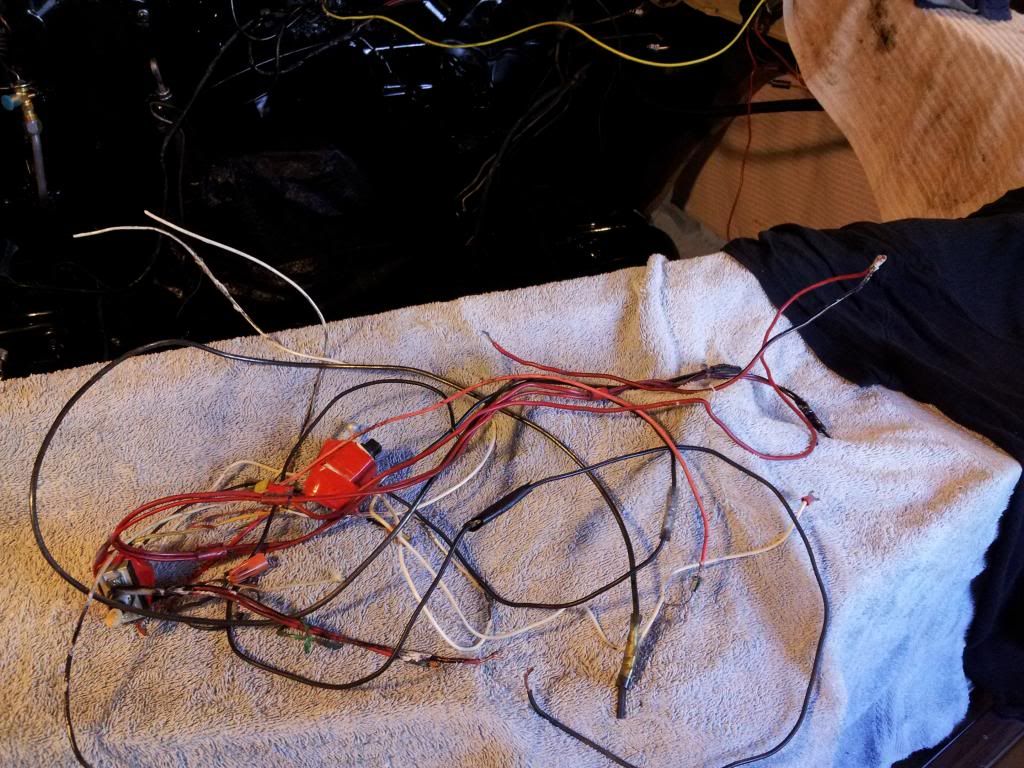 [/IMG]
[IMG]
 [/IMG]
[IMG]
 [/IMG]
Justin
Joined: Mar 2012
Posts: 3,454
From: utah
I would while your there if they leak you should replace shoes depending if the got soaked in fluid or not.
Thread Starter
Registered User
Joined: Aug 2013
Posts: 3,900
From: Central Illinois
Registered User
Joined: Mar 2012
Posts: 1,257
From: Chesapeake, VA
Wow what a progression you have made for a simple motor pull! :-) I've been pretty good though I have removed most of my front clip the motor has stayed in place. Another later time the whole thing will come apart and get the full rebuild.
Connoisseur d'Junque
Joined: Sep 2010
Posts: 21,183
From: The Hudson Valley
I'd say if the wheel cylinders don't show signs of leakage, don't replace them.
Reason? The new ones will be Genuine Made in China, the old ones may be American, and of higher quality.
No point swapping out good old parts for crappy new ones (that may leak in a year... or may not).
- Eric
Reason? The new ones will be Genuine Made in China, the old ones may be American, and of higher quality.
No point swapping out good old parts for crappy new ones (that may leak in a year... or may not).
- Eric
Thread Starter
Registered User
Joined: Aug 2013
Posts: 3,900
From: Central Illinois
Thanks for the info guys, and a good point on the cylinders. If I get stuck I'll let you know. I have wheel bearing grease but it's kind of old. Kind of really old, like 20 years or so. But it seems okay. Maybe I'll get new just in case.
Yeah, turns out I had my MAW helmet on backward, lol. I just couldn't see putting a pretty, shiny motor in a greasy, ugly bay.
Yeah, turns out I had my MAW helmet on backward, lol. I just couldn't see putting a pretty, shiny motor in a greasy, ugly bay.
Registered User
Joined: Jul 2013
Posts: 1,815
From: Mo-Ray-Al, K-Bec.
Thread Starter
Registered User
Joined: Aug 2013
Posts: 3,900
From: Central Illinois
Thread Starter
Registered User
Joined: Aug 2013
Posts: 3,900
From: Central Illinois
One side of the front is done. A fairly steep learning curve but I finally got it. The other side should be much faster.
[IMG]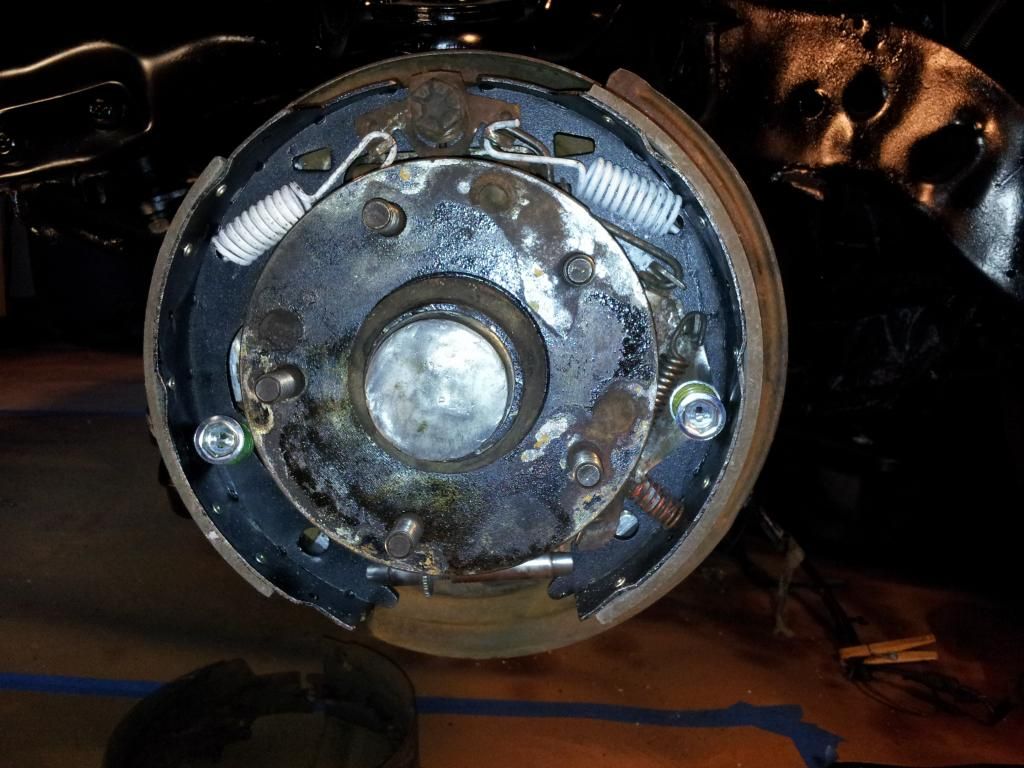 [/IMG]
These came in pretty handy (sorry Copper).
[IMG]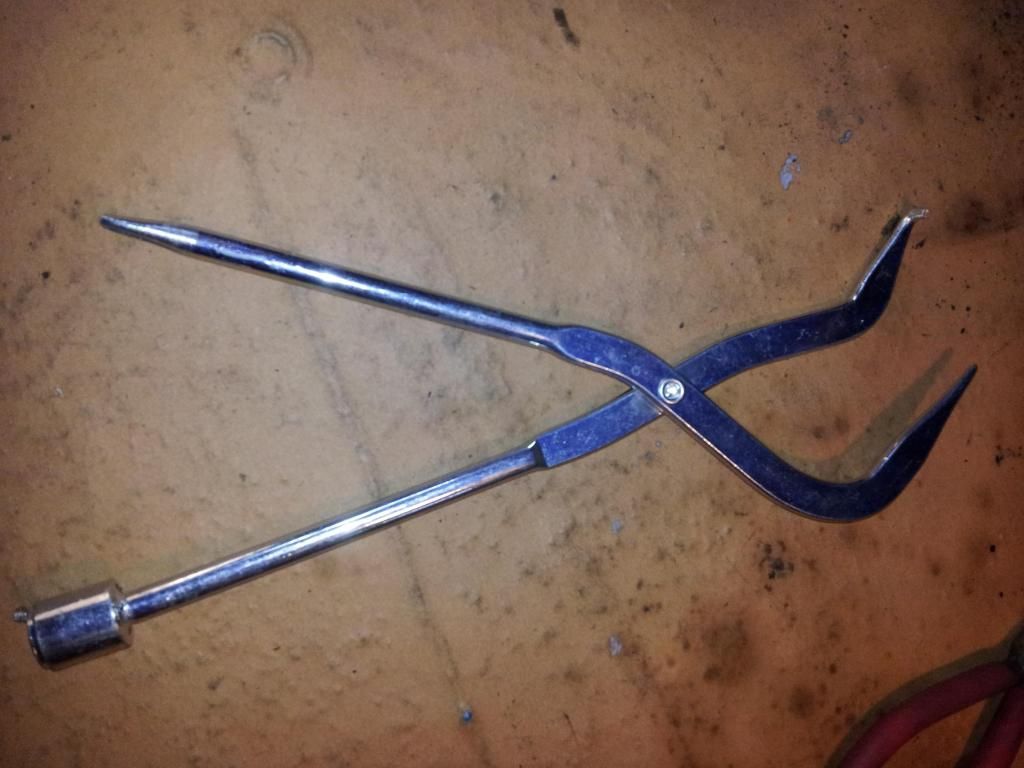 [/IMG]
And I was tearing my hair out until I realized what this could do.
[IMG] [/IMG]
[IMG]
 [/IMG]
These came in pretty handy (sorry Copper).
[IMG]
 [/IMG]
And I was tearing my hair out until I realized what this could do.
[IMG]
 [/IMG]
Thread Starter
Registered User
Joined: Aug 2013
Posts: 3,900
From: Central Illinois
Registered User
Joined: Feb 2010
Posts: 1,746
From: Vancouver Island, Canada
It's little things like that you don't find in the books, don't know to search for and never comes up until someone accidentally mentions it!
I was given a set of brake tools years ago and love them...can't imagine doing brakes without them now!
I was given a set of brake tools years ago and love them...can't imagine doing brakes without them now!
Thread Starter
Registered User
Joined: Aug 2013
Posts: 3,900
From: Central Illinois
Yupper. It's part of the reason I hang out here. Lots of experience for the taking. That, and it's just a cool place to hang out.
Justin
Joined: Mar 2012
Posts: 3,454
From: utah
I am with copper most if the time I have the correct tools but basic hand tools seems to get the job done faster and easier. I am sure it's just because that what I learned with'
Justin
Joined: Mar 2012
Posts: 3,454
From: utah
Mac, I have been rebuilding my car but honestly I'm pulling the two speed trans and little 330 that could and replacing with my rebuilt th400 and soon to be rebuilt 455
I also have a 70? Olds 12 bolt just not sure if I will keep that or find a chev 12 bolt
If you get some time search my build it's " kids helping with project "
I also have a 70? Olds 12 bolt just not sure if I will keep that or find a chev 12 bolt
If you get some time search my build it's " kids helping with project "
Justin
Joined: Mar 2012
Posts: 3,454
From: utah
Yes 455 !!!!
I picked two up last year with a trans I think I am in both like 800 bucks one I paid 600 and the other 200.
The machine work seems fair, but parts man they are pricy. I am currently working with a member for some trw used pistons 30 over with a set of reconditioned rods that he is balancing for me I hope to get them real soon
Thread Starter
Registered User
Joined: Aug 2013
Posts: 3,900
From: Central Illinois
I wanted to test the blower motor before I put the inner wheel well back in and had a couple of surprises. First, it took me a while to figure out how to hook it up to the battery (which is out of the car). Turned out to be positive cable to power in at the resistor and negative cable to the resistor housing.
That's when I discovered it was leaking air pretty badly so I added more 3M strip caulk to the outside of the AC box but I must have pushed it too far in because I started to hear a buzz, like a large bee inside. Soooo......I pulled the motor again. Now, to be fair this wasn't a MAW, more of a do it now or pay later type of thing. And it's a good thing I did because the resistor input wire fell off Now I figured I was really up a creek, not knowing if I could find one and I didn't want to be derailed now that summer is here. So I cleaned it up, got out the ol' soldering iron, and went to work.
[IMG]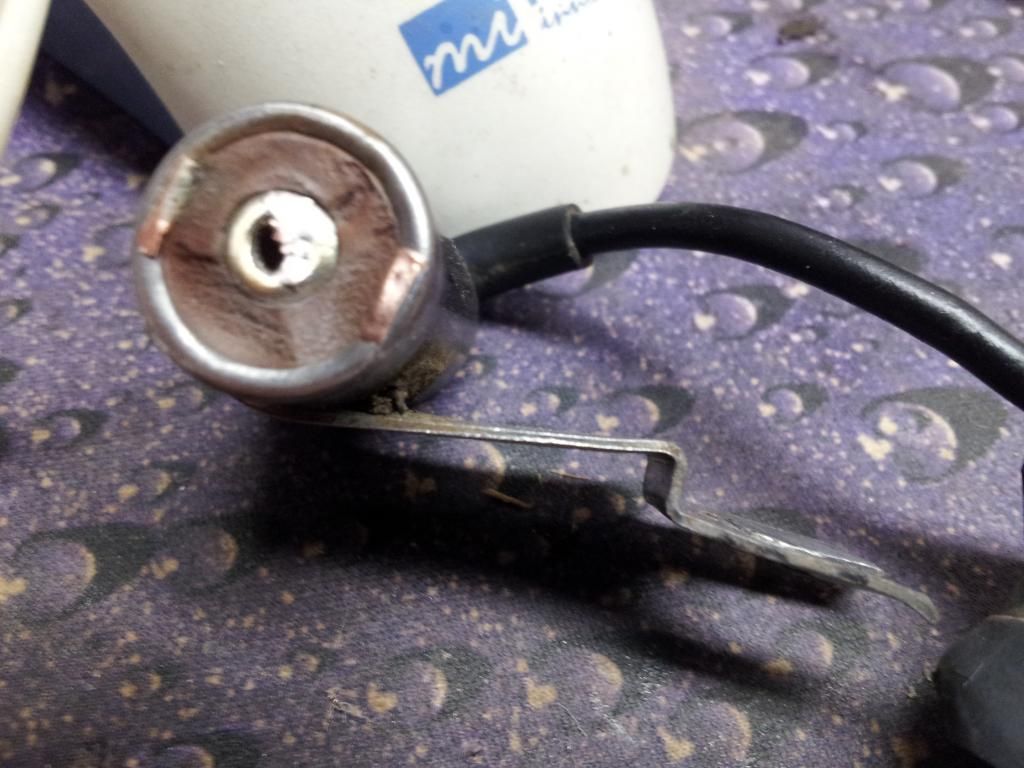 [/IMG]
Luckily the hole was mostly there so I just cleaned up the wire, inserted it, and soldered that baby back in. Now I'm not usually this much of a solder-slob but I wanted that wire REALLY in there.
[IMG]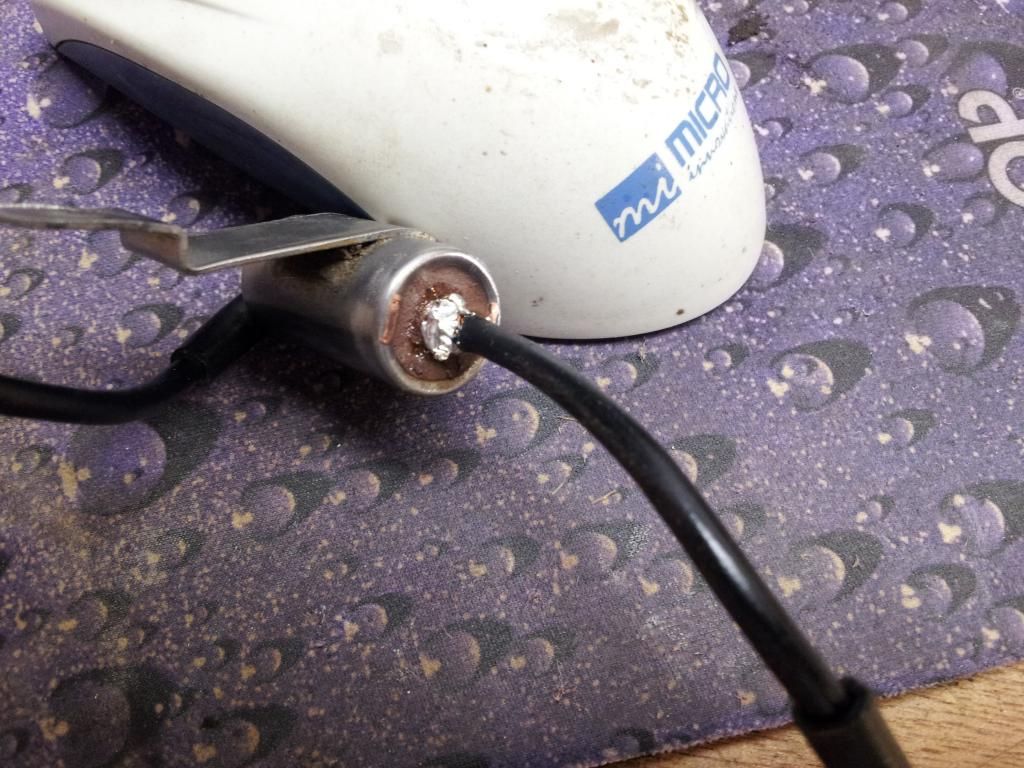 [/IMG]
I waited another minute or so and covered the joint in black hot glue for good measure.
While that was setting I used brake kleen and sprayed out the inside of the motor, it was kinda' nasty in there, and oiled it up with 3-in-1.
Boy it's quiet as a mouse now and kicks out gale force air. I'm really glad I took the time to go through all of this. I mean it worked when I pulled it so I didn't think I would bother but I't's a good think I did
[IMG]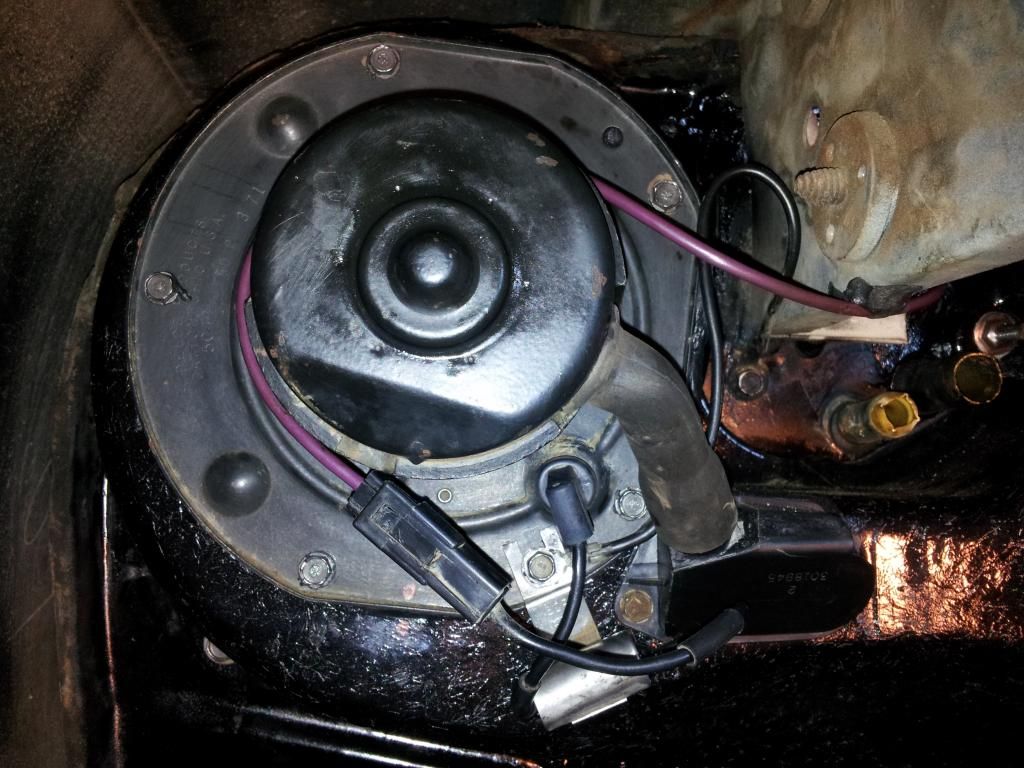 [/IMG]
Now, for that inner wheel well........
That's when I discovered it was leaking air pretty badly so I added more 3M strip caulk to the outside of the AC box but I must have pushed it too far in because I started to hear a buzz, like a large bee inside. Soooo......I pulled the motor again. Now, to be fair this wasn't a MAW, more of a do it now or pay later type of thing. And it's a good thing I did because the resistor input wire fell off
Now I figured I was really up a creek, not knowing if I could find one and I didn't want to be derailed now that summer is here. So I cleaned it up, got out the ol' soldering iron, and went to work.[IMG]
 [/IMG]
Luckily the hole was mostly there so I just cleaned up the wire, inserted it, and soldered that baby back in. Now I'm not usually this much of a solder-slob but I wanted that wire REALLY in there.
[IMG]
 [/IMG]
I waited another minute or so and covered the joint in black hot glue for good measure.
While that was setting I used brake kleen and sprayed out the inside of the motor, it was kinda' nasty in there, and oiled it up with 3-in-1.
Boy it's quiet as a mouse now and kicks out gale force air. I'm really glad I took the time to go through all of this. I mean it worked when I pulled it so I didn't think I would bother but I't's a good think I did
[IMG]
 [/IMG]
Now, for that inner wheel well........


