When you click on links to various merchants on this site and make a purchase, this can result in this site earning a commission. Affiliate programs and affiliations include, but are not limited to, the eBay Partner Network.
Well guys Im still at it. I have been fine tuning all the plug welds and prepping all areas so I can get more epoxy primer on freshly welded and ground areas. I had the body on the rotisserie so I could access all areas as best I could. I had a lot of work to do do inside trunk after replacing the tulip panel. A lot of this stuff is never seen but if you look you will see plug welds inside trunk under package tray and backside of rear seat divider. I know all those welds are there and at this point Im not gonna start cutting corners so I had to touch up and grind every one of them along with all other welds around wheel wells, trunk floor and drops.
Looking forward I want to get the body straight and clean as possible. I also want to use as little body filler as possible. I was planning on using lead on the seams at the top of the quarter panels. After looking at the welded seam on the driver side quarter I wasn't happy with the welded seam. Ive learned a lot about welding sheet metal on this car and the one thing I can warn people about when doing something like this (if you dont already know) is to know that heat is the enemy. The seam wasn't that bad after welding but I should have controlled the heat better. I think where I made the mistake is grinding the seam. While grinding I believe I generated enough heat to cause a bit of heat warp and the seam sunk a bit. My dilemma was the seam crossed the vinyl top molding and I want to replace the studs for the molding but if I fill with lead then I might not be able. I want to get this as straight as possible with little filler (lead or plastic) as possible. I decided to graft a piece from the parts car and control heat better this time. I took car off rotisserie again and put back on jig. I cut a pc from parts car, sandblasted and primed the backside. I cut out the warped seam and slowly stitch welded the new pc in. Heat is very hard to control and even with this replacement I got a little dip on the seam probably from grinding again. I used a stud welder to pull the seam a bit and try to get as close as possible. I then used a shrinking disk for the first time to try and flatten any raised areas. I think I have it pretty close now and it will still require a little filler to just fine tune the surface but will be very little and I believe I will still be able to reinstall molding studs where needed.
Word to the wise: Heat can be your enemy working with sheet metal when welding and grinding so go slow and disperse the heat and use air to cool when possible.
Last edited by scrappie; October 25th, 2020 at 06:09 PM.
I�m guessing you would be into this for at least 15K maybe 20K just in metal work if you were paying someone else to do it. I doubt you would have had near the quality.
I�m guessing you would be into this for at least 15K maybe 20K just in metal work if you were paying someone else to do it. I doubt you would have had near the quality.
I dont know anything about numbers but this part is right on " I doubt you would have had near the quality"
I can really identify what you've been through. It took me over 10 years and the only fortunate thing was I bought my car with a completely restored interior. Not much to be said about the rusted out frame, cowl and all trunk/floorboards that were replaced with brand new (excepting frame that came from a donor 1968 GTO).
I observed and have documented those 10 years of pain, strain and anxiety. I was fortunate enough to have found an expert welder in Daytona that basically put my "bucket" back into shape. Unfortunately the original $7,500 paint job was flawed relegating a second $8,500 repaint. The original resto shop ultimately went into receivership about a month after I received my supposedly restored project. I fortunately found a qualified shop in town that had to basically start again, repaint, repair bent front clip etc. My car is now right.
I've attached a pic from New Smyrna Beach's Canal Street show over a year ago. I can honestly say nobody cared about the Dodge Hurricane next door in red trim. I was entertaining no less than 10 Oldsmobile enthusiasts the entire time I was there. Keep on...
Hey Doc, thanks for that. Goes to show, persistence (and some$) pays off. Your story reminds me Im not the only one that is going or has gone through this process but your picture inspires me. That is a great looking car! Love to see more pics. At least your interior was done to motivate and inspire you along the way. Im motivated by not seeing rust anymore. I think of my car as a patient in critical condition or close to death now in recovery or rehab. Gonna be here a while but it will get better and look forward telling the tale of my journey.
Last edited by scrappie; November 6th, 2020 at 04:50 AM.
Hey Doc, thanks for that. Goes to show, persistence (and some$) pays off. Your story reminds me Im not the only one that is going or has gone through this process but your picture inspires me. That is a great looking car! Love to see more pics. At least your interior was done to motivate and inspire you along the way. Im motivated by not seeing rust anymore. I think of my car as a patient in critical condition or close to death now in recovery or rehab. Gonna be here a while but it will get better and look forward telling the tale of my journey.
Thanks for reaching back out Scraps. You write a real nice letter btw. Yea, I know and feel ya, it's a love of labor these old machines but as I tell everybody, they don't make em' anymore!
I believe GM's biggest mistake was getting rid of the Oldsmobile and Pontiac lines. OP as in alphabet. Oldsmobile was the trendsetter risk taker of the brand, Pontiac followed in the guise of the infamous Mr. John Delorean. I give him credit for being the creative brains behind the GTO but not for his cocain deals. Oldsmobile followed same but in my mind with a superior product over the 64' "acs." My quote.
If you look at the history in NASCAR and how many Oldsmobile engines won on the sand and on the paved oval you know. It's unfortunate to date nobody has ever produced a real film documentary of Oldsmobile's domination of NASCAR in the golden years. Oh well, maybe one day when I retire from live sports television, I'll hire my own crew to do it right.
Good luck on your summary and book restoring yours. I love that blue color.
Nice to see your progress. Its great to see some of the original cars brought back.
Now that the sun is down before I get out of work, my wife is less likely to drag me out for a ride in the 71 conv to a local brewery for a cold beverage after work. Not sure why but is does thwart my desire to work on the W30! lol
Seriously, great progress. Hope I can get mine done for the Nats next year! I am in the block sanding stage. It is a LOOONG stage!
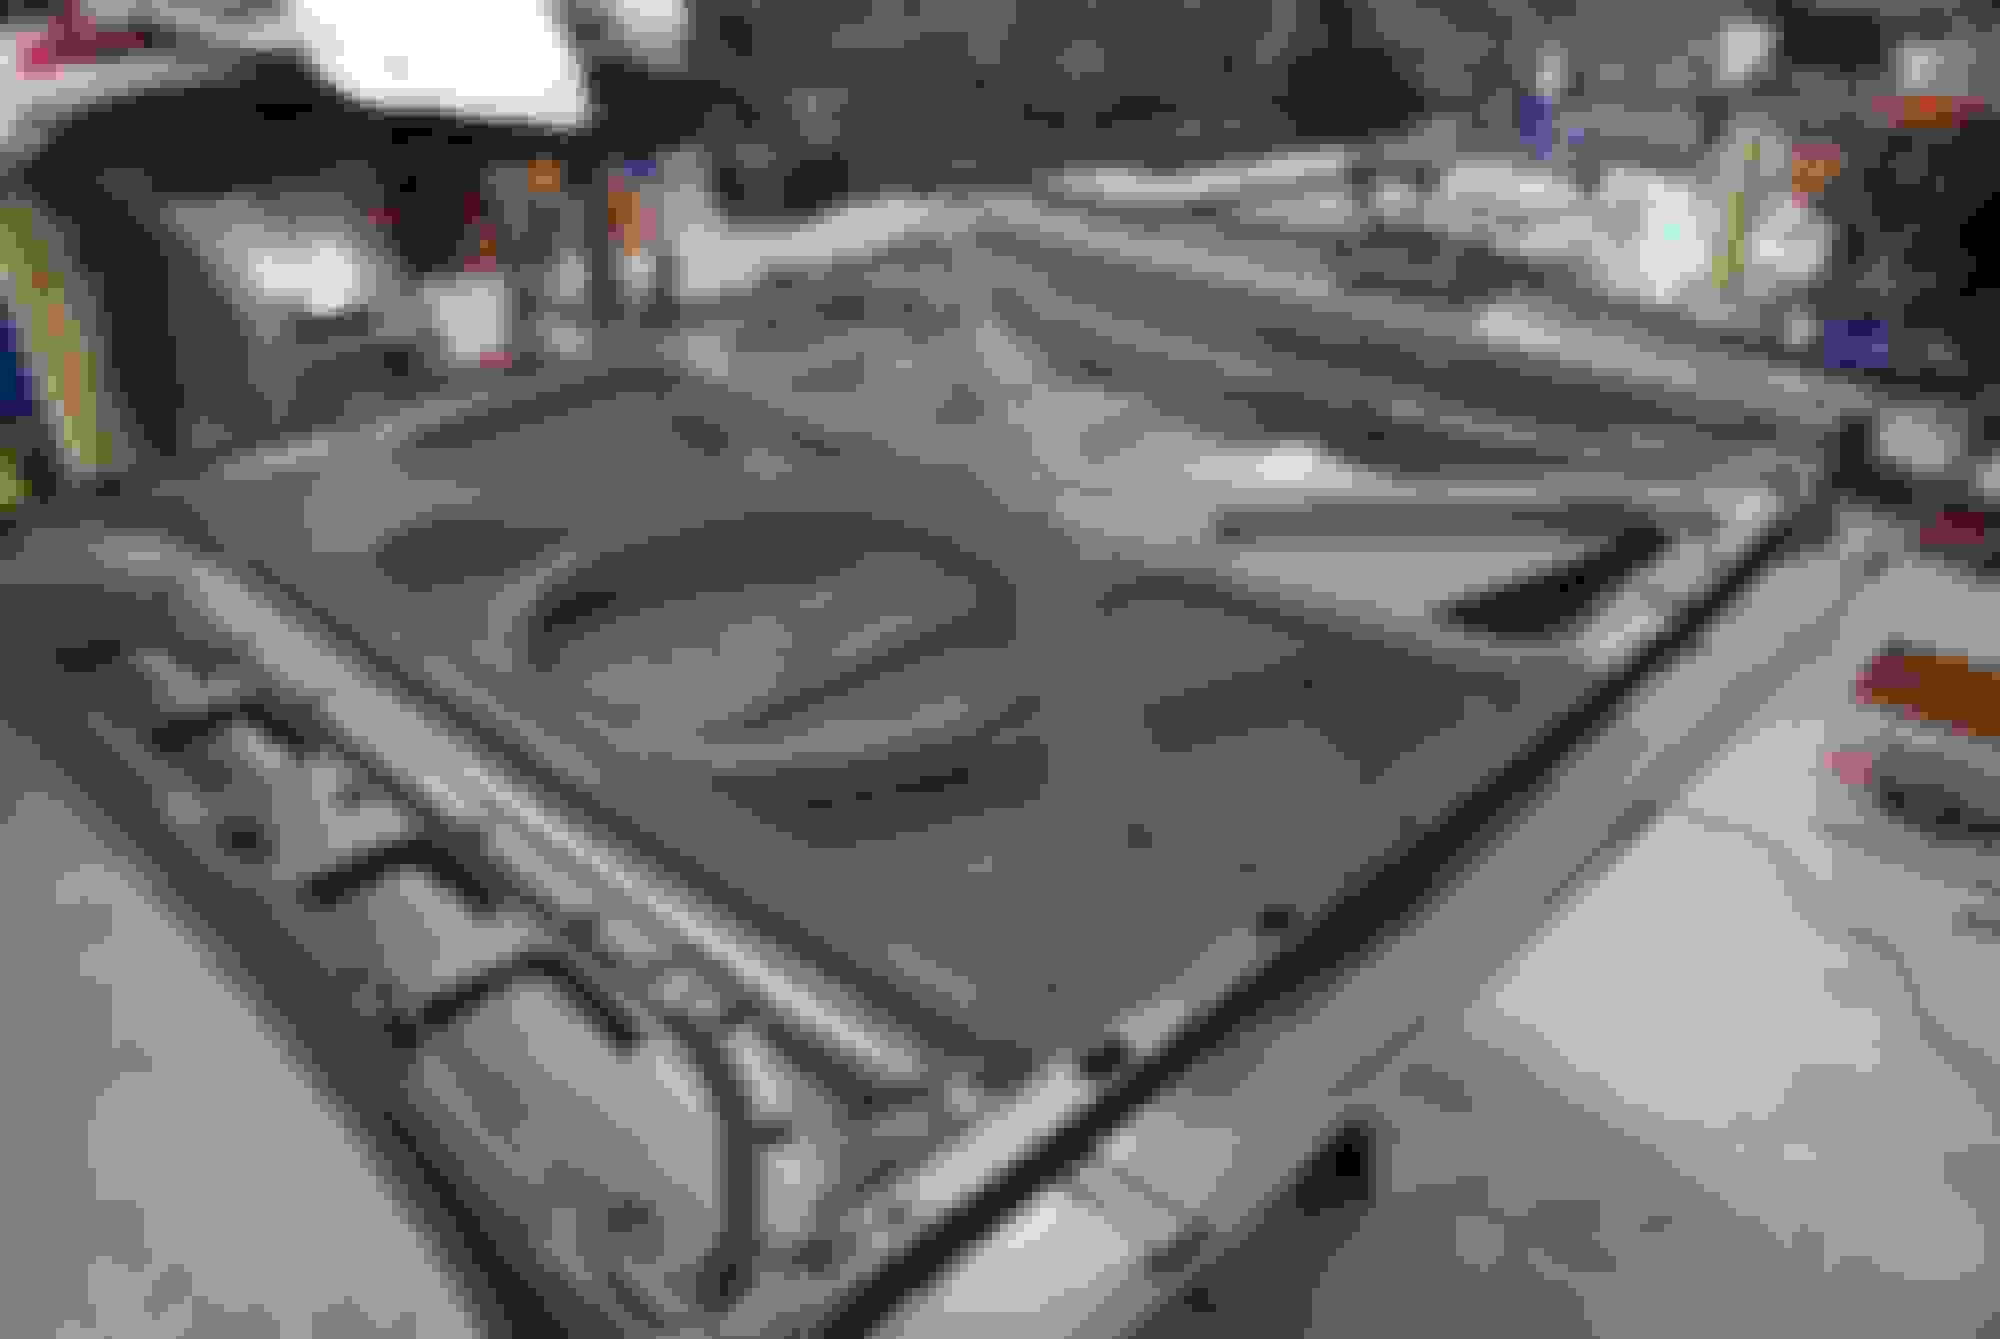
I repaired a couple small holes around rear window and windshield channel by replacing a little metal and welding any holes where trim studs used to be. I then replaced some trim studs front and back with my spot welder and trim stud attachment. It really worked well and was easy to use. I then scuffed inside trunk, underneath and most of body. I also applied SEM rust trap to all visible spot weld seams like around inner and outer wheel housings and any other places that I wanted added protection. I then sprayed epoxy primer starting on the inside and worked my way out. I ran out and still have to touch up one quarter seam but other than that, the whole car is epoxy primed where it needs to be.
I painted the underside of roof and applied X-mat to replace factory padding which looked like a jute material? I welded the roof brace back in after the X-mat.
I think I'm going to paint the underside of car next but have to weld the hump back in also. Then it will be back on frame to hang doors, core support, fenders, hood and trunk lid to start gapping and touching up any needed lead or welding followed by body filler to straighten everything.
Last edited by scrappie; November 28th, 2020 at 06:32 AM.
Ive been prepping for block sanding and thinking about painting underside of car. I want to put it back on frame soon and hang doors, fenders to gap everything. The hood is the last piece yet to be media blasted and still has original paint and stripes. I carefully traced the stripes to duplicate when it comes time to paint. I documented everything I could and stripped the hood and dropped off at the classic car blaster on friday. The hood is in good condition besides a small crack which should be an easy fix. I'll post pics when I get it back.
Last edited by scrappie; November 25th, 2020 at 04:02 PM.
Paul,
I have just spent some time going through your journey/thread and I am impressed with your quality, workmanship, and attention to detail. I find it most impressive when one restores their own car and is rare to find such talent when speaking with individuals at car shows. I'll be watching your journey. Happy Thanksgiving.
Thanks for the words Joe. Part of this experience, for me anyway, is to restore anything I can myself, to learn, to experience and feel the gratification knowing I can and did. I really enjoy this process of making things new again.
Plus it saves a lot of $
Last edited by scrappie; November 26th, 2020 at 05:51 PM.
Paul- making progress! Nice! I'm dropping the frame and suspension parts off to the blaster this weekend. Going to be media blasting some of the brake parts I picked up from you a while ago.
Thanks again!
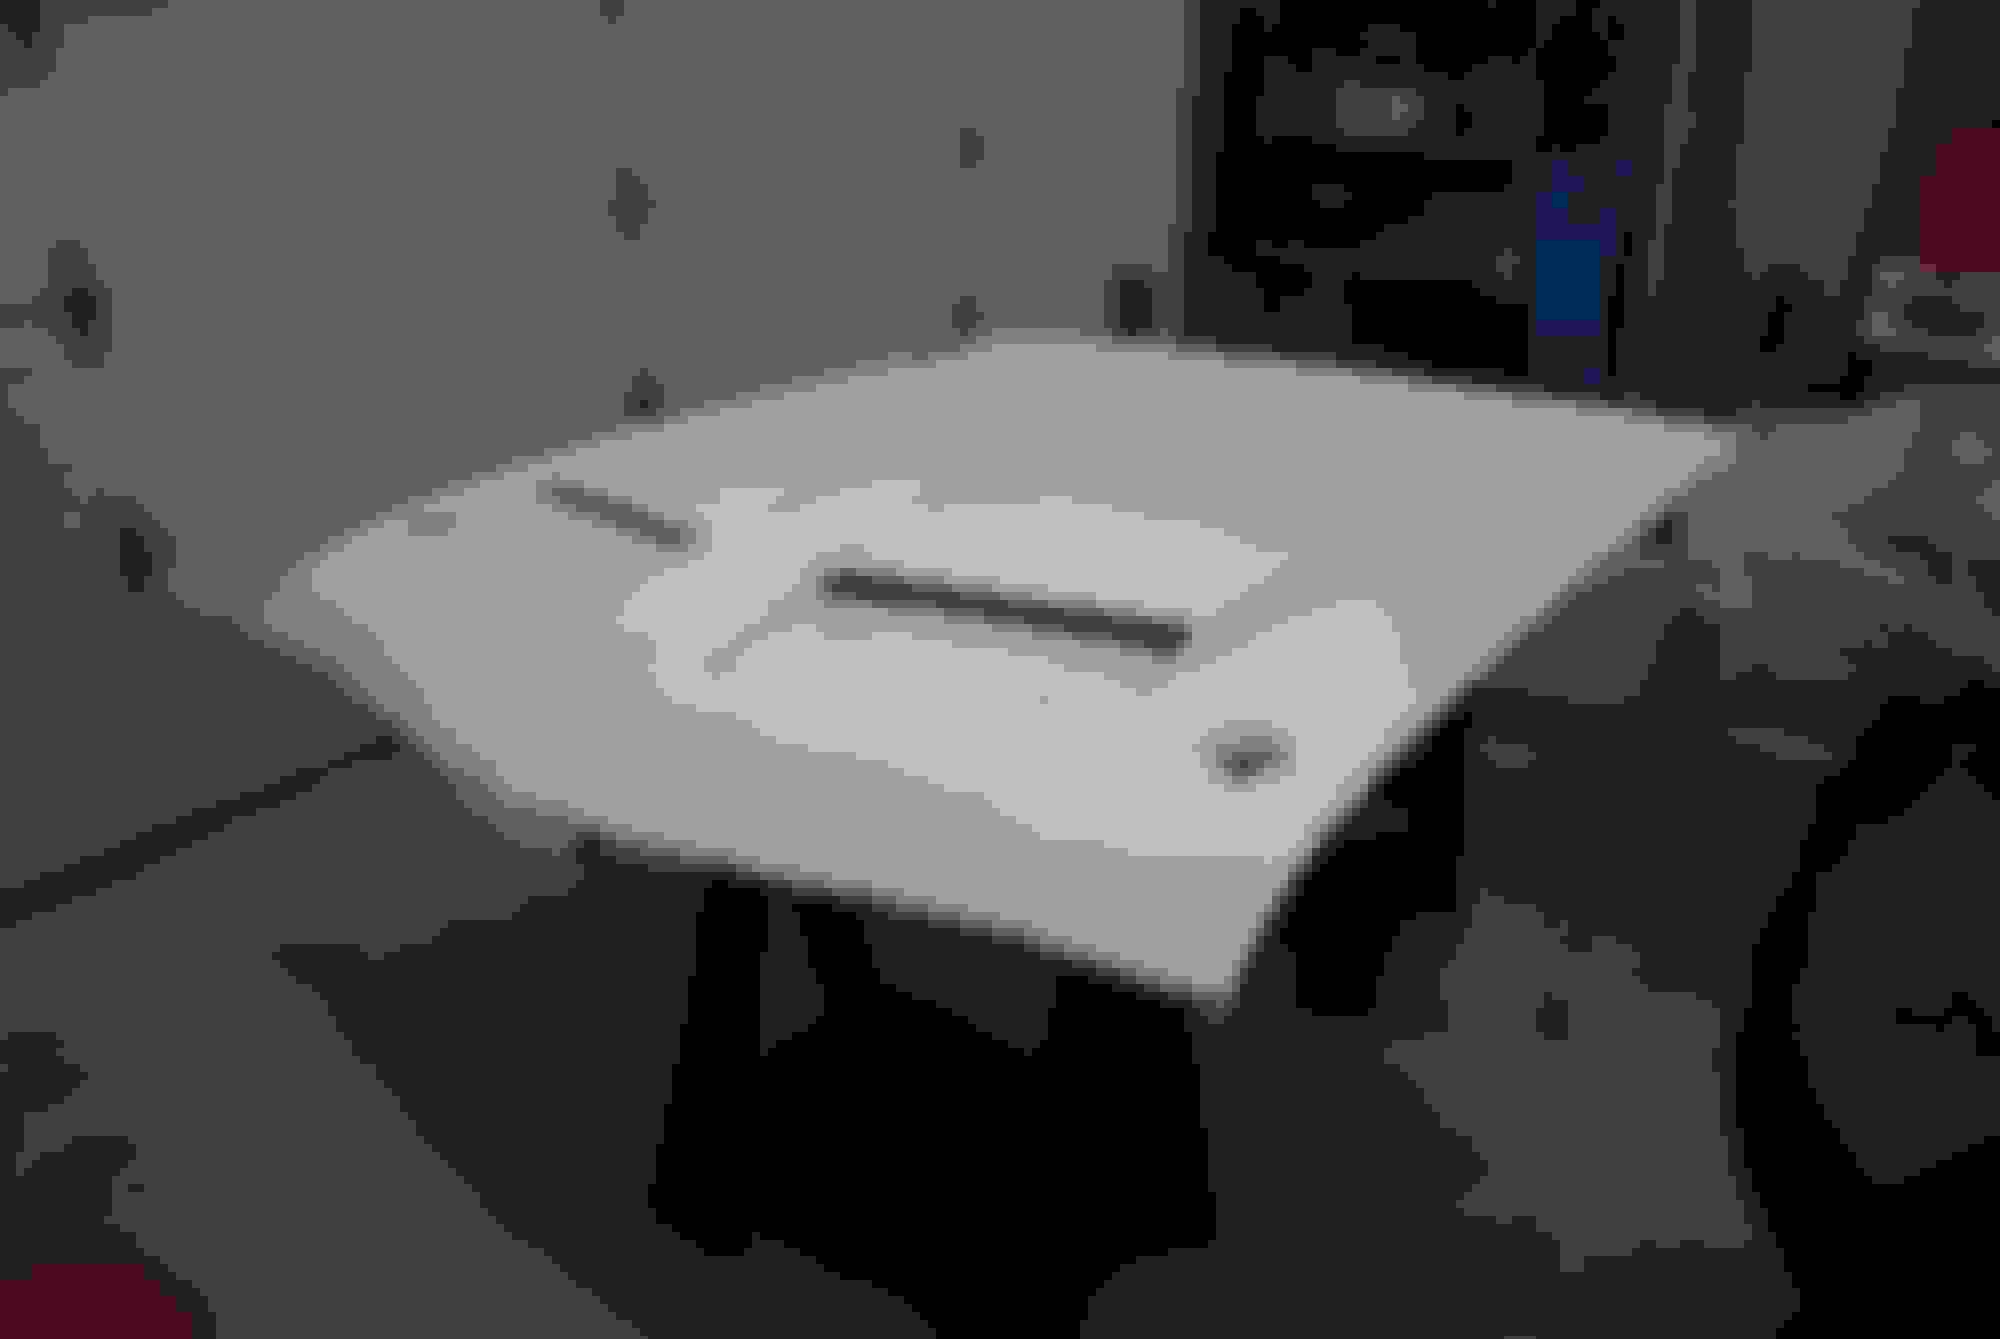
Got the hood back from the media blaster on tuesday. No surprises which is good. A little rot the size of a dime that I replaced with metal along with a small stress crack maybe? It looks like it may be from the metal spring steel that mounts on the core support but Im just guessing. I fixed it anyway. Gonna fine tune the underside of hood with some filler because of some real light pitting and for cosmetic reasons, but this is one of those parts that I believe in taking the extra time to make nice. The hood IMO is by far the most recognized and dominant features of the 70-72 Olds. It changes the whole look of the car when installed. I want the underside to be as nice as the top so I will take the time. I have one small crack on top to fix but in the mean time I dont want freshly blasted metal to sit too long so I will fix prep and seal with epoxy primer the metal frame and underside of hood then concentrate on top.
I also went over the whole underside of car with a scotchbrite pad and plan on painting tomorrow when I do the hood. Ill post an update to let you guys see how it came out
Busy day today:
I started prepping hood today by sanding any filler with 80 then finished whole hood with 180 followed by scotchbrite pad. I followed with 2 coats of epoxy primer.
Ive been researching fiberglass repair and have come to realize the hoods we have like many of that era are a SMC (sheet material composite) fiberglass. Its not like your everyday boat fiberglass with gel coat. It is a bit different due to the release agent so regular fiberglass resin may not adhere to SMC. SMC fiberglass resin or a compatible epoxy resin is required. Just a little FYI if anybody else needs to repair these hoods. The crack repair is in the near future.
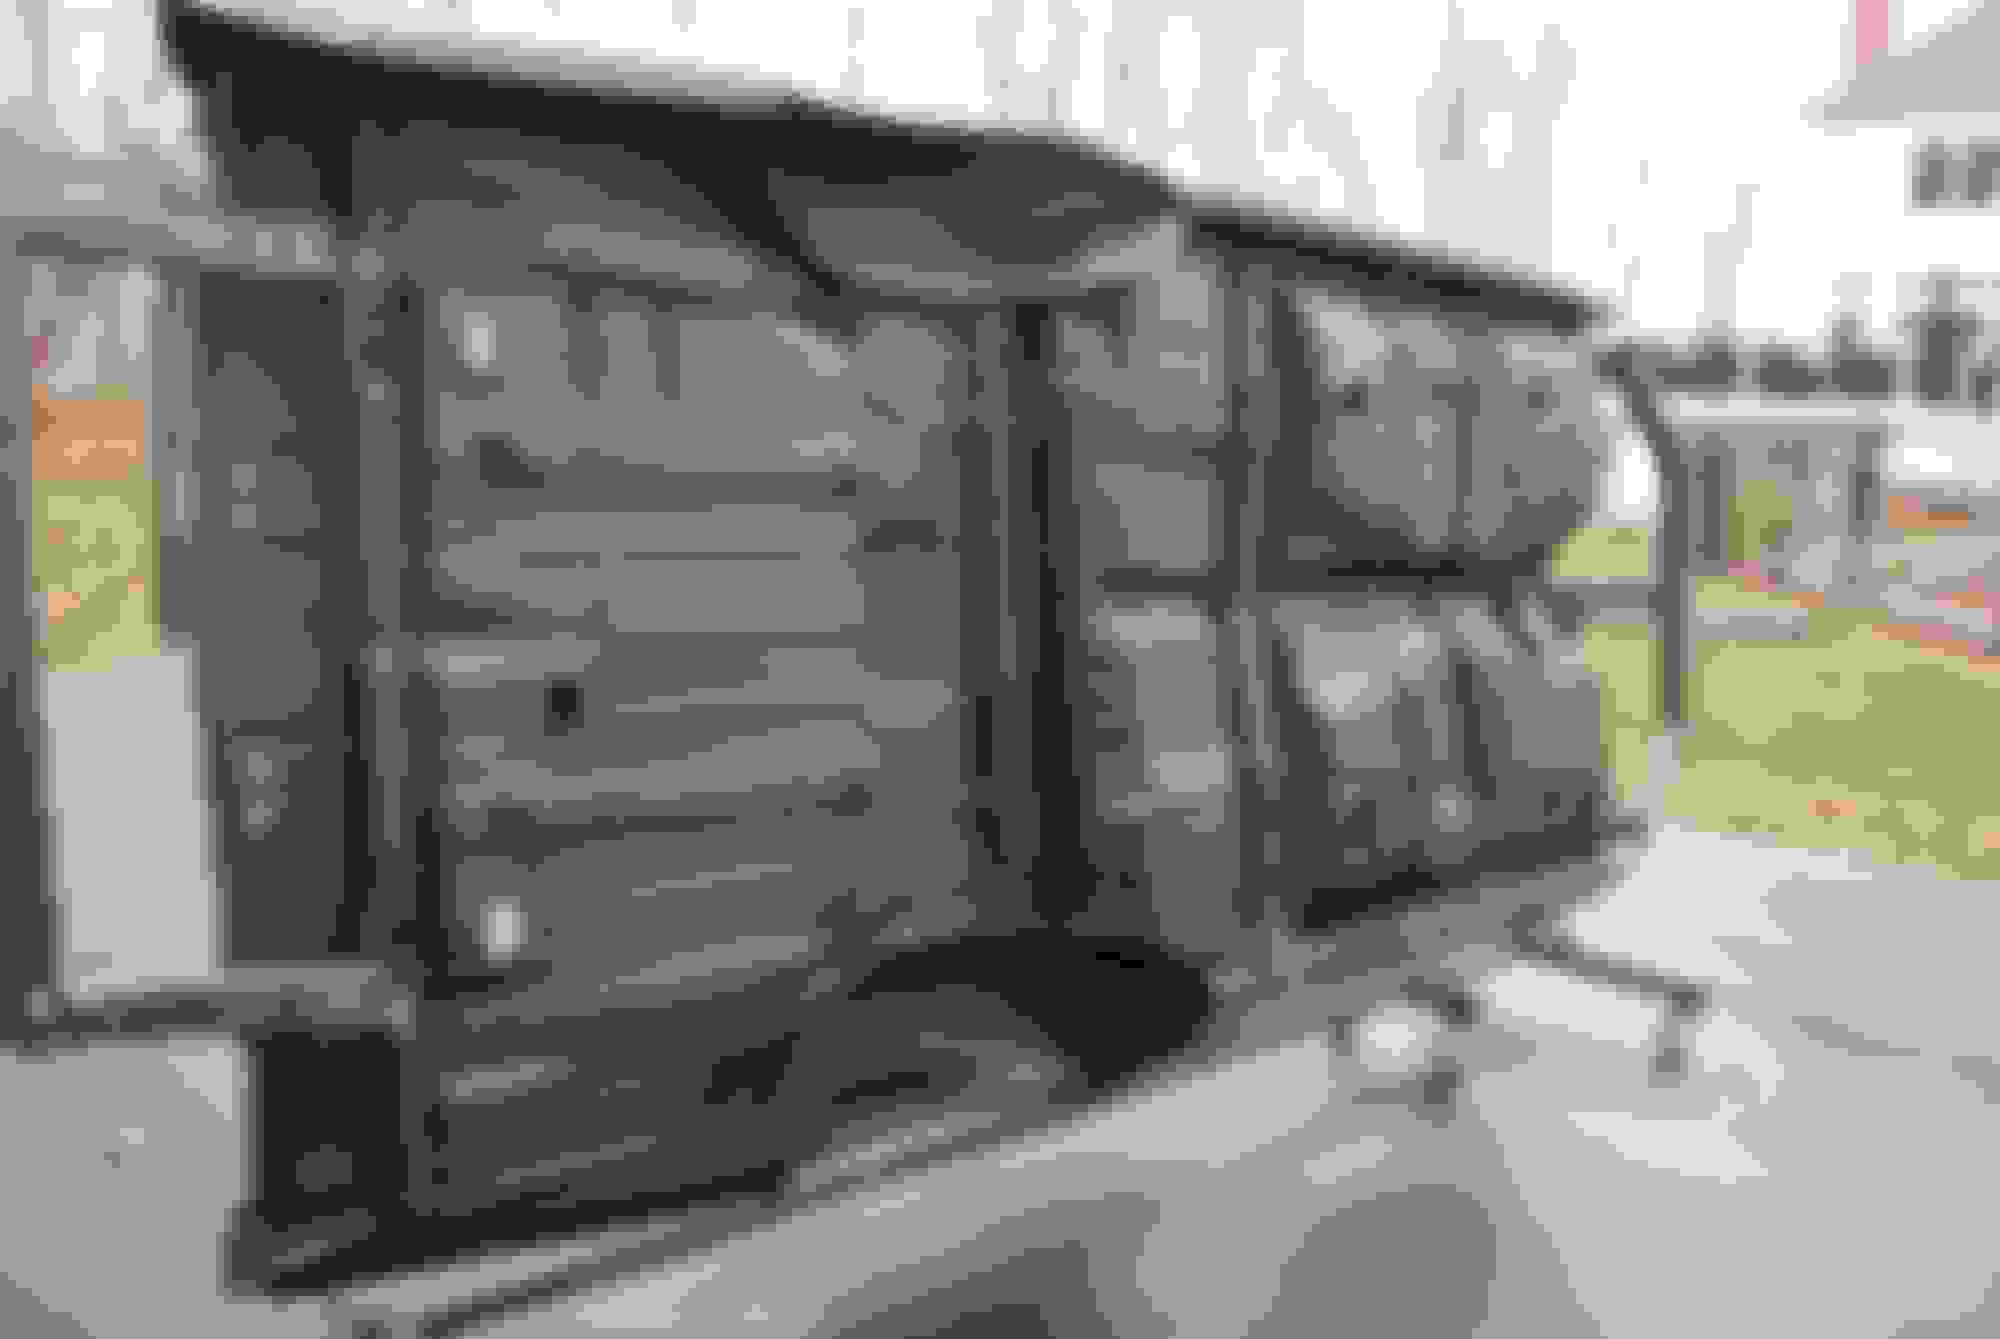
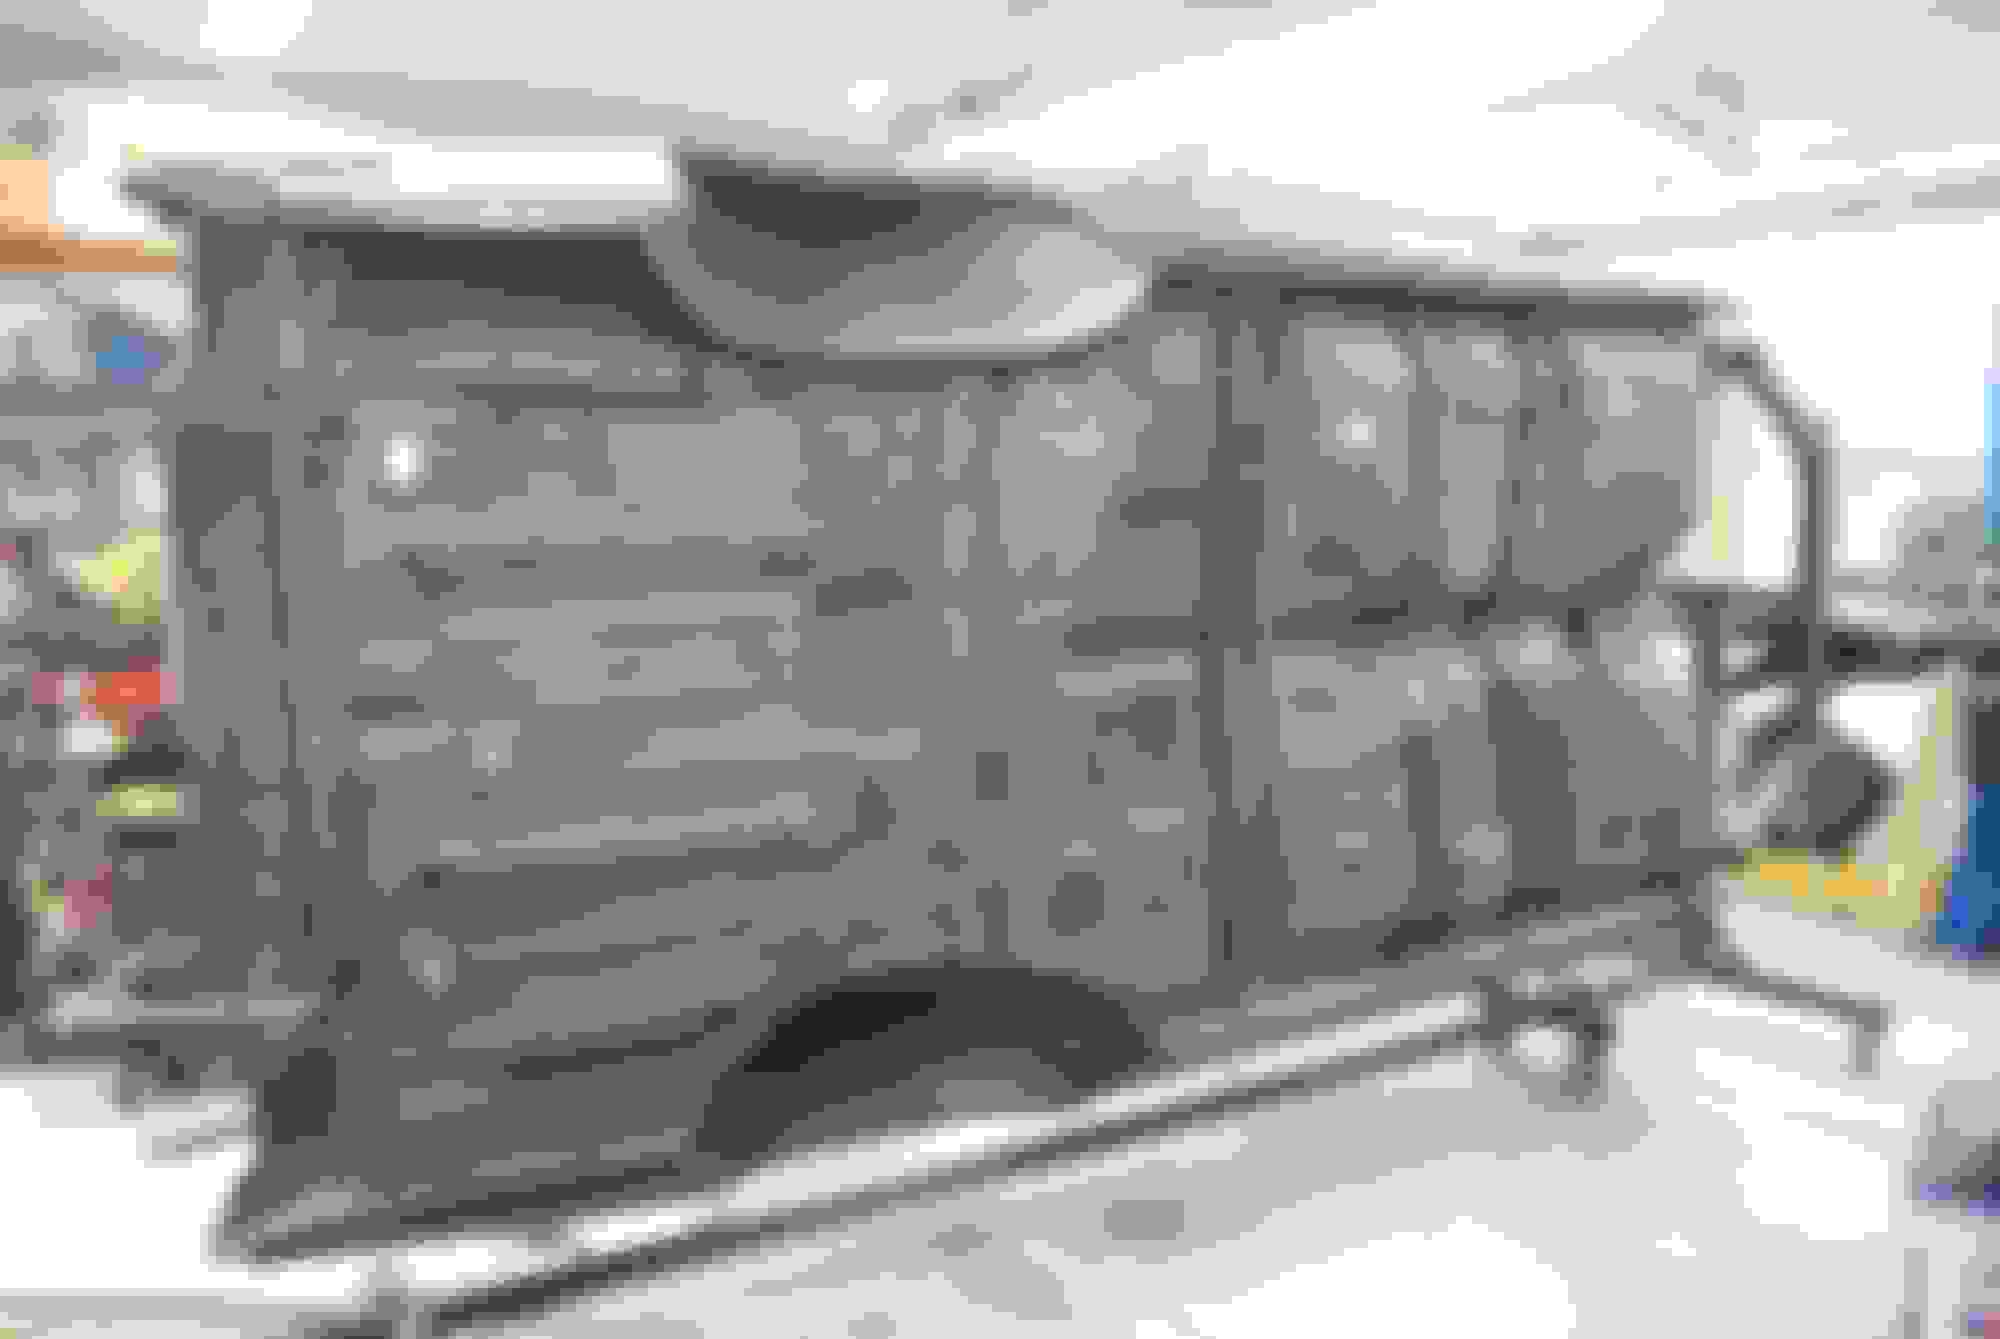
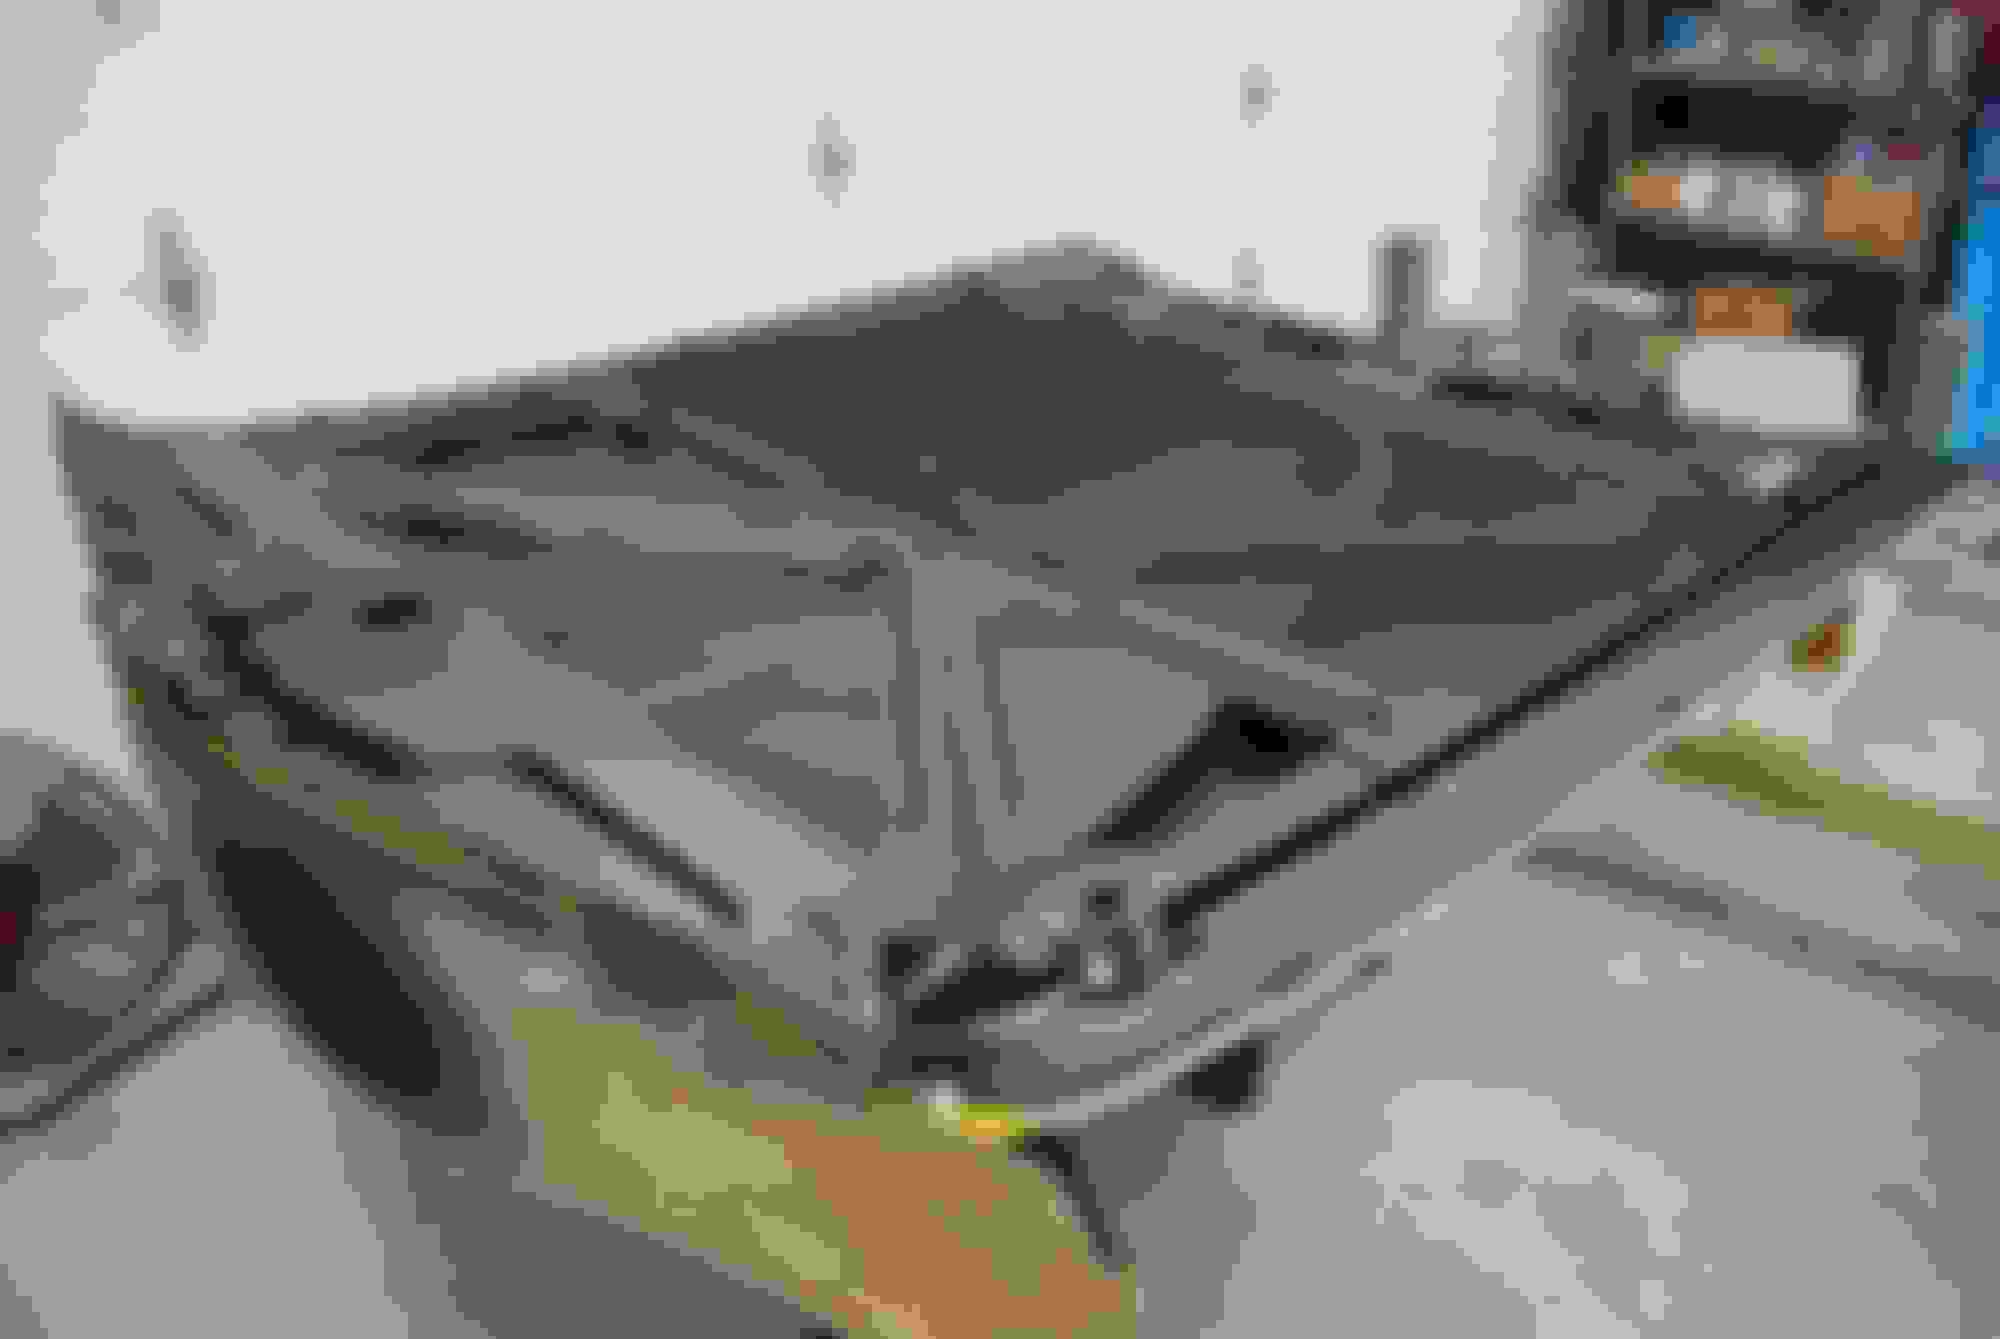
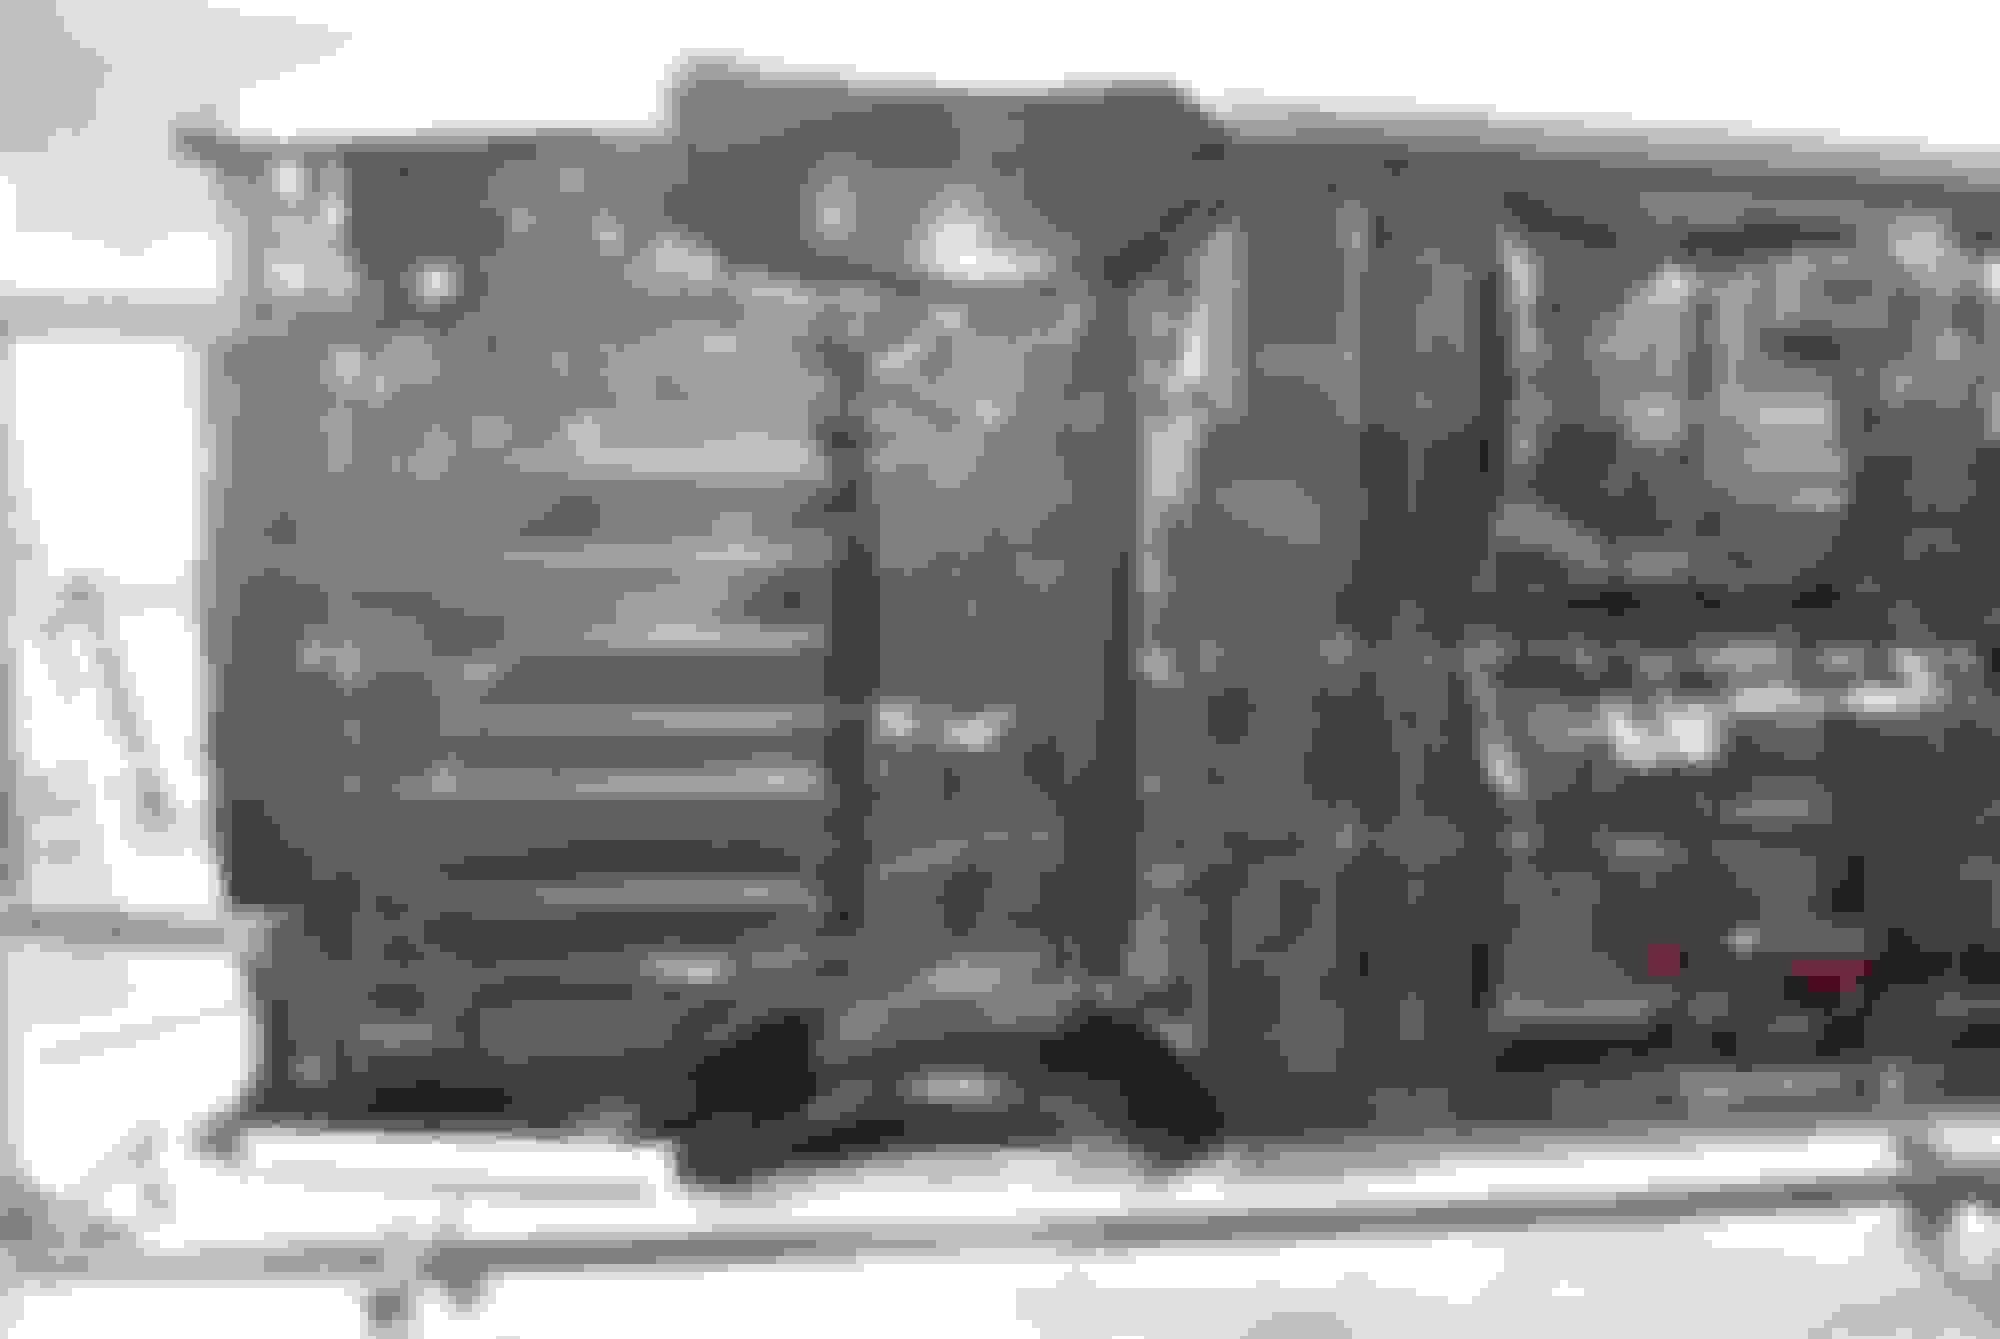
After priming the hood I went right to painting the underside of the body. The pictures are of the paint when still wet so its a bit glossy. Three coats and after letting the paint dry a couple hours I took body off rotisserie so I could touch up areas where rotisserie was mounted. Tomorrow I will put body back on frame so I can hang doors, fenders and core support in order to gap everything..............and then take body off again.
Ah yes, if my first car wasn't an Olds it would have been a Buick. Love the GS and GSX. I know there's a couple guys on here that own and have restored Buicks. Keep at it man!
Put the body back on the frame temporarily and put a final coat of paint on underside of hood while epoxy is still fresh. Picture is right after paint so still wet and glossy.
Next thing to do will be hang doors, fenders, core support, hood and trunk lid to gap everything.
Last edited by scrappie; November 28th, 2020 at 04:01 PM.
Wrapping up this weekends work: Pictures of the underside of hood painted. I got the body back on the frame and mounted so I could start hanging stuff and getting gaps right. Shuffling stuff around took some time but was able to hang doors and I think I have them pretty close. I will get fenders, hood along with trunk lid on next and address at all gaps as a whole. Have to wait for now.
I have to remember the panel gaps on these cars are nothing like the new cars today and Im finding 3/16"- 1/4" looks big but thats how it was so I just have to get used to it.
The only two pcs of reproduction metal Im using are the core support (which looks pretty good) and the trunk lid. My core support is ok, its just really pitted and would need some metal work but the 70 repro looks pretty good and thats the only one made for 70-72 years that I know of so Im gonna give it a try. I always have my original if needed. I bought that about a year ago along with trunk lid. The trunk lid looks pretty good also? I guess I will find out shortly after I install. I have a 71-72 OEM trunk lid that has some holes drilled in it for a wing and a metal patch along bottom edge. Its in ok condition but the holes would be noticed from underneath even if I patched. I just couldn't locate a real nice 70-72 original and if I'm being picky, finding a nice 70 trunk lid (without the circular die markings) is real hard so I opted for the repro which looks identical to a 71-72. I guess I'll see on that also. Here is a shot of the car with the doors on and the underside of hood painted.
Some of the photos are out of focus sorry.
Last edited by scrappie; November 29th, 2020 at 02:49 PM.
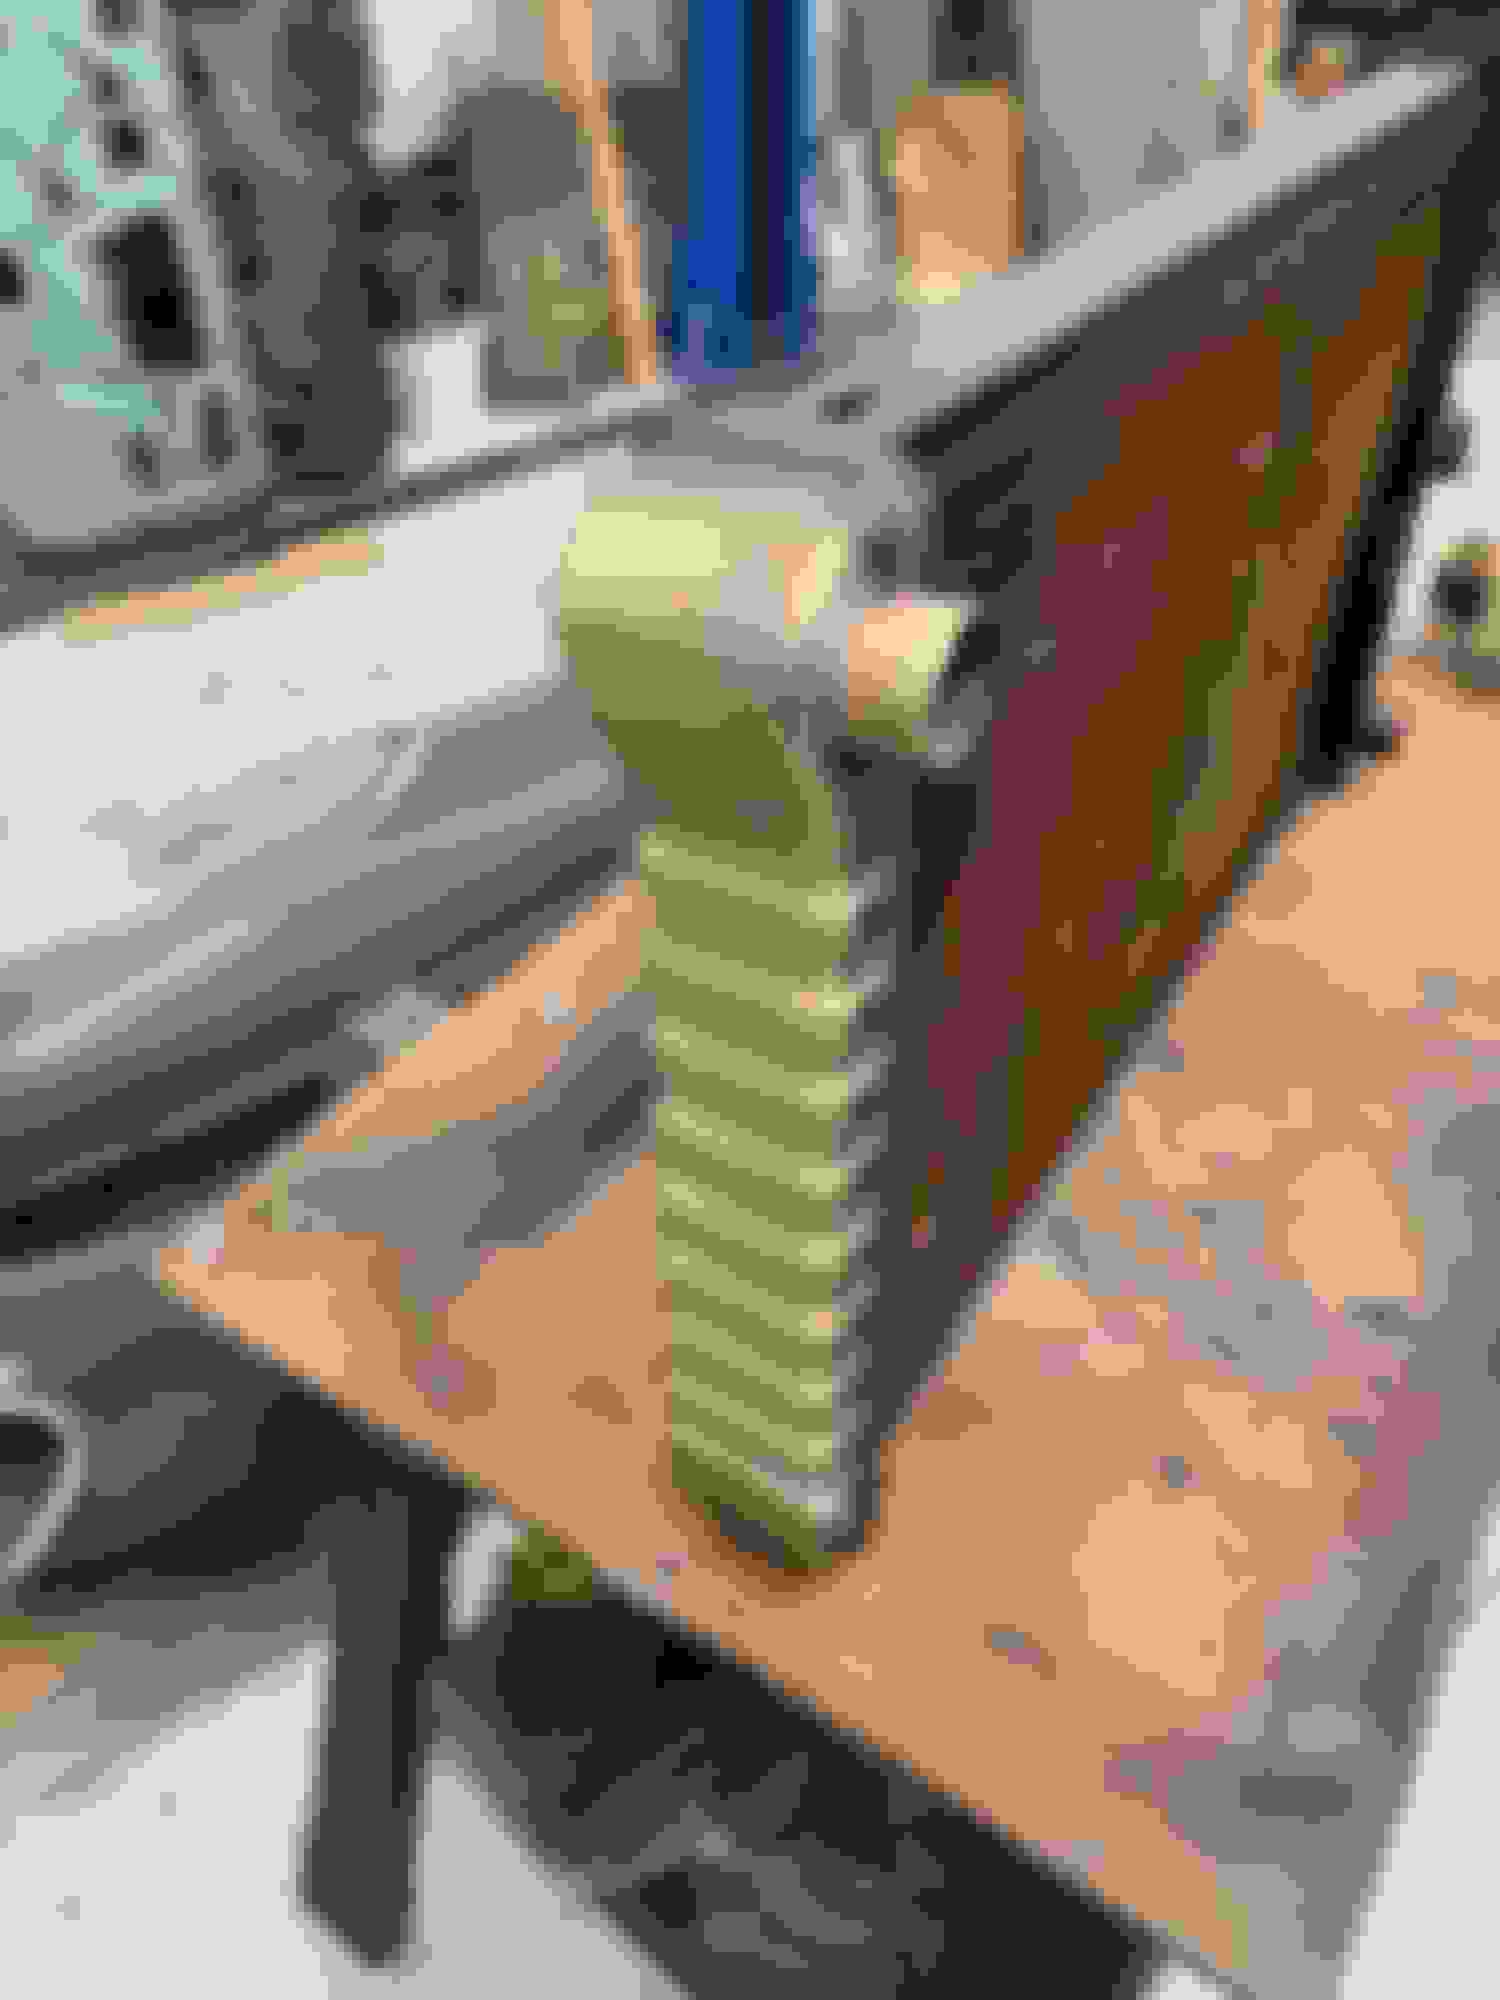
Had the 4-core rad re-cored. Hard to find people who still do this locally but a little word of mouth goes a long way and I was able to find a radiator guy about 1/2 hour away.
Last edited by scrappie; December 6th, 2020 at 04:43 AM.
Thanks Rob
The more I think about it and the more my confidence builds I'm really thinking about doing it? If I dont do it myself, I will get it as close to ready for paint as possible. I could probably set my garage up as a paint booth come warmer weather but my biggest concern is messing the paint job up after all this. Really thinking about it though.
I'll be sooooo jealous if you paint it too!!! LOL! I can do anything mechanical & a little metal work also but nothing like you have mastered! If you can paint like you do bodywork it will turn out great!! I wouldn't even consider painting my 442, I'd be scared I'd f#@$ it up!. As Clint Eastwood said "a man's got to know his limitations"!
I'll be sooooo jealous if you paint it too!!! LOL! I can do anything mechanical & a little metal work also but nothing like you have mastered! If you can paint like you do bodywork it will turn out great!! I wouldn't even consider painting my 442, I'd be scared I'd f#@$ it up!. As Clint Eastwood said "a man's got to know his limitations"!
Thats some funny s$%t right there. I feel the same way but:.................How does one know his limitations unless he pushes those limits? knowing those limitations takes some work.
 October 25th, 2020, 04:59 PM


 I can do anything mechanical & a little metal work also but nothing like you have mastered! If you can paint like you do bodywork it will turn out great!! I wouldn't even consider painting my 442, I'd be scared I'd f#@$ it up!. As Clint Eastwood said "a man's got to know his limitations"!


