
Pulling the motor

Thread Starter
Registered User
Joined: Aug 2013
Posts: 3,900
From: Central Illinois
Right drum was a bear to get off but I got it. I don't see anything amiss but I loosened the brakes a bit and they turn pretty smoothly now. Which begs the question, why did that side get so tight?
Can I spray some silicone on a couple of the pivot points or is that a no-no? Will the centrifugal force get it on the shoes?
Can I spray some silicone on a couple of the pivot points or is that a no-no? Will the centrifugal force get it on the shoes?
Thread Starter
Registered User
Joined: Aug 2013
Posts: 3,900
From: Central Illinois
I think I found the problem. Although I don't know what I did wrong or how to fix it. It appears the side of the shoe was rubbing on the inside of the drum. But only on the driver's side wheel? The mechanism appears to be correctly placed. The shoes just a little too wide?
[IMG]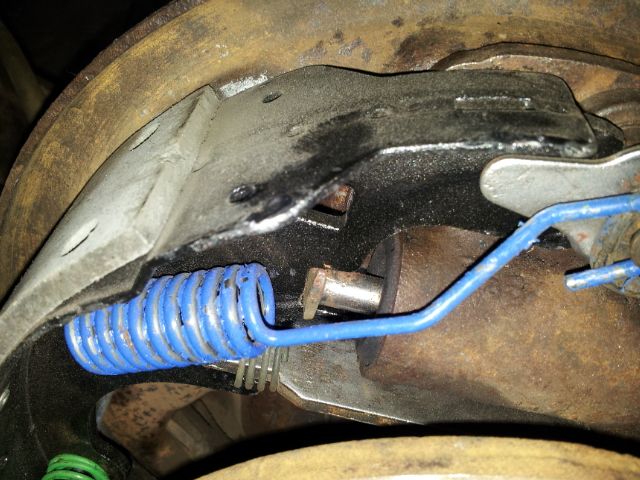 [/IMG]
[IMG]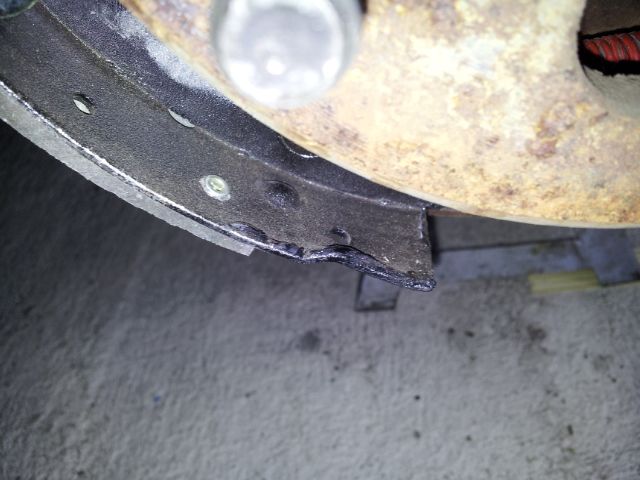 [/IMG]
[IMG]
 [/IMG]
[IMG]
 [/IMG]
Thread Starter
Registered User
Joined: Aug 2013
Posts: 3,900
From: Central Illinois
The adjuster seems to be working fine. It clicks when I turn the screw to tighten the brakes and I have to pull the lever out a little in order to loosen them. The parking brake lever is hard to get a picture of.
[IMG]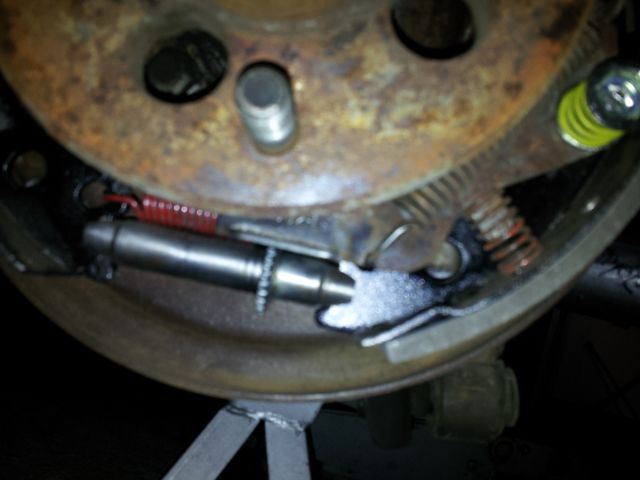 [/IMG]
[IMG]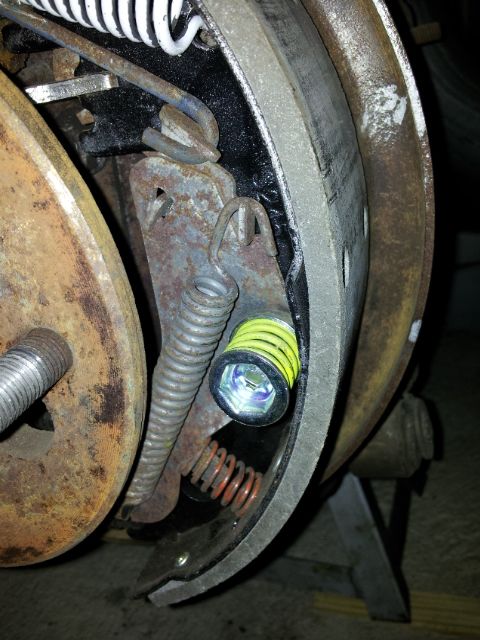 [/IMG]
[IMG]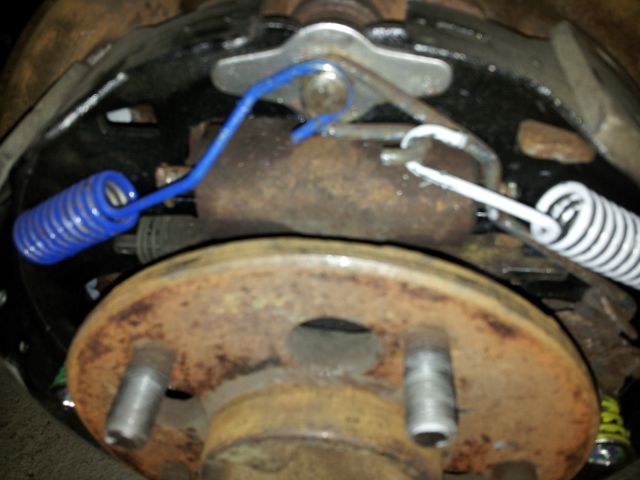 [/IMG]
[IMG]
 [/IMG]
[IMG]
 [/IMG]
[IMG]
 [/IMG]
Last edited by Macadoo; Jul 2, 2014 at 09:51 PM.
Thread Starter
Registered User
Joined: Aug 2013
Posts: 3,900
From: Central Illinois
Shoes are 2"....whew!
Adjusting barrel? The exploded drawing doesn't list that. But I have everything in the drawing and hooked up correctly. And most of it cleaned and lubed. And I used anti-seize on the backing plate.
Adjusting barrel? The exploded drawing doesn't list that. But I have everything in the drawing and hooked up correctly. And most of it cleaned and lubed. And I used anti-seize on the backing plate.
Thread Starter
Registered User
Joined: Aug 2013
Posts: 3,900
From: Central Illinois
Yup, everything looks copacetic. Thanks for the pic.
It appeared to me to be a manufacturing error. I didn't exactly buy the most expensive shoes. The steel plate the shoe is riveted to is much wider at that one point than the same point on the shoe on the other side of the car and any other point on the same shoe. I ground just a smidge off of there and everything seems fine now. I adjusted the parking brake as well and it seems good.
Thanks for all the help
Thread Starter
Registered User
Joined: Aug 2013
Posts: 3,900
From: Central Illinois
Oh man, does ice cream sound good right about now. We've been having 98% humidity for a week.
Live and learn....and learn..and learn some more.
Live and learn....and learn..and learn some more.
Registered User
Joined: Jul 2013
Posts: 1,815
From: Mo-Ray-Al, K-Bec.
Mac, it may well be your greatest legacy to the Olds community ... your willingness to document all those little things that are only ever learned through experience. Whenever we'd get a new employee, I'd always have the last rookie train them instead of the senior guy with years of experience ... because that last rookie still had those 'whoops' moments firmly in the front of their minds ... us old guys do so much on automatic it would never occur to us that you'd need to mention such and such double check (such as, giving a wheel a spin after bolting it on to check brake and bearing drag).
Registered User
Joined: Apr 2012
Posts: 2,972
From: New Mexico
Mac, it may well be your greatest legacy to the Olds community ... your willingness to document all those little things that are only ever learned through experience. Whenever we'd get a new employee, I'd always have the last rookie train them instead of the senior guy with years of experience ... because that last rookie still had those 'whoops' moments firmly in the front of their minds ... us old guys do so much on automatic it would never occur to us that you'd need to mention such and such double check (such as, giving a wheel a spin after bolting it on to check brake and bearing drag).

Thread Starter
Registered User
Joined: Aug 2013
Posts: 3,900
From: Central Illinois
If I didn't show my failures, I'd have nothing to show! 
Lol, jk.
Thanks guys, I guess it's the teacher in me that is willing to document everything. "Hey everyone, here's what NOT to do."
Like today for instance, I learned that 1/8th of a tank really means empty. Glad I was only a couple miles from the house. Humid out but a good day for a run
So, a couple of things:
1. The trans doesn't feel right. Today it was slipping in 2nd but the stick read low (again, but no leaks), so I added about a pint (again), and gave the modulator it's own vac source (I had it teed for the sake of aesthetics) and it now shifts fine. However, if I stomp on the gas it feels like the tranny slips for a second before kicking in.
2. And this one isn't great; I have a small oil leak at the front of the motor. It has to be the front seal but I replaced that, and thought I did a good job of it too. And yes, I used the sleeve on the crank. So, do I have to yank everything back off or can I replace that seal with the cover in place?
Thread Starter
Registered User
Joined: Aug 2013
Posts: 3,900
From: Central Illinois
Today I spent:
1. Moving the fuel filter - it had ended up against the lower radiator hose which I figured wasn't too great
2. Playing with idle mixture - the screws are about two full turns out (which is where I started).
3. Setting timing - and here are the results;
-Initial is now at 16*
-the centrifugal appears to be 15* which gives me 31* at around 3500 rpm (this is a guess; I had to return the tach I barrowed)
-All in is 56* so it appears the vac can has 25* built in
-And I still feel I have an intermittent miss so I started testing the plug wires with my ohm meter. Nothing so far but I only got through the left side bank. I guess I didn't/don't have a lot of confidence in my spark plug wire making abilities.
OH! And I discovered why my idle was too high (900-950?). I had the dash pot cranked in too far. When I built the engine I had it set so that the throttle would fully return but I think after adding the return springs to the carb, that changed it up a little and it wasn't settling all the way back down. That was certainly a "d'oh!" moment.
The carb still needs tuning. There's a guy in town that's supposed to be good with Q-jets so I might take it to him. It's still bogging out when I jump on the throttle.
Anyway, that's today. Getting closer.
Thread Starter
Registered User
Joined: Aug 2013
Posts: 3,900
From: Central Illinois

Registered User
Joined: Apr 2012
Posts: 2,972
From: New Mexico
I have a small oil leak at the front of the motor. It has to be the front seal but I replaced that, and thought I did a good job of it too. And yes, I used the sleeve on the crank. So, do I have to yank everything back off or can I replace that seal with the cover in place?
Justin
Joined: Mar 2012
Posts: 3,454
From: utah
I agree, clean off and see where the oil is coming from could be not enough sealer at the front of the pan or not tight enough on the bolts. Possible timing cover or front seal. I would try your best to narrow it down before tearing it apart.
Administrator
Joined: Oct 2009
Posts: 42,497
From: Poteau, Ok
The problem you may be running into is how much advance is provided by the canister. You might try leaving it disconnected and setting your timing to 18 deg at idle. That will put you at 33 at 3400 rpm and will probably creep up to 36 at the higher rpms. You need to buy an adjustable vacuum advance canister and/or a stop so you can limit your vacuum advance at 50 during cruise. Google hei 101.
Thread Starter
Registered User
Joined: Aug 2013
Posts: 3,900
From: Central Illinois
The oil pan and cover look dry and tight. but thanks fellas
Hey, any recommendations for front license plate holders? It doesn't look like this car ever had one. Do they clamp to the nose or do I have to drill into the bumper?
Thread Starter
Registered User
Joined: Aug 2013
Posts: 3,900
From: Central Illinois
The problem you may be running into is how much advance is provided by the canister. You might try leaving it disconnected and setting your timing to 18 deg at idle. That will put you at 33 at 3400 rpm and will probably creep up to 36 at the higher rpms. You need to buy an adjustable vacuum advance canister and/or a stop so you can limit your vacuum advance at 50 during cruise. Google hei 101.
You're thinking that my bogging/stumbling is a timing issue?
Administrator
Joined: Oct 2009
Posts: 42,497
From: Poteau, Ok
You need to limit the vacuum advance to 50 or under. When you go over 50 the engine may be surging and/or sound like a miss at cruise. Also at idle, if you have too much vacuum advance, the engine will sound like its missing. That's why I suggested disconnecting it and see how it drives.
Thread Starter
Registered User
Joined: Aug 2013
Posts: 3,900
From: Central Illinois
It actually idles more smoothly with the vac can hooked up...but faster. I haven't actually looked but maybe I'll get lucky and there will be a limiter on the can. Why do they give these things so much advance? Nobody seems to like/need it.
Administrator
Joined: Oct 2009
Posts: 42,497
From: Poteau, Ok
MSD has a limiter kit for their Street Fighter distributor pn 8362, it should work on your stock HEI. It has different stop settings, limit it to 10 degrees.
MSDheibolt.jpg
MSDheibolt.jpg
Thread Starter
Registered User
Joined: Aug 2013
Posts: 3,900
From: Central Illinois
Registered User
Joined: Jul 2010
Posts: 1,907
From: Toytown, MA
I think Fusik has the plate bracket. Maybe TPP, I know somebody has it! They came in the trunk of the car when shipped new. If the state required it they put it on. You have to drill, I think there might be indents in the bumper where you drill.
Thread Starter
Registered User
Joined: Aug 2013
Posts: 3,900
From: Central Illinois
That all seemed really complicated....or I'm just getting lazy. So I made my own. It's in there good and tight, couldn't budge it with a screwdriver and hasn't moved after a couple of short drives. I should have made it adjustable though. I got the vac advance down to 12*. I'm calling that close enough for now.
[IMG]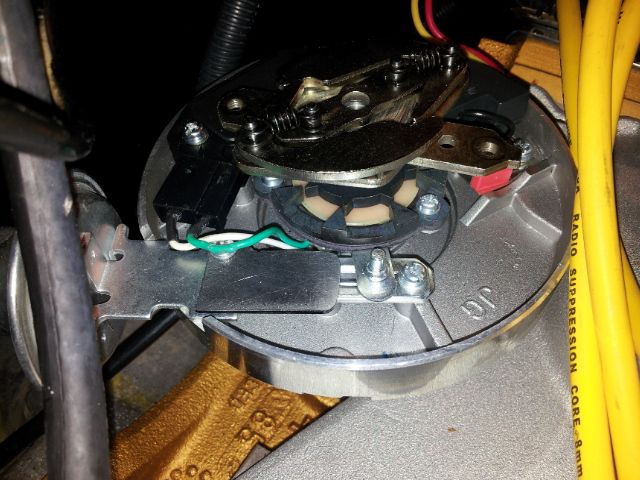 [/IMG]
So I took 13* off the vac advance giving me an all-in at 44* (verified). She idles a little rougher now. I backed the idle mixture screws out to 2.5 turns. Can I go more?
[IMG]
 [/IMG]
So I took 13* off the vac advance giving me an all-in at 44* (verified). She idles a little rougher now. I backed the idle mixture screws out to 2.5 turns. Can I go more?
Last edited by Macadoo; Jul 2, 2014 at 09:57 PM.
Hookers under Hood
Joined: Nov 2013
Posts: 3,543
From: Ontario, Canada
I have been busy this last week, I see you made some huge strides, the engine sounds great Mac. Cheers !!! You have alot of patience I see, working the bugs out and resealing, awesome job. I hope you get alot of summer cruising in!!
Cheers Eric
Cheers Eric
Thread Starter
Registered User
Joined: Aug 2013
Posts: 3,900
From: Central Illinois
Thanks Eric
[IMG]
 [/IMG]
Thread Starter
Registered User
Joined: Aug 2013
Posts: 3,900
From: Central Illinois
I think so. Honestly, the down pipes are still inches from the ground so I can't do much yet. I'm hoping to get the hood on tonight so I can take it to the shop.
I also found a couple of small vacuum leaks; one at the pcv valve (hose a little too big) and brake booster at the manifold. That helped but I'm only pulling [barely]16 hg on the gauge, it's steady and acts as a healthy engine, it's just a little low.
Hopeful soon I'll be able to quit fussing and start driving
Administrator
Joined: Oct 2009
Posts: 42,497
From: Poteau, Ok
Ok now bump your initial timing to 18 with vacuum adv. disconnected and plugged. That should bring your total mechanical without vacuum closer to the 36 deg mark. Then connect your vacuum adv back where you had it and adjust your idle down to where it belongs. Hook up your vacuum gauge and adjust your carb a/f mixture screws for the highest vacuum on the gauge. Make sure they are turned out an even amount between the right and left screws.
Thread Starter
Registered User
Joined: Aug 2013
Posts: 3,900
From: Central Illinois
The hood went on much easier than expected. Thank the gods I drilled guide-pin holes. When I took it off I didn't know about the spacers and they fell out with me not seeing where they went. I took a guess that they went under the back end of the hinges and I guess I got it right.
[IMG] [/IMG]
[IMG] [/IMG]
[IMG]
 [/IMG]
[IMG]
 [/IMG]
Last edited by Macadoo; Jul 3, 2014 at 09:30 PM.


