


Vista Body on Rotiseri


Just an Olds Guy
Joined: Jul 2008
Posts: 24,528
From: Edmonton, AB. And "I am Can 'eh' jun - eh"
If you're looking for an idea of body color under the hood here's one of a 1952 Chevy coupe restification. No AC but extensive use of body color..I think the chrome helps, but it looks overpowering to me


Thread Starter
Registered User
Joined: Sep 2009
Posts: 455
My gut is telling me to just clean up the A/C case real nice and detail the plumbing real good and thats what I will do. It is going to look kinda stock under the hood other than chrome and body color. Thanks for the suggestions and pics.
Just an Olds Guy
Joined: Jul 2008
Posts: 24,528
From: Edmonton, AB. And "I am Can 'eh' jun - eh"
If you havent done an AC restore? Here's a thread that Rob Young put together when he was cleaning up under the hood of his CS and restored his AC. It's a really good read with great pics along the way. IReview the thread whichever direction you want - it's great reading. https://classicoldsmobile.com/forums...tml#post298122
Registered User
Joined: Dec 2011
Posts: 451
From: Burlington, Ontario, Canada
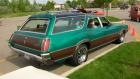
Steve, Hi. If you need some help and pointers on the A/C please ask. I was down that road with my '72 Vista Cruiser, I'm also a certified A/C fellow, helping out on a tech line actually for these things. The pictures Rob Young put together are certainly well done, and give a good idea what most anybody can expect with these systems being the age they are.
Thread Starter
Registered User
Joined: Sep 2009
Posts: 455
Thanks I will keep that in mind. I was thinking of using the sandon? compressor but want to keep the stock brackets. I have several of the original compressors which were working when removed so that is a option. I will be converting to R134 so need to have a plan on which parts to use. This is a ways off but like to plan ahead so thing are in place when I get there. Thanks for the help.
Steve, Hi. If you need some help and pointers on the A/C please ask. I was down that road with my '72 Vista Cruiser, I'm also a certified A/C fellow, helping out on a tech line actually for these things. The pictures Rob Young put together are certainly well done, and give a good idea what most anybody can expect with these systems being the age they are.

Thread Starter
Registered User
Joined: Sep 2009
Posts: 455
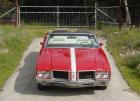
Hi, Nothing to crazy. I put polygraphite bushings,kyb shocks,hotchkis lowering springs and a quick ratio steering box done by Chip at power steering services. It should handle well with these items.
Registered User
Joined: Dec 2011
Posts: 451
From: Burlington, Ontario, Canada
Thanks I will keep that in mind. I was thinking of using the sandon? compressor but want to keep the stock brackets. I have several of the original compressors which were working when removed so that is a option. I will be converting to R134 so need to have a plan on which parts to use. This is a ways off but like to plan ahead so thing are in place when I get there. Thanks for the help.
Just an Olds Guy
Joined: Jul 2008
Posts: 24,528
From: Edmonton, AB. And "I am Can 'eh' jun - eh"
You planning to paint the dash too? I'm going to keep my eye peeled on this one especially when you redo the silver outlines on the lower dash. I never thought of using the convertible lower dash for the VC, but it works - the rear window cutout is in the same place! Just taping off the grounds, or remove them and paint?
Thread Starter
Registered User
Joined: Sep 2009
Posts: 455
Yes the dash will be painted this weekend and the rear window area will be painted soon after. I will outline the dash with a silver paint marker which has worked in the past.
You planning to paint the dash too? I'm going to keep my eye peeled on this one especially when you redo the silver outlines on the lower dash. I never thought of using the convertible lower dash for the VC, but it works - the rear window cutout is in the same place! Just taping off the grounds, or remove them and paint?
Registered User
Joined: Dec 2011
Posts: 451
From: Burlington, Ontario, Canada
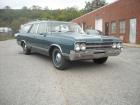
Steve, this car is turning out to be very beautiful. The path you are taking and the resources you have are ensuring the project will be a benchmark for others to follow if they chose to restore any sort of Oldsmobile themselves.
Registered Luser
Joined: Aug 2006
Posts: 3,785
From: LI,NY
 Steve...good to see you are still going at it! I love the color combo! Kind of a "period correct" custom paint job from the 70's! I'm just getting to go back on mine starting this weekend after a year hiatus! Kind of ironic being it will be 3 yrs to the day when I started this project.....anyway, just a few questions.....
1-Did you go with 1" or 2" lowering springs, and will you be using airbags with the springs in the rear?
2-Did you stick with stock front spindles or drops? Reason I'm asking is I was thinking of doing 2" drop spindles with 1" lowering springs in front.....
3-Where did you order the body bushings from?
Good choice for going with "hot hues" for color....
Anyway, thanks in advance for your help and keep up the awesome work and progress!
Erik
Registered User
Joined: Dec 2011
Posts: 451
From: Burlington, Ontario, Canada
Steve...good to see you are still going at it! I love the color combo! Kind of a "period correct" custom paint job from the 70's! I'm just getting to go back on mine starting this weekend after a year hiatus! Kind of ironic being it will be 3 yrs to the day when I started this project.....anyway, just a few questions.....1-Did you go with 1" or 2" lowering springs, and will you be using airbags with the springs in the rear?
2-Did you stick with stock front spindles or drops? Reason I'm asking is I was thinking of doing 2" drop spindles with 1" lowering springs in front.....
3-Where did you order the body bushings from?
Good choice for going with "hot hues" for color....
Anyway, thanks in advance for your help and keep up the awesome work and progress!
Erik
Registered Luser
Joined: Aug 2006
Posts: 3,785
From: LI,NY

Erik, Hi. If I can toss my 2 cents worth in (US and CDN Dollars are not far from par at least!) I would like to say my '72 is equipped with the 2-inch drop spindles according to the previous owner with stock springs. I can believe this as there is plenty of room between the frame snubbers and the control arm, and the car has never bottomed. It really helps the handling in conjunction with Polyurethane bushings front and rear. Regarding the bushings, it would be nice to know exactly where Steve got his and for what model, but from what I have seen from the kit I ordered, which is for a 1972 convertible offering, a quick comparison squeezing under my car eying the old units and the new ones look promising so far. The were obtained from a place in Canada called NOS Reproductions. Regards, Howie
 All kidding aside, I welcome your input. Thanks for the dime on the bushings.
Registered User
Joined: Dec 2011
Posts: 451
From: Burlington, Ontario, Canada
You are so welcome Erik! I try to help where I honestly feel I can from experience/being down a certain road. The bushings really helped, and do not have too many annoying squeaks or things like that, we were very careful to grease them properly upon installation. We will see what the future brings. The rear control arms are boxed, and the front anti-sway bar is an insane 1 1/4 (at least) inch diameter, the rear one is 1-inch. Combined with the other mods and fat tires, 'Sammy' has suprised and annoyed more then one tuner car on twisty turns. Imagine their egos being bruised when a STATION WAGON was able to keep on their tails in the curves. I have taken a quick glance at your '70's story, will examine the pictures more in depth in the near future, you are certainly taking the 'right' route with it in the repairs. Did the wood grain search prove fruitful? Take care, regards, Howie
Thread Starter
Registered User
Joined: Sep 2009
Posts: 455
Erik, Glad to see you are getting back on it. I went with the 1" lowering springs and stock spindles on this car. They do recommend air bags in the back but wait and see what it looks like after it is together to decide. I used polygraphite bushings from performance suspention technololigies and are for 70 Cutlass. This car sits pretty low right now with no weight in it so hope it looks ok together. Right noe trying to decided if I want to used the repro sport steering wheel or get a billet specialties wheel to match the wheels on the car with a color cordinated half wrap.
Steve...good to see you are still going at it! I love the color combo! Kind of a "period correct" custom paint job from the 70's! I'm just getting to go back on mine starting this weekend after a year hiatus! Kind of ironic being it will be 3 yrs to the day when I started this project.....anyway, just a few questions.....
1-Did you go with 1" or 2" lowering springs, and will you be using airbags with the springs in the rear?
2-Did you stick with stock front spindles or drops? Reason I'm asking is I was thinking of doing 2" drop spindles with 1" lowering springs in front.....
3-Where did you order the body bushings from?
Good choice for going with "hot hues" for color....
Anyway, thanks in advance for your help and keep up the awesome work and progress!
Erik
Steve...good to see you are still going at it! I love the color combo! Kind of a "period correct" custom paint job from the 70's! I'm just getting to go back on mine starting this weekend after a year hiatus! Kind of ironic being it will be 3 yrs to the day when I started this project.....anyway, just a few questions.....1-Did you go with 1" or 2" lowering springs, and will you be using airbags with the springs in the rear?
2-Did you stick with stock front spindles or drops? Reason I'm asking is I was thinking of doing 2" drop spindles with 1" lowering springs in front.....
3-Where did you order the body bushings from?
Good choice for going with "hot hues" for color....
Anyway, thanks in advance for your help and keep up the awesome work and progress!
Erik

Registered User
Joined: Aug 2010
Posts: 990
From: Economy, Nova Scotia
I just finished changing my dash pad from green to black using SEM Landau Black and it turned out beautiful. I did the chrome lines with Krylon chrome paint which is in a small can and applied with Qtips. The secret is to have the correct amount on the Qtip and wipe lightly in quick strokes. Practice makes perfect. the Qtips seem to keep the paint from going off the top edges. Like all paint it isn't as good as chrome from the factory but certainly an inexpensive way to reasonably duplicate the finish.
Just an Olds Guy
Joined: Jul 2008
Posts: 24,528
From: Edmonton, AB. And "I am Can 'eh' jun - eh"
Registered User
Joined: Aug 2010
Posts: 990
From: Economy, Nova Scotia
Thanks. The Sherwin Williams dealer I obtained the SEM paint from didn't have any promoters in stock, so I scrubbed it well with Simple Green Max cleaner, Dupont Wax and Grease remover and isopropyl alcohol and took a chance. It seems stuck and the initial sheen dried down to a nice freshly armoralled look. It's hard to believe its just a coating. Sometimes things do go well in this hobby.
Thread Starter
Registered User
Joined: Sep 2009
Posts: 455
Thanks for the tips Rocketbrian your dash turned out great. I have marker pens in silver that work like a felt maker. They come in different widths and will try these again. I got the dash metal painted this weekend and started on the A/C heater box.

Registered User
Joined: Dec 2011
Posts: 47
door bracing
after reading this , i feel at the least you should do is run a thick piece of stock on the inside of each door opening while it is still on the frame.
i will take a c channel piece of stock, new fencing , cut to fit the opening on a chop saw. quick grind and let the mig welder do its job
it does not have to be pretty, just weld each piece of stock to the inner panel of each opening. when done and back on the frame ,grind the welds and take off. you can dress it then as all will be covered up with trim panels.
after restoring cars for years i am a firm believer in precautions at the beginning. remember the doors are off, it will tend to bow in this area. even worse if any floor pan work is done. after it does that all fittmant of panels becomes a challenge. for 1 hour worth of work i can then sleep at night. i have had to repair many other peoples mistakes and they are never the same.
this is a good solid and cheap way to ensure your project will be everything you want.
ps.
i brace every car that goes in the air......
hope this is helpful
john s fry
i will take a c channel piece of stock, new fencing , cut to fit the opening on a chop saw. quick grind and let the mig welder do its job
it does not have to be pretty, just weld each piece of stock to the inner panel of each opening. when done and back on the frame ,grind the welds and take off. you can dress it then as all will be covered up with trim panels.
after restoring cars for years i am a firm believer in precautions at the beginning. remember the doors are off, it will tend to bow in this area. even worse if any floor pan work is done. after it does that all fittmant of panels becomes a challenge. for 1 hour worth of work i can then sleep at night. i have had to repair many other peoples mistakes and they are never the same.
this is a good solid and cheap way to ensure your project will be everything you want.
ps.
i brace every car that goes in the air......
hope this is helpful
john s fry
Registered User
Joined: Aug 2010
Posts: 990
From: Economy, Nova Scotia
Thanks for the comments. When doing the silver lines, as they say "patience is a virtue" . By the way your Vista is gorgeous, I have been following your work and admiring the results.
Today I did the Eastwood rust encapsulater on my floors, as you have done, man that stuff has got some odor to it. Hope it's good.
Today I did the Eastwood rust encapsulater on my floors, as you have done, man that stuff has got some odor to it. Hope it's good.
Thread Starter
Registered User
Joined: Sep 2009
Posts: 455
More progress this weekend. Working on several different things right now. Started the rehab on the inner and outer heater/ac box,took some of the steering colume apart to replace the turn signal switch and get the code of the key cylinder (my key is worn down and difficult to read). I don't know if we still have the code book at work to cut a key. Got the interior metal on the inside of the rear gate opening done also. Waiting on a couple of things to start putting the firewall back together. Here are a few pics
Registered User
Joined: Dec 2011
Posts: 451
From: Burlington, Ontario, Canada
Steve, the dash looks beautiful, it gives me encouragement for when I take mine out again to do in proper detail, it was literally 'thrown' together so the car could be drivable, as the original was a disgusting, hacked up mess. The A/C - heater box is looking nice too, and the detailing inside is as meticulous looking as the efforts put into that beautiful red body. The color so 'works' on a Vista Cruiser. Regarding the lock cylinder, maybe a locksmith can disassemble it and work with the tumblers combined to what is left of the old key to pattern and then construct a proper key for it. Regards, Howie
Thread Starter
Registered User
Joined: Sep 2009
Posts: 455
Thanks Howie, If I can't make a key will get new cylinder kits from fusick but would like to use the original. Lots of little projects going now.
Steve, the dash looks beautiful, it gives me encouragement for when I take mine out again to do in proper detail, it was literally 'thrown' together so the car could be drivable, as the original was a disgusting, hacked up mess. The A/C - heater box is looking nice too, and the detailing inside is as meticulous looking as the efforts put into that beautiful red body. The color so 'works' on a Vista Cruiser. Regarding the lock cylinder, maybe a locksmith can disassemble it and work with the tumblers combined to what is left of the old key to pattern and then construct a proper key for it. Regards, Howie
Just an Olds Guy
Joined: Jul 2008
Posts: 24,528
From: Edmonton, AB. And "I am Can 'eh' jun - eh"
Steve, GM has records of the key numbers from 1946 to current date. If you provide them with proof of your ownership they can get you the key number and make the right key for you. Got that info from GM Vintage Vehicle services.
Thread Starter
Registered User
Joined: Sep 2009
Posts: 455
Thanks Allan, The electronic key cutter at work had the code in its memory. So I cut 2 new ignition keys from the code on the cylinder and read the compartment key and cut 2 new compartment keys, I do have a question though. My rear window key switch is inop and need to know for sure which key works the rear window. I believe the ignition key does is this right. Thanks
Just an Olds Guy
Joined: Jul 2008
Posts: 24,528
From: Edmonton, AB. And "I am Can 'eh' jun - eh"
Registered User
Joined: Dec 2011
Posts: 451
From: Burlington, Ontario, Canada
Don't know how old a post is that I got today Steve, but it is the ignition key that works the cylinder in the tail gate too. I had the electrical end apart on mine a few years ago, it did not want to make the window go 'down'. It was east to take apart, a few small parts, wish I had taken a movie to show, but by being careful, and cleaning the contacts, the switch has been fine since the repair several years ago. Howie
Thread Starter
Registered User
Joined: Sep 2009
Posts: 455
I think I have a plan for the A/C. I have been in contact with Classic Auto Air in florida and will send in my POA valve and expantion valve for reconditioning and calibrate for R134. I will be getting one of there condensers for r134 and a set of there hoses. I am using one of the compressors I have in stock plus I leak checked my evaporater and it seems fine and there was noil in the case. Has anyone dealt with this company before?? Thanks
Registered User
Joined: Dec 2011
Posts: 451
From: Burlington, Ontario, Canada
You are welcome Steve. Because I have only joined the forum recently, what is the story on your Red Rocket coming to life? I am focusing on where specifically the tailgate came from, etc. Could the lock cylinder possibly be not original to the car? It could be a possibility as to why the key will not go in all the way. But the penetrating oil will quell any question of the key not going in all the way due to corrosion. From there, a new adventure! Howie
Registered User
Joined: Dec 2011
Posts: 451
From: Burlington, Ontario, Canada
I think I have a plan for the A/C. I have been in contact with Classic Auto Air in florida and will send in my POA valve and expantion valve for reconditioning and calibrate for R134. I will be getting one of there condensers for r134 and a set of there hoses. I am using one of the compressors I have in stock plus I leak checked my evaporater and it seems fine and there was noil in the case. Has anyone dealt with this company before?? Thanks
Thread Starter
Registered User
Joined: Sep 2009
Posts: 455
The gate was the original rust free other that being hit pretty good a couple of times. Everything was original on the is car and figure the cylinder to be the original. I already got the cap and back of the cylinder off. If I can get the cylinder out of the case I can fix it but I believe it has to turn to get it out. Even if I could find a working used one I could code it to my key just not having any luck finding one. I will see what soaking it does this weekend.
You are welcome Steve. Because I have only joined the forum recently, what is the story on your Red Rocket coming to life? I am focusing on where specifically the tailgate came from, etc. Could the lock cylinder possibly be not original to the car? It could be a possibility as to why the key will not go in all the way. But the penetrating oil will quell any question of the key not going in all the way due to corrosion. From there, a new adventure! Howie
Registered User
Joined: Dec 2011
Posts: 451
From: Burlington, Ontario, Canada
The gate was the original rust free other that being hit pretty good a couple of times. Everything was original on the is car and figure the cylinder to be the original. I already got the cap and back of the cylinder off. If I can get the cylinder out of the case I can fix it but I believe it has to turn to get it out. Even if I could find a working used one I could code it to my key just not having any luck finding one. I will see what soaking it does this weekend.
Thread Starter
Registered User
Joined: Sep 2009
Posts: 455
Hi All, Does anyone hae a good way to get the christmas tree fasteners for the firewall pad thriugh the firewall. I eventually get them in but there has got to be a easier way. Maybe heating them? They must have had some type of pilot or fitting that fit in them to drive thme in.
I have been soaking the rear gate window switch and have got the key in but not turning yet.
I have been soaking the rear gate window switch and have got the key in but not turning yet.


