


Vista Body on Rotiseri


Thread Starter
Registered User
Joined: Sep 2009
Posts: 455
Thanks for the kind words on my project. Should have the body off the frame this weekend and will post some more pics.
Thanks for the updates and great pics. Your updates are an inspiration to all of us slaggers that there more to life than just work and household projects.
Your 68 442 vert looks great. Hopefully sooner than later I can get my 68 vert back together and on the road. Nice Website.
Keep the pics coming.
Your 68 442 vert looks great. Hopefully sooner than later I can get my 68 vert back together and on the road. Nice Website.
Keep the pics coming.
Thread Starter
Registered User
Joined: Sep 2009
Posts: 455
Did some more on the Vista Cruiser this weekend. Got the body off the frame and a lot of the frame taken apart. I hope to get the frame to the sandblaster this week and start on some of the small parts for the frame. Pics of the body off the frame.
Thread Starter
Registered User
Joined: Sep 2009
Posts: 455
Some more progress on the Vista the past couple of weeks. I have the frame at the sanblaster and have pushed all the control arm bushings out and sanblasted all the control arms etc. Here are some pics of the progress. I am trying some of the PPG OMNI line of primers on this project to see if I like it or not.
Last edited by 70vista; Dec 12, 2009 at 07:55 AM.

Just an Olds Guy
Joined: Jul 2008
Posts: 24,528
From: Edmonton, AB. And "I am Can 'eh' jun - eh"
When I first saw the rolling chassis pic, I almost died. From the angle of the picture, it looked like there was no real frame to support such a long car. The head on shot shows the frame quite a bit different. I've never seen a VC frame before but didn't realize the frame rails were that wide. Is that design supposed to reduce or eliminate torsional twist? I would have thought there would be some cross bracing in there somewhere to give added strength, especially in a side impact collision.
Registered
Joined: Jul 2006
Posts: 4,430
From: Northeast Ohio
When I first saw the rolling chassis pic, I almost died. From the angle of the picture, it looked like there was no real frame to support such a long car. The head on shot shows the frame quite a bit different. I've never seen a VC frame before but didn't realize the frame rails were that wide. Is that design supposed to reduce or eliminate torsional twist? I would have thought there would be some cross bracing in there somewhere to give added strength, especially in a side impact collision.
Hope you're okay?
I would call the paramedics before you ever look at a frame like yours without a car on it.


The Vista frame is strong like bull, I would say that with the car on it that it's stronger than any other A body frame of that era by a longshot in all ways.
With the boxed frame and B pillars it's way safer in a side impact than any open framed hardtop, coupe, or boxed frame convertible A-body IMO.
Torsional stiffness?
If you jack the car up at either the front or rear frame jacking point both tires come off the ground on that side and all four doors and the tailgate easily open and close.

Just an Olds Guy
Joined: Jul 2008
Posts: 24,528
From: Edmonton, AB. And "I am Can 'eh' jun - eh"
BTW I need to borrow your shop for about 2 or 3 months. How much to ship everything up here? I'm sure the neighbors won't mind if I bulldoze their places to make room
 !!! I hate long road trips
Thread Starter
Registered User
Joined: Sep 2009
Posts: 455
Got back on the Vista after the holidays and some cold weather. Was able to get the cotrol arm bushings back in the control armas and wet sanded the frame and arms. Will be painting the frame and control arms this coming weekend. Here are some shot of the frame set up on saw horses.
Registered Luser
Joined: Aug 2006
Posts: 3,785
From: LI,NY
Steve, is yours a Rochester car? Looks pretty clean. How are the wheel well openings, doglegs and rear pan and spare tire well? Are you gonna put woodgrain back? Still looking for woodgrain...got a sample from a place out west and it was quite ugly. Color no good either. I'm waiting for Allan(bluevista) to do his first so I can scheme off him!
Thread Starter
Registered User
Joined: Sep 2009
Posts: 455
Eric, This car came out of Sacramento CA and has very little rust. There is only one small hole on the inside of the left quarter where the gas tank goes. All the window openings are dead solid with slight scabs of rust. I will not put the woodgrain back on. I will tu-tone the roof and where the woodgrain was.
Steve, is yours a Rochester car? Looks pretty clean. How are the wheel well openings, doglegs and rear pan and spare tire well? Are you gonna put woodgrain back? Still looking for woodgrain...got a sample from a place out west and it was quite ugly. Color no good either. I'm waiting for Allan(bluevista) to do his first so I can scheme off him!
Registered
Joined: Jul 2006
Posts: 4,430
From: Northeast Ohio
Steve, is yours a Rochester car? Looks pretty clean. How are the wheel well openings, doglegs and rear pan and spare tire well? Are you gonna put woodgrain back? Still looking for woodgrain...got a sample from a place out west and it was quite ugly. Color no good either. I'm waiting for Allan(bluevista) to do his first so I can scheme off him!
I've been searching for woodgrain, the woodgrain for wagons stuff is way off, made in identical panels.
I'll start a thread and maybe somebody will know some better sources.
I checked the 3M stuff and it's close in grain but too dark and not shiny enough, application problems.
I have a few more samples on the way.
I know your car now 70vista, the seller was buddies with the guy's dad that I got his and his dads car from without him knowing it, didn't find out until it was too late.


The frame and stuff looks real good, no woodgrain huh?
People either love or actually hate the stuff.
My car is original.
If it ain't got wood it ain't no good.

Doug - Roller Hoop dude
Joined: Dec 2008
Posts: 35
From: Lincoln, Nebraska
Wow some really great work you guys are doing!
Here is a rotisserie that work well for us with the bigger body cars, and it limits the stress load on the body, this 63 Galaxie is very rusty and would fall apart on a end mount unit, but is very stabble here. this 69 Super Bee was very rusty as well but turned out great. I plan on mounting my 57 Olds 4dr HDT this summer I'll post pictures of it.
Here is a rotisserie that work well for us with the bigger body cars, and it limits the stress load on the body, this 63 Galaxie is very rusty and would fall apart on a end mount unit, but is very stabble here. this 69 Super Bee was very rusty as well but turned out great. I plan on mounting my 57 Olds 4dr HDT this summer I'll post pictures of it.
Thread Starter
Registered User
Joined: Sep 2009
Posts: 455
Wow some really great work you guys are doing!
Here is a rotisserie that work well for us with the bigger body cars, and it limits the stress load on the body, this 63 Galaxie is very rusty and would fall apart on a end mount unit, but is very stabble here. this 69 Super Bee was very rusty as well but turned out great. I plan on mounting my 57 Olds 4dr HDT this summer I'll post pictures of it.
Here is a rotisserie that work well for us with the bigger body cars, and it limits the stress load on the body, this 63 Galaxie is very rusty and would fall apart on a end mount unit, but is very stabble here. this 69 Super Bee was very rusty as well but turned out great. I plan on mounting my 57 Olds 4dr HDT this summer I'll post pictures of it.
Registered Luser
Joined: Aug 2006
Posts: 3,785
From: LI,NY
 Paint or Powdercoat!
Steve...lookin' great! Are the individual pieces painted or powdercoated? I will be able to use you and your pics as reference when I finally get out of my "hell" at the rear part of the car......

Thread Starter
Registered User
Joined: Sep 2009
Posts: 455
Erik, I just sandblasted,epoxy primed and used eastwood paints. The eastwood stuff is pretty good and easy to use.
Thread Starter
Registered User
Joined: Sep 2009
Posts: 455
Got a little more done on the front suspension and brake line front to rear. I am still looking for a anti-spin carrier for the orignal diff. I am putting a spare rear that has a lot of pitting in the housing for now. Here are some pics.
Last edited by 70vista; Feb 6, 2010 at 05:43 PM.
Thread Starter
Registered User
Joined: Sep 2009
Posts: 455
Hi, It is the eastwood stuff. I used spray gray on the sway bar and detail gray on the steering linkage. Some of the sruff like dust shields and caliper brackets are not correct for a stock restoration but this is not going to be stock.

Thread Starter
Registered User
Joined: Sep 2009
Posts: 455
Thread Starter
Registered User
Joined: Sep 2009
Posts: 455
Made some more progress on the Vista Cruiser this past weekend. Installed most of the frame components and the chassis will be rolling soon. The lines I had Classic Tube make fit good. Here are some pics.
Registered
Joined: Jul 2006
Posts: 4,430
From: Northeast Ohio
Very nice.
Never get those fuel lines in with the body on would you?
Is the sway bar the same as a regular A body?
I think I need one now.
Hey Erik, when are you going to detail your '70's underbody?
I know Spies-Hecker (do you pronounce it "schpees?) has to make some fine Vista Cruiser frame and floor pan paint?
Didn't they provide all the red paint for Manfred von Richthofen's Fokker??
I went to their website to see but you click on the frequently asked questions section and it just says,
"You ask no questions...We are the only ones allowed to ask questions!!! ".
".
Never get those fuel lines in with the body on would you?
Is the sway bar the same as a regular A body?
I think I need one now.
Hey Erik, when are you going to detail your '70's underbody?
I know Spies-Hecker (do you pronounce it "schpees?) has to make some fine Vista Cruiser frame and floor pan paint?
Didn't they provide all the red paint for Manfred von Richthofen's Fokker??
I went to their website to see but you click on the frequently asked questions section and it just says,
"You ask no questions...We are the only ones allowed to ask questions!!!
".
Thread Starter
Registered User
Joined: Sep 2009
Posts: 455
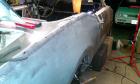
Well got the chassis rolling with a temporary rear in it. Started to get the body on the rottisseri but ran into a snag. The rear step area hansg down below the rear body mount where the rottisseri attaches. I am haveing a solid 3" spacer made to lower the brace there to clear. Here are some pics of where I am.
Registered
Joined: Jul 2006
Posts: 4,430
From: Northeast Ohio
That sure looks nice Doc, just the way I would do it.
I see what you mean about the step getting in the way.
That "step" is really for the hinge on the two way tailgates.
It conveniently doubles as a step for third seat passengers but Vista Cruisers don't have a rear facing third seat?
I guess you got to have it anyway with that gate.
That woodgrain is tough to get off, it does keep the finish underneath it nice though.
I see what you mean about the step getting in the way.
That "step" is really for the hinge on the two way tailgates.
It conveniently doubles as a step for third seat passengers but Vista Cruisers don't have a rear facing third seat?
I guess you got to have it anyway with that gate.
That woodgrain is tough to get off, it does keep the finish underneath it nice though.
Thread Starter
Registered User
Joined: Sep 2009
Posts: 455
Hope to pick up the spacer today to get the body attached to the rottiseri and the body moved to the work side of the shop but mother nature had another idea. She dumped a foot of snow in my driveway so moving the body will have to wait. Still will get the rottiseri attached.
Thread Starter
Registered User
Joined: Sep 2009
Posts: 455
Yes it is a shame a lot of my work will be hidden. Got the body secure on the rottiseri. The spacer I had made worked perfect and the body seems to sit well on the rottisseri. The weight of this body makes it want to rotate very easy. Here are some pics of the body on the rottiseri.

Registered User
Joined: Jul 2009
Posts: 156
From: Northampton, PA
the one we have, my dad made it long enough to be able to put frames on it. yes, there's alot hanging of either end when there's a body on it. but it makes sandblasting/painting frames so much nicer.
Thread Starter
Registered User
Joined: Sep 2009
Posts: 455
Yours looks a lot like mine. Now Iam doing some dirty work like scraping all the sealer out of the seams so I can reseal. The stuf from the factory pops right out of the seams. I will be doing this for the next couple of weekends.
Thread Starter
Registered User
Joined: Sep 2009
Posts: 455
Hi All, Moved the body to the work side of the shop. Started to do some cleaning on the underside. Here are some pics of the move from one side of the shop to the other. The Vista is taller than a cutlass "A" body and just cleared the top of the door openings. This is the last crappy job to do on this project.
Thread Starter
Registered User
Joined: Sep 2009
Posts: 455
Wow can't believe it's been over 2 months since the last update. When spring arives I have a lot of house/yard stuff to do so just getting back to it. I stripped all the undercoating of the bottom and wheelhouses and patches a small hole on the inside of the left quarter. This past weekend I began sanblasting the bottom. Here are some pics.


