


Vista Body on Rotiseri


Thread Starter
Registered User
Joined: Sep 2009
Posts: 455
Joe,
It just cleared by a couple of inchs (My doors are 9'X7'). It has to be on the smaller casters though. I put the bigger tires on after it clears the door. A friend of mine is doing a 70 pace car also.
It just cleared by a couple of inchs (My doors are 9'X7'). It has to be on the smaller casters though. I put the bigger tires on after it clears the door. A friend of mine is doing a 70 pace car also.
Nice job steve!! I went through all of your postings today after I checked out to see if there were any more postings on the Pace car that I'm doing for my customer. I do have one question... How did you get the car out of the garage when it was on the rotisserie?... it looked like it was higher then the door

Thread Starter
Registered User
Joined: Sep 2009
Posts: 455
I thought you were the Joe I know who is doing pace car. His name is Joe also and has a blue 69 W-30. I also have another friend named Steve whos is doing a frame off on a 70 pace car also.
Thread Starter
Registered User
Joined: Sep 2009
Posts: 455
Not much to report this week but got the pushrods that I ordered and set up the sharp rockers and installed the valley tray on the 496. Had to get a car ready for a indoor show this upcoming weekend in Hamburg N.Y. so won't get much done this coming weekend. I will post some pics later.
Thread Starter
Registered User
Joined: Sep 2009
Posts: 455
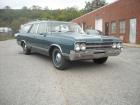
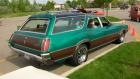
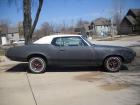
Back on the Vista this weekend and got some items done. Got most the trim on the gate,got the pedals back in,fixed up the A/C harness and retaped,sent out the exhaust manifolds and the repro. W-30 intake out for coating. I moved the car so I can paint the interior pieces in the coming weeks. Here are some shots of the car outside this afternnon.
Registered Luser
Joined: Aug 2006
Posts: 3,785
From: LI,NY
Oh yeah...beautiful day, beautiful car Steve....the trim really "pops" on that color. Good move making the darker color in place of the woodgrain. If it was the other way around, might not look as nice.....awesome!

Thread Starter
Registered User
Joined: Sep 2009
Posts: 455
Thankf for all the encouraging words guys,it meens alot to me. I am still a long ways off and it seems like all this little stuff is taking me forever to do. It's been nice out latley so working a hour a night on it durning the week. Working on the dash board now.

Thread Starter
Registered User
Joined: Sep 2009
Posts: 455
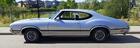
Got the dash painted ,swapped over the wire harness and cleaned up the A/C ducts and outlets, changed the harness for the rally pac,painted the lower A/C housing/ducts and cleaned up and painted the steering colume. Should get the dash back in the car this week. I also started cleaning the front inner wheelhouses for paint. Does anyone got a good plan for painting them. I plan on painting them body color on the engine compartment side and semi gloss black on the wheel side. I suppose I could sand them and use some type of adhesion promoter then base clear them. Here are some pics.
Thread Starter
Registered User
Joined: Sep 2009
Posts: 455
Yes that is a Tan/Beige color. This is a mild custom with the interior being the tan and cinabar (cinnamon). Where the woodgrain on the dash is there be cinabar and the steering wheel will have a half wrap in cinabar.
Still need to do the black/silver on the dash around the woodgrain with paint marker sticks.
Still need to do the black/silver on the dash around the woodgrain with paint marker sticks.
Just an Olds Guy
Joined: Jul 2008
Posts: 24,528
From: Edmonton, AB. And "I am Can 'eh' jun - eh"
Maybe it's me....... ya it is. Just wondering why you went with such a light color on the dash? It's going to create all kinds of reflection on the windshield. That was one of the reasons all manufacturers went to darker colors there.
Thread Starter
Registered User
Joined: Sep 2009
Posts: 455
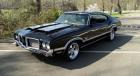
Wow it's been 2 weeks since my last update. Spring has sprung here in western ny and have lots of chores to get caught up on. I did manage to get the engine almost ready for the dyno (Still might just throw it in un dynoed) and installed the dash pad. I have a clearance issue with the HEI distributer cap hitting the back of the stock O.A.I aircleaner I am using. I think a 1/4" spacer may make it clear. If not I am going to get a MSD 8529 ready ro run which is smaller cap wise. Here are some pics of the engine. Happy Easter Everyone.
Just an Olds Guy
Joined: Jul 2008
Posts: 24,528
From: Edmonton, AB. And "I am Can 'eh' jun - eh"
I have a clearance issue with the HEI distributer cap hitting the back of the stock O.A.I aircleaner I am using. I think a 1/4" spacer may make it clear. If not I am going to get a MSD 8529 ready ro run which is smaller cap wise. Here are some pics of the engine. Happy Easter Everyone.
Your engine looks amazing. Takes a little getting used to seeing the non blue 455, but it fits the overall theme of the car. Great work! What kind of dyno results are you looking for?
Thread Starter
Registered User
Joined: Sep 2009
Posts: 455
HEI dist will always cause clearance with non HEI air cleaners. That's why the later 70's have offset air cans. You're handy with things. A spacer will not help. What you need to do is to modify the OEM air cleaner. You can see where the problem is easily when it's on the carb. I took mine, marked it, and cut out the area I needed for space. Then re weld the piece in with an inward gap of about 1/4" detail and paint. I have a stock dual snorkel I want to use, so I'm likely going to pull my HEI and reinstall stock dist.
Your engine looks amazing. Takes a little getting used to seeing the non blue 455, but it fits the overall theme of the car. Great work! What kind of dyno results are you looking for?
Your engine looks amazing. Takes a little getting used to seeing the non blue 455, but it fits the overall theme of the car. Great work! What kind of dyno results are you looking for?
Registered User
Joined: Jul 2006
Posts: 694
From: Manassas, VA
I had a clearance issue with the HEIs on the firewall side. The cap came very close to the firewall, and with the engine harness running right there, it rubbed (the harness). I was concerned it would eventually cause a wire failure/short, and switched to an Accel Street Billet. The MSD RTR is a good choice too, though I moved away from those because they don' coat the reluctor wheel, and they will rust. If you're running RTRs on other cars, then guess that would be a better choice since you can then stock like parts for multiple cars, but if not, consider the Accel. Only complaint I have is that the black caps are $5 more than the cheesy tan caps.
.
.
Thread Starter
Registered User
Joined: Sep 2009
Posts: 455
This weeks update. Still tons of work around the house But got the rearend setup and found out cutlass/442 rear brake lines are not even close to a Vista Cruiser. It must be the rear wheel cylinders ar a lot different. So am sending the originals out for duplication. Here are some pics of the progress.
Registered Luser
Joined: Aug 2006
Posts: 3,785
From: LI,NY
 Lookin' good Steve! What brake lines did you get? I got mine from ILT and they fit 99%. They only poblem one was the front to rear line, and I had to send it back, along with the original and they copied it. I spoke to your guy up there first, and he told me he had no patterns for the vista, so I would have to send all mine for him to copy.....keep it up my friend!

Thread Starter
Registered User
Joined: Sep 2009
Posts: 455
I used classic tube for the lines and the fit good. I don't know why they didn't store the patterns. I got the wrong prop. valve to master line set though and will need to get the correct ones with the rear lines I have ordered. I can't wait to see how the car sits when get all the weight on it. Still waiting on the interior stuff but hope he is working on it now that I am closer.
Lookin' good Steve! What brake lines did you get? I got mine from ILT and they fit 99%. They only poblem one was the front to rear line, and I had to send it back, along with the original and they copied it. I spoke to your guy up there first, and he told me he had no patterns for the vista, so I would have to send all mine for him to copy.....keep it up my friend!
Lookin' good Steve! What brake lines did you get? I got mine from ILT and they fit 99%. They only poblem one was the front to rear line, and I had to send it back, along with the original and they copied it. I spoke to your guy up there first, and he told me he had no patterns for the vista, so I would have to send all mine for him to copy.....keep it up my friend!
Thread Starter
Registered User
Joined: Sep 2009
Posts: 455
After a very nice summer I am getting back on the Vista. Got the front fenders,core support and some of the wiring installed. I have run into a slight problem on the fan. It seems to be to close at the top and may hit the shroud. This was a small block car and I converted to big block with big block mounts and frame pads. I am thinking of shimming the core support up 1/4" at the mounts. Here are some current pics.
Registered Luser
Joined: Aug 2006
Posts: 3,785
From: LI,NY
Awesome Steve! Now you are making me look bad....I'll start back on mine next month. Only a six month break! Did you switch out the trans? I've heard of people having that issue before with the fan and shroud. There are probably a few threads on that somewhere. Hopefully Allan R. Sees this post or Joe P. Joe could tell you why it's happening, Allan will find the thread! By the way, looks great with the 442 grilles....we are doing the same !
Just an Olds Guy
Joined: Jul 2008
Posts: 24,528
From: Edmonton, AB. And "I am Can 'eh' jun - eh"
Steve, your diff and axles are inspiring. I finally did the diff in my car and changed to a series 3 posi with 3:42. Waiting on ILT for the backing plate to axle gaskets. I wanted to ask you about this pic:

How did you clean that up? Did you press the oil seals and bearings on after the cleanup? I have mine already on and need to clean the axle mounting plate and hub so I've wrapped them with shop towel and taped them up really tight to avoid contamination. I don't want to put them in the blaster for fear of screwing the bearings even with the wrapping it's got.
What kind of paint did you use on the hub? Looks like cast - is it the high heat engine enamel?
Appreciate any suggestions you may have.
How did you clean that up? Did you press the oil seals and bearings on after the cleanup? I have mine already on and need to clean the axle mounting plate and hub so I've wrapped them with shop towel and taped them up really tight to avoid contamination. I don't want to put them in the blaster for fear of screwing the bearings even with the wrapping it's got.
What kind of paint did you use on the hub? Looks like cast - is it the high heat engine enamel?
Appreciate any suggestions you may have.
Thread Starter
Registered User
Joined: Sep 2009
Posts: 455
Allan, I blasted and painted everthing before pressing the bearings on. I used eastwood cast iron on the hubs and eastwood detail grey. There is not enough heat (unless I assemble something wrong) to need high heat paint.
Eric, Thanks for the compliment and am sure yours will be just as nice.
Eric, Thanks for the compliment and am sure yours will be just as nice.
Steve, your diff and axles are inspiring. I finally did the diff in my car and changed to a series 3 posi with 3:42. Waiting on ILT for the backing plate to axle gaskets. I wanted to ask you about this pic:
How did you clean that up? Did you press the oil seals and bearings on after the cleanup? I have mine already on and need to clean the axle mounting plate and hub so I've wrapped them with shop towel and taped them up really tight to avoid contamination. I don't want to put them in the blaster for fear of screwing the bearings even with the wrapping it's got.
What kind of paint did you use on the hub? Looks like cast - is it the high heat engine enamel?
Appreciate any suggestions you may have.
How did you clean that up? Did you press the oil seals and bearings on after the cleanup? I have mine already on and need to clean the axle mounting plate and hub so I've wrapped them with shop towel and taped them up really tight to avoid contamination. I don't want to put them in the blaster for fear of screwing the bearings even with the wrapping it's got.
What kind of paint did you use on the hub? Looks like cast - is it the high heat engine enamel?
Appreciate any suggestions you may have.
Just an Olds Guy
Joined: Jul 2008
Posts: 24,528
From: Edmonton, AB. And "I am Can 'eh' jun - eh"
Thanks Steve. I'm a little late for that so I'm wire wheeling and sanding. Taped off the oil seal and bearings to avoid dust. I was also thinking of metal cast finish. I notice your axles have only 3 holes and my 72 has 4. Is that a VC feature?


