


Vista Body on Rotiseri



Thread Starter
Registered User
Joined: Sep 2009
Posts: 455
Made some more progress on the vista in the last few weeks. Got the inner wheel houses painted and installed plus installed the air cleaner and A/C hoses. Still waiting on the interior to get finished. Here are some shots of the engine compartment pretty much done. Steve

Just an Olds Guy
Joined: Jul 2008
Posts: 24,528
From: Edmonton, AB. And "I am Can 'eh' jun - eh"
I detect a red/black/chrome theme there.... Just curious about something. I notice you painted the plastic inner fender liners the same color as the metal. Did you use a special paint to do that?
Thread Starter
Registered User
Joined: Sep 2009
Posts: 455
Allan, I cleaned them with oven cleaner and 409 then wet sanded them with 220,360 and 600 grit. sprayed them sems adhesion promoter then base cleared them. Time will tell if it the paint will stay on. I got them in without hurting them so am happy so far. Steve

Thread Starter
Registered User
Joined: Sep 2009
Posts: 455
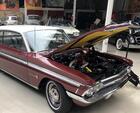
Looks like the car won't be out this year as the season is almost over. I did get the hood on and lined up as best as possible. This repro hood from the parts place is ok for the money. It fits but not perfect. My interior guy finall fonished the front seat and need to pick it up and get back in the car so I can test drive a little before winter. Here are some shots of the hood. I have another question/opinion on the roof rack do I just put the rack back on without the extra ribs that lay on the roof or the complete rack?? Steve
Just an Olds Guy
Joined: Jul 2008
Posts: 24,528
From: Edmonton, AB. And "I am Can 'eh' jun - eh"
Nice! That's their steel lined hood? I see what you mean on the right side about the fitment where the hood is slightly higher than the fender. Will you have to shave some of the fibreglass at the rear where the cowl stainless goes?
re: roof rack. I would say put it all back on. Just having the bare bones outline of the rack somehow wouldn't look right. IMO it would add to the overall appearance since you've also taken the time to collect and install all the side stainless. It would be a shame to skimp on the last few detail parts. Aren't there roof bosses for the bolts to attach that trim?
re: roof rack. I would say put it all back on. Just having the bare bones outline of the rack somehow wouldn't look right. IMO it would add to the overall appearance since you've also taken the time to collect and install all the side stainless. It would be a shame to skimp on the last few detail parts. Aren't there roof bosses for the bolts to attach that trim?
Thread Starter
Registered User
Joined: Sep 2009
Posts: 455
Yes Allan that is there steel lined hood and its not a bad fit just wish if you are going to make something make it right. I already have installed the rear lip stainless and it sticks up a little at the corners like the hood is not shaped right there. I would not have used this on a stock restoration and would have paid the money for a Thorton and probably should have for this car but live and learn.
I already have all the stainless ready for roof rack and will probably do the whole rack. I was lucky as all the pot metal corners for the rack are pit free and the chrome is still nice.
Thanks for the positive comments on the car.
Steve
I already have all the stainless ready for roof rack and will probably do the whole rack. I was lucky as all the pot metal corners for the rack are pit free and the chrome is still nice.
Thanks for the positive comments on the car.
Steve
Nice! That's their steel lined hood? I see what you mean on the right side about the fitment where the hood is slightly higher than the fender. Will you have to shave some of the fibreglass at the rear where the cowl stainless goes?
re: roof rack. I would say put it all back on. Just having the bare bones outline of the rack somehow wouldn't look right. IMO it would add to the overall appearance since you've also taken the time to collect and install all the side stainless. It would be a shame to skimp on the last few detail parts. Aren't there roof bosses for the bolts to attach that trim?
re: roof rack. I would say put it all back on. Just having the bare bones outline of the rack somehow wouldn't look right. IMO it would add to the overall appearance since you've also taken the time to collect and install all the side stainless. It would be a shame to skimp on the last few detail parts. Aren't there roof bosses for the bolts to attach that trim?

Registered User
Joined: Feb 2009
Posts: 11,897
From: Brazil Indiana
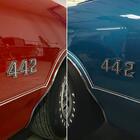
Looks great! I like that you used the Rallye 350 style stripes on the sides of the hood scoops. Don't feel bad about the fitment of the hood. Most factory OAI hoods don't fit that good either. I test fit 3 original hoods to my W-30 before i found one I liked.
Thread Starter
Registered User
Joined: Sep 2009
Posts: 455
Thanks for the positive responses. Will be having all the fixed glass being installed in a week or so. I have some water spots on the vista glass that won't clean off. Does anyone have any suggestions on cleaning this?? I have some rouge that has to be mixed with water and buffed that I may try once the glass is installed but would like any other suggestions. I also am looking to replace the strip on the back gate that fills the opening between the bottom of the gate and bumper. I took the original and stripped it to the metal core then made a vinyl strip and riveted it to the original metal and brackets but not happy with it. Looking for ideas for this also. No new pics right now. Steve

Registered User
Joined: Jun 2010
Posts: 275
From: Lebanon, Ohio
Try #0000 steel wool also. It will not hurt the glass. A third trick would be just using buffing compound and a wool pad.
I just found your project thread and can't wait to see more! For now though, it's time to hit the sack. Keep up the great work. You're almost there!
Last edited by 69 Ragtop; Dec 10, 2013 at 09:29 PM.
Thread Starter
Registered User
Joined: Sep 2009
Posts: 455
Thanks for the ideas guys. I tried the white vinegar and steel wool without success. I have some glass rouge I will try later. I got all the glass back in and some of the widow trim back on. Still waiting on the interior and visit him again next week. Steve
Back in the day the pros used cerium oxide. I have some, but I have no idea where it came from. It's a powder and you just spritz a little water onto the glass, dust on a little cerium oxide and buff it with a wool pad till it dries. As it dries it gets picked up by the pad. Spritz on a little water and it's back on the glass. Pretty neat. It'll take out .002"-.003" scratches, so it should work on water spots.
Try #0000 steel wool also. It will not hurt the glass. A third trick would be just using buffing compound and a wool pad.
I just found your project thread and can't wait to see more! For now though, it's time to hit the sack. Keep up the great work. You're almost there!
Try #0000 steel wool also. It will not hurt the glass. A third trick would be just using buffing compound and a wool pad.
I just found your project thread and can't wait to see more! For now though, it's time to hit the sack. Keep up the great work. You're almost there!

Registered User
Joined: Feb 2009
Posts: 2,223


Thread Starter
Registered User
Joined: Sep 2009
Posts: 455
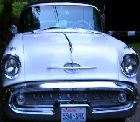
Just a update on this project. The car is all together and running/driving. I have only put a couple of miles on it but will start driving it more soon. Still need to charge the A/C and recheck all my brake and hose connections. Will post some more pictures soon. Steve

Just an Olds Guy
Joined: Jul 2008
Posts: 24,528
From: Edmonton, AB. And "I am Can 'eh' jun - eh"
Mike - I have a question about the alignment. Why does an A body need 4 wheel alignment? I can understand the front end, but there's no adjustability I know of on the rear.

Registered User
Joined: Jul 2008
Posts: 5,507
From: Seneca Falls, NY

Thread Starter
Registered User
Joined: Sep 2009
Posts: 455
Allan.. On my machine at work you have to use all 4 heads even though the rear is not adjustable. That was the first time I used that machine but worked out well. I will have pictures soon. Steve

Registered User
Joined: Dec 2011
Posts: 10
Steve, it looks great! you really did a nice job on it!, now all you need are some "kids" for the back seats. LOL Hey, thought you'd like to know, the W-30 is going to be in Hemmings Muscle Machines sometime soon... 6mo. to a year, maybe soon...as they have never had a 69 W-30 in the mag. before.


Thread Starter
Registered User
Joined: Sep 2009
Posts: 455
Thats great Joe that car defintley deserves it. Let me know what issue so I look for it. Steve
QUOTE=W-30 Joe;706860]Steve, it looks great! you really did a nice job on it!, now all you need are some "kids" for the back seats. LOL Hey, thought you'd like to know, the W-30 is going to be in Hemmings Muscle Machines sometime soon... 6mo. to a year, maybe soon...as they have never had a 69 W-30 in the mag. before.[/QUOTE]
QUOTE=W-30 Joe;706860]Steve, it looks great! you really did a nice job on it!, now all you need are some "kids" for the back seats. LOL Hey, thought you'd like to know, the W-30 is going to be in Hemmings Muscle Machines sometime soon... 6mo. to a year, maybe soon...as they have never had a 69 W-30 in the mag. before.[/QUOTE]
Thread Starter
Registered User
Joined: Sep 2009
Posts: 455


