What have you done to your Oldsmobile today
 March 9th, 2014, 05:01 PM
#641
Registered User
Join Date: Jan 2013
Location: Batavia, IL
Posts: 38
Last weekend I pulled the dash apart to remove the front speaker...which was a pain given that I found the center AC rigid duct full of holes and glued seams...(PO must have been a hack).
This weekend I pulled the back seat out to pull the rear speaker. Now two speakers ready to rehab/replace. Also found a replacement duct through someone parting out an 88 on eBay. Considering how much time it would have taken to remove one in a junkyard, I got off easy.
In front of me--AS long as half the dash is apart already, I might as well fix the clock, trace a likely vaccum leak, and check the AC/heat/Def controls as they are sporadically functional. And then polish that speaker cover in the middle of the rear seat.
 March 10th, 2014, 12:57 AM
#643
2-stroke 1-cylinder guy
Join Date: Nov 2013
Location: Bavaria, Germany
Posts: 333
Found out why my washer pump does not pump - it's missing the inner 4-spoke wheel completely 
wheres_waldo.jpg
Moved my temp switch to the right of the manifold and added a gauge sender on the left
bung.jpg
Next: Add an extension T for the oil pressure gauge.
wheres_waldo.jpg
Moved my temp switch to the right of the manifold and added a gauge sender on the left
bung.jpg
Next: Add an extension T for the oil pressure gauge.
March 10th, 2014, 03:20 AM
#644
Registered User
Join Date: Sep 2013
Location: 25 miles North of Tampa, Land O' Lakes, Florida (Originally from Bethpage, Long Island, NY)
Posts: 332
Just finished up my Big Block 455 on my 72 Cutlass
Here is my rebuilt 455, should be dropping it in within 2 weeks or so..
 March 12th, 2014, 12:50 PM
#647
Minor maintenance and cruising
Changed out the fan clutch, the old one's bearings were wasted and the seal broken. Tightened my lower radiator hose where it enters radiator, it's been leaking after the engine cools down. Finished adjusting the sound of the recently installed stereo. After all that I had to take it out for a drive so took the Wife to lunch in town, about a 25 mile trip. Everything is running great and nothing leaking.
In fact it ran so well I'm thinking of maybe driving it to the Lone Star Good Guy Nationals at Texas Motor Speedway this Saturday. Just hope it doesn't rain since the wipers are still not working!
In fact it ran so well I'm thinking of maybe driving it to the Lone Star Good Guy Nationals at Texas Motor Speedway this Saturday. Just hope it doesn't rain since the wipers are still not working!
March 12th, 2014, 03:39 PM
#648
Registered User
Join Date: Oct 2004
Location: Forest Ranch Ca.
Posts: 7,734
I'm getting ready for the MOTHER OF ALL ROAD TRIPS in May and have been going over all the stuff I did 12 years ago looking for anything that may have worn out or looking like it may need attention. The list goes on.
#1 Checked brakes then repacked the front wheel bearings (replaced one that looked bad).
#2 Replaced the generator (thought maybe the battery was going bad as it would loose juice after a while and not start but the generator also wasn't generating fully all the time) So new generator.
#3 I also put in a new battery, the old one was past it's expiration date and I wan't no problems on this trip.
#4 Working on the heater push pull switch thingy, It appears the wire may have broken or just come unsoldered from it's heater control bracket I'll work on that tomorrow if my knees will let me. This should just about be everything that It needed to put it back to near new, the wheel bearing and generator were a bit of a surprise but I would rather find it out now than 1200 miles away from home......Tedd
March 13th, 2014, 10:31 AM
#649
Registered User
Join Date: Oct 2004
Location: Forest Ranch Ca.
Posts: 7,734
when it rains it pours
Suprise suprise, when the heater control cable was reattached the heater control valve gave it up and dumped a 1/2 gallon of coolant on my carpeted floor, what a mess. I was distracted and left the engine run while I listened to a new engine squeal because the brand new generator that was just installed had bad bushings right out of the box! Some days it doesn't pay to get up. ...Tedd
...Tedd
March 13th, 2014, 01:07 PM
#650
2-stroke 1-cylinder guy
Join Date: Nov 2013
Location: Bavaria, Germany
Posts: 333
Rewired my generator, horn relay, original and additional water temp/oil pressure senders, replaced old oil pressure sender and tee-ed in a new one for the gages.
Now it's time to wrap it all up...
2014-03-13_15-17-32_110.jpg
2014-03-13_17-26-57_642.jpg
Checked and adjusted voltmeter with calibrated lab voltmeter from work, checked water temp with infrared gage from work, seems ok, too.
Oil pressure is ~72psi after start, gages seem to be a little high, but I don't know what oil is inside and how old it is....
March 14th, 2014, 02:03 PM
#651
2-stroke 1-cylinder guy
Join Date: Nov 2013
Location: Bavaria, Germany
Posts: 333
Checked my complete blower motor wiring, battery via relais and resistors to the wire that vanishes under the passenger side fender - The motor ground must have rattled loose
Need a few measurements, please.
Need a few measurements, please.
March 15th, 2014, 03:16 AM
#652
2-stroke 1-cylinder guy
Join Date: Nov 2013
Location: Bavaria, Germany
Posts: 333
One hour: Removed radiator over flow tank, pvc tank, wheel, fender liner, fixed the blower ground and put it all together again.
New record...
New record...
Last edited by Nop; March 15th, 2014 at 11:05 AM.
March 15th, 2014, 10:24 AM
#653
"Trying to fix her right"
Join Date: Oct 2012
Location: Bartlett IL
Posts: 749
The weather was finally decent enough to get in the garage and do a little work. Froze my a$$ off last year and I swore I wasn't going to do that again this year.
I adjusted the trans bracket and shifter linkage that my trans guy jacked up for my 200-4R trans. Now park is in the correct position and I'm getting all 4 gears. You think a trans guy would know how to do this, but I guess he's not familiar with the Shift Works hurst dual gate kit used on a 200-4R.
I got my console back in as well and got it all adjusted.
Started her up and took her for a ride to get gas. She's a monster! A lot of power with my new motor. Going to have to replace the gas tank soon. The PO replaced it with one that is not correct for my car so the filler neck is at a weird angle making it very difficult to put gas in.
BTW Nop, your monopolizing the thread! Give someone else a chance to post.
I adjusted the trans bracket and shifter linkage that my trans guy jacked up for my 200-4R trans. Now park is in the correct position and I'm getting all 4 gears. You think a trans guy would know how to do this, but I guess he's not familiar with the Shift Works hurst dual gate kit used on a 200-4R.
I got my console back in as well and got it all adjusted.
Started her up and took her for a ride to get gas. She's a monster! A lot of power with my new motor. Going to have to replace the gas tank soon. The PO replaced it with one that is not correct for my car so the filler neck is at a weird angle making it very difficult to put gas in.
BTW Nop, your monopolizing the thread!
Give someone else a chance to post.
 March 15th, 2014, 11:23 AM
#655
2-stroke 1-cylinder guy
Join Date: Nov 2013
Location: Bavaria, Germany
Posts: 333
Wife & kid are taking a cure for three weeks, gotta make good use of my remaining time....
Moved my radiator over flow tank a little to the front and down, the cap hit the hood before.
Dremel'd the door hinge support under my kick panels 1/2" to make room for my JBL speakers.
Pulled in new speaker wires to the kick panels.
When USPS delivers my washer pump (next week, hopefully) I'm done with everything up to the a pillar.
March 16th, 2014, 09:40 AM
#659
2-stroke 1-cylinder guy
Join Date: Nov 2013
Location: Bavaria, Germany
Posts: 333
Glued the vacuum actuator behind the passenger kick panel - was cracked all around so the "lid" with the attached hoses was removable. Let's see if that works...
Wired all speakers, cleaned up the wiring behind my dash, pulled in a fused line from the battery for the radio, stuffed my new cardboard glove box in.
A still from the garage:
2014-03-16_12-24-08_332.jpg

Wired all speakers, cleaned up the wiring behind my dash, pulled in a fused line from the battery for the radio, stuffed my new cardboard glove box in.
A still from the garage:
2014-03-16_12-24-08_332.jpg
Last edited by Nop; March 16th, 2014 at 09:52 AM.
 March 17th, 2014, 04:07 PM
#661
Registered User
Join Date: Mar 2014
Posts: 27
put elderblock air cleaner
changed low beam bulb on pass side
cut off rusted part of exhaust
changed front speakers (if someone could tell me the factory size for 77 98 front speakers that would be great the ones i put dnt really fit )
changed brake light fuse
got my high beams to turn off (lever is broken)
fixed some vacuums
sprayed damn near everything that squeaks with wd-40
March 17th, 2014, 04:25 PM
#662
Registered User
Join Date: Apr 2010
Location: Connecticut
Posts: 1,471
put elderblock air cleaner
changed low beam bulb on pass side
cut off rusted part of exhaust
changed front speakers (if someone could tell me the factory size for 77 98 front speakers that would be great the ones i put dnt really fit )
changed brake light fuse
got my high beams to turn off (lever is broken)
fixed some vacuums
sprayed damn near everything that squeaks with wd-40
changed low beam bulb on pass side
cut off rusted part of exhaust
changed front speakers (if someone could tell me the factory size for 77 98 front speakers that would be great the ones i put dnt really fit )
changed brake light fuse
got my high beams to turn off (lever is broken)
fixed some vacuums
sprayed damn near everything that squeaks with wd-40
Please double check but I think the front speakers would be 3 1/2 inch round.
March 17th, 2014, 04:55 PM
#663
Registered User
Join Date: May 2013
Location: Newtown CT
Posts: 221
Just finished port & polish on C heads for my 455
engine build project.
Head1_zpsddc5d5a4.jpg
15f56065-f0e3-4389-9d0d-2a53b172a1e9_zpse9f8afbb.jpg
PortingDiagramA_zpsdea565a7.jpg
engine build project.
Head1_zpsddc5d5a4.jpg
15f56065-f0e3-4389-9d0d-2a53b172a1e9_zpse9f8afbb.jpg
PortingDiagramA_zpsdea565a7.jpg
March 18th, 2014, 01:08 AM
#667
2-stroke 1-cylinder guy
Join Date: Nov 2013
Location: Bavaria, Germany
Posts: 333
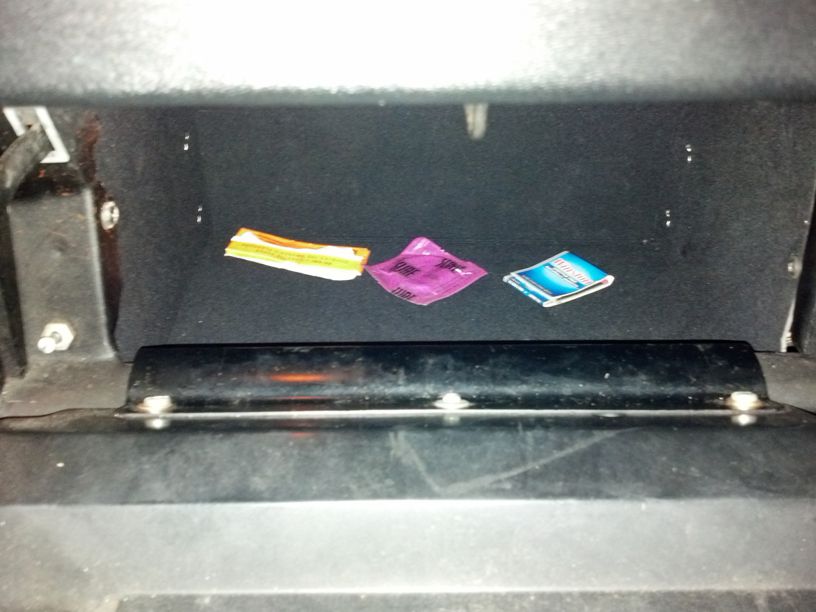
Wired my small rear LED turn signals for Germany's "historic" registration...
The local "DMV" requires orange turn signals from 1970 on to make absolutely sure the 112 year old blind and deaf retard in his Mercedes behind you really does notice when it's time to hit the brakes because you want to make a turn:
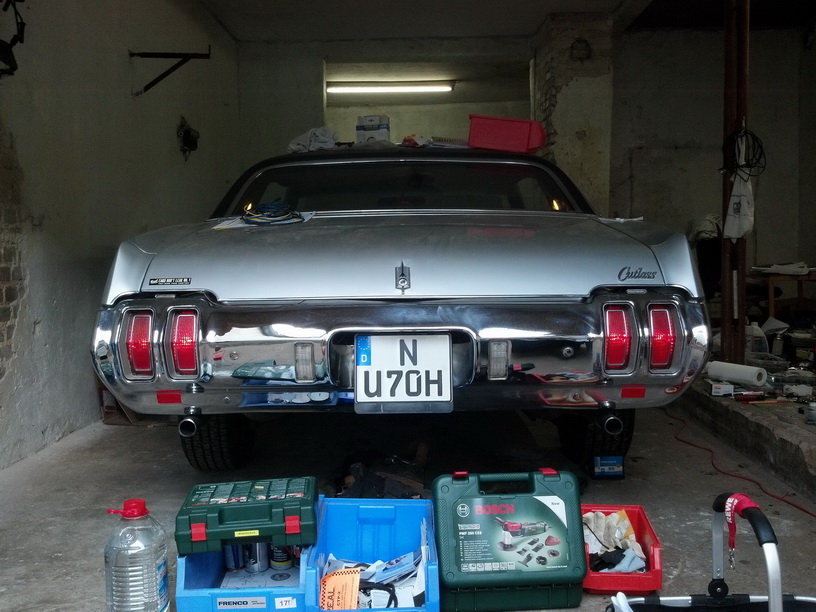
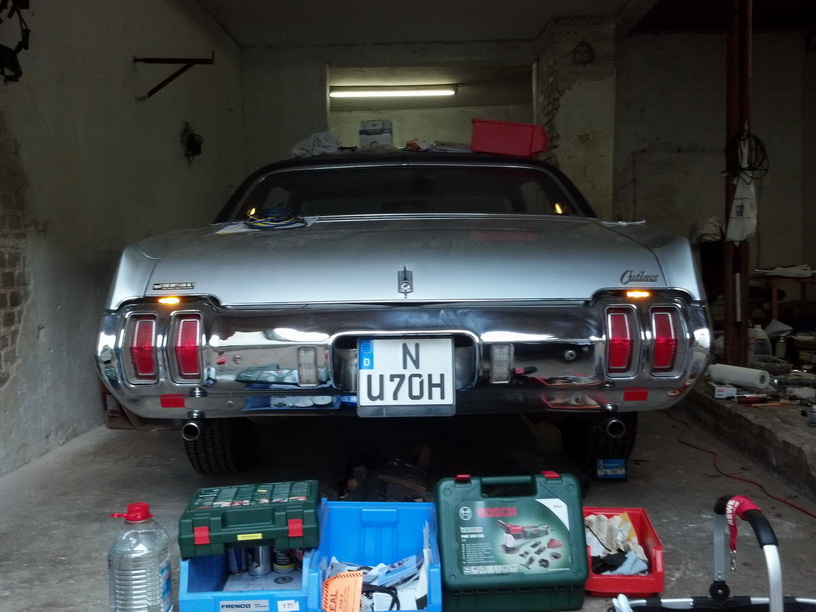
They don't look as bad as I was afraid, but I'm still thinking about ripping them out again after registration is done
Ed:
Bored at work - made an oldschool animated gif:
Ed2 - good evening.
Plugged the holes the removal of the door lock solenoid cables left in the doors and chassis,
wired my amp in the trunk,
fixed my battery to the tray,
cleaned up the wiring behind my head lights,
test-fitted my kick panels with speakers,
re-routed some wiring to make room for the left outer air duct (Ooops)
painted my transmission hump a second time,
marked the parts to cut & replace of my floor boards
The things left to do are:
Fit the washer pump once it's through customs,
cut and weld floor panels, paint them afterwards,
roll out rest of damping mat afterwards,
fit the new carpet,
fit rear seat and bench together with set belts,
weld a hole in my right rear quarter (obviously this guy also parked my Cutlass once... )
charge the battery again
and cosmetics.
Phew. Now this post is my new ToDo-list.
The local "DMV" requires orange turn signals from 1970 on to make absolutely sure the 112 year old blind and deaf retard in his Mercedes behind you really does notice when it's time to hit the brakes because you want to make a turn:
They don't look as bad as I was afraid, but I'm still thinking about ripping them out again after registration is done
Ed:
Bored at work - made an oldschool animated gif:
Ed2 - good evening.
Plugged the holes the removal of the door lock solenoid cables left in the doors and chassis,
wired my amp in the trunk,
fixed my battery to the tray,
cleaned up the wiring behind my head lights,
test-fitted my kick panels with speakers,
re-routed some wiring to make room for the left outer air duct (Ooops)
painted my transmission hump a second time,
marked the parts to cut & replace of my floor boards
The things left to do are:
Fit the washer pump once it's through customs,
cut and weld floor panels, paint them afterwards,
roll out rest of damping mat afterwards,
fit the new carpet,
fit rear seat and bench together with set belts,
weld a hole in my right rear quarter (obviously this guy also parked my Cutlass once...
)charge the battery again
and cosmetics.
Phew. Now this post is my new ToDo-list.
Last edited by Nop; March 18th, 2014 at 11:29 AM.
March 18th, 2014, 04:59 PM
#669
Tree Row Hunter in N.D.
Join Date: Oct 2013
Location: Great white north ND
Posts: 200
Cleaned up some junk, threw a bunch out and made a new home for the 54.
I cleaned down to the rust, no less than 7 boxes of junk from the car. Prior owner was a pharmacist lots of unusual bottles.
I cleaned down to the rust, no less than 7 boxes of junk from the car. Prior owner was a pharmacist lots of unusual bottles.
Last edited by barnfind; March 27th, 2014 at 07:37 AM.
March 18th, 2014, 05:33 PM
#670
Registered User
Join Date: Dec 2012
Location: Texas
Posts: 1,584
Started the passenger floor patch, just need to finish welding around it, grind it then weld from the bottom when the body comes off the frame.
Last edited by steverw; March 18th, 2014 at 05:34 PM. Reason: for pic
March 19th, 2014, 07:54 AM
#673
Beer Connoisseur
Join Date: Aug 2008
Location: Daly City, California
Posts: 2,091
I've been busy last couple of days. Finally managed to fabricate, weld the brackets for the buckets and installed new rear control arms. Waiting on the carpet so I can install the dual gate, center console and finish the interior.
[IMG]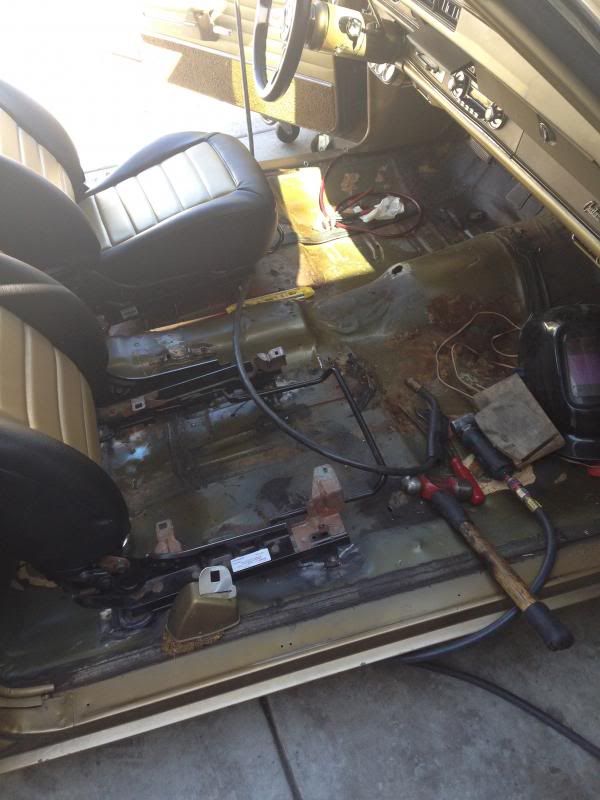 [/IMG]
[IMG]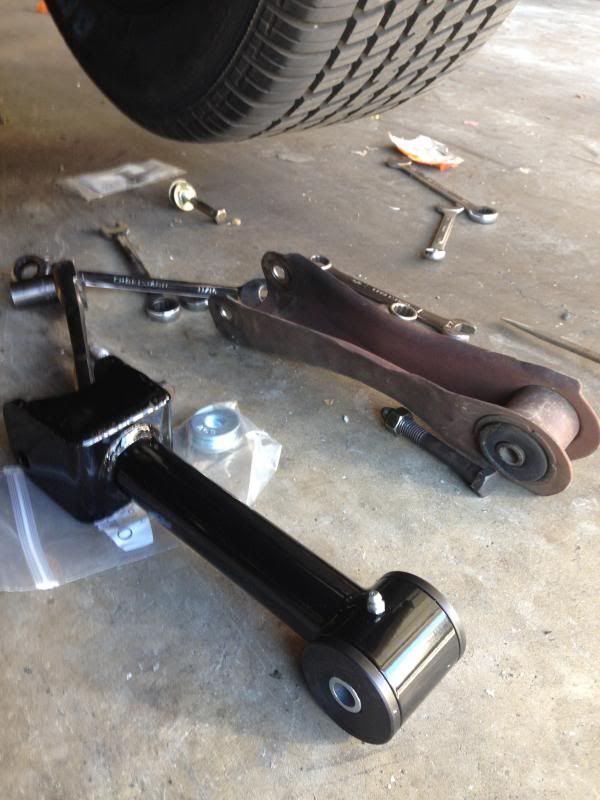 [/IMG]
[IMG]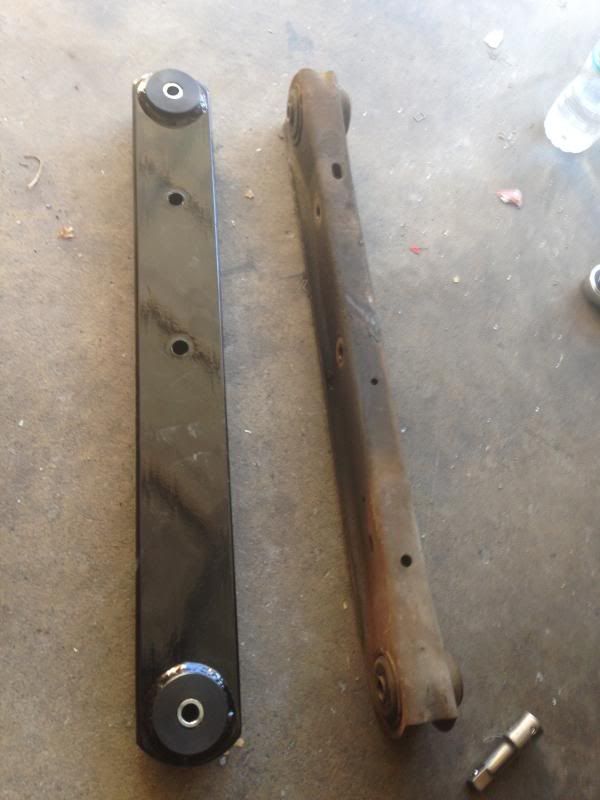 [/IMG]
[IMG]
 [/IMG]
[IMG]
 [/IMG]
[IMG]
 [/IMG]
March 21st, 2014, 01:29 AM
[/IMG]
March 21st, 2014, 01:29 AM
#674
2-stroke 1-cylinder guy
Join Date: Nov 2013
Location: Bavaria, Germany
Posts: 333
Replaced and checked washer pump - works. Although that snapping shooting sound from the pumping cycle scares me a little...
Closed the hood for the first time in 2 months...

Done with everything up to the A pillar now, next up: Welding.
Closed the hood for the first time in 2 months...
Done with everything up to the A pillar now, next up: Welding.
Last edited by Nop; March 21st, 2014 at 01:32 AM.
March 21st, 2014, 12:32 PM
#676
2-stroke 1-cylinder guy
Join Date: Nov 2013
Location: Bavaria, Germany
Posts: 333
This is where the fun ends.

At least the dreaded passenger side is the only spot. Driver side is okay and dry.
There's some ruber-like stuff in the bottom of the trunk pocket (the "standing up" rust colored stuff on the bottom of the square hole).
Is this from the factory or was the splatter paint the only coating on the sheet metal?
March 23rd, 2014, 07:04 PM
#679
Registered Thread Killer
Join Date: May 2011
Location: Wisconsin
Posts: 192
Lifted the car cover and gave her a pat on the passenger Quarter panel while consoling her that soon, the snow will all be melted and that her and I will once again be thundering down the roads of the little town of Peshtigo Wisconsin.:)
March 23rd, 2014, 10:58 PM
#680
2-stroke 1-cylinder guy
Join Date: Nov 2013
Location: Bavaria, Germany
Posts: 333
Adjusted the headlights as good as I could in the garage,
fabricated sheet metal patches for my right rear quarter bottom,
cleaned and primered both trunk side pockets on the inside,
sealed and painted the driver side trunk pocket,
cleaned and sealed both rear fenders on the outside and redid the undercoating,
cleaned my floor pans and cut them to start welding this week.


