
Pulling the motor

Chevy budget Olds powered
Joined: Jul 2011
Posts: 8,638
From: Elgin, Illinois
My dad is 64 and still does drums with needle nose pliers and a screwdriver . Its a universal tool for drums you can buy at autozone. Im just used to makin my own tools or making do. Few bucks here and a few bucks there add up. The only place I buy tools to make my life easy is work. I buy every little tool to make my job easier to put it in prespective I have 15 body hammers each one for a specific type of metal repair . I got all the time in the world at home lol .
Thread Starter
Registered User
Joined: Aug 2013
Posts: 3,900
From: Central Illinois
I busted my fingers up pretty good a few years ago. I was tired and made a stupid mistake sharpening a wood gouge on a bench grinder. I can afford $9 to save some pain.
Yeah but I've only driven mine twice. I'm getting antsy! Lol.
My dad is 64 and still does drums with needle nose pliers and a screwdriver . Its a universal tool for drums you can buy at autozone. Im just used to makin my own tools or making do. Few bucks here and a few bucks there add up. The only place I buy tools to make my life easy is work. I buy every little tool to make my job easier to put it in prespective I have 15 body hammers each one for a specific type of metal repair . I got all the time in the world at home lol .
Chevy budget Olds powered
Joined: Jul 2011
Posts: 8,638
From: Elgin, Illinois
I can relate. I drove my 72 once then decided to tear it apart and fix it all and spent 1.5 years to fix it up. Now the time has come to fix those pesky little things that I put off when I was 17 mainly the frame and body mounts which at the time where fine. All I was saying is you don't need the "proper" tools sometimes . Although yes the proper tools will make life easy and if its worth it its worth it. Your call on buying the tools I was just saying if you didn't want to spend the money you don't need to buy the tool you could use some simple tools you already have. I have never personally had issues using the pliers and screw driver but results vary. I will say use some good mechanics gloves and glasses . I have had springs snap and go flying at me and I have also had them snap into my hand. Regardless of what tool you use its always a possibility. Btw work looks great .
Thread Starter
Registered User
Joined: Aug 2013
Posts: 3,900
From: Central Illinois
Oh I'll cut corners where/when I can get away with it. I've done my share of disc brakes and caliper replacements but these drum brakes look intimidating. Good call on the gloves, I should have picked up a pair a long time ago. I would have saved money on band-aids. ")
Thread Starter
Registered User
Joined: Aug 2013
Posts: 3,900
From: Central Illinois
I can relate. I drove my 72 once then decided to tear it apart and fix it all and spent 1.5 years to fix it up. Now the time has come to fix those pesky little things that I put off when I was 17 mainly the frame and body mounts which at the time where fine. All I was saying is you don't need the "proper" tools sometimes . Although yes the proper tools will make life easy and if its worth it its worth it. Your call on buying the tools I was just saying if you didn't want to spend the money you don't need to buy the tool you could use some simple tools you already have. I have never personally had issues using the pliers and screw driver but results vary. I will say use some good mechanics gloves and glasses . I have had springs snap and go flying at me and I have also had them snap into my hand. Regardless of what tool you use its always a possibility. Btw work looks great .

Thread Starter
Registered User
Joined: Aug 2013
Posts: 3,900
From: Central Illinois
Thread Starter
Registered User
Joined: Aug 2013
Posts: 3,900
From: Central Illinois
A little progress yesterday and today. Not my best paint job but it was colder this morning that I thought it would be. Paint tends to run when the steel is very cold. But it did seem to level out.
[IMG]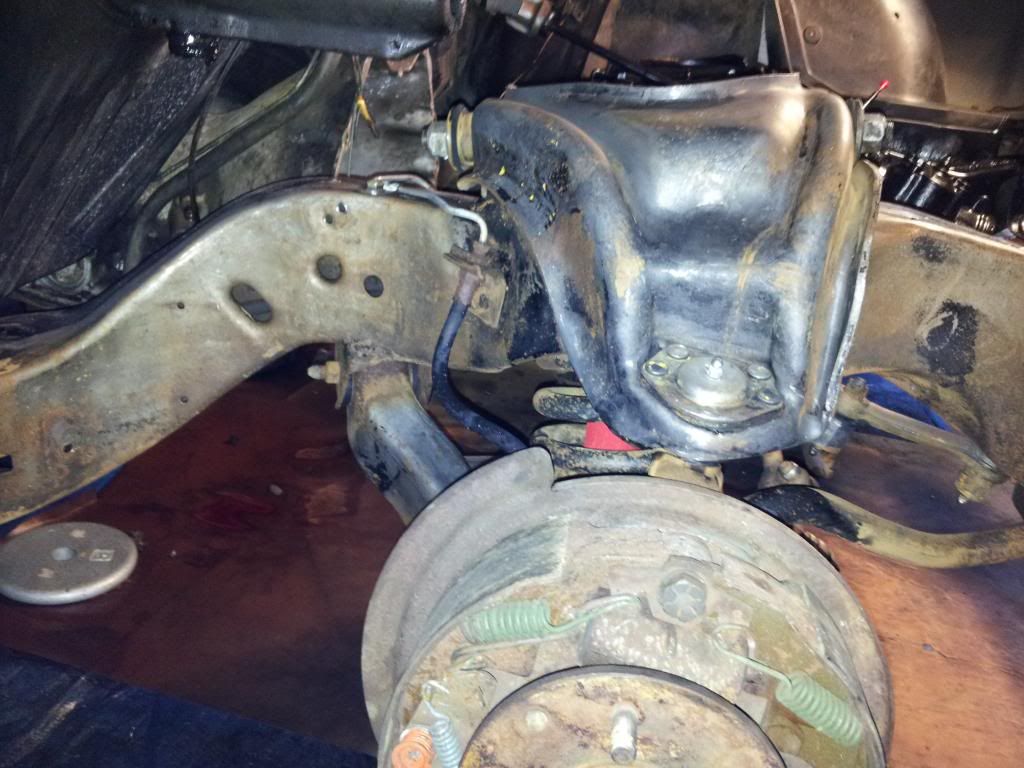 [/IMG]
[IMG]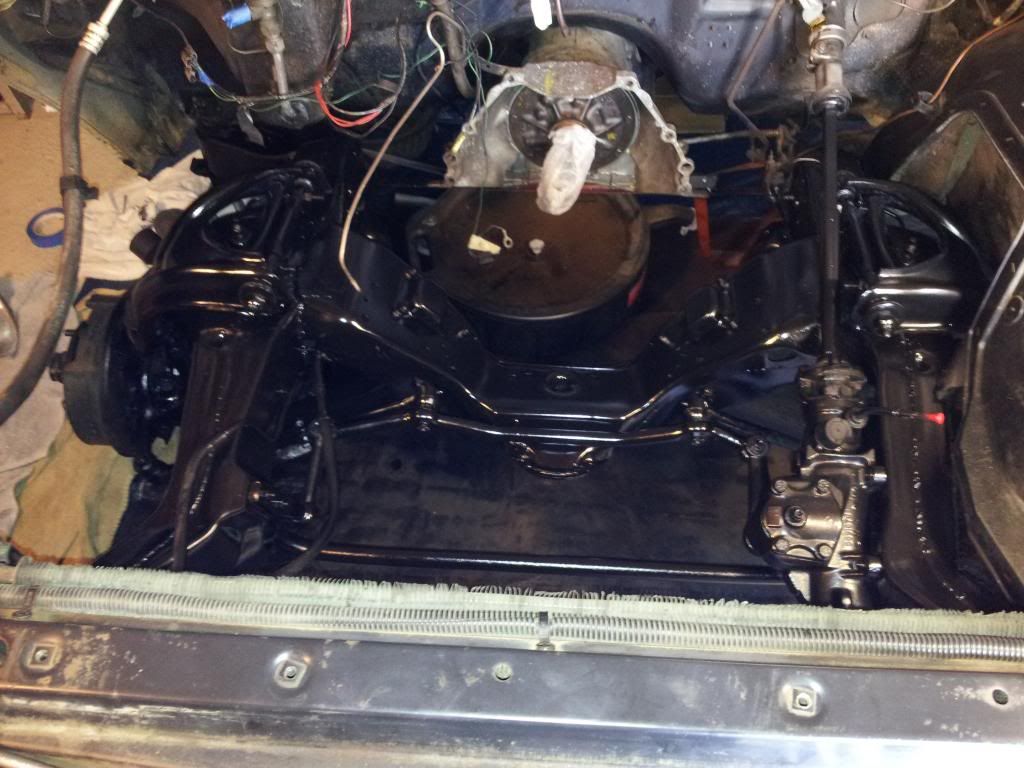 [/IMG]
[IMG]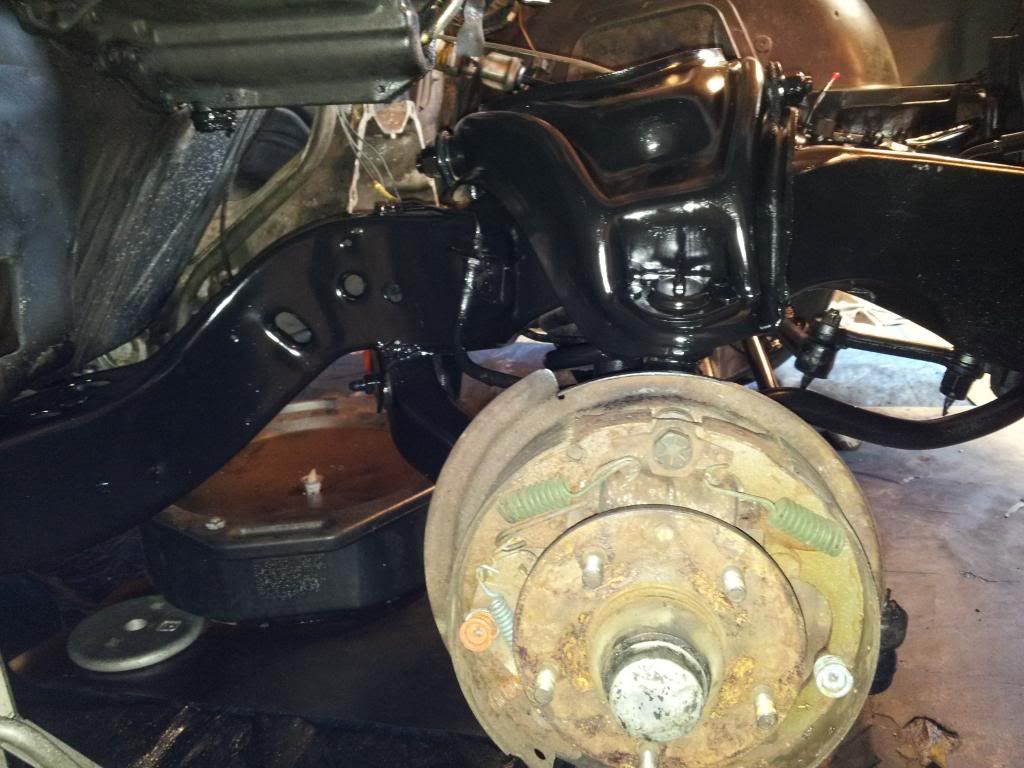 [/IMG]
Looks like I forgot to pull the tape off those grease zerks before the pics.
[IMG]
 [/IMG]
[IMG]
 [/IMG]
[IMG]
 [/IMG]
Looks like I forgot to pull the tape off those grease zerks before the pics.

Thread Starter
Registered User
Joined: Aug 2013
Posts: 3,900
From: Central Illinois
I was hoping no one would ask. One might think with all this work I would have used something expensive like Por 15. But no, just something called XO Rust paint and primer in one. A rattle can. My farmer neighbors like it and I've used it on outdoor items before and it seems pretty durable. I find that it's more about surface prep than anything.
Thread Starter
Registered User
Joined: Aug 2013
Posts: 3,900
From: Central Illinois
Thanks Justin. I think I'll stick with drums for now. Looking to pinch the budget where I can right now. Expensive winter.
Easier said than done. Wee need a nice strong thunderstorm to wash all that winter ice-melt away.
Easier said than done. Wee need a nice strong thunderstorm to wash all that winter ice-melt away.

Registered User
Joined: Aug 2007
Posts: 2,250
http://www.harborfreight.com/3-piece...kit-97804.html
Chevy budget Olds powered
Joined: Jul 2011
Posts: 8,638
From: Elgin, Illinois
No I got a 7/16 ths gearwrench for that. Lol. Or if I'm inpatient the slim head stubby 1/4 air ratchet to drive em in then do em by hand once they are in. I also have a low pro socket for that job.
Justin
Joined: Mar 2012
Posts: 3,454
From: utah
My dad is 64 and still does drums with needle nose pliers and a screwdriver . Its a universal tool for drums you can buy at autozone. Im just used to makin my own tools or making do. Few bucks here and a few bucks there add up. The only place I buy tools to make my life easy is work. I buy every little tool to make my job easier to put it in prespective I have 15 body hammers each one for a specific type of metal repair . I got all the time in the world at home lol .
Thread Starter
Registered User
Joined: Aug 2013
Posts: 3,900
From: Central Illinois
Yeah well, the more I work on it, the more I'm rethinking the daily driver idea. Maybe more like a Friday driver? Lol, I won't know until it's done and discover how much fun it is to drive.
Thread Starter
Registered User
Joined: Aug 2013
Posts: 3,900
From: Central Illinois
I thought I'd have a go at the left side frame and control arms, etc. today. I skipped the dawn and hot water and went right for the oven cleaner. I did scrape off as much as i could with a screwdriver, wire brush, wire wheel on my drill, and a putty knife. This lovely pile is just the top of the top ball joint.
[IMG]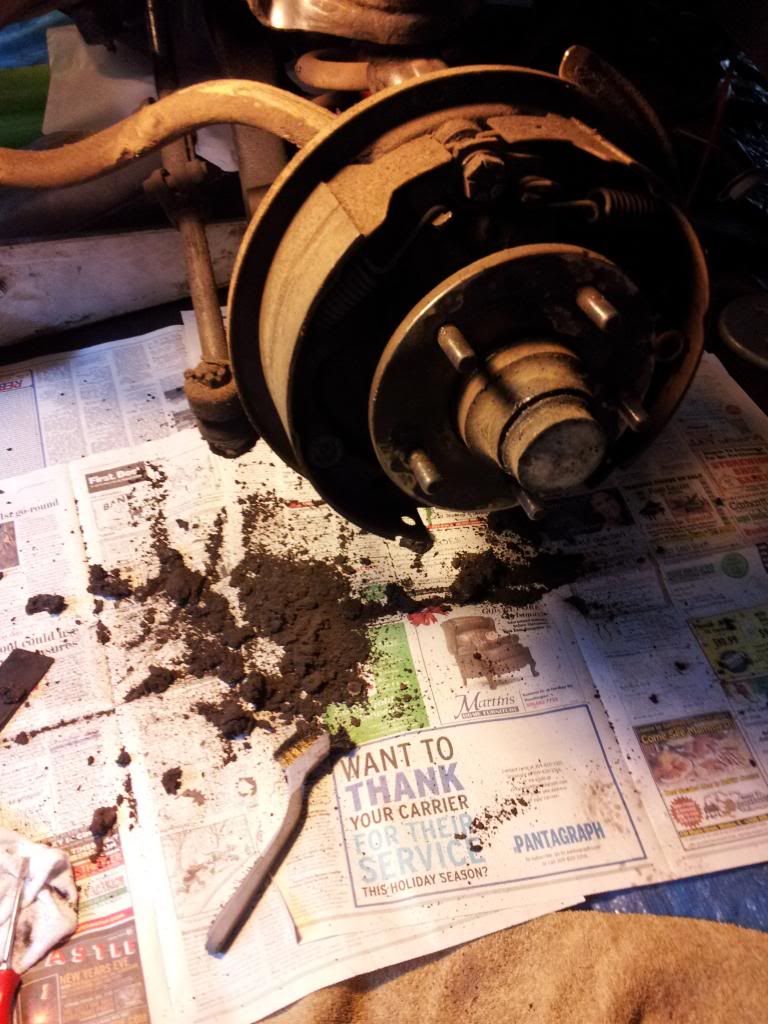 [/IMG]
Then I sprayed everything down with two cans of oven cleaner. Here are some tips if you're going to go this rout:
1. Safety! Wear new playtex gloves and watch for holes. I kept tearing holes in mine when I caught them on cotter pins, etc.
2. Wear long sleeves. This is a MESSY job and oven cleaner burns skin.
3. Use a face shield rather than just goggles. Guess What I did? The scrub brush I was using splattered oven cleaner on my face. Luckily I was wearing goggles but even though I went in the house and washed immediately, I look like I'm 14 again with zits all over my face. And it hurts. I washed it off with mild soap and put on aloe gel. It helped. Wear the face shield.
4. Use Easy Off Heavy Duty. No generic, no low odor. And wear a face mask.
5. I covered all rubber, including boots, with petroleum jelly before spraying but I don't know if it's necessary. The cleaner didn't effect the gloves and puddles sat in the cheap kiddie pool for almost two hours with no ill effects.
6. Let it set as long as you can. As i said above, I let it set almost two hours.
7. Scrub with a good stiff bristle brush. I picked up a couple different sizes, along with an old tooth brush for tight areas. And wear a face mask.
8. Spray it all down real well with either your garden hose (assuming it's warm outside) or , if you're like me and the car is stuck in the garage with the motor out, then use a garden sprayer, the kind you can pump up with pressure, and VERY hot water.
9. Repeat both the oven cleaner and water spray as necessary. Twice is good.
10. Either let air dry or, if it's safe, place a space heater near the area to help it dry more quickly.
11. Give everything a good spray with brake cleaner and let dry before painting. It should go without saying but turn off that space heater before using the brake cleaner
[IMG]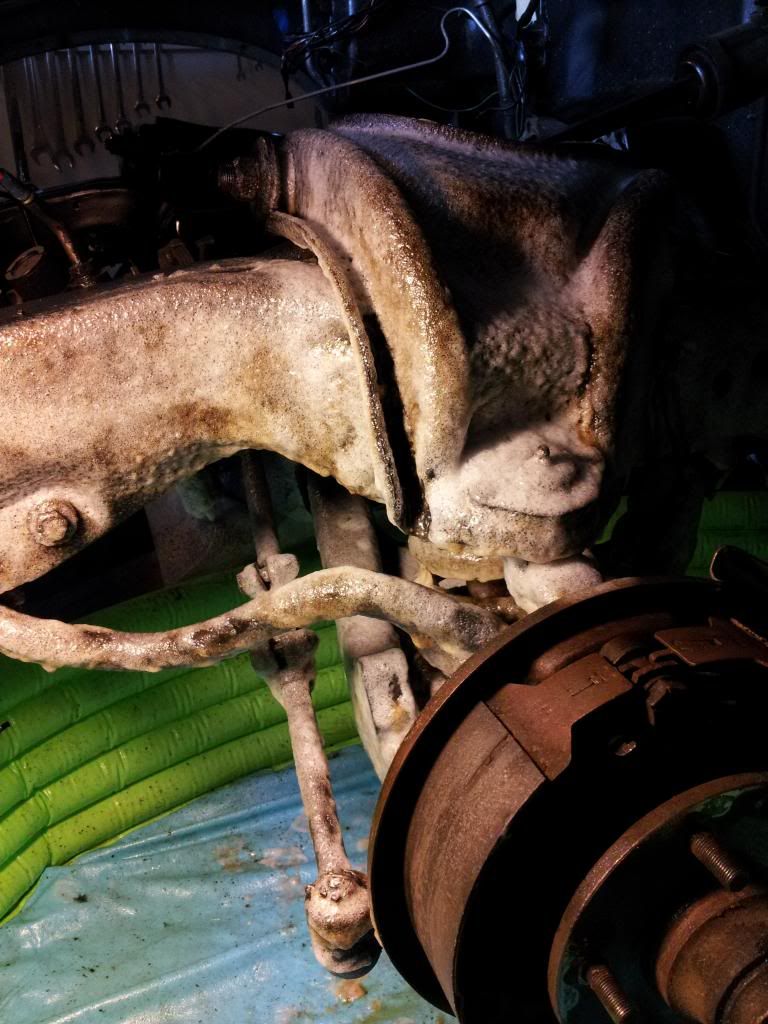 [/IMG]
I went from not being able to see the upper ball joint grease zirk to this in the matter of a few hours.
[IMG]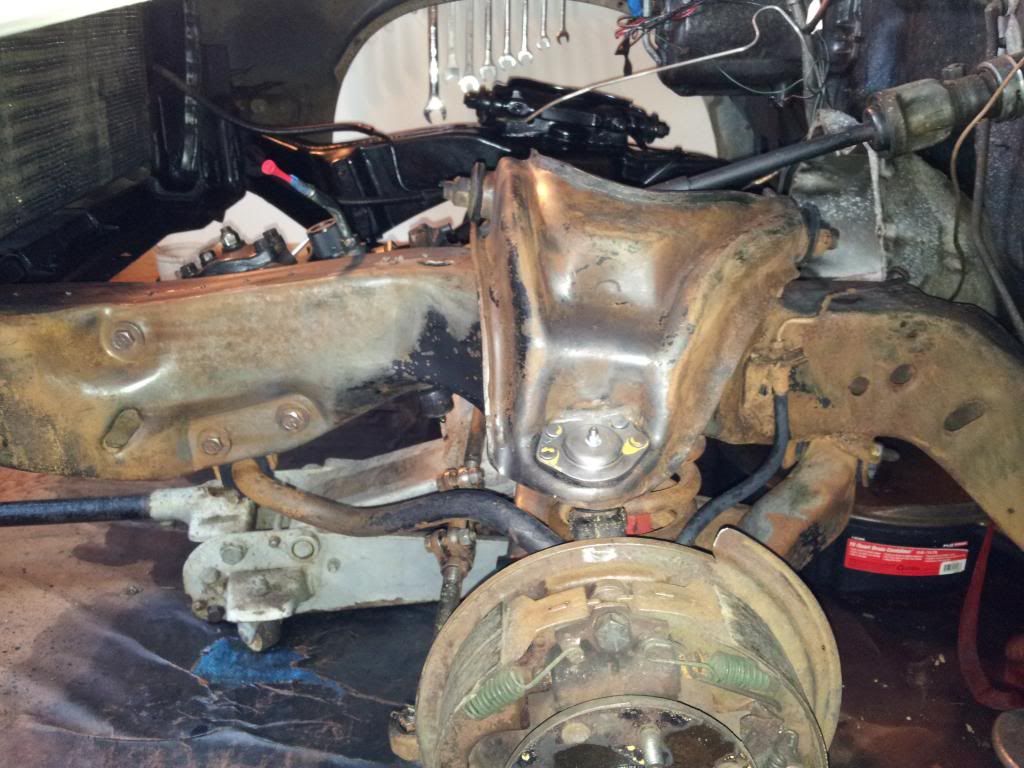 [/IMG]
Tomorrow.....paint
[IMG]
 [/IMG]
Then I sprayed everything down with two cans of oven cleaner. Here are some tips if you're going to go this rout:
1. Safety! Wear new playtex gloves and watch for holes. I kept tearing holes in mine when I caught them on cotter pins, etc.
2. Wear long sleeves. This is a MESSY job and oven cleaner burns skin.
3. Use a face shield rather than just goggles. Guess What I did? The scrub brush I was using splattered oven cleaner on my face. Luckily I was wearing goggles but even though I went in the house and washed immediately, I look like I'm 14 again with zits all over my face. And it hurts. I washed it off with mild soap and put on aloe gel. It helped. Wear the face shield.
4. Use Easy Off Heavy Duty. No generic, no low odor. And wear a face mask.
5. I covered all rubber, including boots, with petroleum jelly before spraying but I don't know if it's necessary. The cleaner didn't effect the gloves and puddles sat in the cheap kiddie pool for almost two hours with no ill effects.
6. Let it set as long as you can. As i said above, I let it set almost two hours.
7. Scrub with a good stiff bristle brush. I picked up a couple different sizes, along with an old tooth brush for tight areas. And wear a face mask.
8. Spray it all down real well with either your garden hose (assuming it's warm outside) or , if you're like me and the car is stuck in the garage with the motor out, then use a garden sprayer, the kind you can pump up with pressure, and VERY hot water.
9. Repeat both the oven cleaner and water spray as necessary. Twice is good.
10. Either let air dry or, if it's safe, place a space heater near the area to help it dry more quickly.
11. Give everything a good spray with brake cleaner and let dry before painting. It should go without saying but turn off that space heater before using the brake cleaner
[IMG]
 [/IMG]
I went from not being able to see the upper ball joint grease zirk to this in the matter of a few hours.
[IMG]
 [/IMG]
Tomorrow.....paint
Last edited by Macadoo; Apr 12, 2014 at 02:39 PM.
Hookers under Hood
Joined: Nov 2013
Posts: 3,543
From: Ontario, Canada
Awesome post!!! I have no idea where you get the energy Mac, I'm a few years younger than you I think. After the long work week along with my wife in the office I just couldn't get to doing that on my car. I can only watch I'm in awe I wish I could !! Those upper ball joints look original... riveted in. Are they still ok ?
Thread Starter
Registered User
Joined: Aug 2013
Posts: 3,900
From: Central Illinois
Lol, thanks 76. It comes with age, I can't sit still! Honestly, today was a little rough. Long week and I'm tired but I want to get back on schedule. It's all about getting her on the road this summer.
I haven't had the chance to check the joints yet and I won't get to until the power steering is hooked back up. However, the 100 or so miles I drove it home it seemed tight with no weird sounds or excessive wandering. of course that was on bald tires so who knows. Funny thing is, all the boots look brand new.
76, your name is Eric, yes? Another other Eric?
Hookers under Hood
Joined: Nov 2013
Posts: 3,543
From: Ontario, Canada
Yes another Eric lol. We still have a little snow up here on the ground, couple feet around the property from the snow drifts and where I pushed the snow out too. I'm just hoping the warm weather and sun will bring me around after this long cold winter. That oven cleaner looks to be working great no need to sand blast, although I'm sure you were doing a lot of chipping scraping and brushing, I was stiff just putting a heater core in early September last year lol. I love it your chassis looks awesome!!!
Thread Starter
Registered User
Joined: Aug 2013
Posts: 3,900
From: Central Illinois
It was 80 today! Although I thought my house was going to blow away. 35 MPG winds with gusts over 40. But at least it's warm.
Scraping, yes. Chipping, definitely yes. Scrubbing came after the cleaner.
The wife and I have always wanted to move north, but after this past winter........I'm good where we are, lol.
Scraping, yes. Chipping, definitely yes. Scrubbing came after the cleaner.
The wife and I have always wanted to move north, but after this past winter........I'm good where we are, lol.
Registered User
Joined: Jul 2010
Posts: 1,907
From: Toytown, MA
Looks great! Ok...before painting...the clamps on the tie rod sleeve should face bolts down not up. They can interfere with other things under there the way they are. They should be down +- 18 degrees or so...they have to cover the slot in the sleeve. Do you have a manual? Know what I'm talking about?
Thread Starter
Registered User
Joined: Aug 2013
Posts: 3,900
From: Central Illinois
Yeah, that's right. Weird though, I didn't think the front end had ever been worked on. I have the CSM. Not sure I want to mess with the alignment though. Not at this stage at least. Maybe I should tape that off before painting?
Hookers under Hood
Joined: Nov 2013
Posts: 3,543
From: Ontario, Canada
I would have thought it all looked original myself other than the idler arm on the other side, the rivets are still in the upper ball joints. The original front ends parts were dam good. I would leave it unless you get some play with a Johnson bar. Setting the toe is a bugger unless you swap out inners outers etc. Even marking the tie rods and installing new ones to the thread length never work lol.
Thread Starter
Registered User
Joined: Aug 2013
Posts: 3,900
From: Central Illinois
I would have thought it all looked original myself other than the idler arm on the other side, the rivets are still in the upper ball joints. The original front ends parts were dam good. I would leave it unless you get some play with a Johnson bar. Setting the toe is a bugger unless you swap out inners outers etc. Even marking the tie rods and installing new ones to the thread length never work lol.
Registered User
Joined: Jul 2010
Posts: 1,907
From: Toytown, MA
No...you don't need to mess with the alignment at all. Only moving the sleeve itself changes the alignment. You can move one clamp at a time if you are nervous about moving the sleeve. Right...I noticed the riveted ball joints. Most likely it is all original. But surely somebody had it aligned at some point. Then they would have to loosen the clamps. Kids today think the clamps go UP for clearance, 'cuz that' how newer cars are I think. Actually, the clamp/sleeve setup is "old school".
Hookers under Hood
Joined: Nov 2013
Posts: 3,543
From: Ontario, Canada
I wouldn't mess with those clamps myself lol, but hey that's just me. Probably need some heat and a BFH to get those to turn. Liquid wrench may help soaking that metal on metal over the summer.
Thread Starter
Registered User
Joined: Aug 2013
Posts: 3,900
From: Central Illinois
The wife and daughter fell asleep during family movie night last night so guess where I went....
The pictures look awful but the paint does not
[IMG]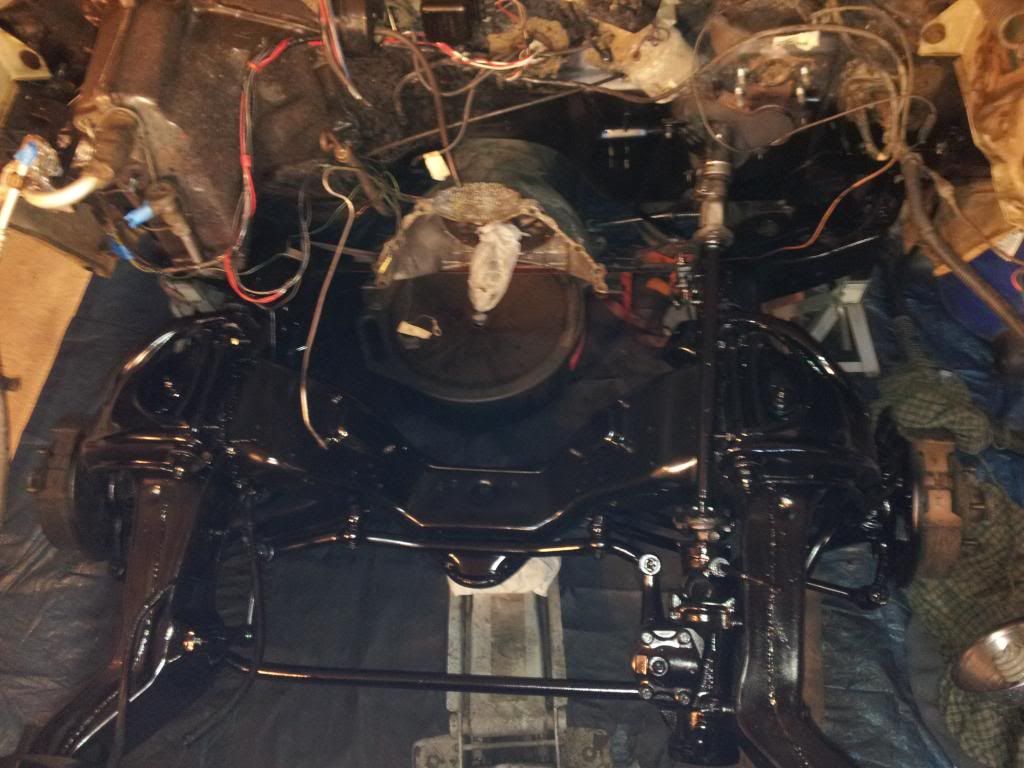 [/IMG]
[IMG]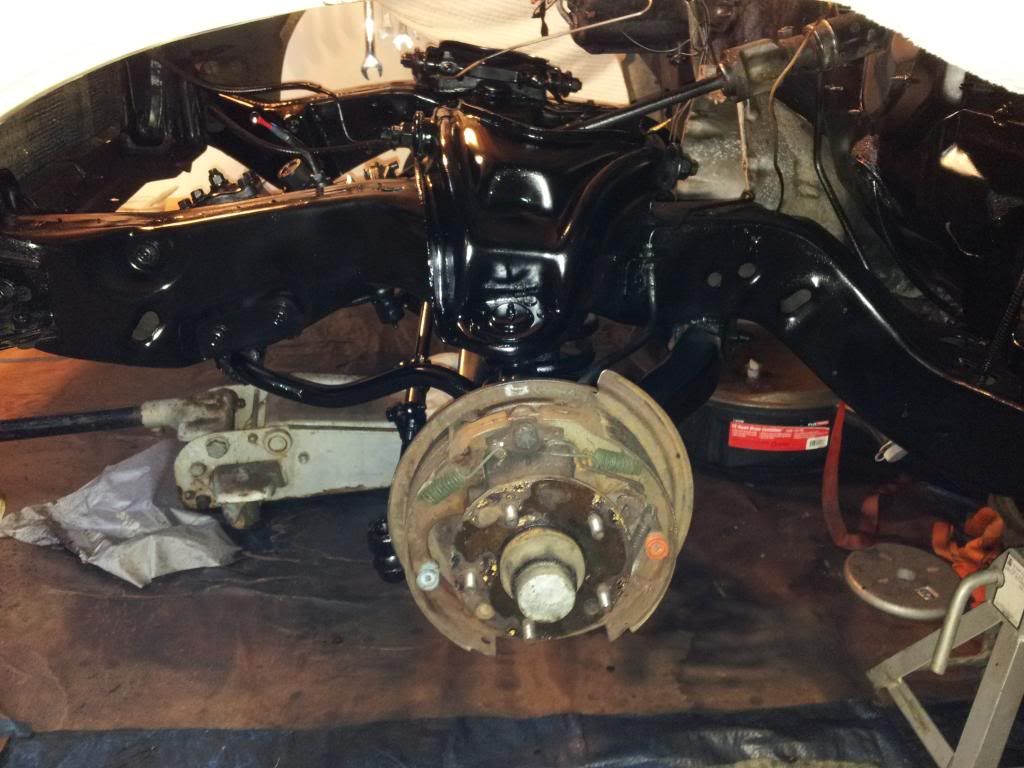 [/IMG]
The next few weeks I'm going to finish the firewall, clean the wheel wells, do the brakes, and decide what I'm going to do with the AC (R12 or convert). Actually I think first I'll pull the evaporator and take all the components in for testing. Where can I take all this stuff, evap, condenser, compressor, for testing?
The pictures look awful but the paint does not
[IMG]
 [/IMG]
[IMG]
 [/IMG]
The next few weeks I'm going to finish the firewall, clean the wheel wells, do the brakes, and decide what I'm going to do with the AC (R12 or convert). Actually I think first I'll pull the evaporator and take all the components in for testing. Where can I take all this stuff, evap, condenser, compressor, for testing?
Last edited by Macadoo; Apr 13, 2014 at 05:07 PM.


