Part 2, bought a 65 442 Club Coupe

 November 22nd, 2012, 08:09 PM
#84
72 Olds CS
Join Date: Jun 2011
Posts: 6,657
nice details like reapplying the original stickers everything is looking great.
also thanks for showing how you straightened out the dash that will look good when its all together
is this the gibbs brand you used ? That will prevent rusting on bare metal ?
also thanks for showing how you straightened out the dash that will look good when its all together
is this the gibbs brand you used ? That will prevent rusting on bare metal ?
Last edited by RetroRanger; November 22nd, 2012 at 08:11 PM.
November 23rd, 2012, 05:47 AM
#85
Registered User
Thread Starter

Join Date: Feb 2009
Posts: 2,026
Yes Gibbs Brand. I found a can on my old mans shelf. He used it to try to free up an old Caddy engine. You have to reapply it every so often to keep the metal saturated. But from what Ive read guys have put it on wheels and 5 years later they are still nice.
November 23rd, 2012, 12:25 PM
#86
Registered User
Thread Starter
Join Date: Feb 2009
Posts: 2,026
60 degrees yesterday and 40s with snow today. Had to spray the bottom today so I fired up the heater and did my best. Ran it directly on the frame to get some heat into the metal. Frame is now completely primed, kinda wish this was the final coat. Color matches damn well.
DSC_0743.jpg
DSC_0738-1.jpg
DSC_0757.jpg
DSC_0743.jpg
DSC_0738-1.jpg
DSC_0757.jpg
December 17th, 2012, 04:13 PM
#88
Registered User
Thread Starter
Join Date: Feb 2009
Posts: 2,026
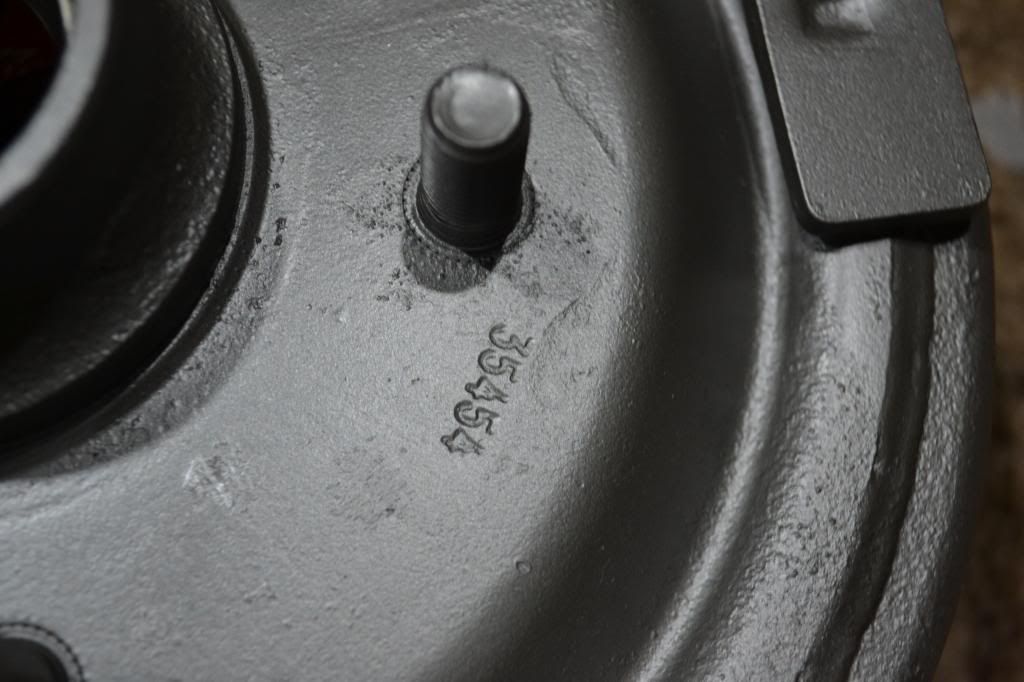
Had the front backing plates replated in silver zinc. Got them back today.
DSC_0843-1.jpg
DSC_0844.jpg
DSC_0843-1.jpg
DSC_0844.jpg
January 25th, 2013, 01:20 PM
#90
Registered User
Thread Starter
Join Date: Feb 2009
Posts: 2,026
Finished up the front brakes, well theyre not on the frame yet but close enough.
Before..
beforeplate.jpg
After..
DSC_0315.jpg
DSC_0316.jpg
Before..
beforeplate.jpg
After..
DSC_0315.jpg
DSC_0316.jpg
February 2nd, 2013, 09:39 AM
#92
Registered User
Thread Starter
Join Date: Feb 2009
Posts: 2,026
Original alternator worked great but as I found when I took it off, the upper mounting ear was broke. Figured it was scrap but Ken Bruno, who restores alternators, said it wouldnt be a problem to fix. He tig welded and machined it back to normal. Cant tell it was ever broken.
DSC_0837_zps32ffd727.jpg
DSC_0836_zpsee73460b.jpg
DSC09324_zpsf175b176.jpg
DSC09325_zps478c0dff.jpg
DSC09327_zps95438300.jpg
DSC09328_zps5c304c85.jpg
DSC_0837_zps32ffd727.jpg
DSC_0836_zpsee73460b.jpg
DSC09324_zpsf175b176.jpg
DSC09325_zps478c0dff.jpg
DSC09327_zps95438300.jpg
DSC09328_zps5c304c85.jpg
 June 7th, 2013, 01:38 PM
#94
Registered User
Thread Starter
Join Date: Feb 2009
Posts: 2,026
Small things starting to add up. Not much more I can do before getting to the bigger things like bodywork and paint. Maybe start on the rear end and drive shaft.
DSC_0356_zps9957f23e.jpg
DSC_0191_zpsaba17b3f.jpg
DSC_0193_zps6e9fe022.jpg
DSC_0197_zps311b5593.jpg
DSC_0198_zps293c6bc6.jpg
DSC_0200_zps2547390c.jpg
DSC_0201_zps0bacaf57.jpg
DSC_0204_zps434dfc99.jpg
DSC_0217-1_zps4ff67aad.jpg
DSC_0218_zps5ba3751e.jpg
2013-06-02111232_zps06e03aa8.jpg
DSC_0356_zps9957f23e.jpg
DSC_0191_zpsaba17b3f.jpg
DSC_0193_zps6e9fe022.jpg
DSC_0197_zps311b5593.jpg
DSC_0198_zps293c6bc6.jpg
DSC_0200_zps2547390c.jpg
DSC_0201_zps0bacaf57.jpg
DSC_0204_zps434dfc99.jpg
DSC_0217-1_zps4ff67aad.jpg
DSC_0218_zps5ba3751e.jpg
2013-06-02111232_zps06e03aa8.jpg
June 18th, 2013, 02:17 PM
#96
Registered User
Thread Starter
Join Date: Feb 2009
Posts: 2,026
October 13th, 2013, 09:36 AM
#97
Registered User
Thread Starter
Join Date: Feb 2009
Posts: 2,026
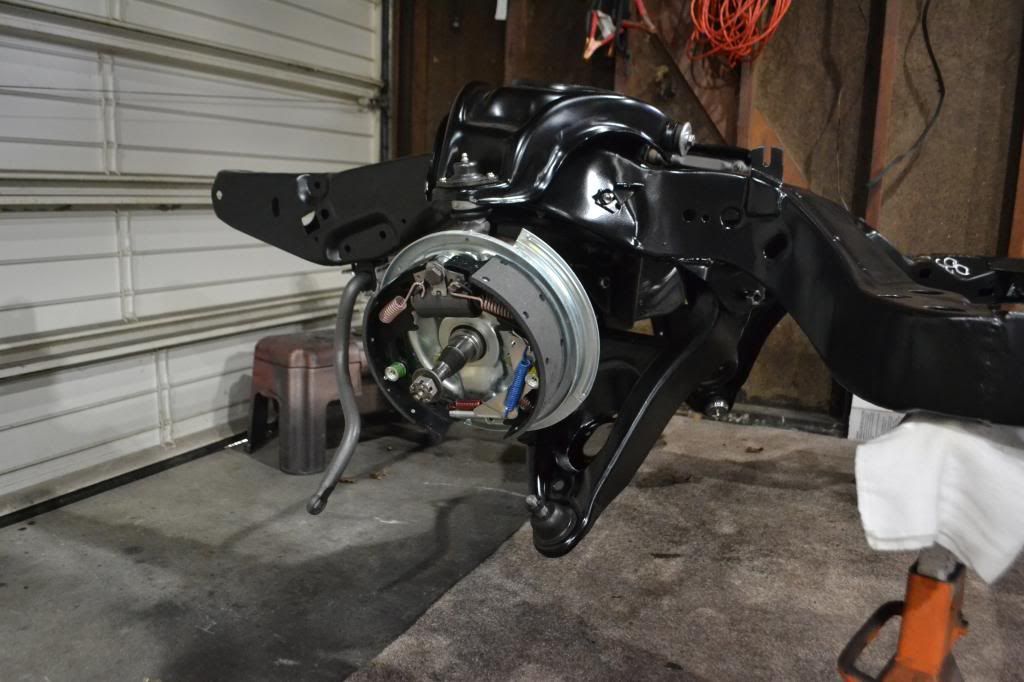
Painted the frame and started putting the suspension back on this week.
DSC_0239_zpsc7566537.jpg
DSC_0238_zpsac2dcf09.jpg
DSC_0152_zps883387d2.jpg
DSC_0160_zpsd35822fa.jpg
DSC_0239_zpsc7566537.jpg
DSC_0238_zpsac2dcf09.jpg
DSC_0152_zps883387d2.jpg
DSC_0160_zpsd35822fa.jpg
 October 13th, 2013, 01:02 PM
#99
Registered User
Join Date: Jan 2009
Location: maryland
Posts: 1,393
Hey Jasen, Everything is looking great!!! You have a real talent there my friend, and I am always eager to see any progress updates. Have you started the body work? Any final color decisions? I know the "guts" will be red, but what about outside? Any chance of a two-tone?
October 13th, 2013, 04:33 PM
#101
Registered User
Thread Starter
Join Date: Feb 2009
Posts: 2,026
Thanks guys. Got the drums painted today. After 50 years good drums are hard to find. Might have to stock up on them for the future.
DSC_0249_zps933b971d.jpg
DSC_0254_zps874f4392.jpg
DSC_0249_zps933b971d.jpg
DSC_0254_zps874f4392.jpg
October 13th, 2013, 05:56 PM
#102
Registered User
Join Date: Sep 2011
Location: Battle Creek, Michigan
Posts: 2,236
Your progress is nearly as quick as the photo shift in your signature icon...WOW! Damn sharp work sir. I'd wish you good luck but it appears you already have it all ") . Brett
. Brett 
. Brett
October 18th, 2013, 08:12 PM
#103
Registered User
Thread Starter
Join Date: Feb 2009
Posts: 2,026
Got the springs installed, what a pain in the ***. Drivers side took all afternoon, first spring compressor wouldnt come out after the I put the spring in. Second one wouldnt compress it enough. It took 6 45lb plates, some tires, a head, and myself to get it far enough into the ball joint to start the nut. Nicked up the control arm and the spring pretty good. Other side took 5 minutes, no nicks at all. Must have been the all day practice on the other side.


Last edited by TK-65; October 18th, 2013 at 08:18 PM.
October 19th, 2013, 09:50 PM
#104
Ben
Join Date: Mar 2009
Location: Snohomish, WA
Posts: 1,825
Sure looks nice!
Little tip for you, next time around-
Try to only use the upper half of the compressor, and thread the rod DOWN through the upper shock hole, and use the compressor to pull the spring up into the frame socket.
Works like a charm, and you don't have to look for heavy things to put on the car to give it weight if the engines out- or fight with getting the upper and lower set of compressor fingers to stay put while you tighten it up.
Last edited by RAMBOW; October 19th, 2013 at 09:54 PM.
October 26th, 2013, 04:37 PM
#105
Registered User
Thread Starter
Join Date: Feb 2009
Posts: 2,026
Sure looks nice!
Little tip for you, next time around-
Try to only use the upper half of the compressor, and thread the rod DOWN through the upper shock hole, and use the compressor to pull the spring up into the frame socket.
Works like a charm, and you don't have to look for heavy things to put on the car to give it weight if the engines out- or fight with getting the upper and lower set of compressor fingers to stay put while you tighten it up.
Little tip for you, next time around-
Try to only use the upper half of the compressor, and thread the rod DOWN through the upper shock hole, and use the compressor to pull the spring up into the frame socket.
Works like a charm, and you don't have to look for heavy things to put on the car to give it weight if the engines out- or fight with getting the upper and lower set of compressor fingers to stay put while you tighten it up.
Got the drums on the front. Moving on to the rear end now. Will be much easier to move around once I get it rolling again.
Decals are ultra-high-compression.com exclusives.
DSC_0202_zps1fb097bb.jpg
DSC_0195_zpsf6445520.jpg
Rear end waiting for a new posi and new paint.
DSC_0218_zps8a20a1f1.jpg
Last edited by TK-65; October 26th, 2013 at 04:41 PM.
November 10th, 2013, 06:40 PM
#110
Registered User
Thread Starter
Join Date: Feb 2009
Posts: 2,026
Fuel line and brake lines installed.
DSC_0247_zpsdcc9e766.jpg
DSC_0258_zps0255cb8f.jpg
DSC_0261_zps75fd77ee.jpg
Clips came painted red, but originally they were green phosphate. Ordered a can of Moeller Zinc Chromate primer off Amazon to make them correct.
DSC_0255_zpsd20d90af.jpg
Rear upper arms are on, stamped PONT.
DSC_0262_zps7bef681a.jpg
DSC_0266_zps9f41b7fd.jpg
Lower arms are nice used Pontiac Tempest arms I got from Franks Pontiac parts out in California. Unboxed with no holes for a sway bar. I had to drill the holes to make them work. Thats after they received new bushings. The burn method worked great for getting the rubber insert out. Need to get the boxed inserts welded it then I can paint them.
DSC_0271_zpse8038b39.jpg
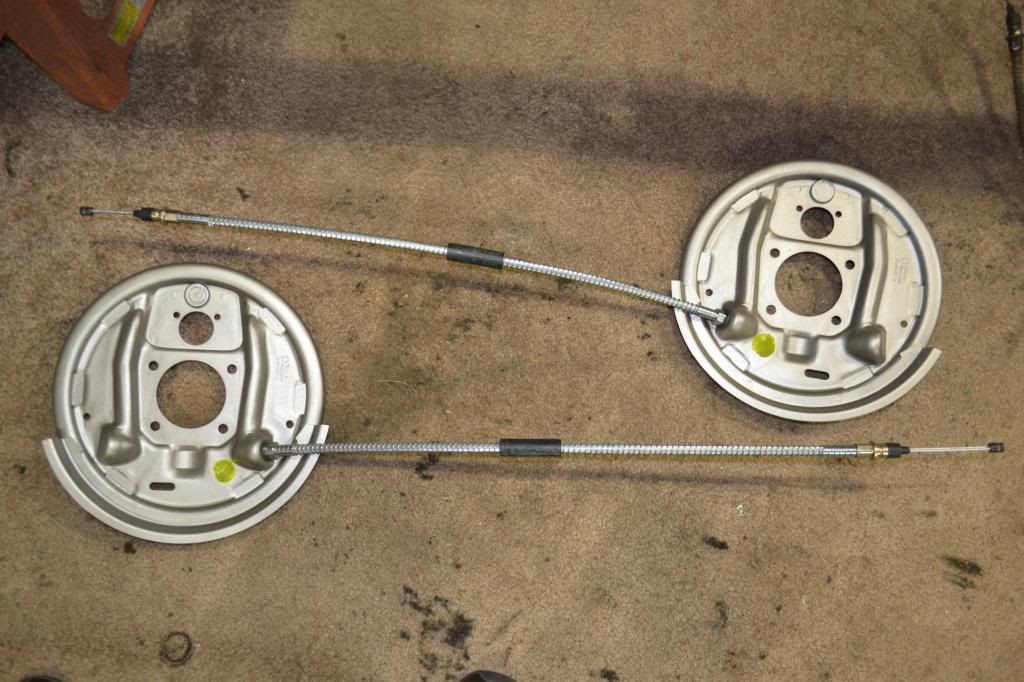
Rear backing plates are cleaned and painted, ready for brakes.
DSC_0247_zpsdcc9e766.jpg
DSC_0258_zps0255cb8f.jpg
DSC_0261_zps75fd77ee.jpg
Clips came painted red, but originally they were green phosphate. Ordered a can of Moeller Zinc Chromate primer off Amazon to make them correct.
DSC_0255_zpsd20d90af.jpg
Rear upper arms are on, stamped PONT.
DSC_0262_zps7bef681a.jpg
DSC_0266_zps9f41b7fd.jpg
Lower arms are nice used Pontiac Tempest arms I got from Franks Pontiac parts out in California. Unboxed with no holes for a sway bar. I had to drill the holes to make them work. Thats after they received new bushings. The burn method worked great for getting the rubber insert out. Need to get the boxed inserts welded it then I can paint them.
DSC_0271_zpse8038b39.jpg
Rear backing plates are cleaned and painted, ready for brakes.
 yes. Took two weeks and three phone calls before they shipped them. Thought they might have red flagged me.
November 10th, 2013, 08:10 PM
yes. Took two weeks and three phone calls before they shipped them. Thought they might have red flagged me.
November 10th, 2013, 08:10 PM
#113
Registered User

Join Date: Nov 2010
Location: illinois
Posts: 560
just checking up on your thread and had to laugh a little about the pain in the butt front spring install. it reminded me of the front springs I just put in my 57 chevy. they were about 5 inches taller than the stockers to get the nose up in the air {gasser look} that was a real party!!! anyway the chassis looks top notch. btw are the ball joints ILT with the look alike rivits?
November 11th, 2013, 04:42 PM
#114
Registered User
Thread Starter
Join Date: Feb 2009
Posts: 2,026
November 14th, 2013, 11:26 AM
#115
Registered User
Thread Starter
Join Date: Feb 2009
Posts: 2,026
February 1st, 2014, 08:37 AM
#117
Registered User
Thread Starter
Join Date: Feb 2009
Posts: 2,026
Sent out the steering gear to Chip @ Powersteering.com Looks perfect and should perform as new. He also restored the Pittman arm and the not reproduced manual rag joint for free. Box is dated A3574, first shift December 23rd 1964.
DSC_0573_zps576d0829.jpg
DSC_0576_zps735e54c3.jpg
DSC_0573_zps576d0829.jpg
DSC_0576_zps735e54c3.jpg
February 1st, 2014, 08:43 AM
#118
Registered User
Thread Starter
Join Date: Feb 2009
Posts: 2,026
Cleaned and primed the rear end. Bought a 3.90 posi set for it and hope to get it installed this week. Once the gear is in Ill paint the housing. No use painting it then having the axle shop scrape it up on the workbench.
DSC_0141_zpsde0a77c1.jpg
DSC_0553_zps32f4b80f.jpg
DSC_0554_zpsdf7d4939.jpg
DSC_0557_zpsac38752f.jpg
DSC_0559_zps65b3ffb7.jpg
DSC_0141_zpsde0a77c1.jpg
DSC_0553_zps32f4b80f.jpg
DSC_0554_zpsdf7d4939.jpg
DSC_0557_zpsac38752f.jpg
DSC_0559_zps65b3ffb7.jpg
July 20th, 2015, 02:21 PM
#119
Registered User
Thread Starter
Join Date: Feb 2009
Posts: 2,026

Thread
Thread Starter
Forum
Replies
Last Post


