Eddie Hansen's '69 Cutlass Convertible
 December 1st, 2012, 06:58 AM
#401
Administrator
Join Date: Oct 2009
Location: Poteau, Ok
Posts: 40,597
OOOh a wise guy, eh! We have a change in seasons here. Fall lasts through mid December, then we have intermittant spurts of winter, a couple of days here and there through February (snow and ice), then a long spring, and an escruciatingly long and hot summer.
 December 1st, 2012, 10:44 AM
#402
Just an Olds Guy
Join Date: Jul 2008
Location: Edmonton, AB. And "I am Can 'eh' jun - eh"
Posts: 24,525
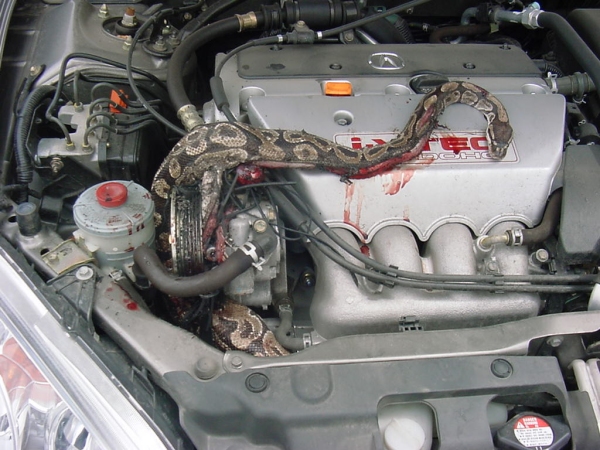
Jeepers, hard to say who has it worse. If either Eddie or me came to TX we'd probably have to ditch the tightey whiteys in favor of speedos. And you just gotta know that's not going to be pretty. Well, in a way I envy you Eric - my Mrs. has been constantly reminding me for the last month how uninviting the weather here has been. She'd probably be more comfortable with the TX heat, but I can't see me moving there. I'm terrified of the TX gators, snakes and scorpions. I trust you shake out your boots in the mawnin before putting them on? Don't forget to check under the hood for snakes that crawl up there for the warmth of the engine block....
December 1st, 2012, 10:55 AM
#403
Registered User
Thread Starter
Join Date: Jan 2008
Location: South River, New Jersey
Posts: 3,515
Allan will do, the kit would work fine but I am really fussy on looks too, so if I want the factory look I have to pay the price
 December 1st, 2012, 10:55 AM
#404
Administrator
Join Date: Oct 2009
Location: Poteau, Ok
Posts: 40,597
My god Allan, quit bringing up the Speedo thing, I'll have nightmares!!! Snakes, alligators, scorpians.... I'm not in south Texas. Ok, possibly snakes, maybe an alligator or 2. Joking, it's not like that here.
But, all joking aside, the south is nice.
Eddie, there are property taxes, no income taxes.
Now back to your regularly scheduled post by Eddie.
But, all joking aside, the south is nice.
Eddie, there are property taxes, no income taxes.
Now back to your regularly scheduled post by Eddie.
Last edited by oldcutlass; December 1st, 2012 at 10:59 AM.
December 1st, 2012, 03:46 PM
#405
Registered User

Join Date: Jan 2011
Location: Maryland
Posts: 1,665
Yes, I've admired that on several occasions and it looks pretty solid. Much as I like the older cars, if it was mine, I'd probably resto-mod it and put in some very nice creature comforts like AC, pw, pdl, cruise, tilt wheel, pulse wipers, pwr remote heated and monochromatic side mirrors, Nav system, buckets, console and probably an LT 5.7L and an 4L60 OD transmission....That car would look killer in a candy red or blue. Oh yeah, need fuzzy dice for the rear view mirror (which would also have auto dimming and compass), now add 17's on the front, 18's on the rear and turn up the sound system! Hmmm, maybe french the hood a little too. Jeepers, if Brian gets wind of this maybe we can sway him to the dark side. He needs a break from all that 100 point concourse OEM resto stuff! 

Brian
December 2nd, 2012, 10:12 AM
#407
Registered User
Join Date: Jan 2011
Location: Maryland
Posts: 1,665
Brian
December 3rd, 2012, 11:18 AM
#408
Registered User
Thread Starter
Join Date: Jan 2008
Location: South River, New Jersey
Posts: 3,515
ok moving on..... took me the whole weekend to get Allan's speedo thing purged from my mind ewwwwwwwwwwwwwwwwwwwwwwwwwwww.... I definately don't need to be seen wearing a sling shot LOL...
Ewwwwwwwwwwwwwwwwwwwwwwwwwwwwwwwwwwwwwwwwwww
As stated I have been chatting with Brian, and with his great advice I have decided to have the brakes look much more stock ( yes i have pictures LOL) I also spoke with Todd over at GetDiscBrakes also known as the right stuff, I ordered this adjustable proportional valve ( pov1)
December 3rd, 2012, 11:22 AM
#409
Registered User
Thread Starter
Join Date: Jan 2008
Location: South River, New Jersey
Posts: 3,515
new distribution block
My car came with 4 wheel power drums, I have the original distribution block, but it is made of steel, even though I glass beaded it, and repainted it, I thought the threads looked a little pitted so I decided to get a new Brass one, so I ordered the POV6 from Get Disc Brakes as well and at 59$ was the most reasonable proced one around

December 3rd, 2012, 11:32 AM
#410
Registered User
Thread Starter
Join Date: Jan 2008
Location: South River, New Jersey
Posts: 3,515
I then ordered a new set of stainless master cylinder ( power) lines for a 4 wheeel drum set up to go from the master to the distribution block, as I said I previously bought a set from fine lines but they sent me the manual drum lines, (if anybody needs them in stainless let me know) I also have the kit under master cylinder proportional valve,bracket master cylinder and front chasis lines in stainless if anyone needs them.
I then refitted the replacement SS front drum chasis lines ( 2 pieces) to the chasis, I ordered a 2 foot length of stainless steel line, plus the correct fittings, so I can attach this to the distribution block (rear Line attachment point) and the POV1 prop valve, the additional length means I I can tuck the POV1 down along the chasis (probably by the front drivers seat).
I have to say again, I dealt with Todd Mcclure over at Getdiscbrakes, you can not get more helpful then this guy! yes you can find kits a few bucks less, but the way this guy goes out of his way to make sure you are 100% satisfied he is by far bar none the best person I have ever dealt with. It speaks VOLUMNS for this company and is well worth the additional few bucks then some no name on ebay.
December 3rd, 2012, 12:23 PM
#411
Registered User
Thread Starter
Join Date: Jan 2008
Location: South River, New Jersey
Posts: 3,515
tools....
well no point doing a project without at least 1 new tool LOL... seriously since this is stainless, I decided I better upgrade by flaring tool, eastwood had these on sale for 199 plus free shipping, not the best one they make, but should be ok for me I hope... they say to use antisieze? wouldn't a drop of oil be ok too?

December 3rd, 2012, 12:49 PM
#412
Just an Olds Guy
Join Date: Jul 2008
Location: Edmonton, AB. And "I am Can 'eh' jun - eh"
Posts: 24,525
Nice new flare tool Eddie. Looks like it also does bubble flares? Man I could have used one like that 3 years ago... Don't ask. What you need now is a new steel line bending tool.
December 3rd, 2012, 01:16 PM
#413
Registered User
Thread Starter
Join Date: Jan 2008
Location: South River, New Jersey
Posts: 3,515
Allan when I did the rear axle lines I bought the pliers and the bending tool from eastwood, the bender is made by imperial and looks like this....

I don't know if I got a defective one, or I don't realize my own strength, but when I was putting a 90 degree in a brake line snapped the handle off, I have done this with a few pliers as well, but I suspect poor quality for top dollar nowadays.
I bought a cheap replacement from Harbor freight and so far it has been ok, I will write to Imperial as eastwoods says I bought it two years ago and there is no warranty?
 Bastids
December 3rd, 2012, 03:47 PM
Bastids
December 3rd, 2012, 03:47 PM
#416
Registered User
Thread Starter
Join Date: Jan 2008
Location: South River, New Jersey
Posts: 3,515
finally a picture or two
here is the 9 inch booster installed, I had a choice of the stock 11 inch booster, decided to have a little more room for the slightly higher valve covers

Uploaded with ImageShack.us

Uploaded with ImageShack.us
December 3rd, 2012, 03:50 PM
#417
Registered User
Thread Starter
Join Date: Jan 2008
Location: South River, New Jersey
Posts: 3,515
you will notice that Bafugly union connection right out there in the open, I mean yes it will work, but I really don't like the look

Uploaded with ImageShack.us

Uploaded with ImageShack.us
December 3rd, 2012, 03:54 PM
#418
Registered User
Thread Starter
Join Date: Jan 2008
Location: South River, New Jersey
Posts: 3,515
I also think the rear line was not bent correctly, as I added the bends around the master and then put a loop in it and some small bends to meet up with the front to rear line. so I decided to get rid of the under master prop valve and plumb like a 4 drum car

Uploaded with ImageShack.us

Uploaded with ImageShack.us
December 3rd, 2012, 04:00 PM
#419
Registered User
Thread Starter
Join Date: Jan 2008
Location: South River, New Jersey
Posts: 3,515
BTW trunk extensions
I know It is off topic but I promised brian some pics of the trunk extensions.

Uploaded with ImageShack.us

Uploaded with ImageShack.us
December 3rd, 2012, 04:37 PM
#421
Registered User
Join Date: Jan 2012
Location: Thousand Oaks, CA
Posts: 506
Damn you Eddie!
I had the week off after Thanksgiving, spent a whole day trying to chase down a way to connect my "GETDISKBRAKES" front disk kit to my rear drums! I had absolutely no luck as a 9/16'" to 5/16" line didn't exist in the entire Thousand Oaks area! (and not for lack of trying!) So I too called GDB and found out they have a line for that (after being told they don't have one and I'd have to fab it up myself a few weeks earlier).
(Ask for Todd...noted!) So now you tell me it's BUFUGLY! Great, now every time I step on my non pulling, superior stopping power, modern breaking system I'm going to have a vanity complex!!!!!!!! Where have you been my friend! I think I will still blame Brian for his above bar standard he has set for us!!!!!
Anyways we can compare notes when my "ugly" set up arrives. No points awarded for style please!!!!
Craig
I had the week off after Thanksgiving, spent a whole day trying to chase down a way to connect my "GETDISKBRAKES" front disk kit to my rear drums! I had absolutely no luck as a 9/16'" to 5/16" line didn't exist in the entire Thousand Oaks area! (and not for lack of trying!) So I too called GDB and found out they have a line for that (after being told they don't have one and I'd have to fab it up myself a few weeks earlier
). (Ask for Todd...noted!) So now you tell me it's BUFUGLY! Great, now every time I step on my non pulling, superior stopping power, modern breaking system I'm going to have a vanity complex!!!!!!!! Where have you been my friend! I think I will still blame Brian for his above bar standard he has set for us!!!!!
Anyways we can compare notes when my "ugly" set up arrives. No points awarded for style please!!!!
Craig
December 3rd, 2012, 06:04 PM
#422
Registered User
Thread Starter
Join Date: Jan 2008
Location: South River, New Jersey
Posts: 3,515
Damn you Eddie!
I had the week off after Thanksgiving, spent a whole day trying to chase down a way to connect my "GETDISKBRAKES" front disk kit to my rear drums! I had absolutely no luck as a 9/16'" to 5/16" line didn't exist in the entire Thousand Oaks area! (and not for lack of trying!) So I too called GDB and found out they have a line for that (after being told they don't have one and I'd have to fab it up myself a few weeks earlier).
(Ask for Todd...noted!) So now you tell me it's BUFUGLY! Great, now every time I step on my non pulling, superior stopping power, modern breaking system I'm going to have a vanity complex!!!!!!!! Where have you been my friend! I think I will still blame Brian for his above bar standard he has set for us!!!!!
Anyways we can compare notes when my "ugly" set up arrives. No points awarded for style please!!!!
Craig
I had the week off after Thanksgiving, spent a whole day trying to chase down a way to connect my "GETDISKBRAKES" front disk kit to my rear drums! I had absolutely no luck as a 9/16'" to 5/16" line didn't exist in the entire Thousand Oaks area! (and not for lack of trying!) So I too called GDB and found out they have a line for that (after being told they don't have one and I'd have to fab it up myself a few weeks earlier
). (Ask for Todd...noted!) So now you tell me it's BUFUGLY! Great, now every time I step on my non pulling, superior stopping power, modern breaking system I'm going to have a vanity complex!!!!!!!! Where have you been my friend! I think I will still blame Brian for his above bar standard he has set for us!!!!!
Anyways we can compare notes when my "ugly" set up arrives. No points awarded for style please!!!!
Craig
December 4th, 2012, 07:26 AM
#423
NOVICE car nut
Join Date: Nov 2010
Location: Milwaukee Wisconsin
Posts: 3,123
Allan when I did the rear axle lines I bought the pliers and the bending tool from eastwood, the bender is made by imperial and looks like this....

I don't know if I got a defective one, or I don't realize my own strength, but when I was putting a 90 degree in a brake line snapped the handle off, I have done this with a few pliers as well, but I suspect poor quality for top dollar nowadays.
I bought a cheap replacement from Harbor freight and so far it has been ok, I will write to Imperial as eastwoods says I bought it two years ago and there is no warranty? Bastids
I don't know if I got a defective one, or I don't realize my own strength, but when I was putting a 90 degree in a brake line snapped the handle off, I have done this with a few pliers as well, but I suspect poor quality for top dollar nowadays.
I bought a cheap replacement from Harbor freight and so far it has been ok, I will write to Imperial as eastwoods says I bought it two years ago and there is no warranty?
Bastids I rented a tool similiar to this one , and had problems with the tube kinking on me when I tried to bend it . IIRC the tube was a bigger size then the brake lines . Could this be why this happened ? I remember doing this years ago , and had no problem bending the tube , but recently ( a year ago or so ) I had nothing but problems . Could the tube be weaker today in comparison to years ago ?
December 4th, 2012, 07:52 AM
#424
Registered User
Thread Starter
Join Date: Jan 2008
Location: South River, New Jersey
Posts: 3,515
first things first....
I rented a tool similiar to this one , and had problems with the tube kinking on me when I tried to bend it . IIRC the tube was a bigger size then the brake lines . Could this be why this happened ? I remember doing this years ago , and had no problem bending the tube , but recently ( a year ago or so ) I had nothing but problems . Could the tube be weaker today in comparison to years ago ?
There are some tubes that are not "annealed" not many designed for this use but it is possible, annealing is when you take a hardened metal and heat it till it is red hot then allowed to cool naturally, this softens the metal and allows bending/flaring to be accomplished much easier. If hardness is rerquired, after bending/flaring, it can be heated up again, and then quickly quenched in water, this would hardened the metal.
This applies generally to steel, Aluminum must be slowly heated and slowly cooled in an oven setting to perform this feat, but that would be several chapters of a book and I am no expert.
I am bending and forming stainless which is inherently harder than standard line, I will probably have to anneal the end again before flaring, ( I will test it without this step first).
You also must remember as you work a softened metal, bending, hammering etc the metal begins to hardened itself, it is sometimes referred to as hammer hardening, it aligns the molecules or some such, and may need to be reannealed during a working process, think of a papper clip, as you bend it back and forth, eventually a cross section starts to hardened, as you bend it back and forth, it gets brittle, and microscopic tears start forming, eventually you will break it in half.
again I am no expert and I am sure others could contribute, just trying to explain the basics
 December 4th, 2012, 08:13 AM
#425
NOVICE car nut
Join Date: Nov 2010
Location: Milwaukee Wisconsin
Posts: 3,123
Bry there are several reasons the tube can kink but I think "IIRC the tube was a bigger size then the brake lines " was the main culprit there, the bender must be the right size, as the tubing sits in the grove and is supported and contoured as you slowly bend it around the form, think of a piece of cardboard, if you press it around a paint can for instance it will curve around the can, if you try to bend it without the support of the can it will fold. Does this make sense? well the kink you mentioned is the fold, the tubing bender provide support on 1/2 the tube, it prevents the sides from flattening out, and gives a diameter to curve around.
There are some tubes that are not "annealed" not many designed for this use but it is possible, annealing is when you take a hardened metal and heat it till it is red hot then allowed to cool naturally, this softens the metal and allows bending/flaring to be accomplished much easier. If hardness is rerquired, after bending/flaring, it can be heated up again, and then quickly quenched in water, this would hardened the metal.
This applies generally to steel, Aluminum must be slowly heated and slowly cooled in an oven setting to perform this feat, but that would be several chapters of a book and I am no expert.
I am bending and forming stainless which is inherently harder than standard line, I will probably have to anneal the end again before flaring, ( I will test it without this step first).
You also must remember as you work a softened metal, bending, hammering etc the metal begins to hardened itself, it is sometimes referred to as hammer hardening, it aligns the molecules or some such, and may need to be reannealed during a working process, think of a papper clip, as you bend it back and forth, eventually a cross section starts to hardened, as you bend it back and forth, it gets brittle, and microscopic tears start forming, eventually you will break it in half.
again I am no expert and I am sure others could contribute, just trying to explain the basics
December 4th, 2012, 10:54 AM
#426
Registered User
Thread Starter
Join Date: Jan 2008
Location: South River, New Jersey
Posts: 3,515
Bry a propane torch would be fine, heat it till it is cherry red, place on a cement floor and let cool by itself,
In my opinion the MOST logical answer was the wrong size was selected in the tubing bender, or it was the wrong size tubing bender.
December 4th, 2012, 10:43 PM
#427
Registered User
Join Date: Jan 2011
Location: Maryland
Posts: 1,665
December 10th, 2012, 07:31 AM
#428
Registered User
Thread Starter
Join Date: Jan 2008
Location: South River, New Jersey
Posts: 3,515
Getting There....
Well I got home Friday, and what should appear.... but a box from the right stuff with my brakes and gear LOL.....
Seriously managed to get a good jump on things, ( yes pictures to follow )
I removed all the previous assemblies, except for the master cylinder and Booster, I installed the power drum brake lines on the master, I then positioned the new brass distribution block, while not a 100% perfect "looking" replacement it is about 99% , and far far better than my steel one, lines went on with no trouble and it looks the part, If anyone has pictures of power drum brake lines from the master onto the firewall I would appreciate seeing them. I got a nifty clip from Brian, I checked the old booster for hole placement and there wasn't one? did my car not have a clip?
Anyway, the lines run nice down along the firewall into the distribution block.
I then removed the rear to front brake line * yes the one I installed a little while back BEFORE putting the body down, it wasn't too bad getting it out but not as easy as putting them in LOL... I found a spot that I wanted to put the adjustable proportioning valve, far enough under the car and still accessable. I thought how to mount it as it has two holes on the side but this would mean the **** would face down? yes easier to use, however as it is under the car, I also thought it would be at risk to some errant road debris? I figured I wanted the **** slightly above the bottom of the frame, so I cut a piece of 1/8" thick aluminum 2 " angle probably about 2 inches wide, I then marked the holes for mounting the valve, plus two mounting holes for the frame, I elongated the holes for the mounting to the frame, and as I was looking at the plain piece, I put a little custom doodad with my milling machine. I plan to paint this black anyway so it doesn't stand out and slap you when you look underneath.
I bent my front to rear line previously to meet the union valve ( bad Idea ) If I was to write instructions, I would say mount the valve, then see where the rear to front line lands, cut it right in the middle of the valve bracket. this allows enough material to 1.) flare the rear to the Prop Valve) and also provides enough material to flare the prebent line from the POV to the distribution block, making a perfect splice.
Of course I thought about all this frikken afterwards LOL.. as is my usual SOP but live and learn what is cash for except to burn LOL....
Seriously this would have saved at least a couple of hours of work. It is Common sense looking back at it, but I bent the line up too much to reuse it.
I ordered a piece of 2 foot line, when I ordered my valve, and I bent this to meet the distribution block following the bottom of the frame, still needs the final little bends.
Seriously managed to get a good jump on things, ( yes pictures to follow )
I removed all the previous assemblies, except for the master cylinder and Booster, I installed the power drum brake lines on the master, I then positioned the new brass distribution block, while not a 100% perfect "looking" replacement it is about 99% , and far far better than my steel one, lines went on with no trouble and it looks the part, If anyone has pictures of power drum brake lines from the master onto the firewall I would appreciate seeing them. I got a nifty clip from Brian, I checked the old booster for hole placement and there wasn't one? did my car not have a clip?
Anyway, the lines run nice down along the firewall into the distribution block.
I then removed the rear to front brake line * yes the one I installed a little while back BEFORE putting the body down
, it wasn't too bad getting it out but not as easy as putting them in LOL... I found a spot that I wanted to put the adjustable proportioning valve, far enough under the car and still accessable. I thought how to mount it as it has two holes on the side but this would mean the **** would face down? yes easier to use, however as it is under the car, I also thought it would be at risk to some errant road debris? I figured I wanted the **** slightly above the bottom of the frame, so I cut a piece of 1/8" thick aluminum 2 " angle probably about 2 inches wide, I then marked the holes for mounting the valve, plus two mounting holes for the frame, I elongated the holes for the mounting to the frame, and as I was looking at the plain piece, I put a little custom doodad with my milling machine. I plan to paint this black anyway so it doesn't stand out and slap you when you look underneath.I bent my front to rear line previously to meet the union valve ( bad Idea ) If I was to write instructions, I would say mount the valve, then see where the rear to front line lands, cut it right in the middle of the valve bracket. this allows enough material to 1.) flare the rear to the Prop Valve) and also provides enough material to flare the prebent line from the POV to the distribution block, making a perfect splice.
Of course I thought about all this frikken afterwards LOL.. as is my usual SOP but live and learn what is cash for except to burn LOL....
Seriously this would have saved at least a couple of hours of work. It is Common sense looking back at it, but I bent the line up too much to reuse it.
I ordered a piece of 2 foot line, when I ordered my valve, and I bent this to meet the distribution block following the bottom of the frame, still needs the final little bends.
December 10th, 2012, 08:13 AM
#429
Registered User
Thread Starter
Join Date: Jan 2008
Location: South River, New Jersey
Posts: 3,515
Flaring Stainless Saga
Well I knew I would be flaring stainless and my old manual flaring tool might be a bit lacking, so I bought the Eastwood Cam action station.
I had some issues, but I will own up and say they were all my Own Fault.
I cut the tube with a tubing cutter, I chamfered the end with a file, reamed the inside edge and blew out the line, put it into the die set and used the very handy deadstop feature which positions the tube at the perfect depth etc etc. Now I looked at the tube, it measured 1/4 inch ( outside ) so I first select the correct 1/4 inch operation 1 die, everything is clamped, and voila pull the lever back, then I select the correct operation 2 die, and pull the lever back voila split at the flare, cut it off, redo the chamfer, etc etc 2nd time I annealed the tip of the tube, let cool, cleaned it with a scotch bright and voila split at at the flare...
Now I am thinking holy crap 200 bucks for a tool that won't due stainless, that is 10 cases of beer my friends, those numbers really hit home
LOL....
ok cut to the chase
I then followed all the steps again, except I use the inside diameter of 3/16ths and voila perfect flare... each and everytime.. never had a tool like this before, so I learned something new....
there will be pics to follow..
I had some issues, but I will own up and say they were all my Own Fault.
I cut the tube with a tubing cutter, I chamfered the end with a file, reamed the inside edge and blew out the line, put it into the die set and used the very handy deadstop feature which positions the tube at the perfect depth etc etc. Now I looked at the tube, it measured 1/4 inch ( outside ) so I first select the correct 1/4 inch operation 1 die, everything is clamped, and voila pull the lever back, then I select the correct operation 2 die, and pull the lever back voila split at the flare, cut it off, redo the chamfer, etc etc 2nd time I annealed the tip of the tube, let cool, cleaned it with a scotch bright and voila split at at the flare...
Now I am thinking holy crap 200 bucks for a tool that won't due stainless, that is 10 cases of beer my friends,
those numbers really hit home LOL....
ok cut to the chase
I then followed all the steps again, except I use the inside diameter of 3/16ths and voila perfect flare... each and everytime.. never had a tool like this before, so I learned something new....
there will be pics to follow..
Last edited by Eddie Hansen; December 25th, 2012 at 03:43 PM.
December 10th, 2012, 07:26 PM
#430
Registered User
Thread Starter
Join Date: Jan 2008
Location: South River, New Jersey
Posts: 3,515
Some Pics...
 December 10th, 2012, 07:32 PM
#431
Registered User
Thread Starter
Join Date: Jan 2008
Location: South River, New Jersey
Posts: 3,515
December 10th, 2012, 07:33 PM
#432
Registered User
Thread Starter
Join Date: Jan 2008
Location: South River, New Jersey
Posts: 3,515
Home made bracket and adjustable prop valve
 December 10th, 2012, 07:35 PM
#433
Registered User
Thread Starter
Join Date: Jan 2008
Location: South River, New Jersey
Posts: 3,515
I know I have some touch up on the frame, the body supports were in the way, but I wanted to get it all mocked up before I clean up that little area and put somje por 15 and chasis paint on it...
December 11th, 2012, 11:09 AM
#434
Just an Olds Guy
Join Date: Jul 2008
Location: Edmonton, AB. And "I am Can 'eh' jun - eh"
Posts: 24,525
Eddie,
Trial by fire? I know the feeling; I think it happens to all of us. Good thing though is now you have this good information to share and the experience to coach others who may have the same issues. So SS is not so user friendly on bending? Yup, I knew that too. But finding the solution is the cool thing about your efforts, congrats on trying the options and finding the one that works.
FWIW I like the look of the changes you've done. Never cared for the position of the PV up there beside the MC. IMO, even when you put in the headers you will not have any issues with overheating the brake line or Dist Block. And if you think it's still going to be hot? You can machine a nice heat shield with those nice tools of yours and make it look stock.
So you had to take out the brake line front to back? By any chance was the only clip that got in your way the one closest to the rear frame hump? I was looking at that last fall and it appears to be fastened from the top instead of the side like the others. Seems kind of retarded to me from a mtce point of view. I'm considering just cutting the clip and putting on a new one that fastens to the side of the frame. Since I can't seem to get the rear hose to brake line connection at the back (to the top of rear axle) to let loose, I'm seriously thinking of just replacing the whole line to the back with a new one and busting the old connections loose. Of course that means I MAW do the front ones while I'm at it. Hmmm, I guess I also better get a head start on draining my MC, lines and front hoses..... Oh Yay! Can't you just see the next MAW thread I'm going to start next year???
BTW, I see someone stole your motor and front clip
December 11th, 2012, 11:40 AM
#435
Registered User
Thread Starter
Join Date: Jan 2008
Location: South River, New Jersey
Posts: 3,515
Yes Allan, I installed the lines and left the front loose by the E-Brake Cable
Allan, It was tedious but not insurmountable, I used a Wrench, then a Ratcheting Wrench, after all the clips are off, disconnect the flex line , swing the front of the hose toward the backside of the front passenger wheel while gently pulling and feeding the line out, there isn't that much of a bend, if you have a helper even better.
By the hump the body and the frame form a channel, and there is enough room to finagle it in there, but why worry, you MAW Change the Body Mounts too LOL....
Dang Nefarious Foreigners, they steal anything that isn't nailed down LOL.... the motor is actually in the garage, front fenders are in the Basement, hoods on the roof, well you get the picture....
As for the Stainless it is harder, but there is nothing like no rust.... and it was more my inexperience using the new tool, but once you get it right you will be looking for things to use it on again LOL...
Thanks for the Kudos.. It isn't Brian's or Your work but what is? Pretty Damn High Standards for a shade try lackey like myself...
By the hump the body and the frame form a channel, and there is enough room to finagle it in there, but why worry, you MAW Change the Body Mounts too LOL....
Dang Nefarious Foreigners, they steal anything that isn't nailed down LOL.... the motor is actually in the garage, front fenders are in the Basement, hoods on the roof, well you get the picture....
As for the Stainless it is harder, but there is nothing like no rust.... and it was more my inexperience using the new tool, but once you get it right you will be looking for things to use it on again LOL...
Thanks for the Kudos..
It isn't Brian's or Your work but what is? Pretty Damn High Standards for a shade try lackey like myself...
December 21st, 2012, 08:33 AM
#436
Registered User
Join Date: Jan 2012
Location: Thousand Oaks, CA
Posts: 506
Too Much time on your hands my friend!
Hi Eddie,
Once again I have been long off the Olds reservation (a certain 2 and 5 year old is dominating my time!) Boy that seems like a lot of work but it looks nice. I am still struggling with my conversion. Talked to a guy (not Todd) at GDB he sent me a front to rear breakline. It has a 9/16" for the Booster and a 1/4" on the other end to mate to the existing rear line at the frame (where the old union was.) Problem is the rear line is a 5/16". I miss the days where you could run down to the local part store and browse the many parts! I noticed your GDB old line is different than mine, I have 11" booster maybe that's why. I am going to see if I can find a 1/4" to 5/16" union and call it a day. On another note and please excuse my ignorance, do I have an adjustable POV on my car? I really haven't looked past the firewall on mine (always like to keep around the corner surprises for future projects) Do I need one? I just thought it was magically adjusted from GDB!
I just got the new rag joint and hose inserts from lee engineering so hopefully with the week and half off I have, I can make some progress!
I talked to my engine builder yesterday. He got my pistons they are $1100!!!! Damn '68's!
Anyways hope you are well!
Craig
Once again I have been long off the Olds reservation (a certain 2 and 5 year old is dominating my time!) Boy that seems like a lot of work but it looks nice. I am still struggling with my conversion. Talked to a guy (not Todd) at GDB he sent me a front to rear breakline. It has a 9/16" for the Booster and a 1/4" on the other end to mate to the existing rear line at the frame (where the old union was.) Problem is the rear line is a 5/16"
. I miss the days where you could run down to the local part store and browse the many parts! I noticed your GDB old line is different than mine, I have 11" booster maybe that's why. I am going to see if I can find a 1/4" to 5/16" union and call it a day. On another note and please excuse my ignorance, do I have an adjustable POV on my car? I really haven't looked past the firewall on mine (always like to keep around the corner surprises for future projects) Do I need one? I just thought it was magically adjusted from GDB!I just got the new rag joint and hose inserts from lee engineering so hopefully with the week and half off I have, I can make some progress!
I talked to my engine builder yesterday. He got my pistons they are $1100!!!!
Damn '68's!Anyways hope you are well!
Craig
December 21st, 2012, 12:36 PM
#437
Registered User
Thread Starter
Join Date: Jan 2008
Location: South River, New Jersey
Posts: 3,515
But First, a few things you are going from 4 wheel power drums to front disc brakes Correct.
then your stock drum lines go from the master cylinder to the distribution block down on the frame, the front to rear line goes from the rear axle rubber line, down along the left side of the chasis to the distribution block.
does your original brake lines connect to this

Now you have the kit, so you will have the master cylinder, and 2 very short "elbows" that go to the brass valve under the master cylinder, this basically takes the place of the distribution valve on the chasis. you will need new front lines to go from each spindle to the brass valve under the master cylinder, then there will be another adapter line as I will call it that mates from the rear of the POV valve to the rear line, this is the part I didn't like.
are we on the same page?
does your set up look similar
Last edited by Eddie Hansen; December 21st, 2012 at 12:39 PM.
December 21st, 2012, 01:11 PM
#438
Registered User
Thread Starter
Join Date: Jan 2008
Location: South River, New Jersey
Posts: 3,515
On another note and please excuse my ignorance, do I have an adjustable POV on my car? I really haven't looked past the firewall on mine (always like to keep around the corner surprises for future projects) Do I need one? I just thought it was magically adjusted from GDB!
) Do I need one? I just thought it was magically adjusted from GDB!if you didn't get this pov valve first don't buy it I have one,
and I will PM you the contact info for a guy who may be willing to sell you the front lines I got with my kit
if he isn't using them....
December 25th, 2012, 03:56 PM
#440
Registered User
Thread Starter
Join Date: Jan 2008
Location: South River, New Jersey
Posts: 3,515
thank you
Thanks dave in the beginning of this thread shows the conversion of the rear brakes, my only issue with get disk brakes ( right stuff) was the spring protector, and their method for attaching to the rear line, I must give credit to Brian monahan as he spent a good long while thinking and rehashing the installation with me as I wanted a more stock appearance he came up with the idea of using an adjustable prop valve, and we came up with going through the stock distribution block. If you have issues I must say ask for Todd at the right stufff, I truly believe they are committed to delivering an excellent product, at a good price.
As I said I had the same issue with the axle flange but I will also say once the casting flash was off it was fine, I haven't tried my ss2/3 wheels I am concerned now, but we will see. I think I should be fine
As I said I had the same issue with the axle flange but I will also say once the casting flash was off it was fine, I haven't tried my ss2/3 wheels I am concerned now, but we will see. I think I should be fine


