


70 Cutlass S Build

Thread Starter
wait.... what....
Joined: Mar 2009
Posts: 817
From: London Ont Canada
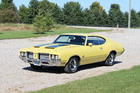
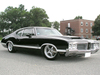
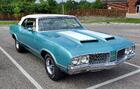
Stripes are on, and so is the final clear. The stripe stencils were not worth buying. The adhesive stuck to the body when they were pulled up, and the wheel well stencils weren't even close to lining up. Also the stripe from the door to the rear wheel well on both sides were a couple inches to short. It might not be perfect but i'm happy with the results.





NOVICE car nut
Joined: Nov 2010
Posts: 3,140
From: Milwaukee Wisconsin

Registered User
Joined: Feb 2008
Posts: 697
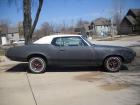
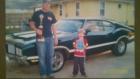
Hmmm, looks strangely familiar... Nix the white vinyl roof, it,s not a 442 clone and even they didn't look good with'em!
As a side note, I saw a W31, red with a black vinyl top at the Homecoming. It didn't look right either.
Nix the white vinyl roof, it,s not a 442 clone and even they didn't look good with'em!As a side note, I saw a W31, red with a black vinyl top at the Homecoming. It didn't look right either.
Registered User
Joined: Feb 2008
Posts: 697
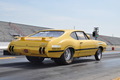
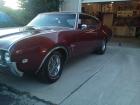
I didn't take my car, but, you probably saw a black and white striped W31 with steelies there. It belongs to a young fellow from Detroit...2dr htp, bench seat and four gear. Quite similar to mine except for a few options.
BTW do you know the fellow from London who had a blue and blue striped W31 there?
BTW do you know the fellow from London who had a blue and blue striped W31 there?


Thread Starter
wait.... what....
Joined: Mar 2009
Posts: 817
From: London Ont Canada
Very slow Henry, i haven't done a whole lot since getting it home. I have been doing other things ( honey do list ). I did buy a motor that was already done tho, so now i am really broke lol. How's yours coming along?

Last edited by oldzzy; Jul 11, 2012 at 06:37 AM.

Arrrggggg
Joined: Jul 2009
Posts: 322
From: Indianapolis
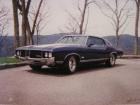
Love this thread. Your car is turning out so good man. Picked up a few tips by reading this build thread and now I have something to look forward to when I blast all my parts and paint them.
Kick *** car bro!
Kick *** car bro!
Registered User
Joined: Sep 2011
Posts: 33
From: Lawrenceville, GA
First of all, nice choice on the make and model of car!!! Second, love all the info and pics of the build. Third, the color choice is sa-weet!!! Get-r-dun!!!! Very impressed and green with envy!!!! Great job!!
Thread Starter
wait.... what....
Joined: Mar 2009
Posts: 817
From: London Ont Canada
Finally got back into the garage. I put the rear bumper on the car, and then realized that i needed to install the tail lights first.

So Brian (61reoldsman) was over at my place, so i made him help me take it off lol. I then painted the back side of the bumper, and installed all the lights and gas door. I had already restored all the light housings, tail lights, and the gas door, so it didn't take very long to put it all together. Now i just have to re install it!


So Brian (61reoldsman) was over at my place, so i made him help me take it off lol. I then painted the back side of the bumper, and installed all the lights and gas door. I had already restored all the light housings, tail lights, and the gas door, so it didn't take very long to put it all together. Now i just have to re install it!

Just an Olds Guy
Joined: Jul 2008
Posts: 24,528
From: Edmonton, AB. And "I am Can 'eh' jun - eh"
Shane, I need to ask you about the tail light housings. How does the electrical connector come out of the housing so you can clean it up? I don't think there's any difference between the pigtail connections on 70 and 71/72. Any advice or helpful hints would be greatly appreciated. I want to try doing those tomorrow.
Any issues with mounting the back bumper? It looks really amazing. I'm trying to keep up with you, but falling behind I see.
Something I'm NOT seeing on your bumper though and it should be there is the rubber bumper fillers. Don't forget to put them in before putting the bumper on - trying to make them fit afterwards is, well .. really awkward. Don't ask.
Any issues with mounting the back bumper? It looks really amazing. I'm trying to keep up with you, but falling behind I see.
Something I'm NOT seeing on your bumper though and it should be there is the rubber bumper fillers. Don't forget to put them in before putting the bumper on - trying to make them fit afterwards is, well .. really awkward. Don't ask.
Thread Starter
wait.... what....
Joined: Mar 2009
Posts: 817
From: London Ont Canada
I had the bumper fillers on when it was on the car, i just took them off when taping it up for painting. By electrical connectors, do you mean the bulb socket, or the piece that connects the the wiring to the harness?
Just an Olds Guy
Joined: Jul 2008
Posts: 24,528
From: Edmonton, AB. And "I am Can 'eh' jun - eh"
I think it's the socket. I was able to get the ones off the tag light and backup lights fairly easily. I'd like to take the electrical connector off the tail light housing so I can do a better clean up job on it. It has a double wire boot that slides up the wires to expose a black plastic plug. What I'd like to do is get that plug out so the wires can be separated from the housing. I'm sure you know what I need, but if you want I can shoot a pic of it. I might just try farting around with it to see if I can get it apart. Really don't want the wires in the way when I'm working on it.
Thread Starter
wait.... what....
Joined: Mar 2009
Posts: 817
From: London Ont Canada
Well if i am getting what you mean, the socket is crimped over the housing, and even if you get them out, you'll have to crimp them back over the housing when putting them back in. My friend made a tool to crimp them, but it wouldn't work on mine (he has a mopar), so i left them in and worked around the wires. The tool he made was a pair of vise grips with a fork type thing welded onto one of the jaws to go around the socket on the back side, and a big ball bearing welded to the other jaw so when pressed it was the same size as the socket, to crimp the whole area evenly.
Just an Olds Guy
Joined: Jul 2008
Posts: 24,528
From: Edmonton, AB. And "I am Can 'eh' jun - eh"
Ok, I guess that means I'm going to have to work around the wires too. I'll check the local market. Maybe Greggs Distributing might have something. I'll let you know if I find something that's a good workable solution. After all, you know you want another project after you get your 70 done...
Thread Starter
wait.... what....
Joined: Mar 2009
Posts: 817
From: London Ont Canada
Ok, I guess that means I'm going to have to work around the wires too. I'll check the local market. Maybe Greggs Distributing might have something. I'll let you know if I find something that's a good workable solution. After all, you know you want another project after you get your 70 done...
Thread Starter
wait.... what....
Joined: Mar 2009
Posts: 817
From: London Ont Canada
Decided to tackle a couple small projects tonight. Fueled by rum n coke, I installed the trunk lock which was a little harder than i thought it was going to be. I think with the new gasket behind the lock, i had a hard time getting the lock cylinder retainer to go on. I ended up pulling down on the rod with a pair of needle nose pliers, while pushing on the retainer. I then decided to tackle the repo trunk emblem that didn't fit right. It started off like this... The beveled part of the emblem was not right, and hit the trunk lock.

It's a lot deeper than the original i believe. I got rid of my original one as it was REALLY pitted and i knew i wouldn't use it. Who knew i should've kept it for reference!

I marked around the edge of the beveled part with a sharpie to give me an idea on how much to take off, and to keep all side kinda the same.

I figured my weapon of choice would be my Dremel with a cone shaped stone for the bit.

While this was working, the stone kept clogging up, and it was taking a lot longer than i thought so.... I switched to this!


After grinding some material away, i stopped every so often and checked the fit to make sure i didn't take to much away. After around 15-20 mins, i think it turned out pretty good.


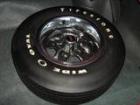
Now the 2 fasteners that came with the emblem are to big to fit in the holes in the trunk lid, so i was thinking of using the same size ones that the Cutlass emblem came with. Does anyone know where i can get these? The one on the right is the one that came with the rocket emblem, and the one on the left came with the Cutlass emblem, so it's the one on the left that i am looking to get.

It's a lot deeper than the original i believe. I got rid of my original one as it was REALLY pitted and i knew i wouldn't use it. Who knew i should've kept it for reference!
I marked around the edge of the beveled part with a sharpie to give me an idea on how much to take off, and to keep all side kinda the same.
I figured my weapon of choice would be my Dremel with a cone shaped stone for the bit.
While this was working, the stone kept clogging up, and it was taking a lot longer than i thought so.... I switched to this!
After grinding some material away, i stopped every so often and checked the fit to make sure i didn't take to much away. After around 15-20 mins, i think it turned out pretty good.
Now the 2 fasteners that came with the emblem are to big to fit in the holes in the trunk lid, so i was thinking of using the same size ones that the Cutlass emblem came with. Does anyone know where i can get these? The one on the right is the one that came with the rocket emblem, and the one on the left came with the Cutlass emblem, so it's the one on the left that i am looking to get.
Lance
Joined: Oct 2009
Posts: 757
From: YUKON, OK.
Try AMK, look in there bulk section.
http://www.amkproducts.com/bulk1.asp
http://www.amkproducts.com/bulk1.asp
Registered User
Joined: Aug 2009
Posts: 1,021
From: St. Louis, Missouri
Decided to tackle a couple small projects tonight. Fueled by rum n coke, I installed the trunk lock which was a little harder than i thought it was going to be. I think with the new gasket behind the lock, i had a hard time getting the lock cylinder retainer to go on. I ended up pulling down on the rod with a pair of needle nose pliers, while pushing on the retainer. I then decided to tackle the repo trunk emblem that didn't fit right. It started off like this... The beveled part of the emblem was not right, and hit the trunk lock.
It's a lot deeper than the original i believe. I got rid of my original one as it was REALLY pitted and i knew i wouldn't use it. Who knew i should've kept it for reference!
I marked around the edge of the beveled part with a sharpie to give me an idea on how much to take off, and to keep all side kinda the same.
I figured my weapon of choice would be my Dremel with a cone shaped stone for the bit.
After grinding some material away, i stopped every so often and checked the fit to make sure i didn't take to much away. After around 15-20 mins, i think it turned out pretty good.
It's a lot deeper than the original i believe. I got rid of my original one as it was REALLY pitted and i knew i wouldn't use it. Who knew i should've kept it for reference!
I marked around the edge of the beveled part with a sharpie to give me an idea on how much to take off, and to keep all side kinda the same.
I figured my weapon of choice would be my Dremel with a cone shaped stone for the bit.
After grinding some material away, i stopped every so often and checked the fit to make sure i didn't take to much away. After around 15-20 mins, i think it turned out pretty good.
Shane, nice work on the emblem fit. As you know I had the same problem with that reproduction part, however, I sent my back to the vendor. I restored the OEM emblem with polish, masking, and paint process - it came out very good (not perfect). So, I might buy another and follow your lead to trim the backside of the bezel.
Your car is looking fantastic; great thread.


