70 Cutlass S Build

Thread Starter
wait.... what....
Joined: Mar 2009
Posts: 817
From: London Ont Canada
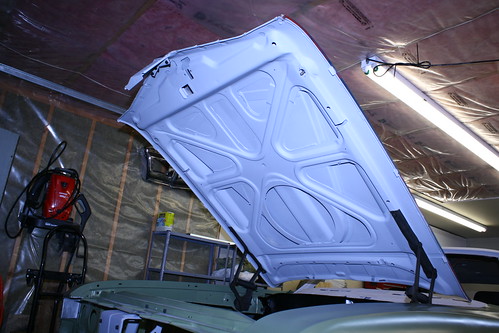
Hey Henry, Media blasting would be the best bet if you ask me, but you have to make sure the guy doing it really knows what he is doing (and yet i did my own lol). The last thing you want to do is wreck the hood. I got mine all cleaned up and primed, and now on the car. I masked off all the fiberglass sections underneath the hood with cardboard and masking tape, and actually sandblasted the steel. I can't believe i didn't take any pics of the hood all masked off lol, but here is the steel frame all blasted.
After sand blasting, it took me like 3 hours to get all the sand out of the hood! All i seemed to do was chase the sand from one side of the hood to the other. I was using an air wand and a shop vac, blowing all the sand to one side, vacuum, blow all the sand to the other side, vacuum. You get the idea lol. I then sanded the fiberglass with sand paper and some scotch brite pads.

After sanding to the fiberglass was done, i again vacuumed the hood, and did a final clean with some alcohol wipes. I the taped off the edges and primed it with aproxy primer. I will get pics of the primed hood soon, as it is bolted to the car, and headed to the body shop tomorrow.
After sand blasting, it took me like 3 hours to get all the sand out of the hood! All i seemed to do was chase the sand from one side of the hood to the other. I was using an air wand and a shop vac, blowing all the sand to one side, vacuum, blow all the sand to the other side, vacuum. You get the idea lol. I then sanded the fiberglass with sand paper and some scotch brite pads.
After sanding to the fiberglass was done, i again vacuumed the hood, and did a final clean with some alcohol wipes. I the taped off the edges and primed it with aproxy primer. I will get pics of the primed hood soon, as it is bolted to the car, and headed to the body shop tomorrow.
Last edited by oldzzy; Dec 6, 2011 at 03:13 PM.
Thread Starter
wait.... what....
Joined: Mar 2009
Posts: 817
From: London Ont Canada
i just used a hammer and chisel on the spot welds, and it popped off fairly easily. It probably went well because i have a new screen so i didn't care what happened to the old one. If i was trying to save the old screen, knowing my luck i would have destroyed it!
Thread Starter
wait.... what....
Joined: Mar 2009
Posts: 817
From: London Ont Canada
Registered User
Joined: May 2009
Posts: 100
From: Ottawa ON. Canada
The car looks great!!!! Noticed in one of your pictures a Princess Auto sand blast cabinet. Is that what you are using to clean all the parts? How do you like it? Thinking about getting one. What have you equipment your shop with for this project. keep up the good work.
Thread Starter
wait.... what....
Joined: Mar 2009
Posts: 817
From: London Ont Canada
Thread Starter
wait.... what....
Joined: Mar 2009
Posts: 817
From: London Ont Canada
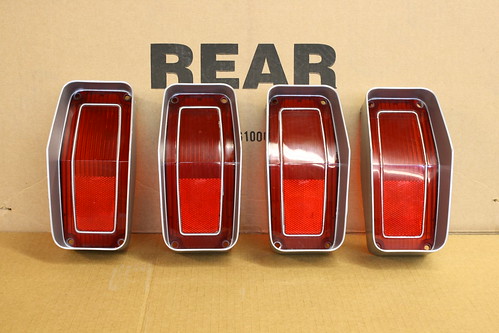
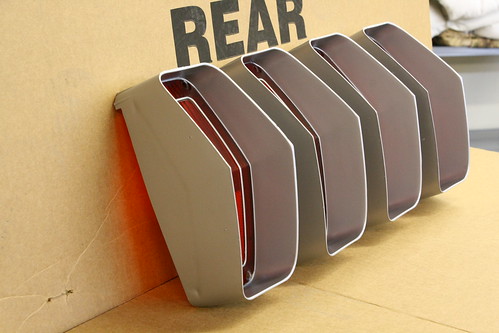
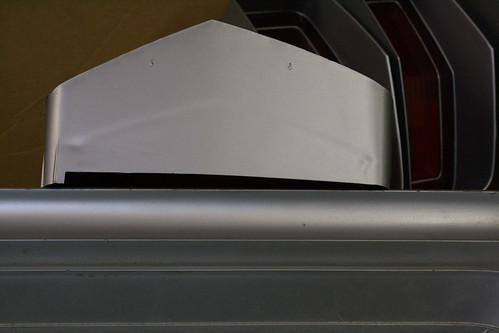
I had the luxury of knowing that i wasn't going to have much to do at work yesterday so, i took my tail lights to work to sand, mask off, and paint. Let me tell you, and i am sure the ones that have done it know, but what a pain it is to mask the these things! Once i had them sanded and masked i painted them and i think they turned out pretty good. I still have to do the aluminum colour on the lens itself, but i will use a paint marker for that.
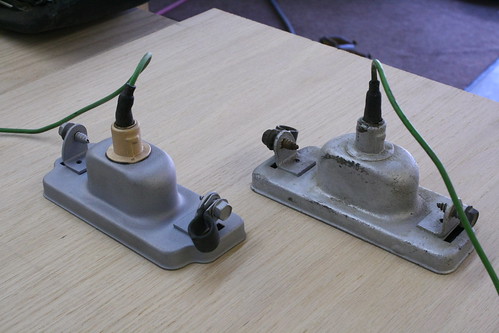
I also decided to try and save the rear license plate light housing. I wish i had taken a pic of it before, but i honestly didn't think i was going to use it. It was rusted and pitted like crazy, so i sandblasted it shot it with some primer and paint and much to my surprise it didn't turn out to bad. I still have to get a new lens for it cuz the old one can't be saved. I also cleaned up the wire and the connector as well with a little paint thinner.
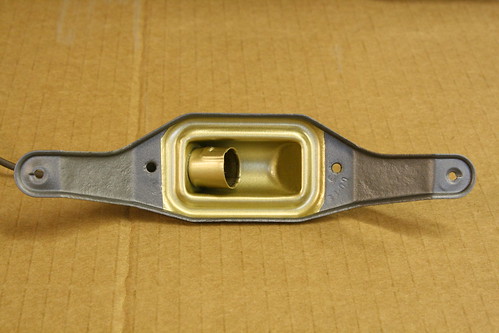
I also decided to try and save the rear license plate light housing. I wish i had taken a pic of it before, but i honestly didn't think i was going to use it. It was rusted and pitted like crazy, so i sandblasted it shot it with some primer and paint and much to my surprise it didn't turn out to bad. I still have to get a new lens for it cuz the old one can't be saved. I also cleaned up the wire and the connector as well with a little paint thinner.


Registered User
Joined: Feb 2008
Posts: 697
Just curious, did you have to remove your painted surface and redo with electro-conductive paint when you did yours?
Thread Starter
wait.... what....
Joined: Mar 2009
Posts: 817
From: London Ont Canada

Last edited by oldzzy; Dec 13, 2011 at 07:21 AM.
Thread Starter
wait.... what....
Joined: Mar 2009
Posts: 817
From: London Ont Canada
Last edited by oldzzy; Dec 15, 2011 at 10:38 AM.
Thread Starter
wait.... what....
Joined: Mar 2009
Posts: 817
From: London Ont Canada
A friend had them lying around, so i used them. The only problem was that they didn't leave a big enough hole for the plug welding after i took them out, so i had to redrill each and everyone of them bigger before plug welding. I still have them, and your more than welcome to use them if you want.
Registered User
Joined: Dec 2011
Posts: 978
From: Tillsonburg Ont. Canada.
A friend had them lying around, so i used them. The only problem was that they didn't leave a big enough hole for the plug welding after i took them out, so i had to redrill each and everyone of them bigger before plug welding. I still have them, and your more than welcome to use them if you want.
Thread Starter
wait.... what....
Joined: Mar 2009
Posts: 817
From: London Ont Canada
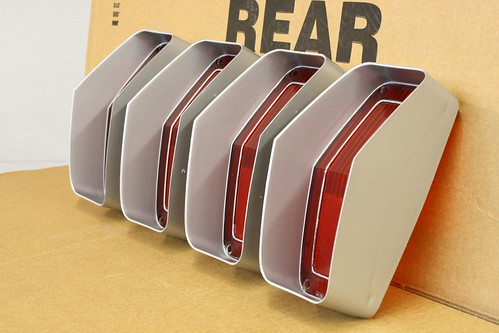
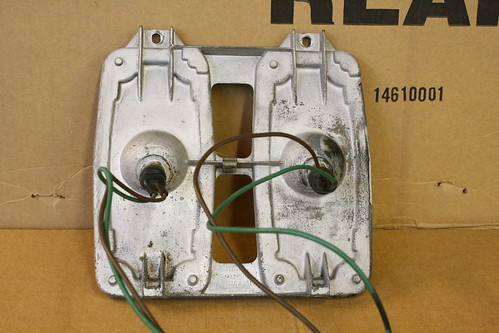
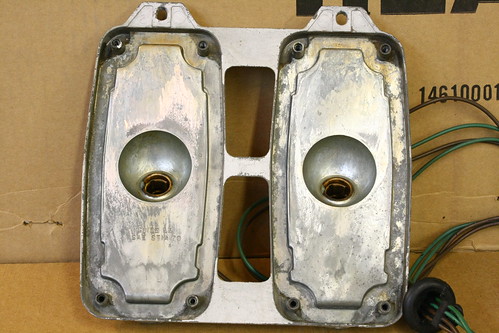
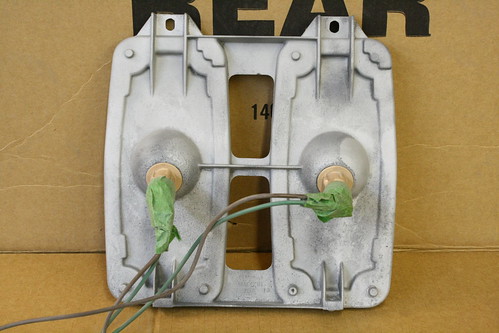
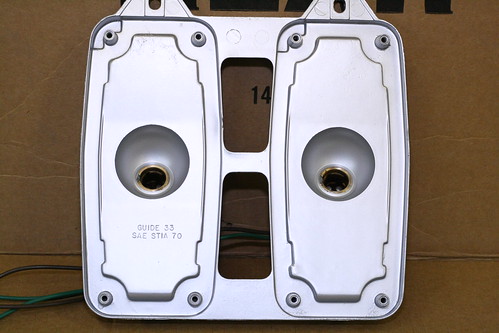
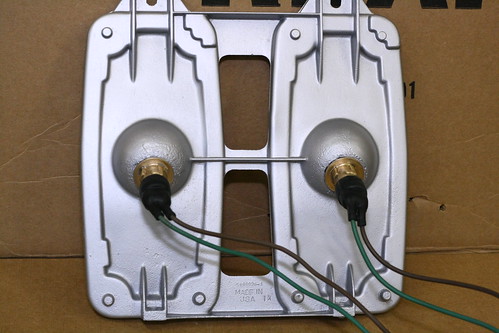
Finally got the tail light housings done. The bulb sockets looked like they were in great shape, just full of grease. I cleaned out the sockets with varsol, and then used a rag and compressed air to get the varsol out. Someone painted them at some point so i sand blasted them. I turned the air pressure down in the cabinet so i wouldn't do any damage to the housings. Once they were blasted and then cleaned, i painted the bulb side of the housings with an aluminum paint, and did the backside of the housings with a dull aluminum. I didn't like the gold paint i had for the bulb housings as i thought it was to gold, so i pulled out the dremmel and polished the housings. Once they were polished i then put a satin clear on the sockets to help protect them from the elements. Finally i cleaned up the wires, and connectors.
Thread Starter
wait.... what....
Joined: Mar 2009
Posts: 817
From: London Ont Canada
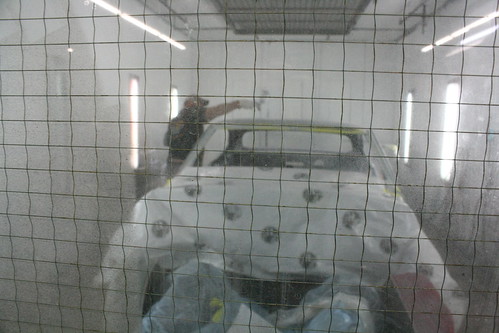
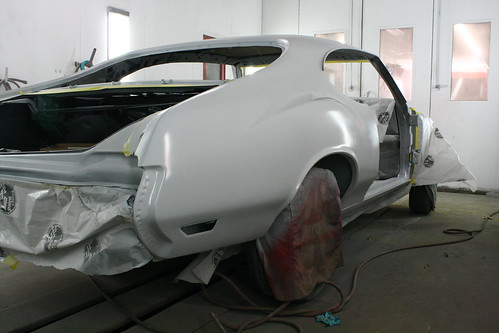
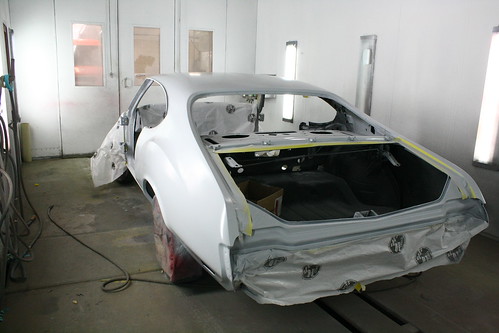
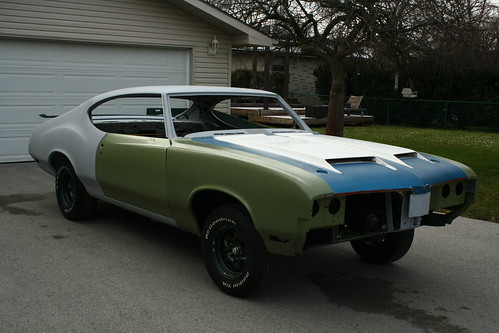
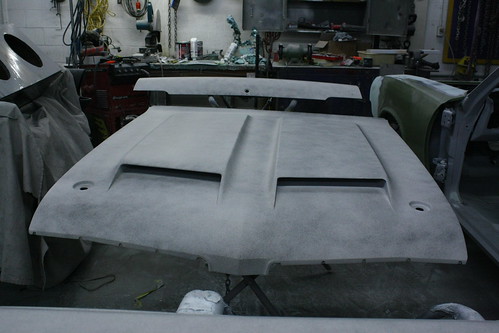
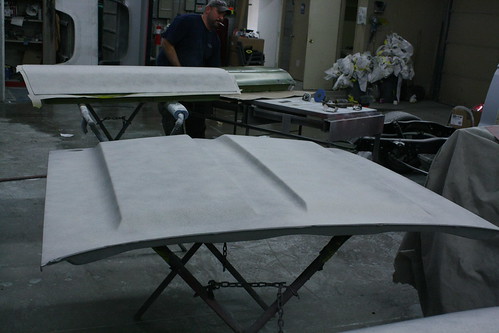
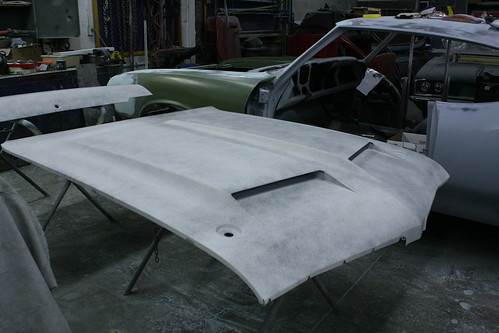
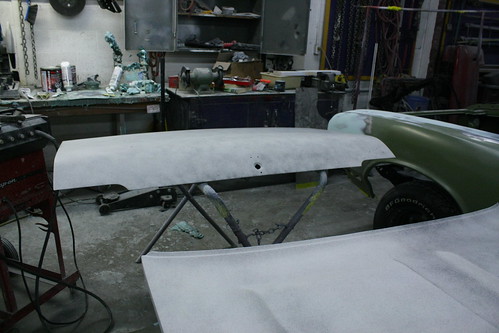
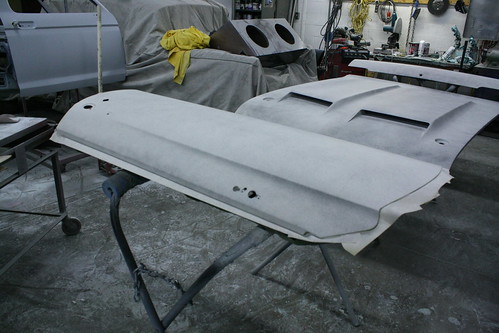
Starting to see some progress at the body shop. The hood, trunk lid, and drivers door are ready for final block sanding. The hood needed some fiberglass work on the front nose as it was cracked. Now that they fixed it the hood tooth lines up perfect!
Thread Starter
wait.... what....
Joined: Mar 2009
Posts: 817
From: London Ont Canada
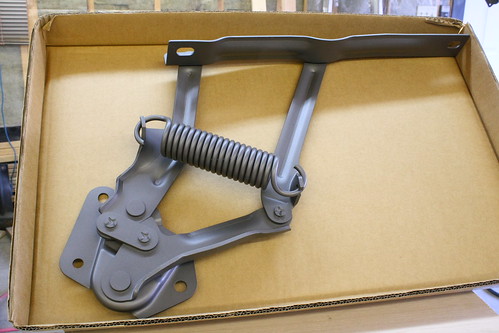
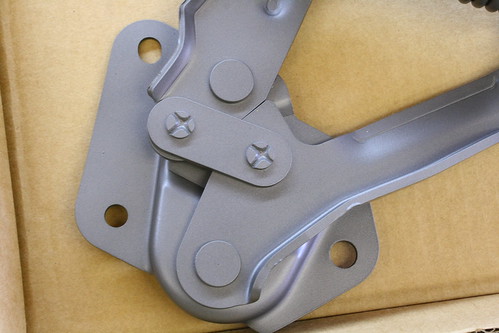
When i was at the body shop, they told me they were going to be needing my door latches soon so..... I might be getting a little carried away, but i just can't seem to put something dirty on the car, even when you won't see it!
Door latch before

Cleaned door latch
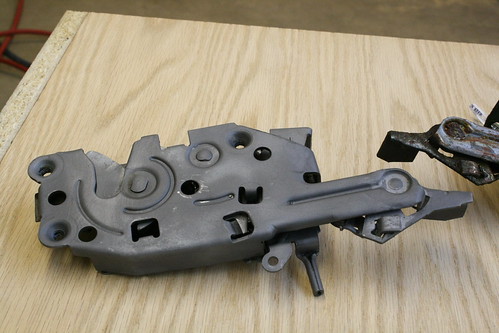
Now i will take the latches, along with the bolts to work to phos coat them for future protection from rust.
Door latch before
Cleaned door latch
Now i will take the latches, along with the bolts to work to phos coat them for future protection from rust.
Thread Starter
wait.... what....
Joined: Mar 2009
Posts: 817
From: London Ont Canada
Thanks for taking the time to look through my build and comment! I am getting excited as the car is getting closer to getting painted. It's always nice to go to the shop and see that a lot of work is being done.
Thread Starter
wait.... what....
Joined: Mar 2009
Posts: 817
From: London Ont Canada
I found out a couple weeks ago that after i sandblasted my hinges and had them phos coated, that they were wore out. I bought a new pair and picked them up a couple days ago. They were a black colour so instead of blasting them, and putting a phos coating on them, i decided to sand them, and paint them a cast colour.
I also replaced the sand in my cabinet to glass to see what it was like. I was amazed at home nice of a job the glass does. There's a lot less dust which makes it easier to see the parts your blasting. I figured i would give the glass a try and did the front parking light housings, and reverse light housings. These pics are just showing the difference between blasted and not blasted
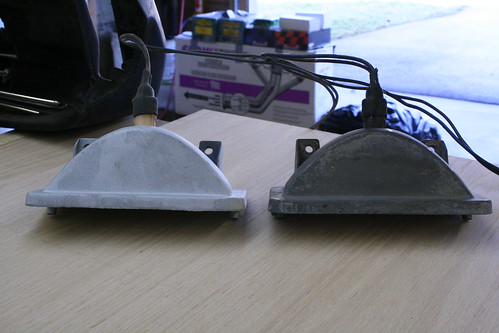
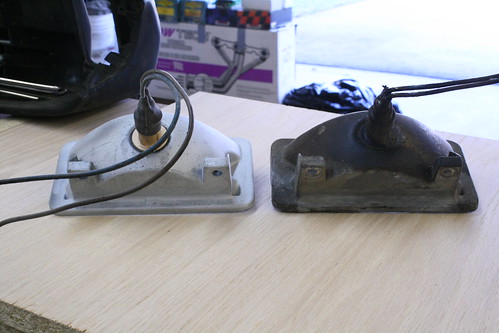
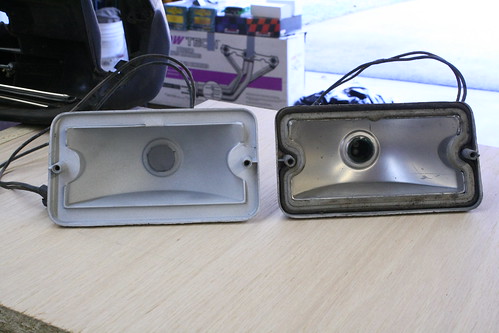
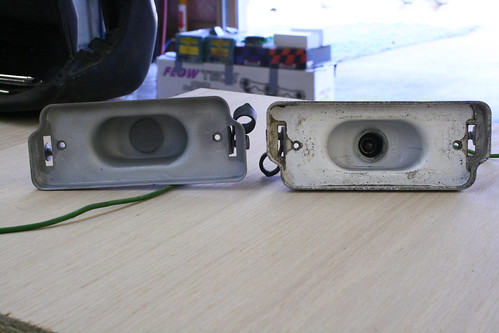
I also replaced the sand in my cabinet to glass to see what it was like. I was amazed at home nice of a job the glass does. There's a lot less dust which makes it easier to see the parts your blasting. I figured i would give the glass a try and did the front parking light housings, and reverse light housings. These pics are just showing the difference between blasted and not blasted
Last edited by oldzzy; Mar 16, 2012 at 09:17 AM.
Lance
Joined: Oct 2009
Posts: 757
From: YUKON, OK.
Shane, don't throw away your original hinges. Willie can rebuild them for cheap, and he does great work with quick turn around times.
http://www.hoodhingerepair.com/
Also, you can do your own phosphate plating at home with below chemical (easy to do!).
http://www.palmettoenterprises.net/P...-Welcome-.html
http://www.hoodhingerepair.com/
Also, you can do your own phosphate plating at home with below chemical (easy to do!).
http://www.palmettoenterprises.net/P...-Welcome-.html
NOVICE car nut
Joined: Nov 2010
Posts: 3,140
From: Milwaukee Wisconsin
I am no pro, but it looks really close to the original colour and sheen. I should have taken some before and after pics. Okay i just went and took a pic of an original grille with the new painted tail light. It's kinda hard because of the curve on the grille with the light but it looks close to me.
Thread Starter
wait.... what....
Joined: Mar 2009
Posts: 817
From: London Ont Canada
The taping did suck lol. I just layed the tape on the lens, made sure it was pushed tight into all the corners and then trimmed off any extra tape with an exacto knife.
NOVICE car nut
Joined: Nov 2010
Posts: 3,140
From: Milwaukee Wisconsin
 I'm gonna have to replace my lenses , two are cracked so I was get some replacements when I can afford a rear bumper .
Thread Starter
wait.... what....
Joined: Mar 2009
Posts: 817
From: London Ont Canada
The car is coming up for parole soon, hopefully it will make parole and get out of paint shop jail soon! Some of the parts were supposed to be getting painted today, and he is going to block sand the body a couple more times this week. Hopefully it will be ready for some paint by the end of the week, and painted before he leaves for work for a month.