
70 Cutlass S Build


Thread Starter
wait.... what....
Joined: Mar 2009
Posts: 817
From: London Ont Canada
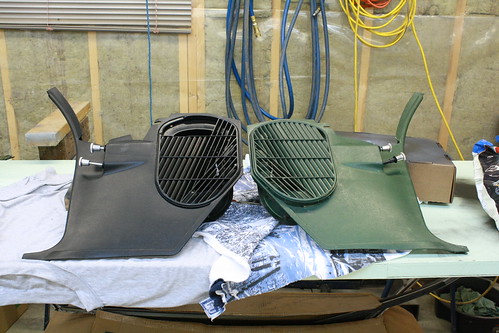
Just picked up some SEM paint for the interior pieces, Landau Black. I thought i would try it out on my kick panel vents to see how it goes on, and how it looks. I cleaned the vents with soap and water, then i used a grease, silicone, and wax remover, and then sprayed the paint on them. I think the colour came out well, and i really like how it sprayed.


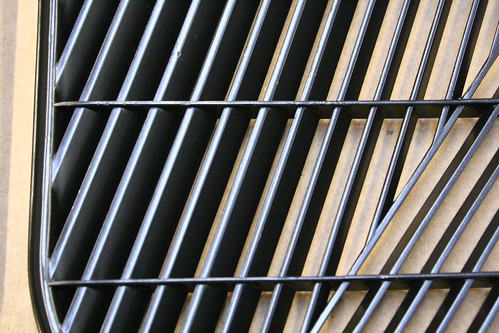
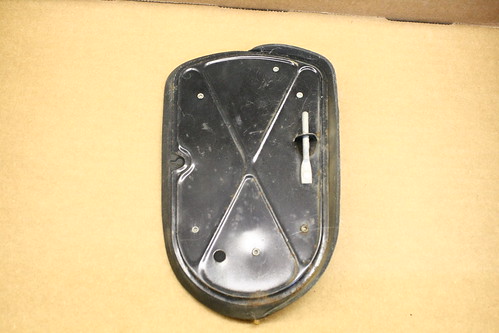
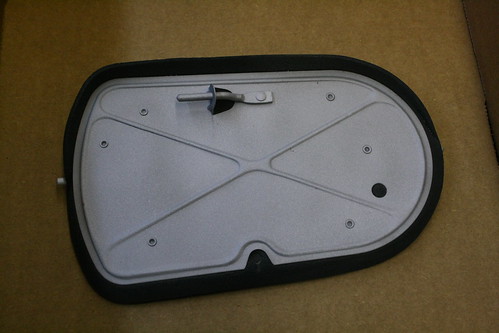
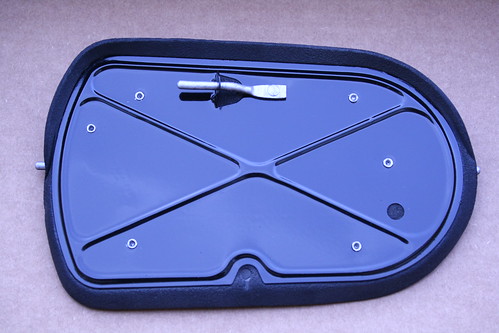
While i was digging the vents out of the box they were in, i came across the metal flapper door that goes in the kick panel. It didn't look so good on the one side, so...... lol
Fairly good side
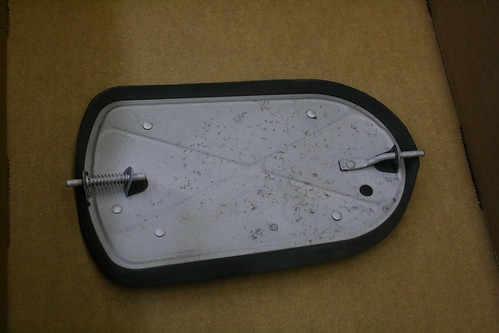
Not so good side
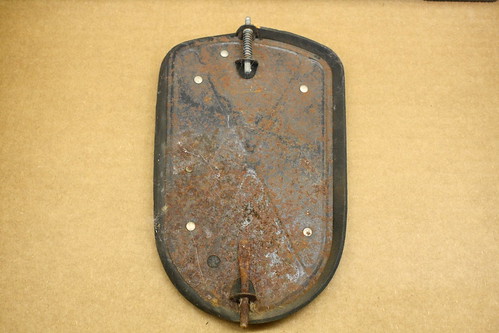
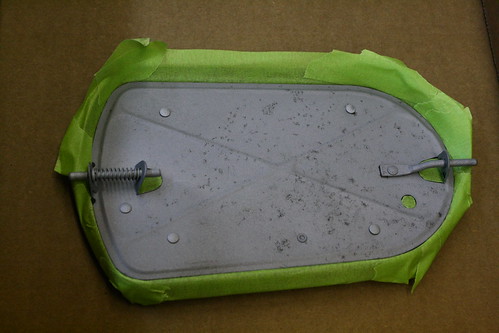
A little bead blasting
Some taping off, and have i mentioned how much i hate taping!
Now some primer.
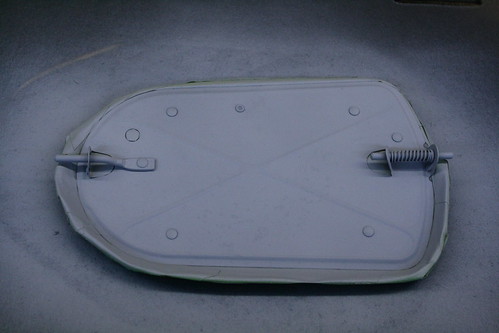
Ran outta time for today, some hopefully some paint tomorrow.
While i was digging the vents out of the box they were in, i came across the metal flapper door that goes in the kick panel. It didn't look so good on the one side, so...... lol
Fairly good side
Not so good side
A little bead blasting
Some taping off, and have i mentioned how much i hate taping!
Now some primer.
Ran outta time for today, some hopefully some paint tomorrow.

Thread Starter
wait.... what....
Joined: Mar 2009
Posts: 817
From: London Ont Canada

Thread Starter
wait.... what....
Joined: Mar 2009
Posts: 817
From: London Ont Canada
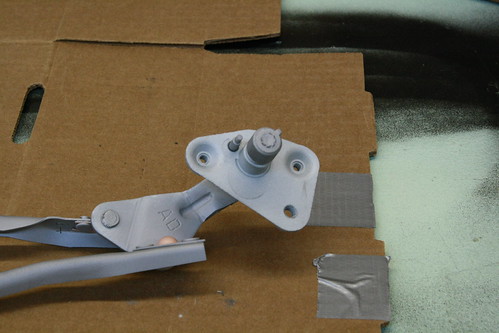
This is the part where my wife looks at me and shakes her head lol. I just use a tiny paint brush, like one for models, and paint the rivets and other parts that are silver.
Just an Olds Guy
Joined: Jul 2008
Posts: 24,528
From: Edmonton, AB. And "I am Can 'eh' jun - eh"
Here's what I do different - and don't get me wrong; everyone has their own way of doing this so everyone is right. My way is equally time consuming from a 'before' paint event. I tape off around the pieces/rivets I want to stay 'au natural' and clear them. When the clear is dry, I tape over those parts carefully trim the tape with an exacto knife so it's a precise/crisp reveal. Sometimes I need to use a magnifying glass for that because my eyes are 'old'. Then shoot with paint. After peeling off the paint the detail is pretty awesome.
Shane's right though. Who's going to notice that? Only person who will know is the ones that he talks to about it, or who look through his picture album on his build. I am never disappointed watching these posts. It's all a matter of ownership and personal pride. Great work Shane!
Thread Starter
wait.... what....
Joined: Mar 2009
Posts: 817
From: London Ont Canada
Here's what I do different - and don't get me wrong; everyone has their own way of doing this so everyone is right. My way is equally time consuming from a 'before' paint event. I tape off around the pieces/rivets I want to stay 'au natural' and clear them. When the clear is dry, I tape over those parts carefully trim the tape with an exacto knife so it's a precise/crisp reveal. Sometimes I need to use a magnifying glass for that because my eyes are 'old'. Then shoot with paint. After peeling off the paint the detail is pretty awesome.
Thread Starter
wait.... what....
Joined: Mar 2009
Posts: 817
From: London Ont Canada
Wow thnx! There are a lot of awesome people on this site that are willing to take the time to help us figure things out, all you have to do is ask. Start a build thread when you start working on your project, and post some pics of your car. We all like pics!
Thread Starter
wait.... what....
Joined: Mar 2009
Posts: 817
From: London Ont Canada
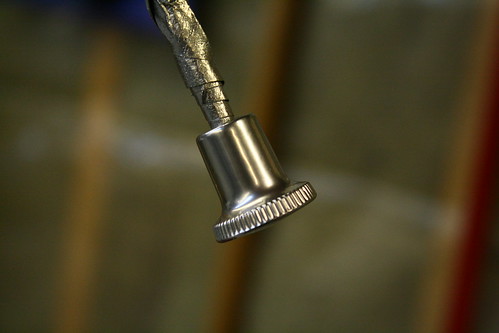
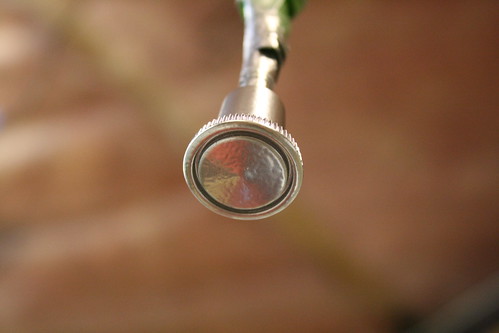
Little bit more painting. The fresh air pull ***** were pretty crappy looking. The chrome was all wore off, and you could see the greenish coloured finish under the chrome. I thought i would try Duplicolor's chrome paint too see what it would turn out like. I scuffed up the ***** with scothbrite, primed them, painted them gloss black, and then painted them with the chrome paint. They turned out ok i guess, the face of the **** looks a little bumpy, but the paint i still wet and i think it will smooth out a little. I had them looking pretty good yesterday, thought they were dry, but i found out that this chrome paint takes A LOT longer to dry than most other paint. It feels dry to the touch, but if you put to much pressure on it you'll leave finger prints.

Just an Olds Guy
Joined: Jul 2008
Posts: 24,528
From: Edmonton, AB. And "I am Can 'eh' jun - eh"
Shane, I'm glad to see you tackled this. The chrome ***** on my car also need to be redone. One of the ***** appears to be broken loose so I'm torn between using some JB weld to reattach it or just buying repops. They list for 6.50 each
If you had to redo this, would you still try to refinish or go with new repros? BTW I'm not looking forward to pulling those vent cables and kickpanels. The car was used on a LOT of dusty roads back in the day. I'm sure I'll need to find some way to clean the vent piping too. Sounds like a serious dash teardown doesn't it?
Want your opinion on something I'd like to install on my 72. It would require some minor modification but I was thinking of extending the upper air distribution to include the center vents (from an AC car) to give better flow through in the middle of the car when the upper vents are opened. IMO, these cars should have had that included whether AC or not. You had/have your dash out? How hard would it be to run those extended vent lines? I know the mod would require the main vent tube to be Y'd to do that.
Thread Starter
wait.... what....
Joined: Mar 2009
Posts: 817
From: London Ont Canada
I think if I had to, I would probably just redo the ***** like I did with these 2. I still have the other side to do yet, so I'll see how they turn out.
As for your dash ducting, yeah I took the dash out years ago, and I'm not totally sure on how much room there is back there to do what your asking. Seems like a good idea, and I'm surprised someone else hasn't done it already.
As for your dash ducting, yeah I took the dash out years ago, and I'm not totally sure on how much room there is back there to do what your asking. Seems like a good idea, and I'm surprised someone else hasn't done it already.
Just an Olds Guy
Joined: Jul 2008
Posts: 24,528
From: Edmonton, AB. And "I am Can 'eh' jun - eh"
Sounds good Shane. I know the chrome paint you're talking about. Tried it a few years back on a neighbors trim badge. It was really thin and runny even after shaking the heck out of it. Not sure if the one **** is repairable either. Any specific issues getting the cables and doors out?
re: venting. Crap. Now you know there's another MAW disaster headed for the forums on this topic.....sigh.....
re: venting. Crap. Now you know there's another MAW disaster headed for the forums on this topic.....sigh.....
Thread Starter
wait.... what....
Joined: Mar 2009
Posts: 817
From: London Ont Canada
Getting the cables and doors out is the easy part. The cables are held in with little clips that I pulled out with a pair of needle nose pliers, and one of the pins that the door swivels on is spring loaded, so you just press down, and out it comes.
Just an Olds Guy
Joined: Jul 2008
Posts: 24,528
From: Edmonton, AB. And "I am Can 'eh' jun - eh"
I think I also need to fix the black plastic grommet (cable retainer??) where the cable slides in and out of the kickpanel. When I pull the lower vent on the right side, the whole grommet comes out. Might have to just 'weld' it in there after all is cleaned and done.
EDIT: looking at your pics, it's possible one of the black plastic clips on that sleeve is broken; causing the whole thing to come out of the kickpanel?
EDIT: looking at your pics, it's possible one of the black plastic clips on that sleeve is broken; causing the whole thing to come out of the kickpanel?
Thread Starter
wait.... what....
Joined: Mar 2009
Posts: 817
From: London Ont Canada
That could be quite possible. If the plastic housing is broke, I would fix before painting it (if you have to repaint it)
1968 Olds Cutlass S
Joined: Dec 2008
Posts: 428
From: Seattle, WA
Very nice Shane. Like others have mentioned, I've referred to your Flickr photos on many occasions to see how you've done things. One question, you mentioned that when you painted your chrome *****, that after you cleaned and primed them, you shot them with gloss black prior to shooting them with the chrome. Was there a specific reason for shooting it with the gloss black before shooting it with the chrome?
Thread Starter
wait.... what....
Joined: Mar 2009
Posts: 817
From: London Ont Canada
I think it's having the base being really dark, kinda like a mirror has the black backing. I was told you always had to do it when painting chrome years ago when I used to do a lot of airbrushing on R/C car bodies.
Just an Olds Guy
Joined: Jul 2008
Posts: 24,528
From: Edmonton, AB. And "I am Can 'eh' jun - eh"
So now I have another question about that 'rippling' on the front of the ****. When you shot the black, how long did you let it cure before shooting the chrome? Speculation on my part, but if the black wasn't cured for a couple days? Maybe the chrome paint dissolved some of the black?
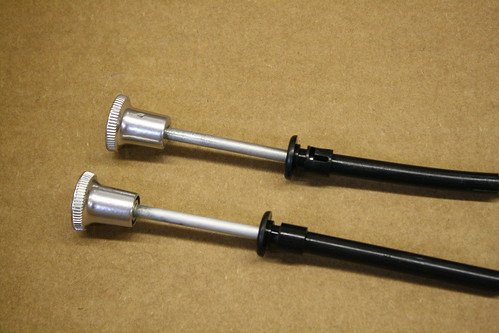
Oh, I think I may have figured out what's causing the **** to pull the whole sleeve out of the kick panel. Very likely the retaining c clip on the back has come off.
Sample picture:

Oh, I think I may have figured out what's causing the **** to pull the whole sleeve out of the kick panel. Very likely the retaining c clip on the back has come off.
Sample picture:
Thread Starter
wait.... what....
Joined: Mar 2009
Posts: 817
From: London Ont Canada
So now I have another question about that 'rippling' on the front of the ****. When you shot the black, how long did you let it cure before shooting the chrome? Speculation on my part, but if the black wasn't cured for a couple days? Maybe the chrome paint dissolved some of the black?
Oh, I think I may have figured out what's causing the **** to pull the whole sleeve out of the kick panel. Very likely the retaining c clip on the back has come off.
Oh, I think I may have figured out what's causing the **** to pull the whole sleeve out of the kick panel. Very likely the retaining c clip on the back has come off.
That could be why your sleeve is pulling through. Let's hope your clip is either missing or broken, cuz that's an easy fix!
1968 Olds Cutlass S
Joined: Dec 2008
Posts: 428
From: Seattle, WA
P.S. I'm like you, I think I've spent more time taping off things, then I do on the actual work. Other than the prep time, and clean up time which also takes up most of my time. I should have bought stock in 3M tape.
Thread Starter
wait.... what....
Joined: Mar 2009
Posts: 817
From: London Ont Canada
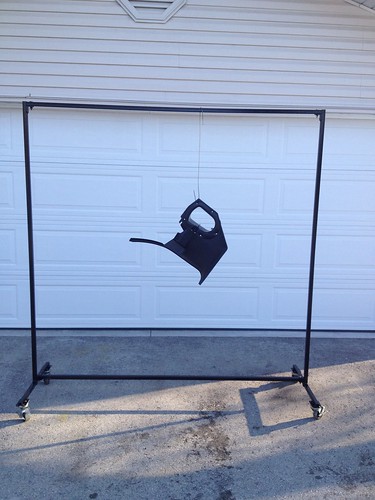
Not to much lately. I have been working a lot, i hadn't had a day off in 3 weeks, but now i'm on holidays for a week. I have a couple small projects on the go right now, and hoping to get them both done by the end of this week. One of the projects was a parts hanger i guess you'd call it. It's what the body shop uses to paint small parts. It is basically a square frame with casters, that you can roll in and out of the booth. I will be rolling it in and out of the garage. I got it all together tonight and just have to paint it now. I made it out of 1" square tubing, and it's 6' tall and 6' long, rolling on swivel, and locking casters. I looked at some on the net, and they ranged from $200-300, and i built mine for around $40. I also made it so that it comes apart for storage when i'm not using it.
Registered Luser
Joined: Aug 2006
Posts: 3,785
From: LI,NY
Shane, no snow in your part of Canada....? Warm enough for paint? I think it's time to escape from NY, and move to the great white north.......stand looks good! You can also make those from black pipe and different plumbers elbows and T's etc.....screw it all together and you are good to go, and take apart...
Thread Starter
wait.... what....
Joined: Mar 2009
Posts: 817
From: London Ont Canada
More playing around in the garage today. I assembled the drivers side kick panel today, i just have to add the clips for the vent pulls to finish it off. It came out pretty good, the colour seems right.
I had my rebuilt wiper motor sitting around, so i thought i might as well install that as well.
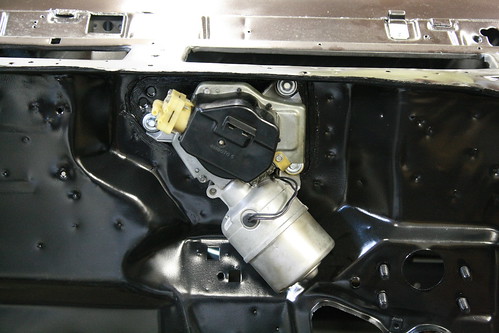
I then hooked up the hood release linkage, cuz i got tired of reaching up and under to do it lol.
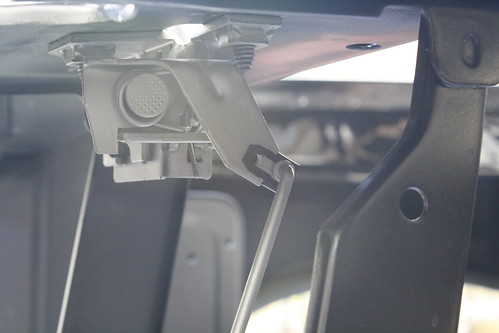
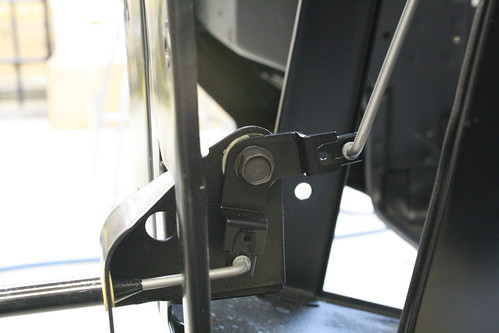
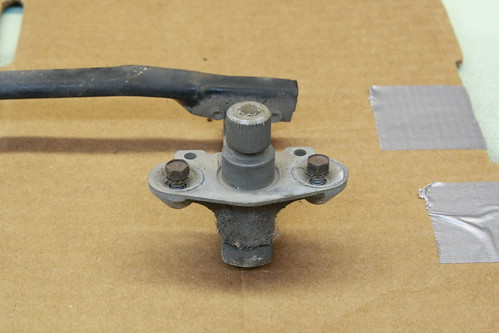
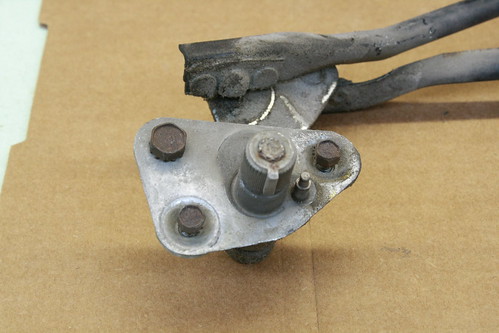
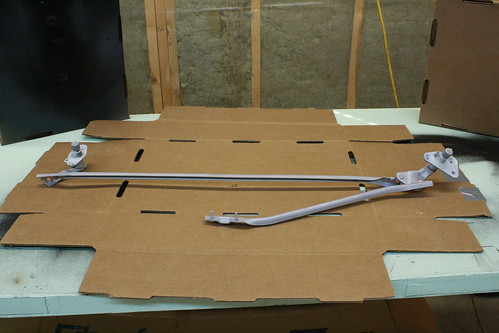
Since i installed the wiper motor, i thought i would tackle the wiper arm linkage


I also installed the front, and rear marker lights today as well, just no pics yet.
I had my rebuilt wiper motor sitting around, so i thought i might as well install that as well.
I then hooked up the hood release linkage, cuz i got tired of reaching up and under to do it lol.
Since i installed the wiper motor, i thought i would tackle the wiper arm linkage
I also installed the front, and rear marker lights today as well, just no pics yet.
Last edited by oldzzy; Feb 17, 2013 at 02:27 PM.
Just an Olds Guy
Joined: Jul 2008
Posts: 24,528
From: Edmonton, AB. And "I am Can 'eh' jun - eh"
Very nice work Shane! just curious - did you mask off the decal on the WW or is it gone now?
What the heck?? That doesn't match the green one at all!!. JK I know you still have to do the PS.
Thanks for posting those updates - makes me want to git at'r even though I can't right now. I'll be using this part of your thread when I do my repairs to the vents and kick panels. It's always nice when someone does it first and I can see what they've done.
I assembled the drivers side kick panel today, i just have to add the clips for the vent pulls to finish it off. It came out pretty good, the colour seems right.
Thanks for posting those updates - makes me want to git at'r even though I can't right now. I'll be using this part of your thread when I do my repairs to the vents and kick panels. It's always nice when someone does it first and I can see what they've done.


