When you click on links to various merchants on this site and make a purchase, this can result in this site earning a commission. Affiliate programs and affiliations include, but are not limited to, the eBay Partner Network.
My battery tray is more missing than there, but the bits that I would attach to the radiator mounting/baffle are in good shape. I pulled it out while I was refreshing the grille, and I've decided to do something better than a piece of 1X8 pine and a bungee chord. I figured I'd post this under "big cars" because this is one of those parts that is not available for big cars from the early 60's, so the thread is really only of interest to people with the big cars- or people who can't find a replacement battery tray.
Some pictures will help... This picture gives you a pretty good idea of how bad my battery tray is, and a clue as to how I hope to do better. That's the bottom view of the tray.
I had a little piece of steel laying around. It's only about 18 gauge, but that means I have half a chance of bending and shaping it with my meager tool set.
I'm actually pretty happy with the welds. With my $400 Harbor Freight wire feed unit and minimal skills as a welder, I was afraid I'd only blow holes in it, make a complete mess, and then I'd have to go to plan B (a piece of 1X8 and a bungee cord?). I'll clean up the welds with a bit of body filler and paint the tray black, and once the battery goes in, I'm thinking no one is going to criticize my welds, or my metal working- Hey, all I have is a couple hammers, a couple dollies and some blocks of wood. Considered, I don't think that's half bad. Still- the back edge remains unsupported, so I need to fab an "EL" bend that I can weld to the bottom of the back edge, and I guess there should be a couple bolts through the baffle panel to hold it in place. It's still only 18 gauge steel, so it doesn't have the strength to support a battery in that config.
That's the fit at the back edge. The piece sticking up has to either go, or get bent over flat with the top of the tray Something like this, I think...
It got to be 6 pm and I decided this is a good place to quit for today. I need to do a bit of shaping on this one before I try to weld it. I'm okay with the tray in general, so I'm going to cut out the badly rusted pieces of the factory tray and start thinking about how to seal it and paint it. I also have to get the battery ties down, and on the '64 Dynamic, I need a funky little "S" shaped fastener that bolts to the back of the radiator baffle panel, in addition to the typical foot long tie down bolt. There's still of bit of imagination and creating required, so I think it's Miller time. I'm going to hope you don't judge my filthy rug. This is my work space, but obviously I should drag a vacuum out here and clean this place up. Sorry about that.
Good job Dave!
I did about the same thing using the best parts of two trays and some fiberglass mat.
Even on a "rust free" New Mexico car like mine, the battery tray was hopelessly rusted.
I pretty much finished the tray. It's not pretty, but I'll try to clean it up some and paint it black. Then I can buy a battery mat if I want, or just let the battery cover it. It was actually great practice with my welding. I found that I wasn't feeding wire fast enough, which is why I had trouble running an actual bead. Once I turned up the wire feed rate- by a lot- My welds looked much better. It's very strong. I banged on it with a hammer to try to correct little problems with edges and shaping. I had moderate success, but more importantly, all the welds held.
Some pictures...
That's the piece, as crude as it is. That's the back edge. I bent a piece of metal to make an L shape and welded it along the flat edge of the top piece. It makes it really strong. This weld was tricky, and since it's on the bottom I didn't try to clean up the slag. I probably should- and if I worked it a little more, I could probably make the weld better too. Again from below. I should grind this down before painting, at least try to make it look better.
So that's where it's at for now. After I mock it up, I'll work on appearances, and start on the tie down.
Nice job. That should hold up really well.
I'm hoping for a better car show season and I get to run into you at one and check out your ride with all the work you've done on it.
Nice job. That should hold up really well.
I'm hoping for a better car show season and I get to run into you at one and check out your ride with all the work you've done on it.
Are you going to Shrewsbury in May? The Herbert Candy Mansion on the 9th, hosted by Eastern Ma Club- I'm not sure if it's GM, Oldsmobile only, or all cars. It's their "Spring Dust Off".
You know what makes a good welder?? A grinder! Great job on batt tray. Does that Olds take the long and skinny expensive battery?
Apparently yes. Originally it was a group 60K, which is about 13" by 6"and 9" tall. I bought a standard group 24 battery for it. I didn't even think about the original type until I started on this little project.
Are you going to Shrewsbury in May? The Herbert Candy Mansion on the 9th, hosted by Eastern Ma Club- I'm not sure if it's GM, Oldsmobile only, or all cars. It's their "Spring Dust Off".
I'll put it on my calendar, I wanted to go last year but I think the weather was looking real shabby so I didn't take the chance. Cruisin Bruce is showing it on his website.
I did some final welds, and lots of grinding down, then I decided to test fit the piece. Next I need to hit it with a rust inhibitor, then a seam sealer or body putty, and a coat of paint.
Here's the test fit- I'm pretty happy with it!
It looks like it belongs there. The whole thing needs to be rust proofed and painted... which is actually the plan.
I took the whole front off the car and cheated on the paint. It's a couple coats or Eastwood 2K epoxy primer and then their 2k under hood black. I say "cheated" because I painted it all in place, masked off the fenders and covered the engine. I think it looks great! Open the hood and see fresh paint, not rust and crap- that's what I'm talking about!
besides the battery tray, there used to be a hole rusted right through that panel under the front fender, just above where the wire is in the picture. The chrome trim also came off. The piece under it was scrubbed, sanded, and painted with the same Eastwood 2K under hood black I just wanted everything to look clean when you open the hood. These corner tins still need a good polishing, but I cleaned them up good before re-installing them The horns got taken out, cleaned and painted too front view, the whole shebang!
Do you think you'll be showing up at the car show (weather permitting of course)?
That's my plan for May 9th in Shrewsbury, at the Herbert Mansion. It's supposed to be a GM/Olds show, I think... Yeah, the Eastern Mass GMO Club. I put the radiator back in it today, and started it up. I've fixed the leak in the oil pan. I had failed to put the 2 little cork blocks under the rear main bearing cap- pretty stupid, but I'm still fairly new at the oddities of big early 60's Oldsmobiles. It's fixed now, live and learn. Oil change is done and the starter, motor mount, and idler arm are re-installed, so the whole job is done. I need to fab the funky part of the battery tie down, the piece that bolts to the "radiator baffle panel". It's got to be flat at one end to bolt to the flat panel, "S" shaped and threaded to accept the nut. I think I'm going to buy a short piece of 5/16" steel brake line and do some damage.
I also got the frozen screws out of the front turn signals so now I can clean them up and replace the bulbs. I wish I could replace the lenses but good luck finding those anywhere. And I might try to touch up the grille pieces a bit, just the painted parts, but they look good as is (not great, but quite good). I'm just waiting for my bumper. The chrome shop ran into an issue with their boiler or tank or something. That's the story anyway. It's a core I picked up from a guy in Cali so I still have my rusty old bumper on the car.
Dave - Sounds like a pleasant event at the Hebert Candy Mansion. Enjoy yourself. Wonder if they checked their calendar for the Rain Date because that makes no sense. It's either Saturday, May 16 or Sunday, May 17.
Dave - Sounds like a pleasant event at the Hebert Candy Mansion. Enjoy yourself. Wonder if they checked their calendar for the Rain Date because that makes no sense. It's either Saturday, May 16 or Sunday, May 17.
You certainly have been busy. When I saw it all apart I figured it'd be awhile getting it back together. It's looking good. Hope to see you there.
You're from Warwick and you used to do home improvement? We probably have met, or at least have friends in common. I lived in Oakland beach for a time. I have lots of friends from Pawtuxet Village, Pilgrim, and Gaspee Point, and I worked in home improvement myself in the Warwick/Cranston/Providence area for 15 years- East Greenwich, Pawtucket, wherever there was work. Before I moved to Worcester County, I was in Pontiac Village, on King Street. I bought a foreclosure property on King St for $65k back in the 90's, rehabbed it. Nicest house on the street when we sold it- I think so anyway.
Can I find a picture of it?
I grabbed this off Zillow... it looked better when I owned it. It sold recently for $400K Cute little bungalow- shabby neighborhood.
Last edited by davek1661; Apr 27, 2026 at 05:43 PM.
Yea, we might have crossed paths in our comings and goings getting supplies at the local stores.
Nice looking house, not much land to it though. If they got $400k for that then my house must be worth 1/2 mil..lol.
I used to row my kayak in the Pawtuxet River from that spot down river to the Pawtuxet Falls and then went up river to the Royal Mills in West Warwick other times.
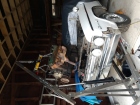
It's back together! I fabricated a battery tray, using what I could salvage of the old tray and 18 ga steel. I repaired a rust through in the inner fender/radiator baffle, cleaned and painted the radiator and the radiator support, and the radiator baffle panels. I pulled off the grille, head lamp assemblies and the front bumper, cleaned and painted the grille and nacelles. I cleaned up the electrical connections and replaced the rusted/frozen screws in the front markers/turn signals. While it was apart and on the lift I fixed a leak at the oil pan gasket and did an oil change. I tested the lights and blinkers- I also had the right side exhaust manifold planed and replace the gasket to fix an exhaust leak, and I got the power door locks working.
Mostly, the radiator, radiator support, battery tray, and all the associate metal parts got cleaned, sanded, repaired as needed, primed and painted. Grille has been refreshed, and all the electrical connections got a good once over, were tested and shown to work as designed.
I think I'm ready to wash it, detail it, and drive to Shrewsbury for the dust off next weekend!
All the silver painted surfaces were repainted with an aluminum color paint Everything you see has been repainted- Not new parts, just painted the old ones! The turn signals came out, got cleaned and repaired as needed. That's a nice look... Mostly done- I still have some cable management to do Ready to come off the jacks