


394 Dual Carbs Questions


Thread Starter
Registered User
Joined: Mar 2007
Posts: 99
From: Oregon
Went out today to pull the exhaust manifolds and ended up pulling the engine and transmission. How does that happen? 
Looks like the cam is a 280H. Any idea who makes this and the specs?

The 394 needs some TLC and paint:

Transmission:


I found this looking for some bolts to bolt the engine on the engine stand:

I assume I should look into progressive linkage. Yes?
Looks like the cam is a 280H. Any idea who makes this and the specs?
The 394 needs some TLC and paint:
Transmission:
I found this looking for some bolts to bolt the engine on the engine stand:
I assume I should look into progressive linkage. Yes?
Last edited by bccsrc; Mar 30, 2014 at 09:36 PM. Reason: Fixed link
Thread Starter
Registered User
Joined: Mar 2007
Posts: 99
From: Oregon
Pretty much! If the engine wasn't in the way I could paint or clean this easier.....
I've read some on the progressive linkage. Do you think its a good idea? I can see both ways being good.
Any reason why I shouldn't just use the Edelbrock Dual Quad Progressive Linkage Kit #7094?
Speaking of the carburetors, what about the fuel lines? I kind of like the idea of putting either the fuel distribution block on the firewall and running the lines to the carburetors or something like this?

Thoughts? I'd like to have a fuel pressure gauge somewhere in the mix of this stuff as well.
Do these Edelbrock #6593 air/fuel ratio monitors work?
Can I get a way with wrapping the engine in plastic at night when I'm done working on it? Either that, or just setting the heads and intake back on it when I'd done with it for the night? As you can see I'm traumatized by thought of rust...
Thanks,
Brandon
I've read some on the progressive linkage. Do you think its a good idea? I can see both ways being good.
Any reason why I shouldn't just use the Edelbrock Dual Quad Progressive Linkage Kit #7094?
Speaking of the carburetors, what about the fuel lines? I kind of like the idea of putting either the fuel distribution block on the firewall and running the lines to the carburetors or something like this?
Thoughts? I'd like to have a fuel pressure gauge somewhere in the mix of this stuff as well.
Do these Edelbrock #6593 air/fuel ratio monitors work?
Can I get a way with wrapping the engine in plastic at night when I'm done working on it? Either that, or just setting the heads and intake back on it when I'd done with it for the night? As you can see I'm traumatized by thought of rust...
Thanks,
Brandon
Thread Starter
Registered User
Joined: Mar 2007
Posts: 99
From: Oregon

Phantom Phixer
Joined: Dec 2011
Posts: 5,527
From: Apopka, FL
Registered User
Joined: Feb 2011
Posts: 1,192
Spray WD-40 on any bare metal and cover with a garbage bag, no rust.
Thread Starter
Registered User
Joined: Mar 2007
Posts: 99
From: Oregon
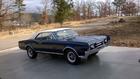
Spent most of today cleaning up parts and painting them. Does this look like the correct red color for this 394? Hope so.....

This bellcrank has me puzzled. Seems like it has been welded at one point. I broke the weld trying to get it to move. Is this missing a piece and should I be able to disassemble it further?

Thanks,
Brandon
This bellcrank has me puzzled. Seems like it has been welded at one point. I broke the weld trying to get it to move. Is this missing a piece and should I be able to disassemble it further?
Thanks,
Brandon

Registered User
Joined: Apr 2010
Posts: 988
Great progress. I agree, you should look into the progressive linkage. As far as the fuel pressure gauge - purchase one that is liquid filled. If not, the needle will vibrate. Be careful about the mounting position. Close to the carbs worked best for me. Keep up the good work, and posting photos of your progress.
Thread Starter
Registered User
Joined: Mar 2007
Posts: 99
From: Oregon
I was hoping this was the correct red color. It was $40.00 for 2 cans of spray paint... It looks like the existing color of the engine was more orange then red, because these are two different colors for sure.
Great progress. I agree, you should look into the progressive linkage. As far as the fuel pressure gauge - purchase one that is liquid filled. If not, the needle will vibrate. Be careful about the mounting position. Close to the carbs worked best for me. Keep up the good work, and posting photos of your progress.
Question about tuning the carbs. How should I tune them? Can I run the engine on one carb and tune each one separately and then hook up the (progressive) linkage?
Phantom Phixer
Joined: Dec 2011
Posts: 5,527
From: Apopka, FL
The rear carb should be adjusted the same as a single 4 barrel. I.E. Choke, idle mixture, idle speed etc.
The front carb should have the idle speed screw backed off entirely so the throttle plates are closed tight. The idle mixture screws should be turned all the way in. And the choke should be rendered inoperative or removed.


Phantom Phixer
Joined: Dec 2011
Posts: 5,527
From: Apopka, FL
The largest one obviously belongs to the oil filter adapter .
The oblong one with 3 holes is oil pickup .
Large round one is distributor to block gasket.
Four rubber washers are probably for center bolted valve covers.
Not sure on the cork pieces .
Many gasket sets will include extra gaskets so that the set will fit a larger range of years. It is not uncommon to have "extra" gaskets in a set .
The oblong one with 3 holes is oil pickup .
Large round one is distributor to block gasket.
Four rubber washers are probably for center bolted valve covers.
Not sure on the cork pieces .
Many gasket sets will include extra gaskets so that the set will fit a larger range of years. It is not uncommon to have "extra" gaskets in a set .
Phantom Phixer
Joined: Dec 2011
Posts: 5,527
From: Apopka, FL
Registered User
Joined: Aug 2012
Posts: 413
From: Adelaide south Australia
Kind of changing my mind about having the heads rebuilt. I will check tomorrow to see what it would run. How can I prevent stuff from rusting up, like the cylinders? My thoughts is to leave the heads setting on the engine.... ? I lose sleep over the thought of letting this sit to much and seeing rust on the engine.
If you choose not to rebuild the heads at least replace the valve seals. it will smoke at idle with a few missing.
Check the shaft diameter as sometimes they fit over sized shafts and just rebore the guides.
Scott
Registered User
Joined: Nov 2006
Posts: 1,918
From: SE Wisconsin
Thread Starter
Registered User
Joined: Mar 2007
Posts: 99
From: Oregon
Worked on painting the grill and engine compartment this weekend:

I think I would like the fuel pressure gauge and lines to be at a 45 degree angle to the carbs.
Before:

After:

Any idea what I need for this fuel pump?

I should be getting the head gaskets this week.
Pretty much tossed aside the Edelbrock progressive linkage for the Lokar TCB-PLR2 8-5/8" to 9" Center Distance Progressive Linkage Rod. Its about 200% better IMO.
I think I would like the fuel pressure gauge and lines to be at a 45 degree angle to the carbs.
Before:
After:
Any idea what I need for this fuel pump?
I should be getting the head gaskets this week.
Pretty much tossed aside the Edelbrock progressive linkage for the Lokar TCB-PLR2 8-5/8" to 9" Center Distance Progressive Linkage Rod. Its about 200% better IMO.
Last edited by bccsrc; Apr 28, 2014 at 05:42 PM.
Thread Starter
Registered User
Joined: Mar 2007
Posts: 99
From: Oregon
I picked up the heads today. They took a while to get done but I know they were built by a professional. The heads needed new valves, valve springs, valve seats, valve seals and some other work done to them. $800 worth of labor and parts but he said they are basically like brand new.
Kind of funny another guy I know was in where I was getting the heads rebuilt. He spotted them on the floor all rebuilt and he knew right away what they were. He said they were excellent heads for that era. Sound right?
Can't wait for summer to get here. I'm ready to get this engine back in the car and take it out for a summer drive.
Is there some sort of guide I should use when rebuilding the engine. I can't remember exactly which gaskets need silicone which ones don't.
Kind of funny another guy I know was in where I was getting the heads rebuilt. He spotted them on the floor all rebuilt and he knew right away what they were. He said they were excellent heads for that era. Sound right?
Can't wait for summer to get here. I'm ready to get this engine back in the car and take it out for a summer drive.
Is there some sort of guide I should use when rebuilding the engine. I can't remember exactly which gaskets need silicone which ones don't.

Oldsdruid
Joined: Dec 2007
Posts: 10,627
From: Southside Vajenya
There was a reason the 394 ruled the Gasser classes in early 60s, and the bulletproof bottom end and great for their time heads affected that.
I can guarantee what happened with that set of head gaskets. You said "394" and the parts or warehouse guy heard "390 Ford". I've had it happen several times.
Have had it happen on later stuff too. Ordered a choke pull-off for my QuadraJet equipped Toronado and one for a Motorcraft carb came in. Parts guy says "You said 69 Torino." No hell I didn't.
I can guarantee what happened with that set of head gaskets. You said "394" and the parts or warehouse guy heard "390 Ford". I've had it happen several times.
Have had it happen on later stuff too. Ordered a choke pull-off for my QuadraJet equipped Toronado and one for a Motorcraft carb came in. Parts guy says "You said 69 Torino." No hell I didn't.

Registered User
Joined: Oct 2004
Posts: 7,743
From: Forest Ranch Ca.
On post 57 the little cork gasket pieces look to be the gaskets that fit on the rear main cap. I'm not sure why they would be in a top gasket set but that sure looks to be what they are. If you went that deep into the engine I sure hope they were installed or you will be doing a tear down again...Tedd
Last edited by Tedd Thompson; Dec 30, 2014 at 11:06 AM.
Thread Starter
Registered User
Joined: Mar 2007
Posts: 99
From: Oregon
Just getting around to what I have left after getting my car back from a divorce. I need to get the following:
Lifters
Pushrods
Rocker arm assembly (shaft and rocker arms?)
Where should I purchase these items?
Lifters
Pushrods
Rocker arm assembly (shaft and rocker arms?)
Where should I purchase these items?
Thread Starter
Registered User
Joined: Mar 2007
Posts: 99
From: Oregon
How much are you thinking?
I found this USA Parts Supply, they are wanting $60.80 for the push rods and gulp $300.32 for the valve lifters. The rocker arms for both left and ride add up to $228. I don't think they sell the rocker shafts.
I'm concerned with the push rods since dad had 20,000 milled off the heads. Will the stock push rods work?
Also how do I tell what year this engine block is?
I found this USA Parts Supply, they are wanting $60.80 for the push rods and gulp $300.32 for the valve lifters. The rocker arms for both left and ride add up to $228. I don't think they sell the rocker shafts.
I'm concerned with the push rods since dad had 20,000 milled off the heads. Will the stock push rods work?
Also how do I tell what year this engine block is?

Registered User
Joined: Aug 2004
Posts: 137
From: WV
As far as the pushrods go, I think you should be ok. Factory used steel shim gaskets and most all replacements are composite which usually are a tad bit thicker. Let me look at what spares I have before I talk price. In case my stuff isn't up to par. I'll try to have pics and such by the end of the weekend. I will also dig around a bit to see what the differences in the blocks are. Not sure there is too much different in the blocks themselves between 59 and 64 other than the timing covers and that bolt pattern. early 394's used the cast iron front cover and the 63-64's used an aluminum cover.
Thread Starter
Registered User
Joined: Mar 2007
Posts: 99
From: Oregon
As far as the pushrods go, I think you should be ok. Factory used steel shim gaskets and most all replacements are composite which usually are a tad bit thicker. Let me look at what spares I have before I talk price. In case my stuff isn't up to par. I'll try to have pics and such by the end of the weekend. I will also dig around a bit to see what the differences in the blocks are. Not sure there is too much different in the blocks themselves between 59 and 64 other than the timing covers and that bolt pattern. early 394's used the cast iron front cover and the 63-64's used an aluminum cover.
You wouldn't happen to have a spare one of these throttle/kickdown things would you?

Thanks,
Brandon
Phantom Phixer
Joined: Dec 2011
Posts: 5,527
From: Apopka, FL
Thread Starter
Registered User
Joined: Mar 2007
Posts: 99
From: Oregon
Any idea which one of these rocker arm shafts I might need?
#RAS42012 (18 15/16 inches in length) with end brackets two shafts per purchase
or #RAS42013 (17 7/8 inches in length) without end brackets two shafts per purchase
#RAS42012 (18 15/16 inches in length) with end brackets two shafts per purchase
or #RAS42013 (17 7/8 inches in length) without end brackets two shafts per purchase


Phantom Phixer
Joined: Dec 2011
Posts: 5,527
From: Apopka, FL
You may very well have adjustable rocker arms and solid lifters .
Fusick Automotive has paint they claim is original color .
However , much cheaper is Ford red . Which is available at most auto parts stores . It's reported to be a close match .
Thread Starter
Registered User
Joined: Mar 2007
Posts: 99
From: Oregon
Let's see a shot of your rocker arms . Please .
You may very well have adjustable rocker arms and solid lifters .
Fusick Automotive has paint they claim is original color .
However , much cheaper is Ford red . Which is available at most auto parts stores . It's reported to be a close match .
You may very well have adjustable rocker arms and solid lifters .
Fusick Automotive has paint they claim is original color .
However , much cheaper is Ford red . Which is available at most auto parts stores . It's reported to be a close match .
I went ahead and ordered the Ford red. Looks pretty close to what I need. Now I just need to get the engine out of storage and put it in the garage and get it put back together.


