Pulling the motor
 May 24th, 2014, 01:34 PM
#1281
Registered User
Join Date: Feb 2010
Location: Vancouver Island, Canada
Posts: 1,512
I have the room (although not for long term storage) and most importantly I have acquisition permission from the project manager, aka SWMBO.
I've been doing VWs for decades and have boxes, sheds and cars full of parts so no stranger to the benefits of a parts car! (Or the pressures to get rid of some of the crap)
Just trying to determine whether it's worth picking up, and leaning towards "yes"...then deciding it's fate. Went for a look at it this morning. But I'll probably start my own thread on that when the time comes rather than send yours off the rails :-)
 May 24th, 2014, 05:22 PM
#1282
Registered User
Thread Starter
Join Date: Aug 2013
Location: Central Illinois
Posts: 3,900
I have the room (although not for long term storage) and most importantly I have acquisition permission from the project manager, aka SWMBO.
I've been doing VWs for decades and have boxes, sheds and cars full of parts so no stranger to the benefits of a parts car! (Or the pressures to get rid of some of the crap)
Just trying to determine whether it's worth picking up, and leaning towards "yes"...then deciding it's fate. Went for a look at it this morning. But I'll probably start my own thread on that when the time comes rather than send yours off the rails :-)
I've been doing VWs for decades and have boxes, sheds and cars full of parts so no stranger to the benefits of a parts car! (Or the pressures to get rid of some of the crap)
Just trying to determine whether it's worth picking up, and leaning towards "yes"...then deciding it's fate. Went for a look at it this morning. But I'll probably start my own thread on that when the time comes rather than send yours off the rails :-)

I'll look forward to the thread.
 May 24th, 2014, 06:01 PM
#1283
Justin
Join Date: Mar 2012
Location: utah
Posts: 3,448
May 24th, 2014, 08:37 PM
#1285
Registered User
Thread Starter
Join Date: Aug 2013
Location: Central Illinois
Posts: 3,900
Yeah, starting to wish I hadn't let the wife in on that one. The truth hurts!
Thanks Eric, that's what I ended up doing with the longer pins. At least I guessed something right
Thanks Eric, that's what I ended up doing with the longer pins. At least I guessed something right
May 24th, 2014, 08:52 PM
#1288
Registered User
Thread Starter
Join Date: Aug 2013
Location: Central Illinois
Posts: 3,900
Well I should have known better than to copy a brake setup that wasn't working to begin with. I was just mad at myself. I remember thinking, "huh, kinda' looks like that star gear should be kicked by that adjuster plate but since this was the way it was put together...." Just wish I would have listened to my gut. No matter, I'm getting pretty fast at it now.
May 27th, 2014, 06:35 AM
#1290
Connoisseur d'Junque
Join Date: Sep 2010
Location: The Hudson Valley
Posts: 21,183
Excellent point.
The adjuster arms have to be able to wind the screws outward by pressing downward on the outside, which means that the right side screws outward counterclockwise while the left screws outward clockwise.
The screws are stamped "R" and "L" on their ends.
- Eric
The adjuster arms have to be able to wind the screws outward by pressing downward on the outside, which means that the right side screws outward counterclockwise while the left screws outward clockwise.
The screws are stamped "R" and "L" on their ends.
- Eric
May 27th, 2014, 06:39 AM
#1291
Registered User
Join Date: Jul 2013
Location: Mo-Ray-Al, K-Bec.
Posts: 1,815
They say you learn best from yer mistakes ... never be ashamed of making the first one. As for She Who Must Be Obeyed .... you're not allowed to you that term until you've sat through at least one entire season of Rumpole for the Bailey so that you may use the term correctly.
Be strong ... it's almost worth it.
Be strong ... it's almost worth it.
May 27th, 2014, 09:18 AM
#1292
Registered User
Thread Starter
Join Date: Aug 2013
Location: Central Illinois
Posts: 3,900
Excellent point.
The adjuster arms have to be able to wind the screws outward by pressing downward on the outside, which means that the right side screws outward counterclockwise while the left screws outward clockwise.
The screws are stamped "R" and "L" on their ends.
- Eric
The adjuster arms have to be able to wind the screws outward by pressing downward on the outside, which means that the right side screws outward counterclockwise while the left screws outward clockwise.
The screws are stamped "R" and "L" on their ends.
- Eric
http://peoria.craigslist.org/pts/4464281146.html
Trying to decide of the savings are worth the rust and unilug issue.
They say you learn best from yer mistakes ... never be ashamed of making the first one. As for She Who Must Be Obeyed .... you're not allowed to you that term until you've sat through at least one entire season of Rumpole for the Bailey so that you may use the term correctly.
http://www.amazon.com/Rumpole-Bailey.../dp/B000CRR360
Be strong ... it's almost worth it.
http://www.amazon.com/Rumpole-Bailey.../dp/B000CRR360
Be strong ... it's almost worth it.
May 27th, 2014, 09:48 AM
#1294
Registered User
Thread Starter
Join Date: Aug 2013
Location: Central Illinois
Posts: 3,900
May 27th, 2014, 05:12 PM
#1297
Hookers under Hood
Join Date: Nov 2013
Location: Ontario, Canada
Posts: 3,543
Mac If you can get them for $500 I would go for it myself, the rubber looks good really. I would clean them up best you can till you get a nice new set IMO.
( We all know how you can make something look awesome!!!)
I think its a deal .... you'll be hooked up rubber and rims to start.
If you buy new ones one day put them back up for sale, they will always sell. I have the unilug on my 76 I haven't had any issues with them, not as easy to install but put your 2 feet under the tire to get the lugs in properly and your good to go with them. Balance them and keep the weight to the inside!!! Get some good oval washers and stepped lug nuts in the event you purchase them.
Put-r-ther .... Eric!!
Last edited by 76olds; May 27th, 2014 at 05:21 PM.
May 27th, 2014, 05:25 PM
#1298
Justin
Join Date: Mar 2012
Location: utah
Posts: 3,448
Mac, IMO I think that one wheel the rust has lifted the chrome. I think at 500 you would need to rechrome them to be really nice yes you could clean them up and run with them but I wouldn't pay anything over 300.00 unless the tires are fairly new (dot date code ) I think a new set is like 800.00 plus tires so around 1500? Slotted wheels are okay but check and make sure they aren't Messed up I have I e that came loose and messed the lug holes up
May 27th, 2014, 05:43 PM
#1299
Hookers under Hood
Join Date: Nov 2013
Location: Ontario, Canada
Posts: 3,543
oldstata..... I used the oval washers on my slotted rims and they bolt up nicely, just need patience and two hands when installing them for proper washer position, but you are definitly correct they will get messed up without the proper washers. Plus the fact they will shake horribly at highway speed.
May 27th, 2014, 07:26 PM
#1301
Used cragars in ok driver shape 250 and the rest depends on the shape of the rubber. I used to buy and sell wheels. I would buy mags , and cargars. I would clean them up and sell em for a nice profit. Specially ebay the mags get bought up fast by the rat rod guys. We did new cragars for my dads 77 Pontiac with wheels and tires for about 1300 with the correct lug nuts and washers.
Mac expand your search into the Chicago area stuff comes up cheap.
Mac expand your search into the Chicago area stuff comes up cheap.
May 27th, 2014, 07:28 PM
#1302
http://chicago.craigslist.org/sox/pts/4486468994.html
These are 2 towns over from me
http://chicago.craigslist.org/nwc/pts/4448586539.html
These are 2 towns over from me
http://chicago.craigslist.org/nwc/pts/4448586539.html
Last edited by coppercutlass; May 27th, 2014 at 07:32 PM.
May 27th, 2014, 07:39 PM
#1304
On the cragars yeah they are 14's but the rubber looks new and 14's don't look bad with the right rubber. Now on the other I add I showed its mags and he has 15's. That was just a few links.
May 27th, 2014, 07:42 PM
#1305
probably not mac's cup of tea but for 700 these are a deal !
http://chicago.craigslist.org/wcl/pts/4487818470.html
http://chicago.craigslist.org/wcl/pts/4442686628.html
http://chicago.craigslist.org/wcl/pts/4487818470.html
http://chicago.craigslist.org/wcl/pts/4442686628.html
May 27th, 2014, 08:52 PM
#1306
Registered User
Thread Starter
Join Date: Aug 2013
Location: Central Illinois
Posts: 3,900
Thanks fellas. I took a pass on those wheels. It was the rust that held me up but he also couldn't tell me the backspacing and if you look at the pic of the Malibu he has it jacked way up to clear the tires that stick out too far.
I'm shopping for new right now. Does Summit mount tires? I don't see the point in buying wheels one place, tires another, and getting overcharged to have them mounted locally.
For the record, and I've been measuring and doing the math all day, I'm going with 15x8 rears with 4.25" backspace with 275/60-15s. But I'm confused about the fronts. The least amount of backspacing I can get in the Cragar SS 7 inch rim is 4" (unless I go reversed). Is that too much backspacing for the front? I'm thinking of running 235/60-15s in the front.
Wheel/tire combos can be very overwhelming.
May 27th, 2014, 08:56 PM
#1308
Registered User
Thread Starter
Join Date: Aug 2013
Location: Central Illinois
Posts: 3,900
probably not mac's cup of tea but for 700 these are a deal !
http://chicago.craigslist.org/wcl/pts/4487818470.html
http://chicago.craigslist.org/wcl/pts/4442686628.html
http://chicago.craigslist.org/wcl/pts/4487818470.html
http://chicago.craigslist.org/wcl/pts/4442686628.html

Last edited by Macadoo; May 27th, 2014 at 08:59 PM.
May 27th, 2014, 08:58 PM
#1309
Registered User
Thread Starter
Join Date: Aug 2013
Location: Central Illinois
Posts: 3,900
I'll call around again tomorrow but the places I called today can't even order the Cragars. That would greatly simplify things though, wouldn't it.
May 28th, 2014, 04:10 AM
#1311
Hookers under Hood
Join Date: Nov 2013
Location: Ontario, Canada
Posts: 3,543
I would always obey in this case... don't forget to give back
(-
May 28th, 2014, 03:32 PM
#1312
Registered User
Thread Starter
Join Date: Aug 2013
Location: Central Illinois
Posts: 3,900
Okay, putting the wheels on hold for a few days. I'm slated to drop the motor back in on Saturday and would appreciate any tips, tricks, little known techniques (or well known techniques).
1. I was thinking I could get a couple of extra long trans housing-to-block bolts, cut the heads off, thread them into the block, and use them as guide pins. Yeah or nay?
2. Have the daughter lower (and angle) the motor into the bay while I lay underneath and jimmy the trans onto the guide pins (not a fan of laying underneath while the motor goes in. Have the car on jack stands?)
3. Use a long Philips screwdriver to line up the motor mount holes
4. Bolt the headers on before the the engine is lowered all the way in? Not sure when the headers should go on. (You can tell I'm nervous, I'm stuttering.."the the")
***Prime the engine the night before***
Anything else?
 May 28th, 2014, 06:08 PM
#1314
Connoisseur d'Junque
Join Date: Sep 2010
Location: The Hudson Valley
Posts: 21,183
You have limited clearance in pretty much all directions. Creating a situation where the engine has to be even more forward in order to engage these bolts may cause more problems than it solves.
And don't use jackstands. You'll have a hard enough time getting the motor over the fenders - you don't need the car to be even higher.
You want to have the transmission propped or cabled up (nylon web straps aren't bad) into roughly its anatomical position (or, actually, pointed just slightly upward), so that you don't have to move it. Then you angle the back of the engine downward a little bit as you engage the guide pins and the center of the converter, then you use both arms and a good deal of strength to shake / wiggle the block down and into full engagement with the transmission, as you guide it to sit down properly on the motor mounts.
You will not get it to slide in the first time, and probably not the tenth, but just stick with it, letting it down a bit, then pumping it back up, then doing it again, until you've got the angle just right, and it just drops in.
A floor jack under the transmission may allow you to fine tune its angle as you go.
You may or may not need this - usually it will drop into them with a good strong pull in the right direction.
Other advice? Remember the laws of inertia: A 600 pound engine moving very slowly can be very hard to stop, and can do a tremendous amount of damage in slow motion.
- Eric
Last edited by MDchanic; May 28th, 2014 at 06:11 PM.
May 28th, 2014, 07:51 PM
#1315
Registered User
Join Date: Apr 2010
Posts: 978
I work in the service department for Waukegan Tire. I know it's not really too close to you, and I'm not trying to sell you anything, but you should check out our website.
http://www.waukegantire.com/index.htm
It might help you get some ideas of how many different rims are available. The Craigers are definitely a classic look, I guess I'm just tired of them. There's so many cars out there running around with them. Why not be different?
As far as tips on engine install:
1) Extra hands and eyes are good, but inexperienced helpers can be disastrous.
2) I like getting the car up on jack stands. It's easier for me to check alignment from below.
3) You might want to check into renting an engine angle lift bar. This allows you to change the angle of the engine while installing.
4) Check to see if you can easily mount your starter with the headers installed.
5) I like to support the trans with a jack and a piece of plywood under the pan.
6) After you get some of the bell housing bolts started, draw them in evenly.
7) Sometimes it's easier to tighten the upper bell housing bolts with a long extension and a swivel socket on an impact gun, with the transmission lowered in the back.
8) Be careful not to pinch any wires between the trans and engine.
9) Make sure the torque converter is pushed all the way in.
10) I usually place the headers in as the engine is going down. You can use bungi chords to hold them on the inner fenders.
11) I may be a little ****, but I like to use a torque wrench on every fastener that I can. Be sure to use blue lock tite on the flexplate to crank bolts.
12) Do everything you can to prep for the install, including protecting anything shiney that might get scuffed or scratched during the man handling. Have all your bolts cleaned and organized. Have a to do checklist before attempting the fire up.
Hope some of these tips helped. I'm sure you'll do just fine.
May 28th, 2014, 08:22 PM
#1316
Registered User
Thread Starter
Join Date: Aug 2013
Location: Central Illinois
Posts: 3,900
I don't think so.
You have limited clearance in pretty much all directions. Creating a situation where the engine has to be even more forward in order to engage these bolts may cause more problems than it solves. Understood
Don't lay underneath. At least not unless you're sure that your daughter knows she's not a beneficiary. - Good point
And don't use jackstands. You'll have a hard enough time getting the motor over the fenders - you don't need the car to be even higher. I'll think about this one. I'd like the extra room underneath
You want to have the transmission propped or cabled up (nylon web straps aren't bad) into roughly its anatomical position (or, actually, pointed just slightly upward), so that you don't have to move it. Then you angle the back of the engine downward a little bit as you engage the guide pins and the center of the converter, then you use both arms and a good deal of strength to shake / wiggle the block down and into full engagement with the transmission, as you guide it to sit down properly on the motor mounts.
You will not get it to slide in the first time, and probably not the tenth, but just stick with it, letting it down a bit, then pumping it back up, then doing it again, until you've got the angle just right, and it just drops in.
A floor jack under the transmission may allow you to fine tune its angle as you go. - I was planning on using the floor jack here. I thought an upward angle would be helpful
You may or may not need this - usually it will drop into them with a good strong pull in the right direction. - Won't hurt to have it handy I suppose
Other advice? Remember the laws of inertia: A 600 pound engine moving very slowly can be very hard to stop, and can do a tremendous amount of damage in slow motion. - Hence my nervousness ;-)
- Eric
I work in the service department for Waukegan Tire. I know it's not really too close to you, and I'm not trying to sell you anything, but you should check out our website.
http://www.waukegantire.com/index.htm
It might help you get some ideas of how many different rims are available. The Craigers are definitely a classic look, I guess I'm just tired of them. There's so many cars out there running around with them. Why not be different? - Yeah, I know they're a little clich� but I've always wanted a set and the wife likes them....and ONLY them, lol.
As far as tips on engine install:
1) Extra hands and eyes are good, but inexperienced helpers can be disastrous.
2) I like getting the car up on jack stands. It's easier for me to check alignment from below.
3) You might want to check into renting an engine angle lift bar. This allows you to change the angle of the engine while installing. - The picker I rent has the bar with it. A nice surprise and definitely an advantage
4) Check to see if you can easily mount your starter with the headers installed. - Already checked, no issues. They're shorty headers.
5) I like to support the trans with a jack and a piece of plywood under the pan. - Thanks for the plywood reminder.
6) After you get some of the bell housing bolts started, draw them in evenly. - Understood
7) Sometimes it's easier to tighten the upper bell housing bolts with a long extension and a swivel socket on an impact gun, with the transmission lowered in the back. - I have pictures of my double box wrench with duct tape setup for the right-upper housing bolts, lol
8) Be careful not to pinch any wires between the trans and engine. - Understood
9) Make sure the torque converter is pushed all the way in. - And prefilled, yes?
10) I usually place the headers in as the engine is going down. You can use bungi chords to hold them on the inner fenders. - Good tip.
11) I may be a little ****, but I like to use a torque wrench on every fastener that I can. Be sure to use blue lock tite on the flexplate to crank bolts. - I didn't know this one, thanks!
12) Do everything you can to prep for the install, including protecting anything shiney that might get scuffed or scratched during the man handling. Have all your bolts cleaned and organized. Have a to do checklist before attempting the fire up. - Check!
Hope some of these tips helped. I'm sure you'll do just fine.
May 29th, 2014, 05:39 AM
#1318
Registered User
Thread Starter
Join Date: Aug 2013
Location: Central Illinois
Posts: 3,900
Thanks Justin.
May 30th, 2014, 12:11 PM
#1319
Registered User
Thread Starter
Join Date: Aug 2013
Location: Central Illinois
Posts: 3,900
My trans front seal installer tool made from parts laying around the shop
[IMG]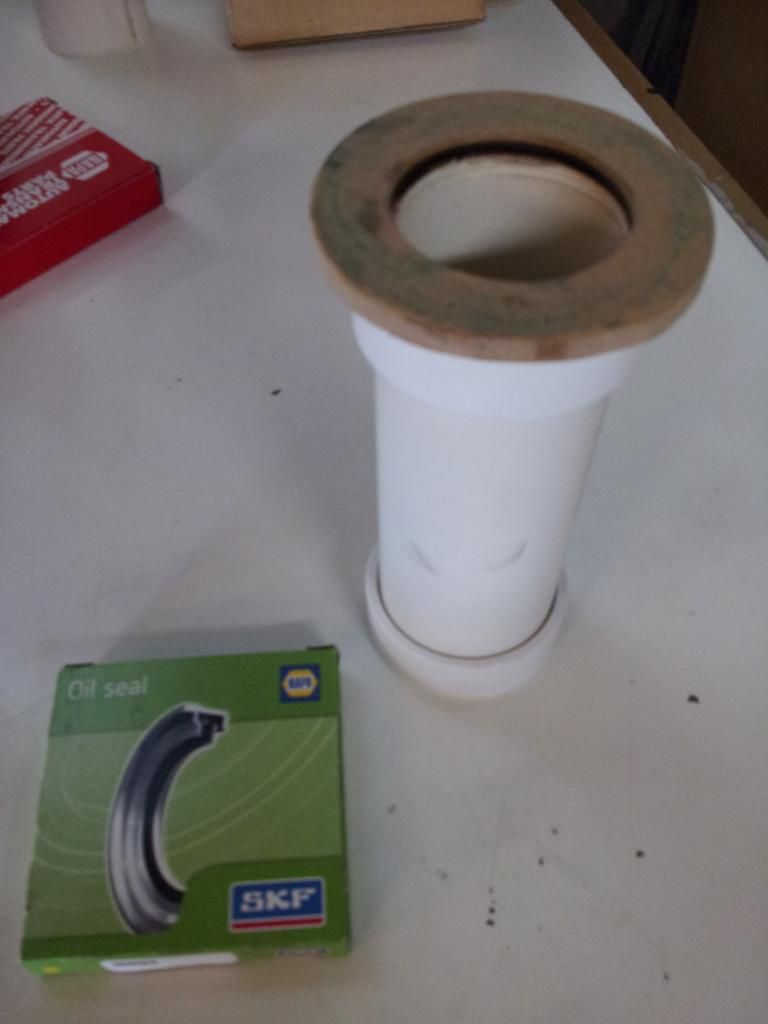 [/IMG]
Dryer and condenser are back in as well.
[IMG]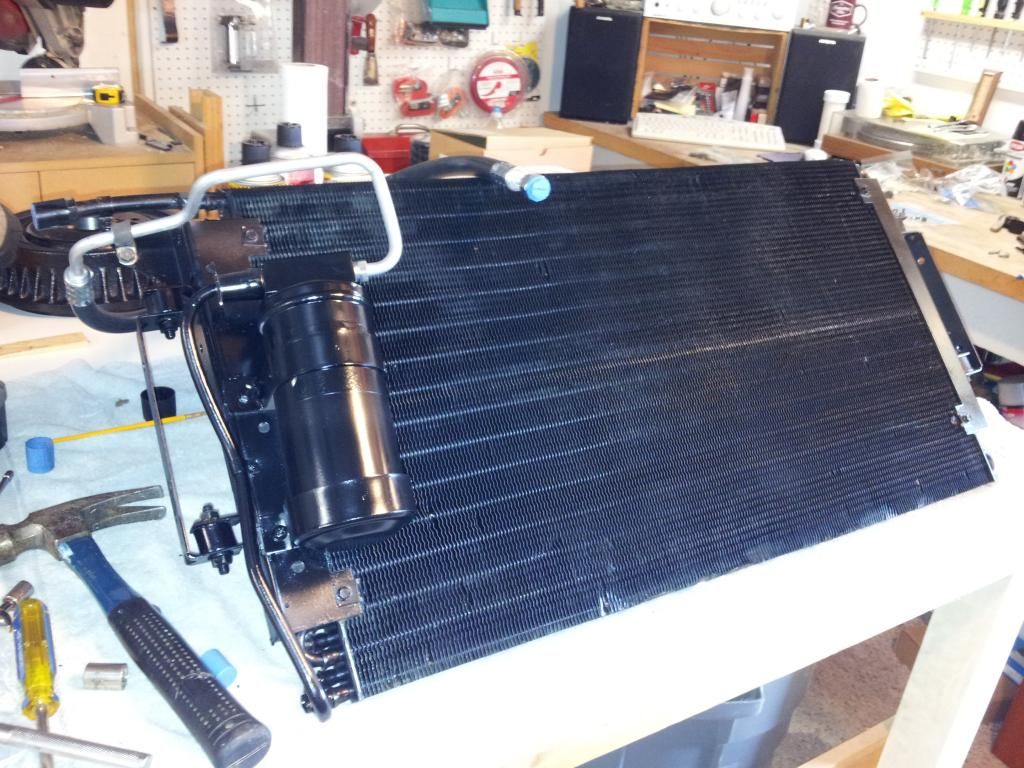 [/IMG]
Bleeding the master cylinder. Seemed like it was taking forever to get all the bubbles out until I realized there were paint flecks floating around inside. Why do they paint the orifices?
[IMG]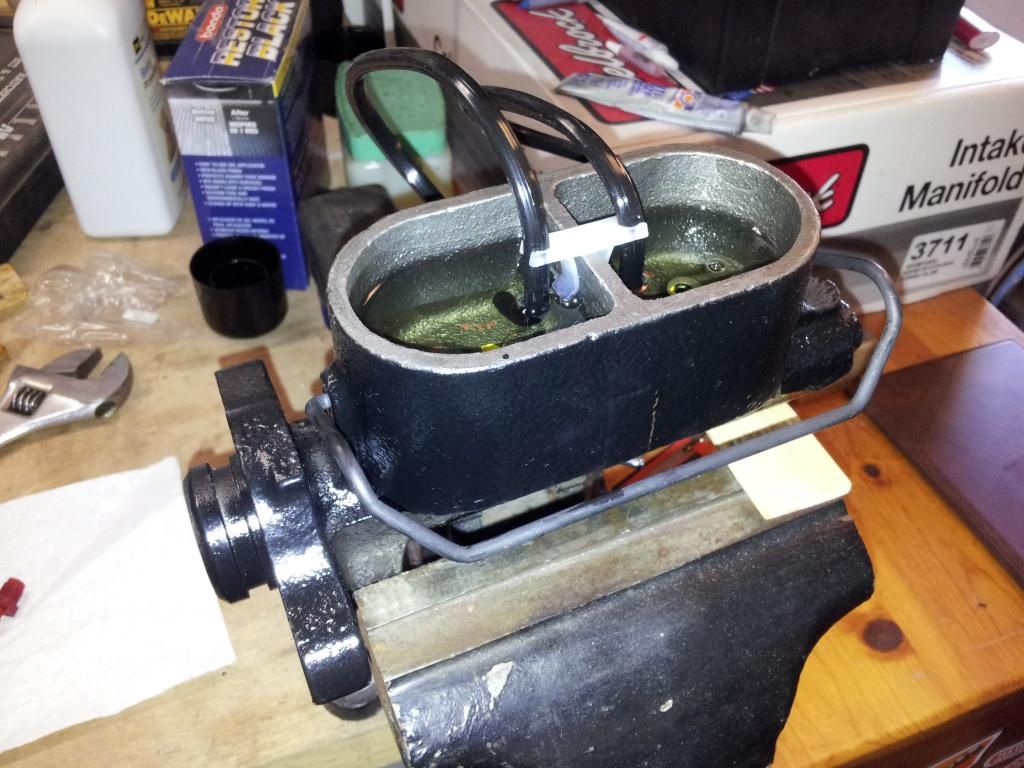 [/IMG]
Brake booster fun. This was a lot easier before I got something called "golfer's elbow". And I don't even golf")
[IMG]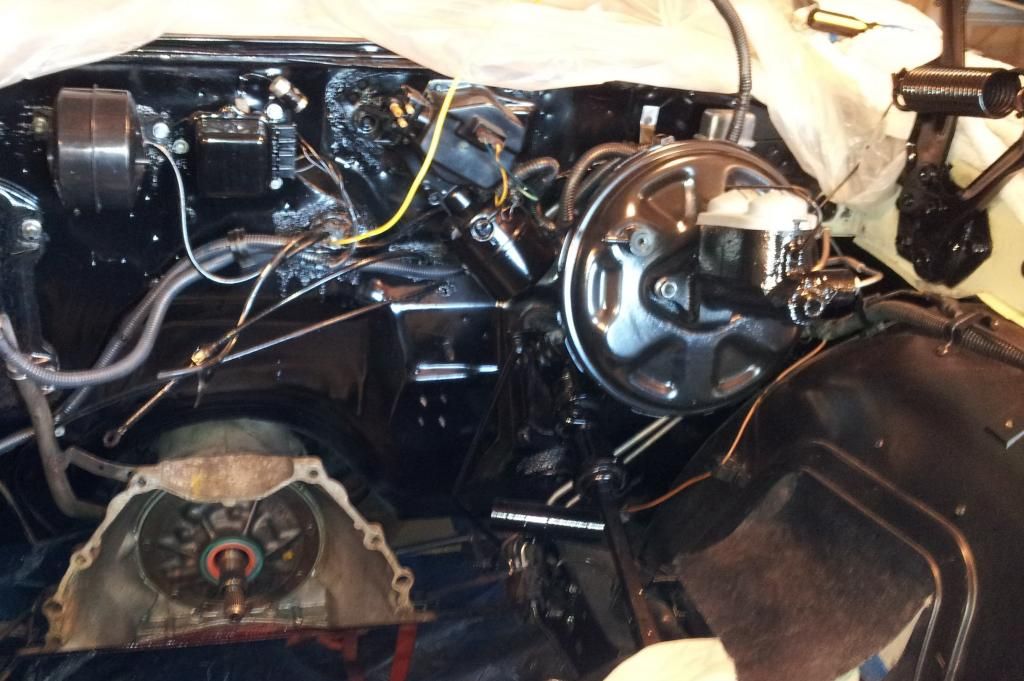 [/IMG]
A few more things on the list checked off.
[IMG]
 [/IMG]
Dryer and condenser are back in as well.
[IMG]
 [/IMG]
Bleeding the master cylinder. Seemed like it was taking forever to get all the bubbles out until I realized there were paint flecks floating around inside. Why do they paint the orifices?
[IMG]
 [/IMG]
Brake booster fun. This was a lot easier before I got something called "golfer's elbow". And I don't even golf
[IMG]
 [/IMG]
A few more things on the list checked off.
Last edited by Macadoo; May 30th, 2014 at 12:14 PM.


