When you click on links to various merchants on this site and make a purchase, this can result in this site earning a commission. Affiliate programs and affiliations include, but are not limited to, the eBay Partner Network.
My son and I put on the upper and lower rad hoses last night. Found more rust then I want to see but that's a problem for another day. We started putting anti freeze in the rad and got about 6 liters in and it started leaking out the frost plug by the front passenger cylinder. I picked up a 1.5" frost plug to replace it and some high temp silicone, problem is I'm not sure how to get the old one out and the new one in with out removing the whole engine. I know this is a temp fix and I'll have to replace the coolant after running it for a bit. I just hope they didn't run the engine dry and over heat it.
Thanks guys. I picked up a block heater for cheap so that will do a temp fix. Just need to remove the old one which shouldn't be to hard if I can find a lip on it.
Always a possibility the coolant froze esp if you don't have good history on the car. If so better to hope the freeze plug did its job and pushed out instead of cracking the block's water jacket.
If you have a slide hammer and room to work it, screw it into the plug and bang it out.
If not, drill a hole in it, stick a sturdy screwdriver or punch in it and start prying and twisting till it comes out.
To replace, clean rust etc out of the opening and make sure the sealing surface is clean. Then measure the opening to get correct size plug.
I think you'd have more success using something like Permatex than silicone.
Then use a big socket close to FP diameter to drive the new plug in.
Always a possibility the coolant froze esp if you don't have good history on the car. If so better to hope the freeze plug did its job and pushed out instead of cracking the block's water jacket.
If you have a slide hammer and room to work it, screw it into the plug and bang it out.
If not, drill a hole in it, stick a sturdy screwdriver or punch in it and start prying and twisting till it comes out.
To replace, clean rust etc out of the opening and make sure the sealing surface is clean. Then measure the opening to get correct size plug.
I think you'd have more success using something like Permatex than silicone.
Then use a big socket close to FP diameter to drive the new plug in.
Well we tried it they way he said in the video. It didn't go as planned. First swing and it put a bigger whole in it. Basically I was able to get the center out but the sides are welded in there. I soaked it with some liquid wrench then stuck a soaked rag in there and I'm letting sit over night. It's also not the standard 1.5 inch plug. It's smaller. I'm afraid I may have to pull the engine just to get at it. Here's a picture.
Take a flat punch or an old screwdriver and hit the outer part of it in one spot. Usually they will start to move in and twist sideways and then you can pry them out. Soaking it is a waste of time. Silicon is not the correct sealer to use either. You need a gasket sealer of some type or just put it in dry like the factory did. I use Aviation Form A Gasket or Permatex "Indian Head" gasket shellac.
Hit it where I have the yellow mark in the picture.
We have been (frustration is showing). Its not budging. If the oil soak does work tomorrow I think I'll try and cut it with a small hack saw or dremmel. It's rea(lly hard to swing in there. Not a lot of room. I bought some RVT to use after talking to the auto parts guy about what to use.
Don't cut it all the wat through, just enough to where it's thin enough to split it with a chisel or screw driver. Then peel it out. You don't want to damage the mounting surface.
Don't cut it all the wat through, just enough to where it's thin enough to split it with a chisel or screw driver. Then peel it out. You don't want to damage the mounting surface.
That is a concern. Cut it just enough to weaken it so the screwdriver can break it.
I'm also trying to keep my sons hopes up. He thought since they guy said it runs it wouldn't take much work. I told him these are all things that would need fixing on a 50 year old machine. Had to remind him that most people don't keep cars more then 10 years. When we got his 2007 truck it tool an extra 4000 just to get it safe. This thing hasn't had much maintenance so times that by 5. I'm also prepared to spend my money on it to get it running. I think I'm into it for more then he paid for it now and it's only been a week.
If the frost plug is below the surface, a screwdriver may not work. Grind two areas but not all the way through. Use a SHARP pointed punch to separate the frost plug edge from the hole before trying to fold it inward with screwdriver. Be patient. .
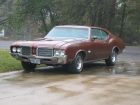
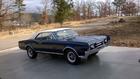
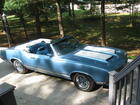
1972 Olds Cutlass S. Not sure if we can remove just the inner panel.
Yes you can, though if car is rusty you may not want to, and I don't know if it will give you the room you need anyway, but it may be a option. There are bolts around the wheel opening and other bolts into the frame, I think. I have done it but can't really remember off hand. It's a plastic inner fender. But I wonder, do you have a small grinder, like a dremel tool or die grinder? Maybe a small die grinder could reach in the hole and grind down the outer edge of the rusted out plug until it's thin enough to hit it with a chiesel or something and collapse it in? Keep at it, You will get it....
Just to let everyone know we finally got that plug out. Took a dremmel with a diamond burr bit and worked a groove into it but not all the way through. Then it popped right out just like the videos. It didn't turn like I wanted but I way able to get a pair of pliers on it and pulled it out. Thanks for the tips and encouragement. Now we just need to wait until tomorrow to get a new one and to pound it in.
Glad you got it out !!!! Just keep a good eye on it because there is a good chance that if that one was rusted through ......... the others are close behind
By the way is that your call sign in your user name ?