When you click on links to various merchants on this site and make a purchase, this can result in this site earning a commission. Affiliate programs and affiliations include, but are not limited to, the eBay Partner Network.
Sure...the problem is...I'm not home. I know there is a really excellent diagram in the 69 assembly manual, I assume it's in the other years, too. It was deep in there near the end in the electrical section I think. My manual even had handwriting on that page saying how important it was to get them in the right position. Typically, those 2 smaller wires get mangled up when the starters are changed. Sometimes peeps just crimp a term w/o insulation. I'll see if I can find another pic.....
All right. Thank you all for the pics and help!!!! All in and connected. It will still
be a while till I start it but at least it's in correctly. Boy those r and s wires run close to the manifold.
Toms Cutlass, can you direct me to the heat shield for the solenoid like you were talking about? Thanks again guys!
Chris
Here's a link to pics of the type of metal heat shield I use. (Note: I am NOT referring you to this seller.) http://www.ebay.com/itm/1967-69-Pont...VZH1kO&vxp=mtr There are other similar solenoid heat shields available from various aftermarket auto components online retailers.
You should be aware that a heat shield for Cutlass ('70 - '72) is not OE. It does however add a margin of additional protection helping to prevent hot soak of your solenoid and hot starting issues. Also, check your negative terminal battery cable (black) that bolts to the engine block and negative side of the battery. Often times, hot starting issues can be traced to a poor negative side battery cable and related connections. Replace that cable in addition to installing a solenoid heat shield if you have any doubts and want peace of mind to avoid hot soak and hot start issues.
Thanks guys. Allan I think it was you who said you had about 3/4" clearance between the wires and the exhaust. Mine are actually touching the head pipe flange. So I'm not even sure if a sheild would work. I have to finish connecting the exhaust from the muffler back so maybe this will move the flange enough to get it off the wires... Not sure if I have them routed wrong (running along side the solenoid/starter junction, or if it's because I have the thornton larger 2 1/4" exhaust manifold (which I think will solve my exhaust problem from the other post). I still can't find the assembly manual page with the starter and solenoid wire routing. Do you know what page it is? Thanks guys!
Chris,
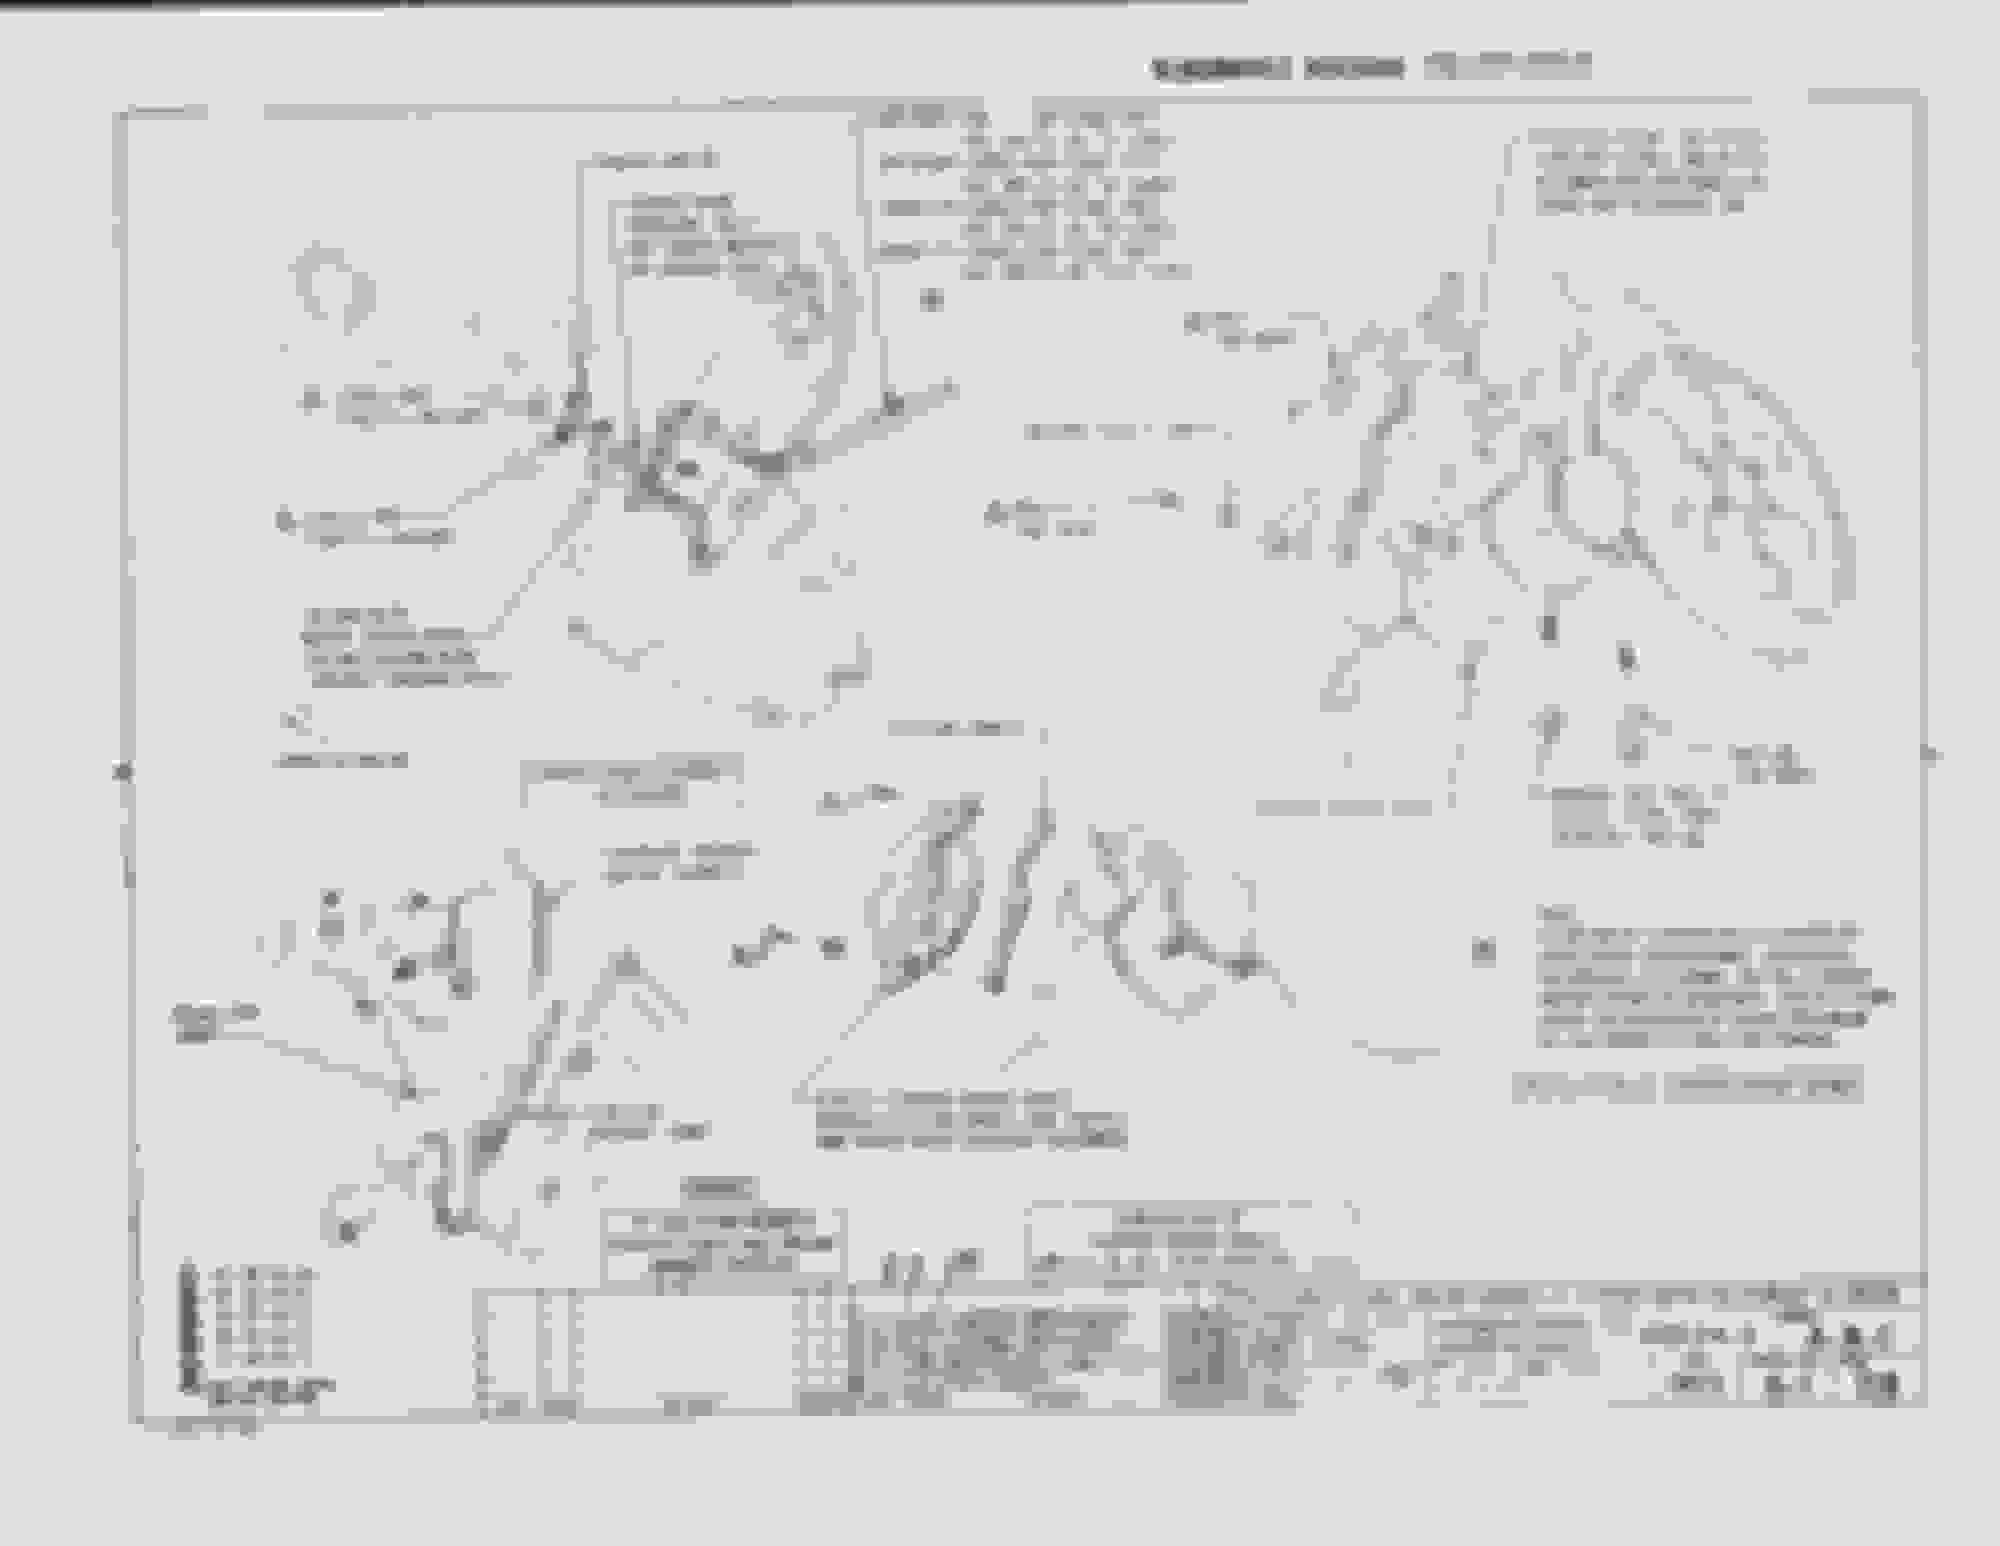
There should be plenty of clearance. If you don't have that clearance you'll likely fry your starter wires. Here's the picture you want. I scanned it from the 72 Assembly Manual. Note the specific instructions for the purple and yellow wires.
... I'm not even sure if a sheild would work. I have to finish connecting the exhaust from the muffler back so maybe this will move the flange enough to get it off the wires... Not sure if I have them routed wrong (running along side the solenoid/starter junction, or if it's because I have the thornton larger 2 1/4" exhaust manifold (which I think will solve my exhaust problem from the other post).
Chris,
I have the Thornton Jr. 350 exhaust manifolds as well and there are no solenoid wire or heat shield clearance issues. Follow the assembly schematic instructions carefully. The 3 solenoid wires route solenoid front to rear up along engine block. Shown in assembly picture upper left. The block runs much cooler than the exhaust manifold.
EDIT: The solenoid heat shield should be installed around the solenoid before the starter assembly is installed onto the engine block.
Last edited by Toms cutlass; Aug 15, 2017 at 07:34 AM.
Tom, I know this may be a lot to ask but if you have a chance, could I trouble you to get underneath your car and take a photo looking at the starter wires and manifold from the vantage point of a few feet behind it? I see what the assembly Says but it doesn't appear to look identical in real life.
Don't know if you saw my edit to post #54 ... if you're going to add a solenoid heat shield, I strongly urge you to add it before bolting in the starter and solenoid to the block.
These pics show the location of the solenoid wires over the top of the solenoid and inside of the primary positive (red) wire connected to the top lug of the solenoid. (The view is from the rear looking forward.)
Note the primary wire routed to the outside nearest the manifold (it has its own shield and heat tube) and the solenoid wires to the inside (near the block). The pics also show the solenoid heat shield between the solenoid and the Thornton exhaust manifold. The heat shield is fastened to the outer side of the solenoid providing direct protection from the adjacent manifold.
Last edited by Toms cutlass; Aug 15, 2017 at 02:34 PM.
Also note that the Assembly diagram has the solenoid wires routed down under/behind the starter brace (which neither you nor I have) and then the wires pass directly over the side of the solenoid in the Assembly diagram -- which is directly adjacent to the exhaust manifold. Not having a brace (or a threaded hole in the starter cover for a brace bolt) which would hold the wire routing in place, I had to improvise, routing the solenoid wires behind the primary wire to shield them from the heat of the exhaust manifold. It's worked absolutely fine for me.
EDIT: The Assembly diagram also instructs to route the solenoid yellow and purple wires so as to not touch the solenoid ground post, as well as the purple wire not touch the starter brace (if you have one). This is another reason why I chose to route those wires away from those critical areas, as well as the exhaust manifold.
Last edited by Toms cutlass; Aug 15, 2017 at 04:01 PM.