When you click on links to various merchants on this site and make a purchase, this can result in this site earning a commission. Affiliate programs and affiliations include, but are not limited to, the eBay Partner Network.
I was leaning towards installing a reproduction turn signal lever. Glad I didn�t! The reproduction is about 1/2� to 3/4� shorter depending on how you look at it and line up the holes.
Tonight in the garage it was 45 degrees. It’s about 12 degrees outside right now in Chicago. It’s not warm.
I wanted to get the deluxe wheel installed so that was my focus tonight. The third “cup” arrived in the mail for the springs inside the pad so I assembled everything on the bench. I'd recommend doing this instead of trying to align the plastic, springs, and screws while the wheel is mounted!
I finished the cancel cam install as well. I ended up putting a dab of grease on the inside of the plastic ring just so it would move better. I reused the OEM turn signal lever, too. A quick polish, some black detail paint in the appropriate place, and the lever looked as good as any 50 year old part could look.
The front wheels are angled a bit in the garage so I was careful to align the marks between the column and the steering wheel. I ended up sliding the cancel cam down a pinch to get just enough room to wiggle the wheel on. Once the wheel was on and aligned I torqued it to 25 ft lbs as it called for 25-35 in the PIM.
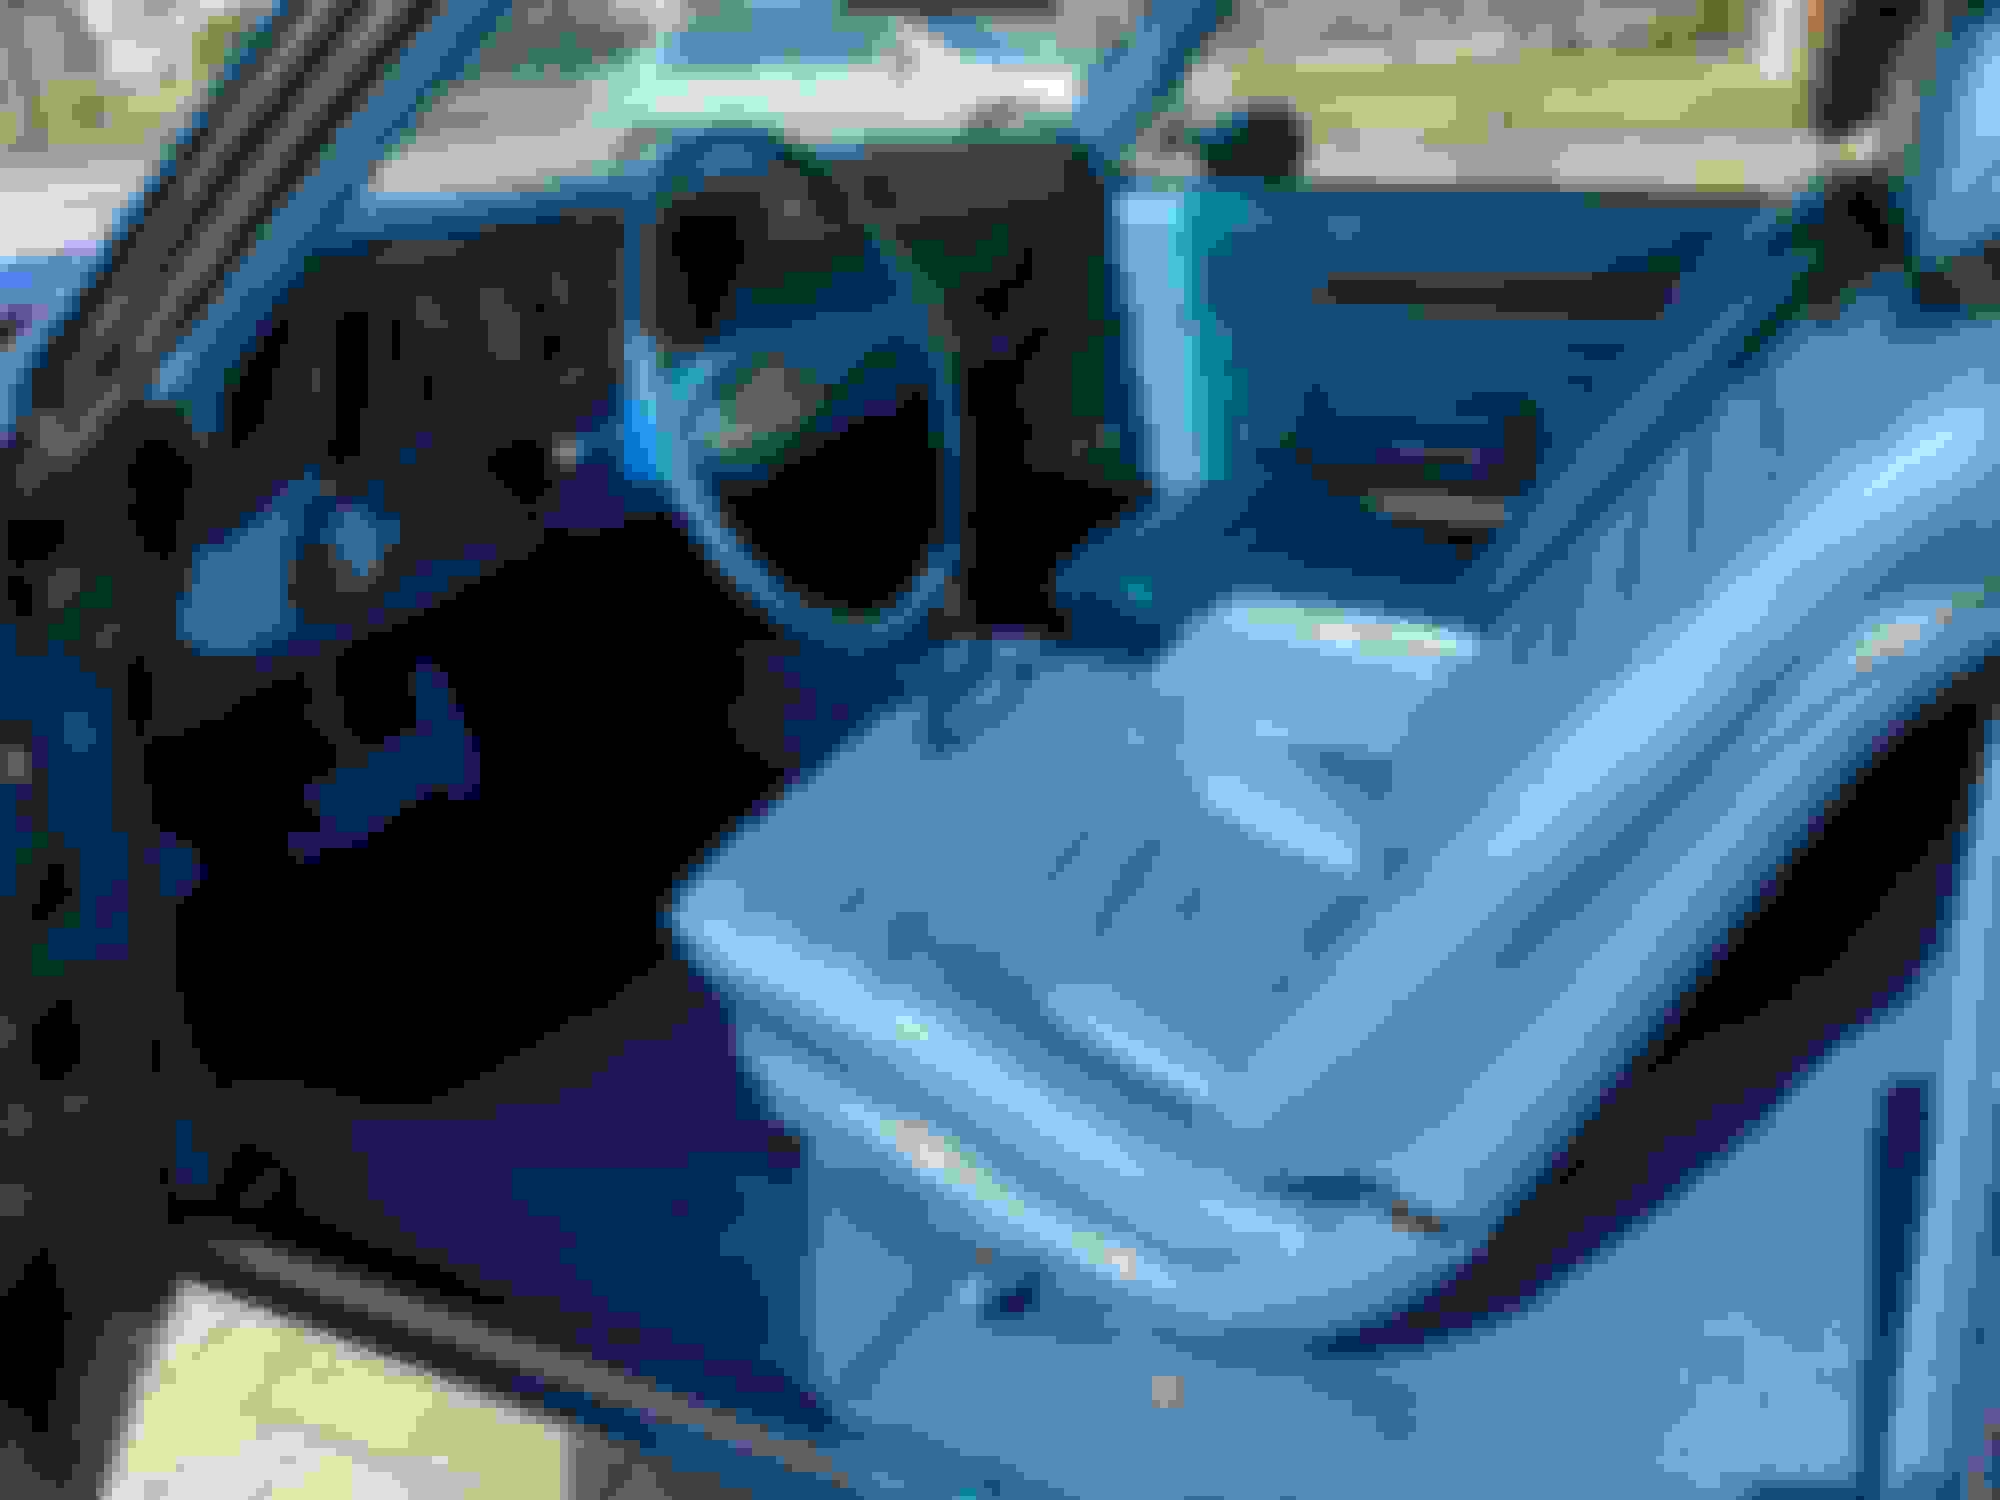
I freaking love this wheel. I love the blue contrast between the column. We see way too many colored interiors that are just a single shade of blue, gold, green, etc., and that just is not how these interiors looked. I would even venture the shades of black vary for a black interior, too.
Lastly, I removed the map light from the dash and discovered the ‘L’ shaped plug was not connected. Fortunately, I was able to pull the plug forward and connect it to the light right through the front of the dash. I don’t think my hand would fit up there from the back with everything in place. I will test tomorrow as I didn’t want to risk hooking up the battery and having the horn start blaring with a sleeping child in the house
Marks lined up.
The deluxe wheel looks cool but feels a bit dainty.
I really dig this side view and the contrast between the blue paint on the column and the blue of the steering wheel.
Last edited by WTHIRTY1; January 20th, 2021 at 07:42 PM.
Hooked up the battery during lunch to test the horn and the courtesy lights. The lights worked fine. I was surprised at the level of illumination. I still need to troubleshoot the glove box light.
The horn worked the first 2-3 times I pushed it. No issues. Then it just stopped working all together. Not sure if it's the horn relay because the light harness works and the buzzer works. Can the horn relay still work for other areas of the car but not work for the horn itself? The other thing I'm wondering is whether the dab of grease on the ring of the cancel cam may have caused an issue. I need to clean up the paint for the two ground screws on the core support, however, it seems strange it would work and then just stop working. Thoughts?
I'm not sure, Jimmy. But I've seen grease on the cams before, maybe I've even done it before. It's not that die electric grease, right? It's like wheel bearing grease?
Check that when you push horn the wire on relay shows ground. The ground completes the circuit in relay sending power to horn. Also should hear relay click when pushing horn.
The other thing I'm wondering is whether the dab of grease on the ring of the cancel cam may have caused an issue. I need to clean up the paint for the two ground screws on the core support, however, it seems strange it would work and then just stop working. Thoughts?
The horns on the '70 are self grounding; they use those tooth/star washers at the mount points.
Did you try turning the wheel back and forth or round and round? I just had this problem putting a standard wheel on a '70. Got it all hooked up, worked a few times and then stopped. As soon as you pull the wheel and the lock ring hub you'll know by grounding out the contact. I did just that, cleaned the connections and it's worked fine.
Thanks to you Jimmy I knew the part number and found an NOS cancel cam for the car
My W30 like your W31 has this hole left unplugged at both jambs; do you know why?
That's where the second switch that operates the electric seat back release mechanism would go, but I've never seen the hole without the switch (or the option).
It is freezing here in Chicago. Even with the heaters running in the garage, it’s about 35 degrees. No real updates outside of finding an NOS trans mount on eBay.
I haven’t had a chance to work on the car in about a month and I’m cool with it. We added a puppy to our family three weeks ago, and all our time and attention has been around the dog.
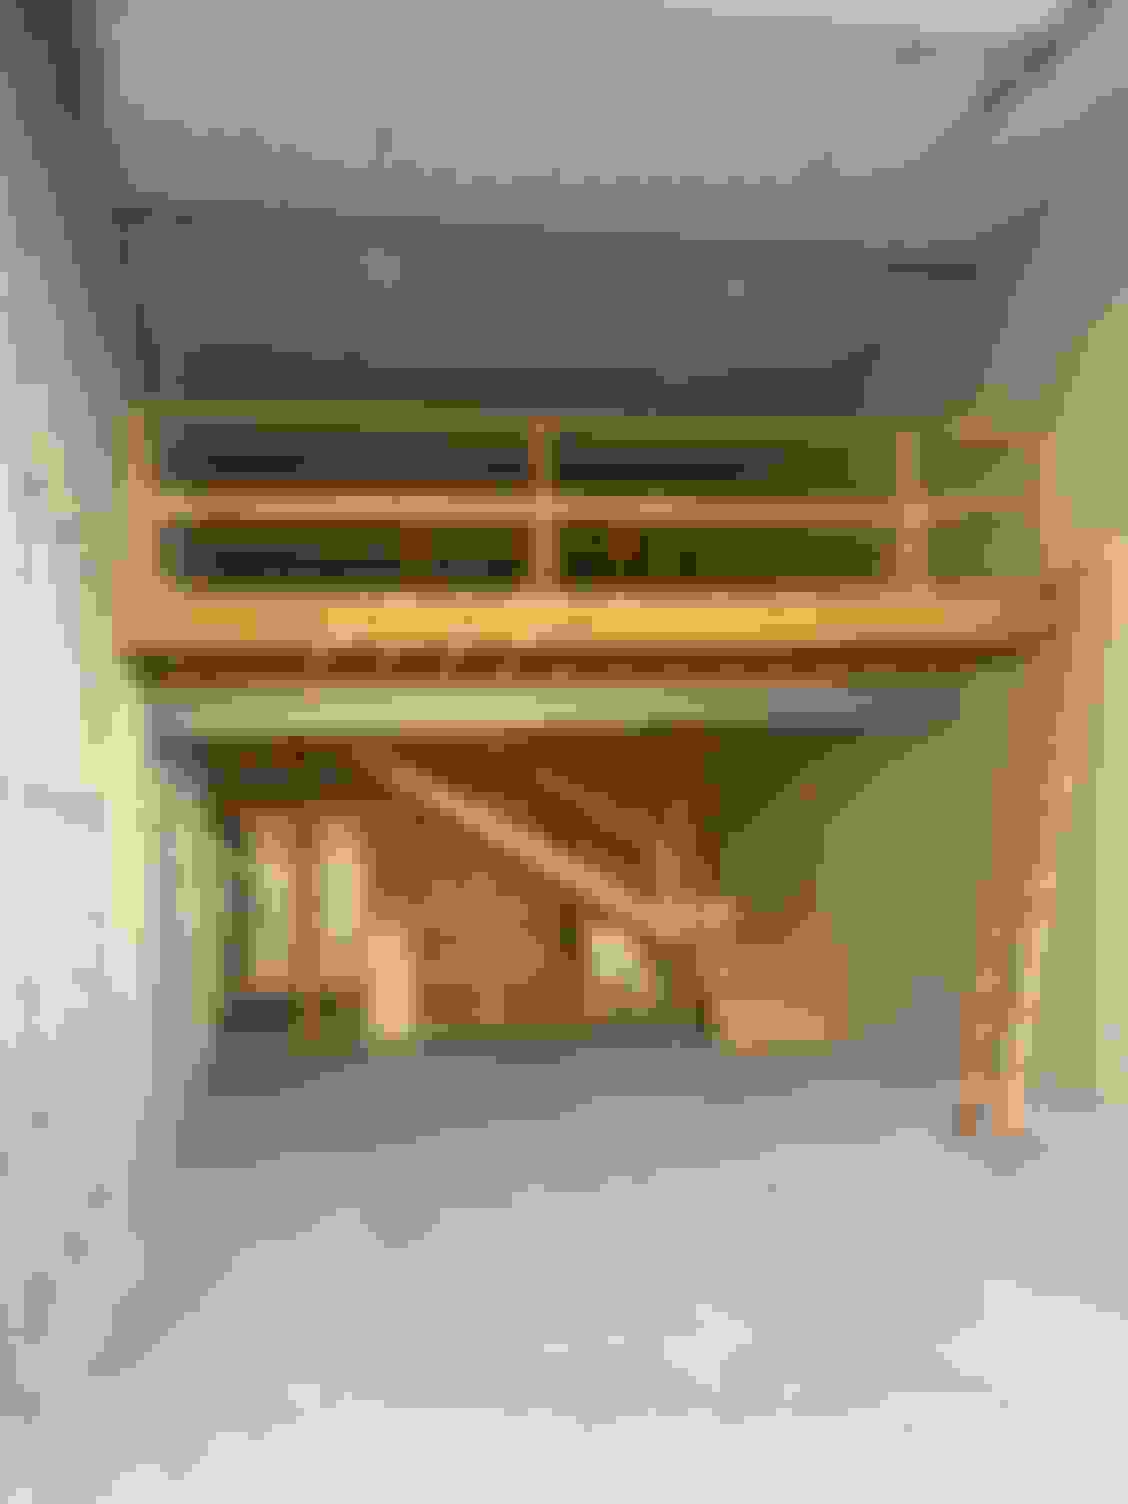
On another positive note, we made a move to purchase a 20x40 garage space with a large loft at the Iron Gate Motor Condos. We close in a few weeks on the unit and then another few months to complete the build out. It'll be nice to get all the cars plus the enclosed trailer under one roof. We also have a 1959 Glasspar fiberglass speedboat that we'll be storing inside the garage.
Here’s the outside of the garage.
It’s a really impressive complex. They host cruises and shows almost weekly throughout the summer.
Here is an example of one of the builds. Looking forward to setting up the garage!
Last edited by WTHIRTY1; February 15th, 2021 at 11:32 AM.
I have to admit that after looking at the interior of this W31 that the blues are very striking. I'm partial to blue anyway, since that is my eye color , but regardless, the various hues that Oldsmobile incorporated here are notable.
Despite the challenge restoring such an interior has been, just think of how it must have driven the original designers bonkers trying to bring all these different shades onboard. I can imagine just trying to obtain authority to use the many varied colors was likely monumental in itself.
Imagine if the designer had wanted to incorporate a verdigris palette in as many shades!
I can imagine just trying to obtain authority to use the many varied colors was likely monumental in itself.
When that interior was designed, the bosses had worked their way up. They understood what the designer was doing. There was no committee of car-agnostic, business-school graduates to second-guess decisions of skilled people. That came later, starting in the mid-70s.
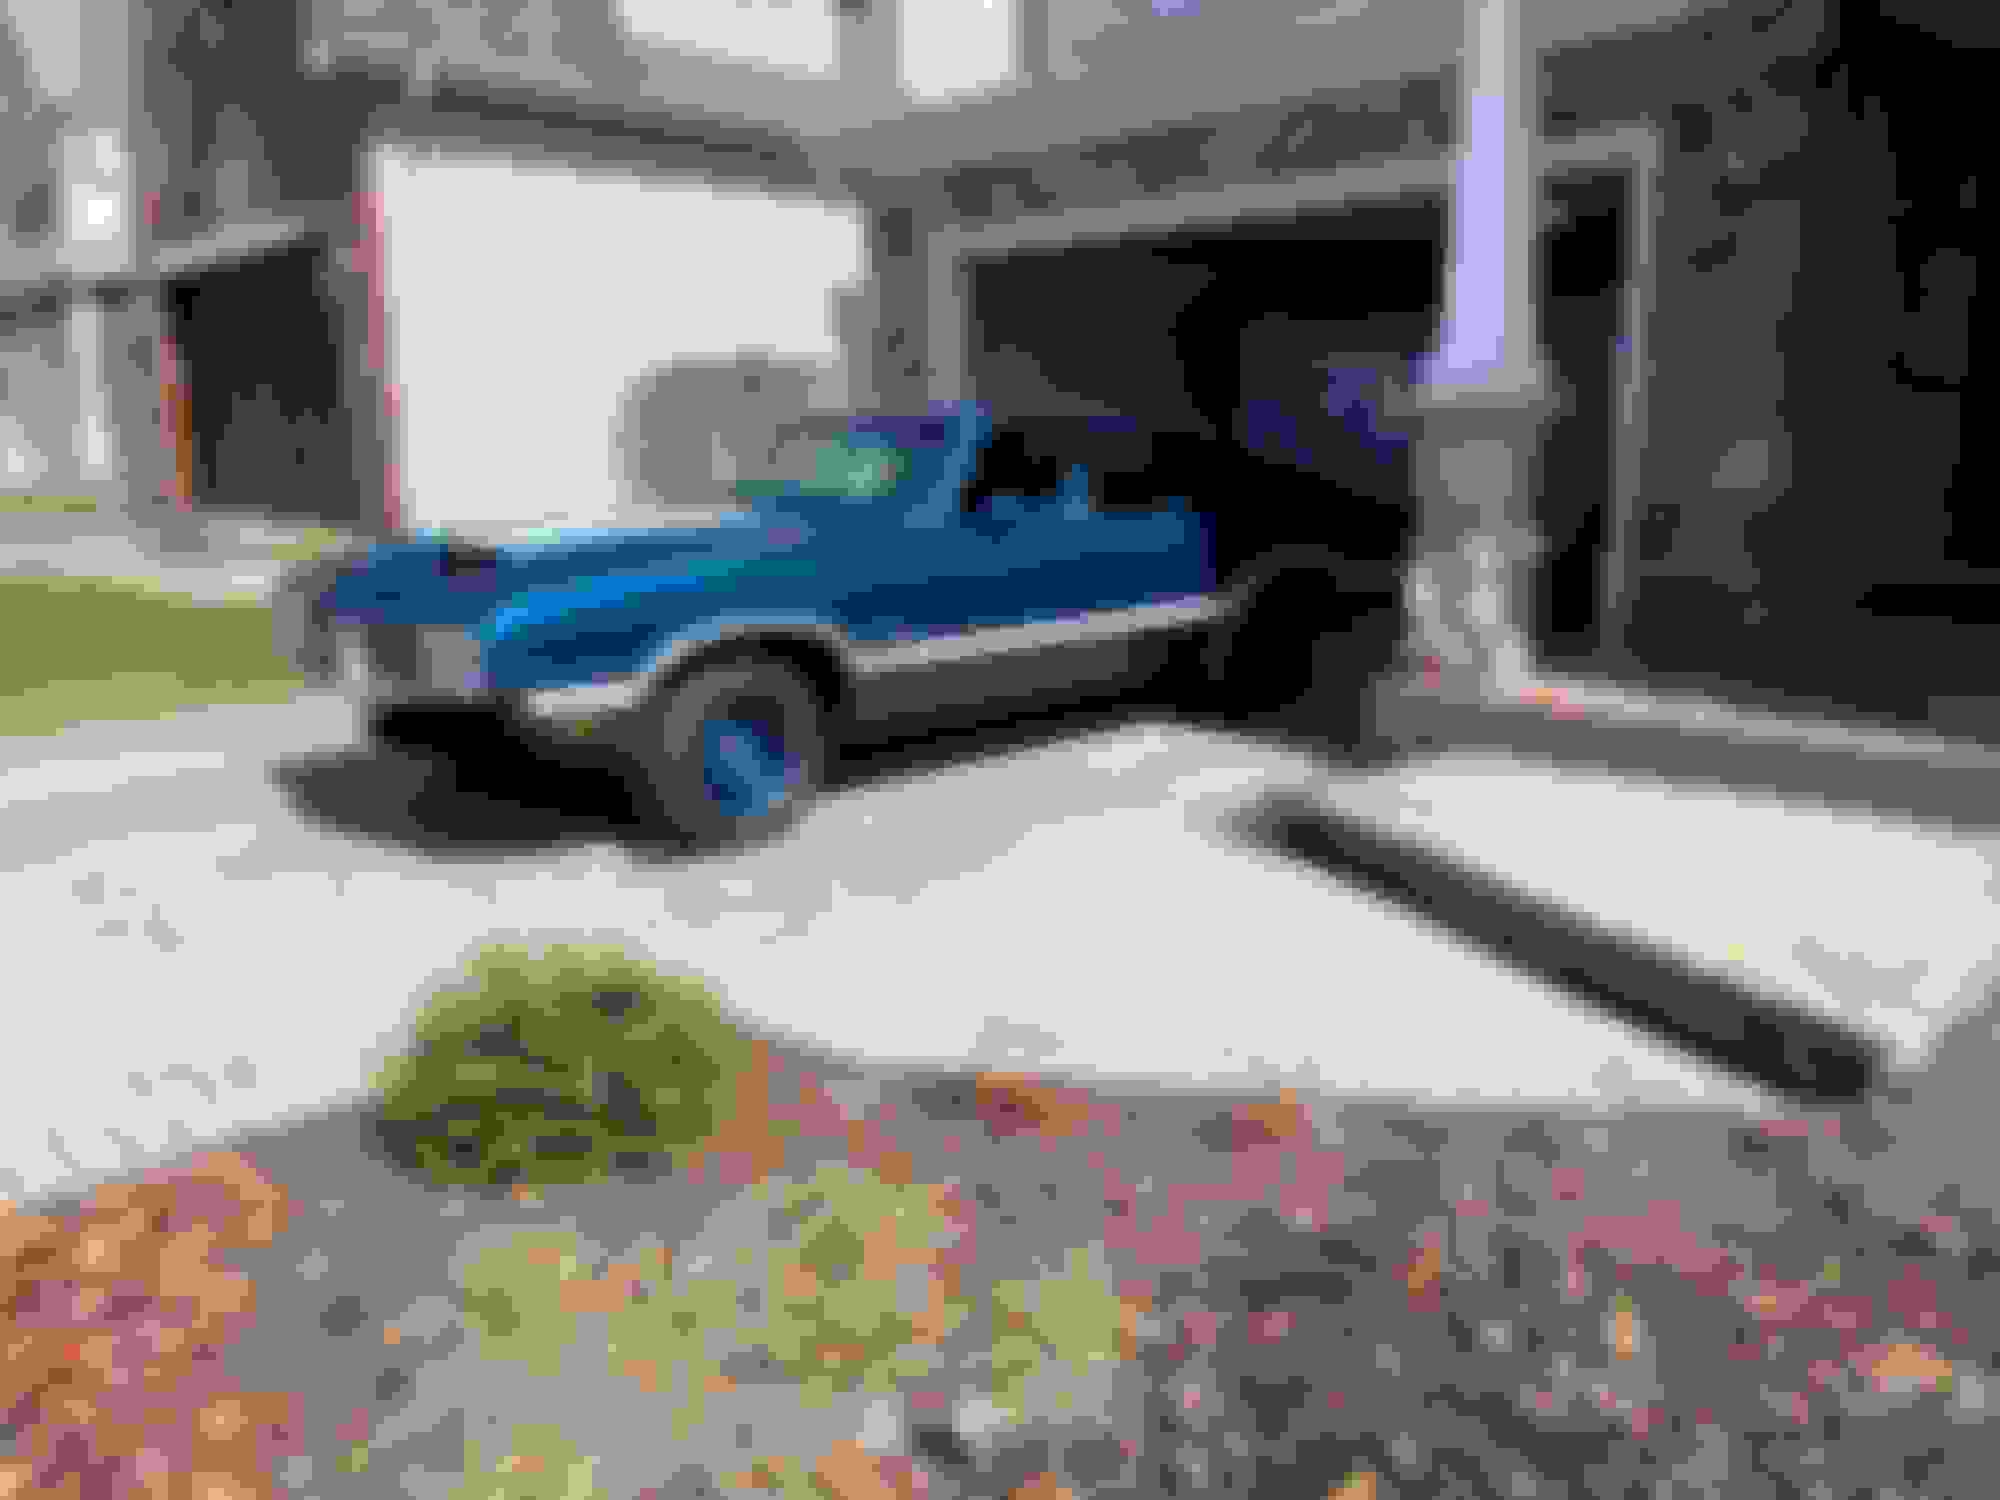
After taking a solid two months off from the garage and the car, I took advantage of some warmer weather and pushed the Olds out of the bubble to get a few things done. I needed to get the front bucket seat out, and since the door was up against the garage wall, I couldn�t get it out until I pushed the car on to the driveway. Now that the seat is out, I can focus on the LH side kick panel and door panels.
I figured out my horn issue. The metal contact point on the wheel wasn�t making good enough contact because the wheel wasn�t tight enough in to the plastic retainers. I tightened all three screws a bit more and it seems to be working without issue now.
The plan is to get the interior completed this month and then arrange for the car to go back up to Michigan in April for a few minor touch ups.
I need to do some digging in my old pictures and see where these purple and green plugs should actually connect relative to the column. Right now they are hanging too low (pink and orange not applicable).
I was able to get that carpet to cut across the gas pedal plastic just as the factory carpet did.
Great job. What headliner did you use ? Brand ? Which cars use perforated vs basket weave ? Thx
SMS for the headliner. They pre-sew it so it's ready to go. No perforation on the '70 headliner. The material they sent was dated early 1970 and was the same as what came out of the car. They give you enough to cover your sail panels as well...just ask your shop to recover the original cardboard since it has the 50 year curve to it versus the stiff and flat cardboard that is available today!
Spent a few minutes in the garage last night getting the rear armrest base installed along with the correct nuts with the "locker" for the tie rod clamps.
The rear armrest metal that goes from the top near the package tray down to the metal base itself with the two screws required a new hole to be drilled. The way the new Legendary panels fit for the rear leave a tiny sliver between the panel itself and the metal thus exposing the body of the car. I drilled a new hole for the lower screw and left the two screws on the base relatively loose. It looks better but I still hate the fit of the rear door panel itself. Hindsight, I would have sent the original factory panels to Legendary and had them redone as the metal on the repops just aren't close to how they should fit. Oh well. Now to rinse and repeat for the LH side of the car...
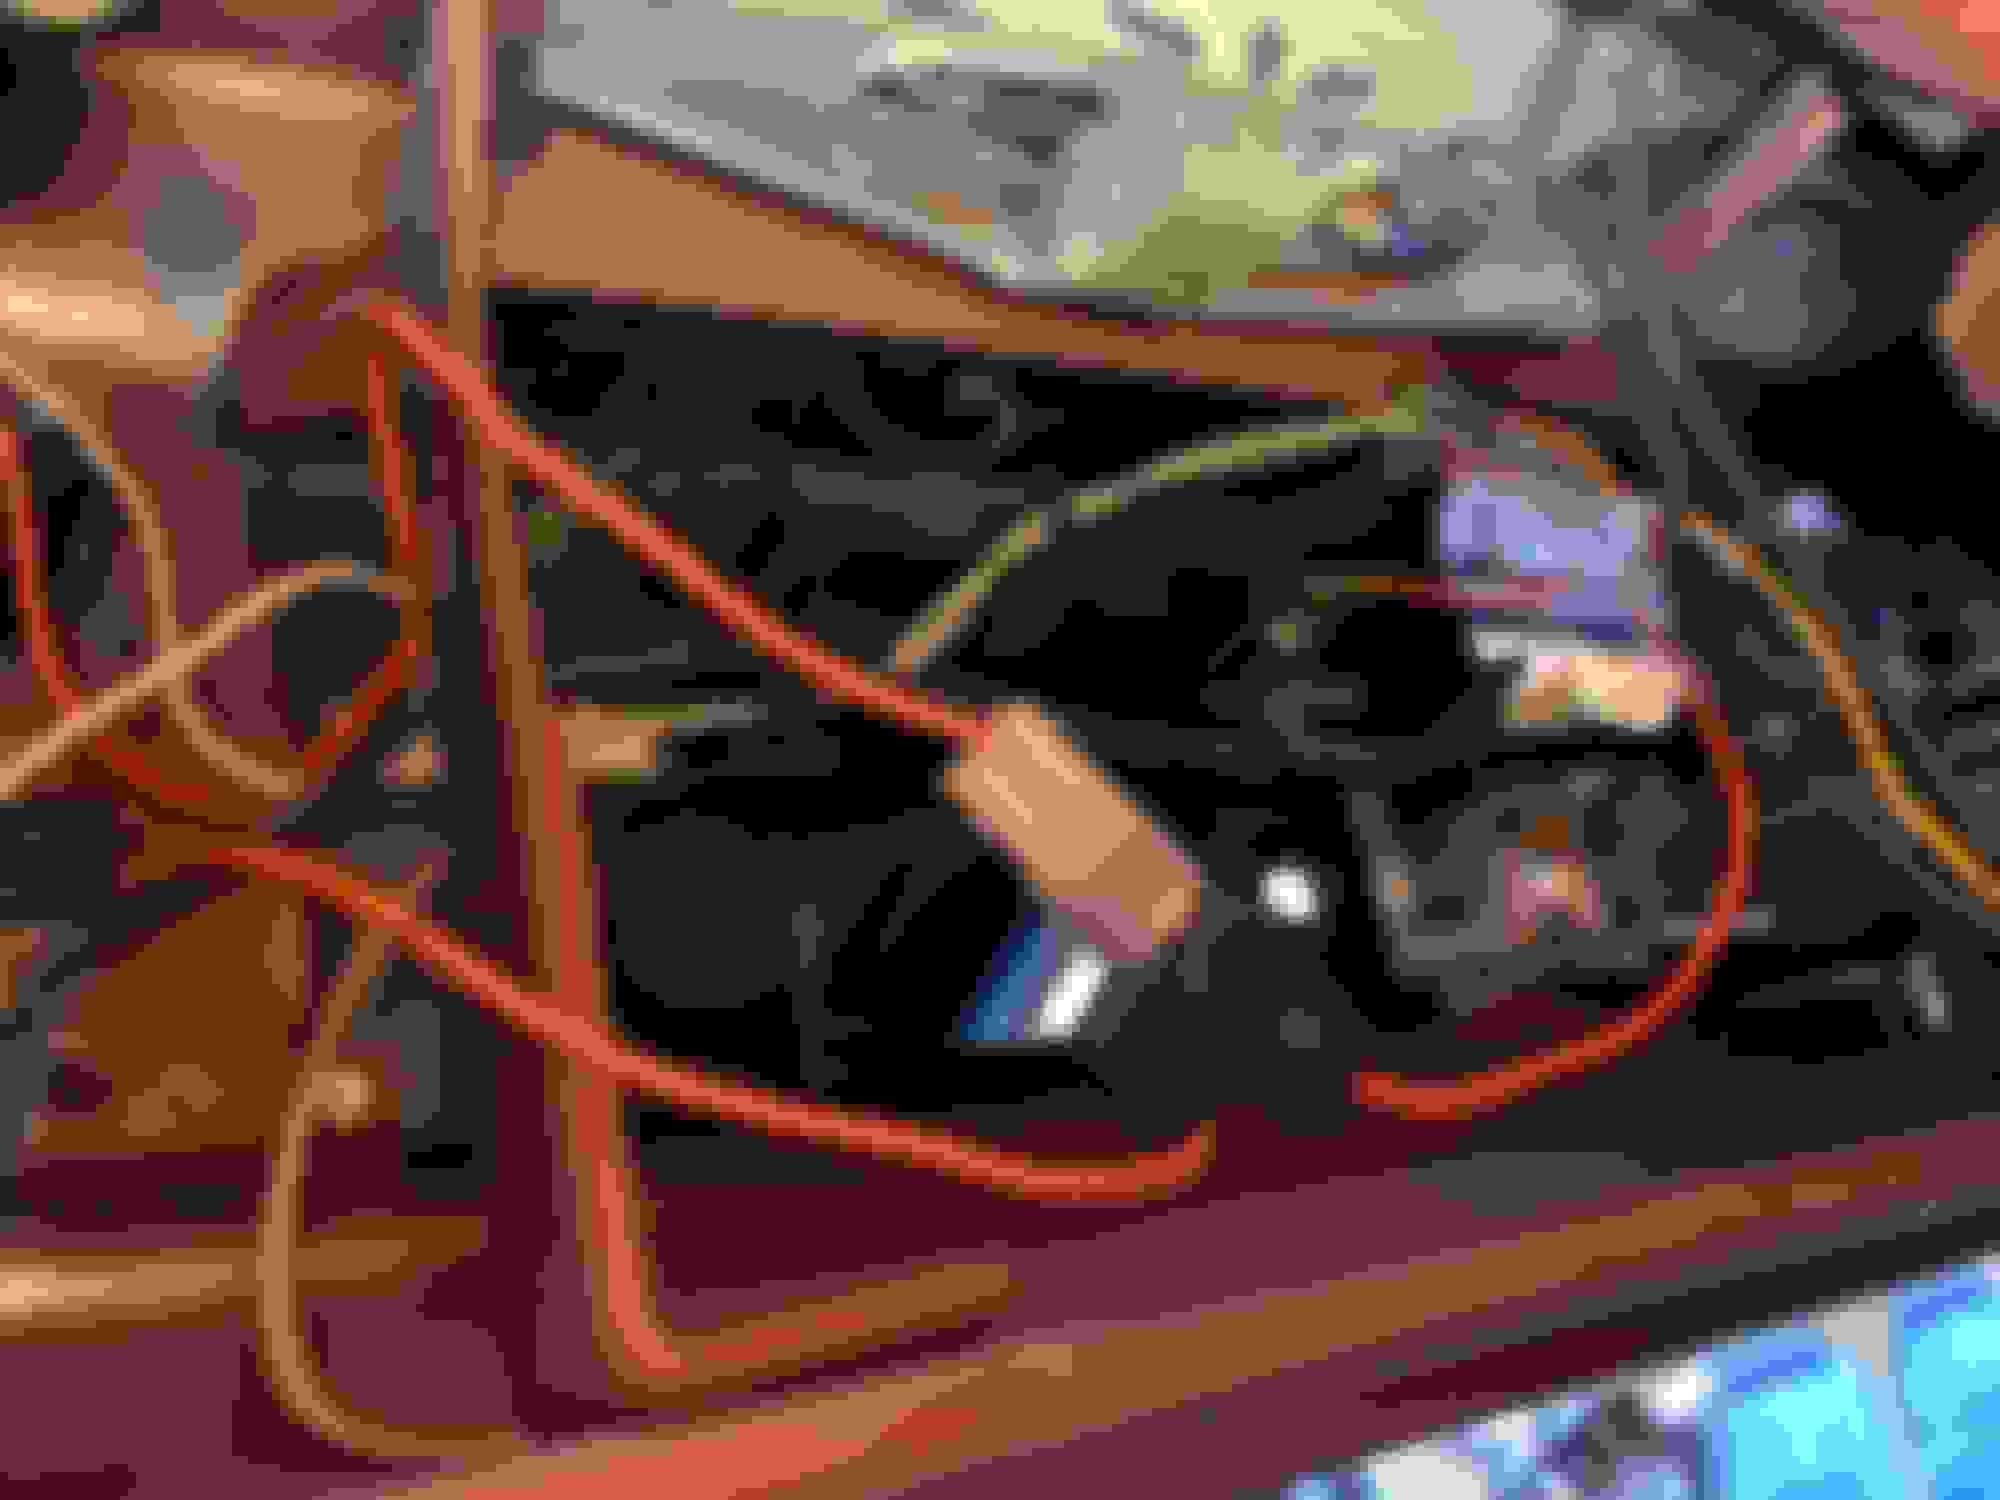
When I crawled under the front of the car, I noticed a bit of oil on the floor of the bubble. It seemed almost like a silicone with a different viscosity in comparison to engine oil. There was a tiny bit on the bottom of the fan shroud as well. I inspected everything engine related, and it appears the fan clutch is weeping a bit. This is the fan clutch I had rebuilt from Kirkconnel almost a year to the date. It hasn't even been put to use so I am wondering if it's a critical failure of the fan clutch or an issue from sitting for so long without movement. Any thoughts? Either way, I want to pull it. The last fan clutch I replaced required the top plate and shroud to come out...is there a better way to get the fan clutch off without having to remove the top plate?
Last edited by WTHIRTY1; March 22nd, 2021 at 12:35 PM.
You have a two-year warranty on the fan clutch rebuild by Kirkconnell. I'd email Diane and explain what is going on with yours. PM me and I'll share her email/phone number if you need it. They were awfully nice to deal with so I would be surprised if you had issues with getting this weep corrected.
I don't have a fan shroud on my set up so I'll leave that to be addressed by someone else as how best to get at the clutch. It's always something it seems, but we all know that is how things go with vintage cars.
I appreciate you sharing the clutch failure information as I just received my back from Kirkconnell about 2 weeks ago and I will keep an eye on it.
It is freezing here in Chicago. Even with the heaters running in the garage, it�s about 35 degrees. No real updates outside of finding an NOS trans mount on eBay.
I haven�t had a chance to work on the car in about a month and I�m cool with it. We added a puppy to our family three weeks ago, and all our time and attention has been around the dog.
On another positive note, we made a move to purchase a 20x40 garage space with a large loft at the Iron Gate Motor Condos. We close in a few weeks on the unit and then another few months to complete the build out. It'll be nice to get all the cars plus the enclosed trailer under one roof. We also have a 1959 Glasspar fiberglass speedboat that we'll be storing inside the garage.
Here�s the outside of the garage.
It�s a really impressive complex. They host cruises and shows almost weekly throughout the summer.
Here is an example of one of the builds. Looking forward to setting up the garage!
Congrats, it�s an awesome place with an incredible car culture. Exotics to Muscle Cars. I first met the Original owner of a 1968 Ram Rod there. The W31 is coming along just marvelously!
Taking some time off really did wonders because things that were challenging before seemed to just make a lot more sense now. For example, the LH side kick panels and vent pulls installed much easier than the RH side. I followed the same process as before with regards to sliding the panel in to place so the carpet stays nice and tight under the panel. The cables that come with the reproduction panels suck. Period. The black casing / shielding around the cable isn�t long enough on the cable. When you go to clamp the J hook to the body of the car, you won�t be able to because the cable is exposed since the casing is too short. The reproduction cables solve that problem. The NOS cables also solve that problem, but in my experience it was much longer and needed to be cut.
I had my daughter help me today with installing the LH receiver seat belts. My factory belts were C over E on both sides so we replicated that.
I wanted to get the under dash area wrapped up, and in order to do that, I needed to install the e-brake cable. Always do this with the body off the frame if you can! I am disappointed we didn�t do this earlier! This required taking out the three inside bolts of the inner fender so I could get a hand inside there to guide it in to the floor. I went through the top of the frame with the threaded rod, pulled the rod through the hole on the �inside� of the frame by guiding it with pliers through the large hole on the bottom side of the frame, and then muscled the cable with the claw through the floor of the car. Pain in the ***. I also removed the e-brake pedal setup so it could meet the cable in the floor versus trying to pull the cable up and insert it in to the pedal mechanism. Once the cable was in place, I moved the e-brake mechanism back in to place which was much easier!
A little bit of trimming on the firewall pad over the steering column was required. I pulled the speedo cable over the pad once it was in place, and then I finished the install with the plastic carpet guard.
I left the vent grille as is since it is molded blue plastic.
I still need to replicate the factory grease marking on the column.
LH door panels, rear seat belts, rear seat divider, and the back seat are the remaining parts to be installed before I can put a bow on the interior.
Last edited by WTHIRTY1; March 28th, 2021 at 02:39 PM.
I've done some restorations in my day but nothing to the detail you have done. It's all so awesome. Better than new IMO!
I'm going to try to get my 1972 442 painted by the end of the summer and start putting it back together over the winter so I'm sure I'll be asking questions about where to buy the replacement interior material for it and any advice to be sure I get correct carpet, front bucket covers and headliner for it. Your restoration is so inspiring!
I want to be terrorizing the streets with my 455 and 8 track tape player by the time I reach my 70th birthday.....soon! LOL!
OLE442
Last edited by OLE442; March 29th, 2021 at 05:35 AM.
Regarding how the carpet is treated under the dash area, I understand along (A) the carpet will be under the toe kick plate; along (B) it appears to be simply cut and layed flat; along (C) it looks like it is tucked under the firewall pad from about half-way the hump to the RH passenger side? Has this been changed or is this going to be its final position?
Last edited by tnswt; March 28th, 2021 at 03:09 PM.
Regarding how the carpet is treated under the dash area, I understand along (A) the carpet will be under the toe kick plate; along (B) it appears to be simply cut and layed flat; along (C) it looks like it is tucked under the firewall pad from about half-way the hump to the RH passenger side? Has this been changed or is this going to be its final position?
The carpet is placed and tucked as close to how the factory did it.

 January 18th, 2021, 06:52 AM