When you click on links to various merchants on this site and make a purchase, this can result in this site earning a commission. Affiliate programs and affiliations include, but are not limited to, the eBay Partner Network.
I'm replacing the instrument cluster wood grain applique. The applique is metal and the cluster is plastic. What type of adhesive should be used? Thanks in advance.
I'm replacing the instrument cluster wood grain applique. The applique is metal and the cluster is plastic. What type of adhesive should be used? Thanks in advance.
I used contact adhesive, Came in a can and brushed it on. Did it 15 years ago and still holding strong
Hey Tom, I've got the exact same car, a red '70 Supreme convertible, have had it for 34 years. I've just received a new wood grain dash kit, switch plates for the convertible top, lights and heater, and gauge bezels from OPGI. Is that what you're doing? I was planning to have an experienced Olds specialist do the work, but he's busy as hell. Am wondering how difficult it is or was for you? I've never done any dash work, aside from replacing some bulbs behind the speedo.
Tom did you source OE woodgrain applique? It was my understanding that the woodgrain applique used on the side of station wagons and in the interior had a sticky backing?
Hey Tom, I've got the exact same car, a red '70 Supreme convertible, have had it for 34 years. I've just received a new wood grain dash kit, switch plates for the convertible top, lights and heater, and gauge bezels from OPGI. Is that what you're doing? I was planning to have an experienced Olds specialist do the work, but he's busy as hell. Am wondering how difficult it is or was for you? I've never done any dash work, aside from replacing some bulbs behind the speedo.
Maybe I can learn from you
Paul in Canada
Hey Paul,
Very nice ride you have! I'm the 2nd owner on mine ... 41 years.
I did not replace all of the trim that you are doing. All I did was (carefully) remove the OE wood grain insert around the instrument cluster to replace the plastic chrome gauge bezel. The wood grain insert on mine is in fine condition; the chrome bezel was not.
This is a job that can be done DIY. It requires some patience especially removing the old wood grain. I don't know what is in your dash kit, but you're wise to replace all 3 of the wood grain pieces (gauge cluster, dash wood grain, glove compartment) since if you do only one of the wood grain pieces, it may not match the existing. I used some heat on the instrument bezel to soften the glue adhering the wood grain applique insert, and carefully pried the wood grain off the old bezel. The other wood grain pieces on the dash are similarly glued on. If you have new switch plate covers, they are likely similarly factory glued. Use a heat gun on all of the existing to help remove. Your new wood grain pieces may have double-sided 3M tape to affix. Dry fit every piece before final install.
Tom did you source OE woodgrain applique? It was my understanding that the woodgrain applique used on the side of station wagons and in the interior had a sticky backing?
Hi Jesse,
No, I have the OE wood grain in mine. There are several sources for replacement wood grain pieces for the dash, but you do have to be careful because some companies glue vinyl to the metal dash backing piece and that method will not hold up. Vinyl on metal is not how the OE pieces were manufactured. OE is laminated wood grain to the steel backing.
Edit: I think I may have confused you by using the word "applique."
Last edited by Toms cutlass; Jun 5, 2019 at 10:26 AM.
Vinyl on metal is not how the OE pieces were manufactured. OE is laminated wood grain to the steel backing.
Oh, ok. I've used the 3M adhesive that Pat linked in his earlier post. I've also used this for trim and emblems. I think I left the 3M adhesive open and it dried out so I had to buy some new stuff:
Tom, my kit does include all three of those wood grain panels you mention. I'm not doing the console right now, but I knew the other pieces would have to match.
So you're re-using the stuff that you pried off?
And how do you get those old yellowed bezels out? From behind, I presume?
Tom, my kit does include all three of those wood grain panels you mention. I'm not doing the console right now, but I knew the other pieces would have to match.
So you're re-using the stuff that you pried off?
And how do you get those old yellowed bezels out? From behind, I presume?
Paul, I'm not sure what you mean by "yellowed bezels." The lenses of the gauges often yellow, and are easily and inexpensively replaced. The gauge chrome bezel is easily replaced with 4 screws. The wood grain insert is glued into it.
Last edited by Toms cutlass; Jun 5, 2019 at 02:10 PM.
Tom, my kit does include all three of those wood grain panels you mention. I'm not doing the console right now, but I knew the other pieces would have to match.
So you're re-using the stuff that you pried off?
And how do you get those old yellowed bezels out? From behind, I presume?
Tom, the round edges of the openings on my bezel are very yellowed (I'll try attaching a photo), so that's why I ordered the reproduction from OPGI. I didn't know removing the wood grain was even possible, which is why I ordered all new pieces. Mine look perfectly fine, too, so perhaps I should reconsider. After all, reproductions probably aren't as good as the OE.
That thread on removing the switch plates looks very helpful, thanks.
What did you use to remove the wood grain, aside from a heat gun? A scraper, or just your fingers?
Paul
I see now in the pic what you are referring to. If your wood grain around the gauge cluster bezel is in good condition and acceptable to you, it could be re-used and applied to a replacement chrome bezel ... like what I did. Since the gauge cluster can be easily removed, I put the piece in the oven and carefully warmed it to 150* - 175*. The plastic chrome bezel is going to be discarded anyway so all you need to preserve is the wood grain. The OE wood grain was not affected at all by the heat (after-market vinyl would melt). Heating softened the factory glue. I used a small flat head screwdriver and began carefully prying around an edge of the wood grain to find a spot where it began to easily lift away. Be careful not to bend the metal-backed wood grain. Some may use nylon pry tools (very inexpensive on Amazon) for this rather than a metal screw driver.
Your switch plates faces are worn too, I see. I believe those are also glued onto the switch base. Though I haven't done it, heating with a heat gun is the method I would use to loosen the switch plate covers. Perhaps use a jewelers or small eye glasses flat head screwdriver to pry out. Apply tape to the edge of the base plate so you don't damage it when prying.
EDIT: If you are only replacing the face of the switch plates, you could try to remove the face while the switch is on the dash, rather than removing the whole switch.
Tom
Last edited by Toms cutlass; Jun 6, 2019 at 10:19 AM.
Paul, There are 4 screws that mount the gauge cluster to the dash. The lower screws hold the lower dash light diffuser (blue translucent rectangular plastic) on as well. See pic for location.
OK, I'm ready to start this project. I will be replacing all the woodgrain pieces with the new ones from OPGI. Reason: the cutout surrounding the radio on my original one has been enlarged slightly to accommodate a stereo (not by me). So now that I've put an original radio back in, it's not a perfect fit. Since I'm replacing that piece of woodgrain, I'll have to replace them all for a match. Although I must say I don't like the "grain" in the repro ones as much as the originals. It's a tighter, darker grain than the originals.
Oh well, the finished product will be a huge improvement, overall.
Damn, just read another thread about sprucing up the gauges by painting the inside of them and upgrading the bulbs. I'll have to see
Will update with photos, but I'm slow so it could be a while.
Here's an update. Did the easy woodgrain piece first: glued the new piece onto the new bezel that surrounds the gauges. Piece of cake, and looks great. What a difference from the old, yellowed bezel edges.
Next up, the glove box door piece. Removed the glove box door for better access. Couple screws and then just pull out the metal piece it hangs from. Came out easy. Hope I can get it back in as easy.
Now the tricky part: removing the small Cutlass Supreme script on the glove box door. Two hard-to-reach tiny nuts hold it on. Reached in through the holes in the back side of the door with a socket. Careful to not lose the nut inside the door. One nut wouldn't come off easily. Had to pull at the script with my fingernails while turning the nut. Eventually got it.
Used a heat gun and this flexible metal tool to get the woodgrain off the glove box door. One edge was loose before I started, so it was relatively simple. Took my time with the heat gun. Low setting. Didn't want to damage the plastic door.
There was quite a mess of old, dried glue on maybe half of the glove box door. Tried four things to get it off: paint thinner, Goo Gone, rubbing alcohol and nail polish remover. Not a lot came off, even using that metal scraper and more heat.
That surface should be cleaner and rougher than it is before I try gluing the new woodgrain, so I will try sanding off the old glue. Ran out of time for today. Will keep you posted.
Now, I'm motivated to replace mine.....fortunately, my wood grain pieces are all in good nick but the bezel itself is showing its age.
That said, I took apart my gauges yesterday and painted the insides and polished the lenses...everything got a good cleaning and polished the lenses (even lubed the speedo cable as an added bonus) and reassembled. Did it all in a couple of hours. Not difficult at all. Putting them back together was a little fiddly but all in all easy and very worthwhile.
OK, Step 2 is complete. Used 100-grit sandpaper to get most of the old glue off the lid of the glove box. 220-grit didn't do a thing.
Here's a photo of my old woodgrain next to the new one. That's the old one on the left. I kind of prefer it, but there's no turning back now.
The gluing was nearly trouble-free. Except I wouldn't bother following the glue instructions that say to put the two pieces together, then separate them for 10-15 seconds before putting them together again. That just makes a mess and leaves strings of glue in places you don't want it.
Re-attaching the Cutlass Supreme script to the glove box door was as tricky as I feared it would be. Reached through the holes in the back of the glove box door by holding the speed nuts with tweezers. Sure enough, I dropped one of the nuts into the door. Used a telescoping magnetic tool to retrieve it. Once you get the nut onto the post, try to poke it down as far as you can with the tweezers or something pointy, then reach in with a socket to turn it tight.
Here's my finished product, installed. You'll see it doesn't quite match the woodgrain piece surrounding the radio, to the left. That's the last one I'll replace. And the trickiest, as it's long and very thin in places. Not to mention I have to get all the switches off first. Until then...
Ran into a roadblock. Hope somebody (Tom?) can help me out.
First, what went well: got the ***** off the wiper switch and heater controls no problem, using a tiny allen key. Used a heat gun and tiny screwdriver to pry/peel off the metal applique (is that the right word?) from all three switches. Took Tom's advice to tape the edge of the switch plates to prevent damage when prying.
The problem: The wood grain pieces goes behind the wiper and convertible top switch plates. So the switch plates have to come off. I can hardly get a look back there from under the dash, let alone do whatever it is I have to do to get those off. I understand there's a nut or two that holds them on, but I can't even see it.
The wiper switch has three small screws IIRC. I am fairly confident that the climate control panel can stay. The top switch will have to be left to the guys who have soft tops.
The wiper switch from behind/under dash is a big PIA
There are two 1/4 in screws that hold the top switch from behind. I find it easiest to remove the gauges and reach through the holes with a 1/4 inch socket. It’s feel only type of job.
Tom, yes I'd read that thread before starting. And correct, the heater switch plate stays, as the wood grain does not go behind anything. But as the other guys have said, I don't think it's one nut on the wiper or top switch plate. If it's two screws, I have a hard time seeing them.
Dave, your idea of removing the gauges and reaching through the holes sounds interesting. You mention a socket. Screwdriver not required, then? That would certainly make it easier to get a hold of something you can't see. Perhaps a mirror would help?
So I removed the fuel gauge and went through the hole to get two screws off the back of the wiper switch. Lost one in the dash
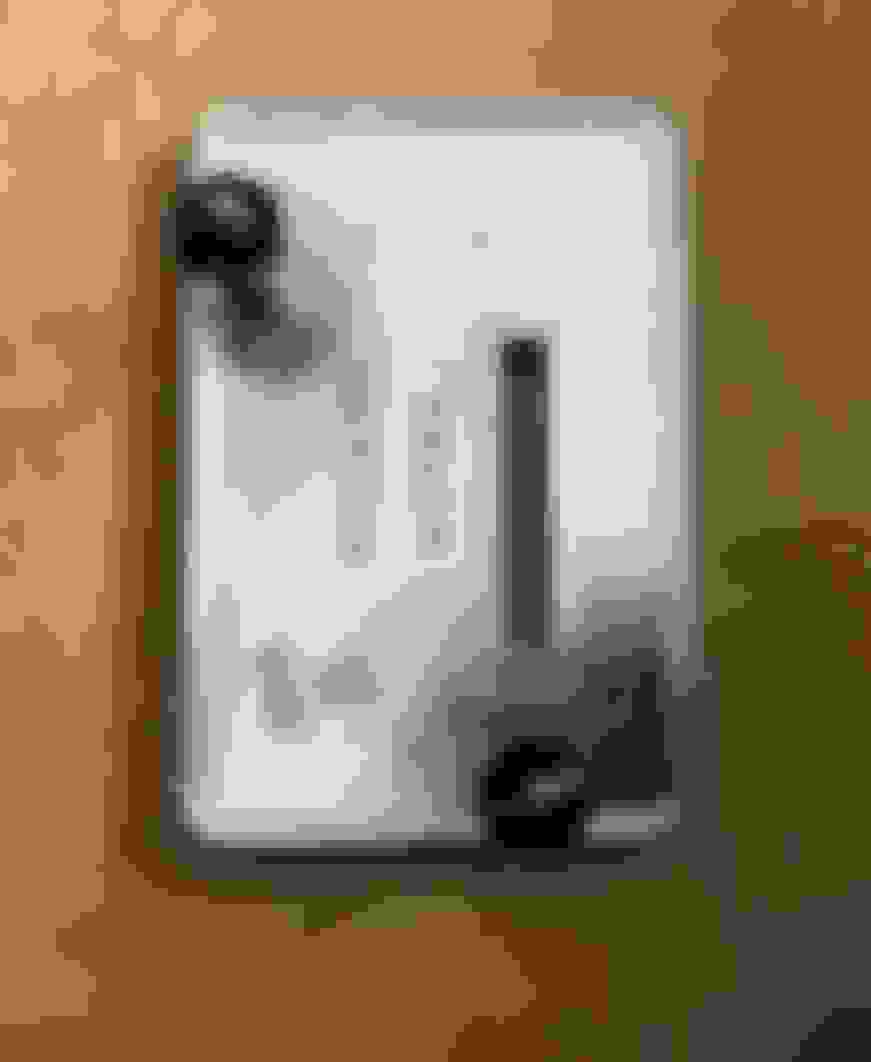
The thing is, the switch plate is no looser. Only the switch itself has loosened. I managed to worm my way under the dash with my phone and a flashlight for this photo. You'll see the two empty screw holes on the left side of the switch. There's another screw on the lower right. I haven't loosened that one yet. I don't think the screw on the upper right is related to this. It seems to be holding something else down. Either way, the switch plate should be loosening by now.
Don't know if you can see this, but there's the sharp end of steel poking out between the two empty screw holes. Surely that's not holding the switch plate onto the dash? Do I need to get a tool on that sharp end and push it back through the dash?
The good news is I haven't hurt my back or lost my patience, yet. Not sure which will be the first to go.
Paul
Last edited by pfriesen; Jul 4, 2019 at 06:11 PM.
Reason: trying to move text above photo
You're doing great and the replacement pieces all look great!
You need to remove that 3rd screw on the lower right side too. Don't push on anything until you remove that 3rd screw, and the top switch.
The wiper switch should come out with the 3rd screw removed. The switch plate may need some coaxing after being stuck on there for 50 years. Does your new switch plate have 2-sided tape? Don't mess with the wiper switch plate until you also have the top switch removed as well. Then the whole dash applique can be removed.
Tom, do I even have to take the actual wiper/top switches out? They are completely behind the dash. I believed the switch plates out front are the only thing I need to remove to get the wood grain off. I may be wrong.
I'm not replacing the switch plates. Just the thin metal (applique) that has the words on it (Wipers On/Off, Top Up/Down). My new ones come with a peel off sticky backing, it appears. Unlike my new wood grain pieces, which I'm gluing.
You can see the sharp end of that stud in the photo. It's the shiny tip, between where the two screw were. Still not sure if that holds the switch plate on. Could the plate be glued on?
Paul, I actually wondered why you were removing the entire switches. Several posts above, you were only going to replace the inset face plate for the switches; not the lower dash wood grain. Per the other thread, the wiper switch plate shows only one stud with a nut holding it on. Yes, there may be glue holding the switch plate on as well, but if there is no nut holding the back of the switch plate to the dash, you should be able to remove the wood dash applique with the switch plates still glued to it. Then you can remove the switch plates on your bench using some mild heat.
The sharp metal piece you mention is somewhat blurred in the pic. It may well be that it is part of the switch plate that helps square up the plate with the rectangular opening in the dash. You may need to heat the area around the switch plate opening while it's still on the dash to get it to release. Be sure there are no nuts on the back side holding the switch plates for both switches. The switch plates may be a snug fit onto the dash, as well as glued on the applique.
Looking at this pic (from the other thread) showing the back side of the wiper switch, it's hard to say what the sharp object is in your pic. Perhaps it is a wiper switch plate positioning piece that rests against the edge of the wiper switch and snugs it all square. You should be able to make that determination.