When you click on links to various merchants on this site and make a purchase, this can result in this site earning a commission. Affiliate programs and affiliations include, but are not limited to, the eBay Partner Network.
Hello I am looking for a Master power window switch for my 1973 Oldsmobile Delta 88. a couple of my wires were broken when my door panel was removed for a paint job. Or can the wiring be replaced? if so what do I look for, thanks. for any all suggestions.
Hello I am looking for a Master power window switch for my 1973 Oldsmobile Delta 88. a couple of my wires were broken when my door panel was removed for a paint job. Or can the wiring be replaced? I have the 4 tab switch that sits above the arm rest if so what do I look for, thanks. for any all suggestions.
Hello I am looking for a Master power window switch for my 1973 Oldsmobile Delta 88. a couple of my wires were broken when my door panel was removed for a paint job. Or can the wiring be replaced? I have the 4 tab switch that sits above the arm rest if so what do I look for, thanks. for any all suggestions.
Sincerely a Damsel in Distress lol
Sorry, I'm having a difficult time understanding/accommodating your question(s).
(1) If a couple wires were broken - they weren't broken on the switch itself since there are no serviceable wires on the switch; instead, there are metal poles to accommodate the wiring harness which plugs into the switch. If they broke a couple wires, you should not need a new switch you need those couple of wires spliced/butted together - depending on where the breaks occurred in the wiring (a picture would assist greatly). Where are the wires broken - in the door panel wiring harness or in the wiring connector which plugs into the switch?
(2) You should be able to demonstrate if the switch itself is defective by simply splicing/butt connecting temporary wire(s) to fix the wire breaks - this should allow you to determine if, in fact, you need a switch. Are you positive the switch itself is not functioning?
Last edited by Vintage Chief; Aug 7, 2021 at 10:29 AM.
From what I can visualize from your pictures, it would appear you need a new wiring harness connector. The wiring harness connector is the item which "plugs into" the switch. The assemblage of wires connect into the wiring harness connector and then the wiring harness connector "plugs into" the switch; or, thought of in the converse, the switch "plugs into" the wiring harness connector. You should be able to (with the aid of a flat-tipped screwdriver) lift (jiggle) the connector off of (from) the switch body. This should then reveal the wiring harness connector.
BTW, the better way to remove the switch is to remove the entire "door panel" - this will then free up the entire connector and you can then visualize the wiring harness (with all the wires) and the connector. It appears someone pulled the entire switch from the door panel. Surprising it doesn't look like the door panel was ruined (or maybe it is). None-the less, far better to remove the entire interior door panel than to attempt to pull that switch from the flimsy interior door panel material.
My apologies, sorry, this is a D88 and the switch assembly is built into the armrest I think. Forget what I said about the door panel. None-the-less, I would think you could access the switch and connector better if you were to remove the armrest - not completely certain.
You're trending in a somewhat positive direction - at this point you have now stated it isn't the switch, but instead it's the wires. That's quite different than needing a switch. The issue is going to become one of wiring harness connector (pigtail) availability for a 1973 D88. Frankly, I do not know what the availability or part number is for a 1973 D88. Someone else might be able to assist on conceived availability and perhaps a part number. You can create a thread in the Parts Wanted section and someone may have or know of availability. The image (link) below is essentially what a power window switch (connector) pigtail assembly looks like. If such a pigtail is available for you vehicle, you would simply cut the current wires, and splice in a new (or used) pigtail (connector). Again, the link below is for demonstration purposed only so you can better visualize what you're looking at.
I'll mention there is the possibility the wiring harness pigtail (connector) you're looking for might very well have been used on other GM full-sized vehicles, as well - i.e. Chev, Buick, Pontiac. Others might have additional information to assist you. Here's another link for illustration:
Just repeating myself here for clarity. Get a straight flat-tipped screwdriver, and begin prying the connector off of the switch. You'll need to surround (go around) the connector between the connector and the switch but the two will eventually separate. Be patient, use a little twisting action with the screwdriver and you'll see the connector will lift off of the switch with a little persuasion.
Pookie:
You probably need a new connector which can be purchased as a "pigtail" with short sections of wire that are spliced into the existing wiring harness. I'm more familiar with A-body cars (Cutlass, Chevelle, etc.) but GM often used the same motors and switches across multiple models & years. Here's a picture & link to one on eBay that may be what you need to repair your harness. I hope this help you out.
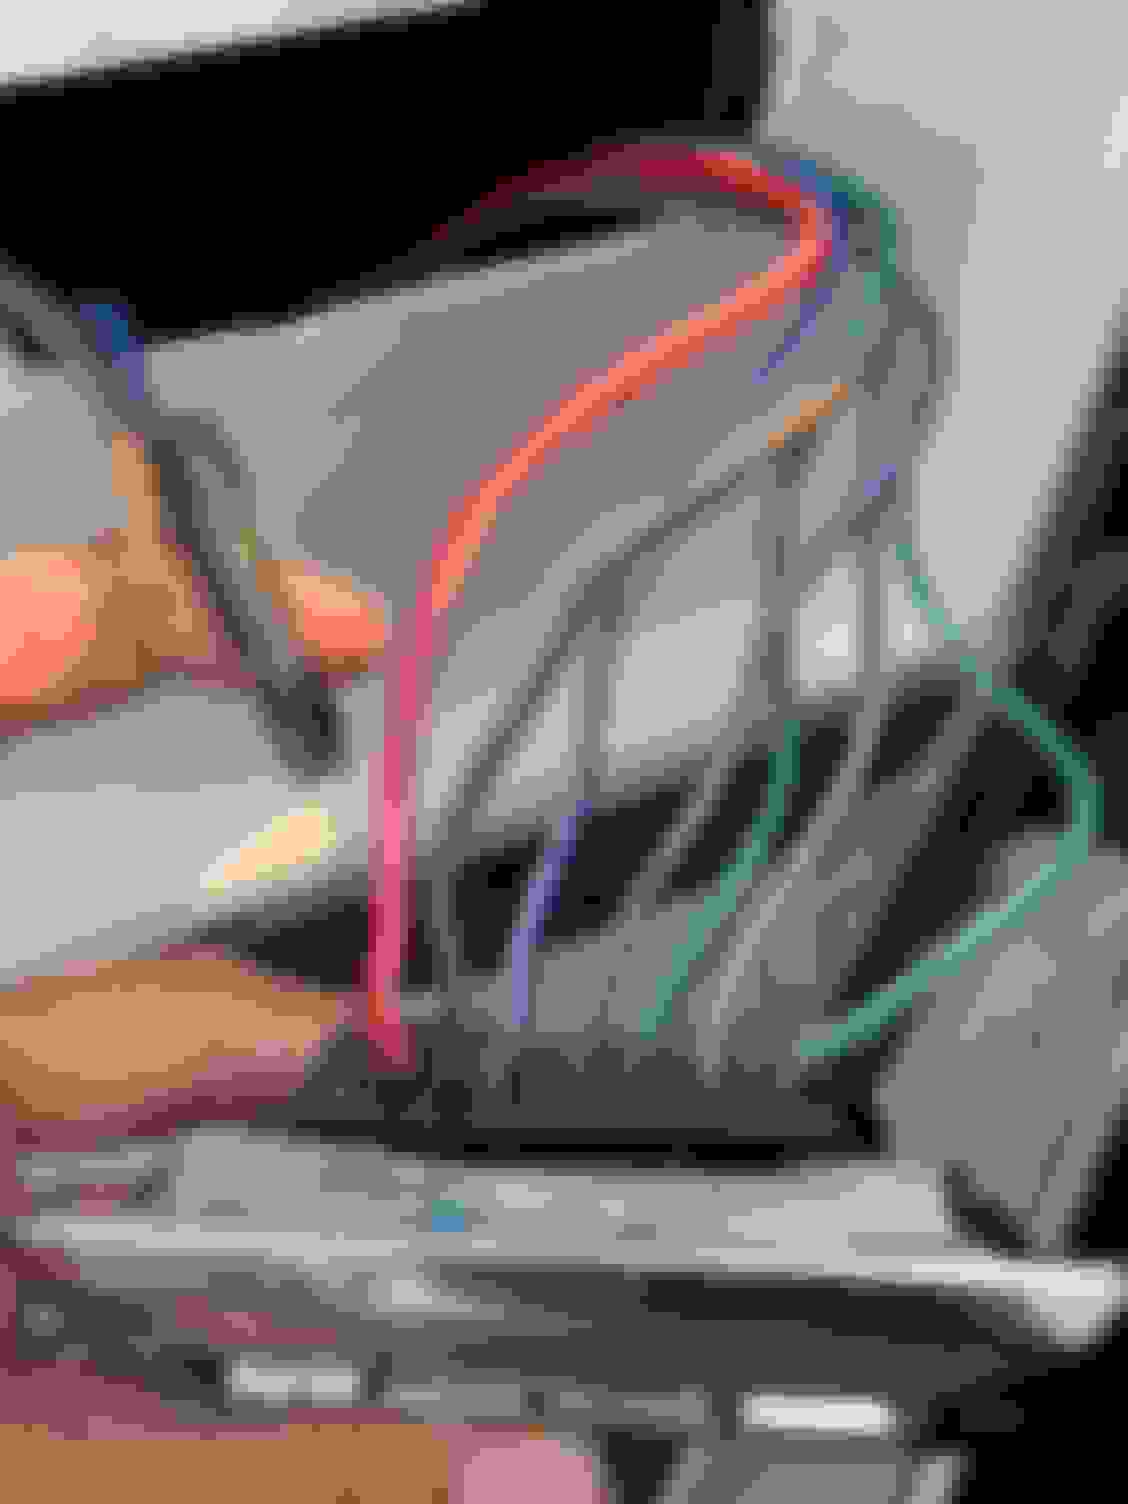
So I purchased the wiring harness connector, thanks @ Vintage Chief, and it fits perfectly. The only thing is some of the wires are not the same colors as the original connector. Here are some photos, does it matter the color of the wire of do I just need to match the wires exactly to the wires on the original connector?: Original Connector wiring New wiring connector both connectors old one attached, the new one behind it
Ensure you match the same wires of the wiring harness (as noted by the original connector) into the exact same positions of the new connector - regardless of the colors on the new connector. It's the position of the original wire(s) into the same position which you want to maintain. You could take some pieces of tape and mark them to match up - that may help.
For the removal of the old connector and installation of the new connector you shouldn't be taking wires OUT of the connector(s). You should CUT the wires from the old connector (at the point I've marked CUT) and then SPLICE the new connector with its accompanying wires with the old wires. Be careful if you use crimped butt connectors (they're rather flimsy). Most folks would solder the two wires together and use heat shrink wrap on each of the wires surrounding/enclosing each splice. Use some good electrical tape to then neatly bundle the wires together as a single wiring harness which you'll then install back into the door panel. I believe I have matched the wires correctly for you - aside from the two which are broken/missing (brown/blue). Be careful when you reinsert the wires back into the door panel so you don't interfere with the window's movement UP & DOWN. Even though I've mentioned this previously it's far easier to remove the door panel to gain the work room you need to perform this operation correctly. I originally thought your switch was in the arm rest but I can see it is in fact in the door panel. It's a little tricky pushing that switch back into the door panel without busting out the door panel as those side clamps get awfully rusty and don't move easily. Good Luck.
Last edited by Vintage Chief; Aug 14, 2021 at 06:41 PM.
Reason: sp