


Silver and Black


Registered User
Joined: May 2008
Posts: 3,625
From: Austin, Texas
If you go to an auto paint supply store they should have a good quality 3M blue vinyl tape in a narrow width. Or you can even use the real narrow regular 3M masking tape from the same source (the stuff that's the typical light brown in color).
As Drew already suggested, the pinstripe tape should also be fine. In fact, it may be a bit thinner and easier to make curves with. Also easy with regard to getting it....any auto parts store probably has it.
As Drew already suggested, the pinstripe tape should also be fine. In fact, it may be a bit thinner and easier to make curves with. Also easy with regard to getting it....any auto parts store probably has it.
Registered User
Joined: Mar 2010
Posts: 410
From: IL..where the road salt kills..
I've always used clean grease and applied with my finger (slowly) on the sections that I want unpainted and just spray the whole piece. Let it dry very well (a good day or two) and then just take a clean rag and wipe. 
Registered User
Joined: Dec 2007
Posts: 1,151
From: Raleigh, NC
Paint the bezels and use a buffing wheel to remove the paint on the edges. While you're at it, consider sanding the edges to remove the anodized finish and polish them to a chrome like finish. I started with 150 grit and finished with 2000. Takes a little time but the results are worth it.

Registered User
Joined: Jan 2011
Posts: 1,665
From: Maryland
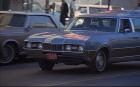
It appears to me that your bezel and that of mhood are both installed incorrectly. The small notches in the bezel to get to the headlight adjusting screws are not in the correct location. There is an adjustment screw at the top and on one side yet both photos show a notch for a screw at the bottom, where there is no adjustment screw. It appears they are upside down and possibly on the wrong side.
Thread Starter
Registered User
Joined: Aug 2010
Posts: 44
From: Milton GA
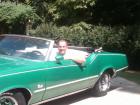
I took off the bezels and decided to clean them up before painting with some Goof Off I had lying around. I was amazed how shiny they looked underneath the paint so I spent a couple hours trying to get all the paint off. I like the look, I know its not correct for the 72 but it seems to make the front end pop. Thoughts?
Did Olds really just paint the chrome over for 72? Weren't the 71's like this?
Thanks for the advice, I think I got them mounted properly.
I didn't like the way the paint looked on the medallion so I am going to try again.
Did Olds really just paint the chrome over for 72? Weren't the 71's like this?
Thanks for the advice, I think I got them mounted properly.
I didn't like the way the paint looked on the medallion so I am going to try again.

Thread
Thread Starter
Forum
Replies
Last Post
4speed455
General Discussion
40
May 29, 2017 06:38 AM


