When you click on links to various merchants on this site and make a purchase, this can result in this site earning a commission. Affiliate programs and affiliations include, but are not limited to, the eBay Partner Network.
I recently acquired a 1970 Olds Delta 88 with a 455 and a 2-barrel. The car has 54,000 original miles on it but it has been sitting in a garage since 1993. The interior is all but perfect and the paint will shine up excellently. The gas tank is full of rust but I've already dropped it and I'm working on that as we speak. Obviously there is a lot to do before I can drive it regularly. The other day I opened up the valve covers to have a look at the valvetrain (the seller said that it ran and started it for me when I came to look at it originally. It was ticky at the top end so I figured there would be work to do there). I found 3 bent pushrods (in fact, so bent that I can't take them out). I also know that the cam gear is a classic weak point for these cars so i was planning to do a timing set already and from what I am reading you have to pull the engine to do that job. While I have it out (and with knowing now that I have bent pushrods) I was going to send the heads away for a valve job and of course get new pushrods. I have stuck a camera in the plug holes and there is a lot of carbon in there but I can't tell exactly how bad my cylinder scoring might be. In the event that I do need to rebuild more than just the top end, I am not really super interested in making a race machine out of a 4200 pound 4 door. I'd really just like the engine to sound good and run well. Do y'all have any advice for me on using as many stock parts as possible and rebuilding? For instance, if I need to bore out the cylinders and get new pistons, I would prefer to be able to reuse the stock heads and the stock crank. Basically, I'm not looking to spend $10k on a rebuild and I don't need the thing to blow up the dyno. I'm already kind of annoyed that I have to pull the engine to do the timing set, but if I have to do that then I might as well go ahead and go through everything just to make sure I don't have to worry about it down the road.
Sorry if anyone here is also on the OCA facebook page and has seen me asking similar questions there lol. I'm just trying to get multiple perspectives and I want to have a good reliable street driver that doesn't make me take a second mortgage out on my home. Thanks for the help!
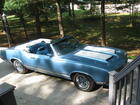
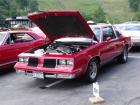
I guess I could have included some pics with the first post! Here are some of the whole car and also some of the engine with the valve cover off. You can see that two of the three bent pushrods were the very first ones at the front of the motor on each side. Don't know if that has any significance or not. The top end of the engine wasn't sludgy or anything. It just didn't seem to have a lot of oil on it at all.
I see the plates are from Warren County. Is that where you are located? Nice score. Although I have never changed a timing set out on a Delta, I have on a Cutlass and did not have to remove engine.
I would make sure motor turns freely, replace push rods snd if all that works then replace timing chain. Good luck.
I see the plates are from Warren County. Is that where you are located? Nice score. Although I have never changed a timing set out on a Delta, I have on a Cutlass and did not have to remove engine.
I would make sure motor turns freely, replace push rods snd if all that works then replace timing chain. Good luck.
Don W
I am actually in eastern ky but yes this car came from Bowling Green. It was bought new there.
the motor definitely turns freely. I am reading that in order to take off and replace the timing cover on the 455 you have to drop the oil pan and in order to drop the oil pan you have to at least lift the engine and if you’re going to do all that then you might as well take it completely out. Was that not the experience for you?
WOW... Slow down.... This is what I would try. I'll bet after the car setting for years a couple valves stuck (rusted) on their seats. When engine was cranked they wouldn't move- thus the bent pushrods. Mess around with the valves to get them freed and buy some new pushrods. Put back together and see if OK. You can change the timing chain set in the car.. I am a cheap guy, I would check that first. I wouldn't rebuild.. See what happens...I'll bet that old girl will be OK. Only thing wrong with it is it sat too long- Good luck! keep us informed.
WOW... Slow down.... This is what I would try. I'll bet after the car setting for years a couple valves stuck (rusted) on their seats. When engine was cranked they wouldn't move- thus the bent pushrods. Mess around with the valves to get them freed and buy some new pushrods. Put back together and see if OK. You can change the timing chain set in the car.. I am a cheap guy, I would check that first. I wouldn't rebuild.. See what happens...I'll bet that old girl will be OK. Only thing wrong with it is it sat too long- Good luck! keep us informed.
Thank you Greg! This was my initial thought as well. But a lot of the people (on Facebook) tell me that my valves probably need done at the very least and I might as well just rebuild now. It’s got me spiraling for sure. I also have oil in a couple cylinders but I’m willing to bet that the rings will come back around with a few heat cycles and some good soaks in marvel. You concur?
Nice car, I will be following.
Yes, I agree with Greg, get it freed up and running first, I'm in a similar situation, got my 455 D88 running the past summer, had sat for at least 6 years, several doses of MMO in oil and oil changes, comp test revealed all is well 155-160 psi on all cylinders except #1 120psi, it showed a bad valve with a leak down test at 80% I also will be doing timing chain and a valve job, I will be pulling engine though, TOO FAR to reach in on a Delta to do engine work, back hurt for days after doing water pump.
Owing to the fact that this engine has sat unused for over 40 years, this engine probably has internal corrosion .
The fact that this engine has three bent pushrods means that it has three stuck valves.
Considering your situation, I would recommend removing the engine, and pulling the heads and oil pan.
That way you can do a valve job, as well as measure cylinder bore wear and check the condition of at least one main and rod bearing.
If you have more than .012 "taper" in any of the cylinders the block should be bored.
If the crank is more than .002 out of round on any of the rod journals then it should be ground.
Fooling around doing anything else is going to be a waste of time.
Take it from a guy who has actually worked on "B" body's. It's a helluva lot easier to change a timing chain with the engine out.
Last edited by Charlie Jones; Jan 7, 2025 at 07:15 PM.
Owing to the fact that this engine has sat unused for over 40 years, this engine probably has internal corrosion .
The fact that this engine has three bent pushrods means that it has three stuck valves.
Considering your situation, I would recommend removing the engine, and pulling the heads and oil pan.
That way you can do a valve job, as well as measure cylinder bore wear and check the condition of at least one main and rod bearing.
If you have more than .012 "taper" in any of the cylinders the block should be bored.
If the crank is more than .002 out of round on any of the rod journals then it should be ground.
Fooling around doing anything else is going to be a waste of time.
Take it from a guy who has actually worked on "B" body's. It's a helluva lot easier to change a timing chain with the engine out.
Sigh. There seems to be two schools of thought on my situation and it appears that I'm the one who has to make a choice. I'll update as I go. Thank you all!
[QUOTE=DevonDelta;1610380]Sigh. There seems to be two schools of thought on my situation and it appears that I'm the one who has to make a choice. I'll update as I go. Thank you all QUOTE]
Well, my "school of thought " is based on actual experience freeing up rusted stuck engines.
Of which I have done several over the last fifty years.
In every case they all still needed to be overhauled even though some were made to run (poorly).
Sigh. There seems to be two schools of thought on my situation and it appears that I'm the one who has to make a choice. I'll update as I go. Thank you all QUOTE]
Well, my "school of thought " is based on actual experience freeing up rusted stuck engines.
Of which I have done several over the last fifty years.
In every case they all still needed to be overhauled even though some were made to run (poorly).
Didn't mean to offend you, Charlie. I appreciate your perspective.
Didn't mean to offend you, Charlie. I appreciate your perspective.
No offense taken.
I just didn't want to see you waste your time trying to revive an engine that at least needs a valve job and very possibly a complete overhaul.
Before doing anything, remove the oil filter and cut it open. Make sure the car wasn’t parked because of engine problems. If the filter is clean of debris, move on.
Get the valves freed up. Remove the rocker arms, spray the valves with penetrating oil, and let them soak. Next, take a piece of hard wood and a hammer and lightly hit the valve stem. Hopefully you can get them freed up. Once they are moving freely, reassemble everything, drain the oil, and refill. Pull the distributor and prime the engine with a drill. Once that’s done, reinstall the distributor and try to start it.
I’d personally want to hear the engine, and hopefully drive the car before yanking the engine out for an overhaul. It would really suck to build the engine, install it, and then find out the transmission slips, or the rearend howls, or rusted brake lines, leaky heater core, or any other countless obstacles to overcome when bringing a neglected car out of hibernation.
Once the car is running, then you will have a much better idea on how to proceed. You might find it runs like a champ.
I tried to replace the pushrods and get the valves freed up and see what I had. I really tried. But for the life of me I couldn't get *any* of the bent pushrods to come out. So I removed the intake manifold. This is what I found:
anyone care to change their opinion of whether or not to rebuild?
This engine *ran* and started *immediately* every single time. It didn't sound great, but it only sounded ticky, not like it was rapidly eating itself or anything.
The sludge isn't excessive. If you can get those pushrods out by removing the rocker arms and bridges it might be worthwhile trying to resurrect the engine without a full rebuild.
To properly clean this mess I'd pull the engine and take it apart.
I have a lower mileage '69 455 2bbl too, it's much cleaner but it's down to the shortblock minus cam and lifters currently. I can possibly polish the crank and hone to get by, with all new bearings/rings/cam & lifters and gaskets, but you don't know what's hiding internally and are showing alot of filth with some damage too! $.02
Alright, a little update on the Delta for those who are following along. Also some questions for the hivemind.
I decided to take Greg and RWK's advice and replace the pushrods and get the valves freed up and see what I have from there. Obviously three of the pushrods were too bent to remove, so I went ahead and cut them in two with a deathwheel. One of the bent pushrods apparently knocked the retainer clip out of the top of its lifter so I decided to replace that lifter. I pulled it out and it looks fine, no grooves on the bottom side at all. Then I got to thinking that stuck lifters (as opposed to stuck valves) could also cause bent pushrods. So $90 later and I have now replaced all the lifters. They all looked completely smooth on the bottom but I can't really tell if any of them are stuck or not (if anyone knows a way to test this, I would like to do so, I kept them in order just in case I could determine somehow if any are stuck). I have oiled all the valves down with Marvel and they all seem to be doing their thing just fine. I hit them all with a hammer and none of them sound stuck. I think it's possible they freed up after the initial startup (which probably bent the pushrods). Either that or it was the lifters that caused them to bend. I am at the point now where I need to torque down the rockers. I have been told that on an Olds you do this by finding TDC, torqueing #1 rockers to 25 lb/ft, rotating it 90 degrees clockwise, torqueing #8 rockers down to 25 lb/ft, and so on through the firing order. Does this sound right to everyone?
I decided to go ahead and take this opportunity to make the switch to a 4-barrel intake and carb. I have an Edelbrock carb on the way. I have read on here that you can't use the stock air cleaner with an edelbrock carb. Assuming that is true, does anyone know what I should do about the pipe from the exhaust manifold to the air cleaner? I think it's the heat riser if I understand correctly (although I might be wrong about that). I assume I need to block it off in some way. Do I also have to block off the crossover port in the engine if I am going to do that? What's the best way to block either/both of these off, assuming I need to?
Oh! One more thing: I wanted to go ahead and clean out all the oil passages that I possibly could while I have the intake manifold off but I just wanted to confirm the location of all of them before I start. Does anyone have a diagram or something showing where all the oil passages are in the 455?
Thank you all for your help! I might still end up needing to do a full rebuild on this engine, but I'm still hopeful I can be enjoying the car in a few months, rather than having it blown apart in my garage for years.
Here are some pictures I have taken so far:
This is the first lifter I took out. The bent pushrod had knocked out the retainer clip holding the plunger in. The bottom side of the same lifter. I also cleaned all that sludge and crud out of the valley. Much better now. New pushrods and new lifters, ready to torque down the valvetrain. Just showing off how clean this car was underneath. I have the gas tank out cleaning it. After por-15.
There are drain holes in the corners of the heads, and oil drains between the lifters. Use a shop vac to clean as much of the crud as possible, drain the oil pan, and use some diesel fuel or solvent to flush as much crud out of the oil pan. Definitely plan on a couple oil changes, o wouldn’t be surprised if there is a ton of debris down in the oil pan.
Which brings up the next subject: have you looked at the timing chain? Oldsmobiles (and many other engine makes) use a nylon coated cam gear. When the nylon gets old and brittle, it flakes off and falls into the oil pan. That nylon collects in the oil pump pickup, restricting oil flow. If enough nylon flakes off, the engine either stops running due to the valves being out of time, or the engine stops running due to oil starvation.
You can get an idea on timing chain condition by reinstalling the distributor. Slowly rotate the engine in ONE direction (don’t reverse rotation if you overshoot the mark) until the timing marks line up. Then slowly rotate the engine the other direction while watching the rotor in the distributor, as soon as you see it move stop and look at the timing marks again. I’m not sure of the “official” spec, but if it took 15-20 degrees of rotation to get distributor movement I’d consider that excessive.
My family and I had a 68 455 engine w/ 2 bbl Olds for 55 years. Was mine for a dozen. Other than routine maintenance the only thing that really needed replacing was the water pump. Was pretty amazed as to how well that engine was. The 2 bbl carb was rated for 310 hp and and even could spin the wheels if I wanted to after 50 years - not sure I would change to a 4 bbl Holly, but if you have the money and just want to, go for it, but you don't need it. My first car was a Pontiac that had a 455 with 4 bbl and I got single digits mpg, but I did notice a little more power when I was quasi racing and gunning it but you're not going to do that with yours. Unless you are going to do the rebuilt yourself, I would get some quotes from some shops and weigh the pros and cons of just buying a replacement motor. I find plenty of refurbished / used engines online. You should be okay if was garage kept but would be concerend of spending a lot of money of something and still not running right - perhaps others here can comment on restoring barnfinds. Welcome to the Forum and congrats! I hope you are on the road soon.
You can get an idea on timing chain condition by reinstalling the distributor. Slowly rotate the engine in ONE direction (don’t reverse rotation if you overshoot the mark) until the timing marks line up. Then slowly rotate the engine the other direction while watching the rotor in the distributor, as soon as you see it move stop and look at the timing marks again. I’m not sure of the “official” spec, but if it took 15-20 degrees of rotation to get distributor movement I’d consider that excessive.
It's more like 8 to 10 Matt.
But yes, that is also my preferred method for passing judgement on timing chains without tearing apart an engine.
Since I was last on here, I have replaced all four shocks, gotten four new tires, gone through each of the brakes, replaced the front two wheel bearings and checked the rears, and done a ton of work to the engine. I went ahead and took y'all's advice to do the timing chain while I had it apart. That went relatively smoothly, except for putting the timing cover back on (boy that was a pain, I'm not 100% sure the pan won't leak now, even though I added The Right Stuff, but I guess we'll see). I went ahead and painted all the accessory bracketry and cleaned up the power steering pump and the alternator and the fan and the shroud and flushed the radiator while I had it all out. I painted the engine too (the blue isn't quite right, but it's a lot better than the rust color it was before). I went ahead and got a new water pump cause why not. I also decided long ago to upgrade to an aluminum intake and a 4brl, since I was taking the intake off anyway. I know there are a million different opinions on whether or not this was a good idea, and I totally respect everyone's opinion, but I decided for mine that I wanted to open it up a little. I've got all of the front of the engine back together now, the new intake manifold on, and the water pump and alternator back in place. Here's what the engine looks like now:
Now that I'm done with adding big things, I'm starting to plan for the small things I'll need to think about before I try to start it, and that has led me to a few questions I'm hoping some folks here can help me with:
1. Please don't yell at me but I cheaped out on the manifold. I was thinking of getting an Edelbrock performer but ultimately I didn't want to spend that much on it and basically decided that if it was really worth the upgrade, I could always do it in the future. Instead, I went with this chinese knockoff one from Amazon. It actually seems pretty nice and seems to fit well (although who knows, I guess I'll find out when it has 30 vacuum leaks). The problem I see with it now is that it doesn't have any pre-tapped holes for manifold vacuum except for the big two at each corner in the front, the one on the back directly below the carb for the brake booster, and a tiny one right underneath where the choke will be (I'm really not sure about the purpose of this one, my carb is electric choke so I was thinking of just plugging this hole with a screw).
My question is this: the stock manifold has like three or four tiny vacuum fittings scattered around the top of it. I know where some of them go, I don't know where some others go, but I really don't want to fool around with trying to drill and tap new tiny vacuum ports in the manifold if I don't have to, especially since it's already installed in the engine. Is it necessary that any of the components running to these ports on the stock manifold actually be run from manifold vacuum? Can I get away with deleting or capping some or running some off of carb vacuum? If I understand the manual correctly, the vacuum tree at the front is supposed to go: top to distributor, middle to carb, and bottom to manifold vacuum. I think I also remember reading somewhere that this system could be deleted as long as initial timing was modified to compensate for the new lack of vacuum at idle. Do I understand that correctly? And if so, could I just run distributor vacuum advance to the carb and then put a new tree sans valve in the place of the current vacuum tree and use that to provide manifold vacuum to anything else that needs it?
2. My new intake manifold also lacks a bolt hole for the rear alternator support bracket. Seems to me that the bracket I have installed supports the alternator just fine but I assume that there was some specific reason that GM engineers added that second bracket, so I figured I'd check. I know that on the edelbrock performer, the manual suggests bending the back support bracket so that it lines up with the hole they provide, but, like I said, my el cheapo manifold doesn't even have one. Again, trying to avoid drilling and tapping the manifold if at all possible. Anyone ever ran with just the front alternator bracket?
I think those are all my questions for now. If anyone has any helpful advice, I'd really appreciate it.
All of the accessories are back on the engine, new tires, new shocks, new plugs, new wires, new rotor, new cap. Still don't have the fuel tank addressed but I decided this past weekend that I would finally try to start the motor and set timing and dial in the carb.
After some initial failed starts and some tinkering, I determined that I had put the distributor in 180 out. So I corrected that and it fired right up, but ran pretty poorly. I hooked up a vacuum gauge and it wouldn't hold a solid vacuum, basically the needle bounced wildly with every rotation from about 0 to 10. I had a feeling that I had a vacuum leak so I ran a smoke test and absolutely nothing leaked even a little bit. Honestly, I was relieved by this because I really didn't want to do the manifold again. But the question remained what exactly was wrong with it. I decided to compression test all the cylinders. Every one of them tested between 150 and 170, except for cylinder number 4, which tested zero compression at all. Admittedly, I freaked out a little. I was mainly just mad at myself for not compression testing this thing sooner. But eventually I pushed past my frustration and took the valve cover off. Nothing looked suspicious. I took both rockers off for cylinder 4 and examined the springs and valve stems. All looked correct to me. I sprayed a bunch of brake clean on both valve stems and gave them both a few wacks with a rubber mallet. One of them definitely sounded different than the other. So I kept this up for a while, wacking and spraying. Then I put it back together and compression tested again and it still showed zero. So I gave it one more shot of brake clean and for some reason I guess that was the one that did it because I hit the starter again and it now tests at 150psi.
I put it all back together, dumped some fuel in the carb, and the old girl started right up. I adjusted the timing some and dialed in the carb, and man it runs really well. Not too shabby for a $120 intake manifold and an $80 chinese carb lol.
Now if I can just get the fuel tank sorted out, I can finally drive it. I'm so excited!
Updated pic of my finished refresh.
Thanks to everyone who has helped me along the way!
I'm not really 100% sure which of the valves on that cylinder was stuck because I never did a leakdown test, but yes one of the pushrods on that cylinder was dog-legged all to hell. I would say it was probably that one. And yeah, don't think for a second I don't know how lucky I am -- I literally couldn't believe it when I saw that needle finally jump. I tested it five more times just to make sure I wasn't imagining it.
Looks great! What/how did you use/do? Is that original paint?
I used a rotary polisher with a foam pad, two passes with Meguiar's ultimate compound and one pass with Meguiar's Show Car Glaze. Nothing fancy, just seeing how well it would polish out. I might follow it up with something else but really I'm just trying to make it presentable for its first drive!
I thought it was the original paint, it's definitely the original color from the VIN. But I saw some evidence of a respray when I was polishing so I think there are definitely two layers of Aspen Green on there.
Last edited by DevonDelta; Jun 20, 2025 at 08:00 AM.
So I suppose that I'm the guy who is going to ask- tell me about this cheap Chinese intake manifold and carb...
the manifold is on Amazon, just search for Olds 455 intake manifold. The fit and seal seems to be good. It doesn’t have any screw holes for any accessory brackets or any manifold vacuum ports other than the one for the brake booster, but for my purposes it seems to be fine. It’s single plane so tuning it for the street might be dicey but I don’t know yet.
The carb is just a little Edelbrock knockoff from eBay.
I’m reserving judgment on both of these parts because I keep having valve cover leaks that spill right down on my spark plugs and foul them out. Currently waiting on my third set of gaskets to arrive and I’m going back to the stock valve covers now (the cheap aluminum ones from Amazon leak, I know, I’m shocked too).
I'm jumping in a few days late apparently but on clearing out the oil passages, I highly recommend draining the oil, removing the distributor, and dumping a few quarts of gas, kerosene, paint thinner, CRC from Tractor Supply; some sort of solvent if you're feeling expensive and running the oil pump. Then change the filter and drain whatever you put in there and do it again, just run it for a few minutes. This will clear the varnish out of the passages, especially the ones running parallel with the camshaft. Then drain and change the filter and dump in a couple quarts of your favorite cheap 5W30, just enough to get all the passages covered. Then drain that and dump in the good stuff, fire it up. Bent pushrods....yeah that's an issue but obviously tomorrow's if she's runnin'.