Intake Manifold Reinstallation
#1
Intake Manifold Reinstallation
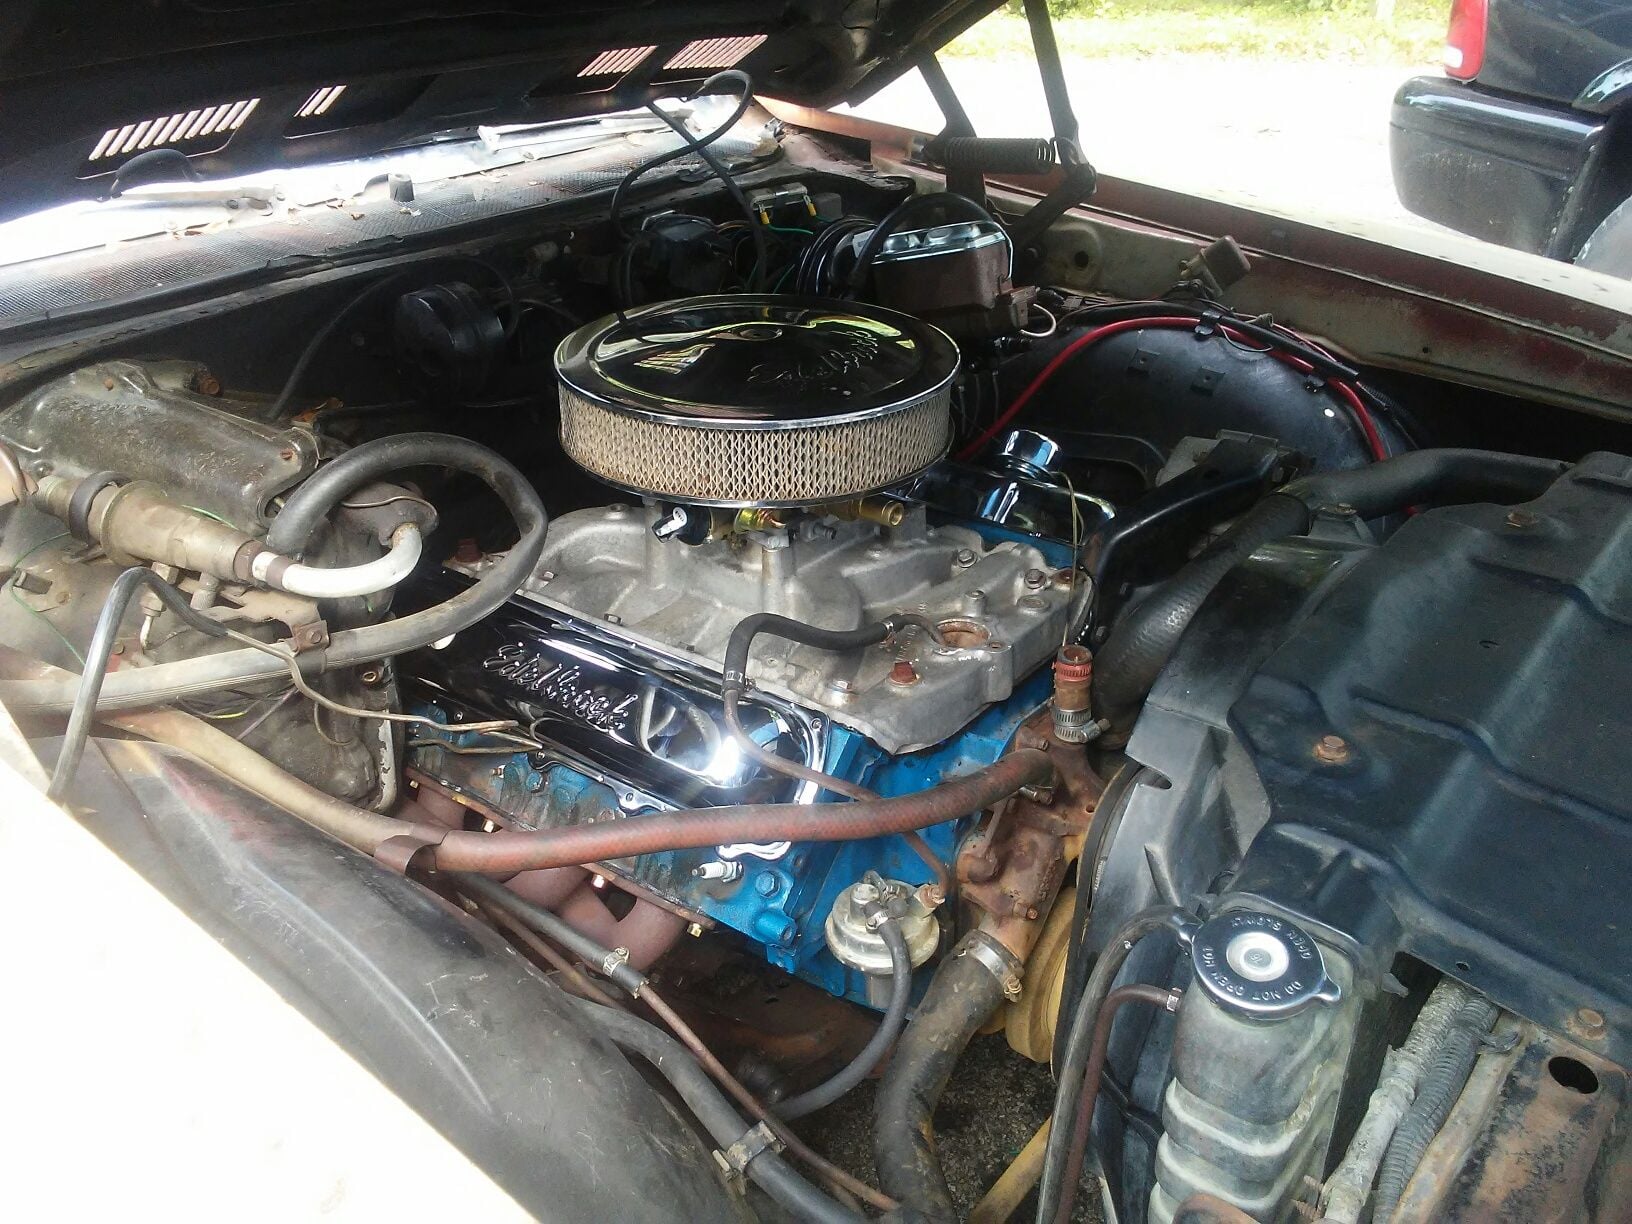
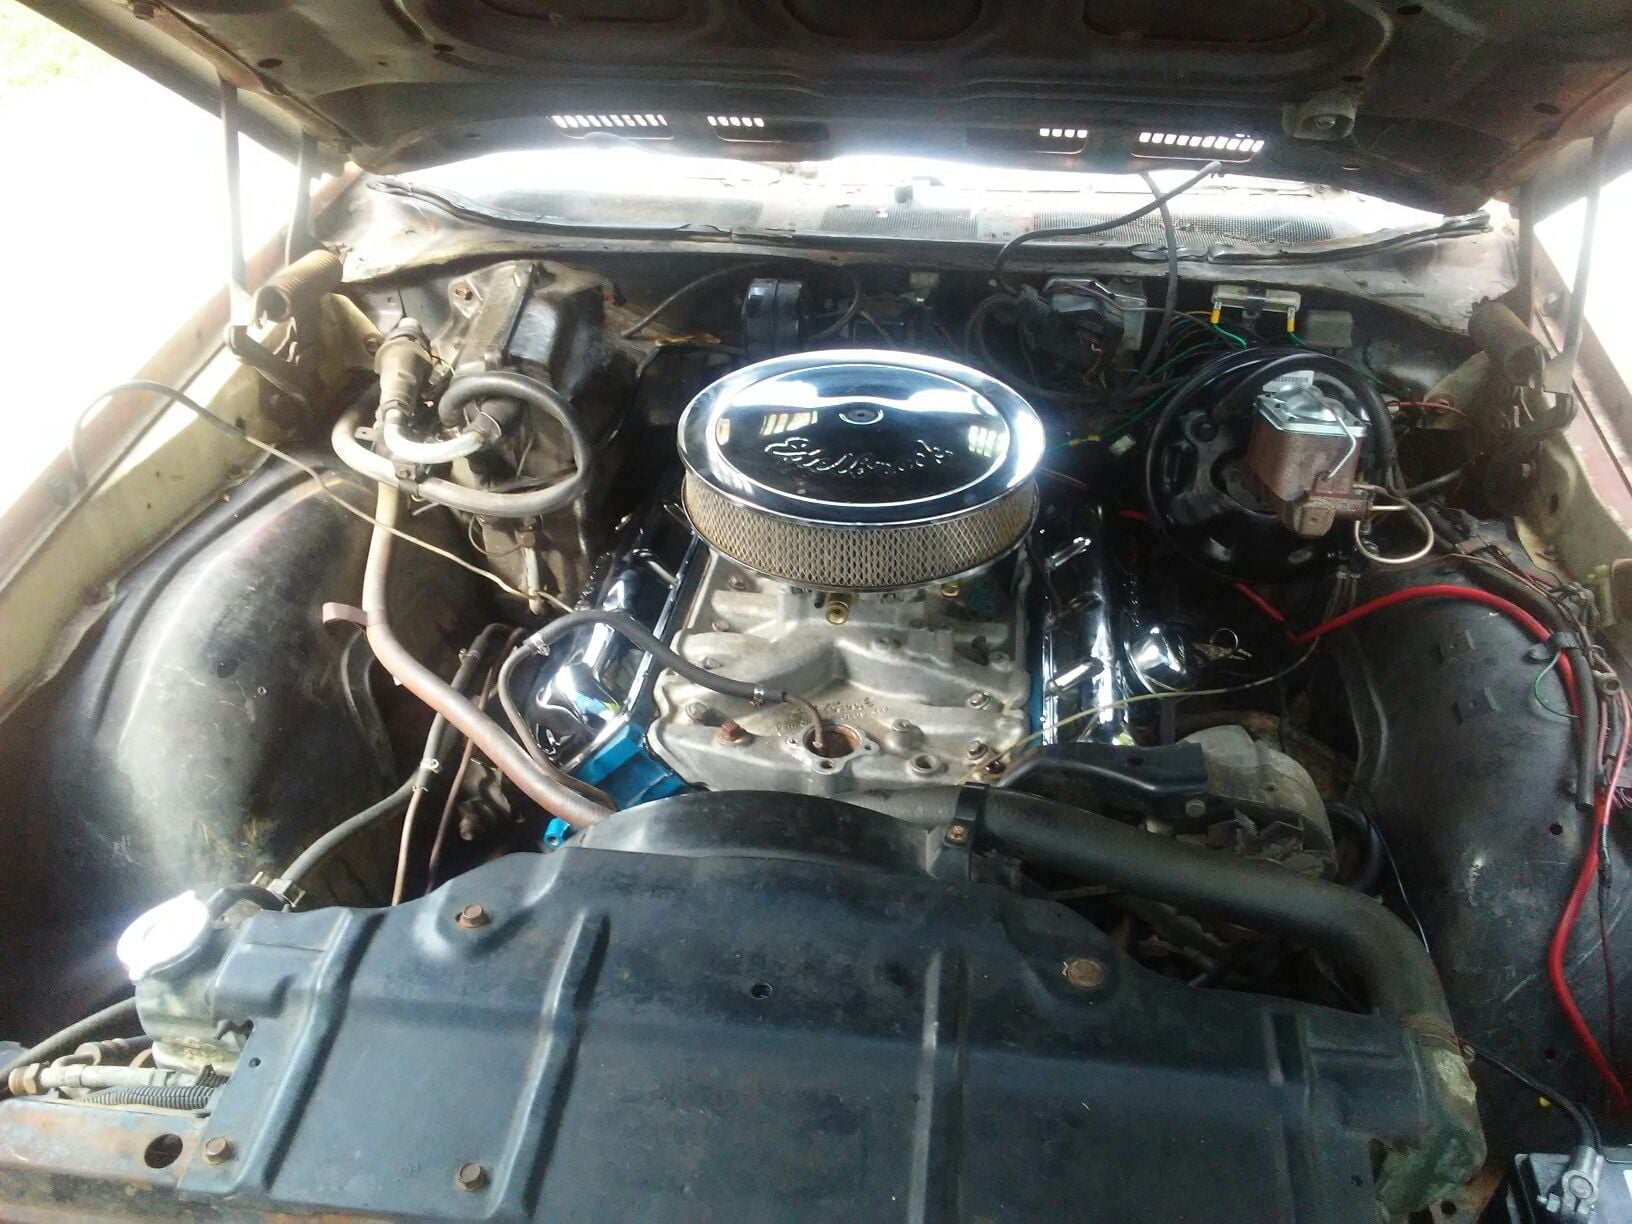
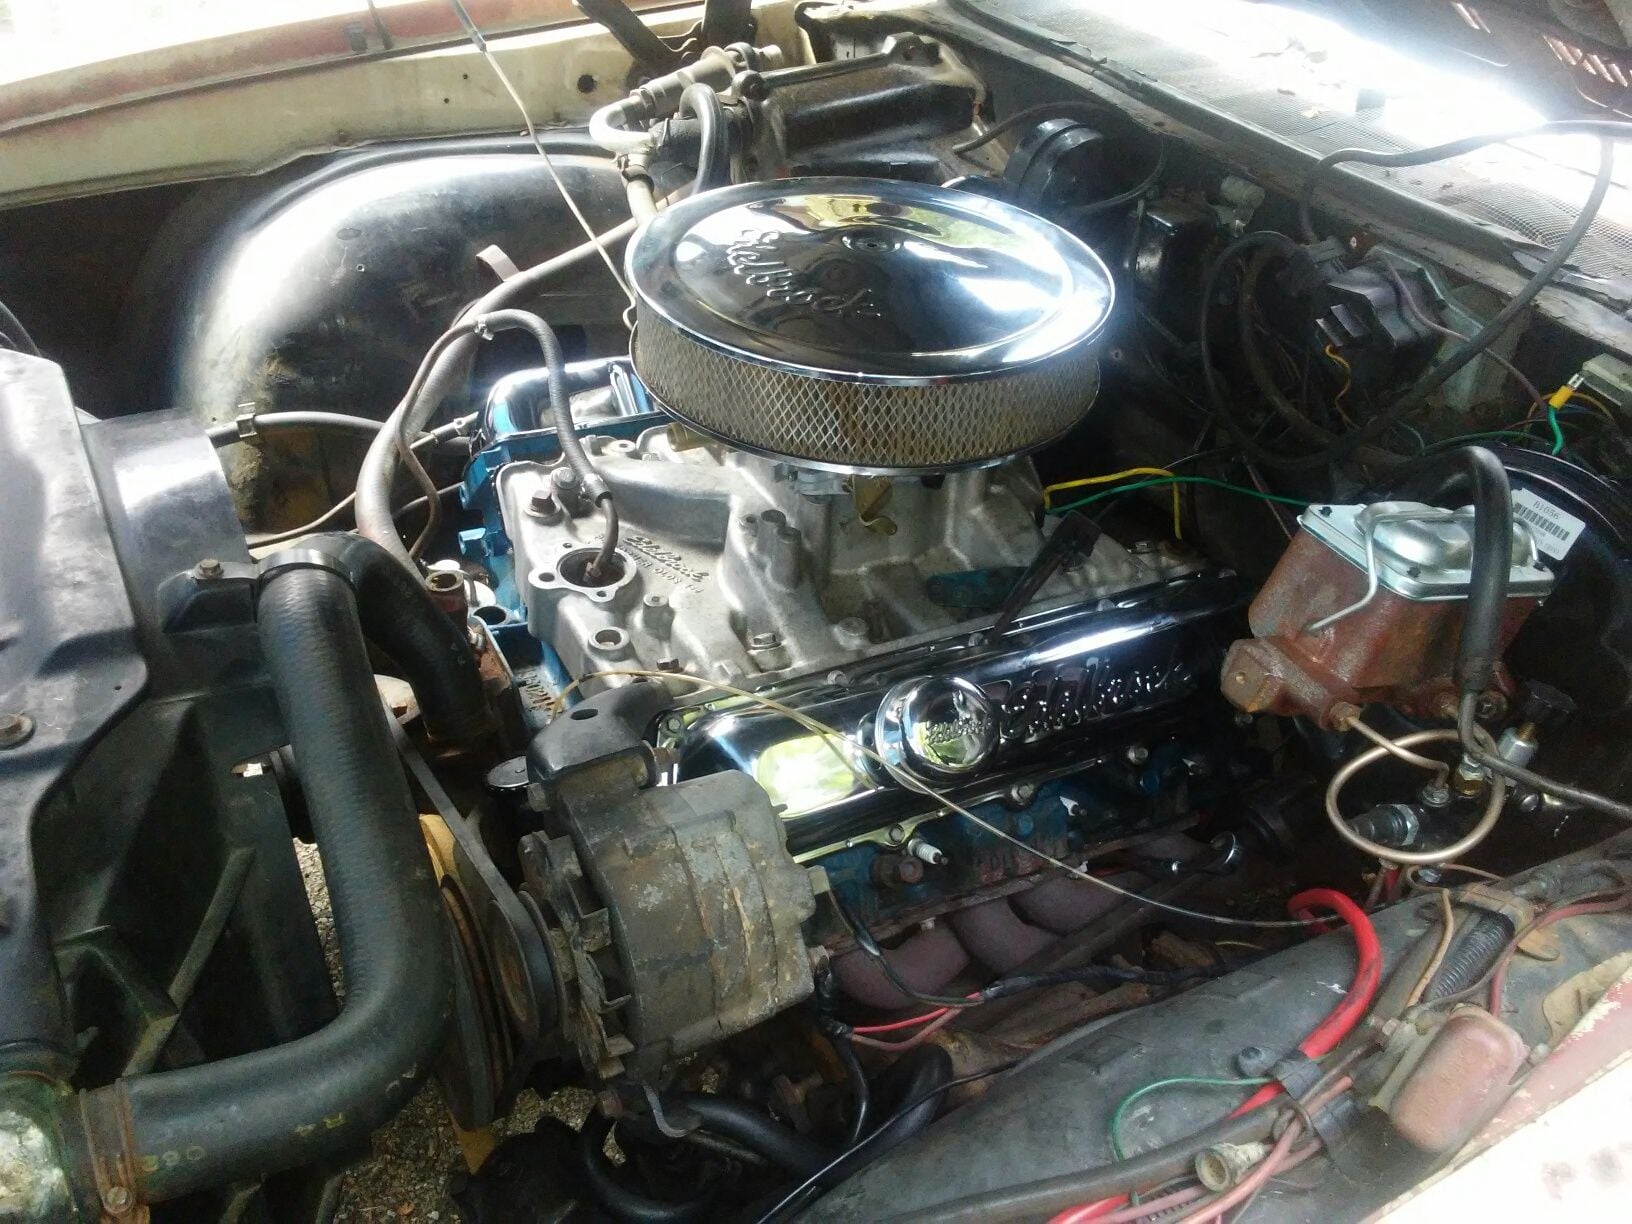
I am going to be re-installing an Edelbrock Performer intake manifold and I have a few questions. I am still new at this so bear with me.
1. I am going to install the exhaust crossover plugs. I will have to modify them to fit. Should I consider putting some sealant around them so they don't rattle?
2. The old intake gaskets didn't compress evenly. Is there a chance that gas could go under the intake manifold? Is there something I should be doing like running a bead of RTV sealer or something?
3. I do not have a metal valley pan. Should I purchase a stock one piece replacement or go for Mondell*'s VT-581 Valley Tray?
#2
1. I am going to install the exhaust crossover plugs. I will have to modify them to fit. Should I consider putting some sealant around them so they don't rattle?
============
What sealer holds up to exhaust temps?
What if you were to install the plugs - and drill a small hole on the divider line between plug and engine, and use a roll pin to secure the plug? Like a Dutch key.
http://en.wikipedia.org/wiki/Key_(engineering)
2. The old intake gaskets didn't compress evenly. Is there a chance that gas could go under the intake manifold? Is there something I should be doing like running a bead of RTV sealer or something?
==============
Intake runners contain vacuum. Stuff might leak IN.
Is something machined incorrectly- at the wrong angle? Chevy voodoo?
As long as the gasket seals it need not compress *evenly*
Never use RTV for a fuel passage sealant. Hi-Tack, Aviation 3H, Form-a-Gasket #2 are all good sealants. If by "the gaskets" you mean the END SEALS then sure leave out the rubber and just use a proper bead of RTV in place.
3. I do not have a metal valley pan. Should I purchase a stock one piece replacement or go for Mondell*'s VT-581 Valley Tray?
===============
I don't see a problem using the factory type turkey tray. Cut out the Intake runner sections if you like, and rely on the fat fibery gaskets to seal intake to heads except at the 4 corners. This is not uncommon when using AL intake on the Olds iron V8.
#3
I'd use multi piece gaskets and forget those plugs, I use stainless steel block off plates and they work great and are easy are to install. I found that a cheap stainless drywall knife from home depot can provide the material to make them out of.
#4
I have used them plugs before.used a die grinder and a angle grinder. Made a taper interference fit in the head. then grind the plugs almost flush to the heads.use the paper gasket they have some sqish .the plugs won't leak or come loose. BTW cover everything but the hole with tape and heavy paper. Put a small piece of cloth i used a tac cloth down the hole when you are die grinding . use a shop vac to suck up all the shaveing for every test fit.new TAC cloth each time.
Last edited by grampy; July 28th, 2014 at 07:25 PM.
#5
I am re-thinking the plugs and may go with a metal plate to cover the holes. I think I will put some hi-tack on the head side then stick the metal plate to that.
What kind of pressure are we talking about that the metal plate will be subject to? Or is it mainly heat I should be worried about?
What kind of pressure are we talking about that the metal plate will be subject to? Or is it mainly heat I should be worried about?
#6
Reviving an old thread here...
I picked up a used Performer intake, and just printed up the instructions.
Didn't know about the exhaust passage plugs.
What is the purpose of these?
Does it have to do with eliminating the EGR?
They're cheap, so I'll order them if necessary.
Or, if cheap stainless putting knife would do, I may go that route.
Was hoping to install the intake tonight, but may have to hold off if I need these.
#7
The plugs block off the exhaust crossover port. It helps keeping the carb cooler and the paint from burning up on the manifold. Some of us use little metal plates with the fiber gaskets. Just a note, do not (even recommended by Edelbrock) use the rubber or cork end gaskets. Use "The Right Stuff" gasket maker.
#8
#9
OK. Thanks guys.
I'm going to file the plugs for a tight fit, and then use a thin bead of JB Weld to hopefully hold them in place.
And I already planned on tossing the end gaskets and using RTV per the Edelbrock instructions.
I'm going to file the plugs for a tight fit, and then use a thin bead of JB Weld to hopefully hold them in place.
And I already planned on tossing the end gaskets and using RTV per the Edelbrock instructions.
#10
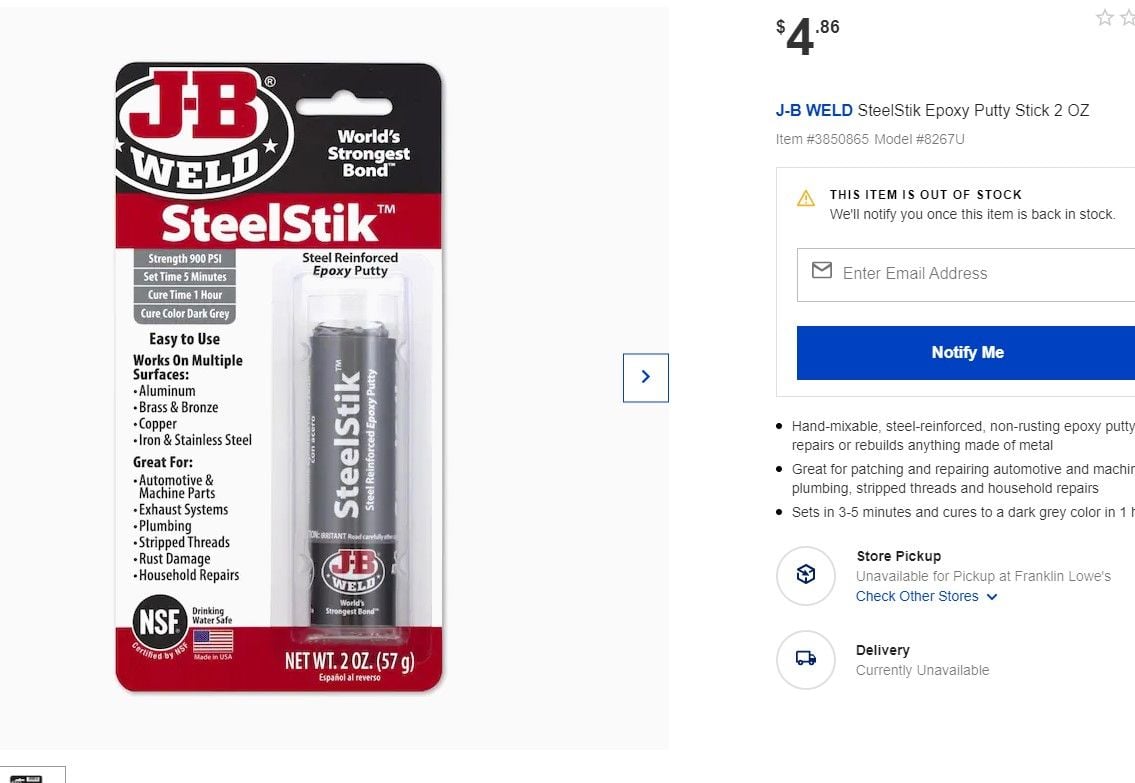
I always used JB weld 2 part steel putty to block off the exhaust crossover. It takes one batch of the putty to block off each side, once it sets up it’s there to stay. No leaks, no rattles, perfect seal, no exhaust crossover whatsoever, and the paint stays on the manifold.
Keep in mind the engine won’t run as well during warmup (especially in cooler high humidity conditions) and if your using a hot air style choke, your going to need to convert to an electric choke or disable the choke completely.
I first used the steel putty on a Performer manifold about 20 years ago. It has been on a friends 66 Olds, when he pulled the heads for aftermarket aluminum the putty was still there. Those aluminum plugs leave much to be desired.
#11
I always used JB weld 2 part steel putty to block off the exhaust crossover. It takes one batch of the putty to block off each side, once it sets up it’s there to stay. No leaks, no rattles, perfect seal, no exhaust crossover whatsoever, and the paint stays on the manifold.
Keep in mind the engine won’t run as well during warmup (especially in cooler high humidity conditions) and if your using a hot air style choke, your going to need to convert to an electric choke or disable the choke completely.
I first used the steel putty on a Performer manifold about 20 years ago. It has been on a friends 66 Olds, when he pulled the heads for aftermarket aluminum the putty was still there. Those aluminum plugs leave much to be desired.
Keep in mind the engine won’t run as well during warmup (especially in cooler high humidity conditions) and if your using a hot air style choke, your going to need to convert to an electric choke or disable the choke completely.
I first used the steel putty on a Performer manifold about 20 years ago. It has been on a friends 66 Olds, when he pulled the heads for aftermarket aluminum the putty was still there. Those aluminum plugs leave much to be desired.
#13
#14
So life got in the way and I just got around to trying to install my intake...
I sand blasted and cleaned up all the bolts, thermostat housing, oil fill tube, etc... and cleaned all the corrosion off the intake.
Man... It's a mess trying to get the RTV around the coolant ports and end seals, and the Edelbrock gasket adhesive around the intake ports...
Had it all laying there holding it down in place for the adhesive to take hold, but couldn't get the intake gasket corners to sit down flat.
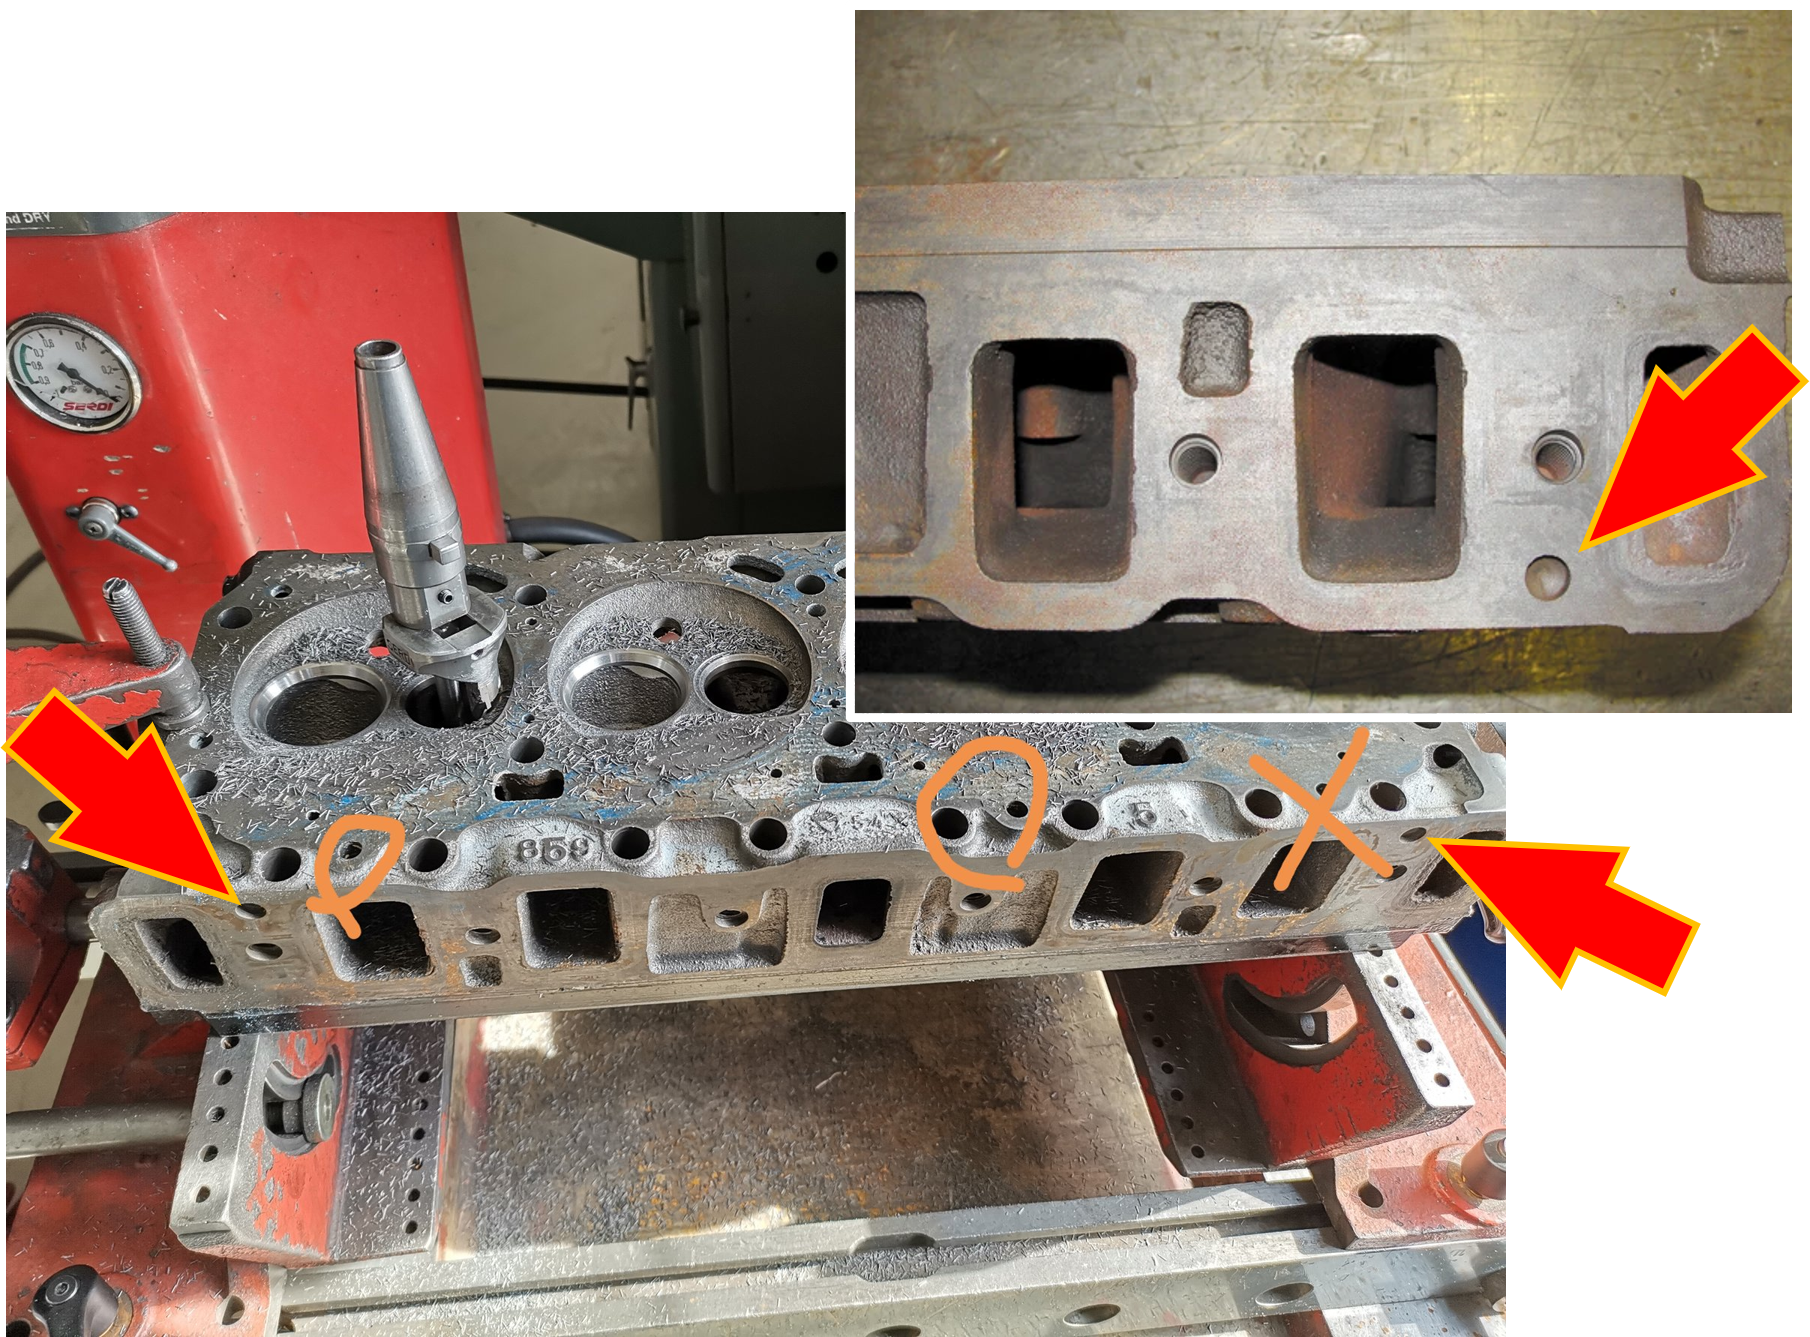
Turned out there were holes in the corners where the punch left quite the protrusion on the underside.
In messing with it, I proceeded to almost slice the end of my finger off on the edge of the gasket.
Had to drop everything and run in and clean and bandage my finger.
So my car is sitting out there with a whole bunch of goop on it and the intake gasket sortof stuck in place...
I should probably clean and scrape everything off and start over at this point.
I did go look at the old original gasket, and it had the same protrusions, and they appeared to have mostly been flattened when the intake was torqued down.
I've rebuilt a few Chevys and Fords and never had this much trouble installing an intake.
#15
Those four protrusions are intentional. They are locating features that fit into holes in each cylinder head. The fact that people don't use them correctly must be why folks have so much trouble with the stock gasket.
#16
I considered that... But I couldn't get them to drop into the bolt holes.
The seemed to be too big of a diameter.
I'll take a closer look and try again tonight.
Come to think of it, the old gasket was probably not the original either... This engine has been apart before...
The seemed to be too big of a diameter.
I'll take a closer look and try again tonight.
Come to think of it, the old gasket was probably not the original either... This engine has been apart before...
Last edited by David Sloop; August 17th, 2021 at 11:54 AM.
#17
#19
It usually takes some tweaking of the gasket to get it to fit correctly. This is not unusual. I will say that about five years ago, I got several gaskets from FelPro that had the locating bosses incorrectly punched. I had to file them to get them to fit properly. The last few I've used have not had any problems, so apparently that was just an incorrectly formed batch.
#21
Last week I also had to slightly trim one of the locating dimples on the FelPro turkey tray to get it set flush. Also had to trim the lower areas where it contacted the front and rear china walls of the block. No biggie…but it wouldn’t set nice and flush without this bit of massaging.
#23
All I can say it that in the last half a century, I've never had to take a ball peen hammer to an Olds intake gasket. As I mentioned , there was a short period of time when the FelPro items were punched incorrectly, but that was only over a period of a year or two. Other than that, the drop right in. No filing the edges, no body work, no grinding, nothing.
#24
As Joe has mentioned in a couple statements, I was the unfortunate purchaser of such a FelPro intake manifold gasket for my 350 sbo. Nothing I managed to come up worked to get the intake manifold gasket locating bosses to line up. I finally gave up and had to grind two of the locating bosses down flat (one at each opposing corner). Aside from that annoyance - which it truly is when heaving a 55 lb slug of iron over the engine several times - I have had no issues with any leaks. Use plenty of RTV "Right Stuff".
Last edited by Vintage Chief; August 23rd, 2021 at 05:43 AM.
Thread
Thread Starter
Forum
Replies
Last Post
import extermination
Small Blocks
3
July 23rd, 2010 05:41 AM


