Vintage Oldsmobiles Curved Dash, Limited Touring, Models 40, 53, 66; Series 60, 70, 90

324 Engine Build

Thread Tools
 
Search this Thread
 
Old Apr 10, 2024 | 04:41 PM
  #1  
madmax442.com's Avatar
Thread Starter
madmax442.com
 
Joined: Feb 2014
Posts: 486
From: Albuquerque, NM
324 Engine Build

So, I am starting a new thread to document my 324 build. I will try to post as many pictures as I can. I am having a shop build the short block. I "could" do it, but I prefer the same folks that do the machine work to build the bottom end. I have been collecting parts for 3 months. I am now only waiting on pistons, rings, bearings, and the camshaft. I obviously had to wait for the initial machine work to be completed so I could order pistons and bearings.

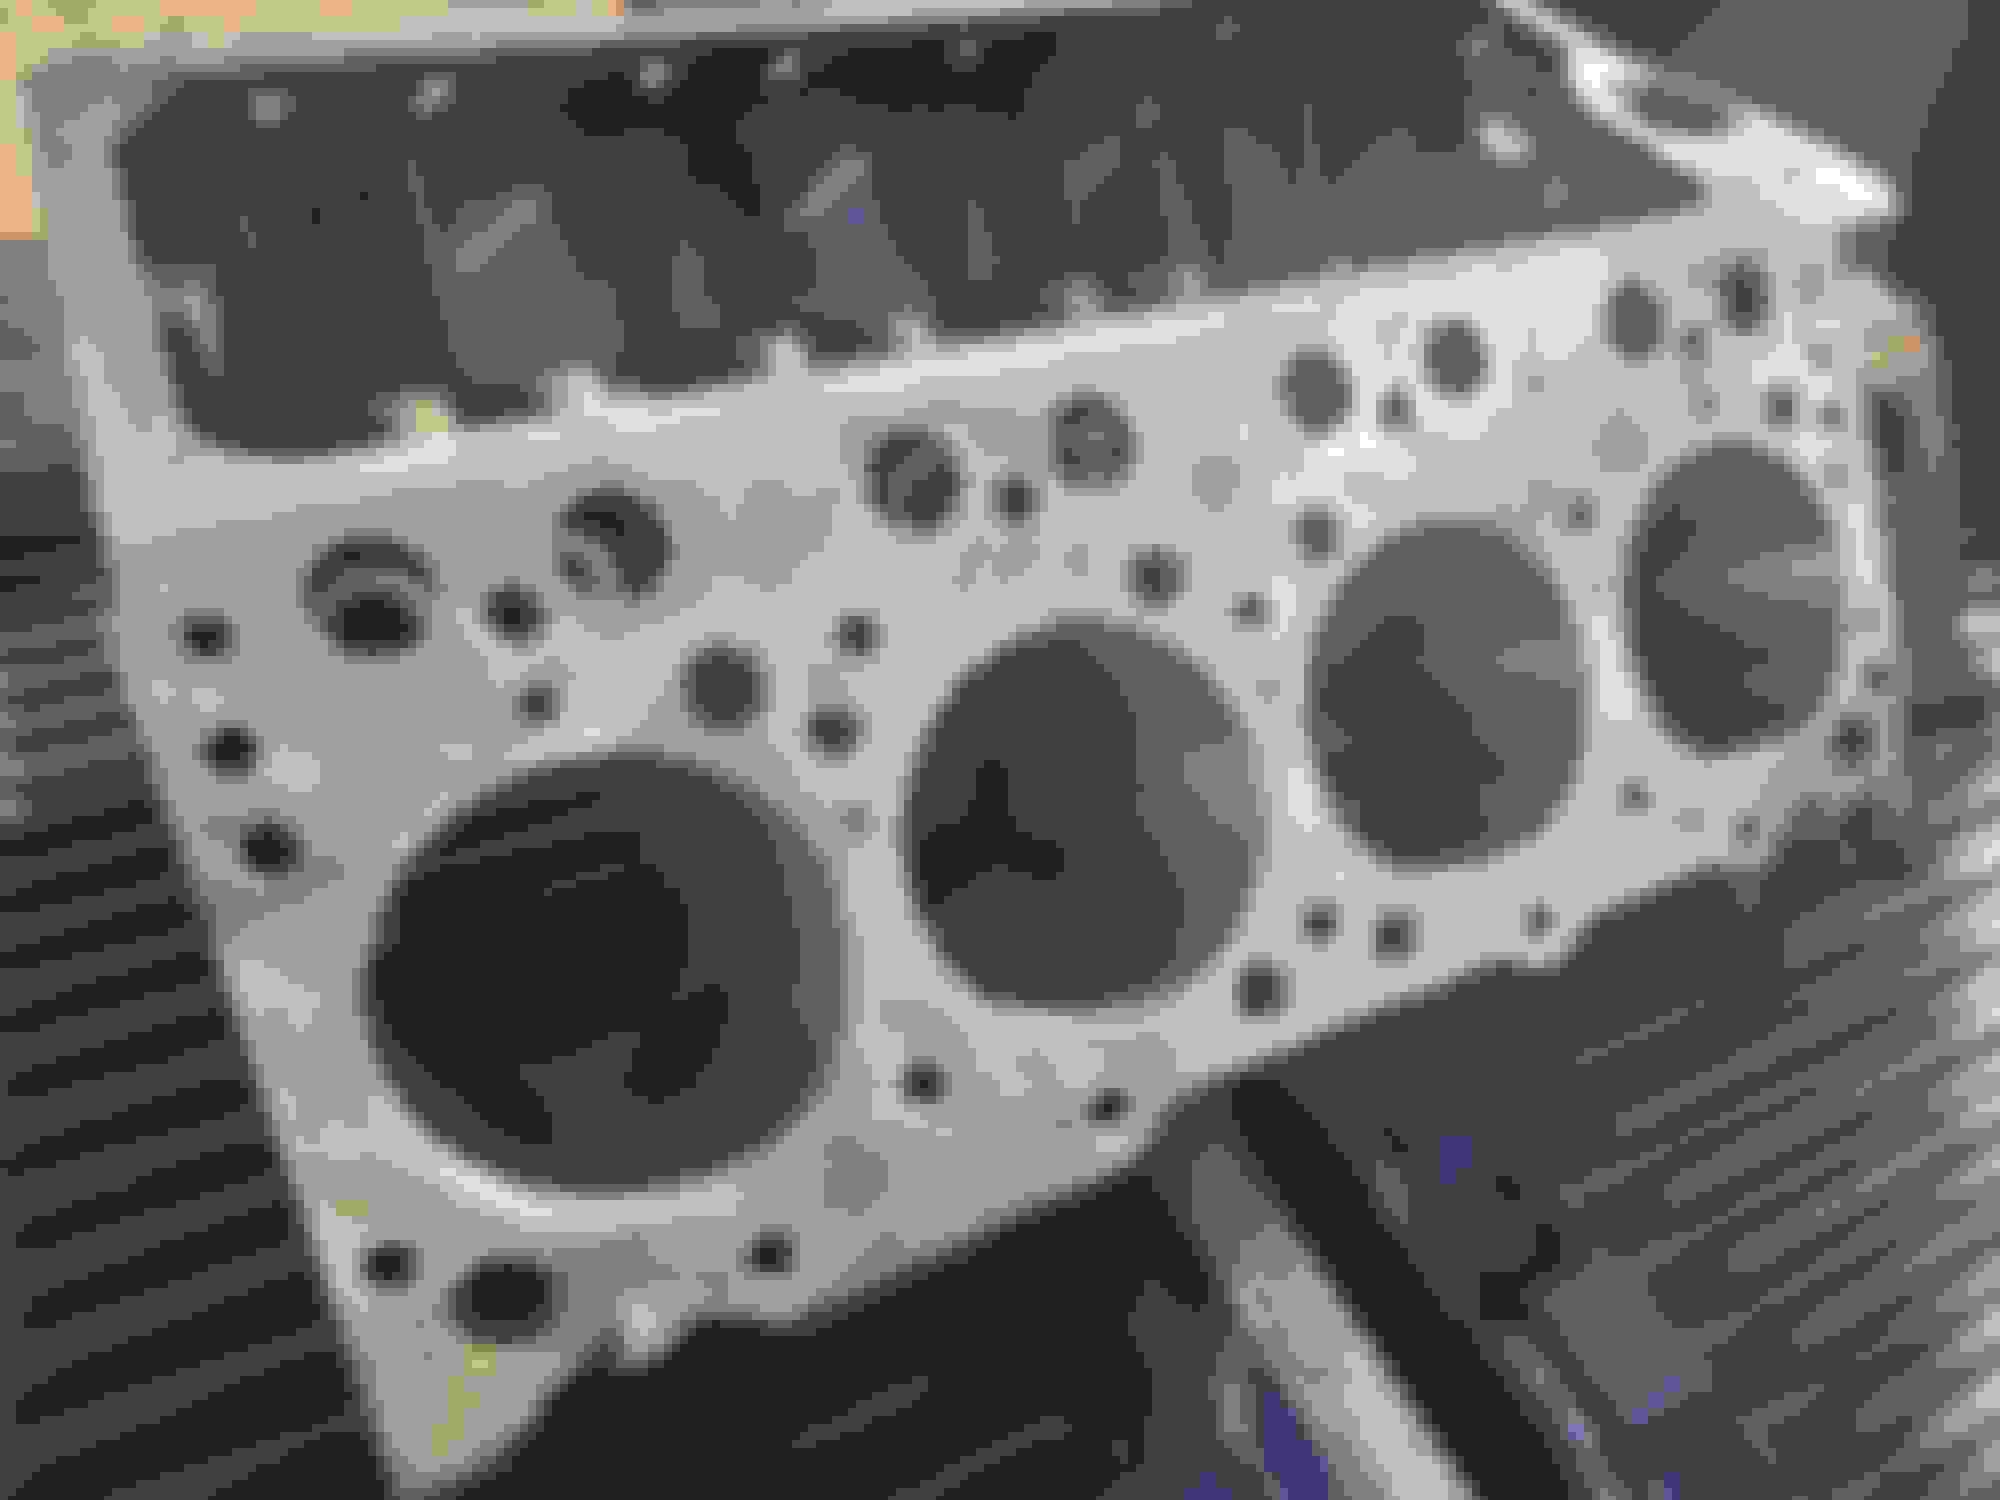
I am doing an upgraded stock build, my '55 is mostly all original. I am sourcing a complete 324 here, as my 324 still runs, in fact driving it tonight to take the wife to a birthday dinner. This block and crank are still '55. The heads I will attempt to build are '56 # 10 heads. The block cleaned up at .060 over and the crankshaft at .010 on rods & mains.

Upgrades:
#10 heads: mild porting and blending, nothing too radical, hardened exhaust valve seats, all new guides and valves. I am going to attempt to reuse springs, but won't know until way later after they get assembled and can check seat pressure.
Camshaft: Camcraft 212 @.050, .495 lift HCR profile https://www.camcraftcams.com/wp-cont...s-4-12mod1.pdf
Timing Set: Ross Racing double roller with advance/retard keys
Pistons: Egge L2133 .060 over https://egge.com/product/egge-piston-set-with-pins-161/
Rear Main Seal: Best Gasket 3772 Rubber seal

Stock Stuff:
Rocker Shafts: stock, reuse everything, already cleaned and ready to go.
Pushrods: Will see if stock pushrods work after decking block and heads
Oil Pump: Have a stock cleaned up one within end play spec, but will put new gears and spring in it

Thank you John for core!

#6 cylinder had the worst pitting of all 8.

Bored .060 over, still needs honed. Im taking to get an extra hot tank tomorrow.

Here's the same #6 cylinder.

Last edited by madmax442.com; Apr 10, 2024 at 04:53 PM.
Old Apr 10, 2024 | 04:53 PM
  #2  
2blu442's Avatar
Moderator
 
Joined: Jun 2006
Posts: 529
I'm glad to see the progress your making on this project!
Old Apr 10, 2024 | 06:45 PM
  #3  
BangScreech4-4-2's Avatar
Registered User
 
Joined: Dec 2014
Posts: 16,742
Just wondering if Ross does pistons. Those Egges are famous for their low compression height and resultant reduced CR.
Old Apr 10, 2024 | 07:14 PM
  #4  
madmax442.com's Avatar
Thread Starter
madmax442.com
 
Joined: Feb 2014
Posts: 486
From: Albuquerque, NM
Originally Posted by BangScreech4-4-2
Just wondering if Ross does pistons. Those Egges are famous for their low compression height and resultant reduced CR.
Probably, but budget-wise staying conservative. Ill post a pic of them when I get them tomorrow. The compression height is reported to be 1.875.
Old Apr 11, 2024 | 10:02 AM
  #5  
madmax442.com's Avatar
Thread Starter
madmax442.com
 
Joined: Feb 2014
Posts: 486
From: Albuquerque, NM
The block has one of these coolant passage plugs (like a freeze plug) on each side, I just removed them both before taking the block to get cooked and hot tanked. They are there to manage coolant flow from the factory. After removing them, there were presumably what I think are factory casting rod pieces down in there. I pulled them out.


Attached Images
File Type: png
Coolant Plugs.png (1.21 MB, 6 views)
Old Apr 11, 2024 | 10:10 AM
  #6  
madmax442.com's Avatar
Thread Starter
madmax442.com
 
Joined: Feb 2014
Posts: 486
From: Albuquerque, NM
I just read they are spikes so they don't drop down into the block. They were detached already. https://www.jalopyjournal.com/forum/...plugs.1219337/
Old Apr 11, 2024 | 01:41 PM
  #7  
madmax442.com's Avatar
Thread Starter
madmax442.com
 
Joined: Feb 2014
Posts: 486
From: Albuquerque, NM
Ok here are the pistons from Egge. They are indeed 1.875 for compression height. They look pretty nice.


Old Apr 11, 2024 | 05:18 PM
  #8  
madmax442.com's Avatar
Thread Starter
madmax442.com
 
Joined: Feb 2014
Posts: 486
From: Albuquerque, NM
These snap rings are way easier than other ones I have seen.


Old Apr 12, 2024 | 01:30 PM
  #9  
madmax442.com's Avatar
Thread Starter
madmax442.com
 
Joined: Feb 2014
Posts: 486
From: Albuquerque, NM
I cleaned up the rods, wire wheel, etc. Ready for recon. I ordered the small end bushings may or may not need them. The pins fit snug by hand but don't fall out.

Old Apr 12, 2024 | 04:45 PM
  #10  
madmax442.com's Avatar
Thread Starter
madmax442.com
 
Joined: Feb 2014
Posts: 486
From: Albuquerque, NM
Just got the block back from thermal cleaning. Wow!


Old Apr 12, 2024 | 05:02 PM
  #11  
Sugar Bear's Avatar
Registered User
 
Joined: Aug 2011
Posts: 4,123
Was the block bored before the pistons were in hand?

Yes the rods in post #4 look like casting supports.

That is a C L E A N block, it looks great.
Old Apr 12, 2024 | 05:10 PM
  #12  
madmax442.com's Avatar
Thread Starter
madmax442.com
 
Joined: Feb 2014
Posts: 486
From: Albuquerque, NM
Originally Posted by Sugar Bear
Was the block bored before the pistons were in hand?

Yes the rods in post #4 look like casting supports.

That is a C L E A N block, it looks great.
No I waited until boring was completed before I bought the pistons. It was left .005 extra, new pistons will get honed in.
Old Apr 17, 2024 | 06:15 AM
  #13  
Wally's Avatar
Registered User
 
Joined: Nov 2011
Posts: 93
From: May Township, MN
Madmax, with 0.060" over standard pistons I calculate your new displacement as 334 cubic inches.

I'm really interested in how this turns out. I have a couple 324 blocks that I will be building one of these days.
Wally
Old Apr 17, 2024 | 07:18 AM
  #14  
madmax442.com's Avatar
Thread Starter
madmax442.com
 
Joined: Feb 2014
Posts: 486
From: Albuquerque, NM
Originally Posted by Wally
Madmax, with 0.060" over standard pistons I calculate your new displacement as 334 cubic inches.

I'm really interested in how this turns out. I have a couple 324 blocks that I will be building one of these days.
Wally
Yes me too! Interesting the 2nd Gen Olds 330 was 3.385 stroke & 3.938 bore. This will be 3.4375 stroke & 3.935 bore.
Old Apr 19, 2024 | 08:42 PM
  #15  
madmax442.com's Avatar
Thread Starter
madmax442.com
 
Joined: Feb 2014
Posts: 486
From: Albuquerque, NM
Dropped off my pistons, rods, and bearings with my machine shop. He still has to deck the block, recon my rods, then hone in pistons. I'm basically letting him build the short block minus the cam. I told him I'll try not to bug him, but I will! Lol


Old Apr 22, 2024 | 04:35 PM
  #16  
madmax442.com's Avatar
Thread Starter
madmax442.com
 
Joined: Feb 2014
Posts: 486
From: Albuquerque, NM
Got my cam today! Engine still at machine shop for a bit.


Old Apr 25, 2024 | 08:03 PM
  #17  
madmax442.com's Avatar
Thread Starter
madmax442.com
 
Joined: Feb 2014
Posts: 486
From: Albuquerque, NM
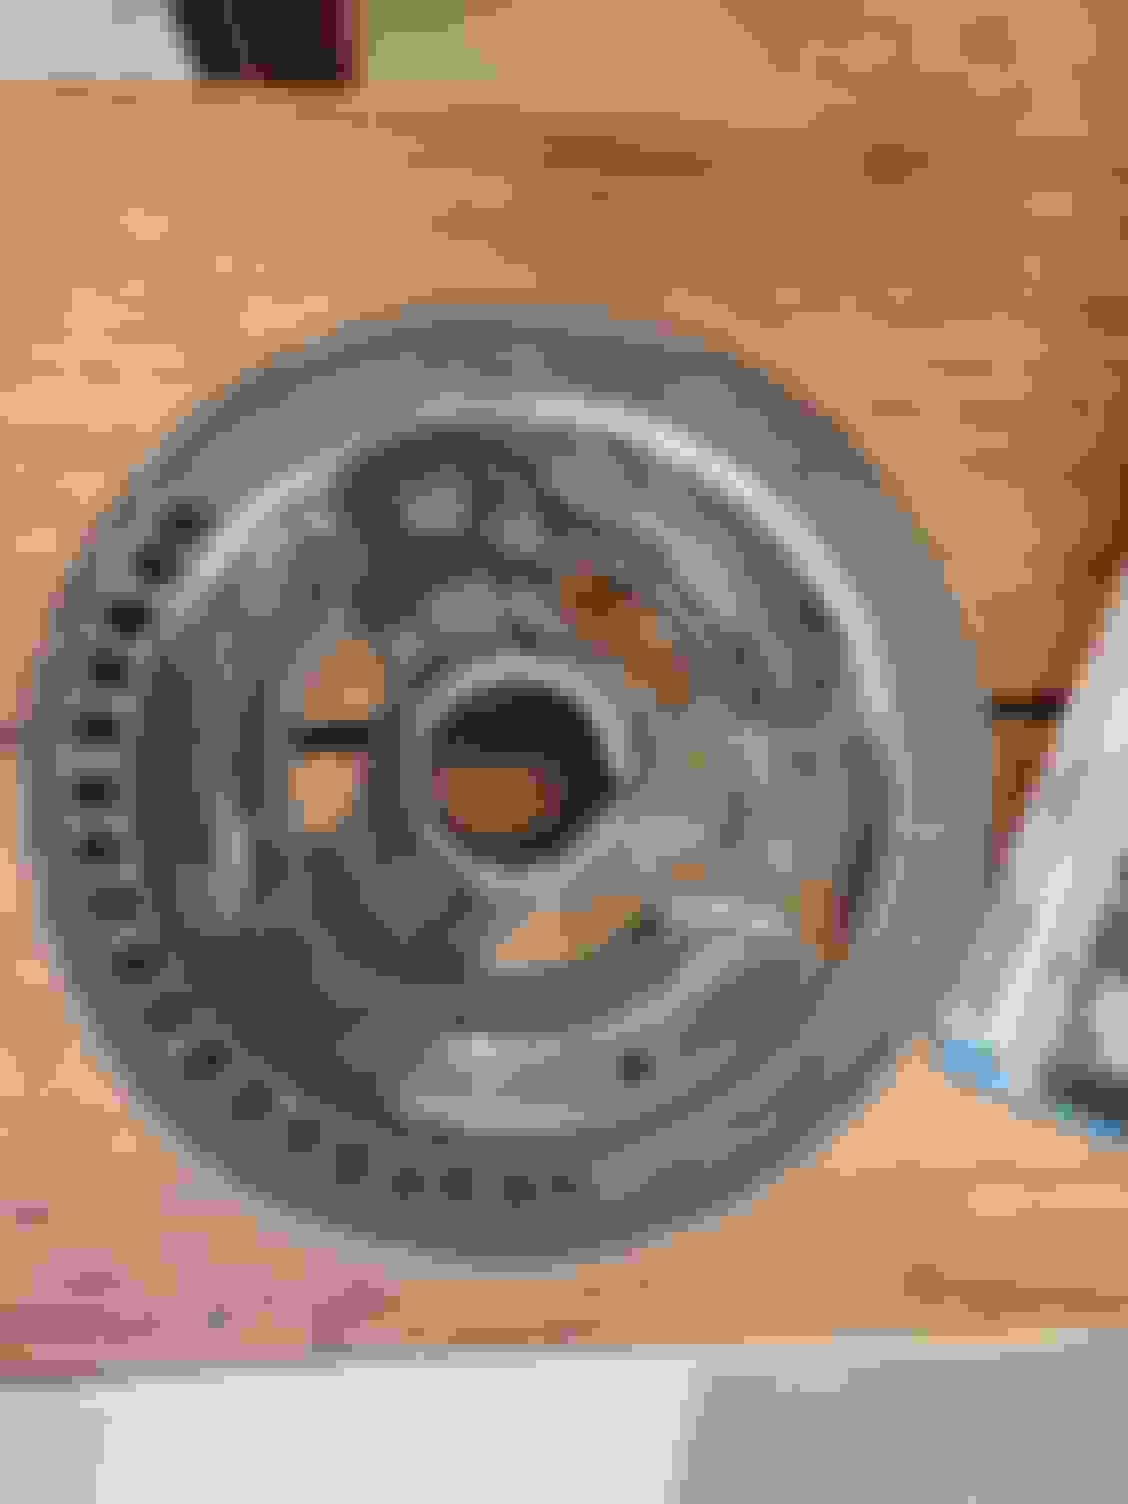
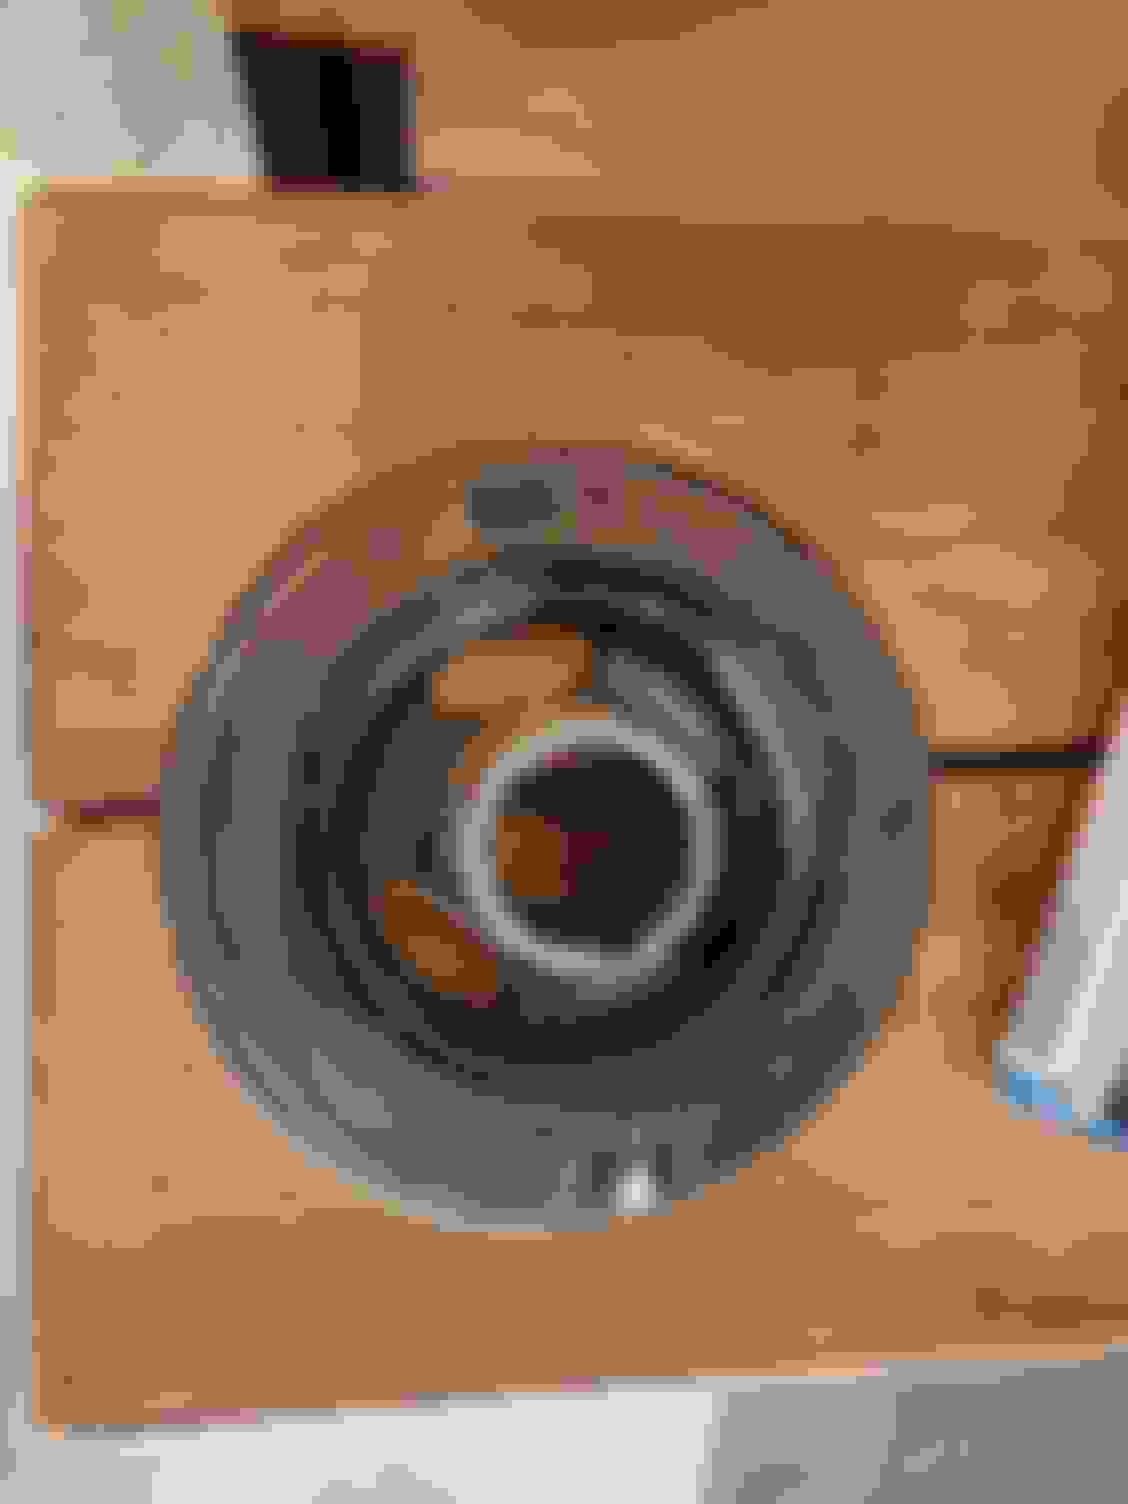
So still waiting on the machine shop with my block and crankshaft. In the meantime, I found a balancer finally and sent that to Damper Dudes. I also found an oil pan from a salvage yard in Minnesota, $200 bucks but I really need one. I want to build a complete motor as much as possible without have to remove and swap over everything. Once I pull my motor and trans, I want to do a quick swap. I will have my existing 324 that is original to the car as a fairly complete spare. I could always part it out after I get sick of storing it, we will see.


Last edited by madmax442.com; Apr 25, 2024 at 08:05 PM.
Old Apr 28, 2024 | 05:43 PM
  #18  
madmax442.com's Avatar
Thread Starter
madmax442.com
 
Joined: Feb 2014
Posts: 486
From: Albuquerque, NM
Don't put the seal in backwards!


Old May 22, 2024 | 04:25 PM
  #19  
madmax442.com's Avatar
Thread Starter
madmax442.com
 
Joined: Feb 2014
Posts: 486
From: Albuquerque, NM
Got the engine back from the machine shop! Short block minus cam and timing set. Will update soon!

Old May 22, 2024 | 06:31 PM
  #20  
Sugar Bear's Avatar
Registered User
 
Joined: Aug 2011
Posts: 4,123
Consider fogging the original engine to prepare it for its hibernation. Marine fogging fluid works well, it is tacky and clings to metal.
Old May 22, 2024 | 08:23 PM
  #21  
madmax442.com's Avatar
Thread Starter
madmax442.com
 
Joined: Feb 2014
Posts: 486
From: Albuquerque, NM
Got it on a stand, gonna paint it tomorrow. The heads are a few weeks out still.


Old May 23, 2024 | 06:33 PM
  #22  
madmax442.com's Avatar
Thread Starter
madmax442.com
 
Joined: Feb 2014
Posts: 486
From: Albuquerque, NM
Got it painted, degreed in cam, installed front cover and water pump.


Old May 27, 2024 | 07:02 AM
  #23  
madmax442.com's Avatar
Thread Starter
madmax442.com
 
Joined: Feb 2014
Posts: 486
From: Albuquerque, NM
Some pics of the bottom end.


Old May 27, 2024 | 07:09 AM
  #24  
Wally's Avatar
Registered User
 
Joined: Nov 2011
Posts: 93
From: May Township, MN
Just a suggestion, you will probably need a longer bar on your engine stand in order to rotate the engine as you build it up.
Just something I learned while building my 371.
Wally
Old May 27, 2024 | 07:19 AM
  #25  
madmax442.com's Avatar
Thread Starter
madmax442.com
 
Joined: Feb 2014
Posts: 486
From: Albuquerque, NM
Rebuilding oil pump.


Old May 27, 2024 | 09:25 AM
  #26  
Sugar Bear's Avatar
Registered User
 
Joined: Aug 2011
Posts: 4,123
Nicely done progress. Please post videos of it running WITH audio!
Old May 27, 2024 | 12:56 PM
  #27  
Charlie Jones's Avatar
Phantom Phixer
 
Joined: Dec 2011
Posts: 5,534
From: Apopka, FL
Originally Posted by madmax442.com
Rebuilding oil pump.

Are you using a kit with new gears?
Those gears are SHOT.
Old May 27, 2024 | 03:30 PM
  #28  
madmax442.com's Avatar
Thread Starter
madmax442.com
 
Joined: Feb 2014
Posts: 486
From: Albuquerque, NM
Originally Posted by Charlie Jones
Are you using a kit with new gears?
Those gears are SHOT.
Yep, waiting on parts.
Old May 28, 2024 | 04:23 PM
  #29  
madmax442.com's Avatar
Thread Starter
madmax442.com
 
Joined: Feb 2014
Posts: 486
From: Albuquerque, NM
Originally Posted by Charlie Jones
Are you using a kit with new gears?
Those gears are SHOT.

Last edited by madmax442.com; May 28, 2024 at 04:50 PM.
Old May 28, 2024 | 06:31 PM
  #30  
madmax442.com's Avatar
Thread Starter
madmax442.com
 
Joined: Feb 2014
Posts: 486
From: Albuquerque, NM
The drive and driven gears each have a square mark on them, so those marks go together (ended up facing down in the pump body). The end clearance was .003 ( shop manual .005 to .009). I spun it up with a drill CCW, seems fine.


Old May 31, 2024 | 07:51 PM
  #31  
madmax442.com's Avatar
Thread Starter
madmax442.com
 
Joined: Feb 2014
Posts: 486
From: Albuquerque, NM
Oil pan installed finally. The Fel-Pro gasket kit came with 2 of the same end rubber seals, I had to order another set. Ultra Black both sides not messing around.


Old Jun 1, 2024 | 05:17 PM
  #32  
madmax442.com's Avatar
Thread Starter
madmax442.com
 
Joined: Feb 2014
Posts: 486
From: Albuquerque, NM
Time to bug machine shop about my heads. Short block is done! I need to make up a shaft to prime my oil pump at some point.


Last edited by madmax442.com; Jun 1, 2024 at 05:33 PM.
Old Jun 1, 2024 | 08:27 PM
  #33  
madmax442.com's Avatar
Thread Starter
madmax442.com
 
Joined: Feb 2014
Posts: 486
From: Albuquerque, NM
Finally found the correct crank bolt on ebay.


Old Jun 2, 2024 | 06:26 AM
  #34  
Sugar Bear's Avatar
Registered User
 
Joined: Aug 2011
Posts: 4,123
Nicely detailed work, it's looking great!
Old Jun 5, 2024 | 11:40 AM
  #35  
Charlie Jones's Avatar
Phantom Phixer
 
Joined: Dec 2011
Posts: 5,534
From: Apopka, FL
Originally Posted by madmax442.com
I need to make up a shaft to prime my oil pump at some point.
I don't think you need to make anything.
I'm pretty sure that that oil pump drive has the same coupling as a small block Chevy.
You should be able to buy ( or even borrow ) a priming tool anywhere.
Old Jun 5, 2024 | 11:52 AM
  #36  
madmax442.com's Avatar
Thread Starter
madmax442.com
 
Joined: Feb 2014
Posts: 486
From: Albuquerque, NM
Originally Posted by Charlie Jones
I don't think you need to make anything.
I'm pretty sure that that oil pump drive has the same coupling as a small block Chevy.
You should be able to buy ( or even borrow ) a priming tool anywhere.
No, its a D shape. I read to buy 5/8" tubing, heat it up and bang a flat into it.
Old Jun 5, 2024 | 06:56 PM
  #37  
Charlie Jones's Avatar
Phantom Phixer
 
Joined: Dec 2011
Posts: 5,534
From: Apopka, FL
Originally Posted by madmax442.com
No, its a D shape. I read to buy 5/8" tubing, heat it up and bang a flat into it.
OK, sorry I thought they looked the same.
Sounds like a good plan.
Old Jun 10, 2024 | 07:44 AM
  #38  
madmax442.com's Avatar
Thread Starter
madmax442.com
 
Joined: Feb 2014
Posts: 486
From: Albuquerque, NM
My heads are still a couple of weeks out. I found an intake on ebay, cleaned that up this weekend.


Attached Images
File Type: jpg
324Intake.jpg (438.9 KB, 5 views)

Last edited by madmax442.com; Jun 10, 2024 at 05:05 PM.
Old Jun 10, 2024 | 05:07 PM
  #39  
madmax442.com's Avatar
Thread Starter
madmax442.com
 
Joined: Feb 2014
Posts: 486
From: Albuquerque, NM
Yes, I'M OCD on the masking.


Old Jun 10, 2024 | 05:38 PM
  #40  
Sugar Bear's Avatar
Registered User
 
Joined: Aug 2011
Posts: 4,123
Looks awesome! Why are you replacing the old one?


All times are GMT -7. The time now is 12:07 AM.