When you click on links to various merchants on this site and make a purchase, this can result in this site earning a commission. Affiliate programs and affiliations include, but are not limited to, the eBay Partner Network.
Ok , the FRONT passenger side lower control arm ball joint is clunking , or at least I believe that's where the noise is coming from anyhow . I replaced everything else on the front suspension , all I have left are three ball joints . I had both control arms off , including the springs about 6yrs ago .
The problem is ..... The rounded end part of the control arm sits inside the hole in the backing plate a little , leaving me wondering how it's going to lower out of the knuckle after I pop it loose . I tried to get the bolt out of the knuckle last weekend after I popped it loose , and was wondering why it stopped lowering . It stopped lowering because the front bottom edge of the control arm is inside the hole on the backing plate , and won't go down any further because of this . Please see example photo below ......
Just a note, you need a ball joint press or you will have to bang the ball joint up through the bottom of the control arm. First off, loosen the lug nuts on that wheel. You need to support the vehicle by the lower control arms with jack stands. Take the wheel off, and then remove the cotter pin and the nut from the ball joint. Whack the side of the steering knuckle housing with a BFH where the ball joint slips through and the ball joint will separate from it. Knock the old ball joint out and install the new one.
The ball joint stud is tapered. Once you have loosened it from the steering knuckle, there will be JUST enough clearance for the LCA to clear the splash shield as you pull outward and up on the knuckle.
Alternately, three bolts and the splash shield comes off of the knuckle.
Personally, I've never had much success with the BFH method of releasing the stud from the knuckle. I use a pickle fork or a ball joint separator.
Just a note, you need a ball joint press or you will have to bang the ball joint up through the bottom of the control arm. First off, loosen the lug nuts on that wheel. You need to support the vehicle by the lower control arms with jack stands. Take the wheel off, and then remove the cotter pin and the nut from the ball joint. Whack the side of the steering knuckle housing with a BFH where the ball joint slips through and the ball joint will separate from it. Knock the old ball joint out and install the new one.
I know this already . It seemed to get hung up on the splash shield
The ball joint stud is tapered. Once you have loosened it from the steering knuckle, there will be JUST enough clearance for the LCA to clear the splash shield as you pull outward and up on the knuckle.
Alternately, three bolts and the splash shield comes off of the knuckle.
Personally, I've never had much success with the BFH method of releasing the stud from the knuckle. I use a pickle fork or a ball joint separator.
I'll try and remove the shield . I didn't have to do that the last time . Do you think loosening the control arm bushing bolts will help ? It usually wants to push upward because that's how it's designed , right ?
The lower arm is designed to push downward. Don't loosen the bushing bolts, it won't accomplish anything. You can break the upper ball joint loose so you can tilt the assy out and up, there is no spring tension on the uppers.
Actually, the upper control arm bushings act as torsional springs and will resist rotation of the arm. You can overcome this pretty easily, but it is annoying when trying to clear the splash shield with the LCA. Loosening the nuts on the UCA shaft will let the UCA bushings rotate more easily. Not mandatory, but helpful. Just be sure to have the weight of the car on the wheels before retorquing them.
Thanks guys , I got it off . The fun part was getting the ball joint out of the control arm . I have a ball joint removal tool kit , but I needed to get the hub up and out of the way in order to make it work . After all was said and done and the tire was back on , I notice a little bit of play somewhere while I wiggled the tire up and down . It didn't seem to do this side to side . I watched all these parts I've been replacing carefully while doing this , and nothing seems to be moving there . It seems to be coming from the hub itself . I ended up buying all new bearings and races for both sides . I'm sure glad I replaced that ball joint though , it was pretty worn out .
The other thing I noticed was , the new ball joint sits way inside the knuckle to where the castle nut is well below the hole for the cotter pin . I mean it could spin a couple turns before hitting the pin .
Is the taper joint of the 2 parts matched correctly? I wonder if the clunking description meant that the steering knuckle is worn to the point that the ball joint goes in too far? What brand BJ did you purchase?
Is the taper joint of the 2 parts matched correctly? I wonder if the clunking description meant that the steering knuckle is worn to the point that the ball joint goes in too far? What brand BJ did you purchase?
I bought a cheaper version replacement and I'm not sure what brand it is .
Hi,I also started to change all bearings in upper and lower control arms after they are porous and steering became sluggish. I placed the jack under the LCA and the car is supported on a stand under the frame. Problem now is that I cant find a way to break loose the lower und upper ball joints. Where exactly do I need to apply the hammer force to lower the LCA first in order to remove the springs by lowering the LCA with the protection threaded rod in the place where the damper was removed.
You need to hammer on the side of steering knuckle cast part that the tapered ball joint is slipped through. You need to hit it in an area where you can get a good swing with a large hammer.
Niels; You need to put the nut back on until the thread is flush, then support the frame with jack stands or other device, then lower the floor jack about two cm, then hammer the knuckle or use a spreader tool and when the joint becomes loose the nut will stop the assembly from bursting apart suddenly.
I was just going to say what Yellow statue said, you dont want that spring to come flying out toward your head, or any other parts. I always tie a small nylon strap through the spring and control arm just as added insurance.
Sorry I never came back to post what the issue was . It turned out to be a control arm bushing on the passenger side . For now I got it to not make the noise anymore by loosening all of the nuts on that side , putting the weight of the car on them and re-tightening them . I bought all new Moog ones for both sides though to replace these next spring . I don't think I had the weight of the car on the old bushings when I tightened them back then .
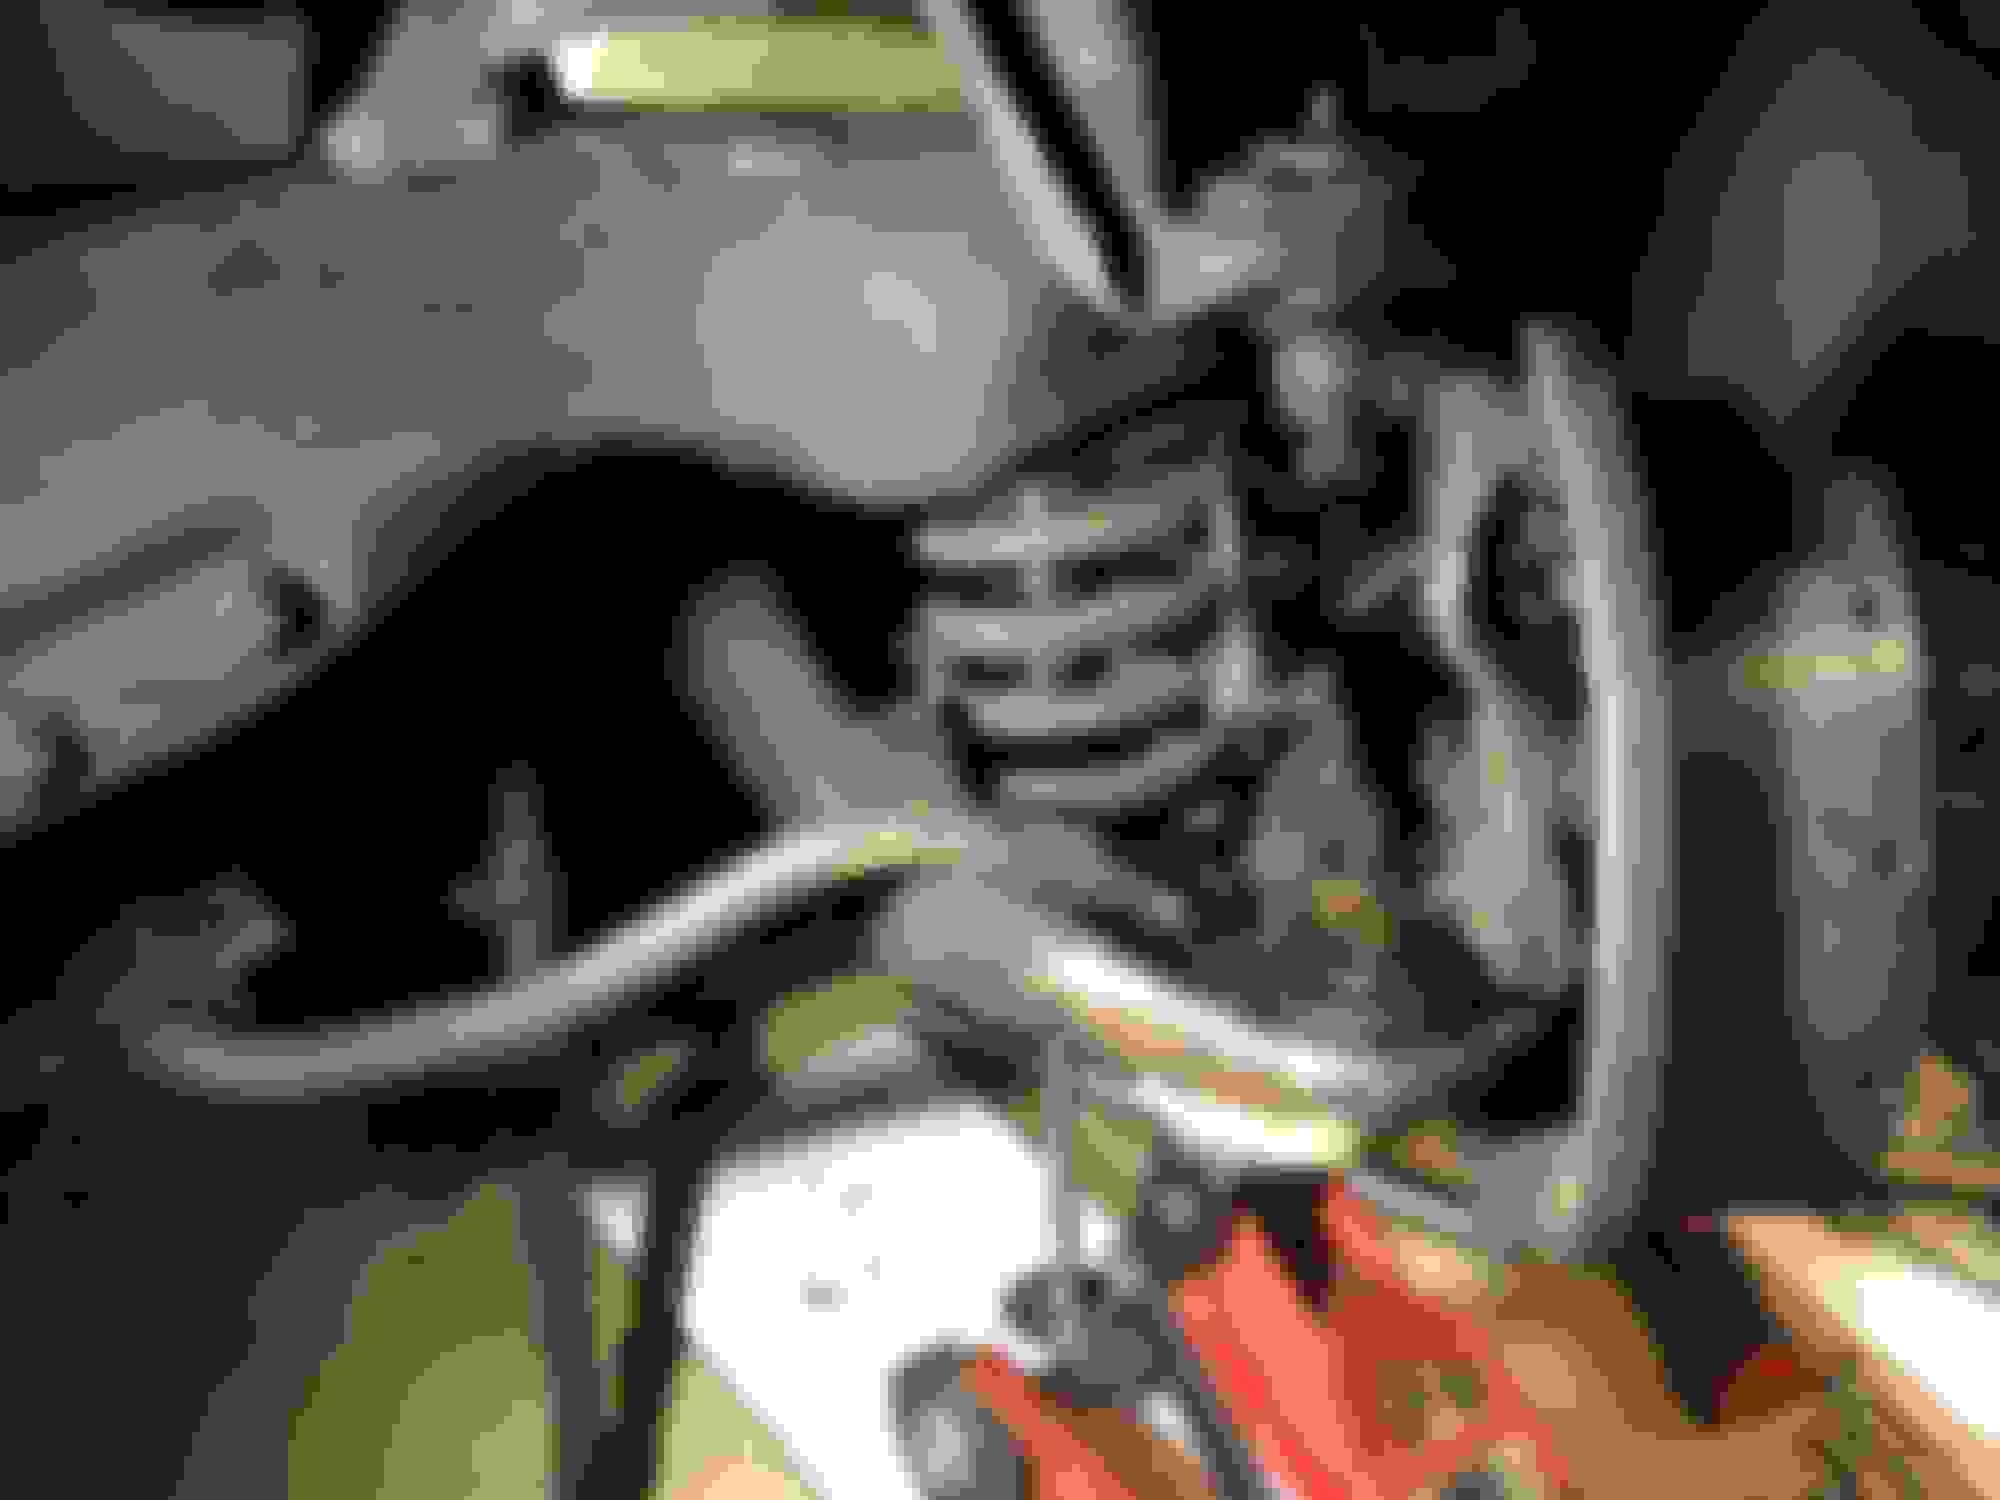
Rear suspension lower control arm aft bolt under tension
Thanks a real lot for the great Support guys, was busy over the last days and spent evenings either buying Tools or lying in the wheel well of the olds. I got the LH front Suspension completely disassambled, all its ball Joints and bushings are out and parts are in cleaning ready to be painted. Waiting on some POR15 to arrive. Now... here is the next Problem I ran in. Searched the Forum here already for some ideas without success so far. While the car is jacked under the Frame on its LH side only in the Garage I started to Change the bushings of the rear Suspension as well. I was getting the upper control arm to differential out but after changing the bushing on the upper end I struggled with the differntial bushing since i did not get any puller in there. So I put the upper control arm back in but hardly only as the holes at the differential to arm bolt where though to allign again. Used a braker bar and Wood to Support the diffderential to get it back in.
The Picture Shows the bolt under Tension...
Also no matter how i suppport the axle the LH lower aft control arm bolt is under Tension and I am afraid to Punch it out and not get things back together. Question now is. Do i Need to jack the entire back of the car on both sides to get a stress free axle in order to take any load of the bolts Holding the lower control arms ? Or do I Need to take the Shocks or springs out first ? Ther CSM does not explicityl provide a jacking procedure but warns that the axle may slip making it tough to allign things back... any recommendation about the jacking ? Thanks again for your help.
Do i Need to jack the entire back of the car on both sides to get a stress free axle in order to take any load of the bolts Holding the lower control arms ? Or do I Need to take the Shocks or springs out first ?
Yes, jack and support the car symmetrically.
Yes, disconnect the lower shock mounts. Put your floor jack under the center of the axle first to slightly compress the springs, disconnect the shocks, and lower the axle. The springs will likely fall out. Be sure to align the pigtails as shown in the CSM when reinstalling.
When you try to jack the axle back up, you can guarantee that the holes in the bushings won't align with the control arms. I usually need to reposition the jack forward or backward under the rear axle housing to tilt it up or down as needed to get the holes aligned. This is no big deal, just expect it. Also, get a tapered alignment punch or bar.
Ok then, thanks Joe. I thought so, just glad now I did not punch the rear bolt out causing a small disaster as space and tooling is limited in my Garage. I just had no Access to the car from the right side so its still on wheel but I will crawl under it with jack and stands to jack the right side as well.. ha...;-) The next Drama I see is the aborted Change of the bushings in the differential housing from what I read here... Drilling, sawing, burning near the tank not a good idea... will see how I manage...
To re-install the rear control arm bolts I put a load strap around the axle and hook the other end to the trans cross member. This gives fore and aft adjustment in conjunction with the up and down of the floor jack.