When you click on links to various merchants on this site and make a purchase, this can result in this site earning a commission. Affiliate programs and affiliations include, but are not limited to, the eBay Partner Network.
Hello!
I bought 2 months ago a Delta 88 1978 Royale Sedan Diesel with the LF9 engine an TH350. I have already rebuild the th350 with burnt clutches by using pieces from a th350c.
The engine was running pretty well but there was a big clicking sound from 1 ccylinder ( i think) and grey smoke, like if it was a hydraulic lifter issue or rocker issue.
I know from the precedent owner that the engine was already opened and head gasket redone but by none professionals and a bit messy.
It makes the (very) big clicking sound since I bought it.
I have already disassembled the intake manifold and taken out all the hydraulic tappets and rocker arms.
I dismantled the tappets and passed everything through an ultrasonic tank.
Looking at the tech journal and the forums I figured out that the rocker arms are not adjustable like on the Chevy blocks.
Chances are the previous owners didn't empty the lifters before putting them back.
There was no play on the push rod, but the doubt is allowed, all the tappets had no preload, they were all fully lifted.
Searching on sites like SummitRacing or JEGS I come across Oldsmobile 350 compatible adjustable rocker arm systems. But I don't see any mention if they are compatible for diesel blocks.
If they are, it will allow me to adjust the preload more precisely.
Another question: When dismantling the rocker arms and the pivots I realized that some (about 60%, completely randomly) were mounted in such a way that the pivots do not allow the rocker arm to pivot over its full stroke.
It's as if halfway there was a stop and you have to force to finish the race. When we flip the pivot this does not happen. I wonder if the previous owners would not have seen that there was a point and would have reassembled certain pivots incorrectly (upside down).
Do you know of a direction of the pivots in the rocker arms?
For my first American I don't start with the easiest I feel
Thanking you in advance for your valuable responses!
Post a pic of the rocker arm bridges, there are a couple of different styles, as least for the gas Olds 350 as replacements. I have seen some bridges that were finicky on install to get proper preload.
Hi olds 307 and 403, thank you for your reply,
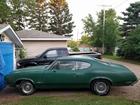
here some pics that I have taken while opening the engine,
Sorry for not having a close-up of the rocker arms, the car is in a garage 60km from my house.. Is it accurate enough to determine what type of bridge?
If it can help I specify that it is an oldsmobile of General Motor France
The rocker arm bridges, sometimes called pivots, are not directional but being a soft metal wear faster than the rockers will. That will cause the "bump" at the end of the rocker arm travel. I think that the aftermarket replacement pivots are made of a harder metal. One way of adjusting the preload is to place shim washers underneath the bridges but in this method both shim washers, intake and exhaust, should be of the same thickness on each rocker arm bridge. Yes, the adjustable rocker arm kits that you have seen for the 350 Olds will install on the diesel motor same as the gasoline motor. I favor the Harland Sharp pedestal style, p/n S50026A, rocker arm kit but it is quite pricey; harlandsharp.com is the website. You may want to contact member "cutlassefi" on this site, he may be familiar with something a little less expensive. Best of luck with your Olds diesel!
As said those look like the stock aluminium pivots. Is there noticeable grooves on the rocker arms themselves where the contact the valves? I find they wear as well. The stock replacement I have bought are steel and 3 pieces. I would just get stock replacements pivots and rocker arms, if they have noticeable wear. I find if you tighten one side all the way and then tighten the other after, they don't torque down properly. Tighten evenly and position as necessary.
I used the adjustable roller tip rocker arm kit available from Comp Cams. It works well but the OE Oldsmobile valve train works just fine if you have good parts. There isn't excessive wear on any of the rocker arms, is there?
Thank you for your answer 67OAI, precise, complete and very useful!
Indeed, looking closely after the passage to the ultrasound I see traces of wear on the pivots. Also I found two rockers with another metal, seems already replaced.
The shim ring solution will allow me to get the engine back up and running quickly, however I really like the HarlandSharp system.
I will buy it as soon as I have the car with the OK technical control at home and redo the necessary.
The kit is a bit expensive but I think it is necessary.
I imagine that the quality is not at all the same, but for a purely collector's vehicle application without an increase in power, could this be suitable?
looks like you have a combination of original and aftermarket bridges and rockers. The original are the one piece bridge casting which is aluminum; the aftermarket are the three piece, two separate pedestals and a tie strap across the top. I think the rockers with the "I" stamping are aftermarket also. As you probably noticed, the bolts holding the bridges in place are 5/16" diameter. The PRW brand rocker arm at Summit requires a 7/16" stud which would require machine work on your cylinder heads. Comp Cams sells a stud that is used in their kit also which is 5/16" on the bottom where it screws into the head and 3/8" on top to accept a standard duty performance rocker arm, p/n 4542-16. No machine work required with this but you also shall need pushrod guide plates p/n 4842-8 which Comp also sells and your choice of any brand 3/8" stud rocker arm. Quite often pushrods must be changed as well to maintain proper geometry. That's why I like the Harland Sharp pedestal kit; I think Scorpion may also have a pedestal kit for the Oldsmobile. A word about pushrod guide plates; you can usually install the 1/16" thick guide plate without milling any material off the rocker arm pad of the cylinder head. Some manufacturers may have thicker guide plates such as 1/8" thick, these would require having some material milled off the rocker pad; at this point we generally mill off the corresponding amount of the thickness of the guide plate!
@67OAI Thank you very much for that information ! I'm really starting to understand how everything fits together, I hadn't understood the quasi-necessity of the guide plates. @v8al Indeed ! Amazing how it's cheap! Saving link in case of But I'll go with the harland kit
I also bought a diesel injector tester to check that one of them is not leaking.
For the quick repair, I'm thinking of taking one of the two LF9 blocks that the seller gave me as a surplus. One looks more rusty, so less mileage? The other one has already been redone, but I don't want to cannibalize it.. I will order immediately for later the Harland kit with the guide plates and new rods.
Thank you so much for your time and help!
I will keep you informed of progress
If those injectors are anything like the IDI injectors in my Ford truck you can disassemble them and add washers to adjust the pop pressure. Here's a good thread on the Ford trucks forum I frequent that addresses injector pop pressure.
BTW, what pop tester did you pick up? I bought a Blue Point MT257B from Snap On $$$🤑$$$ to time the injection pump on my truck. I'm pretty sure you would need a similar tool to adjust the injection pump timing on your diesel.
maitrepathelin, you do not use pushrod guide plates with the pedestal style rocker arm kits, only with the stud style like that which Comp Cams sells! The pedestal style are self aligning and use of a guide plate with them could cause interference and binding.
@67OAI I scrupulously followed your advice and purchased the guide set, the 5/8 3/8 compcam adapter kit, and the PRW 3/8 rocker arms. Delivery this week, hoping customs won't delay delivery too much.
I disassembled, cleaned and tested my hydraulic tappets: 4/16 dead. I took the necessary from the donor engine block.
I tested my tappets by filling them with oil to push the air out and checking that the oil is essentially coming out of the hole in the center of the tappet and not out the sides.
Second test: after a few hours I try to compress them by hand, if they don't sink then it should be ok?
When I was winding up my tappets and threading the plunger into the tappet body if it sank without a spring effect due to the air then I consider it HS, is that a good clue?
Another question: My tappets are full of oil and pushed to the bottom. When reassembling on the block do I have to empty them of oil before adjusting the 1 minimeters of preload with the adjustable rocker arms? Or can I screw by forcing the discharge of the pusher by going there very slowly?
Thank you for your time and your answers!
edit: I also tested all my injectors, they all open at 70 bars.
Last edited by maitrepathelin; Dec 11, 2022 at 11:32 AM.
Did you get new lifters? As I recall, when I installed the Comp Cams adjustable roller tip rockers kit I started by filling the lifters with oil:
Submerge them and use a pushrod to cycle the inner part of the lifter until it doesn't leak air anymore.
After I installed all the lifters I primed the oil pump with a drill and attachment. It's under the distributor in a gas engine. The diesel mounts the vacuum pump there.
After priming the oil in the engine I followed Comp Cams directions to set the valve lash.
@Olds64 thank you for your reply !
I tested my current tappets they were all good except 4 which I took from a donor engine block.
In the workshop manual there is a big message in bold saying that the tappets should not be primed by repeatedly moving them.
I had tried your technique on the first one but it didn't expel the air, it just spring by compression.
I have a burette that fits perfectly in the hole on the oil inlet side, I inject directly into it until the air is expelled and oil comes out in the center.
After that they are hard and do not move, I plunge them back into the oil
When you installed your CompCam kit the plunger of the plunger was then impossible to move and it had gone up to its maximum level or so could you still lower it a little?
The act of priming the oil pump at the drill press is to send oil through the inlet of the tappets and push out the air. Is it then useful to start them fully before?
Isn't this likely to prevent applying the 1mm preload on the tappets with the adjustable rocker arms? (the adjustment will not press the tappets but the valve if the tappet is loaded to the max with oil and cannot move)
Again everything I just said may be completely wrong and that's why I still need your lights to be sure I don't have to reassemble the intake manifold a second time which is a holy horror on this engine!
You mentioned a workshop manual you're using. Is it the factory Oldsmobile manual? If so, definitely go by the steps in the book.
When I primed the lifters before I installed them it was to expel the air trapped in them. It's just like bleeding a master cylinder for your brakes or a hydraulic clutch cylinder.
You removed the intake manifold from your engine, didn't you? If so, make sure you follow the Lifter Disassembly procedure that is referenced.
FWIW, when I bled the lifters in my 455 I could always move the center part of the lifter. The only thing bleeding does is expel the air caught in the lifter.
Post a pic of the Lifter Disassembly procedure and we'll help you make heads or tails of it.
Thank you for your details! I have already disassembled, cleaned and reassembled all my tappets, there they are fully loaded with oil and soaked in oil to prevent corrosion.
Before putting them back in the block, I will dismantle them again and empty them completely.
I use a very thin welding rod to press the ball and expel the air for testing and a syringe to test for oil addition and leaks.
So yes I disassembled the intake manifold, I already have the whole spare gasket kit waiting.
I am now awaiting delivery of my PRW adjustable rocker arms
Thanks for posting the instructions. Information on Oldsmobile diesels is hard to come by. Did you happen to find any of those special tools? I'd think they'd be rare as hen's teeth now.
You can do without these tools. They are mainly used to test the tightness of the tappets.
Basically, to assemble the plungers, you just have to go up the ball and the spring using a soft hammer in the plunger, then put the spring back in the bottom of the plunger, put the plunger back.
Take a very thin welding rod, press the ball at the bottom of the plunger to expel the air and thus replace the non-return valve and the seat of the rod.
The tool used in the image above is just used to pressurize the oil to test for the tappet, but a simple oil can with an oval tip and very liquid hydraulic oil allows you to fill and expel the air from the tappet
Once tested, that the tappet does not leak, it is necessary to dismantle the tappet again to empty it of its oil before putting it back in the engine.
As usual I'm definitely doing something awful. So don't take what I do at face value.
and if needed I have the entire original manual for the LF9 diesel
Last edited by maitrepathelin; Dec 14, 2022 at 01:33 PM.
maitrepathelin, I have been away from the forums for a while but looks like you are doing well with your project. Only thing I might add at this point is that whenever you change the rocker arm set from the stock Oldsmobile equipment you should be prepared to also change pushrod length to restore proper rocker arm geometry. There is no particular pushrod length that can be recommended because there are just too many variables. There are several threads in the forum that address this; also I think Comp Cams has an article about this on their web site. Pushrod length affects how the rocker arm tip sweeps across the tip of the valve stem throughout its travel, ideally it should remain centered on the valve stem tip throughout its travel. If it sweeps across the tip of the valve stem too much during its travel, it will accelerate valve stem/valve guide wear. You can make yourself an adjustable pushrod for checking and establishing the ideal length from one of your stock pushrods if you have extras by cutting about one inch out of the pushrod length with a tubing cutter, tap the inside of the remaining two pieces of pushrod for a stud and locktite or epoxy one end of the stud into one piece of the pushrod and place a nut on the stud to act as a lock and thread it into the other piece of pushrod. Just be sure to make your cut on the pushrod in an area that will be accessible to you. Before you go to all this trouble, check the geometry with your stock pushrod, it may be satisfactory!
Hello @67OAI
To believe that you are a diviner!
I was just yesterday installing all my kit, I'm setting up the guide plates, the threaded rods, the push rod, and .... it's too short!
Basically I have the original rods which are 8.265, measured at 8.264 with wear.
Rocker arm fully lowered, without preload at the level of the tappets, I miss 2mm. I then unscrew my PRW rocker arm to be able to have adjustment margin if necessary, there is 4mm of play. I then add the necessary preload in the tappet: 1.5mm.
So I need 5.5mm longer rods. (8.46457in) SummitRacing has much shorter, much longer, but nothing that comes close to 8.464..
Does anyone have a supplier that has these lengths already pre-made?
Good job, hopefully it all works out as planned. Honestly new stock parts should have fixed your issues. Consider adding a water fuel seperator if you haven't already. All for hopefully close to hopefully 100HP🙃.
@olds 307 and 403 In fact, I also noticed this. But hey, I'm going to go all the way now, no more backtracking possible. 100hp or nothing! To me the fast lane at 90 km / h!
The cost of engine parts and machining just keeps getting higher and higher as the buying power of a dollar keeps falling; not to be political, just an observation. I hope those pushrods work out well for you! Keep us informed of your progress.
@olds 307 and 403 In fact, I also noticed this. But hey, I'm going to go all the way now, no more backtracking possible. 100hp or nothing! To me the fast lane at 90 km / h!
Yeah, you will be flying now. I also mentioned a water fuel seperator to help this beast live. They should be readily available with all the European factory Diesels. Maybe adapt one from a common application? Yeah, part prices are getting ridiculous is an understatement.
I have bought a diesel water separator but not installed it yet, it comes from a boat engine
I have another problem: I'll have to cut the metal plate below the oil evaporator hole in the rocker covers because the PRW rocker arm locking screw is too high for the two central rocker arms (those below this plate)
It's not a big problem yet, but I'm wondering about the height of the rocker arm when the valve is open! If the locking screw is already a problem, I'm afraid that the rocker arm will hit the rocker arm cover when opening the valves. A sight to behold ...
Do you know if there are rocker arm cover extension ?
Use some clay under the valve covers to determine how much clearance you have and where you have issues.
You can use extra thick gaskets : SCE AccuSeal Pro Valve Cover Gaskets 279176
Or use valve cover spacers: Rocket Racing (also available from other sources)
Or get taller valve covers.
Or clearance / remove the baffle plate from the valve cover. Be sure to have some type of baffle over the PCV or oil will be drawn into the system.
That's it, the engine is running with the PRW kit + high-height version rocker covers.
For those who want to get into it: you have to twist all the high-pressure diesel lines to the injectors. It's not funny at all. I did it with a pinch of vices and knees. It's very ugly but it works.
The repriming of the pump and long, but with brake cleaner in the manifold to help it a little and it worked. Regarding the intake manifold, no leaks to report, it's a relief.
To prime the coolant I filled through the radiator cap, once fully filled I press with a screwdriver directly on the valve of the calorstat to release the air. The level in the radiator drops, I repeat the procedure until the liquid arrives in the calorstat, I then put the hose back to the radiator.
The engine was still making a big knock on the same cylinder I was disappointed.
As I have a block in advance redone I started to look a little if things were different. I quickly found the original error. The previous owner had reversed two diesel pump outputs towards the injectors...
I put the outputs in order, no more rattling... Even though they were worn out the old rocker arms actually worked quietly.
Here's a link to the Stanadyne website for a manual on their DB2 pump. The DB2 is the Roosamaster that's in my Ford truck and it powers the Oldsmobile 5.7l IDI. There might be one on the Stanadyne site for your V6 injection pump.
Some diesel truck guys (the ignorant ones) "turn up" a fuel delivery screw in the side of the DB2 pump so the truck rolls coal. The manual I linked details the procedure to set that screw properly.
Other than that fuel delivery screw, there aren't many adjustments you can make to that injection pump without a flow bench. I'd recommend NOT modifying or even attempting to rebuild the injection pump in your Olds if it's the only one you have.
Sorry about the link. I checked older threads on the Ford truck website including that link. They took down the rebuild manual apparently. All of the links are broken.
Here's a good place to start. There are a number of YouTube videos detailing rebuilding a DB2 injection pump.


 Adjustable rockers for the LF9






 But I'll go with the harland kit


