When you click on links to various merchants on this site and make a purchase, this can result in this site earning a commission. Affiliate programs and affiliations include, but are not limited to, the eBay Partner Network.
I just recovered mine myself. It was pretty easy. I used marine grade vinyl which I dyed myself and marine grade 1/2" thick foam.
My car has been apart for 12 years and forget how the vinyl and padding get attached. I do still have the spine that goes on the front of the cash. I do t remember the vinyl being completed dried out and brittle..but not to sure if that was anything else attached to the spine in the front that has some studs coming out of the back of it
Remove all the perimeter trim, two pieces in the front, the windshield pillar trim and the two pieces on either side of the dash. Remove all the screws from under the front of the dash above the glove box, radio and inst cluster. Loosen the bottom bolts under the dash and lower the steering column. With the dash loose and hanging down (I supported mine on either side with a simple wooden block setup) you can remove all of the old dash covering. If you can use it as a pattern for your new cover and foam. Cut new material glue the foam to the cover using upholstery glue. I cut the foam to the same size and shape as the dash and left 2" in front to wrap around. I left about 1" extra material around the front and sides of th foam and about 4 or 5 on the side facing you. This extra material will tuck under the dash into a slot you can feel from the front. i used a plastic bondo spreader to tuck my material in. I trimmed it for the two center dash supports also. All my measurements are approximations off the top of my head so do your own measuring lol. Dont forget to trim for the defrosters, I marked mine off when i test fit it for the first time.
Installation is basically the reverse. I put the pad in place, glued it down with constructin grade adhesive and then installed the front two trim pieces making sure not to make any wrinkles. I made sure I had extra material and foam sticking out the ends you can always trim later but you can't add material. Then pull the pad towards you and start tucking into the slot under the dash. I started in the middle and worked my way out towards the sides. Once that was done i wieghted the dash down with books to let the glue dry.
Next I put the dash back up, this secures the front of the dash pad. Lastly put the sides back on this is the "hardest" part just making sure you have no wrinkles. I hope this helps.
61Bat,
Thanks for taking the time. That was everything I needed ,big help.
I've had this car apart for so long ,I wasn't sure if I had misplaced the dash pad.
The padding and vinyl get glued to the steel part of the dash and everything outside of the dash is held fast with the garnish mldgs, and side post trim. and the front spine ( which is in my hand in the pic ) was held in when the dash is put back together. I took the dash out to repaint and re-chromeplate the trim.
By the way your ride looks perfect!!
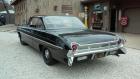
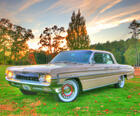
kx1233 thanks for the compliment. We love our Olds, she's far from good but good from far lol. Someday I hope to straighten out the sheetmetal a little better and resquirt it but for now its a fun driver and a great start for a project. I totally lucked out getting the Starfire interior so I'm continuing that route.
Following your build, I really dig 61 Oldsmobiles! Happy to help out another Olds enthusiast.
Been looking everywhere for help to redo dash pad. This car has cruise control and windshield control is in the leftside panel. I'm having trouble getting it off. And where are the I need to take out to drop the dash. Can you help?
Been looking everywhere for help to redo dash pad. This car has cruise control and windshield control is in the leftside panel. I'm having trouble getting it off. And where are the I need to take out to drop the dash. Can you help?
The project stalled for a little , picking back up in the fall, restored all of the dash and chrome etc. but the pad will be done after dash gets bolted up
The reason I asked is after I did mine and had it in the sun the Spray Adhesive started to let go and I had bubbles under it. I did a thorough job of prepping the surface but it let go anyway. I tried to roll it back and re-glue it but made a mess of the whole thing. I'm going to have to do it over. Was wondering what glue should I have used.
Haven't figured out how to lower dashboard. This car has cruise control
Originally Posted by Supernice88
The reason I asked is after I did mine and had it in the sun the Spray Adhesive started to let go and I had bubbles under it. I did a thorough job of prepping the surface but it let go anyway. I tried to roll it back and re-glue it but made a mess of the whole thing. I'm going to have to do it over. Was wondering what glue should I have used.
Can't figure out how to drop dashboard. I loosened one bolt no I took one bolt from the bottom once I did noticed I couldn't get the nut back on it. Realized that bolt shouldn't be removed. My 62 oldsmobile starfire Cruises control and wiper switch
I could use some ideas, suggestions, etc for my '62 Starfire dash pad. It has been restored and looks great but I cant get the metal end pieces (fillers) to fit in place with the metal dash and dash pad. Ive been trying to find another dash pad in fair to bad shape with intact molded ends to help solve the problem. It may be that the restoration of my pad (by Just Dashes) included too much padding in the molded ends. Any ideas?