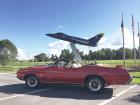
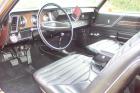
1970 442 W-30 convertible


Thread Starter
Registered User
Joined: Jan 2012
Posts: 156
From: Des Moines, IA
1970 442 W-30 convertible
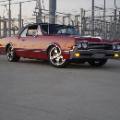
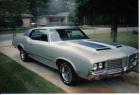
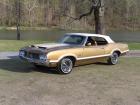
I am starting a thread on my current restoration project of a 1970 442 W-30 Convertible. My father bought this car from a body shop in Platteville, WI in either the fall of 1974 or Spring of 1975. He cannot remember which. He drove it once, from Plateville to Des Moines, IA in 1978 when my parents moved. My mother drove it a few times taking me to day care when I was an infant in 1982. Otherwise, it sat in an old farm machine shed. As far as my dad was concerned, he bought an orange 1970 442 Convertible. If you would have asked him what a W30 was, he would have asked, "what is that?
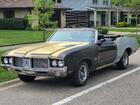
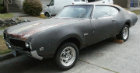
It's 1997, I am 15, restoring my mom's old car that had been sitting in the same shed as the 442 (1969 Cutlass S), I love cars and start poking around the 442. What I discover and uncover is quite a story. I had just purchased the W-Machines retoration guide (I do not know if it is still in print), but they had a spotter section for a 1970 442-W30. The car is orange, steel hood, chevelle stripes on the hood and trunk lid and probably enough bondo to have made 1974 a banner year for the company. It was odd though, there were red inner fender wheel wells, an aluminum w-30 intake. I dug deeper and found the correct carb for a 1970 442 w-30 automatic, w-30 automatic distributor. I then removed about a billion gallons of gunk off the cyclinder head and found the letter F. I was getting really excited!!!! I then went under the car and looked at the tranny, very stupidly used a flat head screw driver to clean off the tag. To this day there are still scratches on the tag, but nevertheless there was OW. Did I mention, I was excited at this point. There were other tell signs, it had an OAI ram air base, with fittings on both sides going into the valve covers. I put a battery in the car and poped open the trunk lid and instead of orange the car was a more red version of orange which I later found out to be Speical Order color Rally Red. (Yes the body tag has a - instead of a paint code.
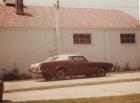
I spoke with my dad and dug a little deeper and got the story on the car. He bought it from the body shop, the body shop bought it from the insurance company, the original owner had beaten the living day lights out of the car and had a massive wreck. He had wrecked it sevral other times before as well. My dad told the shop to make it drivable and paint it as cheap as possible. He then bought it for around $800.
In the spting of 2012, I had finally assembled enough NOS and original parts and knowledge form multiple other restorations to begin this project. I have decided to build as nice of a car, as I can do. The car is very high option.
-Rally Red Special Order, White top,
-Pearl white interrior,
-rally pack,
-a track, am/fm radio, rear speaker,
-dual gate shifter
-SS 1 wheels
-power locks,
-power windows,
-power bucket seat
-delux seat belts, with convertible shoulder harness
-a/c
-power steering, power brakes
-sport mirrors
-power trunk
there are a few more options, I cannot think of this time.
It's 1997, I am 15, restoring my mom's old car that had been sitting in the same shed as the 442 (1969 Cutlass S), I love cars and start poking around the 442. What I discover and uncover is quite a story. I had just purchased the W-Machines retoration guide (I do not know if it is still in print), but they had a spotter section for a 1970 442-W30. The car is orange, steel hood, chevelle stripes on the hood and trunk lid and probably enough bondo to have made 1974 a banner year for the company. It was odd though, there were red inner fender wheel wells, an aluminum w-30 intake. I dug deeper and found the correct carb for a 1970 442 w-30 automatic, w-30 automatic distributor. I then removed about a billion gallons of gunk off the cyclinder head and found the letter F. I was getting really excited!!!! I then went under the car and looked at the tranny, very stupidly used a flat head screw driver to clean off the tag. To this day there are still scratches on the tag, but nevertheless there was OW. Did I mention, I was excited at this point. There were other tell signs, it had an OAI ram air base, with fittings on both sides going into the valve covers. I put a battery in the car and poped open the trunk lid and instead of orange the car was a more red version of orange which I later found out to be Speical Order color Rally Red. (Yes the body tag has a - instead of a paint code.
I spoke with my dad and dug a little deeper and got the story on the car. He bought it from the body shop, the body shop bought it from the insurance company, the original owner had beaten the living day lights out of the car and had a massive wreck. He had wrecked it sevral other times before as well. My dad told the shop to make it drivable and paint it as cheap as possible. He then bought it for around $800.
In the spting of 2012, I had finally assembled enough NOS and original parts and knowledge form multiple other restorations to begin this project. I have decided to build as nice of a car, as I can do. The car is very high option.
-Rally Red Special Order, White top,
-Pearl white interrior,
-rally pack,
-a track, am/fm radio, rear speaker,
-dual gate shifter
-SS 1 wheels
-power locks,
-power windows,
-power bucket seat
-delux seat belts, with convertible shoulder harness
-a/c
-power steering, power brakes
-sport mirrors
-power trunk
there are a few more options, I cannot think of this time.
Last edited by bennie442s; Oct 31, 2012 at 08:45 PM.
Thread Starter
Registered User
Joined: Jan 2012
Posts: 156
From: Des Moines, IA
more pics
Tons and ton of undercoating on this car! When I scrape some off, the beautiful red inner fender wheel wells stick out! Odometer reads 55,000, has not turned a mile since 82!
Last edited by bennie442s; Oct 31, 2012 at 08:43 PM.
Registered User
Joined: Jul 2008
Posts: 4,533
From: Chi-town
wow welcome. Ask any questions you want, lots of knowledable folks on here and a few of us have just finished restorations of our own 70 W30 convertibles. Those shoulder belts seem like a trivial option but are rare in any 70 convertible, an odd option but cool none-the-less.
Great story and good luck with the restoration
Great story and good luck with the restoration
Thread Starter
Registered User
Joined: Jan 2012
Posts: 156
From: Des Moines, IA
manifold and built motor
Thank you for the welcome. It's a January Lansing built car. The intake cleaned up very nicely, though it took a long time even with a bead blaster. The car has 55,000 miles on it and has its numbers matching engine and tranny. When we opened took the heads off and disassembled the engine everything went smoothly. The pistons came out without the use of a ridge reamer. There was one slightly bent rod and a piston with a chip in the side. Therefore, I had to go with new pistons, which I had not wanted to do. My intention is to keep this as absolutely correct as possible with nos or gm original parts. Nevertheless we had to bore the block .030 over, new pistons, balanced rotating assembly, new valves and hardened seats in the heads etc. When I build the motor it went together very easily, it took a while to ensure all piston rings gapped the same tolerance for each respective cyclinder, but its worth the extra time to blue print the motor.
Last edited by bennie442s; Nov 1, 2012 at 05:27 AM.
Thread Starter
Registered User
Joined: Jan 2012
Posts: 156
From: Des Moines, IA
the body begins
Both quarters had a million pounds of bondo from the accidents. They both needed to be cut out and replaced with nos quarters. There really is not much left to a body when both are cut off!
Thread Starter
Registered User
Joined: Jan 2012
Posts: 156
From: Des Moines, IA
more work....
Despite the car being caked in undercoating, the outer wheel well housings in the rear were a little soft and beat up from being pulled out from the accident; I went ahead and replaced them. Even though they were convertible specific, they needed massaging to go in properly. Tons of time spent working with the quarters and outer housings alligning everything properly.
 Keep the pics coming. Got any documentation to go with it? Just curious, we like to see documentation
Thread Starter
Registered User
Joined: Jan 2012
Posts: 156
From: Des Moines, IA
Two incredibly clean california doors were found back in 2002, but the passanger side skin was a little rough on the edges. The yard I bought them from were a little rough. A many month search yielded a set of nos skins from detroit's craigslist. Eventhough i already had a driver nos doorskin, I bought the set, used the passanger skin and now I have two drivers sitting in one of my garages.
Thread Starter
Registered User
Joined: Jan 2012
Posts: 156
From: Des Moines, IA
Documentation found, work continues
I found the broadcast card/sheet in the drivers side front bucket seat this past February. I have it stored in a safe deposit box at the bank so that nothing can happen to it. I will say finding the broadcast card was icing on the cake. In 1997 I was convinced this was a w-30 and began collecting parts and preparing for the restoration.
Windshield cannel top and rear were rebuilt. Lots of cancer there!!! This was another area where it took a ton of time. Lots of patience to get the contour correct on the bottom. The windshield sits perfect now, the glass guy is going to love it. Quarters welded on and epoxy primed.
Windshield cannel top and rear were rebuilt. Lots of cancer there!!! This was another area where it took a ton of time. Lots of patience to get the contour correct on the bottom. The windshield sits perfect now, the glass guy is going to love it. Quarters welded on and epoxy primed.
Last edited by bennie442s; Oct 31, 2012 at 09:37 PM.
Thread Starter
Registered User
Joined: Jan 2012
Posts: 156
From: Des Moines, IA
Sparky's Carb in Milwaukee Wisconsin
I sent the carb out to Sparky's in Milwaukee, WI. Simply, the man is an artists and if you want your carb done right, he is the guy to do it. When I first called him and told him what I had, he listed the part number off the top of his head.
Thread Starter
Registered User
Joined: Jan 2012
Posts: 156
From: Des Moines, IA
Frame is back!
The frame went to a shop and had to have quite a bit of work done to it. It was short in the front end, it sagged, and the engine cradle was folded in. Also the holes for the bolts that attach the core support needed attention as well. This W30 might have only been on the road for four years, but they were a hard four years!
Thread Starter
Registered User
Joined: Jan 2012
Posts: 156
From: Des Moines, IA
sand blasting and undercoat removal
The good news....the car hd undercoating protecting the floors, the bad news...there was undercoating on the floors of the car. 14 hours of sandblasting on all suspension componets as well!
Thread Starter
Registered User
Joined: Jan 2012
Posts: 156
From: Des Moines, IA
more pics
30% gloss black, 70 % gloss black, 100% gloss black....its hard to remember what each piece is suposed to be. Thank you John Richardson of Roanoke, VA for all the hours on the phone helping with this projects preparation. For those of you who do not know him, he scored a 990+ on a 70 w-30 convert he once owned at aaca and oca nationals.

Thread Starter
Registered User
Joined: Jan 2012
Posts: 156
From: Des Moines, IA
Chassis rebuild
I removed and installed all the bushings in the suspension components, removed and installed all the ball joints. I am not doing that again! I used inline tube products and all their pieces for rebuilding this chassis are very nice! I especially like the look a like rivets for the upper ball joints. The engine assembly is comming along very well, although it took me a bit to remember how the engine accessory brakets went back on the engine.
Last edited by bennie442s; Dec 10, 2012 at 04:01 PM. Reason: typos
Thread Starter
Registered User
Joined: Jan 2012
Posts: 156
From: Des Moines, IA
supplier/restoration services??????
I have the original alternator and power steering pump for this car, any suggestions for companies or people that rebuild to exact factory appearence and spec for these two items?
Any suggestions on who rebuilds, restores, offers correct replacement of a/c components. I need to rebuild my a/c compressor, replace my drier, condensor, lines, and basically the whole system.
Any suggestions on who rebuilds, restores, offers correct replacement of a/c components. I need to rebuild my a/c compressor, replace my drier, condensor, lines, and basically the whole system.

Thread Starter
Registered User
Joined: Jan 2012
Posts: 156
From: Des Moines, IA
Transmisison rebuilt
I finished rebuilding and restoring the transmission. I saved the facotry yellow OW on the top and another factory yellow marking as well. I opted not to change or refininsh the original OW tag.
I did a stock rebuild. The OW had what would be termed as a "1970 version of a shift kit;" therefore it has a slightly snapppier feel than the standard OG transmission. Truth be told, I could have bought a modern shift kit and it would be more pronounced and stronger, but this car probably will not see much thrashing. I reused the stock torque converter that had a higher stall speed than the OG transmission as well. Normally, I would replace the converter, but this car had only 55,000 and the original one showed no signs of wear. Finally, I going to try to use the original modulator, it check out as having a strong seal still, so we shall see!!!
Also included is a better picture of restored steering box, illustrating the different colors on this piece.
I did a stock rebuild. The OW had what would be termed as a "1970 version of a shift kit;" therefore it has a slightly snapppier feel than the standard OG transmission. Truth be told, I could have bought a modern shift kit and it would be more pronounced and stronger, but this car probably will not see much thrashing. I reused the stock torque converter that had a higher stall speed than the OG transmission as well. Normally, I would replace the converter, but this car had only 55,000 and the original one showed no signs of wear. Finally, I going to try to use the original modulator, it check out as having a strong seal still, so we shall see!!!
Also included is a better picture of restored steering box, illustrating the different colors on this piece.
Thread Starter
Registered User
Joined: Jan 2012
Posts: 156
From: Des Moines, IA
More work on the body continues
Blocking out the body continues, we are on our 4th round...probably one more coat with black...then a couple rounds of block sanding using body color for the main shell. The donor fenders from my 70 Vista Cruiser got strpped of old paint. The pasenger is going to work, but I think I will use another driver side 70 specific fender I have one up in the garage attic. Lots and Lots of work...

Thread Starter
Registered User
Joined: Jan 2012
Posts: 156
From: Des Moines, IA
body is being shot in color for the next round of blocking
After 6 rounds of block sanding the shell with 360 wet or dry, we decided the body was straight enough to shoot some color. In the next few weeks the car will be blocked again this time using 400 wet or dry. The color we used was Dupont Nason. The paint store's computer color library came up with 1968 code #73 Rally Red. I have my original trunk lid, the underside is unmolested and still retains the original color; this color we shot today does not seem to be orange enough. We used a piece of scrap medal and applied some clear on top of the color.
Upon my request, the paint store called Dupont and used the old Dupont p/n and Dupont said the name had been replaced with the new name Monza red. Monza red was a 1970 Chevrolet color if I remember correctly; nevertheless, they gave me a small sample and we shot it on another small piece of scrap medal. It is closer and more orange, but still not close enough in my opinion.
When we shoot the car in the final color coat, I think I will have the lid scanned and color matched.
To answer a prior post, I am farming out the body and paint to an expert. He painted a 67 442 convertible that won its class at Olds Nationals twice in the early 90's. There have been numerous hot rods he has painted including my 65, I am positive Ron will do a spectacular job. Everthing else for the most part I have done and will continue to do with the exception of interrior and top.
Upon my request, the paint store called Dupont and used the old Dupont p/n and Dupont said the name had been replaced with the new name Monza red. Monza red was a 1970 Chevrolet color if I remember correctly; nevertheless, they gave me a small sample and we shot it on another small piece of scrap medal. It is closer and more orange, but still not close enough in my opinion.
When we shoot the car in the final color coat, I think I will have the lid scanned and color matched.
To answer a prior post, I am farming out the body and paint to an expert. He painted a 67 442 convertible that won its class at Olds Nationals twice in the early 90's. There have been numerous hot rods he has painted including my 65, I am positive Ron will do a spectacular job. Everthing else for the most part I have done and will continue to do with the exception of interrior and top.
Last edited by bennie442s; Jan 4, 2013 at 04:08 PM.
Thread Starter
Registered User
Joined: Jan 2012
Posts: 156
From: Des Moines, IA
More Pics
I put the color on the trunk lid so for at least the guide coat in color, I helped with the paint job! The dash was primed in black epoxy primer and looks nice. It will be blocked again as well in preperation for painting its final color.
If anybody knows of the correct current Oldsmobile Rally Red 1970 DuPont Color Code for Chroma Base or even Nasom that would be greatly appreciated. As work continues, I hope to post more pictures!
If anybody knows of the correct current Oldsmobile Rally Red 1970 DuPont Color Code for Chroma Base or even Nasom that would be greatly appreciated. As work continues, I hope to post more pictures!

Registered User
Joined: Dec 2010
Posts: 857
From: crawfordville, florida
Contact Bob Reeve at Car Shine Restoration and Refinishing LLC in Jackson, MI. @ 517-663-6676. He painted my award winning 70' F-85 W-31 Rally Red - - paint code car. I believe his mixing equipment came from the Lansing Assembly Plant and trained the Olds painters through the junior college. He knows Oldsmobile paint colors very well. Most people do not understand that the Olds 70 Rally Red has slightly more red tint than the 69' Hugger Orange/Orbit Orange color that Chevy/Pont. used.
Please tell him Dave Bunch recommend you call him.
Thanks.
BTW: Nice job you are doing in preserving the originallity of the car and doing a first class job to boot! Also, I believe the dash should be a little flatter in gloss. Firewall looks perfect!
Please tell him Dave Bunch recommend you call him.
Thanks.
BTW: Nice job you are doing in preserving the originallity of the car and doing a first class job to boot! Also, I believe the dash should be a little flatter in gloss. Firewall looks perfect!
Last edited by davebw31; Jan 4, 2013 at 06:01 PM.