When you click on links to various merchants on this site and make a purchase, this can result in this site earning a commission. Affiliate programs and affiliations include, but are not limited to, the eBay Partner Network.
Has anyone had to replace the rocker switch in the dash panel to the left of the steering column? I can't figure out how to get it out of the dash even from behind. Do I have to remove the entire panel to get to the switch? If so, how does one go about removing this panel? Thanks
Take off the dash gauge bezel and left gauge housing for access too, need patience, good lighting, a mirror and a 1/4" socket set.
I'ts a bear, my rear windww switch is the same switch and in the same place, I just wanted to put a nicer bezel on, no big deal.
Get a case of beer.
i went through from the left gauge like Bluevista said. what is wrong with yours? i have taken them apart and cleaned them and greased them up and work like new. half of the time that won't work but you may want to give it a try.
I have small hands (no correlation) and went from under the dash. DId the same thing, just cleaned it up and it worked. Then 5 years later in the body shop they claimed it was cracked when they took the dash out - so I had to buy a new one. If you do make sure you get the switch including the harness, its more money but then the switch and the wires are new. If you end up buying them separately then its 33% more.
Thanks to all of you. My Internet was down for two days so please excuse the tardiness in my reply (good 'ol Comcast). My car is a 1970 Custlass Supreme convertible. The previous owner instlalled a toggle switch under the dash and re-routed the wires to that switch probably due to the trouble with getting the rocker switch out and rebuilt. I think getting to the switch via the left gauge pod is the best approach and knowing a 1/4 inch socket is the correct size will eliminate some frustration. I'm ready to dig in. Thanks again.
Removing the gauges (fuel gauge cluster and speedo) is the best way. My pictures and procedures were done with that method.
Good time to pull the speedo cable and clean and lube it, too!
Done and Done!!
Only took my 4 days of about 5 hours a day in this 90 degree and humid weather. After it is all said and done, I could have made it a lot easier if I had known about those teeny tiny wire nuts holding the dash bezel in place. I lost one of these little devils and had to improvise. I did everything on the reinstall from under the dash and used the empty gauge hole for seeing how I was doing. I modified a speed driver (1/4 inch socket at the end) by grinding away a lot of the thickness of the socket end so it fit over the bolt head that is almost touching the under dash bracing. Once I figured this out I knew I was going to make it. I'm guessing it would have saved me at least 10 hours of work had I done this up front. I found that putting the switch in first, then the bezel and then plugging in the harness was the only way I could get it done. What kept me going was knowing you had been successful in changing over the top switch and the little tips you provided at the beginning. I figured if they can do it, I can do it. Thanks again for all your help.
Great pictures Rob. How you took them is beyond me. A mirror perhaps? Great work though.
A mirror, a good camera set on macro, correct lighting, a bucket of patience, 10 shots, and a cold beer afterward...
I figured those switches gave me enough heck that I would reveal it to the world...
All was not too bad - only took a few hours cumulative. It was in the winter, too - not sure how you were able to do it in the sauna...
Glad you got it done though!
is there an easy way to "jump" the switch while waiting for a replacement ?
just to be able to get the top back up....
Use a piece of bent coat hanger to jump the center pin to either the top or bottom pin, depending on what direction you want to go. Just make sure the wire does not contact the chassis metal or there will be sparks or worse....
A few tools/tricks that I came up with to make the job easier - and take way less than the time it took some other folks.
The following supplies (illustrated below):
LED light stick with magnet on the top - stuck it up under the dashboard pointing back at the switch to illuminate the job.
Part of an old plastic shower mirror - easy to get into the dash after I had removed the fuel gauge
Plastic clamp to hold the mirror to a metal brace that is in the dashboard (it slipped frequently when banged, but was light enough not to mess anything else up every time it fell)
Flexible drill extension (turns on the inside, but the outside stays still) - EXTREMELY useful in being able to snake up under the dash and get the job done on the little screws that hold the switch in. This is what saved me from going nuts.
1/4” magnetic socket head to attach to the extension - kept me from dropping the screws.
Also, be very patient when wiggling the connector off of the black of the switch - it has probably been on there for a long time.
The part is manufactured by TPP (TPPDV-SW1) - seems to be decent quality - it is probably the same one that everybody else sells.
I am also posting the relevant Assembly Manual pages, and Service Manual pages, as I found them to be helpful in further visualizing what I needed to do.
Again, many thanks to those who provided wisdom above.
Tools Used
Looking into Fuel Gauge Cluster Hole (with LED off)
LED on to see the back of the switch with the plastc mirror that I clamped on.
New switch on the Left
Instructions
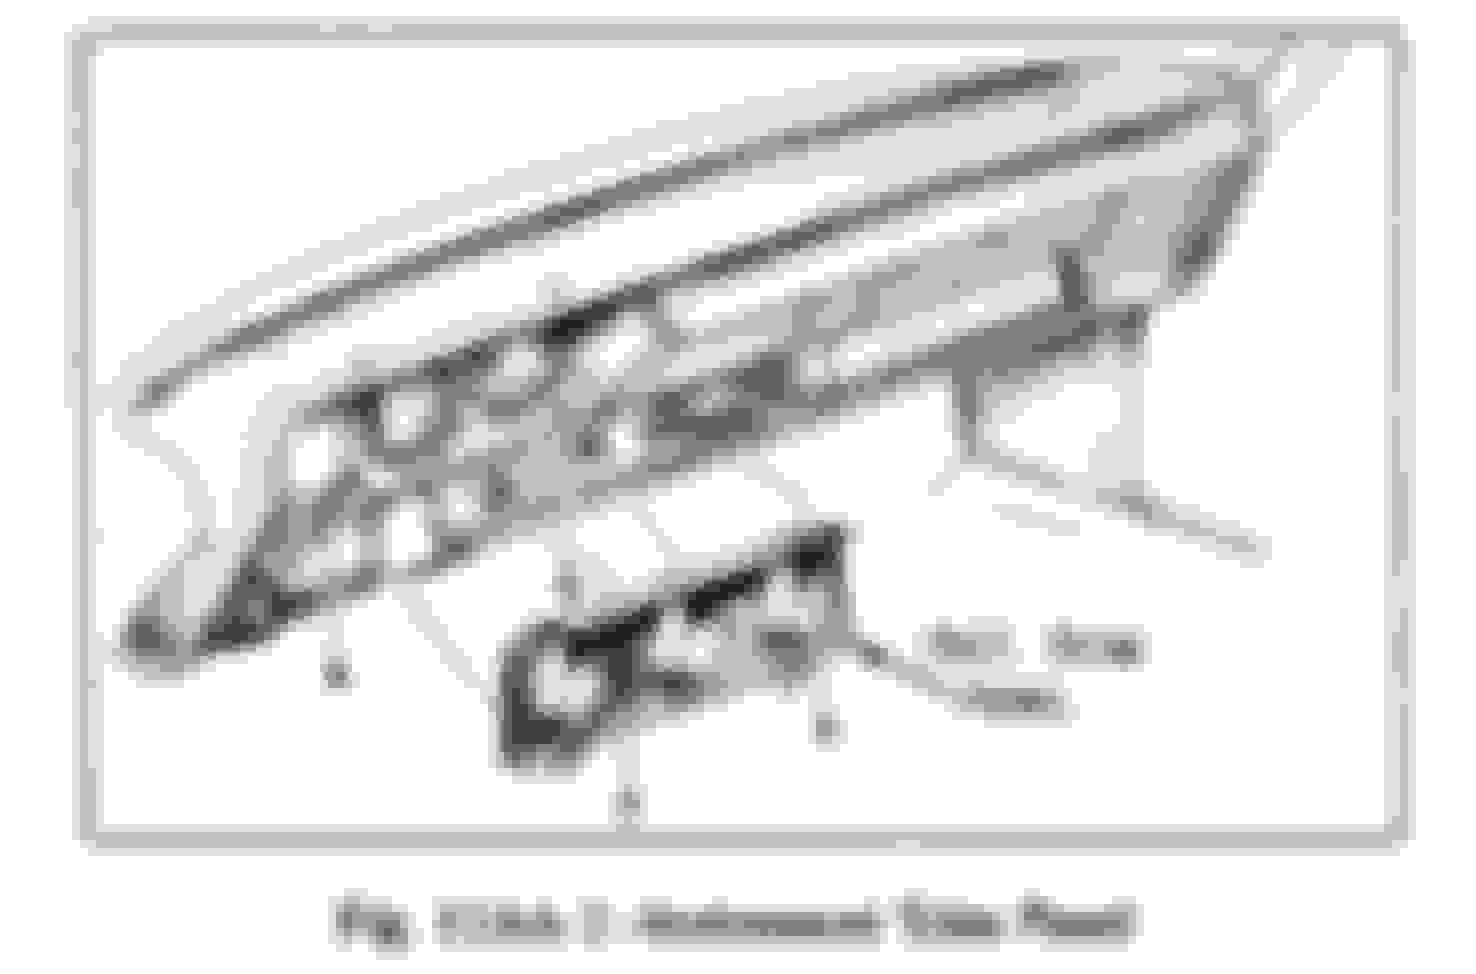
Remove Instrument Trim Panel
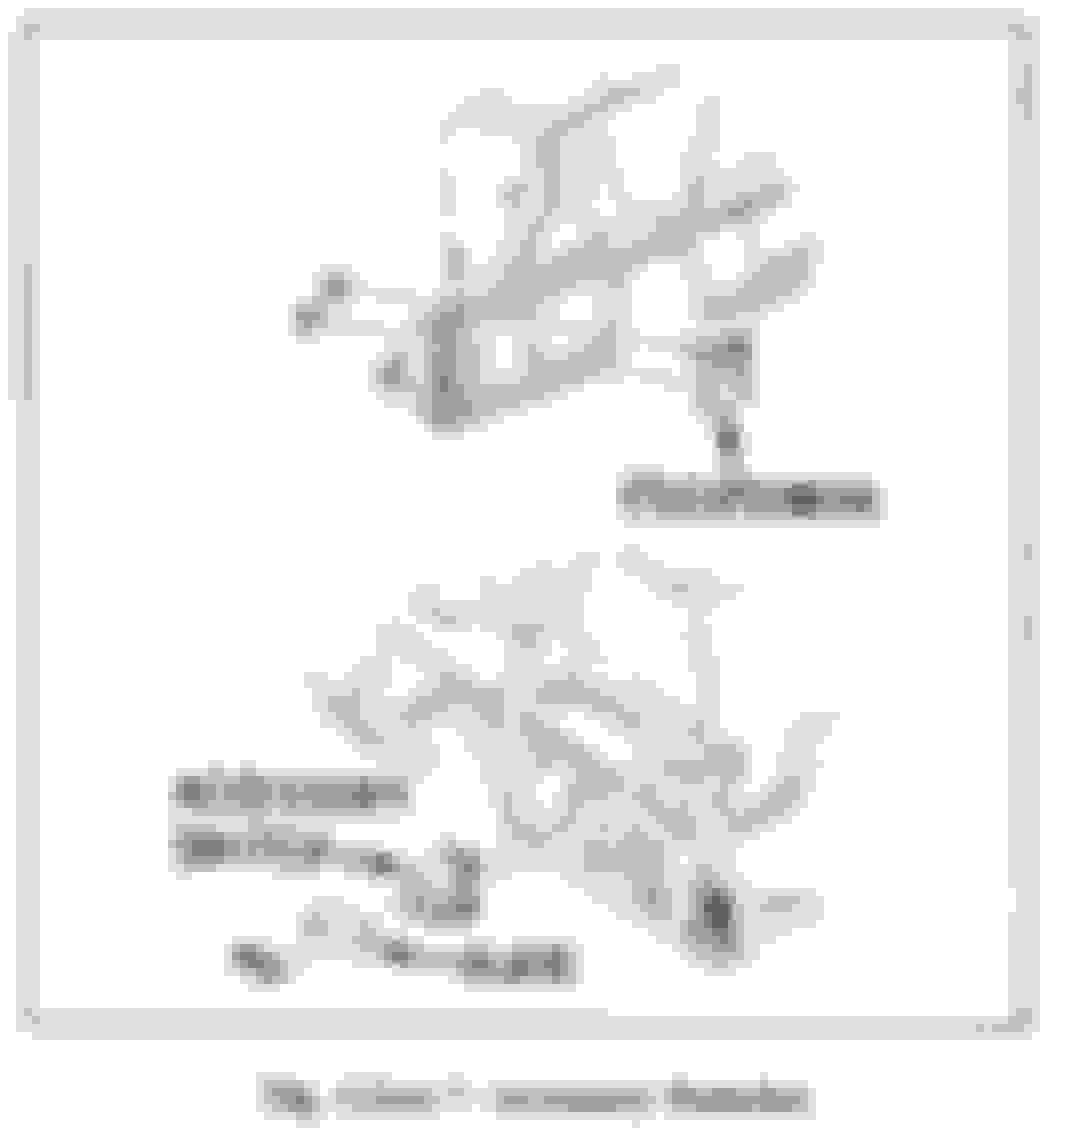
Remove Fuel Gauge Cluster
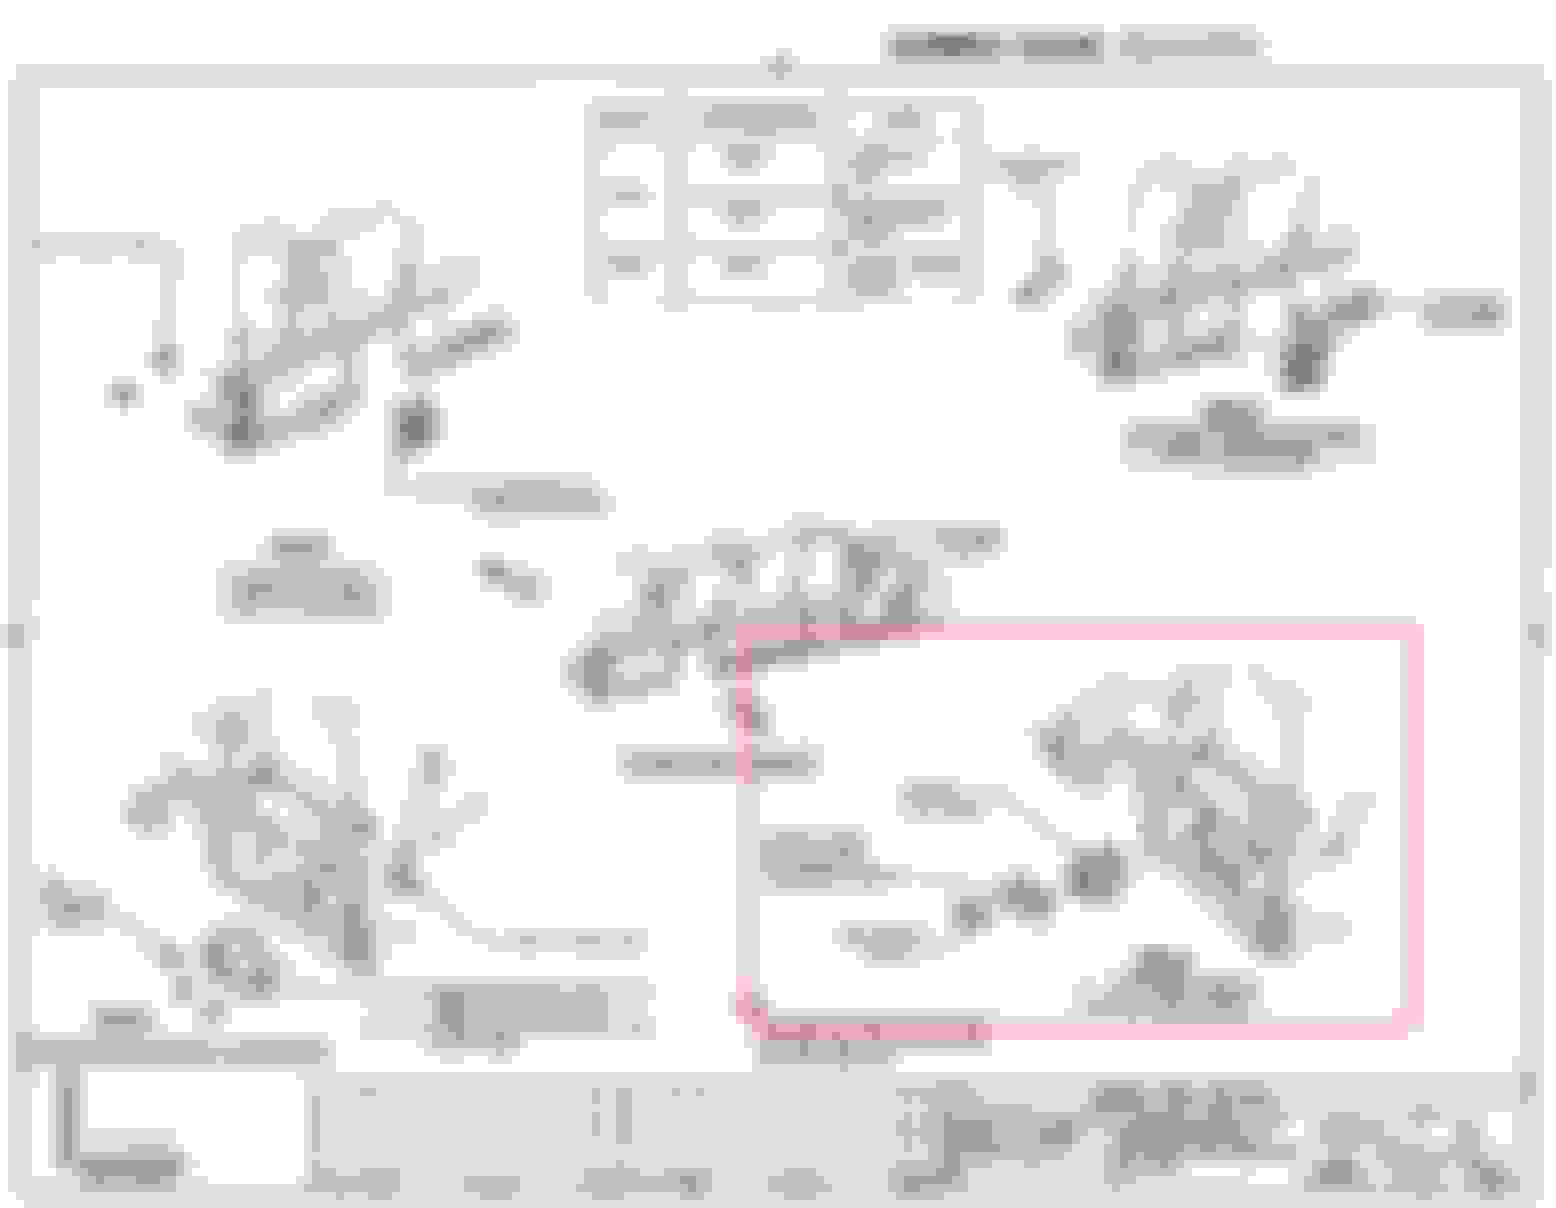
Accesory Switch Diagram #1
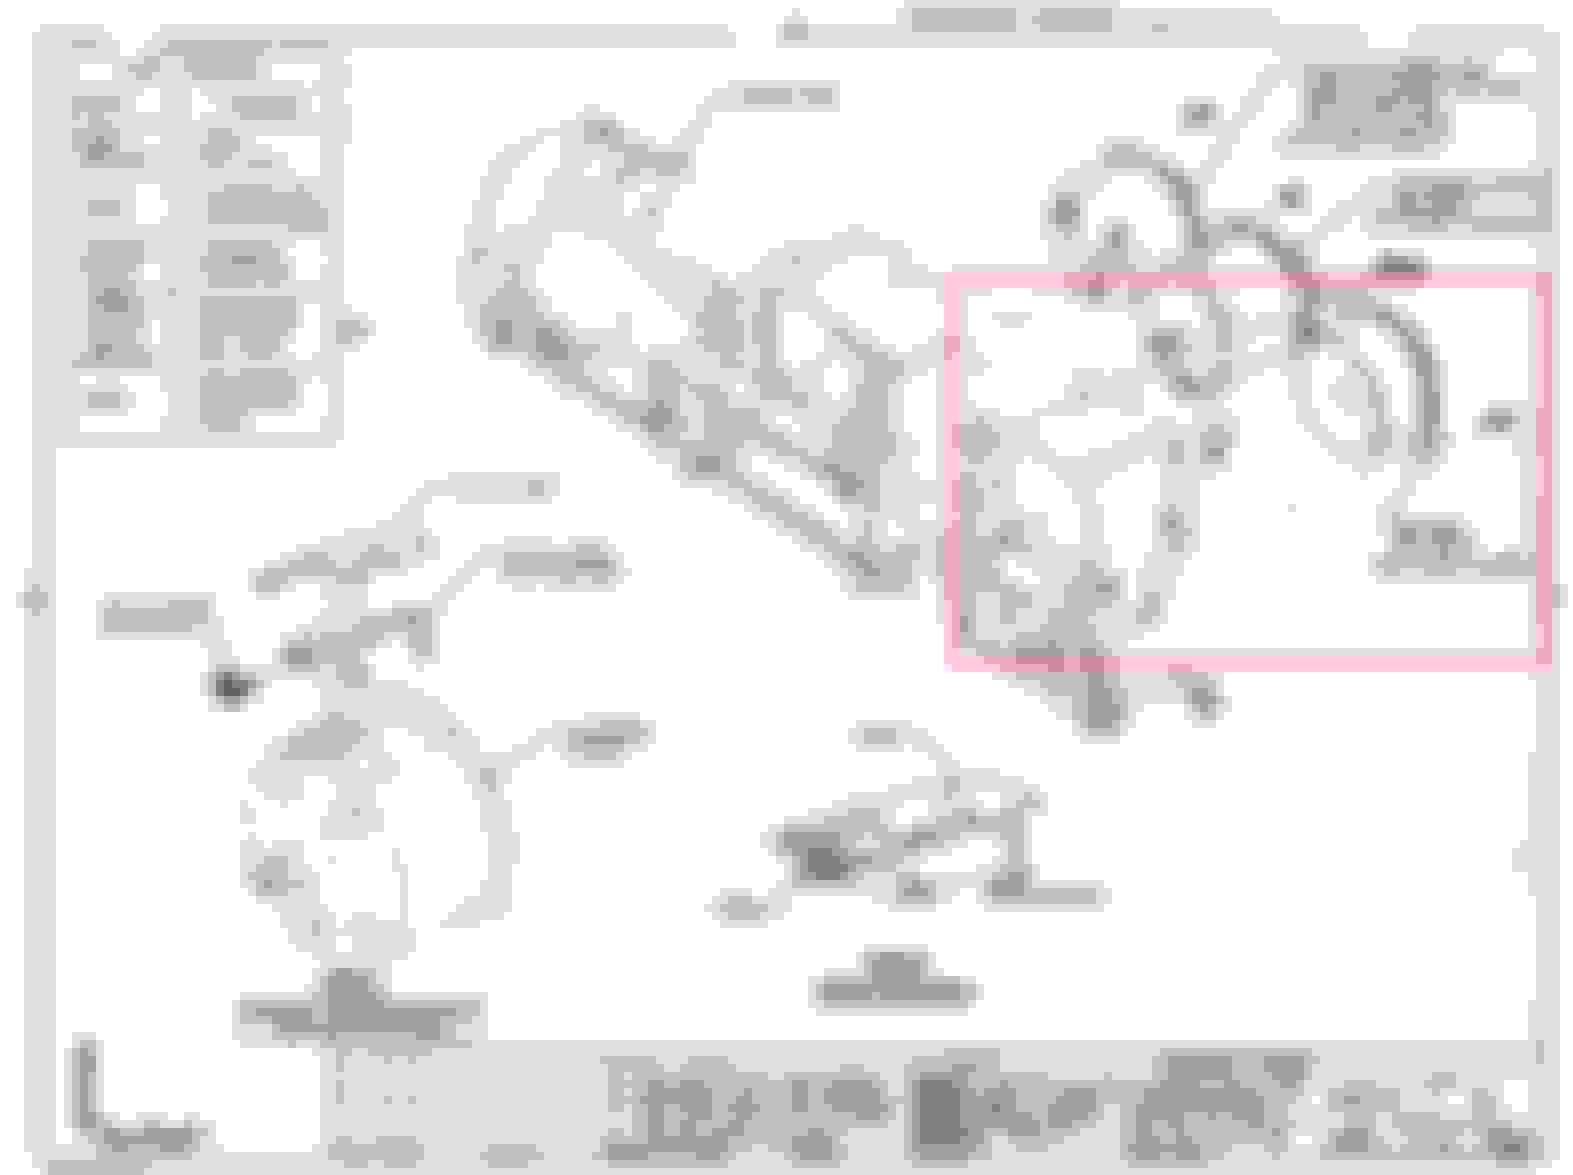
Accesory Switch Diagram #2
Instrument Cluster Diagram
Last edited by ddd777; Aug 7, 2020 at 04:34 AM.
Reason: typo


")

 ) and went from under the dash. DId the same thing, just cleaned it up and it worked. Then 5 years later in the body shop they claimed it was cracked when they took the dash out - so I had to buy a new one. If you do make sure you get the switch including the harness, its more money but then the switch and the wires are new. If you end up buying them separately then its 33% more.