When you click on links to various merchants on this site and make a purchase, this can result in this site earning a commission. Affiliate programs and affiliations include, but are not limited to, the eBay Partner Network.
HELP - I'm n the middle of installing headliner and it looks terrible to me
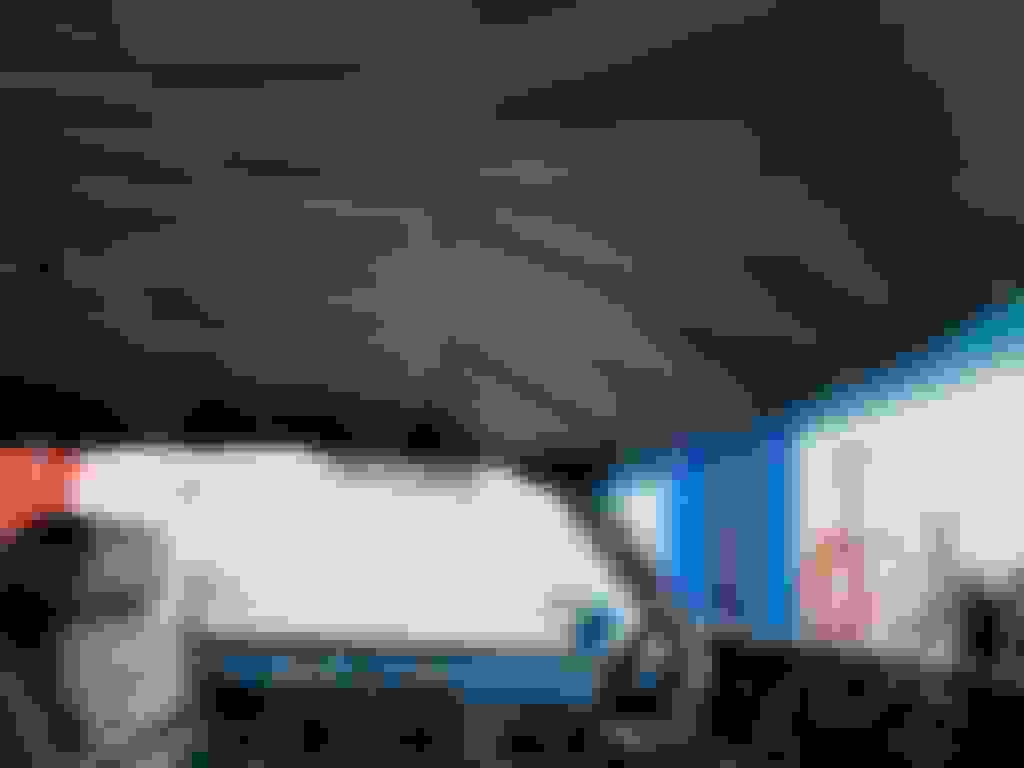
Installing a Legendary Interiors headliner in my '72 Cutlass 442. I got the bows inserted in the cloth tubes on the headliner. It was hard to do and the tubes did not need trimmed. They were trimmed back about 3 inches on each side from the bends. I had it laid out in the sun a couple times and it was wrinkled but not real bad. Yesterday, my wife and I installed it into the holes for the crossbows because I could not get it by myself d/t a repaired rotator cuff that took away one arms range of motion. Any rate, we got it up there and I started putting the clips in up by the front and rear window glass. I went out today and put the clips on both sides. The photos below are as it sits now. Looks pretty rough to me. Tomorrow morning I'm going to turn on a heater in the garage before I leave to vote to get it real warm and around noon, I'm going to try to stretch it more and then use a handheld CONAIR steamer to see if I can get it smoother and if so, I will try to glue it.
The process looks a bit easier in all the YouTube videos I've watched. Look at the "as it is photos" and give me your opinion from your experiences if I did something wrong please? And, what I need to do different or does this look like it should??
Or should I undo all the clips, move it around and then re-stretch and re-clip it? It just doesn't look like I expected at this point!
Thanks, OLE442
Last edited by OLE442; Nov 5, 2024 at 04:52 AM.
Reason: spellin'
I'd undo all the clips and then use the space heater before restretching the headliner into place. I've never done a headliner install though. Good luck. 🤞
I'd undo all the clips and then use the space heater before restretching the headliner into place. I've never done a headliner install though. Good luck. 🤞
Yeah, I'm thinking that this will be my first and last bow type headliner. The newer ones on a fiber board are easier.
Judging from the wrinkles it needs to be pulled side to side. Along the edges, at the pinch welds, I used DAP Weldwood contact cement, but landau top glue from an upholstery shop works better. Get it as warm as possible before you stretch it. Having a broken wing surely complicates things, though. Good luck!
Well, I've watched a number of videos about headliners and taken some tips from each of them but mine is half done and I'm not sure how well I'm going to move forward to finish it. I'm not feeling well today so I'm taking the day off. At any rate, I just saw this YouTube video where the man makes it look so easy and it comes out looking spectacular. Thought you all would like to see it!
I'm debating taking mine all down and starting over. But, it seems to me his replacement headliner might be not as heavy material as mine from Legendary?
If its got shipping creases and wrinkles in it laying on the ground it(looks like it does), then they will NOT pull out with any amount of stretching in the car.
You have to heat it up first and work those out.
Take it back out of the car, carefully remove the bows and put it in a clothes dryer on hot for 5 mins... those shipping wrinkles and creases will be gone and you can start again.
You can also use a steamer on it (with it out of the car) laying on a big flat table. This takes a lot of time to do it this way, going over each section again and again until its smooth.
When I do a headliner that is not black I only use a steamer on it because the dryer method can leave marks, but for black, I always use a dryer. quick and easy.
Did you sand your bows so they would be smooth? They should be unpainted raw steel and sanded until they are shiny so the liner can slide on it easily when stretching. If they are rusty and or painted the liner may not slide as it needs to when working it.
One more comment, I see in your pic you have the sides clipped with the binder clips. There is ZERO reason to clip the sides if the liner is not fully stretched front to back. Only once front to back stretch looks good, THEN start pulling it side to side. Start in the middle and work forward, then return to the middle and work toward the back, the top of the rear window corners is the hardest part.
FWIW, If there are still wrinkles visible when its temporarily clipped, thats the way its going to be when you glue it unless you take it loose and do more pulling or working on it.
Do not expect creases or wrinkles to "work out on their own" unlike seat upholstery which moves around when you sit on it and has a way of working itself out- in a headliner they don't.
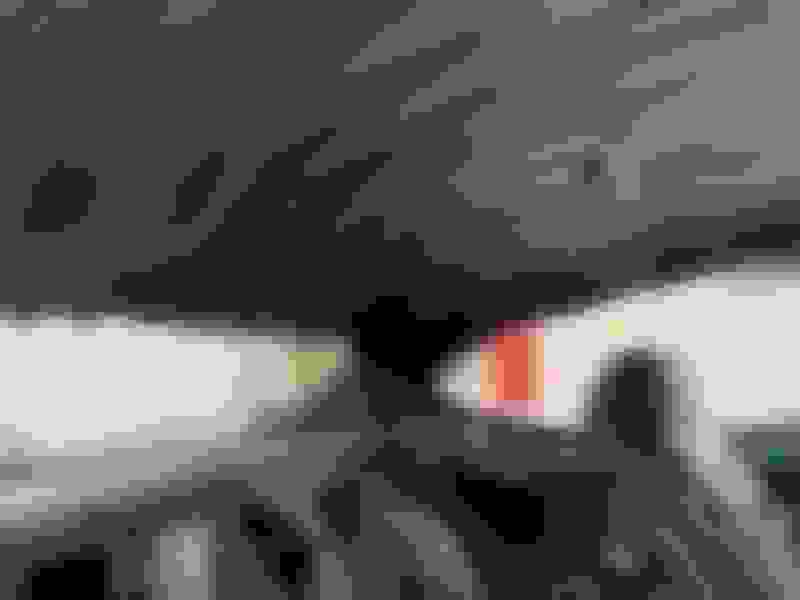
Well, after being off for 5-6 days being sick......I went put this afternoon and put the oil filled electric heater inside the car and turned on the small AC unit that has a heat pump in it and left it for a few hours. After I picked up my granddaughter and made/ate dinner, I sat down down for a bit and then went out to the garage to work on the headliner again. I stretched a bit more and it looks better. I took photos before I came in and checked Classic Oldsmobile. I'll post the recent photos below!
No, I did not sand the bows down but did notice that in the video I posted above so i was wondering if that was part of the issue. I was going to work on it a couple more days with the steamer and see if I could work it out. I really hate to have to insert those bows again.....they were such a PITA the first time! I'm done for the night since at 72 years old laying, twisting stretching and reaching inside that car is tough on an old body. The guy in the above video didn't even use clips. He layed it out after he put the cleaned bows in the cloth tubes, sprayed glue around the edges of the headliner. sprayed glue all around the inside of the car, inserted the bows starting with the middle on and then the front and back bows snapped in....then he started in the front or back stretching it and then did one side and then the other and installed the pinch molding, sail panels and mirror, visors and other accessories. He made it look so freakin' easy! I'm not sure about sticking it all around with out test fitting it?? Odds are, I'll take your advice and remove it tomorrow! Thanks for your comments. Keep looking back because I'm sure I'll need more advice/help before it's done! The 442 is the last car I ever plan on restoring so this is it for me!
OLE442
I did take it all the way out and pulled the bows and Scotch Brite'd them until smooth and shiny! I re-inserted them and re-installed the bows and headliner back in the car. I stretched front/rear multiple side and then the side multiple times. Clipped all around. On the last stretch on all side I used this upholstery tool (see photos below) to grasp the material after applying heat gun and it looks pretty good. I think once I apply glue to the front/rear sides and then the sides that it will look pretty good and when aI add the overhead light, the shoulder belt pouches and the shoulder belts as well as both visors, rear view mirror & the pinch molding and coat hooks it will look acceptable. That tool made the difference to get a good grip to stretch the material IMO!