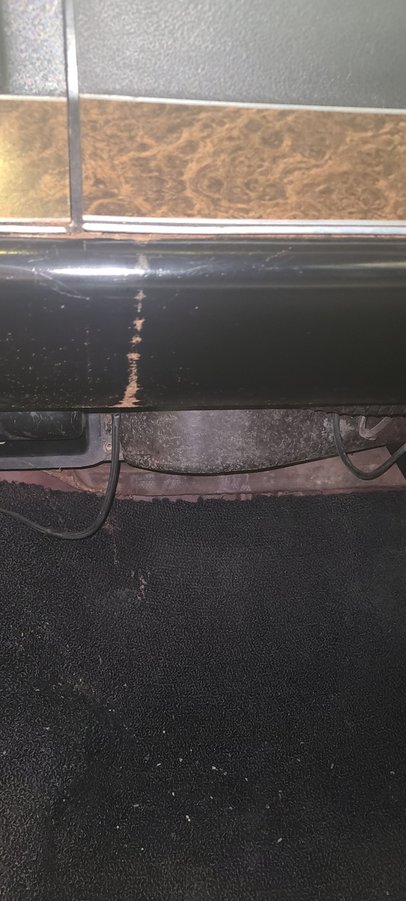
Dash refurb
#2
From the picture, it looks like a simple-to-repair paint gouge. I say "simple to repair" with the understanding that this will be similar to body/paint work on an exterior panel. The best way calls for using a D/A sander to feather the paint out around the damaged area. Prep the underlying steel correctly, thoroughly clean and degrease the area, apply quality primer in layers, block-sand, then ultimately apply correct tint of paint. The alternative is cleaning/de-rusting the gouge, then applying touch-up paint. The first way takes time and patience, and a little bit of skill, but provides the best long term and best looking solution. The second way can be done in an hour or two, and will leave a visible "scar."
#3
this effort like was said perviously is like trying to blend in new paint into old.. Original paint was probably lacquer.. long ago I used Ditzler DDL 9423 low gloss black for my dash.. Seemed close to original sheen. lots of other low sheen black paint out there.. Figure out where you want to blend old to new, some type of demarc.
Steps:
1. Clean the metal with soap and water, let dry.
2. Tape off dash applique with painter tape 1st, then a few layers of Gorilla tape over this to protect it, like about 4.
3. Mask off and seal entire area (Dash, Steering wheel, Headliner, etc etc where you do not want paint. with Plastic sheeting
3. Get hammer and dolly and make bumps flat.
3. Sand rust off, maybe wire wheel on a drill be carefull not to nik applique.. just the metal ..
4. Clean with wax and grease remover, use lint free wiper like Wipall, blow off with clean compressed air.
5. Apply good primer surfacer , make sure you have a good mask on an well ventilated area.
https://www.eastwood.com/2k-areo-spr...=google&wv=3.1
Immediately apply auto grade spot putty, and sand smooth, blend in... maybe more then one coat
6. Apply final primer surfacer, let dry, sand with 400 grit.
6. Apply top coat, blend in..
#4
I'll have to check again, but I don't believe there is a gouge in it. There was a massive rats' nest in the glove box, so I'm assuming that'd be just a streak of urine (stupid mice) that ate away at the paint.
Based on how well the touch up paint on the exterior worked, I think we 'could' blend this fairly well, just didn't know what kind of paint I'd need to look at and if it was even doable.
Based on how well the touch up paint on the exterior worked, I think we 'could' blend this fairly well, just didn't know what kind of paint I'd need to look at and if it was even doable.
#5
Ahh, well then, Mouse Urine. That should be easier to take care of. I think. Is the paint itself actually damaged? Mr. Stanley is really good with his process description, but the wire wheel would put hundreds of tiny gouges/scratches in the soft metal of the dash. Other than that, I think he is spot-on with the process. And like he says, it is more than likely lacquer paint.
#6
Checked again this morning, its a rough spot (expected with rust) but didn't feel like a gouge. I'm kind of holding off on starting anything until the engine goes in for assembly but once that happens, this is probably going to be 2nd on the list for that 6 week span.
#8
Ahh, well then, Mouse Urine. That should be easier to take care of. I think. Is the paint itself actually damaged? Mr. Stanley is really good with his process description, but the wire wheel would put hundreds of tiny gouges/scratches in the soft metal of the dash. Other than that, I think he is spot-on with the process. And like he says, it is more than likely lacquer paint.
The primer surfacer and spot putty would fill the scratches of a wire brush.. I have found a FINE wire brush on a drill cleans up rust pits better then sandpaper. One could also treat the metal rust treatment as well, but one must make 100% sure the rust treatment is 100% washed off and neutralized and dry. If this is not done, the acidic rust treatment will cause the primer to lift afterwards...
Fred
Thread
Thread Starter
Forum
Replies
Last Post


