When you click on links to various merchants on this site and make a purchase, this can result in this site earning a commission. Affiliate programs and affiliations include, but are not limited to, the eBay Partner Network.
For a couple of decades I've been a little envious of the OAI (Outside Air Induction aka Cold Air) available on the late 60's 442's. I've always liked the cool 442 dual snorkel air cleaners, dual hoses, the in-bumper & under-bumper scoops and so on. In my boneyard visits, I noticed that in the '70's-80's Olds piped cold air from the fenders. Probably for emissions, yeah, but others did it for power in the 60's (Ford 427 Thunderbolt?). Earlier this week I was talking with my mechanic who said cold air really helped MPG on his Ford truck. So I started thinking about OAI again.
If I recall, Joe P considers these gains marginal. He's the authority. Cool. But I'm kind of in experimental mode. I'd like to see if OAI helps my car without permanent holes or damage. Then I can decide to keep OAI or not.
To me, big cars aren't hot rods. But I've been playing around with options on how to add a factory-looking OAI to my '66 Starfire. This car has A/C. The radiator support is a little busier than cars with just a heater. If I'm routing OAI hoses, I may need to move some factory A/C stuff. Or leave well enough alone.
Without going aftermarket, some options I see are (in increasing order of complexity/ irreversibility)
1) Modify / slot the '66 my fender turning lights creating forward-facing scoops to force cold air in from outside maybe while retaining the turning light function. The lights are already in my fenders. Modifying the light assemblies to be intakes wouldn't ruin the inner fenders. Plus I've got spare (pitted) turning lights to play with.
2) Add '68 442 under-bumper scoops, then cut the inner fenders to allow the 4" hoses to pass through to the carb. Upside here is the repro parts look great and closest to factory. Downside here is permanent non-factory holes in my inner fenders. 4" hoses are huge, so I may need to move some factory to make room for the hoses. If I remember OAI was not available with AC, now I see why... And Olds required that the battery moved to the trunk...
3) Cut symmetrical vertical oval slots in the radiator support on each side of the rad & run 3" hoses to them. The upside here is the slots would be almost hidden and would shove cold air right into the carb, but the battery on the left and A/C dehydrator on the right would probably need to be moved a few inches outboard. Not awful, but not too simple either.
4) cut horizontal slots into the top of the radiator support to allow fitting of a rectangular intake converting to a 3" hose, probably over the battery (restricting access) and interfering with the A/C dehydrator on the right. Weakening the radiator support which seems dumb to me. But a hole here or there isn't unknown in 60's steel...
Part of this is math that I'm not quite sure how to compute: The car has a 455, factory '66 dual exhaust & an 800 cfm qjet. The cam is smooth RV, but I'm on the fence about 2 x 4" diameter hoses vs 2 x 3" diameter hoses as are commonly available in the cloth Olds used in the 60's.
Two 3" hoses would fit a lot more easily with the AC under the hood. What I don't know is whether 2 X 3" hoses would strangle airflow to the 800 cfm qjet vs. the factory 4" hoses they used on the later 442's. I don't take the motor too much above 4500 rpm, so I'm not real worried about airflow at high RPM's, but I'd hate to make the mpg and power worse by putting too-small hoses in front of the carb.
Would two 3" hoses supply enough cold air to feed a 455 at normal driving speeds up to say 4,500 rpm?
The 4" hoses are pretty big. If I could get away with 2 x 3" hoses that'd be a lot easier. Plus, per Joe, I might not get a whole lot of gains, so I'm leery of cutting up rare stuff just for experimentation.
As of this evening I'm leaning toward opening the back of the fender turning lights & slotting the turning light lenses to let the cold air in. If I fail, it's reversible.
I don't want to fool anyone that this is some weird factory option. I just want it to function well & look like it could have been there from '66. Y'know?
What do you all suggest? Thanks in advance for your ideas.
For a couple of decades I've been a little envious of the OAI (Outside Air Induction aka Cold Air) available on the late 60's 442's. I've always liked the cool 442 dual snorkel air cleaners, dual hoses, the in-bumper & under-bumper scoops and so on. In my boneyard visits, I noticed that in the '70's-80's Olds piped cold air from the fenders. Probably for emissions, yeah, but others did it for power in the 60's (Ford 427 Thunderbolt?). Earlier this week I was talking with my mechanic who said cold air really helped MPG on his Ford truck. So I started thinking about OAI again. Check out W-33 under hood pics. Is the mechanic's Ford truck a diesel ?
If I recall, Joe P considers these gains marginal. He's the authority. Cool. But I'm kind of in experimental mode. I'd like to see if OAI helps my car without permanent holes or damage. Then I can decide to keep OAI or not. Cold outside air can have some affect in certain situations. I would think pressurized outside cold air would have a bigger effect at higher than highway speeds at wide open throttle. Look at the W-33 under hood pics for ideas.
Without going aftermarket, some options I see are (in increasing order of complexity/ irreversibility)
1) Modify / slot the '66 my fender turning lights creating forward-facing scoops to force cold air in from outside maybe while retaining the turning light function. The lights are already in my fenders. Modifying the light assemblies to be intakes wouldn't ruin the inner fenders. Plus I've got spare (pitted) turning lights to play with.
2) Add '68 442 under-bumper scoops, then cut the inner fenders to allow the 4" hoses to pass through to the carb. Upside here is the repro parts look great and closest to factory. Downside here is permanent non-factory holes in my inner fenders. 4" hoses are huge, so I may need to move some factory to make room for the hoses. If I remember OAI was not available with AC, now I see why... And Olds required that the battery moved to the trunk... You might be able to "hang" the scoops from a bracket bolted forward of the wheel well. OAI was used on the 1968 (W-46 (A/C)) Hurst/Olds. Look for under hood pics. 1966 W-30, perhaps 1967 W-30 was the only ones with the battery in the trunk, i believe.
3) Cut symmetrical vertical oval slots in the radiator support on each side of the rad & run 3" hoses to them. The upside here is the slots would be almost hidden and would shove cold air right into the carb, but the battery on the left and A/C dehydrator on the right would probably need to be moved a few inches outboard. Not awful, but not too simple either.
4) cut horizontal slots into the top of the radiator support to allow fitting of a rectangular intake converting to a 3" hose, probably over the battery (restricting access) and interfering with the A/C dehydrator on the right. Weakening the radiator support which seems dumb to me. But a hole here or there isn't unknown in 60's steel...
Part of this is math that I'm not quite sure how to compute: The car has a 455, factory '66 dual exhaust & an 800 cfm qjet. The cam is smooth RV, but I'm on the fence about 2 x 4" diameter hoses vs 2 x 3" diameter hoses as are commonly available in the cloth Olds used in the 60's.
Two 3" hoses would fit a lot more easily with the AC under the hood. What I don't know is whether 2 X 3" hoses would strangle airflow to the 800 cfm qjet vs. the factory 4" hoses they used on the later 442's. I don't take the motor too much above 4500 rpm, so I'm not real worried about airflow at high RPM's, but I'd hate to make the mpg and power worse by putting too-small hoses in front of the carb.
Would two 3" hoses supply enough cold air to feed a 455 at normal driving speeds up to say 4,500 rpm?
The 4" hoses are pretty big. If I could get away with 2 x 3" hoses that'd be a lot easier. Plus, per Joe, I might not get a whole lot of gains, so I'm leery of cutting up rare stuff just for experimentation.
As of this evening I'm leaning toward opening the back of the fender turning lights & slotting the turning light lenses to let the cold air in. If I fail, it's reversible.
I don't want to fool anyone that this is some weird factory option. I just want it to function well & look like it could have been there from '66. Y'know?
What do you all suggest? Thanks in advance for your ideas.
Chris
Get a leftover piece of 4" dryer hose and experiment with the routing. You also need to figure out how to attach the ducting to the air cleaner. ......Just my two cents worth.
I am not well versed on the big cars but FWIW the red 70 has 68 OAI & just required some bracket relocations & mods. Also needed to mod & turn battery tray 90* & use smaller battery but it’s verry close to a 68 “A” body install which may have limited relevance to your situation. Car is driven all winter with hoses disconnected but he can’t wait to hook them up come spring as he swears the car runs better with OAI.
Measure & mock up 6 times, cut once.
Would you consider losing the high beam bulbs & ducting from there? If it were to be you could always go to “E” code lenses w/ dual filament bulbs on relays in the low beams & have more light than you do now.
Edit- I meant to mention but forgot until reading subsequent posts that some carb recalibration might be needed to take advantage of OAI. Tough to say until OAI installed & you get a wideband on it, from there it’s trial & error.
Last edited by bccan; October 3rd, 2019 at 06:47 PM.
Earlier this week I was talking with my mechanic who said cold air really helped MPG on his Ford truck. So I started thinking about OAI again.
If I recall, Joe P considers these gains marginal. He's the authority. Cool. But I'm kind of in experimental mode. I'd like to see if OAI helps my car without permanent holes or damage. Then I can decide to keep OAI or not. Would two 3" hoses supply enough cold air to feed a 455 at normal driving speeds up to say 4,500 rpm?
The 4" hoses are pretty big. If I could get away with 2 x 3" hoses that'd be a lot easier.
Chris
Hi Chris.
I'll give you some ballpark numbers so you can get some background on the advantages and disadvantages of this system.
Here's the assumptions:
80 mph top speed
400 cfm to the carb at your moderate conditions
180 �F underhood
70 �F outside
3 ft length for each hose
Here's what falls out from that...
pressure drop in (2) 3" hoses would be 1" water column, which would reduce power by 0.3%
pressure drop in (2) 4" hoses would be 0.25" water column, which reduces power by 0.08%
ram air effect would be 3" water column, which would increase power by 0.9%
Lower air temperature would increase the mass of air going into the engine by 20%. IF your carb mixture were adjusted to this air temperautre, the power increase would be noticeable.
The take-away is that the only significant way OAI could get you more power is that it reduces the air temperature going through the carb. The other aspects of the changeover have minor effect on power.
Fuel economy will be mostly unchanged as long as your carb is calibrated for the inlet temperature.
The fuel mixture in your mechanic's truck must have been too rich; the colder air inlet temperature would lean the mixture and give better fuel economy.
This should give you the information you need to make a decision about experimenting. You will need to have a fuel-air ratio sensor to make meaningful adjustments. And you will learn a lot about your carb in the process.
Set a list of parameters to test before and after the mod for comparison.
For trial purposes just remove your hood and fab some quickee "scoops" out of flex aluminum dryer vent hoses. Run them from the aircleaner openings over to the hood hinges and duck tape them so the openings face forward to collect incoming air.
Post pics here of your contraption so we can get a smile. Who knows, you could be a instant trend setter!!.
pressure drop in (2) 3" hoses would be 1" water column, which would reduce power by 0.3%
pressure drop in (2) 4" hoses would be 0.25" water column, which reduces power by 0.08%
ram air effect would be 3" water column, which would increase power by 0.9%
Lower air temperature would increase the mass of air going into the engine by 20%. IF your carb mixture were adjusted to this air temperautre, the power increase would be noticeable.
The take-away is that the only significant way OAI could get you more power is that it reduces the air temperature going through the carb. The other aspects of the changeover have minor effect on power.
That's great info. I've been arguing for years that OAI has little to no "ram air" effect. It's nice to see someone actually put numbers to it.
I have been meaning to post this, just haven't had time. I ran a test on my '68 H/O at the track... It typically has a 14x3 filter in the air cleaner; I installed a 14x3.5 to lift the lid and see if getting more air through the filter (at a warmer temperature) made a difference.
I was having traction issues all weekend, so the data is not consistent run to run - it didn't make a large difference in MPH or ET. However, when I was watching the wideband AEM gauge in 3rd gear, the car jumped way rich (from 12.6 previous pass to 11.9 with the taller filter). That meant the car was getting less air intake, and I was going to have to start pulling fuel out of the tune to compensate. At that point, I put the 14x3 filter back in.
It's not the most scientific data, but it shows the stock OAI system does work. I think adding it to a '66 Starfire would be really cool!
I would try to imitate the '67 W30 air cleaner (that had a 4 bbl and not the 3-2bbl like the '66) and use 4" hoses.
Hi Chris. I'll give you some ballpark numbers so you can get some background on the advantages and disadvantages of this system. Here's the assumptions:
80 mph top speed
400 cfm to the carb at your moderate conditions
180 �F underhood
70 �F outside
3 ft length for each hose
Here's what falls out from that...
pressure drop in (2) 3" hoses would be 1" water column, which would reduce power by 0.3%
pressure drop in (2) 4" hoses would be 0.25" water column, which reduces power by 0.08%
ram air effect would be 3" water column, which would increase power by 0.9%
Lower air temperature would increase the mass of air going into the engine by 20%. IF your carb mixture were adjusted to this air temperautre, the power increase would be noticeable.
The take-away is that the only significant way OAI could get you more power is that it reduces the air temperature going through the carb. The other aspects of the changeover have minor effect on power.
Fuel economy will be mostly unchanged as long as your carb is calibrated for the inlet temperature.
The fuel mixture in your mechanic's truck must have been too rich; the colder air inlet temperature would lean the mixture and give better fuel economy.
This should give you the information you need to make a decision about experimenting. You will need to have a fuel-air ratio sensor to make meaningful adjustments. And you will learn a lot about your carb in the process.
Good luck and tell us what you find.
Originally Posted by allyolds68
That's great info. I've been arguing for years that OAI has little to no "ram air" effect. It's nice to see someone actually put numbers to it.
Ram Air Effect 0.9% X 300 HP engine = +27 HP Place your hand outside the car with palm perpendicular to the road and perpendicular to the direction of travel at various speeds. If you don't feel your hand being pushed back, then no effect. If you feel your hand being pushed back, then there is a "Ram AIr effect" present. .....Just my two cents worth.
I added OAI to my '68 Cutlass. I also wanted a/c, and my builder wanted to keep the alternator on the RH side as it would be on a real W-31, so we hung an aftermarket compressor on the LH side of the block. It sits lower than a factory compressor, so that gave us some extra room for the OAI hose on that side. It was still a bit tight. Of course, with a B or C body, you would have more room under the hood.
Ram air is such an unfortunate term. Air is not being rammed anywhere, it's still at atmospheric pressure going into the carb. It really should be called Cold Air Induction. I know you can feel force on your hand going down the road, but it takes more than that force to compress the air into the engine. This is why superchargers (belt or turbine driven) and blowers exist.
I would certainly not add any OAI to any car that never had it available from the factory without first testing the gains, then finding out they will be very little, then going ahead for coolness/fun only. Not saying to not do it, but just to realize the performance gains will not be noticeable.
I was thinking of removing the inboard headlights and running some hose 'ala W-30 but it would require moving my battery and i know its just not worth it. I had to go dual snorkel though.
Hope you guys are having fun with this thread. Sincere thanks for your thought, both technical and not. I've already gone dual snorkel too, couldn't resist.
How to cleanly fit OAI with AC compressor? Hmm.
Something's going to have to move, no matter where I run the hoses. On the driver's side, there's enough room for a 3" hose between the power steering pump and the cruise control unit. Barely. On the passenger side getting a hose under the hood + over or around the AC compressor into the air filter is looking tricky. I'm even beginning to kick around the squared-off cloth tubing which might mate nicely with the '66 air cleaner and look factory-ish. I'd still like to go 4" hoses like the actual OAI, but 3" may be a better optimization for this busy engine compartment.
Just for fun I reversed the snorkels last night to see if a Chevy style from-the-cowl (cowl induction) might work. No go. the 120 degree separation on the inlets just weren't in the right place when reversed.
In answer to the aluminum dryer hose suggestion above, I got a 6' length and played with a little test fitting today. The stuff is great. It's cheap. Plus it's great for mock-ups - it holds shape if you bend it a certain way or want to see how much a closed hood will smash it.
To be clear this is 90% fun-oriented, I'm not expected huge gains. My hunch is any gains will be related to a cooler intake charge rather than any ram air effect. If I have performance losses, I'll revert to factory-ish dual snorkel you see here. Assuming I don't cut up my inner fenders or something else...
Many thanks for the OAI shot above. Some version of this is just where I'm aiming. Subtle, but clear to people who care.
Also my qjet already runs a tick rich. I'm hoping any added air will get me closer to stoichiometric ratios across the rpm bands. I could go to a smaller jet or rod in the carb, but with alcohol percentage of CA gas and moderate timing, I'm trying to minimize ping by running it slightly rich. Like 14.1:1 at idle with about 12.5:1 at moderate cruise.
Anyway keep those cards & letters coming, I'll take pictures once I make some progress. But no, I don't think I'll be removing the hood anytime soon as part of this.
cheers,
Chris
PS: Off to the basement to dig up hens-teeth rare '70 rotors for the 98 now at the shop after Summer fun. Turns out it needs new ones. Good thing I've been stockpiling! I check with my mechanic as to whether he wanted to modify the later Cadillac rotors to fit, he didn't want to play if I've got proper factory ones already. Sensible answer for a busy guy.
Hope you guys are having fun with this thread. Sincere thanks for your thought, both technical and not. I've already gone dual snorkel too,
In answer to the aluminum dryer hose suggestion above, I got a 6' length and played with a little test fitting today. The stuff is great. It's cheap. Plus it's great for mock-ups - it holds shape if you bend it a certain way or want to see how much a closed hood will smash it.
Anyway keep those cards & letters coming, I'll take pictures once I make some progress. But no, I don't think I'll be removing the hood anytime soon as part of this.
cheers,
Chris
Removing the hood keeps everything else in place for your test. Besides, you could be the first on your block to have ROAI...(Redneck Outside Air Induction)...
FWIW my ram air set up was worth 2 mph on the big end at the strip. Just from running at the track with and without one. I will agree its main advantage is the cool air outside the engine compartment. Im running a glasstek hood but my ram air set up is a pizza pan , HVAC foam, and a strainer.
Also you can buy the 68-69 ram air tubes from the parts place for like 80 bucks and then buy some air bells for the high beams from spectre . nice stock looking and not too epensive.
Last edited by coppercutlass; October 3rd, 2019 at 10:11 PM.
I found after using thru the headlights duct system with a ram air box made by ram air fiberglass 90 degree inlets sealed all connections with aluminum tape i gain a little on Et with a 12.50 3750# car me inside . I think with clean air from vents added a tenth on Et but didn't see on mph anything. Now I used this on two different rear ends. One was a 355 posi. The other was 390. Both used 29/10.5/15 slicks the 355 didn't go fast enough but the 390 added mph . The ducts inlets are still on my car but do not use the sealed air box system anymore. As I do not think it added enough. Oh yeah 1970 442 car. JMO
Last edited by wr1970; October 4th, 2019 at 05:57 AM.
Dad added CAI to his '62 Sedan deVille by cutting a ~3" hole in the core support next to the radiator and running a hose from there back to the air cleaner, where he hacked-off the tiny opening in the end of the snorkel so it fit the hose better. As a kid, I remember asking him what that was for and he claimed it helped MPGs. Not sure where he got the idea for it, maybe reading an article in Popular Science or seeing an Olds OAI setup on the local showroom.
I've always been a firm believer in CAI, especially if the setup results in less restriction. Many cars back in the day had a tiny snorkel opening in the air cleaner assembly which, while keeping the intake noise in check, certainly restricted air flow at WOT (which dad's '62 Caddy didn't see until my older brother got the car in college). There is a definite benefit from avoiding the hot under-hood air. The more direct route for the air from outside to the carb the better, less chance for the air to absorb heat. Its one of the reasons Olds changed from long hoses to hood scoops in '70.
Update:
O.k., let's go with big car OAI just to use the Olds term, even though it seems any benefit really comes from cold air induction.
Options / Ideas
I'm not a real custom guy, so cutting the hood was not for me. I thought about substituting some kind of scoops for the optional turning lights, but that seemed too custom as well. I thought about cutting symmetric ovals or round holes on either side of the radiator in the support, but there's too much battery on the driver's side and too much A/C stuff on the left (accumulator/drier) to run 4" hoses. I toyed with Ford Thunderbolt style remove-the-high-beams, but that seemed to go against the grain of the Olds big cars. It was just too obvious for me. I thought about putting scoops into the die cast fender fillers, but it didn't seem like I could get scoops big enough in that location to do any good.
In the end, I picked up a couple of OPGI '68 Cutlass OAI under bumper scoops + cloth hoses on the idea that this would leave minimal damage to my '66 Starfire in case I didn't like the modification for performance, aesthetics, or both. I failed to buy the mounting brackets, so I made some from 1" aluminum bars. I'm not sure that Cutlass brackets would have worked well on my big car anyway.
My immediate reaction on receiving the OPGI parts was "wow, they're big". You can't really tell how big 4" hoses from a picture are until they're sitting in your engine bay. They take up a lot of room. No wonder Olds didn't offer it with A/C. Just too much stuff going on. The '68 plastic scoops are big too north of 10" wide, 1.5" or so inches tall on the scoop (front) end and maybe 6-8" deep. According to the stamps, The Parts Place makes the scoops.
Fooling around with mock-ups, my 1st concern was the depth of the scoops interfering with front wheel turning radius. I mocked up scoop placement with duct tape and went for drive with a bunch of turns. The good news is scoops don't interfere with my front tires, particularly if you locate the upper leading edge of the scoop 1/2" or so in front of the bumper edge. It even fits if that upper leading edge is tucked behind the bumper. At least on my car. The big car fenders and held to the frame with slots which allow a lot of play for body panels, so if you try this and it doesn't work, you may have to trim the OPGI scoops by an inch or so on the front edge. YMMV my tires are 225/70 R15.
I may still trim the scoops some to get them to look symmetrical & right. I kind of like the idea of tucking the upper leading edge behind the bumper instead of in front in the name of subtlety. Yeah, subtlety.
Checking for right and left wheel interference '66 Starfire left front wheel to OAI scoop horizontal clearance. Tires are 15x7 225/70 R15.
'66 Starfire to '68 OAI under bumper scoop clearance with 225/70 R15 tires.
The big job here was cutting giant 4-1/8" holes in my inner fenders. This is a fairly nice car, so I don't cut into it lightly. I started with a small pilot hole 1.25" directly behind the middle of 3 inner fender slots to try and have a symmetric pair of 4" holes. That worked o.k., but my torquey 3/8's drill kept smashing my hand into the car with drill kick back. Eventually I went slowly to keep enough control to cut fairly clean holes. The holes wound up pretty deep into the voids on the outside of the headlights, not bothering much of anything. My turning light bulbs interfered with the hose path, but that's a later story. I relocated the bulbs on the top side of the diecast lights to clear a max flow hose path on each side. I'm guessing there will be airflow restrictions, but why not minimize them?
Fairly symmetric inner fender holes: 4" hole in passenger side inner fender of '66 Starfire. Running hoses will be a challenge due to my vacuum reservoir and my coolant overflow tank (removed here)
4 1/8" inner fender OAI scoop hole outboard of the battery on '66 Starfire. Routing 4" hose between batter and inner fender will be challenge here.
The OAI scoops fit into the holes, vertically just barely. I'm thinking of using an aluminum HVAC collar with a neoprene seal to give me something to connect the factory 4" cloth hoses to. I may run an 60 degree silicone adaptor for routing from the holes to just inside the engine compartment. I'm not sure yet. I'm aiming at making the engine look factory-ish, hiding the custom stuff if possible. With the length of the OPGI hoses, I may have to get a 2nd set.
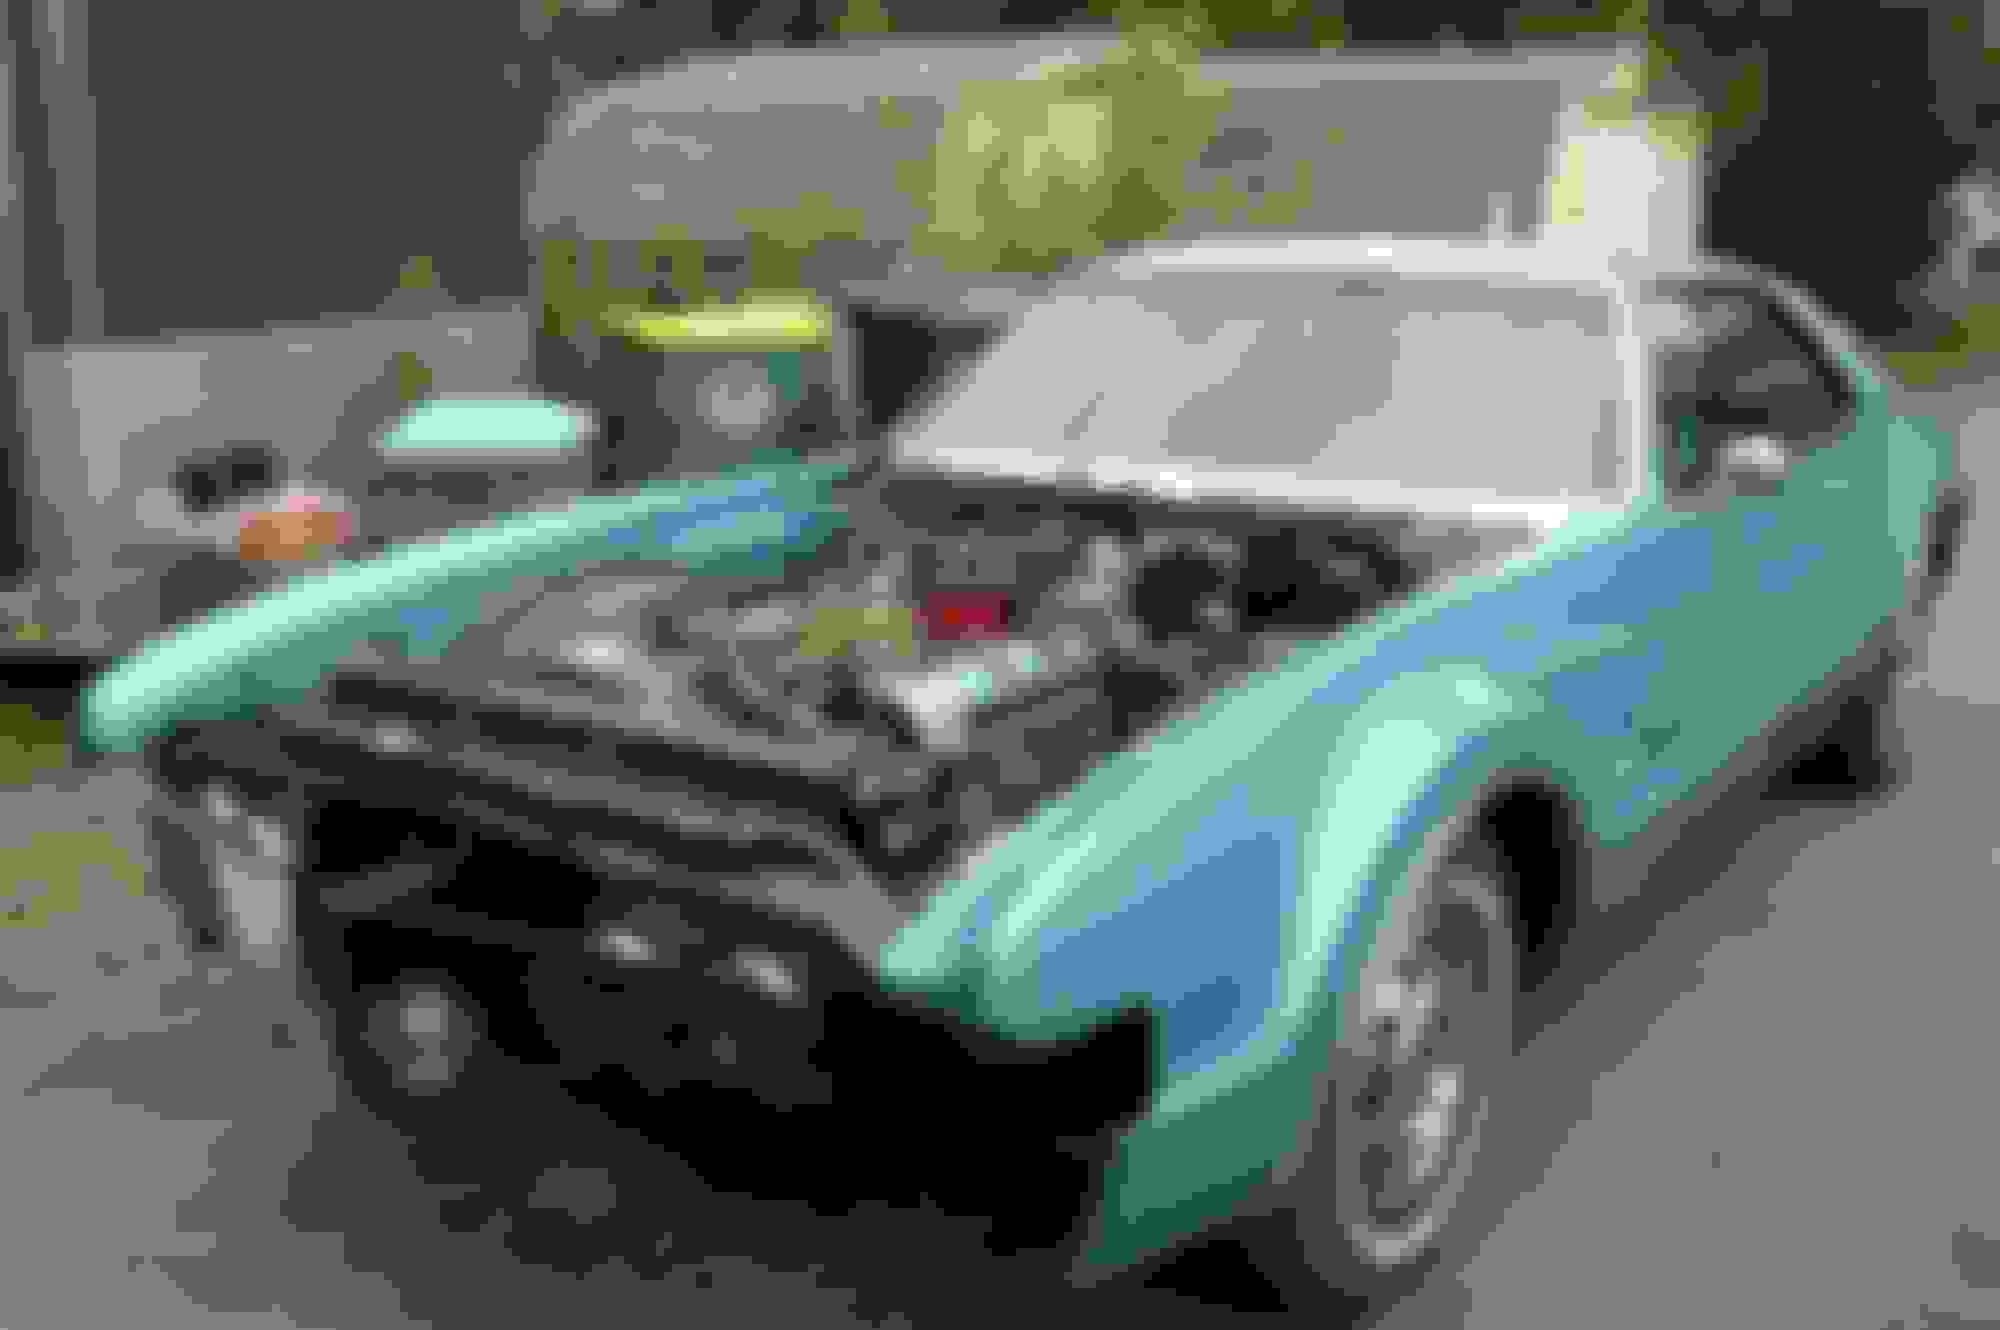
Long, but here's what it looks like from the front: I like how the scoop is barely visible. Hard to see in daylight too.
I have no idea whether it will make any difference to economy or performance at all, but I'm looking forward to learning. There are so many opinions for & against, I figured I'd just build it and see for myself. And in the end I can revert to my fake dual snorkel if OAI complexity is not worth the trouble. But at least then I'll know from my car. And in the meantime I'm running an open air filter with no scoops, snouts, just open to see what that does to power & economy.
Anyway that's the story so far. I took it on an anniversary drive with my wife over past 2 days and no ill effects. I was slightly concerned about underwood pressures but at highway speeds with uncorked scoops it hasn't been a problem.
Associated small jobs to shoehorn OAI into the big cars:
1) I had to pull and relocate the turning light bulbs to the top side of the turning lamps. As originally located, the bulbs and wires protruded directly into my intended OAI hose path. I wound up using '66 98 driving light bulb sockets pressed into the turning light diecast lamps. Thanks Dremel cutting tools! Vertical placement of the lamps meant that I also had to trim a rectangle cut out in the retention brackets to allow the diecast lamp to slip into it's behind-fender retention bracket. As cast and retained, these lights are twice as heavy as they need to be, I won't be up nights wondering if they'll fall out. Plus from the outside no one will really be able to tell where the bulb is located.
2) I had to move my giant vacuum accessory tank from the passenger inner fender up higher underneath the passenger outer fender to create room to run a 4" OAI hose or other duct. It may eventually wind up on the rear of the driver's side inner fender if I can't get the passenger OAI hose to fit right.
3) I had to relocate my non-factory '74 Cadillac coolant overflow tank closer to the radiator to create room for a passenger side hose path. To move the coolant tank, I also had to nudge the A/C accumulator/drier toward the radiator by .75" or so. Plus I had to flip its bracket over so that the retention screw was on the radiator side, not the fender side of the accumulator/drier.
4) Upcoming: I need to see if the A/C lines from the compressor to the evaporator could be moved around to make room for the 4" OAI hose. My original hoses are long gone, along with the muffler, so the question is really whether or not my A/C mechanic has an alternative hose. I'm hoping this is possible.
5) Upcoming: I'm starting with the Spectre 180 degree air cleaner, but may eventually go to some kind of modified '66 Olds air cleaner with symmetric snouts located about 180 degrees from one another. Or something like the '66-67 Toro air cleaner with the forward canted snouts. Haven't decided just yet.
Thank GM these cars are large and allow us to move this stuff around.
Cfair, thanks for filling us in. I bought a pair of '69 "repop" scoops on CO a few months back to do this on my '64 Starfire, exactly what you have done.
I bought plastic 4� hose from Napa. Much cheaper than the cloth stuff, even thought it�s not correct. Unless your well versed on Oldsmobile, and considering OAI was never offered with the. If cars, the non factory look is ok in my opinion. Not many people are familiar with the Olds OAI, I can�t tell you how many times people look at the air cleaner on my car, then mentally follow the hoses, finally pointing under the bumper. Definitely a conversation starter!
I would definitely upgrade to a air filter that can be cleaned and reused (K&N for example). The 68-69 OAI is like a big vacuum cleaner going down the road. I have found crickets, grasshopper, straw, grass clippings, butterflies, all kinds of crap in the air cleaner housing.
So the Spectre 180 degree 16" air cleaner came over the weekend. I was surprised to see it come with a cotton filter. I think I'll go paper, just to be sure the incoming air is clean...
I had a little time to mock up and play with the air box and hoses today.
The Spectre kit is good. It's perfectly functional unless you want cloth hoses that look like late 60's OAI. Other than the Olds cloth hoses I'm looking for, you'd bolt it up and go. The kit hoses and diameters seem to be a little off of 4". As a bolt on kit, I'm sure they'd be just great by themselves. It might sound weird, but they feel metric. So I'm mixing in some 4" USA made plastics to make it all fit well where it doesn't really belong.
Standard U.S. drainage ducts and HVAC ducts come in 4" diameter so there's lots of parts to play with and mix. There are PVC parts, flexible drainage plastic parts and even aluminum HVAC parts which can all get to the mechanical goal. But I'm 20% aiming for aesthetics. So I want to hide/bury the stuff that doesn't look '60's Olds. Again, I'm not a custom guy, but I'm beginning to see why they want to tweak cars - it's creative in a mechanical way.
The Olds cloth hoses from OPGI don't fit over the Spectre air cleaner dual inlets. The diameters are off just an eighth with the Olds hoses being too small to fit over the specter air cleaner intake ducts. To solve the mismatch, I got 2 4" plastic drainage unions and trimmed them to fit very tightly inside the spectre air cleaner ducts. I hacksawed the notched ends off both sides and cleaned up the cuts with a dremel so edges that will never be seen won't look like cr*p. One small V notch was all I needed on the Spectre side to get it to slip in snug. I'm hoping this will stay tight enough that I can just plug and play with air cleaner removal without having to mess with hardware. The Olds hoses fit fine over the 4" trimmed drainage union. I just band clamped them over the union and moved on. And hey, drainage union parts are like $6.00, so if I mess up one, or want it better later, no big deal. But I got what I wanted: cloth factory hoses connecting seemingly directly to the air cleaner with a 4" clamp to secure it.
Blasphemy: '68 OAI hoses on a '66 Starfire. With A/C. And '66 Cruise Control. Olds would have never done this. Too many parts interference possibilities increasing the number of warranty claims. The overall effect is "Danger Will Robinson, Danger!"
I don't think it's half bad, but then I'm totally biased by the hours I've put in and $. I'm still very curious about the mechanical effects. I'm doing the best I can to minimize hose curves, corners and pinch points. Maybe like Olds would have.
Next step is deploy the Spectre kit plastic hoses under the fenders between the factory OAI scoops and the cloth hoses. Basically I'm trying to hide the plastics where they'll work, but can't be seen under the fenders and hidden by the cloth hose inlets. Hopefully I'll get to that in the next few days.
Anecdotal evidence on MPG: Last tank with mixed town/highway driving using the dual snorkel and paper filter yielded 9 MPG. Open air cleaner on mostly highway this tank yielded 11 mpg. I'm not sure this is significant, but I thought it worth reporting to you guys. The motor in question is a '70 Olds 455, factory Starfire duals, 800 com qjet, HEI and a very, very mild cam, 3.23 open rear end. Major differences between this tank & last was the open vs. dual snorkel air cleaner. But of course the roads I used, speeds and driving probably affected the outcome.
Who thinks the air cleaner should be 1966 Olds red vs. Chrome? I'm on the fence.
Will carry on next few days. Hope you all are having as much fun as me.
Today's 1st task was screwing the Spectre 4" plastic collars above the Olds OAI scoops at the inner fender holes on the outboard sides of the headlights. I secured the collars with 5/16's hex head screws right into the inner fender and rear lip of the radiator core. I made and used a 1/4" closed cell foam gaskets under the collar to attempt a sealed system. There's no point in having "ram air" if the rammed air leaks out before it gets to the air cleaner, right? It's pretty hard to drill straight in the voids under the fenders. I located the first hole to center the collar, then used a paper template of the collar holes to sharpie-mark & locate the rest of the screw holes. There are a bunch of bends in the inner fender which make securing the collar a bit like mounting a 6X9 speaker.
Connecting to the collars, I used the Spectre suppled silicone union and their plastic hoses. The silicone union sleeve is band clamped to the now-secured collar. The plastic hoses fit into the sleeve and stay because there are some internal ribs to hold the plastics in securely. Spectre's kit has 2 42" flexible corrugated plastic hoses which take a directional shape pretty well. I was thinking about cutting them into shorter pieces, but left them full length (collapsed) in the voids for possible future changes. The Olds cloth OAI hoses fit right over the Spectre plastic hoses, so I secured the cloth hoses to the plastics with more 4" band clamps. They look about right. Unless you look close enough to see modern plastic. But I'm not really hiding anything or trying to fool anyone.
I stuck two factory OAI clamps on my inner fenders to hold the olds OAI hoses in place. The placement of the clamps isn't symmetrical due to my AC hoses & a cruise unit, but it should work to keep the hoses from causing the hood to sit too high. I had to smush some height out of the OAI hoses to get the hood to sit flat. In essence I created two ovals from two circles for just enough length to keep it from interfering with the hood closure. Once I had the hoses in place more or less where I wanted them, I just pushed down on the parts that seemed a bit too high to sit cleanly under the hood. I think I'm on the hunt now for some decent looking additional clamps to pull the hoses down yet further. But they're ok for now - they don't interfere with anything. The oval parts of the hoses look a bit like the 70's era (& later) cold air hoses I've seen in the junk yard.
From a 2019 perspective, the Olds OAI hoses are essentially oversized 4" cloth a/c & heating duct. It's the fabric stuff with the (asphalt?) coating wound over a wire. I'm sure you guys have worked with this 60's stuff before. Eventually this material frays at the edges, maybe faster in a harsh engine environment. I'm guessing the insulating property of the cloth hose to be about nil. It will be interesting to see if its lack of insulatory properties denigrates or eliminates any performance/economy effects. The latter day Cold Air builders use much thicker (I suspect better-insulating) silicone tubes to keep the incoming air cool. But silicone 4" hoses didn't exist in the late 60's, so it'd look wrong to me in a '66 Starfire. Form over function for now at least.
Oh - I had to pull my passenger side auxiliary vacuum tank to drill the passenger side collar holes. I had to remove the battery to drill collar holes in the driver's side. Otherwise my drill just couldn't get into the void where it needed to be. I also cobbled up a longer 30" or so battery cable to loop it under the driver's side hose more cleanly. I can fit my hand inside 4" hose, so placing the plastic tubing on the collar's wasn't all that bad.
Here's the final result:
OAI in a '66 Starfire. Fun. May even help performance and economy. Time will tell.
Shot from the left At the lower right corner you can see the Olds interface to the Spectre plastic 4" hoses. Not too aftermarket looking.
For performance, all I know is the car is about the same for a low-speed pick up the kids run around town. With luck over the next few days I'll be able to get it out on the freeway for a few real tests.
I'm looking forward to that.
I'm beginning the debate in my head about tweaking my factory red Olds dual snorkel air cleaner vs. painting the Spectre unit. Opinions anybody? It still feels a little blasphemous, but it's fun.
So 6 months went by before I had to chance to really test the OAI. I like it. I just did a 122 mile round trip to Napa at mostly highway speeds and used 8.8 gallons of gas.
13.8 mpg is way better than the 9-11 I'd been seeing recently.
There are a couple of reasons to be suspicious about OAI being important. I rejetted the carb a lot leaner and reset the timing. From 73/43 to 73/49 on the primaries. I think this is most of the MPG gain.
Can any of you tell me what the tire size differerence is between the 225/70 R15's that are on there vs. the original 8.55x14? My memory was Joe thought it was about 8% larger.
If true my mileage is really closer to 14.9 MPG which pleases me to no end.
Whatever the effect of the larger tires, I got somewhere around a 30% improvement in mileage with tuning changes. Maybe I am finally learning....
8.55x14 tires are 27.96" OD nominally
225/70-15 tires are 27.40" OD nominally. That's about 2% SMALLER than OEM, which would hurt freeway mileage normally.
Joe,
Many thanks for this update and for all you have given to the rest of us.
This tire adjustment factor was exactly what I was looking for. Multiplying by the raw MPG calc. (122 miles / 8.8 gallons) by .98 gets me to 13.86 which I'm happy with vs. the previous 9-10 mpg with the richer tuning & no OAI.
My next tuning challenge is solving a light acceleration stumble on the Starfire. The part throttle AFR's are on target at 14.8 - 15.4 for economy. I've been experimenting with HEI vacuum advance canisters. What I've seen is that the Napa/Echlin VC1833 (Caddy 425) in my '66 '98 works well. The Napa/Echlin VC1838 (Buick 350) in the '66 Starfire is associated with an accelaration stumble. I won't say "causing stumble", but if the AFR's are right, my hunch is the stumble is timing that is retarded. All the adjustable (Crane, Moroso, Taylor) HEI vacuum canisters I've tried provide way too much advance and ping at part & full throttle. So I backed off to non-Olds GM fixed vacuum pots.
The Caddy (14 distributor degrees / 28 crank degrees) vacuum canister works well, but I think the settings of the Buick canister (7 distributor degrees / 14 crank) is retarded enough to cause an acceleration stumble. If you want to dig in on the effects of HEI vacuum canisters, see this webpage: https://www.crankshaftcoalition.com/...ance_Specs.pdf.. I've ordered a few Napa/Echlin canisters between the two poles to test over the next few months. Hoping to find the best canister that gives max advance @ no ping among the choices.
I believe I'm near optimal (what my work used to call local maxima) given that I'm running a stock 455, TH400, and 3.23 rear end.
Not trying to invite a flame war, but do you guys think I'm close to optimal?
That reference article on timing is great! It makes all the good points you will need to optimize your timing. I wish I'd read that in my younger days. It would have saved a lot of mistakes.
I didn't see that you gave information on your idle and cruise advance. Referring to the article, here are the principles you should tune to...
Limit total mechanical advance to 20� by changing or modifying the limit bushing under the centrifugal weight plate
Set total timing (without vacuum advance) to 34�, all in by 2500 to 3000 rpm (idle should then be 14�). You will need to change centrifugal-advance springs to get to this rpm setting.
Add an 18� vacuum advance, that starts about 8" and is all in at 2" deeper vacuum than at idle, in gear. With full-time vacuum advance,
timing at idle should be 32�
timing at cruise should be around 52�
At cruise, if you hear knock at upshift or feel chugging or surging pick a bit lower-degree vacuum can.
If you feel hesitation at cruise, pick a bit higher-degree vacuum can.
With your detail-oriented focus, you are one of the few who will bother to go through these steps.
Each is required, in order, to solve driveability problems and especially to attain the best fuel economy.
VC,
Thanks for your thoughts. I completely agree with you on the value of the article. Solild theoretical and tactical advice.
On the Starfire mechanical advance is set @12 degrees BTDC at 750 RPM with no vacuum. I haven't measure total timing yet. I test drove with the intial timing @13 degrees as well. It was clear from how the engine ran that 12 was the right setting, at least with the Buick not-so-advanced vacuum can. I'll try again when the new ones come in and see if I can get a little more initial into it without pinging on the part throttle and high RPM ranges. When the secondaries kick in the AFR's are running 11.8 or so at WOT, so I may be able to go a little richer on the rods or hanger and get rid of any WOT ping, but that all depends on getting part throttle right too.
On the 98 convertible with the JM 20/22 cam and ported heads, I have to leave the intial timing at 11 degrees BTDC / 30 degrees total timing with the Caddy vacuum can or it pings too. The 98 has 73 jets, vs 74 for the Starfire so I may yet richen the 98 jets down the road once I get the Starfire dialed in. They're both 455's, but the 98 has a hotter cam and ported heads, where as the Starfire is pretty much a stock rebuild. I have no idea about actual compression ratios for either car.
None of my family members would call me "detail oriented" but it's fair to say I'm curious just how close I can get these engines to perfect. Plus I've been around engineers and scientists most of my life, so I've picked up a few things about how they think. I was lucky to have my brother-in-law (Phd Biologist) come along the other day on the test drive. Temps were in the high 80's, but on scientific principle alone, he refused 3 times to turn on the A/C just to learn where the MPG would land. For 3 hours!
For anyone who remembers/cares about this thread, I upgraded my wheels & tires last week.
This '66 Starfire now has 15x8 wheels with 245/60 R15 tires on it which are wider than stock by a good measure.
As delivered by Olds, they had 14x6 5x5 wheels and skinny (by modern standards) tires.
Before we upgraded the tires, we checked the OAI scoop-to-tire clearance & it looked o.k.. After mounting/balancing, weight on the wheels, & so on - - the first result, in the tire shop, was the passenger side scoop snapping off when the car was doing an extreme turn. Fixing the scoop-to-tire interference is on me, not my tire/brake/suspension pro.
To accommodate the new tires, the job was moving the OAI scoops forward enough to eliminate front tire interference. Especially in turns.
Turns out that takes 12 hours or so...
Observations on OAI Scoops
1) I was just at Olds Nationals in Dayton & looked at factory OAI scoops (mounting brackets were cleanly riveted, so I'm assuming factory) for sale. My short survey of the available OAI scoops led me to the conclusion that almost all OAI car owners put on oversize tires which rub & destroy the inboard corners of the scoops when turning. Every scoop I saw at the show had some kind of silicone goobered-up repair in the same place mine rubbed. Seeing all the other repaired parts, made me feel a lot more comfortable repairing and modifying mine.
2) My OAI scoops are from "The Parts Place" (as stamped on the part. Well done to eliminate parts cheating). While I was mocking them up, I found that moving them forward to the limit would leave a giant plastic protrusion forward of the bumper. It may sound weird, but OAI scoops 2" proud of the bumper looked wrong. Just wrong.
3) The OAI scoops were made for Cutlass/442, not big cars, so you can quibble with proportions, but if I had a Cutlass/442 with the same oversize tire interference problem, I'd do just the same as I've done below. I.e. cut off the front 1.35".
Modifying OAI Scoops, fabricating mounts & 4" piping connections
Since I'm in custom land, I have no pretensions about factory anything. I decided to remove 1.35" from the leading edge (top/sides/bottom) of the OAI scoops. It took a while with a Dremel wheel on low speed so as not to melt the plastic scoops, but rather to cut them. Cutting slowly got me clean lines which will be visible. Removing that "front underhang" was right: the front OAI scoop edges sit close to flush with the bumper edge & look almost factory.
I upgraded my mounting brackets to 2x stainless steel "L" brackets on the outboard sides of the OAI scoops, mounted to the factory fender bolts on the lower front portion of the fenders. I had to drill out the lower portion of the L brackets to accommodate the big car factory fender 5/16's-18 fender bolts with a 1/4" bit. I used the same 1/4" bit to drill mounting bracket holes in the OAI scoops on the outboard side. Basically I mocked them up & used a silver (black plastic contrasting) sharpie to show me where the holes needed to be on the OAI scoops relative to the factory fender brackets.
The process is a lot of test fitting, blue tape, & sharpie marking. The really time consuming parts are making sure the scoop outlets line up with a silicone collar to move the air from under the bumper to the engine compartment, then also being sure you locate the OAI scoop mounting holes in exactly the right place to have the scoops straight, tight to the air-ducting collar they fit into and looking reasonable from front & side. Once the outboard edges were sorted with the angle brackets, I used a "T" bracket (inverted) to connect the inboard side to the front bumper. I drilled the backside of the bumper in an unseen tab. It feels very solid now.
Just for fun I put some of the vinyl chrome piping around the leading edge after cutting & it looks right. I'm not sure I'll keep the piping, but maybe. I had some left over vinyl strato bucket silver piping so I stuck it on & glued it down. It's a little blingy for my tastes, but if I don't like it, I'll take it off.
If anyone cares about picitures, let me know. Hope I didn't bore you all.
Very cool. I've never seen that promotional shot before. They had so many fun variants in the late 60's. It's a pity they're almost lost to the sands of time.
That intake/pipe certainly got colder air into the carb. Were there there were any exterior openings, or did it pull cooler air from inside the driver's fender?
What I have seen is are the descendants of that system in many, many emissions era cars with long hoses to the fender void on either side to pull cooler air into the carb.
It just pulls air from the area behind the driver side turnsignal. There is a large masticated rubber sheet the sits under the headlight vacuum tank and is secured to the inner fender, upper fender jamb, and radiator support to try to keep the hot under hood air from getting to the OAI scoop.
Chris:
Check out the above thread. In post #7 I show results of some temperature testing I did with a variation on the W34 approach. I got significant air intake temperature reduction without cutting anything up.
As a kid, I remember dad cutting a 4" round hole in the core support of his '62 Sedan DeVille, attaching a flexible duct hose to it and terminating the other end to the air cleaner that had it's narrow nostril cut off. IIRC, he did this based on a Popular Science article that pushed for CAI as a means to improve MPGs. Dad was always looking for ways to improve MPGs, so much that in the late '80s and '90s he'd turn his Olds hood ornaments sideways to improve aerodynamics. My nephews would always mess with gramps by turning the ornaments back to normal.

 October 2nd, 2019, 08:34 PM
 And Olds required that the battery moved to the trunk...


") My nephews would always mess with gramps by turning the ornaments back to normal.
My nephews would always mess with gramps by turning the ornaments back to normal.


