When you click on links to various merchants on this site and make a purchase, this can result in this site earning a commission. Affiliate programs and affiliations include, but are not limited to, the eBay Partner Network.
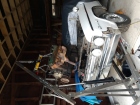
I'm doing one now- anyone interested? I'm pretty far along in the process but I did take pictures. I could post a series of pictures for interested people. Anyone care to see the dash of a 1964 Dynamic 88 come apart?
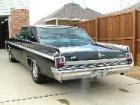
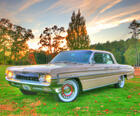
It's a "stock" photo, not mine, but let's call this "before"... these... ...are.... ...after... ... and I'm farther along than this now
Let me know if you're interested. I started with some pictures in the "What Have You Done?!" thread, but I can deep dive here.
Deep scratches in the and around the glove box. and the ignition (the key). Some of the indicators don't seem to work, the left blinker and the oil pressure and temperature warning lights. I'm worried about matching the paint, esp since the glove box is right next to the rest of the dash.
So here's a bit of a story... in Massachusetts it's cold in the winter (yeah, not as cold as other places, but colder than some) and I bought paint for the glove box door and ash tray to match the rest of the dash, but after several tries, I failed to get as close as I wanted. Simply put, they don't match, and that means I have to paint the whole dash if I want to match. And since I already tried to paint the ashtray and glove box, I'm a ways down that road, but like I started to say- it's cold in Massachusetts in February. My sister in law is on vacation ( out of work, not travelling) and she asked my wife to come visit, but my wife doesn't want to leave the house (Massachusetts=cold). Finally she decided her sister was worth the effort to bear down and face the cold, so she went to visit her sister on Thursday, home on Sunday.
Wife is gone. That means I'm free to do whatever I want, until she comes back, which is Sunday- tomorrow.
I had already removed most of the fasteners from behind the dash, and there's a few screws in front (5 or 6 under, behind the dash pad) and 2 nuts around the steering column. Once I released the steering column from the dash mount clamp (allen wrench, one on each side) I also removed the nuts that hold the steering column to the steering box under the hood ( two 1/2" nuts). I was able to get enough free play on the steering column to get the dashboard out.
POINT IS- if you release the steering column from the dash, and you unbolt it from the steering box, you should get enough free play to pull the dash without removing the steering column. The clamp through the firewall really doesn't give you trouble- at least, it didn't give me trouble. Now I have easy access to everything behind the dashboard. And- the dashboard is out This is from behind there's 5 mounts low and 2 or 3 up higher This is the type scratch I'd like to fix now that the dash is out.
So the "wife" part- and it's still cold in Massachusetts, and I have the dash out and paint, and she won't be home until tomorrow.. and the kitchen is big and warm... and there's no one here but me, and I use an air brush. It doesn't blow a lot of paint, I think it's manageable. I have a big drop cloth and a big box and a another big piece of cardboard... so I gave all the pieces a wet sand with 320 grit, wiped it clean with a drop of dish soap and rinsed it thoroughly in the kitchen sink ( previously washed the dash with a brush in the bath tub, used the shower to rinse it and one of my wife's bath towels to dry it off).
I think they came out great. My buddy "Big Trouble" always has to mess with what I'm doing... before paint, still scratched after paint lighting makes i tough to see how close I got the color that's a lot of detail to paint evenly- and my kitchen floor, where I painted it while the misses wasn't home.
So I was pretty happy with it, and I left it on the floor to dry, when my wife hit me up on the phone to say she was done with her sister, and she was "on the road"... that means coming home. It's about 90 minutes from her sister's house in RI to home in central Massachusetts, and these parts are just barely dry enough to handle... I'm kinda screwed.... but I don't want to get divorced. She's a bit of a hard ***, but I love my wife, and it's hard to argue that it's okay to paint auto parts in the kitchen. So I had 90 minutes to clean up the mess, get pats out of the kitchen, and make it look like nothing out of the ordinary was happening... and it's red. There's red everywhere. All you have to do is look across any horizontal surface rather than straight at it, and it's red. the chair legs in the room are red. the table is red... my big fat cat friend came in to eat, and he walked through it and now his white feet are pink and he's left red cat footprints across the floor- across everything.
I thought I had all night to clean this up- now, I got 90 minutes...
Last part made me feel like I had just watched a episode of 48 hours.
Originally Posted by davek1661
So here's a bit of a story... in Massachusetts it's cold in the winter (yeah, not as cold as other places, but colder than some) and I bought paint for the glove box door and ash tray to match the rest of the dash, but after several tries, I failed to get as close as I wanted. Simply put, they don't match, and that means I have to paint the whole dash if I want to match. And since I already tried to paint the ashtray and glove box, I'm a ways down that road, but like I started to say- it's cold in Massachusetts in February. My sister in law is on vacation ( out of work, not travelling) and she asked my wife to come visit, but my wife doesn't want to leave the house (Massachusetts=cold). Finally she decided her sister was worth the effort to bear down and face the cold, so she went to visit her sister on Thursday, home on Sunday.
Wife is gone. That means I'm free to do whatever I want, until she comes back, which is Sunday- tomorrow.
I had already removed most of the fasteners from behind the dash, and there's a few screws in front (5 or 6 under, behind the dash pad) and 2 nuts around the steering column. Once I released the steering column from the dash mount clamp (allen wrench, one on each side) I also removed the nuts that hold the steering column to the steering box under the hood ( two 1/2" nuts). I was able to get enough free play on the steering column to get the dashboard out.
POINT IS- if you release the steering column from the dash, and you unbolt it from the steering box, you should get enough free play to pull the dash without removing the steering column. The clamp through the firewall really doesn't give you trouble- at least, it didn't give me trouble. Now I have easy access to everything behind the dashboard. And- the dashboard is out This is from behind there's 5 mounts low and 2 or 3 up higher This is the type scratch I'd like to fix now that the dash is out.
So the "wife" part- and it's still cold in Massachusetts, and I have the dash out and paint, and she won't be home until tomorrow.. and the kitchen is big and warm... and there's no one here but me, and I use an air brush. It doesn't blow a lot of paint, I think it's manageable. I have a big drop cloth and a big box and a another big piece of cardboard... so I gave all the pieces a wet sand with 320 grit, wiped it clean with a drop of dish soap and rinsed it thoroughly in the kitchen sink ( previously washed the dash with a brush in the bath tub, used the shower to rinse it and one of my wife's bath towels to dry it off).
I think they came out great. My buddy "Big Trouble" always has to mess with what I'm doing... before paint, still scratched after paint lighting makes i tough to see how close I got the color that's a lot of detail to paint evenly- and my kitchen floor, where I painted it while the misses wasn't home.
So I was pretty happy with it, and I left it on the floor to dry, when my wife hit me up on the phone to say she was done with her sister, and she was "on the road"... that means coming home. It's about 90 minutes from her sister's house in RI to home in central Massachusetts, and these parts are just barely dry enough to handle... I'm kinda screwed.... but I don't want to get divorced. She's a bit of a hard ***, but I love my wife, and it's hard to argue that it's okay to paint auto parts in the kitchen. So I had 90 minutes to clean up the mess, get pats out of the kitchen, and make it look like nothing out of the ordinary was happening... and it's red. There's red everywhere. All you have to do is look across any horizontal surface rather than straight at it, and it's red. the chair legs in the room are red. the table is red... my big fat cat friend came in to eat, and he walked through it and now his white feet are pink and he's left red cat footprints across the floor- across everything.
I thought I had all night to clean this up- now, I got 90 minutes...
I was thinking more like crime scene investigation. It smells like lacquer- I opened windows. I could easily say I spent the day taking parts off the car, so move the parts to the basement. She doesn't know what they look like. Wash everything, that's basically it. I washed everything. I even wiped the cat's feet. After the misses got home, I looked at the couch from an angle where it looked red. She went into the bathroom, and I grabbed a damp cloth and wiped down the couch. If she cleans and asks, "Why is everything red?" I'm screwed. I'm thinking the whole time about "Mac The Knife" and the line "There's never a trace of red"... I need that. Never a trace of red... So far, she doesn't suspect a thing, except she asked why there are red cat footprints on the bathroom floor...
I chased down the vacuum lines today and none of them connect to the manifold or the vacuum canister. That explains why the ducts don't work, and also why my power locks don't work. I'll spend some time on that, but I wanted to share a link to a website that has lots of Olds tech manuals for about $20. I have the books, but I don't have book #4, which is the one that covers electrical, dash board, and heating/AC. I could buy the book on eBay for $20, and wait for it to ship from Washington, but these guys sell the full 5 volume set as a pdf download for $20.
Mock up time- everything is painted- and wet sanded, buffed polished and waxed. I have baggies full of screws labelled "dashboard parts", so I figured it was a good idea to do a mock up, place all the screws, pre-fit all the parts, so when I'm out there in the car alone struggling to hod the dash and line up the screws, at least I'll know it's the right screw for the hole. I got the whole dash mocked up (I'm only going to have to take it apart again, but I'll install it tomorrow so it'll be fresh in my mind...)
Here's some pictures of a 1964 Dynamic 88 dashboard, on my kitchen counter
I installed the dash today, chased down the ventilation vacuum lines and I'm working on the power door locks, because they're vacuum actuated too. I have wiring diagrams for the dash- I'll share them for "posterity". I want to make sure all the lights work, and the vents work, and the gauges (idiot lights) work. I had to align the steering column and shifter linkage- clumsy working alone but not rocket science. I made sure the steering wheel wasn't upside down before I bolted up the rag joint under the hood. I installed the shift position indicator and the H.M.T. lamp (On the wiring diagram... with help from Norm I learned "H.M.T. stands for "Hydra-Matic Transmission"- so the HMT lamp is the one that plugs in behind your gear shift position indicator, and it has a ground wire attached you'd want to be sure goes to.... pop quiz, bright boy- where does the "ground wire" go?)
I'm hanging some docs on this thread... wiring, dashboard, ventilation... The canister on the left is on your firewall, and it handles your vents, defrost, heater controls. All those vent doors open and close by vacuum off your intake manifold.
This is a close up of the wiring diagram, showing the lights on your dash- mostly the "illumination" lamps for the ash tray, the glove box and such.
I thought this was really helpful- it's your instrument panel wiring. It shows the cigar lighter feed, the clock feed, and all the little lamps the light up your dashboard accessories.
I hope this is helpful for anyone who's trying to sort things out under the dashboard on their "series 3400" Oldsmobile circa 1964
Last edited by davek1661; Mar 9, 2025 at 05:57 PM.
Reason: more info
Dash pictures!!!! I finished it today, and the belt trim on the passenger side. That was a genuine pain in the butthole, but it looks so much better that the raggity old rubber. Best part is, all the vents work! I really just had to chase down the vacuum lines, re-connect the "input" at the canister under the hood... start the car, which definitely caused some angst. I haven't started the car since November, but she fired right up. I didn't even have to mess with the carburetor, just pump the begeezes out of the gas pedal and crank it over 5 or 6 times... So dash is assembled, heater/defrost/vents all work, all the lights test good (except the glove box light, no love there yet).
I'll move left to right here
I just realized the bottom cover on the steering column isn't on there yet...
It's hard crawling in and out of the car until my knee heals, so I took these pictures leaning in through the open windows. Still a lot of crap on the floor, but I'll clean that up. Carpets are ready for install.