When you click on links to various merchants on this site and make a purchase, this can result in this site earning a commission. Affiliate programs and affiliations include, but are not limited to, the eBay Partner Network.
Thanks Allan - will steal four of step dads straight zerks hehe - bry - I used a flat face of a round cap piece of the ball joint press kit - I didn�t even notice there were notches until you mentioned it (I have an amazing attention to detail huh?) but it worked very well with silicone grease to seat them
Location: Edmonton, AB. And "I am Can 'eh' jun - eh"
Posts: 24,525
When you go to install the new bushings in the pumpkin, it will be much easier on one side than the other just because of the bushing ear design. In a nutshell one side is badly designed. I was going to say it was a retarded design, but that might have sounded politically incorrect. By comparison, the Chevy rear ends are much easier to press those bushing in. Could even just use a BFG and BAM! Done.
My apologies Bry - I was so engrossed in doing my control arms that I didn�t realize you were asking a question about the ovals - after re reading it I don�t know how I missed it - in short - the pvc pipe is the way to go - I took the oval and round bushings to Home Depot and found the size pvc that best fit the bushings inside - I measured the space in the arms I didn�t want to collapse and cut the pvc with a hacksaw (little large to start then ground it down until it fit tight - I cut the pvc almost in half and hammered it in so it completely surrounds the round and was in front and back of oval) it held great with both round and oval and I just pried the pvc out with pry bar after each bushing as it was in there tight - have been able to reuse the pipe several times but bought extra pvc just Incase I need to make another - I used the standard ball joint press kit - and for the oval ...yes I just pressed with a round cap piece in the set so it was flat side to the center pin , rubber , and whatever edge of sleeve that it came in contact with - no issues at all - only issue so far has been peeling powder coat - my three original front control arms are all painted and hope to get them done tomorrow - I took the new one down to metal (almost done) so I can repaint it
Ive been going play by play with what Lady72nRob71 did best I can tell
Last edited by 72442455; June 15th, 2019 at 07:21 PM.
When you go to install the new bushings in the pumpkin, it will be much easier on one side than the other just because of the bushing ear design. In a nutshell one side is badly designed. I was going to say it was a retarded design, but that might have sounded politically incorrect. By comparison, the Chevy rear ends are much easier to press those bushing in. Could even just use a BFG and BAM! Done.
I did my rear end and control arms last fall - just front end this time - I saw a YouTube video where a guy drove both bushings into the pig one hit each - I assure you mine didn�t go anything like that lol - I�ll be glad to be done with bushings.
Speaking of which - any advice on upper control arms bushings? I know I can just press one side in - but when it comes to inserting the shaft and pressing the second bushing in ... do you put a ball joint cup over it and hammer it in? I�ve seen wood and steal supports between both �fingers� to keep them from bending towards each other.. is that for a press? I guess I�m open for ideas
Last edited by 72442455; June 15th, 2019 at 07:31 PM.
One control arm done - waiting on paint to dry on second lower - off to get a pipe cap for upper bushings - still a little shaky on upper bushing procedure
You're doing great work, man. Don't sweat the uppers. I usually find that the stuff I think will be uber hard turns out to be easy. It's the stuff I think will be easy that turns near impossible
I usually use a cheap deep socket or a piece of pipe to hammer the upper bushings in. I start 1 bushing, slip the shaft in and start the other, then bottom them out against the shaft.
Got a question - I�ve got the second lower ball joint pressed in (Moog) but I cannot get the grease boot to seat - I used a ball joint press cylinder that fit perfect and press it down (like I did the first one) and no matter the amount of pressure - when I release it - it slides back up and loose - the first one (grease boot) seated just fine - any experience with this or ideas?
The same thing happened to mine. I never found a way to keep the boot down, so I had to finish assembling it that way. Apparently there is sufficient pressure on the boot to keep the bottom sealed as they don't leak when I grease the ball joints.
Location: Edmonton, AB. And "I am Can 'eh' jun - eh"
Posts: 24,525
Originally Posted by 72442455
........no matter the amount of pressure - when I release it - it slides back up and loose - the first one (grease boot) seated just fine - any experience with this or ideas?
can you post a picture? I haven't seen this on any ball joint install. I used Moog as well and nothing like what you're describing happened. I also used a ball joint press to seat them.
can you post a picture? I haven't seen this on any ball joint install. I used Moog as well and nothing like what you're describing happened. I also used a ball joint press to seat them.
This is the first one where the boot seated with out any problems Here�s the problem boot that won�t seat
Location: Edmonton, AB. And "I am Can 'eh' jun - eh"
Posts: 24,525
Did you try mounting it so the arrow on the boot is inboard? It should slide into place. Look on the inner side of the ball joint to see if it has a raised boss to fit that slot in the boot.
I just did the same ball joints. I happened to have a socket that fit over the rubber flange perfectly and was able to tap it down with the dead blow hammer. It took some heavy blows but it went down and stayed down on both joints. Maybe you got some grease on the inside of the boot where it needs to have the friction to keep it down?
Did you try mounting it so the arrow on the boot is inboard? It should slide into place. Look on the inner side of the ball joint to see if it has a raised boss to fit that slot in the boot.
I did Allan - first one was no fuss - I�ll have to look for a raised boss - ball joint can go in any direction 360 degrees correct? I did make sure to put the grease overflow thingy inboard side away from tire - might have to order another ball joint for just the seal? Could not find the Moog boot alone - I�m suspecting one of two things - 1) I screwed up the boot somehow when I pressed it in with the ball joint cup 2) this is the �new� control arm - what if the seat isn�t as deep as the original causing the ball joint to sit higher and leave a gap with the boot and control arm body - I pray this isn�t the case for obvious reasons - I�ll do some measuring tomorrow if I get a chance - if it�s not # 2 then I�ll order another ball joint for the boot
I just did the same ball joints. I happened to have a socket that fit over the rubber flange perfectly and was able to tap it down with the dead blow hammer. It took some heavy blows but it went down and stayed down on both joints. Maybe you got some grease on the inside of the boot where it needs to have the friction to keep it down?
That is highly possible Mac - as I used grease to help press in the ball joint - I didn�t realize it was a friction fitting - I will try cleaning it up when i get back to it and see if that helps - curious why the first one went so well because I know that got the same grease - matter of fact I used silicone grease to help aid in the pressing in of the boot (maybe not my brightest moment) but it worked and is firm and secure - do you guys know if there is a metal ring inside the rubber boot where it seats? It feels very firm and one thought is that I might have bent it (in kind of a rolled over ish fashion when I pressed it in)
Last edited by 72442455; June 21st, 2019 at 01:45 AM.
I think I�ve made up my mind - costly mistake - I don�t think the guy at southwest speed in fort smith is a bad guy but he is selling junk chinesium parts and I got screwed on the deal - call it a $100 lesson - I�ve got an original used one lined up in Lansing - going to clean and paint it and push new ball joint an bushings into it and write this chinesium one off as a lesson. - the ball joint cup was about half an inch to short on the chinesium control arm so recycle metal. It is.
Location: Edmonton, AB. And "I am Can 'eh' jun - eh"
Posts: 24,525
If it's not too far to go, take both Control arms down to southwest speed and show them the difference. Then tell him you want your money back for the control arm and for the cost of a new ball joint. Fair is fair, if they sold you a substandard part you shouldn't have to take a bath on that. I didn't realize the replacement CA was offshore junk. I was dealing with OEM parts on my 72 and everything fit perfect. My 2�
If it's not too far to go, take both Control arms down to southwest speed and show them the difference. Then tell him you want your money back for the control arm and for the cost of a new ball joint. Fair is fair, if they sold you a substandard part you shouldn't have to take a bath on that. I didn't realize the replacement CA was offshore junk. I was dealing with OEM parts on my 72 and everything fit perfect. My 2�
I already had a 38 minute conversation with the gentleman. He�s in fort smith Arkansas I�m in Lansing mi - the end result was I can ship it back to him and he can look at it to see if it�s bad (which I�m sure he will claim it is not) and if it�s resellable as new (I repainted it cause of the crap coating job it had and pressed in the ball joint and bushings already) he will refund my money - save myself the time and frustration and I told him the same - I�ll just go *blank* myself and save us both the trouble - I simply will just avoid doing business with him ever again - frustrating but live and learn already ordered the parts and will pick up control arm Friday or Monday
Location: Edmonton, AB. And "I am Can 'eh' jun - eh"
Posts: 24,525
Really sorry to hear it turned out like that. Like you said, lesson learned on aftermarket imported parts. Looking back at the pictures of the OEM one with the installed ball joint, it's clear that there's a difference in seat height to the aftermarket one. I'd send him that picture to prove the point. I'm one of those guys who will fight to the end to get the point across when it's needed, and honestly in this case it's needed or he's just gonna continue to sell aftermarket junk to everyone. I'm surprised he hasn't had more complaints. I'd bet he has, but just won't admit it or he'd have to refund a lot of money.
Really sorry to hear it turned out like that. Like you said, lesson learned on aftermarket imported parts. Looking back at the pictures of the OEM one with the installed ball joint, it's clear that there's a difference in seat height to the aftermarket one. I'd send him that picture to prove the point. I'm one of those guys who will fight to the end to get the point across when it's needed, and honestly in this case it's needed or he's just gonna continue to sell aftermarket junk to everyone. I'm surprised he hasn't had more complaints. I'd bet he has, but just won't admit it or he'd have to refund a lot of money.
Yeah he said he sold 72 this year - I got him to admit that Moog was like #1 selling ball joint and pointed out that his control arm won�t allow moogs boot to seat - he said he has never had a problem with them - I find that hard to believe as well - any ways - this is a dead horse - I�m too busy these days to fight for it - I�ll just add him to the avoid doing business list - already ordered new ball joint etc - I picked up the used oem control arm - forgot that I lived in Michigan as its way rustier than my original but looks in good shape structurally - I�ll clean it up and get er ready - thanks all for the continuing support on this - I need to press ahead as all this rain has really turned this into a very long project - I did find a shop in Lansing to align it after it�s done - badgleys garage - specializes in Oldsmobile - shoulda took pics of his shop - I will next time - lots of cool olds signage - spoke with four or five different people at olds homecoming and a local cruise in �Olympic broil� and all of them pointed me to this guy with nothing but great things to say - so feeling positive
Sorry you got the shaft but if it makes you feel better, it happens to all of us. I'd put that arm with its ball joint on eBay and describe your problem with it. Someone might want to take on the challenge.
I'm embarrassed to admit this but when eBay was new I found a projector I really wanted so I emailed (through eBay) a couple of questions. The guy said he'd give me a hundred dollars off if I would wire him the cash because he needed the money right away. Yup, I was out $400. Lesson learned
�New� control arm I don�t EVEN want to tell you guys how long it took me to get the two bushings out of this one .... I had delusions of grandeur on the progress I was going to make today - fell far short of that - pop break
Location: Edmonton, AB. And "I am Can 'eh' jun - eh"
Posts: 24,525
With my media blaster that would clean up like new in about 20 minutes. Ok, I'll guess how long it took Judging by the crud in the first picture, about 45 minutes a bushing. Did you drill out the rubber and then collapse the bushing sleeves? That usually works the best for these. I used a 1/2" drill and a 1/4" drill bit to walk out the rubber.
With my media blaster that would clean up like new in about 20 minutes. Ok, I'll guess how long it took Judging by the crud in the first picture, about 45 minutes a bushing. Did you drill out the rubber and then collapse the bushing sleeves? That usually works the best for these. I used a 1/2" drill and a 1/4" drill bit to walk out the rubber.
Exactly what I did - but this is the 18 bushing I�ve done in 6 - 8 months - you would think I would get better at it! It was pitiful! But it�s done - tomorrow is taping and painting a bunch of things
Location: Edmonton, AB. And "I am Can 'eh' jun - eh"
Posts: 24,525
Hahaha, practice practice practice. Looks good! Don't worry about the time on the bushings; they looked pretty nasty. Since this CA is OEM, did you do a comparison picture showing the seat for the ball joint? I'd love to see that, and also I'd send it to the guy just as proof of the difference between OEM and repop. I know that's a dead horse for you, but still it would be a good comparison.
Hahaha, practice practice practice. Looks good! Don't worry about the time on the bushings; they looked pretty nasty. Since this CA is OEM, did you do a comparison picture showing the seat for the ball joint? I'd love to see that, and also I'd send it to the guy just as proof of the difference between OEM and repop. I know that's a dead horse for you, but still it would be a good comparison.
I�ll do that and post some pics here as well - bushings are my least favorite thing to do so far I think - glad I�m almost done with em. Out enjoying the rare sunshine in Michigan! Just wish I was doing it in a convertible....
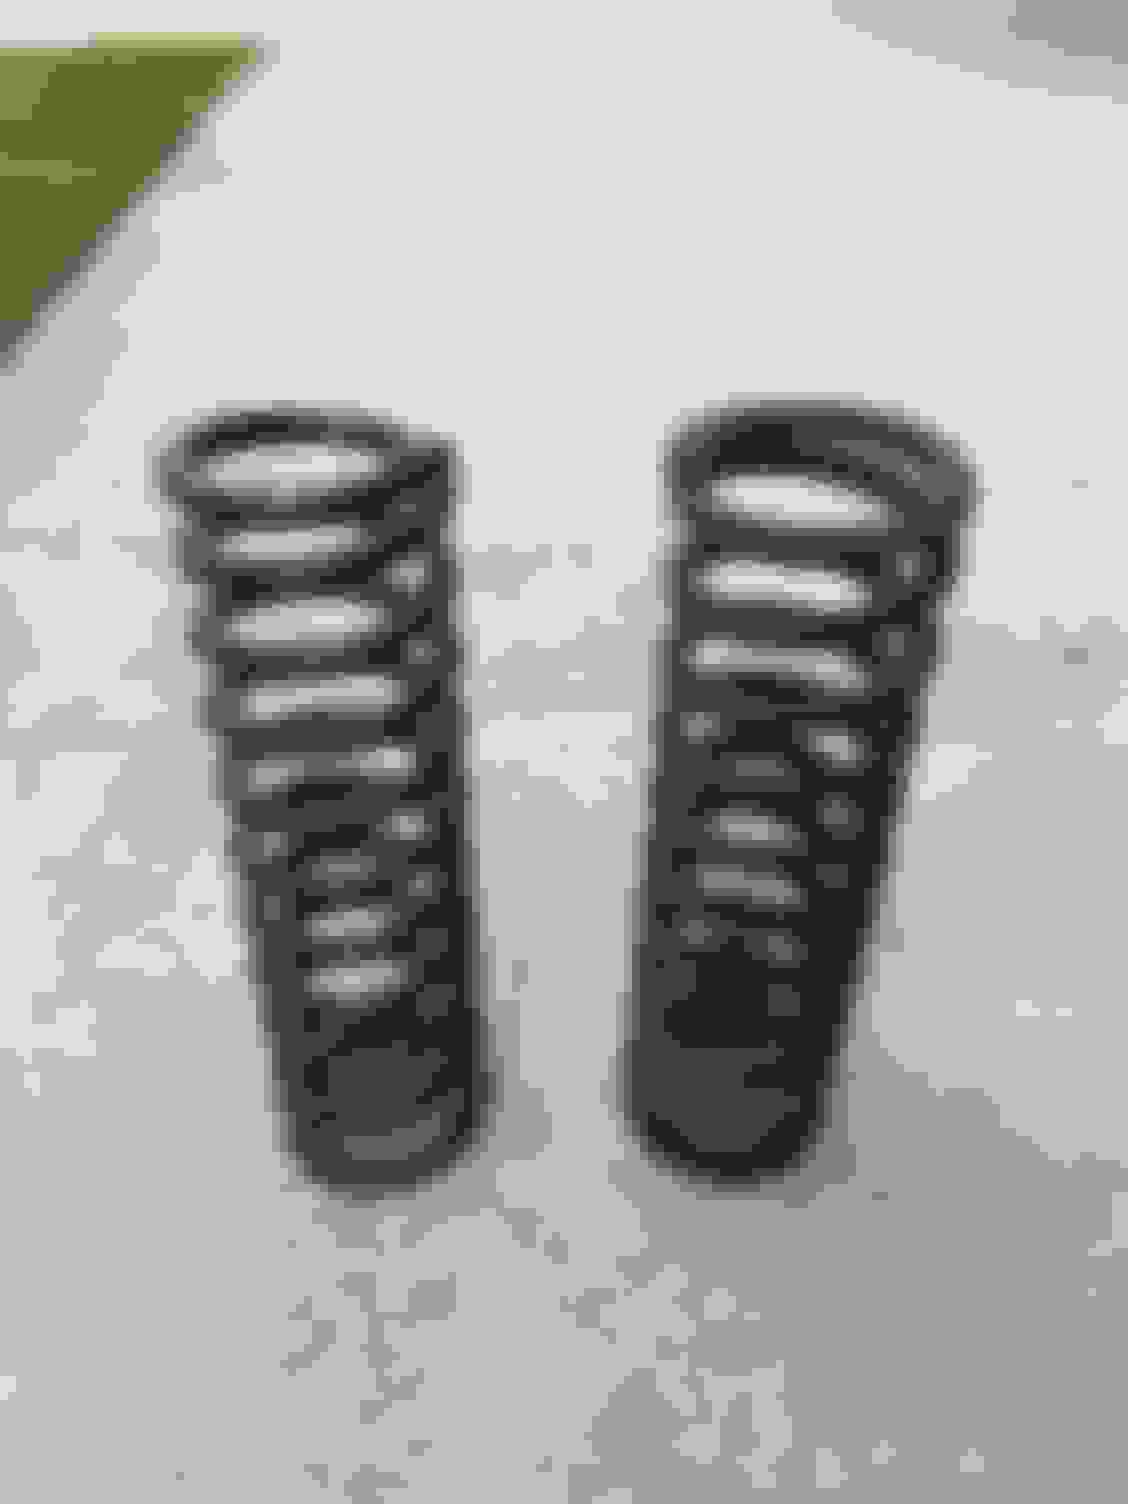
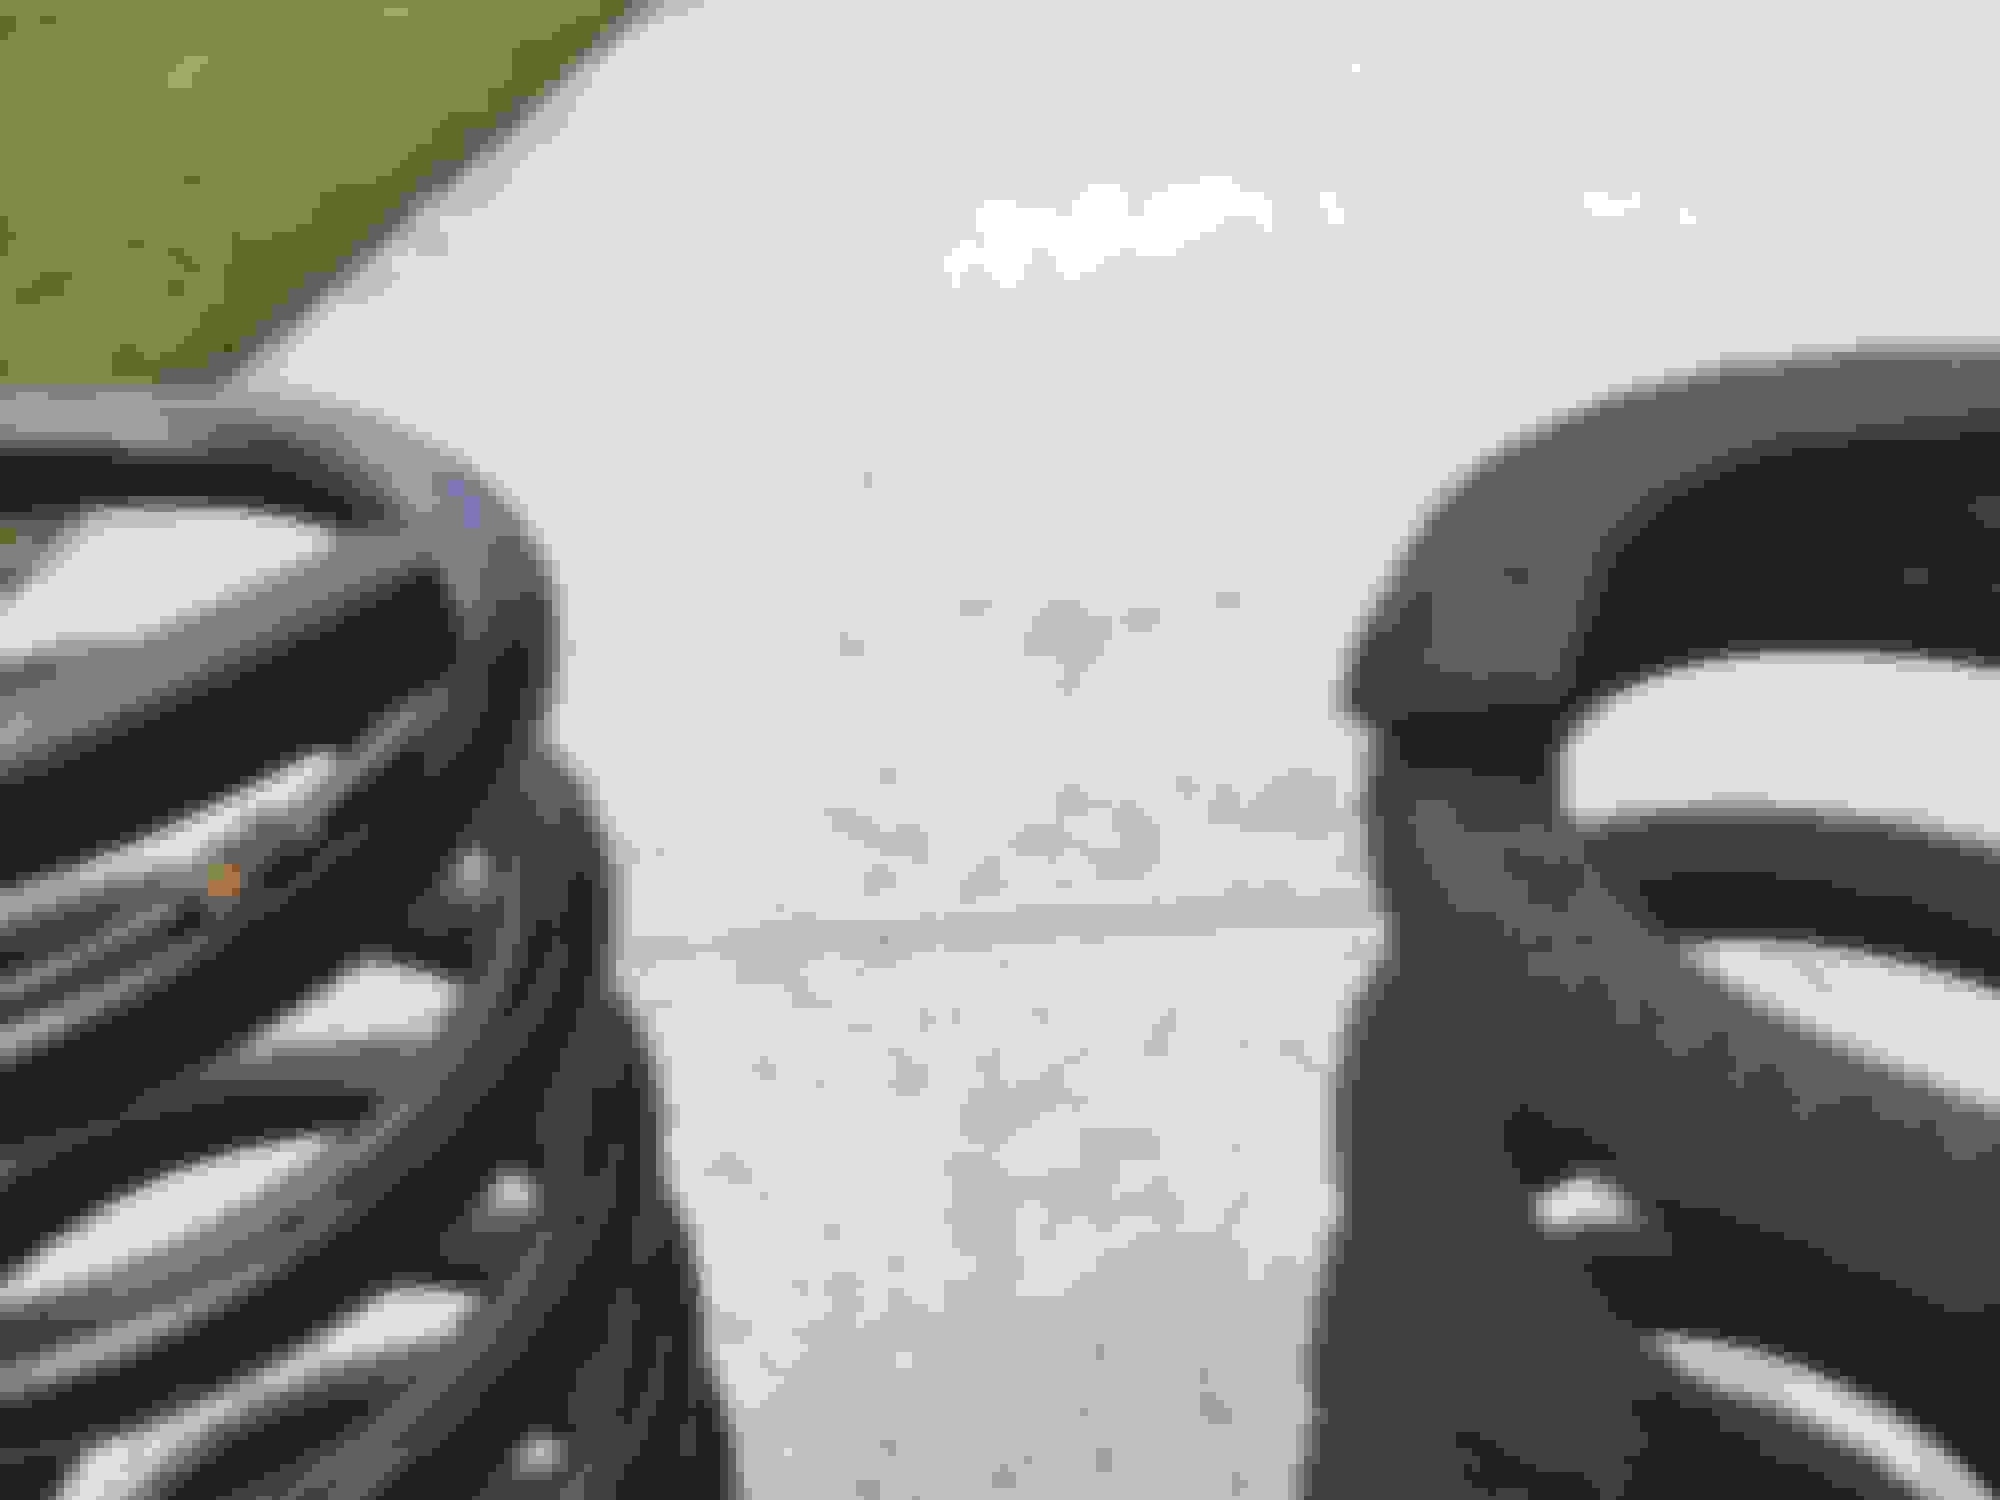
I bought these Moog 5400 springs about 17-18 years ago - I was very new to the game (still am) the new ones aren�t flat like the old ones - I bought them because I went from 350 to 455 - I pulled the a/c out but plan on putting it back in - are these springs correct for a 72 vert with 455 and soon to have a/c? I�m a little scared because I don�t want to make it a gasser or anything
Last edited by 72442455; June 23rd, 2019 at 07:11 PM.
I haven't seen that before, but I bought Moog front springs in the early 2000s so maybe the manufacturing process has changed since then or is different for other manufacturers.
Last edited by Fun71; June 23rd, 2019 at 10:42 AM.
I haven't seen that before, but I bought Moog front springs in the early 2000s so maybe the manufacturing process has changed since then or is different for other manufacturers.
I bought these moogs in early 2000s as well - 2001 - 2002 iirc - doing a front end was completely beyond me at that point - Mac? Did you end up using your circular end springs ? Or did you buy a new set that were flattened out at the ends?
Sorry to hear about the Chinese repop. I also ended up needing a control arm, but I bought a used pair from a '69 Olds as I avoid aftermarket if at all possible.
Here's how I took the bushings out, and I can do each one in 5 minutes or less. First, wire brush as much rust as possible off the bushings OD. Next, get your air chisel with a plain flat blade chisel. With control arm flipped over on the ground, bottom side up, place the chisel on the bushing centerline and hammer until it splits the bushing shell lengthwise all the way across. Next, put the chisel flat against the inside of the control arm and collapse the bushing on each side of the lengthwise split. Repeat on opposite end of bushing. At this point the bushing will be relatively loose. Finally, place the chisel flat against the outside of the control arm and drive under the bushing flange while prying the bushing out. This works very well! Try it, you'll like it.
For putting the bushings in, I first removed any burrs with a file and then used 30w oil to provide a bit of lubricant before pressing. I used a ball joint press same as you, but had some exhaust pipe cut in half and 1.5" long to prevent the flanges from collapsing. Oil is easier to remove than silicone grease before painting. Edit: I also added a spot weld between round bushing flange and control arm as insurance against shell rotation.
With the bushings in place, I then abrasive blasted and I am now ready to install the Moog ball joints. I plan to paint with 2 part black epoxy with a sponge and roller if it ever quits raining.
Last edited by bry593; June 23rd, 2019 at 01:23 PM.
Oh, about your springs. The new and old have same number of coils and mean diameter. However, the new spring wire diameter appears smaller, and if smaller will not be as stiff as the old was when new.
Last edited by bry593; June 23rd, 2019 at 01:14 PM.
Oh, about your springs. The new and old have same number of coils and mean diameter. However, the new spring wire diameter appears smaller, and if smaller will not be as stiff as the old was when new.
Thanks for the tips Bry! No air or air chisel here but I did manage to get it done - just It took me way longer than any bushing before it - just an off day I guess - if I die an go to hell ... I will be in charge of removing and installing bushings for eternity I�m sure.
Today was great! Got tons done before the rain was suppose to come - packed up and in a good place - if weather and work lighten up this week I might even get her started back together - if they all went like today it would be done in a couple of days
shell rotation? Great - something else for me to worry about - what�s the story on that? What happens if the round bushing shell spins? No torch here either.
So the springs should be good even though they lack the flat spot at the coil ends? And just clock the bottom half way in the �drain� hole? Does the top spot �clock� matter?
Also - I was of the school that buying new was buying new but i am quickly gaining the wisdom that you have all earned already - oem is the way to go - BUT! I already ordered my spindles from parts place - no where on parts , box , or website does it state country or origin... however - the cardboard box it came in SCREAMS of China - the staples - the crap light weight faded cardboard - how scared of these spindles should I be? They look great and correct at first glance (haven�t gotten into them yet) and I can�t just keep rebuying crap because I bought crap that I thought was good and isn�t ...
sorry to blast so many questions - appreciate your help and input
Location: Edmonton, AB. And "I am Can 'eh' jun - eh"
Posts: 24,525
I wouldn't worry about the springs if they measure the same height. Not easy to tell from the picture if the new one has thinner or same diameter coils, but I expect they will be identical if you put a caliper to them. Note these springs are made in USA and distributed by Moog in Canada. What I'm curious to find out is if this creates a height difference on the front end when the car has been restored to ride height. There is one thread I was following where the OP had a height difference in the front end that was driving him nuts. He never did find the answer and settled for what it is.
On the topic of OEM and repop - It's not a given that all repop parts are crap. Some are, but many aren't. I suspect the new spindles will be just fine. Don't get too paranoid about parts. I know that the CA was a bad part and that should have been remedied by the seller. Parts Place is a decent seller and the vast majority of the aftermarket parts sold by them, Fusick, Tamraz, Year One etc are the same pieces marketed under the individual companies logo. So unless you get OEM for everything you have to take those chances. I fully understand and appreciate how this can be helpful or of no help at all. We've all been there.
 June 14th, 2019, 06:50 PM

 By comparison, the Chevy rear ends are much easier to press those bushing in. Could even just use a BFG and BAM! Done.


")


 Judging by the crud in the first picture, about 45 minutes a bushing. Did you drill out the rubber and then collapse the bushing sleeves? That usually works the best for these. I used a 1/2" drill and a 1/4" drill bit to walk out the rubber.