Installing eng. & trans. together?
#1
Installing eng. & trans. together?
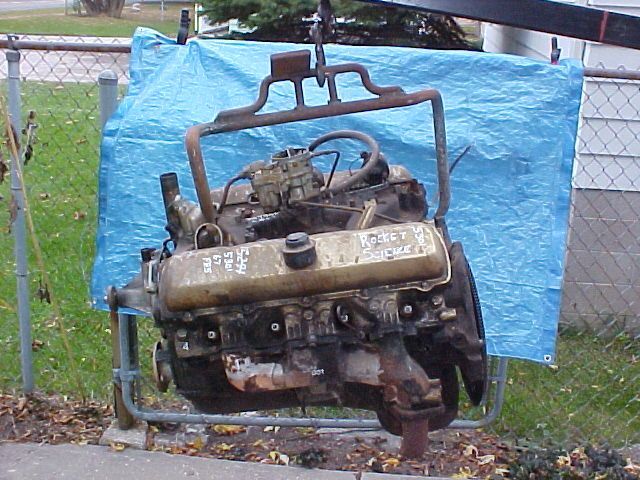
Looking for advice, tips/tricks for installing 455 and th350 trans in 71 cutlass as a complete unit. Can it be done without any fancy leveler, jack back of car up, etc? Also installation steps to install the adaptor plate for trans since it is a chevy bellhousing trans. Thanks!
#2
I wouldn't do it. If you are willing to pull the front clip off then that makes things a lot easier, but then you have to re-align all of that. Personally I would do them one at a time because you need quite a bit of ground clearance with the trans attached to get it in without banging everything up.
#3
I have always installed the short block and 4 speed manual trans together. Just install the chain one cylinder back from center so it tilts easier. On a 66, the hood opens enough that it does not need to be removed. You probably would have to remove it if the heads are on the engine, and on later models where the hood doesn't open as much. This also assumes you are using a stock oil pan, or a bigger aftermarket one with the front lower corners clipped for clearance to the crossmember.
#4
I've installed both many times. Its easier to attach the trans with them both out of the car in my opinion. I remove the hood after marking the bolt positions to make it easier to go back on when I'm finished. As stated above, jack the car up and put the front on jack stands. Make sure you can tilt the engine to slide er in. Its very easy. Also if you have fluid in the trans, tie a plastic bag around the tail shaft or You will have puddles.
#5
I've also done this many times. I will say that the leveler makes this MUCH easier. Of course, if the trans is used, expect gallons of ATF to come out of the tailhousing once you tilt it enough to get it in place. 

#6
As far as the tran fluid coming out. I take a drive shaft yoke, and wire it on the tail shaft, and also put a plastic bag over it, and, it works pretty good, to keep it from leaking. Also I pull mine both together, with a carb plate. But it does take two guys to do it this way for me.
#8
You need to front of the car on jack stands to get the clearance for the trans to slide down in. Buy the leveler it makes it much easier. They are only about $40 and get the 1ton version not the other. You can get the plastic cap to slip over the output shaft to seal it from making a giant mess. Do yourself a favor and remove the brake booster/master cylinder assembly. It will be in the way trying to get it to drop in. I just went through this with my 66 .
#9
There is no reason to remove the master cylinder and brake booster. There is plenty of clearance. If your using a chain cross bolted across the engine you can adjust the center of gravity to install the engine easily. If you have an engine plate, great, but not a necessity. This is not that difficult and does not require over thinking it.
#10
Ok that is kinda what I was thinking. One more thing, is the chain and 2 grade 8 bolts still plenty strong with the team's attached or do I need somethingbstronger? I just get paranoid since I've never done it and it's all borrowed equipment lol.
#12
Good advice, but even more important is to be sure the bolts are not put in bending. For example, if you are bolting the chain to the accessory bolt holes in the heads, use washers or even a socket over the bolt to push the chain link right up against the head. This way the bolt is loaded in shear, not bending. Bolts fail at a much lower load in bending than in shear.
#14
4 Barrels of Laughs
Join Date: Jun 2016
Location: I moved to pittsburgh so I can be near Primantis
Posts: 405
consider if you will...the capacity of your crane with it extended enough to get both in...I know what fully extended for like a 4x4 1 ton, a fully assembled 385 block is close to my limit...you might be 800lbs or more...
#15
I am not sure what the limit is on this thing but it is a very large crane lol. the tubes are probably twice as big as the cheap harbor freight lifts. It is an older one so Im sure its plenty big. Also a guy from work is lending me a plate for top of intake with a screw drive tilt mechanism so that should make things a bit easier. He said to put studs in the intake tho instead of bolting it. Any idea what size studs and where to get? And how to tell if threads are good enough to hold it lol.
#17
4 Barrels of Laughs
Join Date: Jun 2016
Location: I moved to pittsburgh so I can be near Primantis
Posts: 405
Im not sure I followed the last one...I have both appliances you mention - the screw drive tilt thingy AND a plate that bolts over the carb to lift by....
for the screw drive thing I use 2 lengths of chain, one bolted to accessory holes and the other creatively attached in the rear so you have clearance to actually do the tilt. The carb plate - well I dont use that too much and never on an aluminum intake - too fearful that the small sized carb bolts will pull out.
for the screw drive thing I use 2 lengths of chain, one bolted to accessory holes and the other creatively attached in the rear so you have clearance to actually do the tilt. The carb plate - well I dont use that too much and never on an aluminum intake - too fearful that the small sized carb bolts will pull out.
#18
Ok. Maybe I misunderstood what he told me. I was thinking the carb plate and tilt thing were all one unit. Maybe not as I haven't seen it yet. I don't really like the carb plate idea either from all I've read.
#19
So, I got the lift plate, and it is a plate with the screw drive leveler welded to it. The more I read about people afraid of the threads pulling out of the aluminum intake, the more I think I will either put the motor and trans in separately, or else just stick with the chain to heads method.
#20
I work with a modern car company and some of my projects have been what we call end effectors, but the rest of the world calls below the hook lifting devices. Toyota's method for engine picking is to use two hooks on opposite corners of the engines that bolt on with two bolts each. Once the unibody engines are set on their sub frames, or the frame cars' engines set on the frame, the hooks and bolts are unbolted, collected, and reused.
As I understand the Oldsmobile process, as was partly explained by the late, great Mr. Witt, was that there is a hoop on the intake manifold bolted on, and there is a pocket in the casting opposite, and the Olds end effectors would hold the engines there. As the threads are in the heads, the aluminum intake manifolds would probably have no issue, other than I wonder how that hoop was attached.
Accessory bolts in the front of the head are good. Transmission holes in the back would be good if the trans is not there but I wonder about clearance. I wonder how a plate across the exhaust manifold would do.
#21
As I understand the Oldsmobile process, as was partly explained by the late, great Mr. Witt, was that there is a hoop on the intake manifold bolted on, and there is a pocket in the casting opposite, and the Olds end effectors would hold the engines there. As the threads are in the heads, the aluminum intake manifolds would probably have no issue, other than I wonder how that hoop was attached.


#25
I would just put them in together if you got a leveler great, if not one chain from rear of one head to front of the other. Hook hoist up to chain so that both are tilted at roughly 45 degree angle then slowly lower them in and when front of engine clears put a jack with small peice of 2x4 under tranny pan so you can help the tranny back when other person is lowering engine into mounts. It's really not that hard. Last year I put mine in with a buddy and minus prep work it only took maybe 1/2 hour-45min.
#26
The engine first, but then your going to have to manhandle the trans from under the car. You might reconsider doing both at the same time, I assure you its much easier.
#27
Never used jack stands for engine install/remove. Just raised back end with wood under tires, lowered air pressure in front tires and pulled/install motor with transmission attached. Joe P. love that factory lift tool.
#28
Ok thanks all. Got nervous not knowing much about the motor so pulled it apart and found its all dry and appera to been sitting for a long time. Gonna pull while thing apart and clean and re lube everything to be sure it's right to save headaches later. Plan to install as an assembly. The wood blocks and air pressie truck sound better and safer than Jack stands. Thanks!
Thread
Thread Starter
Forum
Replies
Last Post


