When you click on links to various merchants on this site and make a purchase, this can result in this site earning a commission. Affiliate programs and affiliations include, but are not limited to, the eBay Partner Network.
Hello all. I'm trying to install a Pertronix 1181LS electronic ignition in my '56 Old 88 and I can't seem to find the right wiring configuration. I've done a fair amount of searching around and none of the related threads or videos describe exactly what to connect to make this work with my setup, so I'm hoping someone can offer more specific guidance.
Before getting into this, starting was a bit sluggish and the engine would occasionally stall, but everything otherwise ran fine. I decided to start by replacing the cap and rotor with the same Delco parts since those were a bit worn. I figured I'd try out electronic ignition while I was at it (easy, right?), so I removed the points and condenser, installed the Pertonix unit in the distributor, ran the black wire from the Pertronix to the negative terminal on the stock coil. The question is, where to connect the red wire. Looking at the diagram, I have a ballast resistor, so I figured connect it to the side opposite where the jumper connects the resistor to the coil's positive terminal. At least that's what the instructions suggest.
Since the screw terminals on the resistor were too corroded to budge, I went ahead and replaced that with a new one, wired up as before. There is a yellow wire on one side (where I connected the red wire from the Pertronix), and then on the side that has the jumper over to the coil, there is another black wire connected. Both the black and yellow go into the wiring harness that goes in through the firewall. Checked the ignition switch and there is a yellow and black wire at the switch. Seems to match up with the wiring diagram from the shop manual.
After doing this, I get nothing but a single click when I turn the key to start. No cranking, nothing.
I checked all the connections, but I suspect I'm missing something. Found some info on setups a bit different than mine that suggest running some addition wiring, but since those aren't my specific setup and I don't know enough about the wiring system in my car, I don't want to make things worse without some concrete steps.
Add to this, I contacted Pertronix and they suggested just simply replacing the stock coil with their Flamethrower coil. I would gladly do this if the fix were as simple as that, but something tells me it's not that simple. And that still doesn't answer the question of which ignition wire I need to connect to the coil, and what to do with the other.
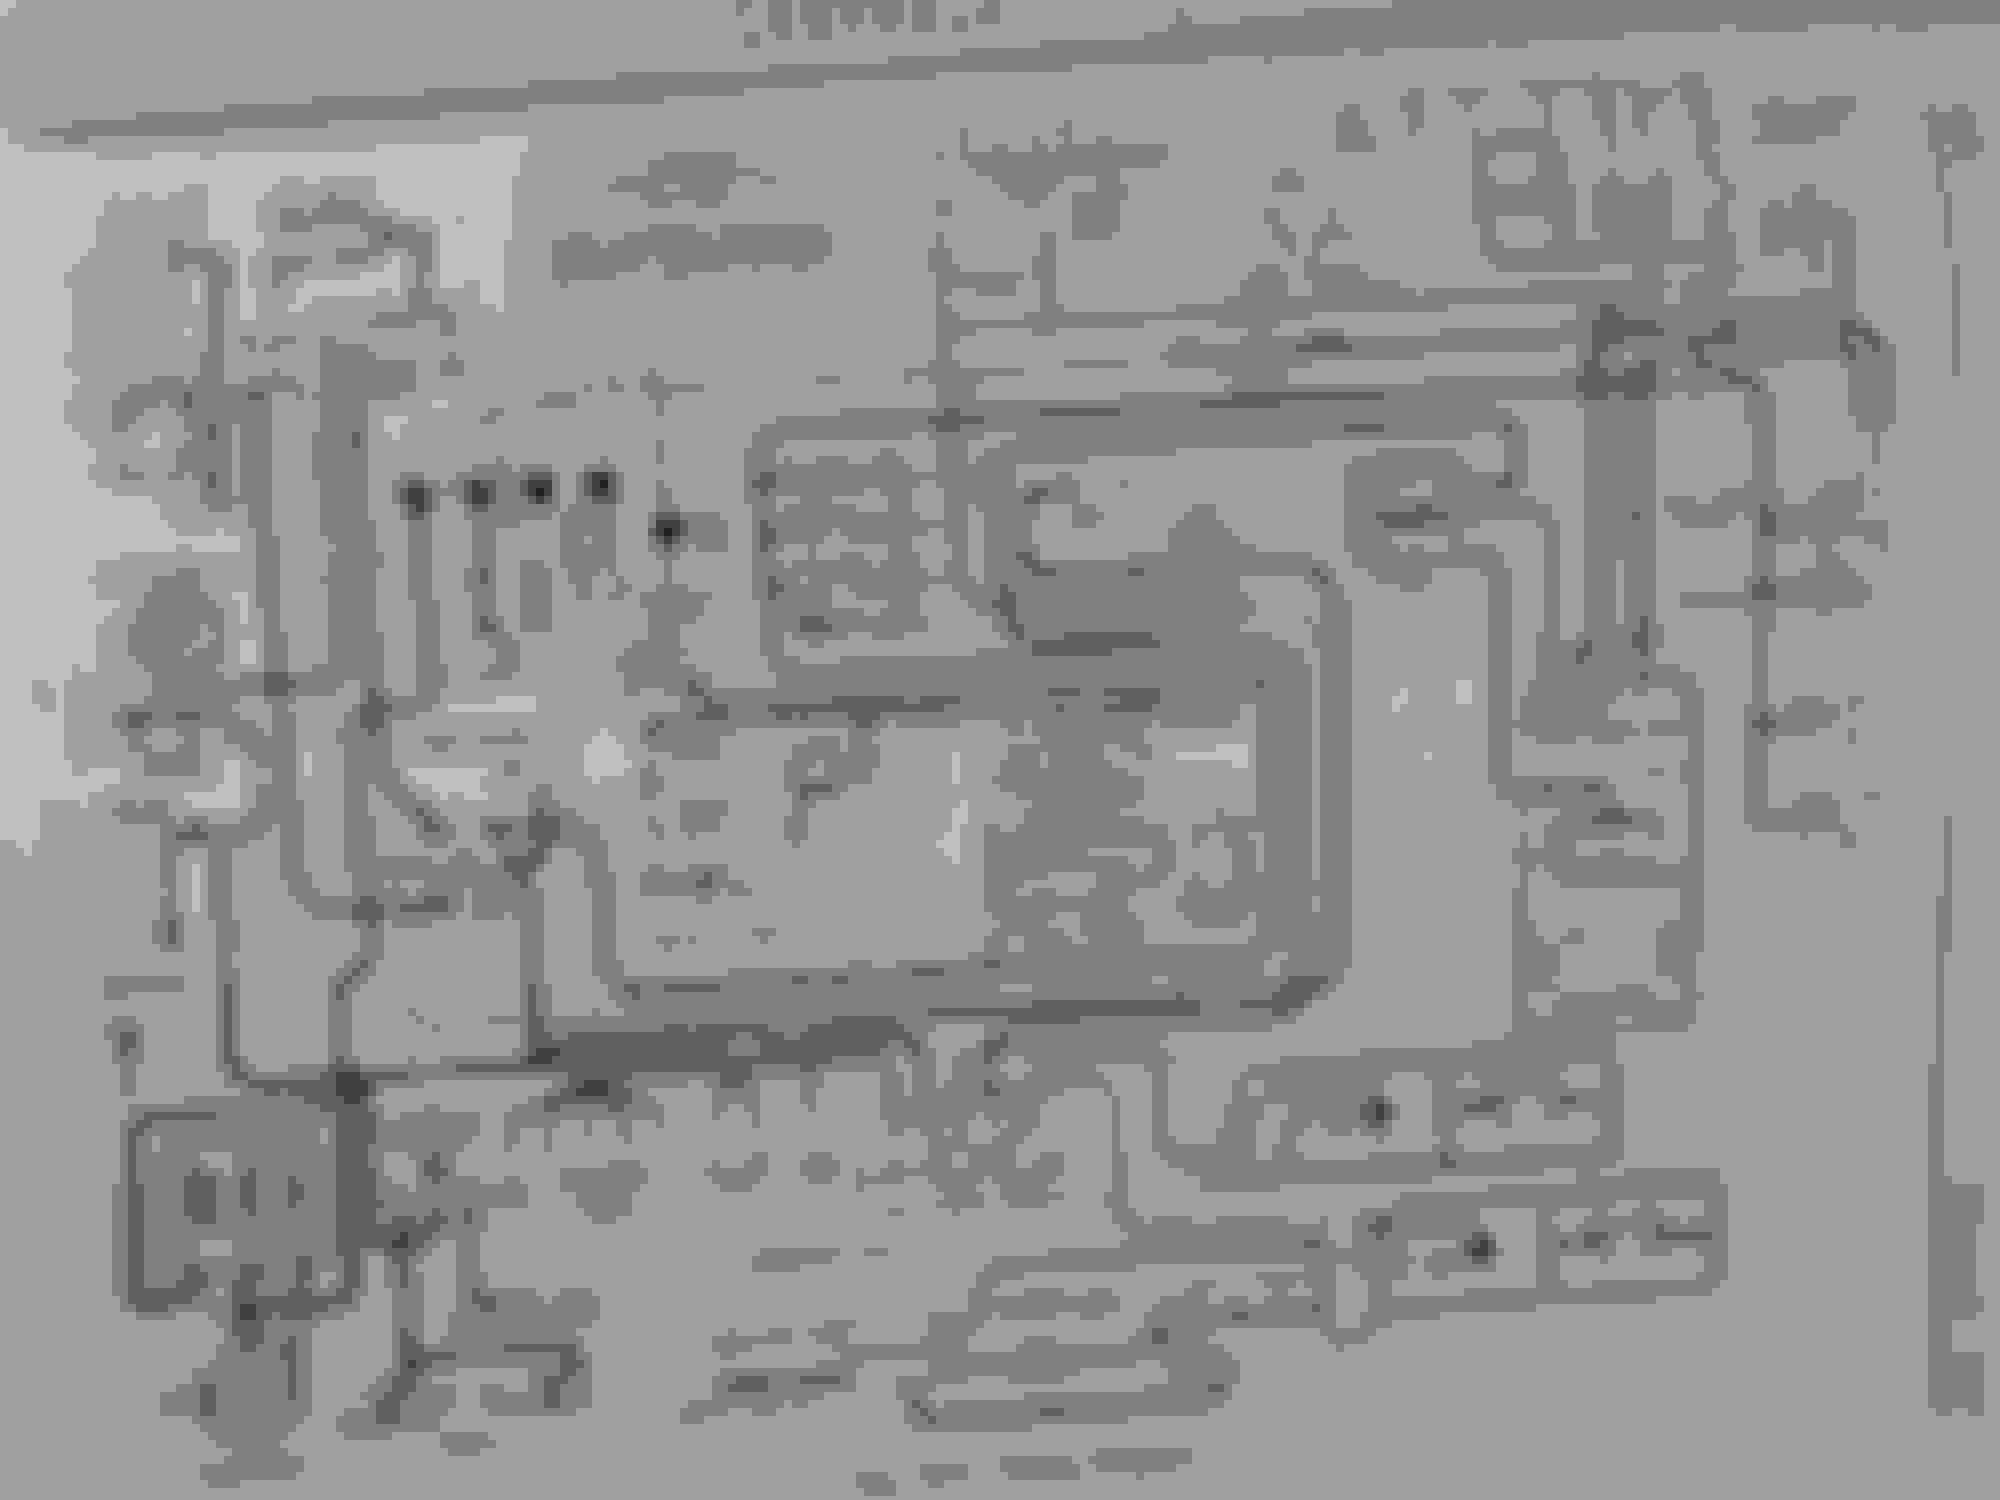
Attaching some photos of the wiring diagrams if it helps. Let me know if I can provide further details and thanks for any help!
That's the Pertronix instructions that I have been working off of. I think that's what I've done, no? I've checked everything else to make sure I hadn't missed anything else and I think the rest of the wiring looks correct. Where is the second ignition wire in that diagram, in my case the black one closest to the coil? That's what's throwing me off.
This is how i. read these instructions .....planning on doing this to my '57 soon .
I label your pic ... is this right? my ignition is the same as your 56 .
The second wire (blk eng2.).. is not shown is Pertx instruction . I believe its only an Oldsmobile application.
There's two wires. The black wire from the Pertroinx goes to the negative terminal on the coil. The red wire goes to a switched 12V source. The side of the resistor that goes to the key is the easiest one to get to. In other words, the red wire goes to the side of the resistor that is NOT directly wired to the coil. Done.
This is how i. read these instructions .....planning on doing this to my '57 soon .
I label your pic ... is this right? my ignition is the same as your 56 .
The second wire (blk eng2.).. is not shown is Pertx instruction . I believe its only an Oldsmobile application.
Thanks for taking the time to do that. Yes, I think you�ve labeled it right. I should say though, I�m not 100% clear on the ignition wiring still and I�m sure there are others that know much more who could weigh in.
I can confirm the red wire is from the Pertronix, and the black wire from the Petronix (not shown) is going to the negative terminal on the coil. Then there is the black wire coming off the ballast resistor to coil positive. And the other two wires you have identified as engine 1 and 2 seem right.
I think you�re correct that this wiring is unique to Oldsmobile and any info I�ve found doesn�t address this two wire combination with the ballast resistor. And most videos are different makes so they don�t have this configuration. So even if I replace the coil and bypass the resistor, I�m still not sure how to handle those two ignition wires. I did get a troubleshooting guide from Pertronix that I can use to at least go through and test continuity and make sure there are no other issues.
I�m just about ready to reinstall the points since at least I know that works!
There's two wires. The black wire from the Pertroinx goes to the negative terminal on the coil. The red wire goes to a switched 12V source. The side of the resistor that goes to the key is the easiest one to get to. In other words, the red wire goes to the side of the resistor that is NOT directly wired to the coil. Done.
That makes sense, but that�s how I have it wired and it�s still not giving me anything. It was working before I removed the points and condenser and the only other change I made was to replace the ballast resistor due to the corroded terminals on the old one.
One other detail. When I reconnect the battery the courtesy lights come on when I get into the car and after I turn the key I get that single click and everything goes out. Does that suggest that there�s a bad ground somewhere or something else I need to test for?
It suggests your not getting enough voltage to the starter and has nothing to do with the pertronix. Check battery voltage, cable ends and battery terminals, and for corroded connections.
One other detail. When I reconnect the battery the courtesy lights come on when I get into the car and after I turn the key I get that single click and everything goes out. Does that suggest that there�s a bad ground somewhere or something else I need to test for?
This is your first problem. Fix this before worrying about the Pertronix. This is symptomatic of a loose connection someplace that is incapable of carrying the full current to the starter. Check EACH batter cable connection, both power and ground wires. Check for corrosion in the cables between the terminals and the conductor. Check for voltage at the starter when cranking. You won't be able to get anything else to work until you find and fix this problem.
Thanks for the input. I will be checking all of these. Everything was working before I uninstalled the points, but maybe in the process, something got jarred loose.
Well, after some troubleshooting, I found the problem and everything is working. Quick follow up to close the loop on this one in case anyone is trying to install these in a similar car.
In testing everything, I found the battery output was borderline, and since the previous owner had installed it, I have no idea how old it was. It had been starting okay before with the points, just a little sluggish, so I hadn't immediately thought the battery was the culprit. When I put the jump pack on it, I got it to crank, but not start.
So I went ahead and replaced the battery and that made the difference. With the Pertronix running black wire to the negative side of the coil and red to the cranking side of the ballast resistor (yellow wire in my case), it fired right up. I still might need to check the timing, but it seems to be running pretty well. Thanks for the troubleshooting tips, which ended up making the fix pretty simple. At least I learned quite a bit about the electrical system in the process!
Just carious, Why do you need the ballast resistor at all, I'm I missing something here? I have installed a Pertronix and bypassed the ballast resistor completely with no issues. It's been a while so maybe I am forgetting something, I often do....Tedd
Just carious, Why do you need the ballast resistor at all, I'm I missing something here? I have installed a Pertronix and bypassed the ballast resistor completely with no issues. It's been a while so maybe I am forgetting something, I often do....Tedd
I did test the resistance of the coil (it's the stock coil) and it was right at 1.5 ohms, but it's working with the ballast resistor so I'm not going to question that, at least for now. Is there any reason why I should bypass the ballast resistor if everything is working well?
My thoughts are the only reason the ballast resistor is there to begin with is to drop the voltage down from 12 to 9 volts on run with key on so the points don't burn, you have no points to burn now. Though I have never had a issue with a ballast resistor stop working it seams that it is no longer needed. Not a big deal ether way just wondering if I was confused or missing something..... Tedd
I agree with your assessment. I don�t see the need for the ballast resistor unless I were to ever need to go back to points, but I don�t foresee that. For now, as long as it�s working, I don�t want to mess with it further, though I may revisit that in the future and bypass it as you have.
I hope you have good luck with your Pertronix and never go back to points. I have used them twice in my 54 and will never use one again. I came home on a flatbed once and came limping home two other times. The last time I got a 56 distributor like you have with the external adjustment points and put it in. I will never go back to Pertronix. I know some people that have run them for years but that was not me.
I'm with Red, my luck with that system has been all bad, others have had them for years with no issues. I just figure that points will last about 10000 miles and at that rate I won't have to change them for about 4 years. I can handle that or someone will do it for me which ever is easiest...... Tedd
It appears that the OP's situation is right at the borderline between needing and not needing the ballast resistor per Pertronix. Leaving the ballast resistor inline in this situation will reduce the current through the coil (and the Pertronix unit) and will likely extend the life of the Pertronix. I'd be interested if those who have had Pertronix units go bad, if they had removed the ballast resistor or not based on ignition coil resistance measurements.
I think at some point I probably had it wired each way. The two times I came limping home the magnetic ring went out. The Pertronix folks said they had never seen that. Pretty weird since there are no moving parts in them.
I think at some point I probably had it wired each way. The two times I came limping home the magnetic ring went out. The Pertronix folks said they had never seen that. Pretty weird since there are no moving parts in them.
Ah, so it was a mechanical failure mode, not electrical. Did the ring break or did the teeth "chip off"? Ether way, you were still stranded and that sucks. However your experience is more of an indictment of Pertronix's mechanical design than of their electrical (module) design.
There have been a number of cases where the bonded-in magnets have come lose from the plastic ring that holds them, both this style and the large diameter version that bolts under the rotor.
That happened to one set we had on a 4 cyl trail groomer, another set was assembled incorrectly and didnt work out of the box, that was replaced by pertronix
Just seeing the additional insights, so thank you all for adding to the conversation. Things have been running well for me for several weeks now, so I'm going to leave well enough alone. I do have the points as a backup, but hope I won't need them. Interesting thoughts on the ballast resistor perhaps extending the life of the Pertronix unit as well as the coil.
For what it's worth, I installed the lobe sensor version of the Pertronix unit, so there is no magnetic sleeve to fail. Not that something else couldn't fail, but fingers crossed it will work as designed. I'm hoping this will be reliable for me for years to come. I will say that it seems to start up and run quite smoothly, and as it turns out, the timing was just fine.
 June 22nd, 2021, 08:34 PM