Log In
Register
Forums
New User Forums
The Newbie Forum
Site Related
General
General Discussion
The Clubhouse
Repair & Restoration
Technical & Reference
Major Builds & Projects
Racing and High Performance
Engine
Transmission and Driveline
Chassis, Tires/Wheels, Brakes, & Related
Body & Paint
Electrical
Interior and Trim
Other
Vehicle Lineup
Cutlass, 442, and Hurst/Olds
Large Oldsmobiles
Final Years Oldsmobiles
Vintage Oldsmobiles
Toronado
Other Oldsmobiles
Classifieds
Buyer & Seller Feedback
Oldsmobile Cars
Oldsmobile Parts
Non-Oldsmobile Classified
Miscellaneous Classifieds
Gallery
Tools
Car Payment Calculator
Tire Rim Calculator
Vin Decoder
Recalls
Technical Service Bulletins (TSBs)
Members List
Live Feed
Marketplace
Vendor Directory
Become a Vendor
New Posts
View Dark Mode
Please register or login to enable Dark Mode.
Log In
Register
Threads
Google
Threads
Posts
Advanced
Dark Mode
Please register or login to enable Dark Mode.
Log In
Forgot your Password?
By logging into your account, you agree to our
Terms of Use
and
Privacy Policy
, and to the use of cookies as described therein.
or
Login with Facebook
Recent
Commented
Albums
My Pictures
My Post Pictures
cdrod
October 15, 2015
1920
0
Sort:
Most Recent
Default
Most Recent
0
2023/09/23 14:34:12
38127
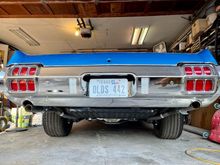
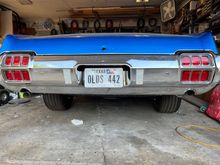
No trumpet tips on the tailpipes.
0
2023/09/23 14:34:11
38127
0
2023/09/23 14:32:37
38127
0
2023/09/20 19:22:33
38127
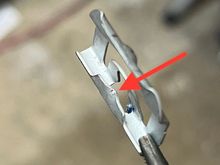
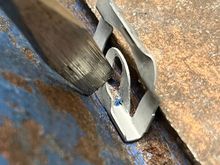
It's not much of a difference, but it was enough to get them to hold tightly.
0
2023/09/20 19:22:31
38127
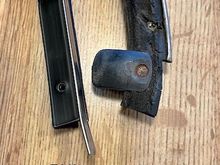
Success!
0
2023/09/20 19:22:30
38127
The red arrow shows the tab that doesn't hold the clip tightly.
0
2023/09/20 19:22:28
38127
A few light taps with a screwdriver and hammer accentuate the tab.
0
2023/09/20 19:22:27
38127
0
2023/09/19 22:33:58
38127
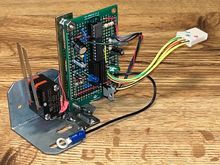
This is the first mock-up of the circuit board & switches mounted to a framing bracket purchased from Home Depot. I need to remove the circuit board to make a few revisions; I need to add the delay timer and some pnp transistor to provide more current to the micro relays. This assembly will mount to the floor shifter inside the console so the limit switches will be triggered by the shifter arm.
0
2023/09/19 16:45:44
38127
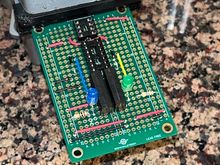
Laying out the chip locations on a 2"x3" proto-type circuit board.
0
2023/09/19 16:45:42
38127
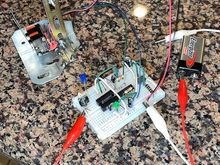
Breadboarding the circuit to work out the major bugs using a 9v battery.
0
2023/09/19 16:45:41
38127
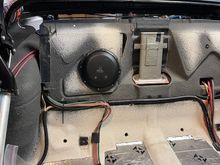
This is the front firing position. The sub will fire through the backseat cushion. It will sound better firing forward.
0
2023/09/18 21:36:11
38127
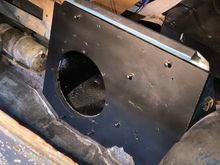
I closed out the first mounting hole with a piece of 16ga sheetmetal. I screwed wood blocks to the inside to dampen the resonance of the sheetmetal, but will probably need to apply more sound deadening.
0
2023/09/18 21:36:10
38127
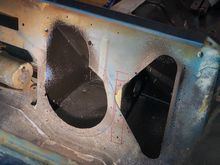
This was my first idea for the sub-woofer; it's facing rearward behind the back seat firing into the trunk. The plywood baffle interferes with the top mechanism in the down position.
0
2023/09/18 21:32:05
38127
0
2023/09/18 21:32:04
38127
0
2023/09/18 21:32:01
38127
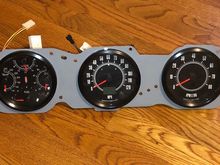
The 4-1/2" gauge size fits behind the stock gauge bezel with a little taken off the back.
0
2023/09/04 07:45:41
38127
0
2023/09/04 07:45:39
38127
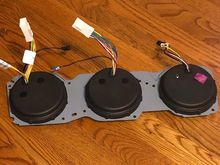
I used multi-pin connectors called Mate-n-Lok from Amp and reworked the wiring harness behind the dash for a clean install.
0
2023/09/04 07:45:38
38127
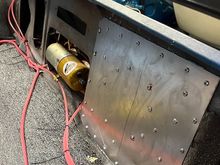
I made a mounting plate out of some leftover sheet metal.
0
2023/09/04 07:45:36
38127
0
2023/08/26 12:34:26
38127
0
2023/08/23 17:14:01
38127
0
2023/08/23 17:13:22
38127
0
2023/08/23 17:12:23
38127
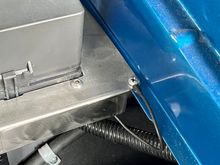
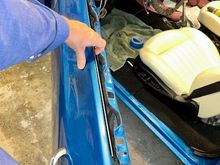
The base plate is mounted in three places.
0
2023/08/23 06:20:10
38127
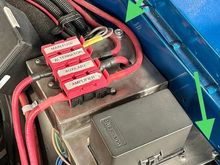
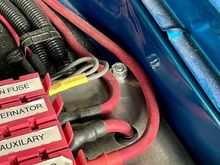
This self-tapping screw ties the front of the bas plat to the fender. The little black wire is the ground path for the relay coils in the auxillary fuse block.
0
2023/08/23 06:20:09
38127
This mounting point fits over one of the 5/16" inner fender liner bolts.
0
2023/08/23 06:20:07
38127
0
2023/08/23 06:20:05
38127
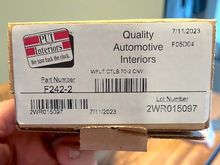
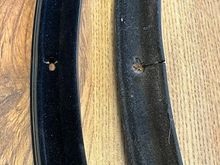
PUI full set (8-pieces) PN: F242-2.
0
2023/08/20 20:47:20
38127
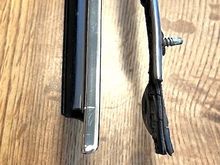
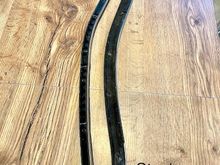
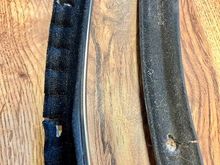
The biggest issue with the PUI part is the bead profile. The flat bead is correct for the interior sweeps but is no correct for the outside sweeps.
0
2023/08/20 20:47:18
38127
The Steel Rubber/Repops part has the correct round profile for the stainless bead, although its a bit larger.
0
2023/08/20 20:47:17
38127
The Steele Rubber/Repop part had a much better shape and the molding better resembled the original part.
0
2023/08/20 20:47:16
38127
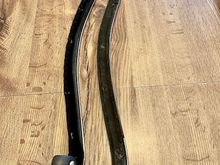
This is the Steele Rubber/Repops.com quarter sweep; Steel Rubber PN: 80-539-57, Repops PN: OH-166A.
0
2023/08/20 20:47:14
38127
The PUI sweeps were also missing the plastic tabs on the ends.
0
2023/08/20 20:47:13
38127
This is the quarter sweep from the PUI kit. The shape is not even close to the stock part.
0
2023/08/20 20:47:12
38127
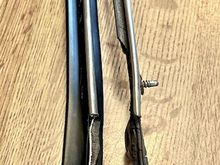
Here is a close up pic of the quarter sweeps I received from Oldsmobilejim.
0
2023/08/20 20:47:11
38127
The quarter sweeps from Oldsmobilejim had the correct shape and included the plastic tabs on the ends.
0
2023/08/20 20:47:09
38127
0
2023/08/20 20:47:08
38127
The door sweeps I purchased from CO member Oldsmobilejim were too short.
0
2023/08/20 20:47:06
38127
First
Page
7 of 48
Last
Go To
Page
1
...
5
6
7
8
9
...
48
7 of 48
Go To
GO
Go to page
of 48
pages
1
...
5
6
7
8
9
...
48