Log In
Register
Forums
New User Forums
The Newbie Forum
Site Related
General
General Discussion
The Clubhouse
Repair & Restoration
Technical & Reference
Major Builds & Projects
Racing and High Performance
Engine
Transmission and Driveline
Chassis, Tires/Wheels, Brakes, & Related
Body & Paint
Electrical
Interior and Trim
Other
Vehicle Lineup
Cutlass, 442, and Hurst/Olds
Large Oldsmobiles
Final Years Oldsmobiles
Vintage Oldsmobiles
Toronado
Other Oldsmobiles
Classifieds
Buyer & Seller Feedback
Oldsmobile Cars
Oldsmobile Parts
Non-Oldsmobile Classified
Miscellaneous Classifieds
Gallery
Tools
Car Payment Calculator
Tire Rim Calculator
Vin Decoder
Recalls
Technical Service Bulletins (TSBs)
Members List
Live Feed
Marketplace
Vendor Directory
Become a Vendor
New Posts
View Dark Mode
Please register or login to enable Dark Mode.
Log In
Register
Threads
Google
Threads
Posts
Advanced
Dark Mode
Please register or login to enable Dark Mode.
Log In
Forgot your Password?
By logging into your account, you agree to our
Terms of Use
and
Privacy Policy
, and to the use of cookies as described therein.
or
Login with Facebook
Recent
Commented
Albums
My Pictures
My Post Pictures
cdrod
October 15, 2015
1921
0
Sort:
Most Recent
Default
Most Recent
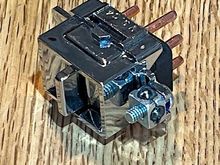
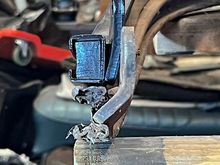
I mocked up the switch to make sure everything centered nicely in the cutout.
0
2022/05/05 06:32:59
38127
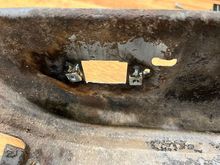
They will create a stand-off to hold the switch down just a little.
0
2022/05/05 06:32:58
38127
Here, the stand-offs have been tack welded in place on the bottom of the armrest.
0
2022/05/05 06:32:56
38127
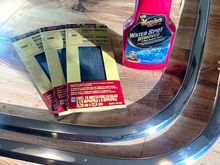
These are my polishing tools; and alot of elbow grease. You should wear some gloves to protect your skin; the waterspot remover can irritate your skin and the metal sanding residue will stain your hands & fingers.
0
2022/04/29 10:02:24
38127
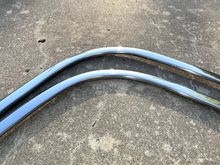
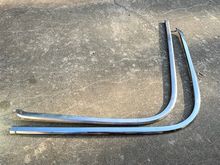
I have about 2.5 hours worth of work in these two moldings.
0
2022/04/29 10:02:22
38127
Here is a close comparing the finished product to what I started with.
0
2022/04/29 10:02:21
38127
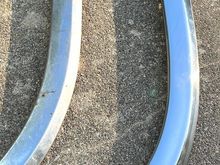
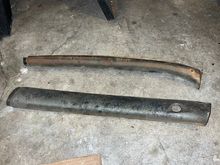
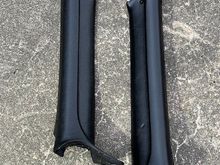
These are the convertible pinch weld moldings; the restored molding is the bottom one in the pic.
0
2022/04/29 10:02:20
38127
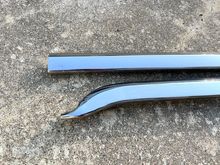
A close up of the final product.
0
2022/04/29 10:02:18
38127
0
2022/04/28 11:13:20
38127
0
2022/04/28 11:11:24
38127
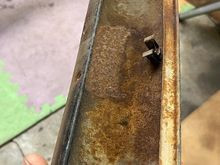
Mine are a bit rusty on the back sides.
0
2022/04/21 05:29:20
38127
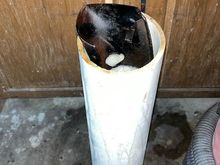
I'm soaking them overnight in a 4" pvc tube filled with Evaporust. I'll lightly sand blast them at low pressure to remove the original paint before spraying with SEM Landau Black interior paint.
0
2022/04/21 05:29:19
38127
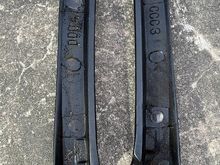
These are the interior header pieces that install along the top of the windshield on either side of the rearview mirror.
0
2022/04/21 05:29:17
38127
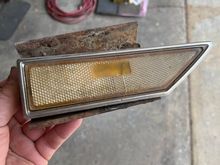
Usually the foam deteriorates exposing the metal insert which will get rusty. These are in really nice condition. Thanks Nick!
0
2022/04/21 05:29:16
38127
These are the A-pillar pads I bought from Nick
0
2022/04/21 05:29:14
38127
0
2022/04/19 11:26:32
38127
0
2022/04/19 11:25:38
38127
0
2022/04/18 19:28:14
38127
0
2022/04/18 19:27:08
38127
0
2022/04/18 19:26:48
38127
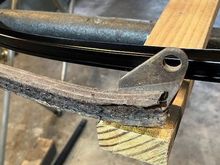
The mounting tab on the original floating bow (on the bottom) is offset about 1/4". The replacement bow (on the top) doesn't have this offset so the bow will be inboard 1/4" on both sides when installed.
0
2022/04/18 16:14:29
38127
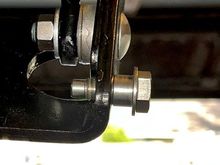
This is the "solution" pivot bolt mounted to the frame mechanism. The nylon spacer pushes the floating bow outward.
0
2022/04/18 15:24:29
38127
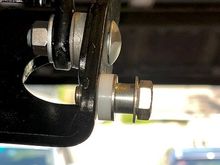
This is the factory style pivot bolt installed on the frame mechanism.
0
2022/04/18 15:24:28
38127
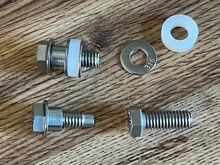
The longer bolts are not really longer, they're just threaded all the way to the end of the bolt. Using a stainless washer and turning the bushing around will capture the floating bow, and the nylon spacer will push the bow 1/4" outward. The
0
2022/04/18 15:24:27
38127
These are the new pivot bolts for the floating bow. The bushing is threaded and screws onto the bolt. There also is an unthreaded portion at the end of the bolt.
0
2022/04/18 15:24:26
38127
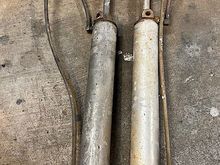
The ram cylinders are completely frozen.
0
2022/04/17 19:32:43
38127
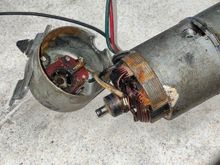
The inside didn't look much better than the outside.
0
2022/04/17 19:32:42
38127
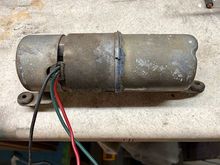
The pump motor is sealed together with silicone.
0
2022/04/17 19:32:40
38127
Here is a better pic of the offset bend in the mounting tab.
0
2022/04/17 18:13:13
38127
The mounting tabs seem to be shaped the same.
0
2022/04/17 18:13:12
38127
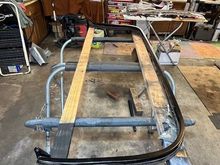
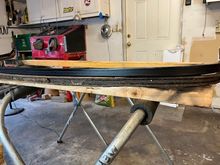
The overall shape of the replacement part is consistent with the original bow.
0
2022/04/17 18:13:10
38127
The original bow has a few bends up & down where the replacement part is straight. I'm not sure if the bends are original to the stamping or if this is the result of 50 years of use and rust.
0
2022/04/17 18:13:09
38127
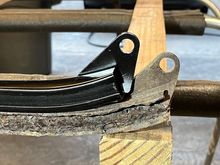
This is the mounting tab on the original bow. It has a small offset which places the tacking strip a little farther outboard.
0
2022/04/17 18:13:08
38127
This is the mounting tab on the replacement.
0
2022/04/17 18:13:06
38127
0
2022/04/16 14:20:13
38127
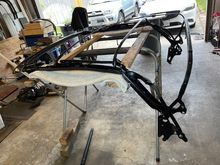
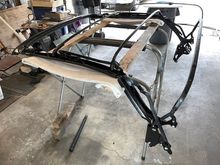
I made notes about the adjustment points and did my best to reassemble with the same alignments.
0
2022/04/16 14:20:12
38127
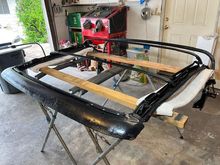
I may spray another coat of paint on the top of the header bow. It was pretty rusty and I don't want any moisture to bring back the rust.
0
2022/04/16 14:20:11
38127
The "after" shot!
0
2022/04/16 14:20:09
38127
I need to touch up some of the metal tabs that hold the tack strips in place. The paint chipped off when I bent them to fit tack strip material.
0
2022/04/16 14:20:08
38127
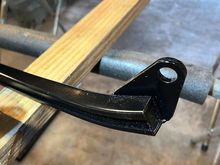
I used a 4-1/2" grinder to clean up casting lines in the latch handles. They look almost brand new, I guess, better than brand new as the factory didn't clean up the casting marks.
0
2022/04/16 14:20:07
38127
First
Page
16 of 49
Last
Go To
Page
1
...
14
15
16
17
18
...
49
16 of 49
Go To
GO
Go to page
of 49
pages
1
...
14
15
16
17
18
...
49