Log In
Register
Forums
New User Forums
The Newbie Forum
Site Related
General
General Discussion
The Clubhouse
Repair & Restoration
Technical & Reference
Major Builds & Projects
Racing and High Performance
Engine
Transmission and Driveline
Chassis, Tires/Wheels, Brakes, & Related
Body & Paint
Electrical
Interior and Trim
Other
Vehicle Lineup
Cutlass, 442, and Hurst/Olds
Large Oldsmobiles
Final Years Oldsmobiles
Vintage Oldsmobiles
Toronado
Other Oldsmobiles
Classifieds
Buyer & Seller Feedback
Oldsmobile Cars
Oldsmobile Parts
Non-Oldsmobile Classified
Miscellaneous Classifieds
Gallery
Tools
Car Payment Calculator
Tire Rim Calculator
Vin Decoder
Recalls
Technical Service Bulletins (TSBs)
Members List
Live Feed
Marketplace
Vendor Directory
Become a Vendor
New Posts
View Dark Mode
Please register or login to enable Dark Mode.
Log In
Register
Threads
Google
Threads
Posts
Advanced
Dark Mode
Please register or login to enable Dark Mode.
Log In
Forgot your Password?
By logging into your account, you agree to our
Terms of Use
and
Privacy Policy
, and to the use of cookies as described therein.
or
Login with Facebook
Recent
Commented
Albums
My Pictures
My Post Pictures
cdrod
October 15, 2015
1921
0
Sort:
Most Recent
Default
Most Recent
0
2022/09/25 08:17:09
38127
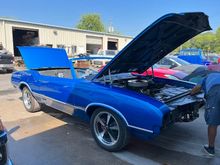
At the body shop after they cut & buffed the paint.
0
2022/09/25 08:17:07
38127
April 1, 2012
0
2022/09/25 08:16:27
38127
0
2022/09/11 17:49:12
38127
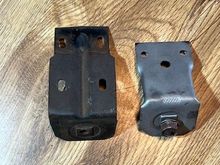
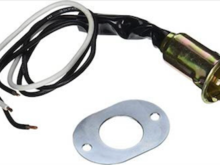
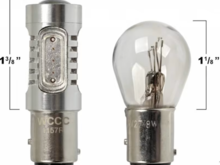
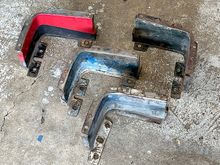
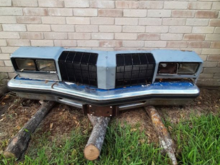
The one on the left is from my '72, the one on the right is the mystery part.
0
2022/09/04 13:40:47
38127
0
2022/09/04 13:40:46
38127
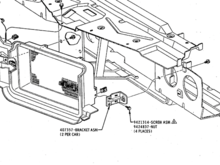
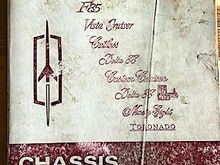
This is from the '72 Assembly Manual.
0
2022/09/04 13:37:58
38127
0
2022/08/29 13:37:27
38127
0
2022/08/28 18:49:30
38127
0
2022/08/28 18:49:06
38127
0
2022/08/28 18:48:06
38127
0
2022/08/28 18:43:33
38127
0
2022/08/19 19:30:22
38127
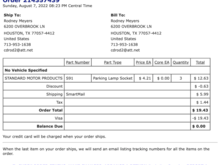
S-91 Socket from Standard Motor Products
0
2022/08/18 09:24:09
38127
0
2022/08/13 16:44:00
38127
0
2022/08/13 16:43:59
38127
0
2022/08/02 18:46:48
38127
0
2022/07/27 16:54:27
38127
0
2022/07/27 16:54:25
38127
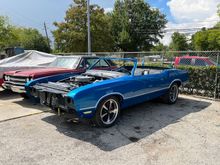
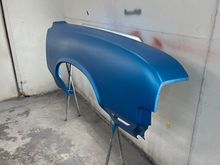
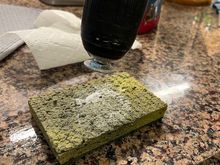
This is a little teaser shot of the final color. We pulled one of the doors out into the sun to see how it looks. The color really pops in the daylight, can't wait to see the whole car in this color!
0
2022/07/26 10:44:20
38127
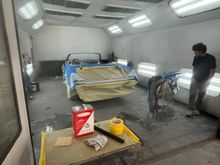
The body shop will lightly sand the color coat before spraying 2 coats of clear.
0
2022/07/26 10:44:18
38127
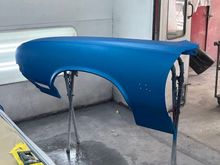
Front fenders have epoxy primer on the back and the base coat on the outside.
0
2022/07/26 10:44:17
38127
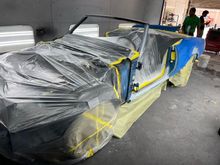
The car is in the spray booth now and the guys were masking off getting ready to spray the base coat.
0
2022/07/26 10:44:15
38127
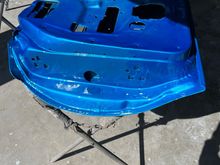
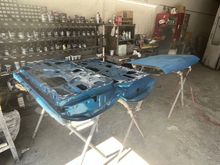
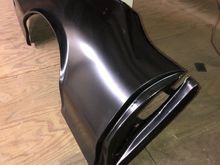
They've sprayed the underside of the deck lid and the edges of the doors with the base color and 2 coats of clear.
0
2022/07/26 10:44:14
38127
0
2022/07/26 10:44:13
38127
0
2022/07/23 07:19:47
38127
0
2022/07/19 09:53:28
38127
I chucked each bolt into my cordless drill and polished them with fine compound.
0
2022/07/16 09:31:40
38127
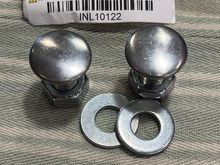
This is the final result; LH is unpolished RH is after polishing. Much better!
0
2022/07/16 09:31:39
38127
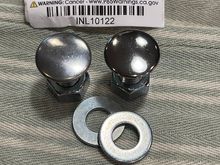
This is how they looked right out of the bag. Pretty lackluster finish.
0
2022/07/16 09:31:38
38127
I squirted a little polishing compound onto a damp sponge and squeezed the trigger.
0
2022/07/16 09:31:37
38127
0
2022/07/16 07:30:46
38127
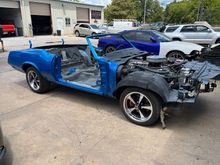
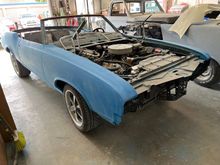
Big picture shot.
0
2022/07/15 11:00:51
38127
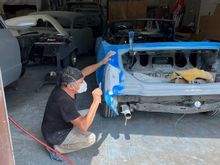
The rear quarters were repaired with quarter panel skins; here Luis is fitting the quarter caps to the skins as there were some irregular gaps.
0
2022/07/15 11:00:50
38127
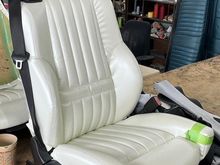
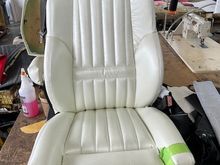
This front seats are from a 2001 BMW M3 convertible. I had the upholstery shop recover them with Pearl White vinyl in the spirit of the factory buckets. There are a few wrinkles to be smoothed out.
0
2022/07/15 11:00:49
38127
The side bolsters are too bulky and square. The upholstery shop will take the bottom cover back apart and make it curve slightly to eliminate the hard corner.
0
2022/07/15 11:00:48
38127
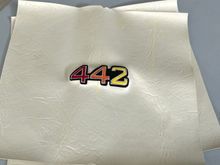
This is the 442 logo embroidery for the seat headrests.
0
2022/07/15 11:00:46
38127
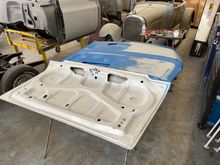
The hood needed a little more attention after block sanding.
0
2022/07/15 11:00:45
38127
0
2022/07/15 05:58:48
38127
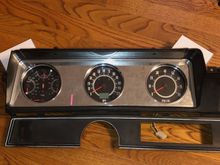
Here is the trial fit behind the factory gauge bezel (without the wood grain insert). The turn signal and high beam indicators are in the center speedo gauge. I may mount 2 additional indicators in the bezel for parking brake and cruise.
0
2022/07/15 03:44:58
38127
First
Page
14 of 49
Last
Go To
Page
1
...
12
13
14
15
16
...
49
14 of 49
Go To
GO
Go to page
of 49
pages
1
...
12
13
14
15
16
...
49