When you click on links to various merchants on this site and make a purchase, this can result in this site earning a commission. Affiliate programs and affiliations include, but are not limited to, the eBay Partner Network.
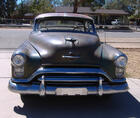
And so it begins.... (first time pulling a motor) everything, at least I think everything is disconnected to get the motor/trans out of the car! Wondering about the speedometer cable? I got it free of the side trans mounts and front engine mount. Now the starter motor is hitting the steering linkage! Guess I’ll need to remove the starter? My old pan that I ordered from Turners wrecking yard finally showed up, so now I’m motivated to get the old butchered one of and the good one on! Had to sawzaw the exhaust pipe off behind the exhaust manifold, no big deal, needs new exhaust!
Good luck and keep us posted. There will be something you forget it's just part of the journey. Coil and fuel pump unhooked? Just remember you are pulling a 1000 lb's compensate for it with your equipment and be safe.... Tedd
Good luck Don. I am not sure what your plans are, but you might want to think about taking a lot of pictures of various brackets, clips, wiring, and etc. I did this with my 57 olds and also video taped every nook and cranny and all the hardware on the doors, dash, and firewall, and wheel well area. As Tedd stated, keep us posted. Mark.
Thanks Mark.... I have started a collection of photographs, videos are good advice!
Tedd... the distributor and cap clear, I’m thinking that I need to remove the wire harness in front of the motor?
Do either of you know where the speedometer cable connects to?
I'm also in the "teardown begins" phase. I just started on my '51 yesterday: drained coolant, removed the rad surround, carb, distributor, hood, horns, labeled and moved a bunch of wiring. There's a lot of stuff I can see needs to be replaced (old hoses and wiring are rotting away), but it's a lot easier to make things happen in there than in my 2014 Nissan!
I'm also a 1st-time engine-remover, so please don't be shy with your posting - I'm interested to see what to watch out for.
Got some time to spend on the Olds today, for the most part a lot of grease and grime removal.
Decided to take a peek under one of the valve cover and was really disappointed with what I found!
Also an issue with one of the heads. Is this an easy fix?
How far do you want to go with this engine? How much do you want to spend? I couldn't myself just clean it up and stuff it back in without checking out what you have. That soft plug can be replaced with out pulling off the heads but I would do them all not just one. A compression check should be done before the engine left the car to see what going on with the top part and the pan should be dropped and the lower end measured for wear on the bearings, Heads off and piston wear and taper should be measured and such.
That valve gum is relatively common on this era engine. Though ugly it will come off and look pretty good when de gunked. but the old valve seals would be more my concern. If they haven't been changed in this century they will start smoking on startup if it isn't doing so now.
It kinda goes on and on. Less can be done but with risk. It is your decision and few of us would do it the same....... Best of luck keep us in the loop.... Tedd
Last edited by Tedd Thompson; Nov 3, 2019 at 07:17 PM.
It's been a while since I've posted an update but here goes.
After getting the exhaust and intake manifolds removed as well as the butchered oil pan.
I've been busy cleaning them all up, oh and btw I was able to locate an oil pan along with a couple of other
misc. parts from a wrecking yard up in Fresno:
Used Purple Power to get the majority of the oil grime and debris removed with worked pretty well:
Removed a couple of broken exhaust manifold studs and one was so tough getting removed that the casting broke away.
Repaired it with some JB Weld, we'll see how well it holds up?
Good work but it's doubtful JB weld will hold up, it just about gives it up around 300 degrees. You may have to drill and tap that hole to get that stud to hold. It's a lot easier to do it now than later when it's back in the hole.
Like Eric said the amount of sludge in the head is pretty common and not really bad at all. It should clean up fine..... Tedd
Good work but it's doubtful JB weld will hold up, it just about gives it up around 300 degrees. You may have to drill and tap that hole to get that stud to hold. It's a lot easier to do it now than later when it's back in the hole.
Like Eric said the amount of sludge in the head is pretty common and not really bad at all. It should clean up fine..... Tedd
Thanks Tedd, that hole can’t be drilled/tapped any deeper. Next resort would be the braise/weld that piece back on to the head.
Really don’t want to take the route of replacing the cylinder head!
Leak test the valves and replace the valve seals while the heads are removed, it's an easy DIY. The JB weld won't hold that, look into getting in brazed? while the head is off.
Can't a hydro coil be used or drill it to slightly larger size(even if it's metric) tap and replace the stud with what ever will fit and look correct.... Just a thought.....Tedd
Not what you want to hear..... get the broken piece welded or brazed back on, its the only way to repair it right.to last. JB Weld will last about 10 minutes before you have an exhaust leak.
Not what you want to hear..... get the broken piece welded or brazed back on, its the only way to repair it right.to last. JB Weld will last about 10 minutes before you have an exhaust leak.
I see the problem now, The whole ear is broken, bummer. I was thinking the threads were buggered. If brazed or welded it will probably have to be machined flat or it could leak....Tedd
I think if the welder knows what he is doing, it will be flat enough. Partially "V'ing" out the crack and clamping in place, four tack welds before "stitch welding" the seam. Clean up the exhaust manifold face with a file and stone should work. I doubt the exhaust manifold mating surface is flat, after all these years. Some sort of "header gasket" is also a possible solution.
......Just my two cents worth.
Well... I attempted to braze the broken exhaust flange after a few of you suggested to do so! It’s not the prettiest of beads but I think it will hold better than JB Weld will?
Do I need to be concerned about replacing these little rectangle corks? Didn’t remove the crank shaft so I’m thinking that I’m good at the rear pan seal?
Last edited by Gofishgobig; Apr 8, 2020 at 09:09 AM.
Those look like rear main seals corks, I've never used RTV in place of them, may work fine I don't know but that is a major hole to fill up with just silicone. Anyone else ever done this with only RTV?...... Tedd
Those look like rear main seals corks, I've never used RTV in place of them, may work fine I don't know but that is a major hole to fill up with just silicone. Anyone else ever done this with only RTV?...... Tedd
Hi Tedd,
I didn't remove the old cork at the rear main seal, the area there is lower then the block surface by maybe 1/16"?
I think I'll be fine.
He posted in #33, that he did not remove the cam shaft,,,,,,,which i assume that he meant to say crank shaft. If that is the true then it sounds like he left the old cork seals in and just gave a light coat of silicone over them or around that area. If so, then maybe they will seal. If the old ones were removed and not replaced, then i agree with Tedd,,,,,,that would be a large void to fill with silicone. Just my 2 1/2 cents.
He posted in #33, that he did not remove the cam shaft,,,,,,,which i assume that he meant to say crank shaft. If that is the true then it sounds like he left the old cork seals in and just gave a light coat of silicone over them or around that area. If so, then maybe they will seal. If the old ones were removed and not replaced, then i agree with Tedd,,,,,,that would be a large void to fill with silicone. Just my 2 1/2 cents.
You are correct, I meant "Crank shaft"... I edited that post to correct it.



 Tear down begins!





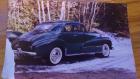
 Can I have the motor and trans for my car though?