When you click on links to various merchants on this site and make a purchase, this can result in this site earning a commission. Affiliate programs and affiliations include, but are not limited to, the eBay Partner Network.
I posted this at the AACA Forum as well. It is more pertinent to Vintage Olds so here it is
All of us have at some point or another been unable to find a part for our old cars. The growing field of 3D printing seems to be the answer. The major difficulty is to create a 3D computer file. Once it is done, it can be used over and over again to fabricate the part at a very reasonable cost. It will be very helpful if any organization, for instance AACA, can start compiling a data bank of files. Seems especially fit for interior parts, plastics, trim, and the like.
The following is the first part I am fabricating. It is a plastic trim that is used on the door of my 41 Oldsmobile. I searched for several months for a replacement and they are not to be found, except in much worse condition than mine and with the entire garnish molding that I don't need.
These are ivory colored plastic trim pieces. I spent exactly 2 hours at my local Public Library with a staff member creating the file by taking careful measurements with his caliper. Of course I provided the damaged original part which is required to do this job and I was adding input when needed. He created a file with the extension .stl and used a printer fed with a PLA plastic filament (I learned all these things just now by seeing him do the work). He printed a sample that needs minor touch ups to be perfect (sanding and painting the correct color). It looks very good and once I can have those minor adjustments completed, it will be a perfect piece. The cost was $1.5 (one dollar and 50 cents) for the materials only. The work is performed by city employees and has an educational purpose to apply new technologies. The best use of tax dollars I have seen in a long time !!!
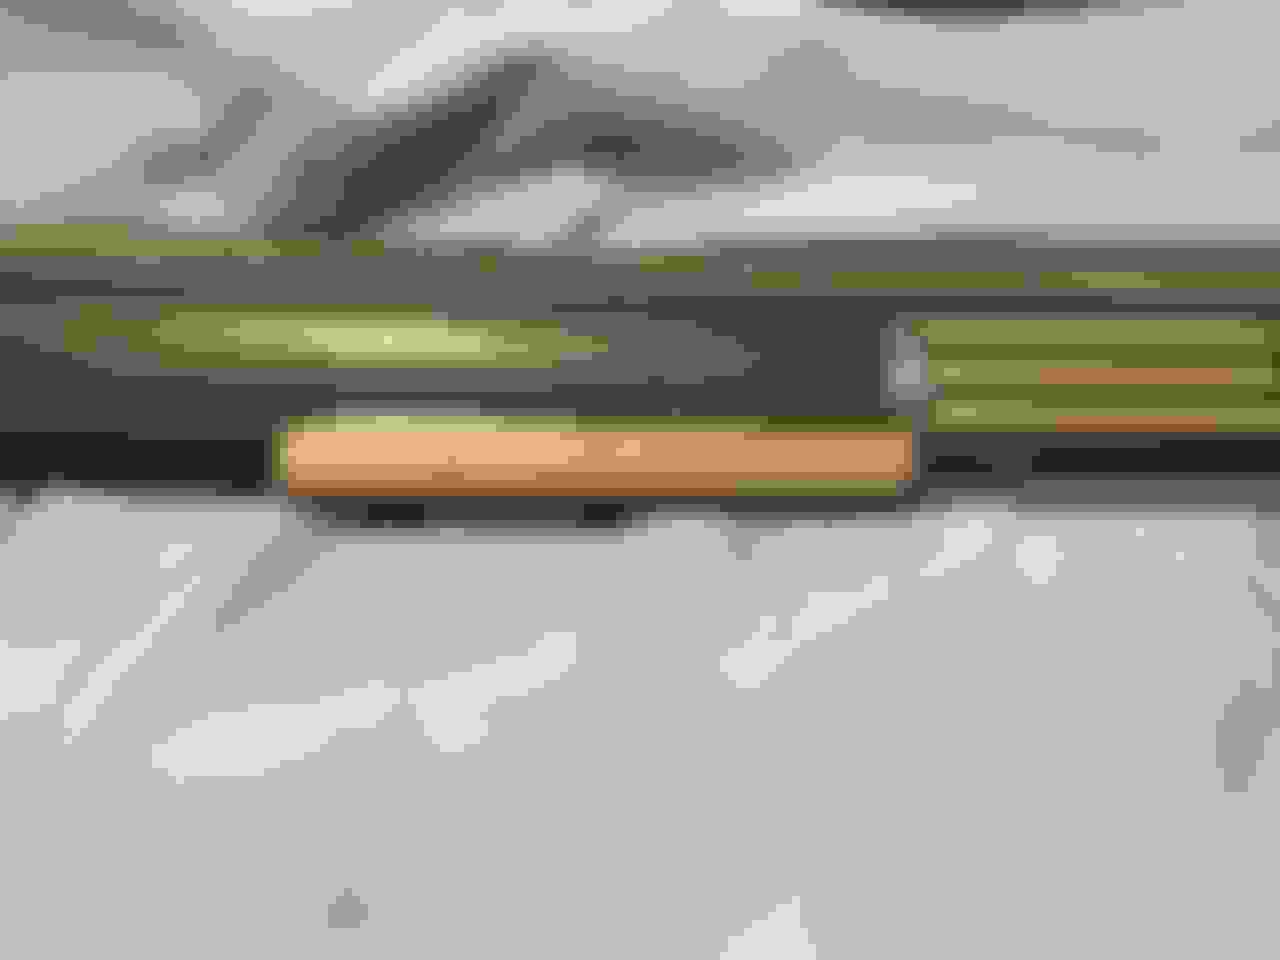
Driver's door garnish molding with the ivory trim. The original is all cracked, warped and deformed after 80 years. The new one is shown ready to test fitness
It fits perfectly well. The grooves need to be a bit deeper, needs sanding and matching the color with the other pieces
The 3 rounded tabs on the back of the trim that fit into the metal holes will be added and then will print the final sample. Or can just glue the trim to the metal base.
I will be happy to share the file with anyone interested for his own restoration. Manuel

 November 6th, 2021, 10:21 PM