Quadrajet rebuild
 May 20th, 2016, 05:39 AM
#81
It's a Cutlass.
Thread Starter

Join Date: May 2014
Location: Colorado
Posts: 265
I should only need one of those, my re-build kit should have one in it (I think). I checked it over quick when I got it two months ago but left it all sealed in the bags until I was ready to go trying to not lose anything.
 May 20th, 2016, 10:01 AM
#84
Connoisseur d'Junque
Join Date: Sep 2010
Location: The Hudson Valley
Posts: 21,183
May 20th, 2016, 10:21 AM
#85
Old(s) Fart
Join Date: Mar 2007
Location: Northern VA
Posts: 47,311
While we can't know for sure what a rebuilder might have used, the 1980s vintage Qjets used a T8 torx screw from the factory to hold the secondary metering rod hanger.
May 21st, 2016, 05:56 AM
#86
It's a Cutlass.
Thread Starter
Join Date: May 2014
Location: Colorado
Posts: 265
What I'm thinking (knowing I know next to nothing about the subject at hand). The spacer was in the car, it ran decent, just some minor issues with the choke and slight fuel leakage. Maybe I could have tightened everything up and sprayed a can of carb cleaner down the throat, worked on the choke a bit and been fine. Since I decided to re-build, it seems like it won't hurt to keep the spacer in, and could help some. I absolutely appreciate and will do my best to follow the tips and vast knowledge gleaned here, but like all things, at times it comes down to opinion so it makes it that much more difficult for the novice to know what to do. I'm not complaining at all, just early morning gabbing.
I will try to post more pictures in the hopes it will help someone else (and me!).
I will try to post more pictures in the hopes it will help someone else (and me!).
May 21st, 2016, 06:02 AM
#87
Old(s) Fart
Join Date: Mar 2007
Location: Northern VA
Posts: 47,311
My gut feel is that in your application, the spacer isn't going to make a noticeable difference one way or the other. The only downside of keeping the spacer is that there is one more potential vacuum leak source (the spacer to intake gasket), which is negligible. The other thing is that when I go back and look at the photos you posted on the first page of this thread, it looks like the spacer may have been installed to provide clearance for the throttle arm on that aftermarket intake.
May 21st, 2016, 06:07 AM
#88
It's a Cutlass.
Thread Starter
Join Date: May 2014
Location: Colorado
Posts: 265
DSCF6090_zpsjztechnv.jpg
DSCF6091_zpst5hejqxx.jpg
there was some fuel, and possibly oil (?) in the spacer cavities. How could oil get in there?
DSCF6091_zpst5hejqxx.jpg
there was some fuel, and possibly oil (?) in the spacer cavities. How could oil get in there?
May 21st, 2016, 06:09 AM
#89
It's a Cutlass.
Thread Starter
Join Date: May 2014
Location: Colorado
Posts: 265
That's kinda what I'm saying, if I were to take the spacer out, what else would I have to adjust/change? My laziness and lack of confidence says keep it in (as long as there's no good reason to leave it out).
May 21st, 2016, 06:11 AM
#90
Old(s) Fart
Join Date: Mar 2007
Location: Northern VA
Posts: 47,311
It's not oil. Most likely is discolored and thickened fuel. The most volatile parts of the gasoline evaporate, leaving the thicker parts behind. Discoloration comes from contact with air, gasket material, etc.
May 21st, 2016, 06:27 AM
#91
It's a Cutlass.
Thread Starter
Join Date: May 2014
Location: Colorado
Posts: 265
ok, good. Now I have a couple more questions. I don't have a vacuum gauge. For the pulloff, if I draw air in with my mouth from the vacuum line and cover the end with my tongue (quit laughing) and it holds for a few minutes, is that sufficient to test it. Or do I need to quit being so cheap and buy a gauge, or new pulloff? Also the lever for the accelerator pump in an earlier picture shows it barely contacts the rod, is it ok to bend the arm a little for more positive contact?
May 21st, 2016, 06:31 AM
#92
Old(s) Fart
Join Date: Mar 2007
Location: Northern VA
Posts: 47,311
ok, good. Now I have a couple more questions. I don't have a vacuum gauge. For the pulloff, if I draw air in with my mouth from the vacuum line and cover the end with my tongue (quit laughing) and it holds for a few minutes, is that sufficient to test it. Or do I need to quit being so cheap and buy a gauge, or new pulloff? Also the lever for the accelerator pump in an earlier picture shows it barely contacts the rod, is it ok to bend the arm a little for more positive contact?
May 21st, 2016, 06:52 AM
#94
Old(s) Fart
Join Date: Mar 2007
Location: Northern VA
Posts: 47,311
May 21st, 2016, 01:28 PM
#95
It's a Cutlass.
Thread Starter
Join Date: May 2014
Location: Colorado
Posts: 265
Hi!
I found the torx bit, only had to spend 7 dollars for a kit. Didn't buy a vacuum gauge, it's complicated. I took a ridiculous amount of pictures, have the air horn and parts off, cleaned, getting close on the fuel bowl stuff. Photobucket is giving me agita, but I'm trying to put some pics up. Meanwhile: the LBMF spring on top of the needle was missing, pretty sure I didn't miss it. How can that be? The new one comes with a spring and I assume the circular part goes on the reduced section on top of the needle. Yes?
I found the torx bit, only had to spend 7 dollars for a kit. Didn't buy a vacuum gauge, it's complicated. I took a ridiculous amount of pictures, have the air horn and parts off, cleaned, getting close on the fuel bowl stuff. Photobucket is giving me agita, but I'm trying to put some pics up. Meanwhile: the LBMF spring on top of the needle was missing, pretty sure I didn't miss it. How can that be? The new one comes with a spring and I assume the circular part goes on the reduced section on top of the needle. Yes?
May 21st, 2016, 01:32 PM
#96
Connoisseur d'Junque
Join Date: Sep 2010
Location: The Hudson Valley
Posts: 21,183
I can't exactly explain it without having it in front of me, but the needle hanger goes on the float in exactly the way that you would think it shouldn't.
I'm sure there are dozens of pictures if you Google it.
- Eric
I'm sure there are dozens of pictures if you Google it.
- Eric
May 21st, 2016, 01:33 PM
#97
It's a Cutlass.
Thread Starter
Join Date: May 2014
Location: Colorado
Posts: 265
May 21st, 2016, 01:34 PM
#98
It's a Cutlass.
Thread Starter
Join Date: May 2014
Location: Colorado
Posts: 265
May 21st, 2016, 01:36 PM
#99
It's a Cutlass.
Thread Starter
Join Date: May 2014
Location: Colorado
Posts: 265
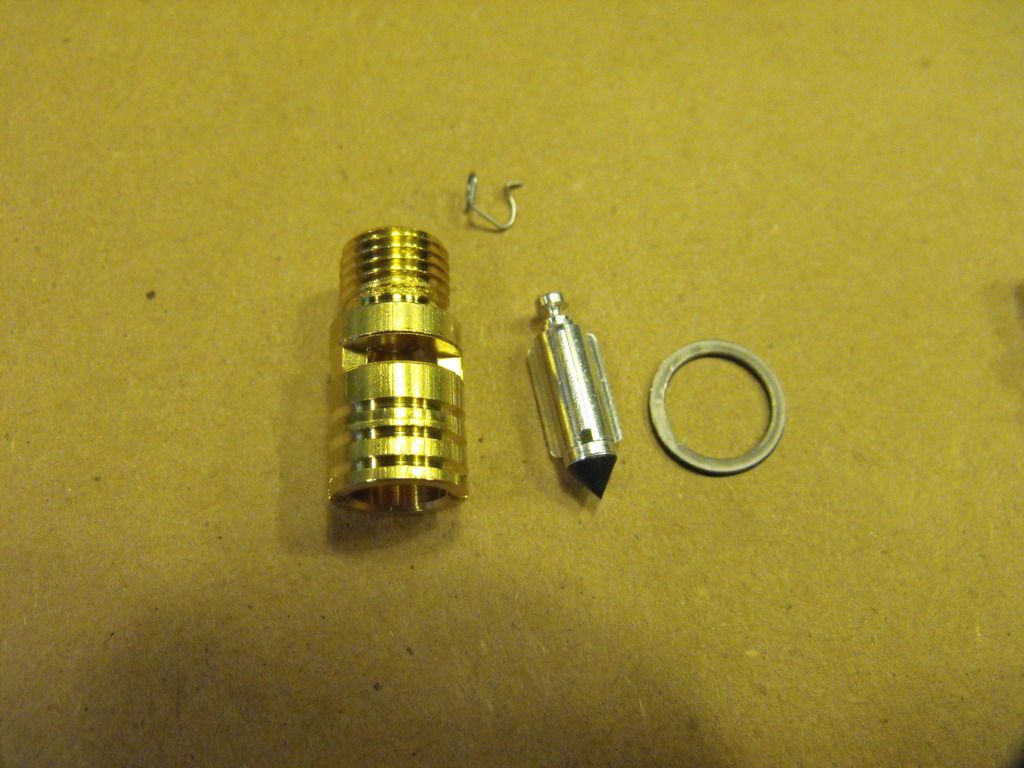
thanks Eric, not sure we're talking about the same thing. The last picture I posted is the part that had no spring, but one is shown in the instructions with the carb kit, as well as provided in the parts. Obviously NOT the spring that rolled into the picture above.
May 21st, 2016, 01:41 PM
#101
It's a Cutlass.
Thread Starter
Join Date: May 2014
Location: Colorado
Posts: 265
more fun pictures.
DSCF6106_zpshuenfhry.jpg
how I remember where some screws go.
DSCF6094_zpsja7u2ufw.jpg
DSCF6106_zpshuenfhry.jpg
how I remember where some screws go.
DSCF6094_zpsja7u2ufw.jpg
May 21st, 2016, 01:43 PM
#102
Connoisseur d'Junque
Join Date: Sep 2010
Location: The Hudson Valley
Posts: 21,183
The two long screws can only go in one place.
The two countersunk screws can only go in one place.
All the other screws go everywhere else.
I don't think I've ever seen a metal shim where the float pivot goes.
There were many minor construction variations, but I don't think that's one of them.
- Eric
The two countersunk screws can only go in one place.
All the other screws go everywhere else.
I don't think I've ever seen a metal shim where the float pivot goes.
There were many minor construction variations, but I don't think that's one of them.
- Eric
May 21st, 2016, 01:44 PM
#103
It's a Cutlass.
Thread Starter
Join Date: May 2014
Location: Colorado
Posts: 265
ah, what's the hardest thing for people to do effectively? Communicate... It's me I know.
Not the hangar, not the pump dischare ball and retainer, the other thing above those. In the kit, and in the exploded view, there is a very small wire, I call it a spring, maybe it's some sort of retainer. There wasn't one in my carb. I'll take a picture of the new parts.
Not the hangar, not the pump dischare ball and retainer, the other thing above those. In the kit, and in the exploded view, there is a very small wire, I call it a spring, maybe it's some sort of retainer. There wasn't one in my carb. I'll take a picture of the new parts.

 May 21st, 2016, 01:51 PM
#107
It's a Cutlass.
Thread Starter
Join Date: May 2014
Location: Colorado
Posts: 265
May 21st, 2016, 01:51 PM
#108
Connoisseur d'Junque
Join Date: Sep 2010
Location: The Hudson Valley
Posts: 21,183
 May 21st, 2016, 01:53 PM
#110
It's a Cutlass.
Thread Starter
Join Date: May 2014
Location: Colorado
Posts: 265
ok, so it was me, not knowing the correct terminology. Thank you so much for your patience and help here. I still don't know how mine was not there, the springy part, cuz below is what came out, unlesDSCF6112_zpse41zg6va.jpgs it flew away while I wasn't watching.
May 21st, 2016, 01:59 PM
#112
It's a Cutlass.
Thread Starter
Join Date: May 2014
Location: Colorado
Posts: 265
I need to buy you a beer! And a shot.
Seriously, if I get this done and running, it's only because of you and several other people here guiding me on e baby step at a time.
Thanks again.
Seriously, if I get this done and running, it's only because of you and several other people here guiding me on e baby step at a time.
Thanks again.
May 22nd, 2016, 08:52 AM
#114
It's a Cutlass.
Thread Starter
Join Date: May 2014
Location: Colorado
Posts: 265
Good morning.
I'm now in the cleaning, adjusting, trying to understand all the parts before putting them back together stage. More questions of course. Maybe I'm just lucky but there seems to be no slop or play in the primary or secondary throttle shafts, even though they have not been bushed. But, in the secondary flaps, I can see light around the edges when it's closed. Having some machining background, I think it would be ok to lightly stone the flaps in the contact areas and I have started doing so making some improvement already. I am using a marker to find the high spots. I am very lightly stoning them. Before I get carried away I wanted to ask if this is a good idea or not..
Also, I may be blind but in the kit directions there is a part called an aneroid assembly and I am not seeing one in this carb. Am I crazy? Sorry if these are extremely dumb questions, I can call Cliffs if it's getting too frustrating for y'all.
May 22nd, 2016, 09:00 AM
#115
Old(s) Fart
Join Date: Mar 2007
Location: Northern VA
Posts: 47,311
Good morning.
I'm now in the cleaning, adjusting, trying to understand all the parts before putting them back together stage. More questions of course. Maybe I'm just lucky but there seems to be no slop or play in the primary or secondary throttle shafts, even though they have not been bushed. But, in the secondary flaps, I can see light around the edges when it's closed. Having some machining background, I think it would be ok to lightly stone the flaps in the contact areas and I have started doing so making some improvement already. I am using a marker to find the high spots. I am very lightly stoning them. Before I get carried away I wanted to ask if this is a good idea or not..
Also, I may be blind but in the kit directions there is a part called an aneroid assembly and I am not seeing one in this carb. Am I crazy? Sorry if these are extremely dumb questions, I can call Cliffs if it's getting too frustrating for y'all.
I'm now in the cleaning, adjusting, trying to understand all the parts before putting them back together stage. More questions of course. Maybe I'm just lucky but there seems to be no slop or play in the primary or secondary throttle shafts, even though they have not been bushed. But, in the secondary flaps, I can see light around the edges when it's closed. Having some machining background, I think it would be ok to lightly stone the flaps in the contact areas and I have started doing so making some improvement already. I am using a marker to find the high spots. I am very lightly stoning them. Before I get carried away I wanted to ask if this is a good idea or not..
Also, I may be blind but in the kit directions there is a part called an aneroid assembly and I am not seeing one in this carb. Am I crazy? Sorry if these are extremely dumb questions, I can call Cliffs if it's getting too frustrating for y'all.
Aneroid assembly? Are you talking about the hot idle compensator that's located on the rear of the carb main body, facing the firewall?
Also, if you haven't done it, download the PDF provided way back in post no. 3 of this thread and read it.
May 22nd, 2016, 09:10 AM
#116
It's a Cutlass.
Thread Starter
Join Date: May 2014
Location: Colorado
Posts: 265
yes, the throttle plates. As I read in the instructions provided by Cliff, "the secondary throttle plates MUST seal tightly in the bores to avoid a vacuum leak...."
Yes, I admit I haven't read the whole of the PDF. I will study it further.
As to the aneroid, I am only using the terminology stated in the instruction sheet. It does have parenthetically (spacer 1976) so maybe that is moot as this carb has obviously had work done to it in the past.
Thank you again sir.
May 22nd, 2016, 09:16 AM
#117
Connoisseur d'Junque
Join Date: Sep 2010
Location: The Hudson Valley
Posts: 21,183
If the aneroid is the idle compensator, your carb doesn't have one, so don't worry about it - there's a rectangular space on the rear surface where it could go if the carb were machined for it.
And, +1 on the throttle plates, in the throttle body, having to seal tightly - these are the lower plates, and not the flaps at the top, in the air horn, which do not seal.
I have never seen secondary throttle plates that do not seal, by the way, though their shaft may be being stopped by another part on the outside of the carb.
- Eric
May 22nd, 2016, 09:24 AM
#118
It's a Cutlass.
Thread Starter
Join Date: May 2014
Location: Colorado
Posts: 265
well, as I hold the throttle body up to the light, there is absolutely some light coming through when fully closed. I was allowing them to snap closed right or wrong. It's probably in the under .010" range and some light stoning on the plates has improved that already. The plates do not close completely horizontal and I understand that would not be ideal, just trying to make it better without damaging. Thanks for verifying the acceptable lack of the idle compensator/aneroid.
May 22nd, 2016, 09:32 AM
#119
It's a Cutlass.
Thread Starter
Join Date: May 2014
Location: Colorado
Posts: 265
ok, my calibrated eye is a little off. A small piece of paper is snug in the "gap" I'm talking about so probably in the .002"-.004" range, still better than it was. I simply polished the machining or casting marks on the plates.
edit: not casting marks, maybe punch press marks.
P.S. I downloaded and saved the PDF. Thank you Dalilama.
edit: not casting marks, maybe punch press marks.
P.S. I downloaded and saved the PDF. Thank you Dalilama.
Last edited by jeff in colorado; May 22nd, 2016 at 09:36 AM.
May 22nd, 2016, 02:50 PM
#120
Old(s) Fart
Join Date: Mar 2007
Location: Northern VA
Posts: 47,311
The actual throttle blades can be adjusted in the bores. Loosen the screws holding the blades to the throttle shaft, hold the shaft all the way closed, and tighten the screws. DO NOT fully remove these screws from the throttle shaft, however. The ends are staked (so they can't back out and get sucked into the engine) and if you try to unscrew them completely without filing off the staking, you will snap the heads off.
DO NOT ask me how I know this...


