When you click on links to various merchants on this site and make a purchase, this can result in this site earning a commission. Affiliate programs and affiliations include, but are not limited to, the eBay Partner Network.
So for the past 35 years or so I've been trying to get my '66 98 grille to look nice. But I could never really get the all those corners clean. And mine's been rattling slightly for years on bumps - one of those little noises that get under your skin. I've spent days chasing those rattles, but never really solved it. Yesterday I grabbed my spare grille from under the house and got going on restoring it.
In '66 Olds used aluminum on the 98's in what was called an eggcrate pattern. The '66's look similar to '65 so what I write here may apply to 65 98's too. The stoneshield quieting stuff below would apply to all of the big cars from '66 and maybe beyond.
Anyway with a '66 98 grille, you start with 4 major pieces: the eggcrate aluminum grille itself, and 3 pieces of silver colored steel stoneshield which attach underneath the grille and slip beneath the bumper as a filler. The grille is attached to the radiator core support with a bunch of 1/2" head screws. They're pretty straight forward, but you have to pull the battery and other stuff to get at some of them. What's tricky is to get to the grille, the easiest way is to remove the stoneshield and that means removing the front bumper. You can do it with the bumper on, but access is way easier with the bumper off.
Looking at the grille from the rear, you can see how it's built: 16 vertical pieces can be removed without too much effort.
Once you have the grille out, if you look at the rear, you'll see that the vertical parts are "swaged" in. They're press fitted into the horizontal pieces and then Olds just punched a piece over the end to hold the verticals in place. When I was done polishing & spraying, I put new swages in at the bottom of the grille where they won't be seen. Like this: '66 98 Grille vertical pieces viewed from the rear. Press fit then hammer an ear to hold them in place.
I spent an hour or so cleaning without disassembling, but I couldn't get it really clean. Eventually I cut the old swages in the center horizontal section and used a plastic drift to hammer the vertical pieces out through the rear. That was the big leap.
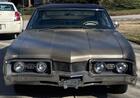
Next was a 4 or 5 hours of sanding and buffing aluminum. It's not perfect, but it's clean for the first time in forever. After polishing, I taped off the horizontal and vertical pieces and resprayed the "dull" contrast areas with 2 coats of Krylon Metallic Aluminum. It's not the best match, but now the front of the car looks consistent and clean:
The stoneshield is attached to the underside to the grille with 6 1/4" hex head screws fastened into J speed nuts. Several of mine were stripped/broken which contributed to rattling. The left & right extensions are screwed with 6 x 1/2" head screws to the radiator support and to the center piece with 4 phillips screws. The phillips screws go through slots so you can adjust the right/left position of the extensions when reinstalling. The stoneshield is just a piece of thin steel and it's prone to rattling, so when I reinstalled, I lined the underside and backside of the extensions with a length of cloth tape. I also lined the top rear 1/4" of the center section in a hidden neat line to isolate the grill underside from rattling against the center stoneshield. Line the stoneshield underside & rear with something to minimize rattles. I used cloth tape with cutouts for the bolt holes
Of course once, you're this deep in the might-as-well's creep in. In my case, I resprayed radiator core support, the headlight buckets and bezels with Satin Black to get a consistent look. The stainless steel bezels were a taping project in themselves, but light duty. Also since the bumper was off, I steel wooled it with #0000 and waxed it up and tightened various bolts on the back side. I even dug around in my collection of bolts to get all the screws in similar places to be consistent length and heads. I wound up replacing a bunch of J nuts too just to make sure things were tight and (hopefully) rattle free.
Anyway, it's not perfect, but it's clean & presentable. I could have gone way off the deep end on getting the aluminum just perfect, but I figured it would look out of place on a car with 25 year old paint. Clean & tight is good enough for me.
Hope this helps some of you along the way. It's great how repairable these cars are.
Great write-up and photos. You sir have inspired me to finally do something about my presentable but something far less than complement worthy '67 grill. Great work and something to be proud of.
A rechromed '66 Starfire grille that taught me about how to disassemble '66 Oldsmobile grilles. The Starfire has no swaged pieces whatsoever, just a bunch of 3/8's head screw holding 2 pieces together. When I went to get it rechromed, I finally looked at how it was put together.
That was the inspiration for the disassembly of the '66 98 grille as seen above.
Anyway if ever you wanted to rechrome a '66 Starfire grille, here's how it will come out. The center should not be shiny per factory, but is after rechroming.
The only major flaw is that the center Starfire emblem is supposed to flat/brushed, not shiny, but I can live with this difference since the rest of the piece looks almost liquid. Like that guy in the Terminator movie...
Anyway hope some of you like this redone piece as much as me.