


Cutlass in South Florida


Thread Starter
Registered User
Joined: Jul 2012
Posts: 12
From: Loxahatchee, Florida
Cutlass in South Florida
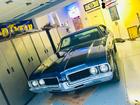
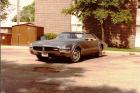
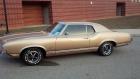
Hello everyone. This is my first post on any forum. Although I’m new to forums I’ve been around Oldsmobile for over thirty years. Born a gear head and have passed it down to one of my sons. I purchased a 1971 Cutlass Supreme convertible back in 1978 for $250, and still have it today. I restored it back then with my father and gave it to my Mom as a wedding anniversary gift. 17 years later she gave it back to me. She used it to run to grocery store and racked up 15,000 miles. After I got it, the Cutlass sat for a while until my 16 year old son Matthew prodded me to restore it with him. What could I say. We had a good time doing a quickie restore job, enough to get it looking good enough for him to drive it to the prom. Since then Matthew and I have completed his own car restorations. A 1969 Firebird convertible and a 1971 Buick Skylark GS. The Cutlass has been waiting her turn. The time has come and I’m working and spending money on the Cutlass. The restoration will be in two major parts. The first section that’s underway is Interior and all mechanical. Second in a year or two, is replace ALL the sheet metal. The car originally had a 350 and now will have a FAST injected Olds 455. It will have lots of modern upgrades to make it a fun car to use anytime such as, Vintage Air, Painless wiring, Hotchkis suspension, Aluminum radiator with electric fans, modern comfortable seats and many custom touches. I don’t hire any mechanics, or paint and body shops. I do it all with help from this forum. Tim
Last edited by Gofishth; Aug 7, 2012 at 04:55 PM.
Just an Olds Guy
Joined: Jul 2008
Posts: 24,528
From: Edmonton, AB. And "I am Can 'eh' jun - eh"
Welcome Aboard!
Cutlass looks really nice in that photo. Cool car for a kid to drive to grad!
Looking forward to your build threads.
BTW, why replace ALL the sheet metal? Just replace what needs it. There are plenty of patch panels now, and some of the after market fenders aren't the greatest for fit.
Cutlass looks really nice in that photo. Cool car for a kid to drive to grad!
Looking forward to your build threads.
BTW, why replace ALL the sheet metal? Just replace what needs it. There are plenty of patch panels now, and some of the after market fenders aren't the greatest for fit.
Thread Starter
Registered User
Joined: Jul 2012
Posts: 12
From: Loxahatchee, Florida
Sheet metal
The cutlass has had lots of patch panels and bondo throughout the years. This car will never be sold by me. It will be passed along. Therefore it's kind of like I want to make it last. As everyone knows, GM never put much effort into rust prevention. Now is my chance to make it last. Fitting the crappy new panels will be a challenge, but I'll only have to do it once. For now, Im going to make it reliable and fun. I'm not sure how to post the build pictures but I'll work on it.
Just an Olds Guy
Joined: Jul 2008
Posts: 24,528
From: Edmonton, AB. And "I am Can 'eh' jun - eh"
* clik the 'go advanced' tab
* Press the icon that looks like a paper clip; and A 'Manage Attachments' box will appear
* Choose (navigate on your computer to where the pics are stored) and hit 'open'. repeat for all 5 pics.
* Hit 'upload'. It may take a bit of time depending on your pic resolution. If you have ultra high res, you will have to 'resize' them with your picture editor to a 1024X768 size for the C.O. server to accept them.
* Close the "manage attachments' box.
* Preview your post and the images will be at the bottom
* Hit 'submit post' and the thread will have the images installed at the bottom. Unfortunately you can only do 5 pics at a time this way.
If you have the pics hosted on another web server?
* Copy the IMG url and Press the icon that looks like an envelope with mountains on it. Paste the URL into that box and hit 'ok'. You can install up to 20 images this way.
* Be sure to preview your work.
* Make sure the images don't carry on across the page, stack them for easier viewing.
Hope this helps.
* Press the icon that looks like a paper clip; and A 'Manage Attachments' box will appear
* Choose (navigate on your computer to where the pics are stored) and hit 'open'. repeat for all 5 pics.
* Hit 'upload'. It may take a bit of time depending on your pic resolution. If you have ultra high res, you will have to 'resize' them with your picture editor to a 1024X768 size for the C.O. server to accept them.
* Close the "manage attachments' box.
* Preview your post and the images will be at the bottom
* Hit 'submit post' and the thread will have the images installed at the bottom. Unfortunately you can only do 5 pics at a time this way.
If you have the pics hosted on another web server?
* Copy the IMG url and Press the icon that looks like an envelope with mountains on it. Paste the URL into that box and hit 'ok'. You can install up to 20 images this way.
* Be sure to preview your work.
* Make sure the images don't carry on across the page, stack them for easier viewing.
Hope this helps.



Registered User
Joined: Jun 2010
Posts: 169
From: Houston, Tx
Thread Starter
Registered User
Joined: Jul 2012
Posts: 12
From: Loxahatchee, Florida
Speedhut. I hope to install them in the same location of the factory gauges so they wont be too noticeable that they aren't factory. The pictures are the proofs. I'll post some picture when I get them.

Thread Starter
Registered User
Joined: Jul 2012
Posts: 12
From: Loxahatchee, Florida
455 is back home
Well, the engine and transmission went back in today. It's so nice to see an engine in the Cutlass. It's been empty since October 2010. I also worked on the dash some. I'm having a hard time getting the silver accent to come out ok. Ive tried painting and taping and it just isn't good enough. I ordered a silver Testors paint pen and hope it will work.
Just an Olds Guy
Joined: Jul 2008
Posts: 24,528
From: Edmonton, AB. And "I am Can 'eh' jun - eh"
Looking good.
Just curious about the gauges. I know they're proto, but where will the tach red line and how do you plan to calibrate the 160mph speedo? Will the car even be capable of that speed? Are you adding a trip meter below the odometer? Curious because of the large cutout area there.
The gauges will be noticeable to an Olds guy, but I will say they have a very nice theme. I like the look better than Dakota digital. How much does Speedhut charge for custom work like that?
Just curious about the gauges. I know they're proto, but where will the tach red line and how do you plan to calibrate the 160mph speedo? Will the car even be capable of that speed? Are you adding a trip meter below the odometer? Curious because of the large cutout area there.
The gauges will be noticeable to an Olds guy, but I will say they have a very nice theme. I like the look better than Dakota digital. How much does Speedhut charge for custom work like that?
Thread Starter
Registered User
Joined: Jul 2012
Posts: 12
From: Loxahatchee, Florida
The tach is adjustable as far as redline. The speedometer is gps. It's suppose to adjust speed 4 times a second. The speedometer has a trip, 1/4 mile, 0-60 and more stuff than I need. All the gauges come with senders and wiring. I will post pics and info when I get them installed.
Just an Olds Guy
Joined: Jul 2008
Posts: 24,528
From: Edmonton, AB. And "I am Can 'eh' jun - eh"
Sounds really neat. Just hope you don't end up driving in an area where you lose satellite reception or there are bad storms - then you will have no speedo. Otherwise I really like your ingenuity on this. Will be watching for your installation pics.
Thread Starter
Registered User
Joined: Jul 2012
Posts: 12
From: Loxahatchee, Florida
New gauges arrived
The gauges arrived and they exceed my expectation. They look awesome. I was hoping the cutlass bezel would fit inside the gauge bezel but it looks like I'll need to make a little modification to the cutlass bezel. The GPS speedometer has a bunch of nice features including 0-60 and 1/4 mile times, along with clock, compass and elevation. The tach has an adjustable shift light and red line. The quad gauge has warning lights that are fully adjustable for highs and lows. Can't wait to start fabricating this weekend if the hurricane stays away.
Just an Olds Guy
Joined: Jul 2008
Posts: 24,528
From: Edmonton, AB. And "I am Can 'eh' jun - eh"
I agree the gages look incredible. Instead of cutting the original bezel though, why not fabricate one to suit your needs and just keep or sell the OEM one? Use the original to create a cardboard template. You could prolly fabricate a metal dash and trim in out in whatever appearance style really works for you. Several of the guys here have modified their interiors to suit a newer and more aggressive theme. (brushed metal, carbon fibre).
Thread Starter
Registered User
Joined: Jul 2012
Posts: 12
From: Loxahatchee, Florida
Dash and new gauges are in
It took a lot of fabricating to get the gauges to look like I wanted and I am very pleased. Spent about 6 hrs fabricating a piece of plexiglass to hold the gauges in the original locations. Installed all the duct work points for the vintage air and the controller. Spent a weekend also setting up the painless wiring harness and the new braided loom. I'm getting excited to see it all go together. It just seems to take forever when I can only spend a few weekends a month. The picture in the ashtray compartment shows the gauge lighting adjustment control. I'm turning that compartment into spot for my i-pod. The stereo will go in the center console.

Thread
Thread Starter
Forum
Replies
Last Post
jeffreyalman
General Discussion
7
May 27, 2009 06:27 PM


