When you click on links to various merchants on this site and make a purchase, this can result in this site earning a commission. Affiliate programs and affiliations include, but are not limited to, the eBay Partner Network.
I have my blue 442 convertible very close to completion now and I was feeling the need for another project, so I bought another 70 442 convertible. I had a great time doing the blue car and learned a ton from the great folks on this forum so I thought I'd do a build thread this time in the hopes of maybe paying some of that help forward. I apologize in advance for what may be a long first post.
History
The car was built in Linden New Jersey on Jan 6, 1970. I am really fortunate to have the build sheet (pic below) although some of it is impossible to read and the lamination done by a previous owner makes it even worse. It was a customer order from Herbert Rosenstock Inc. on 7th Ave in NY. If anybody has any details on this dealer, I'd love to see them. It was direct shipped to Car Services Inc. in Fairview NJ. I'm assuming that this was a limousine service. It seems unlikely that it was used in that service so it was probably the owners personal car. I can find no records for the car until late 1981 when it was transferred from an owner in Texas (DFW area) to a second Texas owner. This owner kept meticulous records of the car including the notes people left on the windshield trying to buy it! The car was then transferred to a third Texas owner who drove it until about 2005 when it was taken off the road and a rotisserie restoration was begun. The project was never completed (the same time/money story you hear on project cars all the time) It's next owner was in PA where it sat untouched for about 5 years. I bought it as shown below, along with boxes of parts, about 4 weeks ago and trailered it back to GA.
Car Details.
It's kind of an odd car actually. Sherwood green with saddle interior and white top. I'm assuming it had white stripes but I don't know the stripe codes on the build sheet - maybe someone can decipher that for me? It was pretty well equipped for a car of that age. PS, PDB, Power windows, auto trans, AC Sport Steering wheel, Accessory Package and a few things I can't decipher on the build sheet
Previous Owner Restoration.
Some good, some not so much. Apparently, he had a thing for gloss paint. Everything that could be painted was painted gloss. Even the metal portion of the dash is gloss brown! I suspect he would have really regretted that decision had he ever driven the car. The firewall, the control arms, the inner fenders, the core support, the fan shroud, the brake pedal and e brake assemblies all gloss black. the frame is powder coated in gloss black. Both the underside of the car and the interior have been sprayed with an undercoat/sound deadener material. This may well be the quietest 442 convertible ever built! As a NJ car it's no surprise that both quarters in inner wheelhouses have been replaced along with the trunk floor. Both front fenders - the correct 70 style - have lower patch panels. The doors and the rest of the structure appear original and untouched. The bodywork actually all looks pretty good and has held up well since it was painted over 10 years ago. The paint itself was a decent two stage job but will need to be redone.The stripes on the car are wrong and were not very well done so they will definitely be redone. The engine (non-original but date code correct) was rebuilt. The trans is numbers matching and also rebuilt.
My plan
I already have a trailer queen so this one is being built to drive. The pics below show the car the way I bought it minus all of the boxes. I've already made a few decisions but more are in the future. The car came with a tan top that was installed in the late 90's. It will be replaced with an original style white one. The interior will definitely be changed to white. The kit is already on order from Legendary. As for the body color - I really haven't made up my mind. With apologies to those that like it, Sherwood Green is absolutely my least favorite 70 Olds color. Not sure what the final color will be but it won't be green.
I have already begun pulling the sheet metal off the car. This week, I will get it up on the lift and get a really good look at it underneath for the first time. Hopefully, other than all that gloss paint on everything, there won't be any nasty surprises. The body stays on. The engine and trans will come within the next two weeks and then it will be off to the body shop. They will remove the stripes, scuff or remove all that gloss paint and reblock the entire car. They will seal coat and prime it and reblock it. At that point, I will get it back again.
While it's at the shop, i will be very busy grinding off powdercoat and paint on lots of parts to get it closer to the way I want it. There is a ton of details that need to be changed to more correct.
Please follow along and ask questions. I will be needing advice along the way. I'm looking forward to the journey.
This car was being sold here several years ago for 10K - I then saw it pop up on 442.com about 6 months ago for 17K. Hopefully you got it on the lower end. I am not a fan of the green either, but green with a white top, interior, and stripes will look great
This car was on Classic Olds about 6 years ago for $15k. I don't know what it actually sold for. It was on 442.com (until the site disappeared) for $25k. I didn't pay anywhere near that for it.
I delivered the front fenders and decklid to my body shop on Saturday. I will be spending the next week or so stripping out the rest of the body including the engine and trans and then the body will go to the shop so they can get started. My body guy is coming to my place on Saturday to go over the car in detail and help build a plan. I'm looking forward to getting started.
Slow progress on the build. I have the engine and trans out. Stripped out most of the wiring. Pulled the sway bars and a few suspension pieces. I wanted to leave the steering column in and connected for now as it's much easier to get to the body shop that way. Will also pull the booster after the column is out.
Now it's off to the body shop. Probably won't be too much activity on it over the next few weeks as I have some small projects to wrap up on the blue car. Then lots of cleaning getting it ready for Gettysburg. It's amazing how much dust and dirt they can accumulate even when you are not driving them!
I am going to put my recommendation in for a black paint job. It's popular, and it may be more "mentally acceptable" than some other bright color other than green as it's less of an opposite.
When this came up six years ago I came close to buying it. The only thing that kept me away was the motor wasn't matching numbers. Funny part is when I was in my 20's I restored two of these, one convertible, and one W30 and neither had the correct motor. I guess the older you get the more **** you become
Thanks. The car is pretty solid with mostly original sheet metal.
Koda,
I am actually leaning towards black. Some of the bodywork will need to be redone because it just isn't good enough for a black paint job. My body guy tells me it will add about $2k to the cost of his work but I think it mighty be worth it.
You're right, it's not matching numbers on the motor but the trans is. The engine that came with the car is date code correct though. By the time I add all date coded parts to it, I don't know how much difference it really makes. Because of the engine, I know it will never be a #1 car so I'm not trying for that. I really want a very nice driver.
You know, I keep looking at the Sherwood Green on the car, and like it more and more. That color, with a white interior, white top, and SS1's with whitewall tires would be a pretty combo. Good Luck whichever way you go!
I too like the Sherwood green, was never a real fan of it in my younger years but white against green is a great combo and you don't see green cars much anymore. Most paint them red or black. I for one love a triple black car but green with white interior - seldom seen
Thanks for the comments but for me the green ship has pretty much sailed.. I've done almost nothing in the car for the last few weeks - except spend money that is! The body shop has been making good progress though. Their work has been mostly going over and fixing a few small issues with the prior work that was done. They tell me that by the time i get back from Gettysburg, they should have the car in primer.
I have suffered an attack of the MAW's though. Like costpenn's latest project, I was absolutely not going to take the body off the frame but the more I looked at the gloss black everywhere under the car and the condition of the brake and fuel lines, I decided that I just couldn't live with it. We are going to lift the body just enough to get the painting done, replace the lines and put in new, correctly painted body mounts. It's more than I intended to do but should look good when it's done
It's more than I intended to do but should look good when it's done
Only to you and those crawling on their hands a knees
Yep, tough decision but at this point it really isn't much of a MAW. Car is at body shop, not a lot to lift off and that's the really the best (and olny) way to properly replace the lines.
Between the Nationals, long hours at work and a vacation thrown in for good measure, progress on the car has been pretty slow. Time now to get back at it.
With everything disassembled and the body off to the body shop, where do you start? I suppose it's different for every car but in this case I chose to start with the transmission. I started there for a couple of reasons - it's already been rebuilt by a previous owner so the work is pretty straightforward and, it's sitting on a cart that I need for other projects!
Because it had already been rebuilt, one of the first decisions, whether to paint it or go with natural look, had pretty much been made for me. It was filthy so the first step was just to get it cleaned up. After that, I went over it with various wire wheels and a scotchbrite pad to clean up all the gunk in the tight spots and remove as much of the loose paint as possible. Then, every part that could be removed was, all the holes were temporarily plugged and it was all given a final, thorough cleaning.
The fluid had been drained while still in the car so the next step was to flip it over and pull the pan. After cleaning I took off any remaining old paint and scuffed all of the surfaces with the scotch brite. I really like the bare steel look and for me anyway, the best paint I have found to match it is the Rustoleum Dark Steel. I used quite a bit of it on my last car and will on this one as well. My only complaint, as Costpenn and others have noted, is that it is very slow drying. You really cannot plan on doing anything with the part for a couple of days as the paint will stay soft for that long. From here I repainted the entire case in Eastwood Aluma Blast.
From there I went on to all of the other various parts. I had an old style vacuum modulator so that got repainted black. Dipstick Tube was prepped and painted Eastwood Bare Steel. This paint is a darker grey that does look like bare steel to me but I like the look on dipstick tubes and a few other parts. Both the governor cover and the modulator hold down bracket were painted using the dark steel paint. I have seen the mod bracket in almost a phosphate looking color as well but chose to use the steel paint on it. The trans mount pad was thoroughly cleaned and refinished. All bolts were redone in Eastwood phosphate.
Just like my blue car, I found evidence of an OG stencil on the side of the trans. This one appeared to have originally been yellow - the other car was kind if a teal color. I had the local Fast Signs shop make a stencil of it so I put that on next and painted over it with a soft yellow paint. I think it cam out pretty well. This is one of those things that is probably a little over the top since once the trans is back in the car, no one will ever see it. But I know it's there and adding the detail doesn't really take that much extra work.
The final step, for now at least, was to put the OG decal (thanks Hairy Olds) back on the tag. It still needs to be trimmed up on the edges and the rivet but I will do that later.
Got it all reassembled and pretty much ready to go back in the car. The torque converter that came with it was a small diameter, high stall type of unknown manufacturer and quality. It will not be going back in the car as I have ordered a new 2000 rpm converter from Summit
Have you decided on colors yet?
Since this one is meant as a driver and concessions to drivability? I had repro wide ovals on mine which looked great, but I couldn't stand the way they drove. I came to the realization I was using the car less because of them. I put them to the side for show duty & got some radials to drive on.
Believe or not I had never taken a car to a major show like the Nationals before. My wife and I had a great time despite the weather not quite being ideal. I managed a First Pace award with the blue car but missed BOC by a few points. A couple of the lost points were pretty painful as they were dumb mistakes on my part. A couple of them, like the missing convertible boot bag and the missing hole in the air cleaner snorkel (I thought only CA cars had them) were learning moments.
It feels good to be working on it again. I think I'm kind of like you and really enjoy working on all those little detail things that a lot of people will never see or recognize.Thanks for the compliment
droptopron,
Yeah, the color decision has been made. I was going to keep it a secret until the paint was done but since you asked - the car will be black with white top, stripes and interior. I hope it looks good when finished. The body guy says it will cost more but he's pretty excited about doing it.
As to driveability, there likely will be a few concessions along the way. You hit the big one. I will likely try the new Firestone radials from Coker instead of the same thing in a bias ply. I had forgotten how bad bias ply tires are until I put a few miles on my car at the nationals.
Seriously on the hole in the air cleaner base? Not all cars had that hole, however, the bulk of them did. There are a few original examples out there without the hole in the snorkel base. My gold W-31 being one of them.
The main thing is you and your wife had a good time doing something you love. It is easy to lose sight of that - ask me how I know.
I did not know anything about the boot bag being required to be shown during judging but I have never taken a vert to Nationals. Are you supposed to display it in the trunk?
They did say the booth bag should be displayed in the trunk. My car was the first to be judged in the convertible class. One of the other guys in the class overheard the judges talking about it and ran over to the swap meet and bought one. At least I saved him a point!
I may have been slacking off on my project but the body shop didn't. I was able to pick the car up this weekend and am pretty happy with where it's at so far.
The car had new quarters installed by the previous owner and generally speaking, the work was pretty solid. There were some issues with the finish work though so I had all of those addressed. The weld seems inside the trunk weren't especially good so I had those addressed. Also, there was some poorly finished weld seems on the D side outer wheelhouse so that got fixed as well. The factory welds on top of the quarters by the decklid were poorly done at the factory (pretty common) and were cracking so that was all ground out and completely redone. Since the car is going to be black, everything needs to be perfect so a lot of time was spent filling and blocking everything.
The PO had the car on a rotisserie and while it was there he sprayed everything inside and under the car with a sound deadener/undercoat. It's not something I would have done but it was also waaaay too much work to remove so, for the most part I left it alone. The inside will be completely covered anyway so it really doesn't matter that much. The underside though was all nice shiny black which I just couldn't stand. the body shop lifted the body enough to scuff lightly and reshoot the entire underside of the car with a semi gloss clear so that at least it isn't as reflective any more.
While the body was lifted, they also scuffed and reshot the frame with a much more acceptable satin finish paint. Even though the body mounts were new, I had them all pulled and replaced with a new set with the proper painted finishes. They also pulled the old fuel lines but for reasons that have still not been adequately explained to me, didn't put the new lines in before they put the body back on the frame!. I guess we will be lifting the body again the next time the car is at the shop.
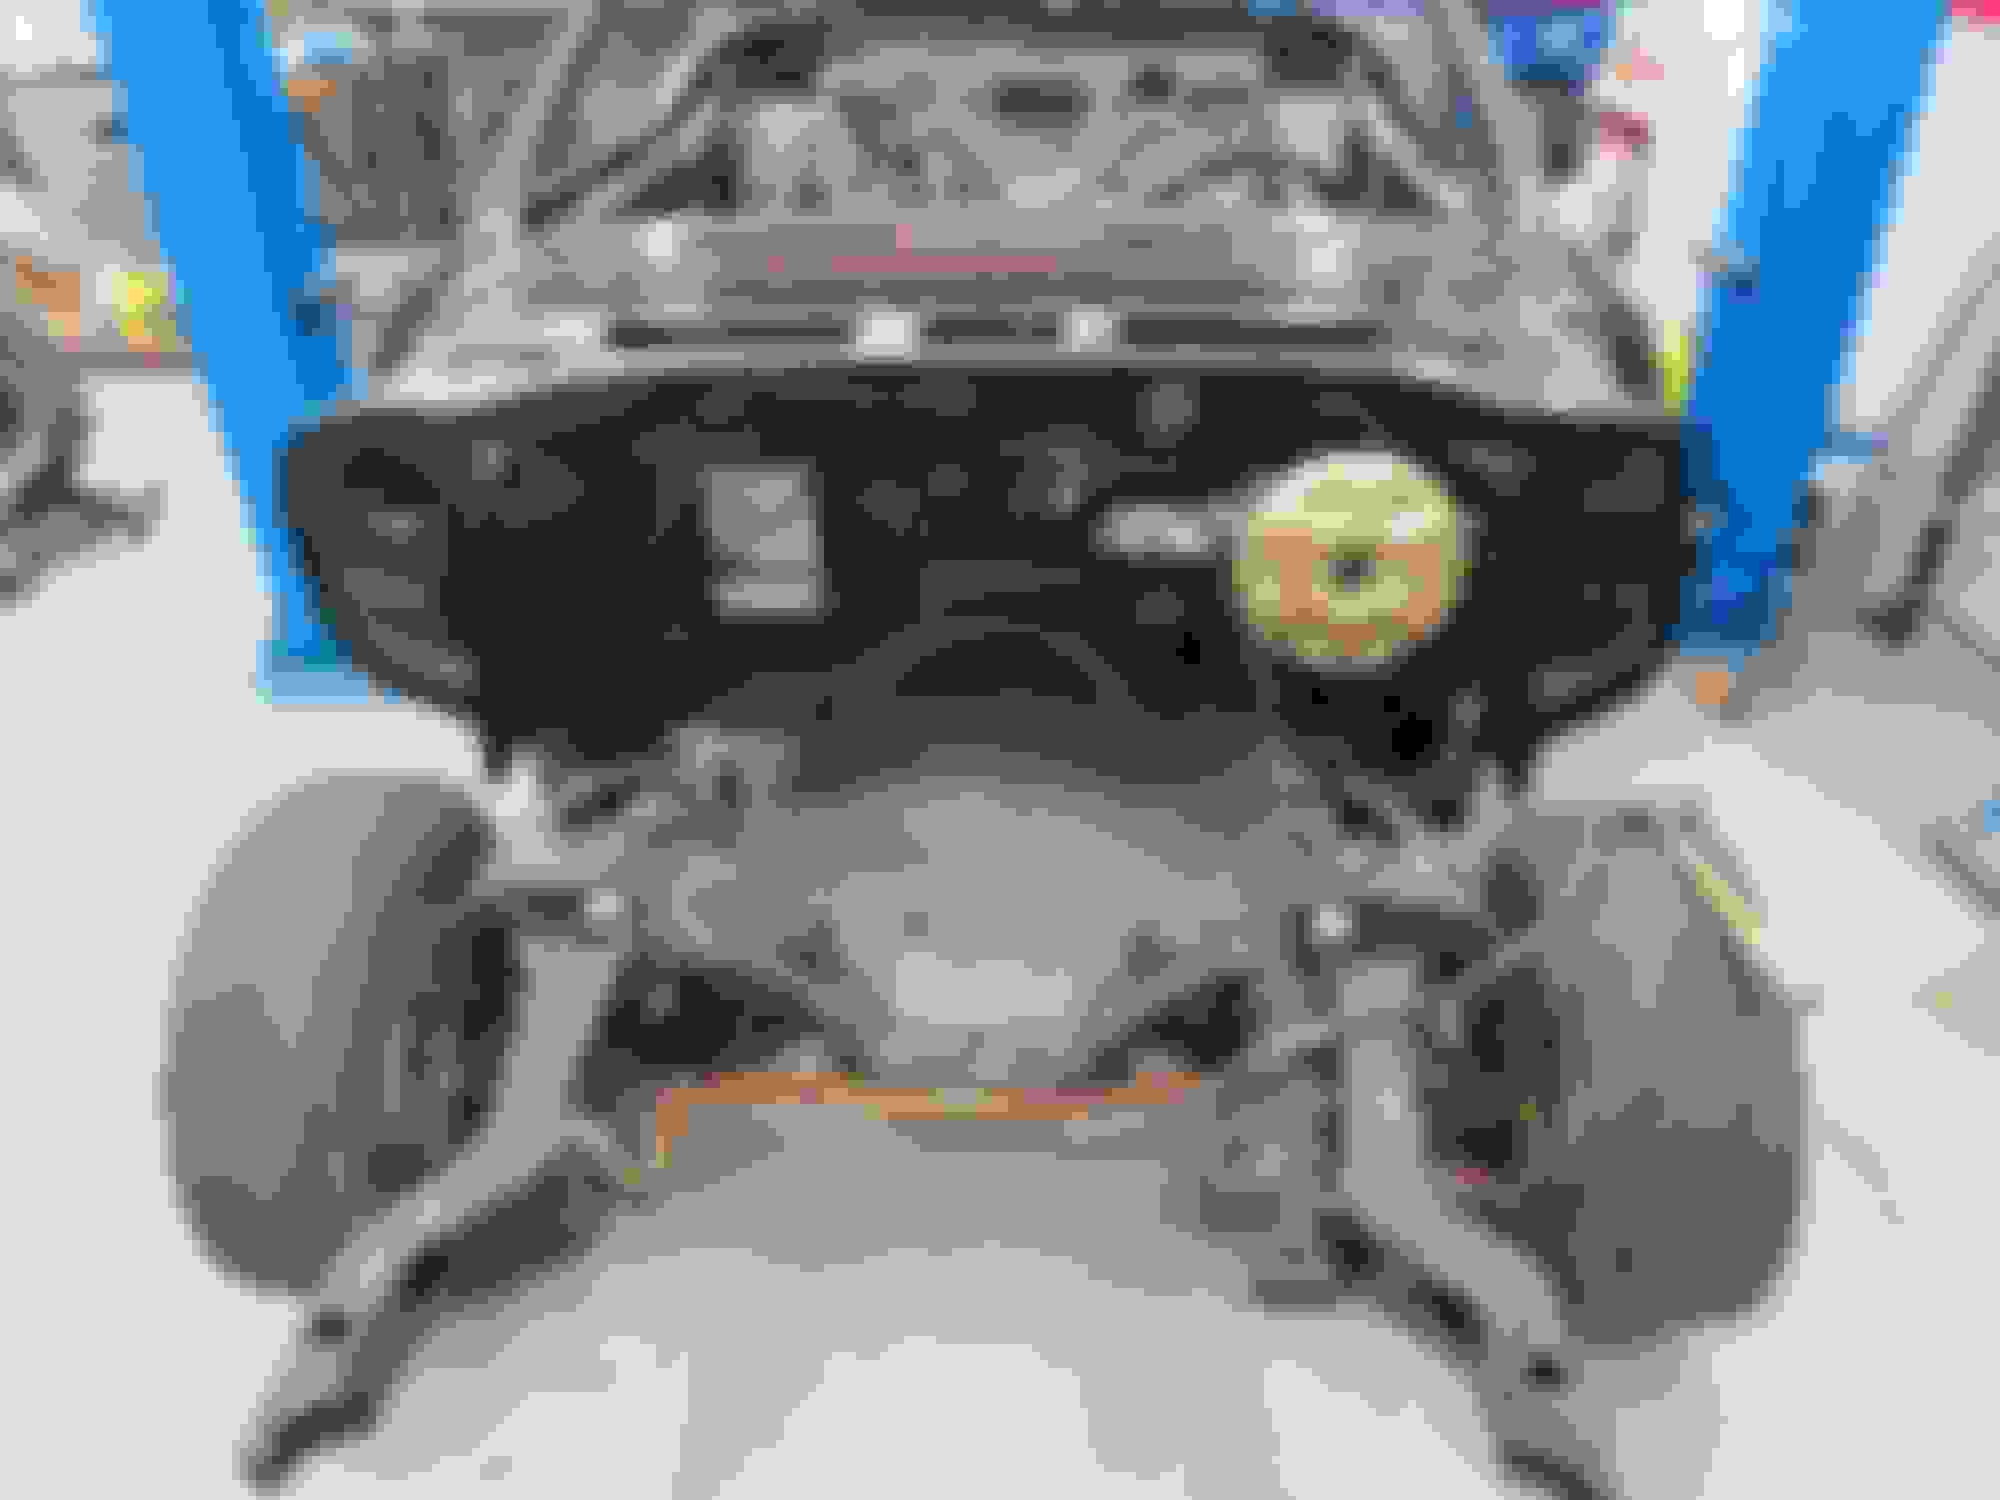
For some reason, just about everything on this car was painted with gloss paint. While the body shop had it, they redid the cowl and the dash structure along with the entire front end with a much more correct satin black. I had them just go ahead and paint over just about everything. The hardware everywhere on the car is probably from the local Home Depot so it's all going to be replaced anyway. I'm also going to blow the entire front suspension off the car and redo it the right way so shooting over it really didn't create any extra work for me. It all looks much better already. The final shot is just primer but still gives a pretty good idea of what the finish will look like when done
I also pulled the rear end out of it over the weekend so getting that redone and back in is my next project.
It's kind of an odd car actually. Sherwood green with saddle interior and white top. I'm assuming it had white stripes but I don't know the stripe codes on the build sheet - maybe someone can decipher that for me?
I may be a little late to the party but your build sheet shows the original color of the paint stripes to be code 55, Galleon Gold.
I am going to put my recommendation in for a black paint job. It's popular, and it may be more "mentally acceptable" than some other bright color other than green as it's less of an opposite.
I may be a little late to the party but your build sheet shows the original color of the paint stripes to be code 55, Galleon Gold.
The build sheet, box 44 lists the lower color as code 48 Sherwood green, A for a white convertible top, the 55 appears to be the stripe color. I'm not sure if that means the stripes were gold or what? I've never been able to accurately decipher the stripe colors. If the stripes were gold, it just makes the car that much more odd. Green, white top, saddle interior and gold stripes? There is an entry on the far right side of the option list that you can partially read that says something about "Color Combo" with an option code I have not be able to determine. It looks like they may have even noted on the build sheet that the car had an odd, non-recommended color combo. It was originally delivered to a limousine service, I have wondered if it ad something to with the company colors?
When I did the driveshaft on my blue car, I spent hours grinding and sanding. I really did not want to go through that again so I thought I'd try a different method. I've become a huge fan of Evaporust so I thought I'd give that a try. I went to Home Depot and bought a 5 foot length of 4 inch PVC along with a couple of end caps. I glued one cap on and kept the other to seal the tube on top. After removing the trans yoke, I put the driveshaft in the tube - it fit perfectly. When I poured the Evapo in I was surprised to find that the tube was actually buoyant and floated with about 6 inches of the driveshaft sticking out of the evapo.
I let it soak for 24 hours and pulled the shaft out with the intention of flipping it 180 degrees to get the rest of the shaft soaked. When I pulled it out, virtually all of the rust was gone leaving nice bare steel. Better yet, you could clearly see where the original stripes had been. A 70 442 automatic should have a brown stripe and a blue one. I've never seen any documentation of what the actual shades were so I just guessed on my last car. There was no evidence remaining of the brown at all but I was really surprised to see that much of the blue stripe was actually still there! It was a very light blue, something close to 70 Azure Blue. I was in a hurry to move on to other things so stupidly, I didn't take any pics, figuring I would get them when the shaft was completely done.
The next day when I pulled the shaft out of it's "bath" virtually all of the rust was gone but so was the stripe - nothing left at all! I really screwed up an opportunity to document something I haven't seen anywhere else. These were definitely in a different place than my other car. They were also spaced differently. I don't know if this is a difference in where they were made or if they were really just very random in location and spacing.
Evaporust is not intended as a paint remover but obviously under certain conditions it will do so. You can also see it in the black paint on the before pics and what was left of it in the after pics.
Now I just need to get the rest of the black paint off, put the yoke back on and paint everything.
The Evaporust is a little pricey but it saves so much time and effort that it is well worth the cost in my opinion.
Next up was the rear end. Like just about everything else on the car, it was in good shape but painted gloss black with hardware store hardware used throughout. I pulled it out of the car and set up on jack stands on a workbench so I could get at all sides of it.
It was completely disassembled including the brakes and axles. Everything was thoroughly cleaned and all paint was scuffed up. I pulled the wheel cylinders but left everything else pretty much alone as it was new. I cleaned and painted the backing plates Detail Gray. Next, the axle tubes were cleaned and painted with SEM black bumper paint. I really like the sheen it leaves and I have found it to be quite durable. After all that dried for a few days, i taped off the axles and painted the center section with Cast Iron. I then carefully masked around the differential spacer and painted it with Bare Steel. I think it came out pretty good. I also soaked the axle ends in a shallow pan of Evaporust being careful not to get the bearings wet.
Reassembly began with refinished bolts and nuts for the axles and new wheel cylinders for the brakes - the old ones were to pitted to save. While waiting for paint to dry on the above work, I began refinishing all of the control arms, springs and frame tie parts. Again, everything had been painted gloss black by the PO when he started working on the car. That meant that nothing was coated in rust but it all had to be sanded and repainted. A pretty good trade off actually from an hours invested perspective. I used VHT Satin Black epoxy on everything but the tie bars. I've never used that paint before but was really happy with it. It sprayed vey well, left a nice satin finish and was pretty forgiving if you messed up. I will use more of it in the future. I also redid the rear springs with Dark Iron. I know that almost everything under these cars was "blacked out" but I just don't like the look. To break it up, I like to use the bare steel paint on some parts like the frame tie parts. I just think the added color looks better.
Besides the gloss black paint, the other constant on this car has been the hardware store hardware. Just about everything I have worked on so far has the wrong hardware so ILT has seen a lot of business from me in getting the right nuts and bolts. Everything went back in the car using correct hardware and bolt direction as per the assembly manual.
I knew you couldn't install new fuel lines with the body on but I learned the hard way that you also really can't put the brake line in with the D side frame tie bar in the way. Not a huge deal but it's frustrating taking parts off that you just put on. Invariably, something gets dinged in the process so, pretty much as expected, I wound up having to redo the tie bar.
After the rear end was back in the car, I pulled the drums back off so I could redo the gloss black paint with Cast Iron and then add the factory correct satin black overspray on the top surfaces. Last chore today was to repaint the gloss black rear sway bar in Cast Iron. I can't install it until I get the correct hardware so, for now, I'm done with the rear end.
Looks good! I like the finish of the SEM bumper black on the axle tubes. I'm with you on opting to not "black out" everything. I'm trying to decide which approach I want to do on my rear and leaning towards fogging the new lines.
I've been working pretty steadily on the front end but before I write on all of that, I thought I'd show just a part of what I did in a little more detail because I haven't seen anyone else comment on it. From the first pic below you can get an idea of what the caliper brackets looked like before I took them off. They had been painted gloss silver and because the car had been sitting so long had started to surface rust. They really looked like crap. I took them off and soaked them in Evaporust for a couple of days. When I pulled them out, all of the rust was gone and so was quire a bit of the paint. What paint was left was left came of pretty easily with just a water blast from the hose and then some grinding with a wire wheel.
What was left was just plain bare steel - no anodizing at all. They were in perfect shape so I thought I would try and re-create the original gold anodized look. I had bought a gold anodize kit from Eastwood about 18 months ago and had never used it so I thought I would give it a try. The directions say that the bare metal needs to be primed so I shot them with a self etching primer from Rustoleum. I read too late that you're not supposed to top coat over that so after I let it cure, I primed again with a regular gray auto primer.
After that cures I shot the gold base coat on. The coverage was good and, other than being a little too flat, the paint looked pretty much like the real thins. The kit also includes both a red and a green phosphate. The instructions say to just "spot" the paint rather than try to cover evenly. I found that to be almost impossible to do ( at least for me) so I wound up fogging it and trying to get more paint in some areas than others. It really was pretty flat when I finished so I top coated the whole thing with Diamond Clear. Still kinda flat but better.
The results are not perfect but not too bad either - especially for a part that is pretty much hidden from view anyway.
I learned the hard way in the caliper brackets as well. I replaced them on my last car and the new ones didn't fit worth a d---m. If i was doing these brackets over again, I would fog a little more gold over the top to knock down some of the red. Didn't think about it until it was too late.
As to the yellow daubs on the rear end, I actually have no clue. I found them on both of my last two cars so I just duplicated them. Olds seemed to use yellow daubs in other areas, like trans to block bolts to signify that they were torqued fully so that would be my best guess on the rear end as well.
I don�t get a lot of time to work on the car so things seem to go pretty slowly. I�ve spent the last couple of weeks pulling the front end apart and redoing all of it. The PO had put a lot of new parts on the car but had painted everything in gloss paint. The sway bar and gear box in gloss black and pretty much everything else in gloss silver. It had been long enough since it was done that most all of it had a nice patina of rust coming through. You can see the rusty orange on the center link and tie rods in the first pic. At any rate, everything was disassembled and what would fit went into an Evaporust bath for about 48 hours. The evapo not only cleaned all of the rust, it also removed a fair amount of paint. What was left was cleaned up with wire wheels, grinders and sanding
.Sway bar � the sway bar is not original to the car. Not sure of its heritage but it is thicker than the standard bar and came with it�s own brackets and bushings. It was the only piece that wasn�t on the car when I got it and now I know why. It�s a pretty straightforward job so I sanded it and painted it cast iron. I installed the ILT end links and found that there wasn�t enough thread for the thickness of LCA and the bar so I took them back off and cut 3/8 inch off of both spacers. The fit was then perfect. Got the bar in place but when I went to install the very last bolt, I found that the hole in the frame was stripped out. I dropped the bar from the center mounts and tapped the frame hole at 7/16�s. I then discovered the hard way that 7/16 is kind of an odd bolt size and so gad some challenges finding one that would work. Gear Box � I had pulled the gear box earlier but hadn�t paid much attention to it. When I started to clean it up I discovered that it was a 4 bolt mount and these cars are three. I didn�t have time to go to the Power Steering guy that did my last one so I ordered a reman from Rock Auto. It was a perfect match and came in a dark gray pretty close to what I would have painted it anyway. I pulled the bolts out of the cover and redid them in phosphate. While they were out I repainted the cover itself in bare steel, then repainted the end cap in Aluma Blast. I used the bolt kit from ILT to mount it and called it a day. Spindles � I did not want to go through the hassle (and risk) of removing the springs (they are black anyway) so I carefully taped up the spindles and everything around them and shot them with cast iron. I also cleaned the nuts with a dremel and painted them phosphate by hand. Also replaced the rusted cotter pins with new ones. Next added the paint daubs that had been visible before I cleaned the spindles up. Steering components � steering links detail gray, tie rods and center link cast iron, tie rod sleeves bare steel, sleeve clamps Ford semi-gloss black and bolts zinc phosphate. As noted by others, the idler arm is actually two different colors. I used detail gray on the top and cast iron on the bottom. The nut was cleaned and cleared. Shocks - shocks that came with the car were brand new KYB gas adjusts so I decided to reuse them. They were cleaned, sanded and painted with ILT shock gray. Since everything above had been connected with hardware store bolts, everything was replaced with new hardware from ILT. There are some more details to be added but for now, with the exception of the disc brakes, the front end is done
After waiting for most of my life to be able to do it, a couple of years ago I was able to build a 30x50 shop on my property. I have it divide into a couple of pieces inside. One side is essentially a two car garage where I can keep non-project cars relatively clean. The other side is larger with room for a small office, storage, work space for my project and a lift. The space is also heated and air conditioned. It gets so hot and humid here that I couldn't work on the car without it. They say when you build something like this, you find out pretty quickly that they are never big enough and that is certainly the case for me. My big mistake right now is having to work around another car that is taking up valuable space I need for my project.
Looking awesome - as always. I too am green with garage space envy - not so much for work area, but storage of spare parts and equipment. I am working on a plan to build a long wall storage shelf unit custom designed for holding/storing all the parts that come off a resto like the ones we do.
For storage units, I went to a local warehouse supply store and bought an 8 ft section of used steel racking. It's about 10 feet high and with 4 shelves it holds most of the parts going into the current project plus some future stuff.I don't recall the price now but it was surprisingly cheap. I hated the green and orange colors they always use for these racks ( too much time in food service DC's I guess) so I gave it a quick sand and panted everything black.
I've also built a few smaller units of wood to fit into various empty spaces around the shop.
My Long Island '50's tract home has a one car garage that measures about 11'x21'. Impossible to work in. Last winter I had to pull the carb to be rebuilt. I had to plan ahead and park it in backwards and then do the job with the garage door open. It stinks. It has enough room for the car & my snow blower in front of it. Thats about it.


")