When you click on links to various merchants on this site and make a purchase, this can result in this site earning a commission. Affiliate programs and affiliations include, but are not limited to, the eBay Partner Network.
What's up everyone, this is going to be a thread in which I will update from time to time as progress is made on my '64. A little about me, I am 23 years old and I've been working on cars since I was 16. I don't have much experience with old American cars as most of my knowledge lies in old 70's-80s Mercedes but I've pretty much done every job imaginable on those types of cars.
With that being said, I'll give a brief background of the vehicle in which I will be somewhat restoring. It was my grandpa's car which he drove in Palo Alto California for years and years and unfortunately, he passed away but he gave my dad the car in the 90's I believe. My mom and dad also drove it for years and years even taking it to Ontario Canada to where they moved for a period of time. The car has since been brought back to California and it is now sitting in my garage.
Over the course of its life, this car was really driven although it was never abused. I talked to my dad yesterday and he speculated the odometer had rolled over at least once and a second time is not out of the question. Currently, it shows 59k miles, meaning it could have 159k or 259k, we are unsure. It has been in only one accident and so very ironically, I was the one who caused it when I was 6 years old. One day, my dad had the car in our driveway and he told my brother and me to help him clean it out. He went into the garage for whatever reason and so I jumped into the driver's seat and grabbed the column shifter pretending to drive it. I accidentally took it out of gear while messing around with the shifter and make note our driveway happens to be on a significant incline. The car began to roll back towards the neighbor's house. My brother and I stood up screaming at my dad to save us but, of course, he couldn't do anything but watch. The neighbor's truck happened to be parked out front and instead of rolling through their house, my brother and I ended up totaling the poor guy's Ford truck instead (thankfully). Mind you, the street which we crossed is quite a busy street flooded with people constantly speeding. Thankfully my brother and I didn't get injured or anything, and I believe the neighbor was cool with my dad afterward no harm no foul. The '64 didn't sustain much damage at all, which is a true testament to the thick gauged steel they once used. The truck, on the other hand, was completely unusable, both doors were crumpled inwards.
*******
Currently, I am a college student and I've got big plans for the future. With that being said when the money starts rolling in and the time is right I will circle back to this '64 and do a complete frame-off restoration in the future. Right now my goal is to get this car running and driving to enjoy it. I'm going to be making a prioritized checklist in the coming days, as I have some time on my hands.
For now, here is a picture of the car as it sits currently:
Here is a rough outline of the priority of things that need to be fixed on the car:
1. Brake hydraulics are completely gone (assuming there is a leak somewhere, have yet to assess)
2. Fuel tank screen + float needs to be replaced. I have the fuel tank removed right now as it was plugged up. I removed the float/screen device, does anyone have a part number for this?
3. Engine is in need of care all around the board, I will do obvious maintenance on it (sparks, air filter, crankcase oil, etc.)
4. Coolant flush, I'll flush the block too.
5. Transmission flush + rear diff oil change
6. Vacuum lines are hard as a rock, most broken
That should keep me occupied for now. I started the car yesterday for the first time in a long time after making a small auxiliary tank in lieu of the original tank. The fluids all around seem topped up, albeit they are in horrible need of a change. With that being said I felt okay running it for a while and it idles okay, the timing is definitely off by a fair bit but I'll worry about that later. Right now I've got my list to worry about and that should be all for now.
Thanks for reading, I'll definitely update over the coming days/weeks with tons of pictures. I'm one to document things and I hope you'll enjoy.
One question for you, what is the best resource for these cars? Where can I read information about them, google seems to struggle to pull anything up for me, can someone give me advice in that regard? I'll certainly check around these forums for now.
Last edited by sunderlandmorrow; Apr 13, 2021 at 10:30 AM.
IDK much about the 64s but this site is probably one of the best resources for knowledge. 1964 cutlass may be a one model year only car meaning almost everything specific to a 64 is different than a 63 or a 65. That doesnt mean other similar parts wont work they just may be different than other model years, so careful research for replacements parts is needed
the 1968 cutlass is like that, w specific things like hood and hinges, glove box door, gauges etc are 1 year only. Other parts can be made to work but are not correct for 1968.
Welcome and stop looking for the best resource, you're here!
Nice car, the brake system on that car has a single reservoir/chamber master cylinder. Any leak anywhere in the hydraulics causes total and sometimes sudden loss of all brakes.
I encourage you to convert it to a dual/tandem reservoir master cylinder. It is inexpensive and drastically increases safety.
Get after the timing chain in short order, the camshaft gear if original has nylon teeth that strip, plug the oil intake and potentially cause internal engine damage.
What motor?
Good luck!!!
Last edited by Sugar Bear; Apr 16, 2020 at 08:04 PM.
Welcome and stop looking for the best resource, you're here!
Nice car, the brake system on that car has a single reservoir/chamber master cylinder. Any leak anywhere in the hydraulics causes total and sometimes sudden loss of all brakes.
I encourage you to convert it to a dual/tandem reservoir master cylinder. It is inexpensive and drastically increases safety.
Get after the timing chain in short order, the camshaft gear if original has nylon teeth that strip, plug the oil intake and potentially cause internal engine damage.
What motor?
Good luck!!!
Okay, glad to know this is THE forum when it comes to these cars. The engine is a 330 high compression v8 with a four-barrel Rochester. Are you by chance on Peachparts? I think I've seen you over there with the same exact screen name.
Looks like a nice project- good to see a young guy involved in cars. My advice is don't blow it all apart, do small steps at a time and be able to enjoy it as you make it better.
The o-ring on this piece that connects the fuel pump to the carburetor was spraying fuel every time I fired the engine. I replaced it and so far no more leaks, the old o ring turned to plastic:
New: ZkbsGnKl.jpg
Also put a new t-stat: (The paper gasket doesn't seem to be sealing too well, do people generally use sealant as well? I'm going to tighten the bolts a bit see if that helps) WChBP9Jl.jpg
These numbers aren't great, but I'm hoping the piston rings might free up a bit once the car is driven. I haven't even taken out of my driveway yet, kinda waiting on the brakes before I do that. Anyways, with that being said the other cylinders should be firing given the compression is okay. Each cylinder is getting spark, so what is the issue. Carburetor not working properly?
Last edited by sunderlandmorrow; Apr 20, 2020 at 08:07 PM.
That fuel inlet nut is an aftermarket repair fitting, the gold standard repair is to send the fuel bowl to a carburetor specialist and have it heli-coiled. Another option is to find a replacement bowl.
It is ok to use a small amount of sealant on the thermostat housing gasket. Don't overtorque it to avoid cracking the housing.
Adding some zinc is ok but don't over do it. Motorcraft 15w-40 diesel oil has 1000 ppm of ZDDP right off the shelf.
The #8? Plug looks oil fouled, I'd try solvent soaking the cylinders, drive it and rerun the compression test. When solvent soaking consider doing one bank at a time while that side of the car is raised to keep the piston tops closer to level. It will help a little, granted not a lot.
About the misfire, check the distributor cap contacts for cleanliness and look for any carbon tracks. Pull the rotor, clean and lube the advance weights and springs underneath.
Double check the firing order.
When fully warm, rev the engine to about 3K and manually push the choke plate closed and release it before stalling. Repeat several times and be alert for backfire flames out of the carb. Keep your face clear, BE CAREFUL.
This causes fuel to rush through passages in the carb often cleaning them.
Okay good to know about the inlet nut repair also the oil with zinc already in it. So I came to the conclusion I must have swapped some spark wires around when I replaced all of the wires + dist cap and rotor. So I set the engine to TDC on compression stroke, found number 1 spark on the distributer and then going counter clockwise I re-did all of the spark plug wires according to the firing order stamped on the engine. Fired the engine up and it is definitely an improvement, I must have swapped at least two of the wires by accident.
As for now, there are two cylinders that are not firing. When I remove number 5 and number 8 plug wire at idle there is no change in the idle. I left them disconnected and sat behind the car listening to the exhaust, no popping/jumping. When I reconnected number 5 and 8 I did the same thing, sat behind the car and at idle there is definitely one or more cylinders trying to fire which is most likely either number 5 or number 8, could be both.
Tomorrow I will give the other things you said a shot, should I pull the rotor out of the engine? Do you just mark it so you know where it goes back in?
Last edited by sunderlandmorrow; Apr 17, 2020 at 11:27 PM.
Your master cylinder was empty? There is a good chance the fluid leaked over the years into the booster. I guess after you get the Master cylinder back on you will be able to tell if the booster is bad- one thing leads to another- oh yeah... I would be very carefull with that aftermarket fuel filter fitting- usually they are for one use only and you leave filter out of carb and put one in line somewhere so you don't have to take it out again. So be very careful putting it back in. Good to hear you got it running. Which #cylinder did that really oily plug come from?- OH I reread it was #8... You'll want to watch that one....I would take out #8 and see if it is all oil fouled already, that would not be good. (but we used to use "antifoulers" on oil burning engines and they would keep a car moving ) Sounds like the compression is good on #5 and#8 ( are you sure those 2 aren't switched) so I'll bet it's a ignition problem- Maybe get a complete tune up set, and go from there. (cap, rotor, points&condenser,plug wires) Good luck- You will get it!!
The distributor rotor is held on by two screws and has a round pin and a square one to prevent incorrect alignment. I'm not suggesting that you remove the distributor as it is unnecessary to access the springs and weights. If you were removing the distributor then yes it is good to mark the distributor position, the rotor position before pulling it and the rotor position just as it comes out. This is because the rotor is driven by a helical gear which makes it rotate as it is pulled upwards. The dist gets one reference mark, the rotor gets two in this method.
Check the distributor vacuum timing advance while in the distributor by applying vacuum. It should hold vacuum and cause the breaker plate, the flat plate that the points and condenser mount on to rotate.
The oil fouling could also be caused by blocked oil returns in the head causing the oil level in the head to be high. Consider pulling valve covers to check that the return holes in the bottom corners are open. If clogged they can be opened with a wire coat hanger.
Good luck!!!
Last edited by Sugar Bear; Apr 18, 2020 at 07:07 AM.
Good start Sugarlandmorrow, and your getting some good advice to work with. Those 330's are almost "bullet proof" I bet you will solve your issues. I'm also a BIG fan of the early A-body F-85 Cutlass's...
Ended up switching Number 5 and 8, the engine is now running on all 8 cylinders as far as I can tell. I swear I had it correct but I'm glad its fixed now. When you're crammed up under that engine bay, a simple task becomes tough real quick as I'm sure you all know.
So we are running on 8 cylinders although its not too smooth yet. I'm still waiting to take it on the road to give the engine somewhat of an Italian tune up. While I wait for the brake master cylinder to arrive, I removed the fuel tank. The fuel tank screen/sock was pretty plugged up and I went ahead and ordered a new one, as well as the float. Hard to see, but I dropped a flashlight in the fuel tank (on a string) so you can see the inside of the tank. For an old tank I personally think its in good condition. Looks to be some sort of residue inside but nothing too bad, and no rust: UjS7rkOl.jpg QbDu2pvl.jpg QMgkC7Ul.jpg 9s7i3iVl.jpg
The gear shifter I discovered doesn't work properly. It will only shift between neutral and drive, and when trying to put it in park or reverse it simply won't budge. It moves only a slight bit but is able to engage into drive from neutral and vice versa. I'm sure its some sort of linkage issue but I don't know where to begin if anyone has any ideas.
While the fuel tank is out I figured it would be a good time to tackle the rear differential as there is an abundance of room underneath the car now. So I removed the fill plug first without issue:
The oil itself is pretty thick and black looking, but I didn't see any sort of chunks or debris in the oil or the differential which seems promising. I'm going to refill it tomorrow after I get a paper gasket, I'll also be using some black rtv I hope this is acceptable. Also I believe it is an open differential thus it doesn't need any additives, correct? When I rotate a rear tire, the other side doesn't move, indicative of an open differential.
Careful with pushing it hard on the road, probably ok to drive it but with the age and mileage don't forget about the nylon teeth on the camshaft gear. Timing chain failure can cause a lot of damage.
Consider pulling the valve covers before running it much to confirm everything is oiling after sitting so long. 64's have one year only rockershafts made of unobtanium. You don't want to run them dry, look for oil out of every pushrod.
Open diff? Yes it sounds like it and no additive used. Black silicone should be fine, better if you let it cure without oil for a day or so. Permatex makes a gray sealer for diff covers, I've used it with bone dry results. The key to no leak is over cleaning the surfaces and letting it setup.
Fuel tank does look good.
Shifter is probably linkage. At the bottom of the steering column is the neutral safety switch with a purple and a purple/white trace wire as I recall, That could be bound up but it's probably linkage. That car should have a two speed Jetaway automatic sith a switch pitch/variable vane converter. That is what the switch is for on the carb/accelerator linkage.
Did the oil pan have the large drain plug? There is a special tool for it but a 1/2" drive short extension, no socket works well there.
Look into the oil fill tube for a screen at the bottom, seen one so clogged oil couldn't be added but the 330 still ran very well.
Keep up the great work!!!
Last edited by Sugar Bear; Apr 18, 2020 at 08:45 PM.
Good to know, so whats the deal with that gear, is it recommended to just swap it out for a new one? I'll definitely be careful driving it remembering about that gear. I'll also pull the valve covers, what am I looking for exactly should it be running or will it spray everywhere.
As for the diff, I cleaned the mating surfaces very well just now and sprayed the inside of the diff with brake cleaner. I blocked the gears from debris when scraping the gasket off. Tomorrow I'll reinstall the cover plate with gasket + rtv and I'll give it a few days before adding oil.
As for the oil pan, yes it did have a large drain plug which I had no tool for, I ended up using a pair of vice grips. Usually I don't half *** things but the drain plug was already chewed up from someone previously in there. Also I did not think to use a 1/2" drive for the plug, what a great idea I will definitely use that trick next time, would have saved me my hands getting banged up with the vice grips flying off and all...
The oil fill tube indeed has a screen still, and there is no debris in there.
The camshaft gear, crankshaft gear and timing chain are changed as a set. No need to go double row but use quality replacement parts. The catch is that the oil pan should be removed, then the front cover R & R'd , then the oil pan goes back last. The front cover can be snuck on and off with the pan in place, BUT not taking the pan off doesn't allow access to cleaning the oil pump intake of debris from the nylon teeth chipping off the gear. So the right way to do the job is pull the oil pan BUT...I don't know if you can get that pan off with the engine in the car.
You could try using a phone endoscope into the oil drain plug to see in the pickup screen, it might work. You'll need to see inside the shrouded part of the oil pump pickup/screen and that may not be possible. The unshrouded part always looks clean, the debris causing the restriction is back under the shroud. It is not an expensive $ job but a large time job.
Do a search for MrEarl and the timing chain he just did to see some great pics of the debris.
About the rocker arms. Do it one side at a time on a COLD engine to reduce the chance of oil on an exhaust manifold possibly causing a fire. Pull the coil wire crank it and see if all the rockers look oiled. Have an extinguisher ready and don't do it inside a garage. A fire is very unlikely but better to be prepared.
Look for oil coming to every rocker arm and in the front and back lower corner is a oil return drain hole, make sure they are not clogged. Open with a coat hanger if needed.
Good luck!!!
Last edited by Sugar Bear; Apr 18, 2020 at 10:40 PM.
The camshaft gear, crankshaft gear and timing chain are changed as a set. No need to go double row but use quality replacement parts. The catch is that the oil pan should be removed, then the front cover R & R'd , then the oil pan goes back last. The front cover can be snuck on and off with the pan in place, BUT not taking the pan off doesn't allow access to cleaning the oil pump intake of debris from the nylon teeth chipping off the gear. So the right way to do the job is pull the oil pan BUT...I don't know if you can get that pan off with the engine in the car.
You could try using a phone endoscope into the oil drain plug to see in the pickup screen, it might work. You'll need to see inside the shrouded part of the oil pump pickup/screen and that may not be possible. The unshrouded part always looks clean, the debris causing the restriction is back under the shroud. It is not an expensive $ job but a large time job.
Do a search for MrEarl and the timing chain he just did to see some great pics of the debris.
About the rocker arms. Do it one side at a time on a COLD engine to reduce the chance of oil on an exhaust manifold possibly causing a fire. Pull the coil wire crank it and see if all the rockers look oiled. Have an extinguisher ready and don't do it inside a garage. A fire is very unlikely but better to be prepared.
Look for oil coming to every rocker arm and in the front and back lower corner is a oil return drain hole, make sure they are not clogged. Open with a coat hanger if needed.
Good luck!!!
Cool, I appreciate all the good info man. If its any assurance to you, I'm not gonna throw the towel in on this car at any point. It will be a good running vehicle in the near hopeful future...
Was supposed to be doing homework tonight but I wanted to get to the bottom of why the transmission won't shift into any gear other than drive/neutral. When I put it in drive, there is an audible metallic click coming from underneath the car. So I had my dad sit in the driver seat and wiggle the shifter repeatedly so I could find where the linkage bolts up to the transmission. I tried to manually shift the gears via the shift lever but still had the same issue. I kinda figured the transmission was locked up in those gears, kind of a bummer but I went back under there and disconnected the linkage and was able to smoothly shift through the gears.
You can see when I hook the linkage back up, the transmission only goes in neutral and drive.
So at this point, the transmission is fine and there is simply something wrong further up in the linkage system. Gonna take a look at it tomorrow maybe, but I really should be doing homework..
Also just by looking from underneath the car it looks like it would be a huge challenge to remove the oil pan, let alone replace it. It'd probably be easier to remove the engine in a weekend and fix it. Of course there's always the "while you're in there" stuff to do while the engine is out, although I would limit it to only a few things else I'll get carried away.
Last edited by sunderlandmorrow; Apr 18, 2020 at 11:49 PM.
You are doing a great job. Attacking problems slowly and logically!! I personally wouldn't change the timing chain now, I would recommend you to get the brake and shifter problems and get it good enough to drive slowly around block, then after car drives,etc maybe change the timing chain and whatever else engine may need. Carry on young man!
X2 on school work is more important, much more important in the long run.
X2 with Greg about not pulling the car all apart, only do what you can start and complete. So many cars get left apart this way. If you do the timing chain stay focused and get just that done, its the kind of job that can lead to the MAW's
As for the school work yeah, I'm going to prioritize that for now. Almost done this semester and then I'm going to take the summer off I think. So I'm gonna just try to knock it out then I'll have a ton of time to work on the car etc. For now I'll do some small projects on it, nothing big.
Column shift.
As for the school work yeah, I'm going to prioritize that for now. Almost done this semester and then I'm going to take the summer off I think. So I'm gonna just try to knock it out then I'll have a ton of time to work on the car etc. For now I'll do some small projects on it, nothing big.
Column shifts have plenty of things that can get worn and out of adjustment. Tinker with the shifting mechanism til school is over, then focus on the timing chain.
Column shifts have plenty of things that can get worn and out of adjustment. Tinker with the shifting mechanism til school is over, then focus on the timing chain.
Yea that's what I decided on too. I'm not going to do any big jobs on the car until school is over. Yesterday I played with the linkage and found out where it is binding up. I recorded it so someone can help diagnose what is the actual issue. For reference, the issue is right where the linkage passes through the firewall into the engine bay. I've got the linkage disconnected from the transmission so what you can see in the video moves without too much force. I'm able to "shift it" as you can see in the video but it keeps getting caught up, and it seems there is a spring loaded mechanism pushing the linkage towards the firewall, which is strange as it causes the linkage to bind up. With some "rigging" I'm sure I could get it to shift through the gears but I'm a stickler for doing the job right. No idea how this mechanism was intended to work, and any insight would be nice.
Take the diff cover with you to confirm gasket fitment. They are often incorrect.
May want to pickup and install a fuel filter in the rubber hose before the fuel pump until the carb inlet nut gets fixed. The original filter is a small bronze one that goes inside the fuel inlet nut. The repair inlet nuts don't do well be removed and reinstalled.
Good luck!!!
Last edited by Sugar Bear; Apr 20, 2020 at 07:56 PM.
Take the diff cover with you to confirm gasket fitment. They are often incorrect.
May want to pickup and install a fuel filter in the rubber hose before the fuel pump until the carb inlet nut gets fixed. The original filter is a small bronze one that goes inside the fuel inlet nut. The repair inlet nuts don't do well be removed and reinstalled.
Good luck!!!
Good idea, I'll bring the diff cover in with me tomorrow. Also I forgot to mention, there was a filter inside that nut. So you're saying this was aftermarket? It should be fine right, or should I revert back to the stock setup. Definitely a different kind of filter from what I'm used to:
The filter looks correct, the nut that holds the filter is not factory. If the filter is in there, runs ok and doesn't leak leave it alone. Was there a spring in the filter/inlet nut assembly?
Putting a filter before it might allow leaving the little filter alone for a long time. Without a pre-filter and the work/cleaning being done the little filter may clog quickly.
Yes there was a spring in there. Okay I will add another filter, why not. Going to change out the rubber fuel lines at the tank + the enginebay anyways.
Did a bunch of school work, also a bunch of car work. The past three or so days I've been tackling the brake system. First I started with replacing the front rubber lines that tee off from the metal ones:
Just by installing the master cylinder, the brakes were somewhat functioning. It appeared that there were no leaks and so I went on to better the rest of the brake system.
The brake shoes in the rear were very thin as well as cracking: q34XTm8l.jpg
The drums were significantly scored on the inside and I could feel some deep grooves in them: pSocQSRl.jpg
Same with the front drums but a lot less grooves: USjJ8wJl.jpg
I ended up ordering all new wheel cylinders as knowing this brake system, you develop a leak somewhere you lose the whole system. cPKwY2Zl.jpg 8yr94jAl.jpg WH7jLSBl.jpg
I got all four drums machined instead of ordering new ones. I also repacked the front wheel bearings as best as I could. The machine shop had to knock the seals out, so I replaced them:
I had my dad help me bleed the brakes a couple of times, eventually, everything went smoothly. The brakes work good, I wouldn't say excellent though. I think the booster is leaking, I'll have to diagnose that soon but for now the brakes work (As well as the e brake of course)
Also got an inline fuel filter installed as suggested:
I mounted the gas tank back and put new fuel lines, as well as filled up the differential.
Took the car for a spin earlier and it drives pretty good, I didn't take it far just up the hill a bit. Still gotta tackle the timing chain/camshaft gear saga before actually driving it.
I dug around through the family photos earlier in hopes of finding some pictures of the car. Heres one of my dad and his band group shot. Not too car-centered but nonetheless: 9AC1WA8l.jpg
My moms going to get pissed but here she is, very pregnant with my older brother who was driven home from the hospital in this very car a few weeks after this picture was taken:
The main issue with the car right now is the column shifter is still screwed up, going to look into that soon. I haven't worked on it much. Also, the alternator wiring caught on fire when I first fired the car up a few weeks ago. I disconnected the wires to the alternator after that incident but they're totally melted which is a bummer. I'll have to rewire it or whatever, maybe I can order something already wired?
Last edited by sunderlandmorrow; Apr 26, 2020 at 01:34 AM.
I'm currently in the process of pulling the engine and trans as one unit in order to tackle some thorough maintenance on the car, including the timing chain saga:
As of right now, the only thing left to remove is the transmission cross-member in which I'll then stick a jack under it when its time to hoist. The only issue I have run into is breaking 4 bolts that connect the exhaust manifold together:
LOpq20Vl.jpg
(Any tips on removing the remaining parts of the bolts would be appreciated. Most likely going to try welding nuts to the ends and or blow torch.)
My main question here is, where does one attach the chains from the hoist to the engine on a 330? Here's my engine bellow, I believe the circled area to be one of the factory "hooks" in which the engine was originally installed. I don't see any other spot to connect the chains. What's the best way to approach this?
The other one in next to the dist. on passenger side. look you will find it there.
Gerald I too live in Nor Cal.
Oh I just found it, I'm trying to figure out how to utilize both of those hooks now. I'd imagine hooking chain up wouldn't work so well, what do you think?
Originally Posted by tru-blue 442
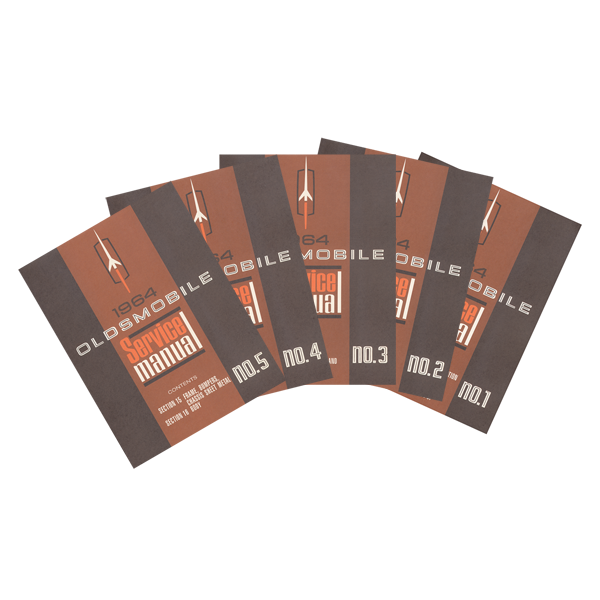
Good job young man. If you can grab some of these, they are the some of the best references in print.
Thanks, and I have one of those so far. Definitely need to pick up the rest. Ebay the way to go?
Last edited by sunderlandmorrow; Aug 4, 2020 at 09:47 AM.
Well, that was a successful pull. I didn't run into any issues big issues which was unexpected.
One thing I'd recommend that helped make the process clean was double bagging the end of the transmission. All of the transmission fluid was encapsulated and made zero mess. Also covered the carb with a bag to make sure no dirt got in it.
Now I've got that overwhelming feeling of what to do next (as to be expected.) The main goal is to replace the timing chain and camshaft gear, as well as clean everything as best as possible and reseal as many gaskets as I can.
I'll strongly consider any suggestions as to any "while you're in there jobs"
With the engine bay empty it would be easy to replace the brake steel lines for safety. Nicop lines are amazingly easy to work with.
About replacing gaskets, that engine has a rope rear main seal. Do a search on replacing it with a two piece rear main. Forum members have replaced the rope with two piece neoprene seals, I haven't but it sounds much better. My replacements were rope...lotsa years ago.
Spent literally all of yesterday cleaning the engine and transmission. I still am going to clean it more, there are some areas which are really tough to clean. Long story short I took parts of an old credit card and scraped off as much oil gunk as I could. Then I went around with a foaming engine cleaner + heavy degreaser and scrubbed for hours and hours. I tried to preserve as much of the gold color as possible by not using metal brushes or too strong of degreaser, seems to be working so far. I left everything hooked up as to not contaminate the inside of the engine. Once this unit is pretty clean I'll disassemble stuff for a better cleaning. Anyways right now its about 80% clean but in the next few days or so I'll go over it again and again to get it to 95-98% clean and call it a day. Here is a before and after shot so far:
The past couple of days I've been cleaning all the parts removed from the car so far. I also removed the transmission and torque converter which was very straight forward. I figured it was time to open the engine up after cleaning off 80% of the gunk/oil.
First I removed the crankshaft pulley bolt which I discovered was 1 1/8th" for anyone else out there wondering. I slid a pipe through the flywheel and wedged it in between the block as to stop the crankshaft from spinning, worked very nicely.
As it turns out, the camshaft gear has been replaced at some point unbeknownst to me. Although from what I can tell the timing chain is pretty loose and the gears look pretty chewed up.
I was curious about what I'd find in the oil pan as possibly the original camshaft gear blew up.
I unbolted all the bolts from the oil pan and managed to pry it off fairly smoothly: 6GnFCXQl.jpg qKQCxWSl.jpg
Looks to be a few remnants of the original camshaft gear, but mainly I see metal chunks which I speculate are from the cam and crankshaft gears.
Although I did find a few bigger chunks of something which I presume is very bad news: 8IdOxJFl.jpg
Let me know what you all think of what this stuff could be. I wasn't expecting to find any metal in the pan, just a bunch of nylon from the original cam gear which there appears to be only a tiny bit of. The oil pickup screen is pretty clear for the record too.
As of right now, I'm going to simply clean everything as best as I can and come up with a plan with what to do with this engine whether that is a rebuild or get to the bottom of where the metal chunks came from. I assume the engines pretty contaminated because of this, however.
I took the heads off yesterday as well as the intake and carburetor so that I could put the block on an engine stand and have it balanced so I could rotate it. The intake was very filthy, how normal/abnormal is this?: iKkL3Jtl.jpg oxh8ev8l.jpg
The more I tear into this engine the more concerning its health becomes. I took both heads off and noticed a good portion of the coolant passages between the heads and block were "gunked" shut. I didn't get a picture of the other side but a few of the passages were 100% gunked up. Heres the better side, in which I poked a screwdriver threw a few of the passages: xfYCCGZl.jpg
I also managed to get the engine bay clean and I'll repaint it at some point before the engine goes back in. There was so much filth and grime you wouldn't believe it, I'm talking 1/2 inch of gunk on top of every part of the engine bay. I almost wish I got some before pictures of the engine bay but I think I forgot. Heres the after shot at least: mDpexgOl.jpg
Would greatly appreciate any insight or advice here so far, thanks for reading. As for now I'll keep cleaning stuff.


