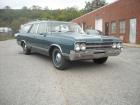
Last pic of it together for a while. (updated 4-11-2023)


Thread Starter
car guy
Joined: Apr 2008
Posts: 5,675
From: Dallas TX
Found it
Registered User
Joined: Nov 2007
Posts: 9,127
From: Rathdrum, Idano
On the subject of your 455, what kind of build are you planning. I am just starting on my 455 for my 48 Olds and have picked up a set of edelbrock heads, eagle rods, and forged steel crank from a guy who abandoned his build got a great price. Now I am trying to select pistons. The 455 in my 57 is similar and I used Keith Black 15cc Hypereutetic pistons. The engine runs real strong. But I keep reading about failures with the top ring skirt breaking so I am looking at other options. Whats your thoughts on this
Thread Starter
car guy
Joined: Apr 2008
Posts: 5,675
From: Dallas TX
I have never been a fan of hypereutetic pistons on high performance applications. They work great up to a point and then decentigate. On the other hand forged pistons will burn or break when they get to the ragged edge but don't turn to dust.
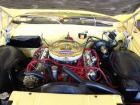
I have a new set of TRWs for my 455
I have a new set of TRWs for my 455

GM Enthusiast
Joined: Jan 2007
Posts: 3,982
From: Long Island, New York
Where did my other gear go?


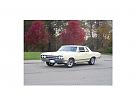
Thread Starter
car guy
Joined: Apr 2008
Posts: 5,675
From: Dallas TX
Thank you
I've been waiting for days with fingers crossed I got it in the mail Friday and sure enough there she was. It would have been nice if they would have made the big picture the car and the small one the back of my head but oh well...I'll take it 
I've been waiting for days with fingers crossed
I got it in the mail Friday and sure enough there she was. It would have been nice if they would have made the big picture the car and the small one the back of my head but oh well...I'll take it

Thread Starter
car guy
Joined: Apr 2008
Posts: 5,675
From: Dallas TX
Well guys and gals after long and serious through I am going to let it go. I dabbled a little with it last Fall but now its time to get serious about it. I have a 2nd daughter due in July and we are just out of room in our house. The car will have to go to afford the room additions we need to do. With Spring on the way I think its the best possilble time.
To get all I can out of it I decided its going to require a few improvements.
Over they next month of so I will post the progress. The plan is to do the following:
1. Install a new top
2. replace the carpet and add Dynamatt
3. remove the front fenders and repair the only rust on the car painting only below the mouldings.
Stay tuned....
To get all I can out of it I decided its going to require a few improvements.
Over they next month of so I will post the progress. The plan is to do the following:
1. Install a new top
2. replace the carpet and add Dynamatt
3. remove the front fenders and repair the only rust on the car painting only below the mouldings.
Stay tuned....
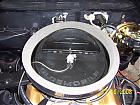
Thread Starter
car guy
Joined: Apr 2008
Posts: 5,675
From: Dallas TX

As for my next car I am not sure. Ive got a 4dr 67 that I have sitting in the driveway, A built 12 bolt in garage, a set of C heads off a 10 sec car on a shelf in the shop hmmmmmm


Registered User
Joined: Nov 2007
Posts: 9,127
From: Rathdrum, Idano
Giving up your car for another kid huh? Beeb there and done that twice. I have three boys, so I know what it feels like. The next build will be something else. With your talent and two daughters to help what could go wrong. Congtats to you and your wife Richard.

Registered User
Joined: Feb 2008
Posts: 11,798
From: Plano, TX
Another helper on the way!
Congrats, Richard!
Just think - you now you will have more help for your small jobs, like washing and tool fetching...
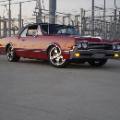
Hope you can keep the red car, as you did such a great job on it. But if you can't, you can't... Heck, just move your bedroom to the shop and let the other daughter have yours. Easy, huh??
Just think - you now you will have more help for your small jobs, like washing and tool fetching...
Hope you can keep the red car, as you did such a great job on it. But if you can't, you can't... Heck, just move your bedroom to the shop and let the other daughter have yours. Easy, huh??
Thread Starter
car guy
Joined: Apr 2008
Posts: 5,675
From: Dallas TX
Thread Starter
car guy
Joined: Apr 2008
Posts: 5,675
From: Dallas TX
I little more work today. Filled the lows with 5/16 Dynaliner and the 1/8" over the top to make an even smooth surface to lay the new carpet down. I ran out of 1/8" today so I cound not quite finish the driver's side.
5-24-10fs075.jpg
5-24-10fs075.jpg
Thread Starter
car guy
Joined: Apr 2008
Posts: 5,675
From: Dallas TX
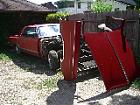
So I sold it for more than I was asking but the deal was I fix the only rust in the car at the bottom of the fenders, install a new top dynamat and new carpet. Well today I started on the first fender.
Kind of looks sad 1/2 way apart
5-24-10fs076.jpg
Here you can see where the damage is and where I decided to make the splice.
5-24-10fs077.jpg
here you can see the cancer cut out and what is left of a reinforcement brace. This piece goes between the main brace and the outer skin making 3 layers in that area.
5-24-10fs078.jpg
Here you can see how crusty even the main brace it. It cleaned up pretty good but will still require a patch to replace some deep pits.
5-24-10fs079.jpg
Here you can see the brace piece I made from some 16 gage scrap I had. This was harder than it looks to make in one piece with basic tools. If I have to do the other side I think I will make it in two pieces and weld it together. Thats it for tonight. Sunday I hope to patch the main brace and get the new skin piece made.
5-24-10fs080.jpg
Kind of looks sad 1/2 way apart
5-24-10fs076.jpg
Here you can see where the damage is and where I decided to make the splice.
5-24-10fs077.jpg
here you can see the cancer cut out and what is left of a reinforcement brace. This piece goes between the main brace and the outer skin making 3 layers in that area.
5-24-10fs078.jpg
Here you can see how crusty even the main brace it. It cleaned up pretty good but will still require a patch to replace some deep pits.
5-24-10fs079.jpg
Here you can see the brace piece I made from some 16 gage scrap I had. This was harder than it looks to make in one piece with basic tools. If I have to do the other side I think I will make it in two pieces and weld it together. Thats it for tonight. Sunday I hope to patch the main brace and get the new skin piece made.
5-24-10fs080.jpg
Registered User
Joined: Feb 2008
Posts: 11,798
From: Plano, TX
Sad to see that car go - it was almost like a part of the family...
However the new owner will be getting one heck of a car - pretty much ready for anything.
The dynamat process looks like the road I went down. I still had to shim the carpet with cheap 3/8" jute material.
I will need to repair my lower fenders like that IF I ever do a repaint. Hopefully it will not be for a long while though.
I still can't believe it is going....
However the new owner will be getting one heck of a car - pretty much ready for anything.
The dynamat process looks like the road I went down. I still had to shim the carpet with cheap 3/8" jute material.
I will need to repair my lower fenders like that IF I ever do a repaint. Hopefully it will not be for a long while though.
I still can't believe it is going....
Thread Starter
car guy
Joined: Apr 2008
Posts: 5,675
From: Dallas TX
Well here is today's progress. I wish i could say this was a couple hours work but the truth is I was at it for more than 1/2 the day. Good thing I don't do this for a living. I would go broke quick. LOL
After a good look at the pitting this is what I decided to replace.
5-24-10fs081.jpg
I did one side at a time to help keep the shape. Most of the time spent was sizing the patches. I got the size close then grind check grind check sneaking up on the final size to fit the hole near perfectly.
5-24-10fs082.jpg
Here you can see the finished piece on the right and just welded piece on the left.
5-24-10fs083.jpg
inner stucture all finished up ready to start on the outside now.
5-24-10fs084.jpg
5-24-10fs085.jpg
Well Oldsmobile purists you may not like this part. I had an old Chevelle door out back and the top edge was very close to the contour of the bottom of the fender that I needed so Chevy metal will be used for this repair
5-24-10fs087.jpg
5-24-10fs086.jpg
Well after lots of time shaping here is where I finished up tonight. I'm not sure if the Chevelle door piece saved me any time or not. I might have been the same or even less work starting from scratch. That it for now more to come later.
5-24-10fs088.jpg
After a good look at the pitting this is what I decided to replace.
5-24-10fs081.jpg
I did one side at a time to help keep the shape. Most of the time spent was sizing the patches. I got the size close then grind check grind check sneaking up on the final size to fit the hole near perfectly.
5-24-10fs082.jpg
Here you can see the finished piece on the right and just welded piece on the left.
5-24-10fs083.jpg
inner stucture all finished up ready to start on the outside now.
5-24-10fs084.jpg
5-24-10fs085.jpg
Well Oldsmobile purists you may not like this part. I had an old Chevelle door out back and the top edge was very close to the contour of the bottom of the fender that I needed so Chevy metal will be used for this repair
5-24-10fs087.jpg
5-24-10fs086.jpg
Well after lots of time shaping here is where I finished up tonight. I'm not sure if the Chevelle door piece saved me any time or not. I might have been the same or even less work starting from scratch. That it for now more to come later.
5-24-10fs088.jpg
Thread Starter
car guy
Joined: Apr 2008
Posts: 5,675
From: Dallas TX

Thread Starter
car guy
Joined: Apr 2008
Posts: 5,675
From: Dallas TX
Moving along on the fenders. I made the first patch panel 3 times before I was happy with it. The 3rd try is now ready to weld in and the other side is about 75% finished.
The first picture is the hammer form I ended up making to do the bolt recesses. The mistake I made on the first one was I fitted the patch perfectly and the tried to make the recesses. This pulled metal from the edge so it no longer fit.
The 2nd patch I made the recesses first but I used wood and the wood gave way and didn't allow my bolt area to be steep and deep enough. This would not have allowed the same adjustment of the fender as original.
The 3rd and final patch I made the metal hammer form and it allowed the metal to go exactly where I wanted it to.
shed1003.jpg
1st try
5-24-10fs089.jpg
2nd try
shed024.jpg
3rd time is a charm
shed1001.jpg
shed1002.jpg
The first picture is the hammer form I ended up making to do the bolt recesses. The mistake I made on the first one was I fitted the patch perfectly and the tried to make the recesses. This pulled metal from the edge so it no longer fit.
The 2nd patch I made the recesses first but I used wood and the wood gave way and didn't allow my bolt area to be steep and deep enough. This would not have allowed the same adjustment of the fender as original.
The 3rd and final patch I made the metal hammer form and it allowed the metal to go exactly where I wanted it to.
shed1003.jpg
1st try
5-24-10fs089.jpg
2nd try
shed024.jpg
3rd time is a charm
shed1001.jpg
shed1002.jpg
Thread Starter
car guy
Joined: Apr 2008
Posts: 5,675
From: Dallas TX
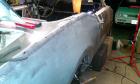
Thanks man. It was a fun learning experience. I don't have any pics of the process but basically you sandwich the sheet between the two pieces and clamp it down with c-clamps. Once that was done I made the bend in the brake. I roughed out the radius with a bag of sand with a old welding bib. I then shrank the edge a little and smoothe it all out.
Registered User
Joined: Apr 2009
Posts: 399
From: Swansea, MA
Thanks man. It was a fun learning experience. I don't have any pics of the process but basically you sandwich the sheet between the two pieces and clamp it down with c-clamps. Once that was done I made the bend in the brake. I roughed out the radius with a bag of sand with a old welding bib. I then shrank the edge a little and smoothe it all out.
Great info there I can work with down the road. Don't need any pics now...
Thanks for sharing that!


Thread Starter
car guy
Joined: Apr 2008
Posts: 5,675
From: Dallas TX
Well I made some progress this weekend. The left fender brace had to have similar patch work as the right and the reinforcement piece had to be made from scratch just like the other side. I used a spot blaster to get all the rust pits clean then I shot inside and out with epoxy to help keep this from ever happening again.
Once the epoxy dried overnight it was time to start putting it all together.
There is the reinforcment tab in its new home.
shed1004.jpg
Started tacking in place
shed1005.jpg
more tacking
shed1006.jpg
And finally finished welding and ground down. Overall I am pretty happy but it still is going to take a little mud to smooth it to perfection. When butt welding a panel like this the metal moves alot from welding. If I was doing this again I would have cut the brace out above where the patch was going to be so I had full access to the back side of the weld on the other sheet. This would let be use the hammer and dolly on the weld seam and have a much nicer finished product.
shed1009.jpg
Now I just need to weld the other side in and do a quick test fit in case I need a slight tweak here or there before paint.