
Alaskan '72 Cutlass on a shoestring

Thread Starter
Unregistered Madman
Joined: Mar 2012
Posts: 55
From: Backwater, Alaska
Alaskan '72 Cutlass on a shoestring
Good afternoon, all! I've been posting parts of this project on some other boards for a number of years, and figured I'd join the party here! I go by 'Doc'- highly original nickname, I know  - and I own and operate a small shop called Doc's Machine. I specialize in, believe it or not, making parts for paintball guns.
I'm also an Olds guy, and have been since my first car- a '66 Toronado, which I still have.
The current project, however, is a '72 Cutlass S, which I was given as a complete basketcase over 20 years ago. The engine was in boxes in the trunk (most of it, anyway) and it'd been painted with a roller, without the benefit of having been washed first. But it was free, and it was either I take it or the guy had it on the hook to haul to the dump. So yeah, I took it.
Not without a little reluctance- I'm not rich nor is my brilliant career choice a lucrative one. Said car sat for the better part of a decade, when I decided to start at least collecting parts for it. The whole of that not-so-sordid tale can be found here, presuming a new member can post a link. If not, check docsmachine (dot) com and go to "automotive projects".
That got the car up and rolling, tagged and licensed, and on the road. Over the next decade, I eventually completely rebuilt the front suspension (switched to discs, tall spindles, tubular uppers, a fast-ratio box, a Toronado swaybar, and stainless and NiCopp lines) then the rear suspension ('69 Chevy 12-bolt in place of the old 10-bolt, a repop W-27 rear just 'cause I could, a new Posi carrier and 3.31's, and more stainless and NiCopp.
Which brings us up to more or less modern day. Last summer I did the floorpans, since only a few threads and a Tasmanian Devil floormat were the only things keeping my heel from resting on the exhaust pipe. With your permission, I'll start reposting from my own board, what I did last summer, and catching us up to this week, which is finishing up a 2004R install.
Doc.
- and I own and operate a small shop called Doc's Machine. I specialize in, believe it or not, making parts for paintball guns. I'm also an Olds guy, and have been since my first car- a '66 Toronado, which I still have.
The current project, however, is a '72 Cutlass S, which I was given as a complete basketcase over 20 years ago. The engine was in boxes in the trunk (most of it, anyway) and it'd been painted with a roller, without the benefit of having been washed first. But it was free, and it was either I take it or the guy had it on the hook to haul to the dump. So yeah, I took it.
Not without a little reluctance- I'm not rich nor is my brilliant career choice a lucrative one.
Said car sat for the better part of a decade, when I decided to start at least collecting parts for it. The whole of that not-so-sordid tale can be found here, presuming a new member can post a link. If not, check docsmachine (dot) com and go to "automotive projects". That got the car up and rolling, tagged and licensed, and on the road. Over the next decade, I eventually completely rebuilt the front suspension (switched to discs, tall spindles, tubular uppers, a fast-ratio box, a Toronado swaybar, and stainless and NiCopp lines) then the rear suspension ('69 Chevy 12-bolt in place of the old 10-bolt, a repop W-27 rear just 'cause I could, a new Posi carrier and 3.31's, and more stainless and NiCopp.
Which brings us up to more or less modern day.
Last summer I did the floorpans, since only a few threads and a Tasmanian Devil floormat were the only things keeping my heel from resting on the exhaust pipe. With your permission, I'll start reposting from my own board, what I did last summer, and catching us up to this week, which is finishing up a 2004R install.Doc.
Thread Starter
Unregistered Madman
Joined: Mar 2012
Posts: 55
From: Backwater, Alaska
(Reposted from May of '25)
The interior, generally speaking, isn't bad, but faded and weathered. One thing I didn't like, because I'm an old-fashioned hotrodder, was the bench seat (the back of which was broken and the adjuster wouldn't work) and the column shift.
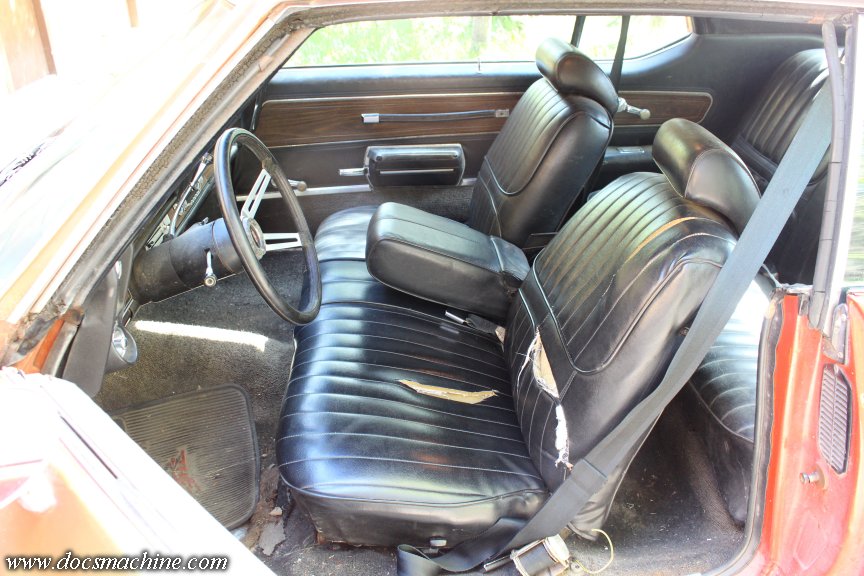
Original bucket seats for these cars aren't all that great, and command a pretty penny- besides shipping to Alaska. So, in a roundabout way, I acquired a set of nice buckets out of a '90 Cutlass, and back in 2017 or so, had a local shop recover them in fresh cloth and vinyl.
At some point after that, I found a decent factory center console and shifter on eBay, and paid a small fortune for it, and a larger one to get it shipped up.
So, on Friday, my traitorous brain got the better of me, and I decided to finally do the full interior rework. That is, there were four things I wanted to do: Swap in the console and shifter, swap in the buckets, swap in some "Rally Pack" gauges, and repair the big hole in the driver's side footwell.

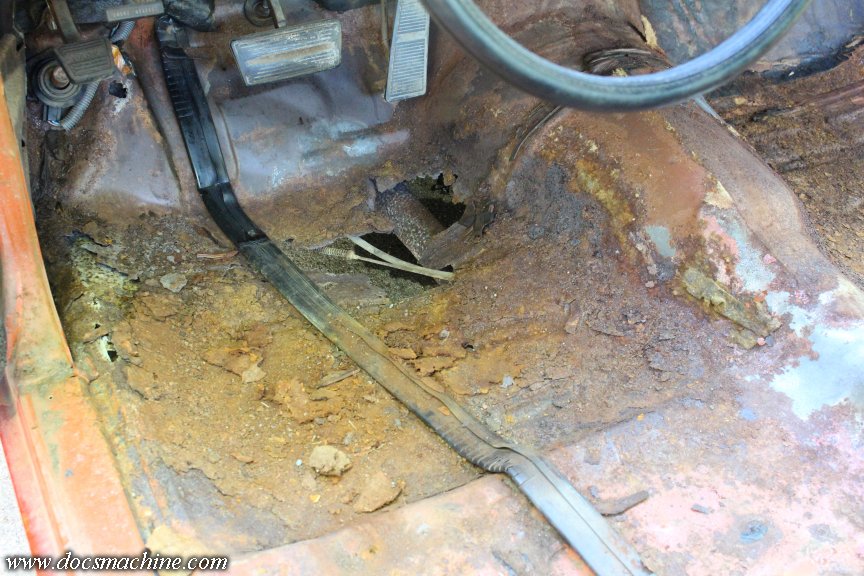
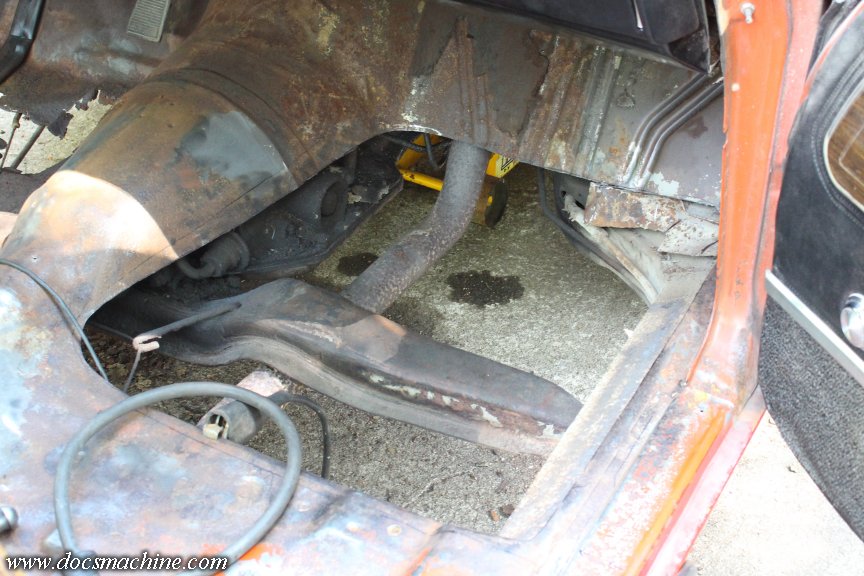
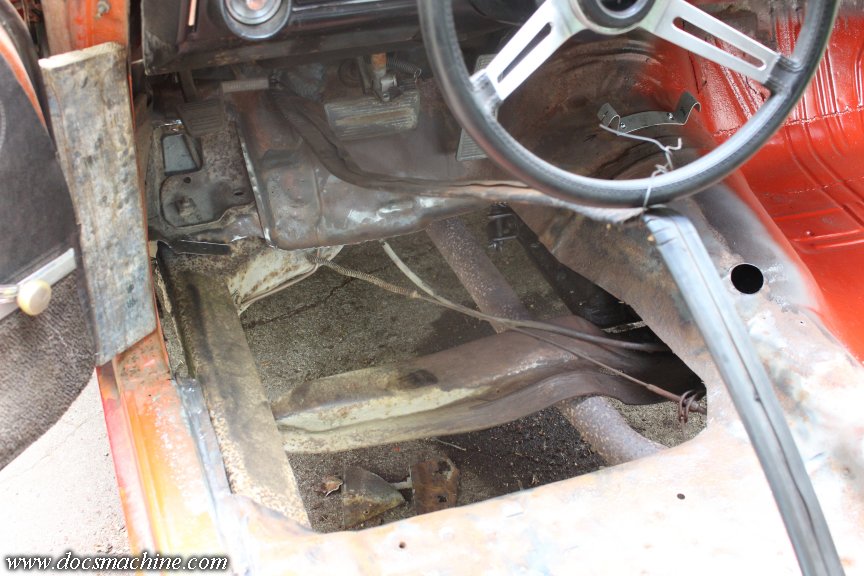
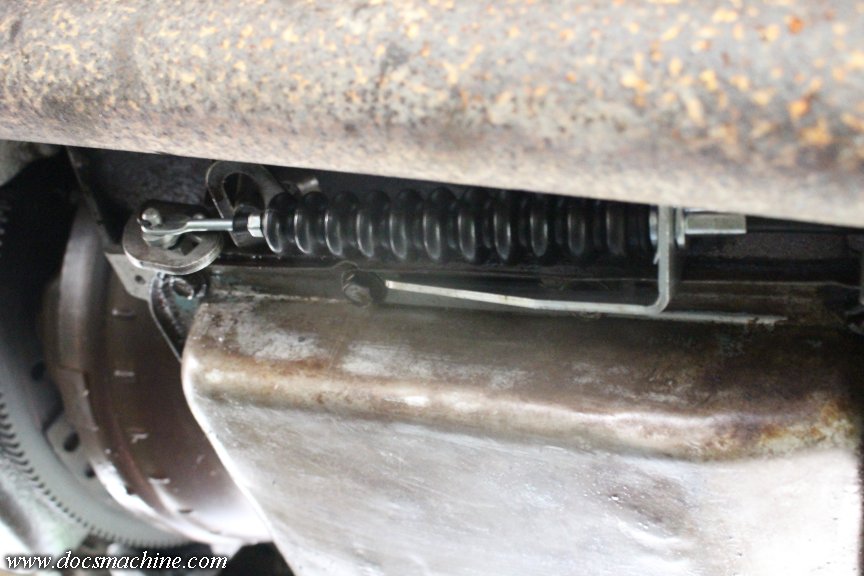
Without that Tasmanian Devil floor mat, my heel would rest on the exhaust pipe.
The bench unbolted without too much fuss- other than the rear bolts were tough to get at since the seat couldn't slide forward- and with some help, I got it manhandled out of there.
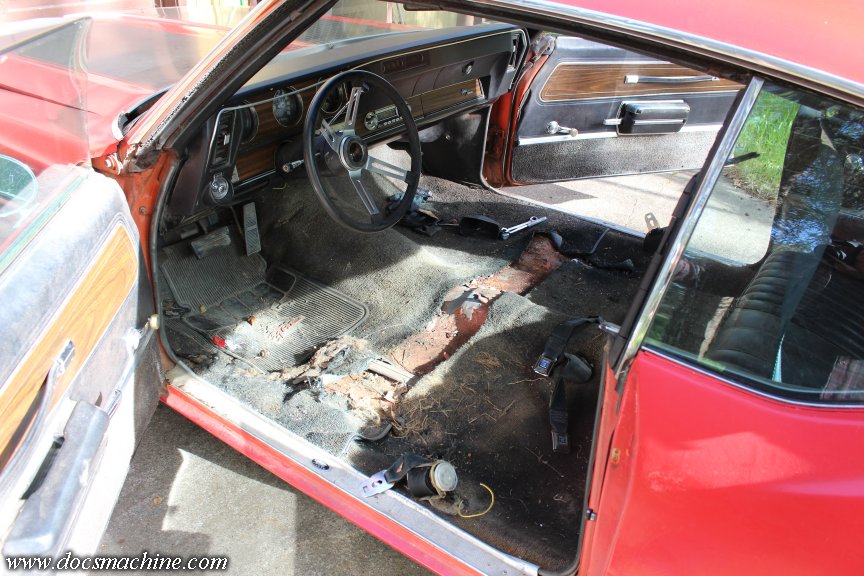
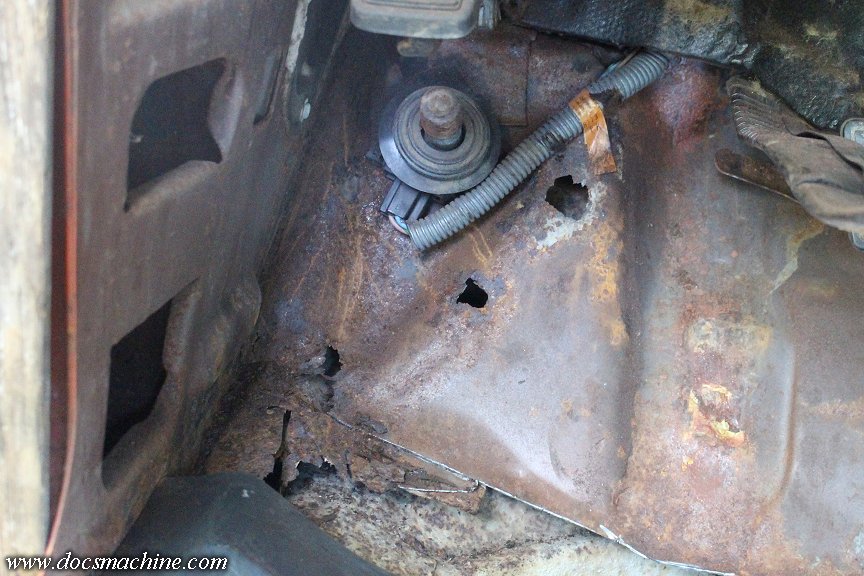
The front half of the carpet is largely destroyed on the driver's side, but the rear half wasn't bad- just heavily faded. I yanked it all out, found a grand total of seventeen cents, and vacuumed up a ton of debris.
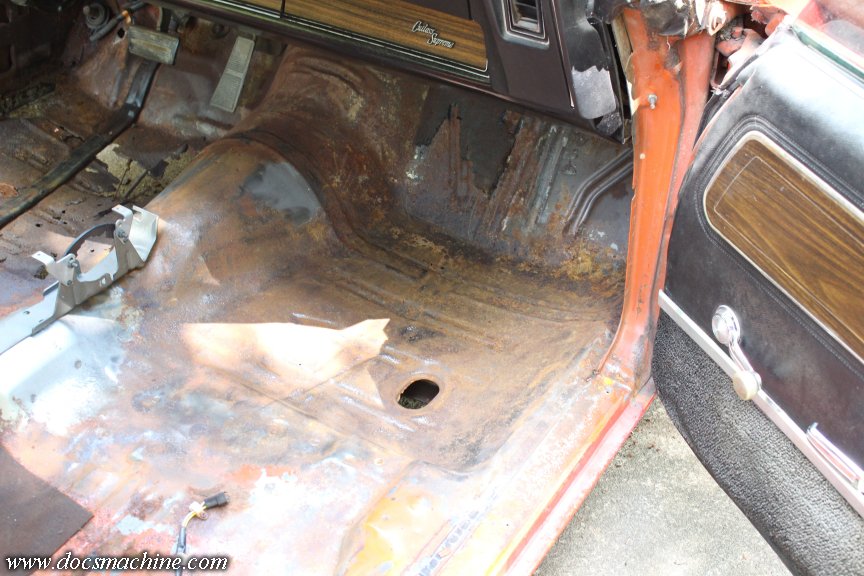
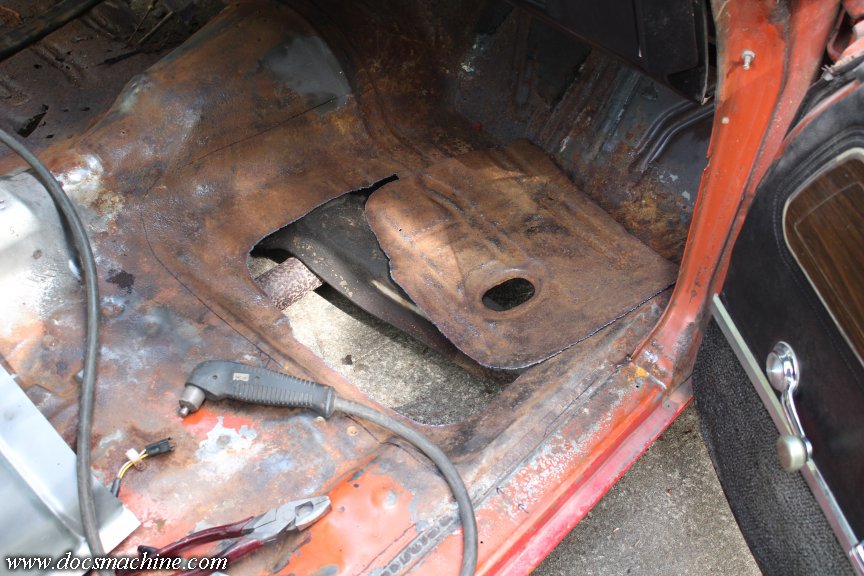
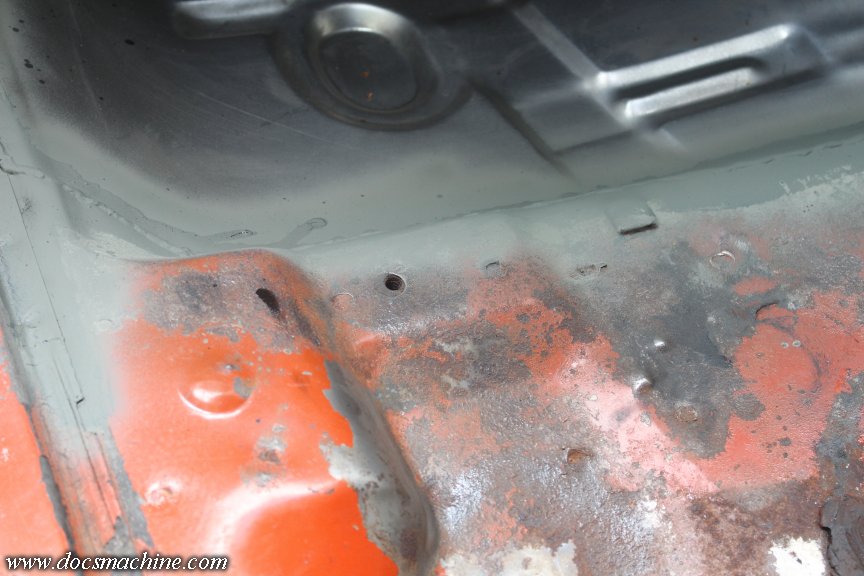
And, already, the rust was more extensive than I'd thought.
I had naively hoped that I could just patch a few holes with plain sheetmetal- this is in no way a 'restoration'- but the whole footwell was far too gone for that
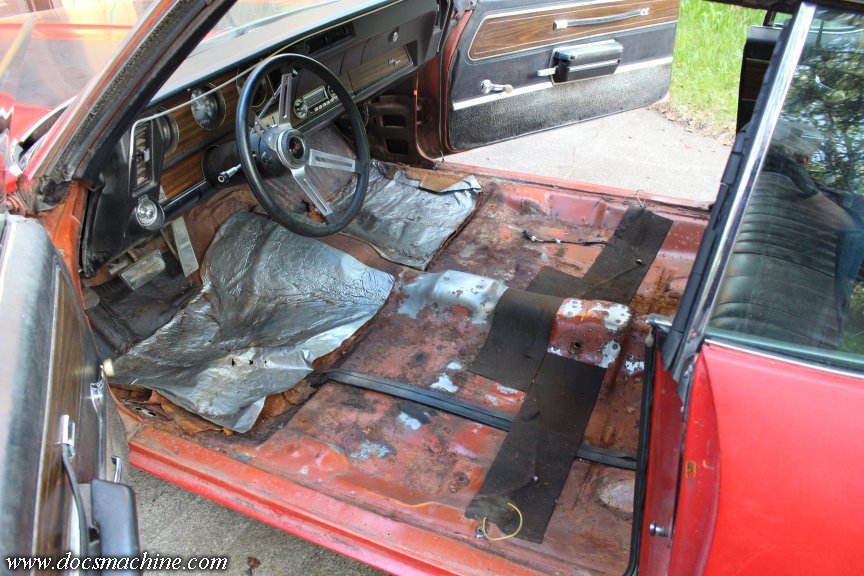
I should have anticipated it, and had a floorpan already in hand, but my 'plotting and scheming' time has been pretty dang thin of late, and the decision to finally jump at this was, after all, kinda last-minute. Once I swept and vacuumed up all the debris, and scraped it a bit with an old screwdriver, it was pretty clear only a total replacement was going to work.
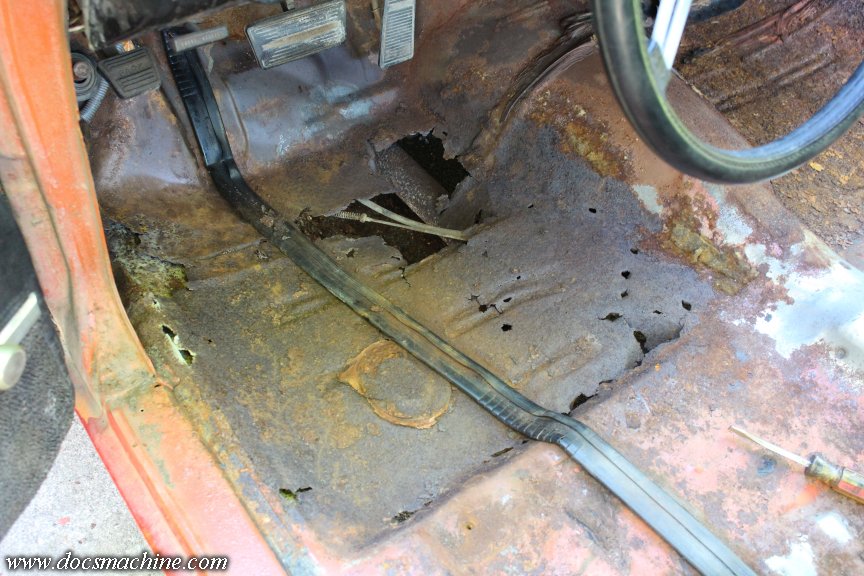
The passenger side was a lot better, and I probably could have lived with it, but it had a few pinholes, and I figured if I'm gonna place an order, I'd get both sides.
Found a set online, from a reputable vendor, and not a bad price- less than $200. Except I'm in Alaska, and they quoted me- I am not kidding, here- $875.74 in shipping.
So I found a different vendor, as you might imagine, and paid only very slightly more for the parts, and only about $140 for shipping.
But, that puts me at a bit of a standstill on that part. I don't even want to start cutting anything out, 'til I can see what kind of overlap I have with the new metal.
But fortunately (if that word can apply, here ) I have the other two things to work on. (I won't be doing the gauge pack 'til later- those cost almost $500, and I've already blown my budget for this project.)
Doc.
The interior, generally speaking, isn't bad, but faded and weathered. One thing I didn't like, because I'm an old-fashioned hotrodder, was the bench seat (the back of which was broken and the adjuster wouldn't work) and the column shift.
Original bucket seats for these cars aren't all that great, and command a pretty penny- besides shipping to Alaska. So, in a roundabout way, I acquired a set of nice buckets out of a '90 Cutlass, and back in 2017 or so, had a local shop recover them in fresh cloth and vinyl.
At some point after that, I found a decent factory center console and shifter on eBay, and paid a small fortune for it, and a larger one to get it shipped up.
So, on Friday, my traitorous brain got the better of me, and I decided to finally do the full interior rework. That is, there were four things I wanted to do: Swap in the console and shifter, swap in the buckets, swap in some "Rally Pack" gauges, and repair the big hole in the driver's side footwell.
Without that Tasmanian Devil floor mat, my heel would rest on the exhaust pipe.
The bench unbolted without too much fuss- other than the rear bolts were tough to get at since the seat couldn't slide forward- and with some help, I got it manhandled out of there.
The front half of the carpet is largely destroyed on the driver's side, but the rear half wasn't bad- just heavily faded. I yanked it all out, found a grand total of seventeen cents, and vacuumed up a ton of debris.
And, already, the rust was more extensive than I'd thought.
I had naively hoped that I could just patch a few holes with plain sheetmetal- this is in no way a 'restoration'- but the whole footwell was far too gone for that
I should have anticipated it, and had a floorpan already in hand, but my 'plotting and scheming' time has been pretty dang thin of late, and the decision to finally jump at this was, after all, kinda last-minute.
Once I swept and vacuumed up all the debris, and scraped it a bit with an old screwdriver, it was pretty clear only a total replacement was going to work.The passenger side was a lot better, and I probably could have lived with it, but it had a few pinholes, and I figured if I'm gonna place an order, I'd get both sides.
Found a set online, from a reputable vendor, and not a bad price- less than $200. Except I'm in Alaska, and they quoted me- I am not kidding, here- $875.74 in shipping.
So I found a different vendor, as you might imagine, and paid only very slightly more for the parts, and only about $140 for shipping.
But, that puts me at a bit of a standstill on that part. I don't even want to start cutting anything out, 'til I can see what kind of overlap I have with the new metal.
But fortunately (if that word can apply, here
) I have the other two things to work on. (I won't be doing the gauge pack 'til later- those cost almost $500, and I've already blown my budget for this project.)Doc.
Thread Starter
Unregistered Madman
Joined: Mar 2012
Posts: 55
From: Backwater, Alaska
Not being able to do anything with the floors just yet, I turned to the shifter and console, and that's when things started getting tricky. The setup is factory made for this car, but not necessarily a "bolt on". There's two brackets that have to be either made or bought (I bought some, they were $40 shipped) and then welded in in the right place.
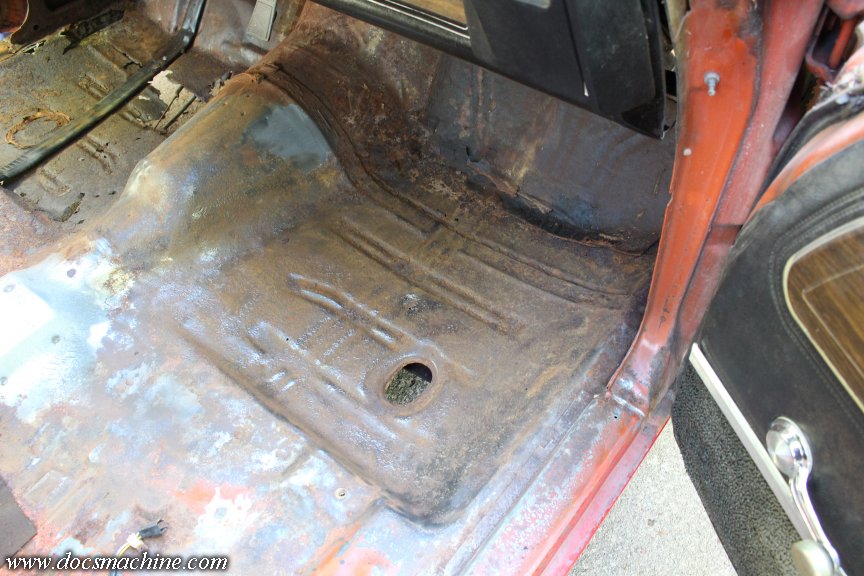
The key, so to speak, is this dimpled lump in the transmission tunnel.
Supposedly that's where the shifter cable goes through- drill right on the dimple, which is supposedly factory located for the workers to drill through, and that should locate the hole for the cable.
The shifter itself is supposed to mount to these dimples- the smaller ones- which were to be drilled out and fitted with screws.
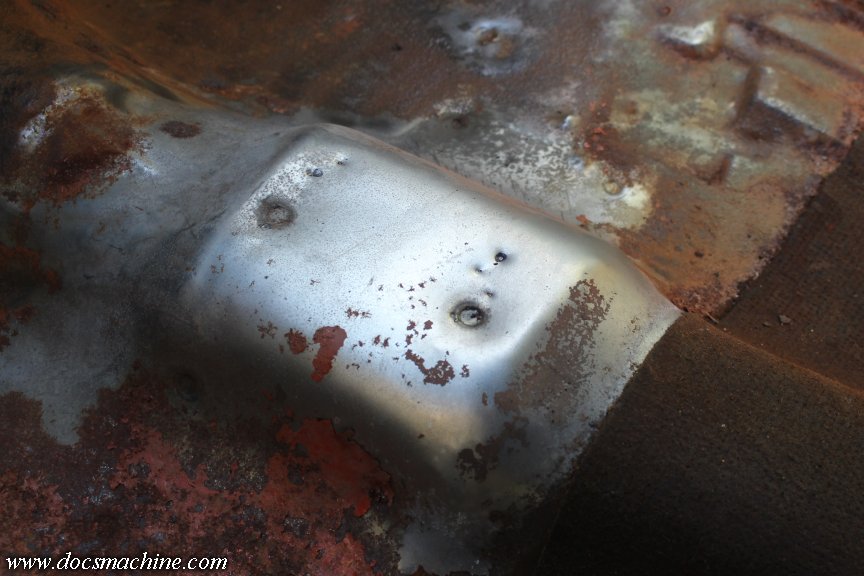
But, getting out the shifter assembly and checking... if you line up the mounting spots, the cable wouldn't even be close. If you line up the cable, the other dimples are way off. And I can find nothing online that says anything about this.
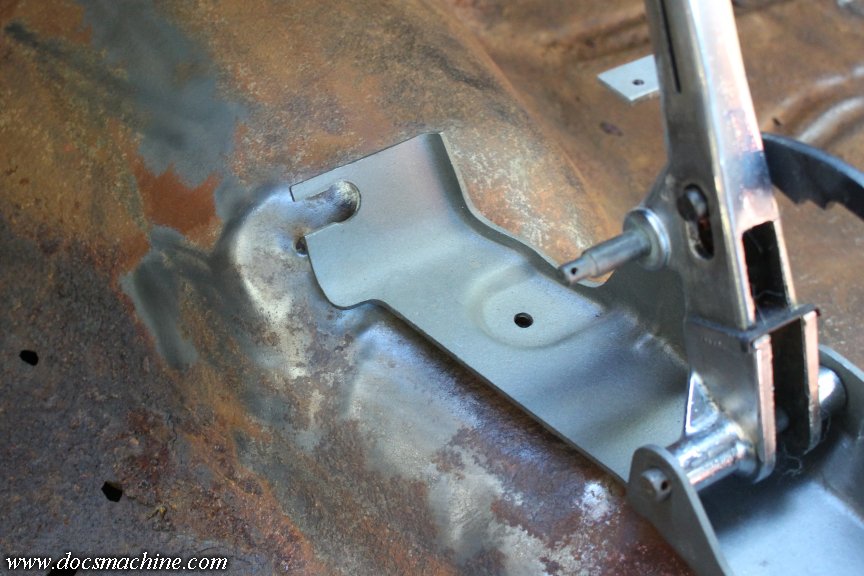
Thing is, the shifter assembly has to be positioned correctly, since the whole console shell attaches in part to it. If the shifter is installed crooked or wonky, the console will be similarly wonky. And, I'm probably going to have to use the console itself to locate where to put the other two mounts, so really, the shifter assembly is the key here.
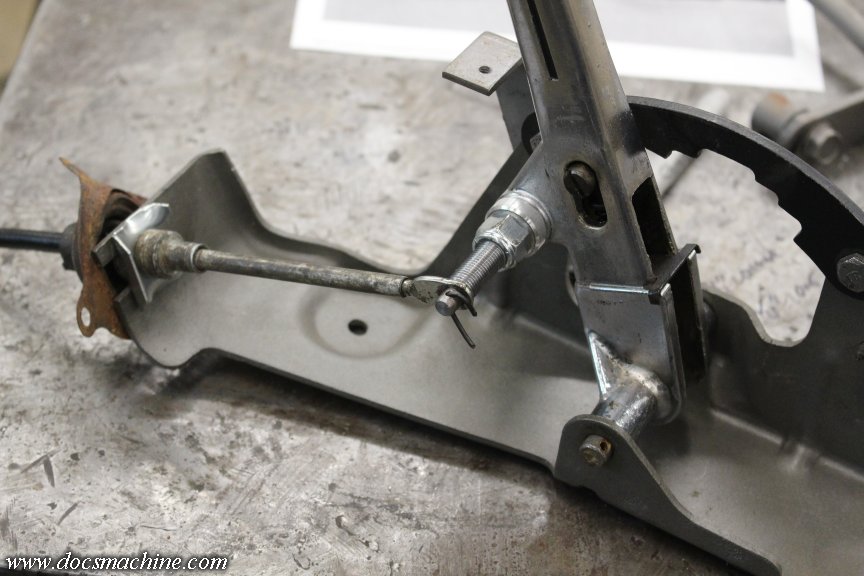
The first thing I did was dig out the cable and see how that attaches- I'll also have to crawl under the car and see how much clearance I have to the trans, since it looks like I'll have to drill for alignment to the assembly, not to the factory dimple.
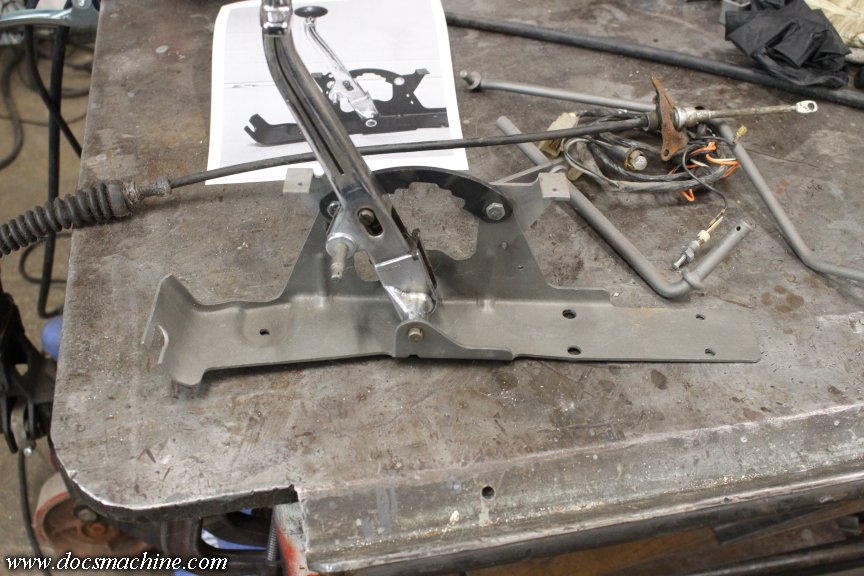
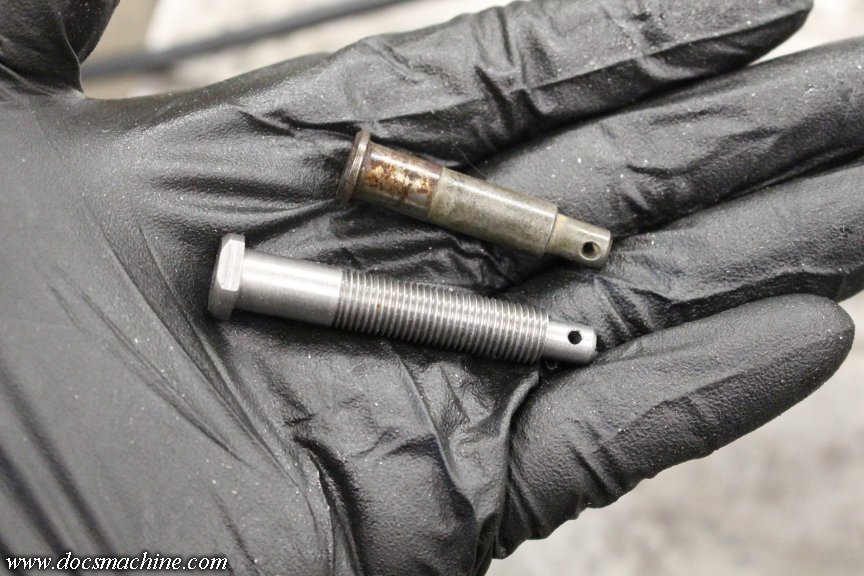
And good thing I did, because the first thing i noticed was the connecting rod was half an inch too short for some reason.
And, the end of the cable wouldn't even fit the rod.
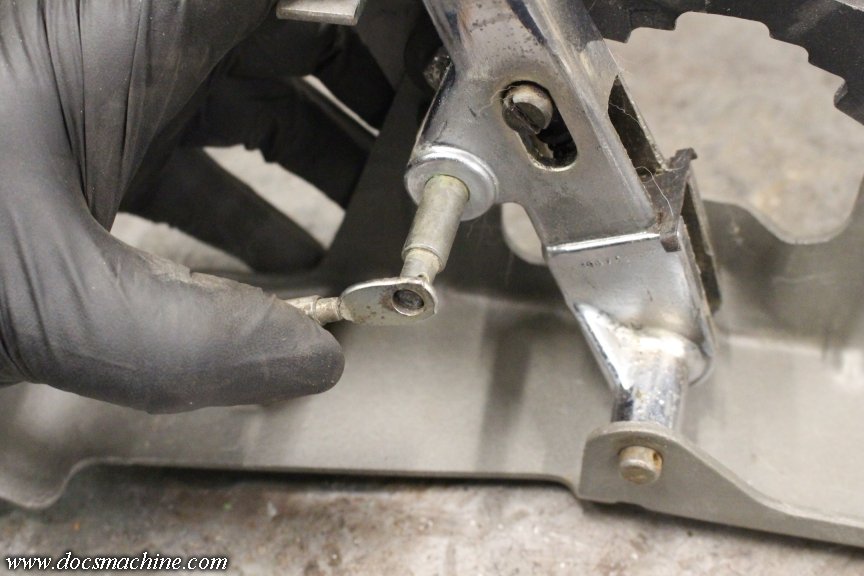
The cable end is nominally .250", while the end of the rod measures .263". Clearly something is wrong here, so back to the internet I go. Almost by accident, I ran across this photo, which showed I had a 1970 shift lever and a '71-'72 bracket.
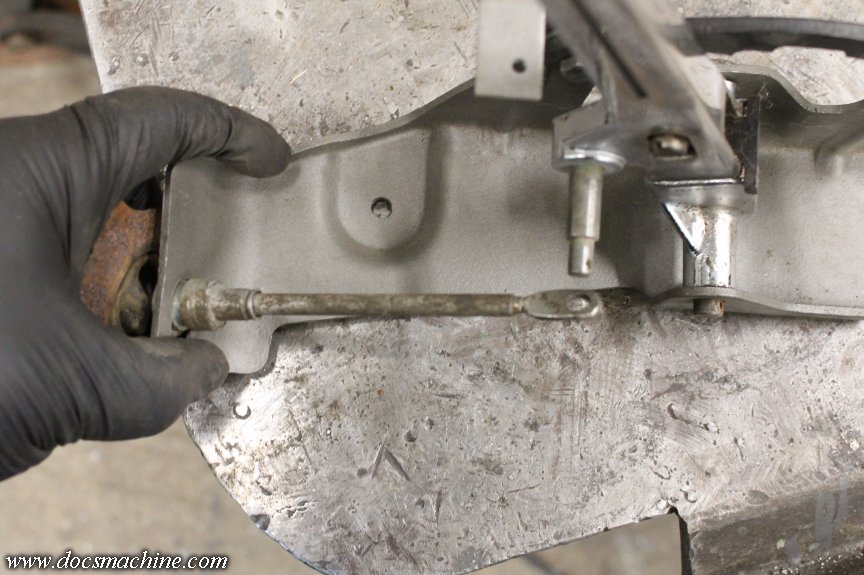
After pondering some options, I naturally chose (controlled) violence, and popped the old rod out in the press.
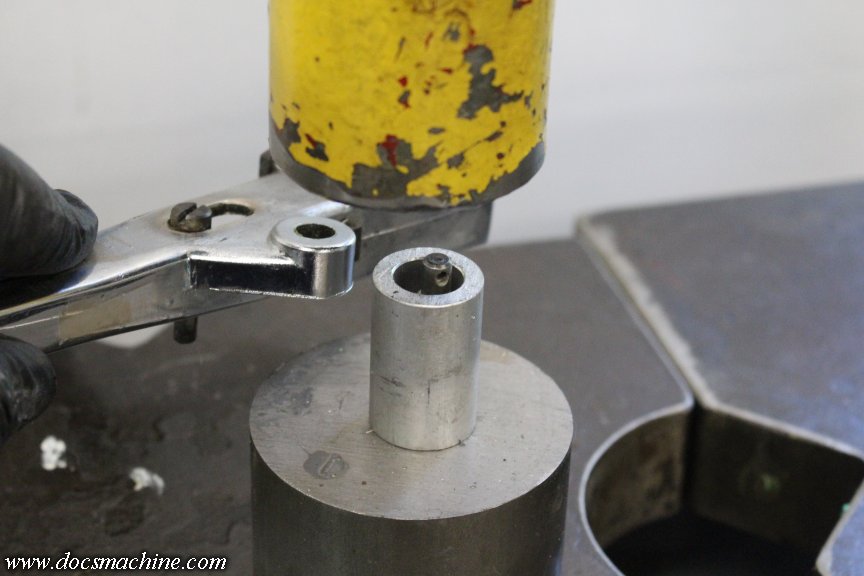
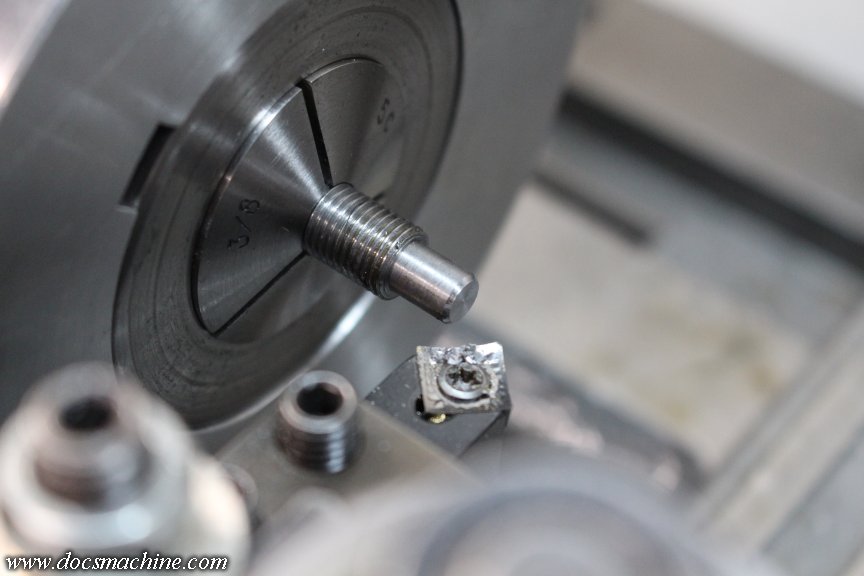
Digging through my box of cut-off and scraps, I found a chunk of what was probably a good alloy steel- I think it was part of an old tap handle, that I got a number of years ago in a bucket of other such scrap.
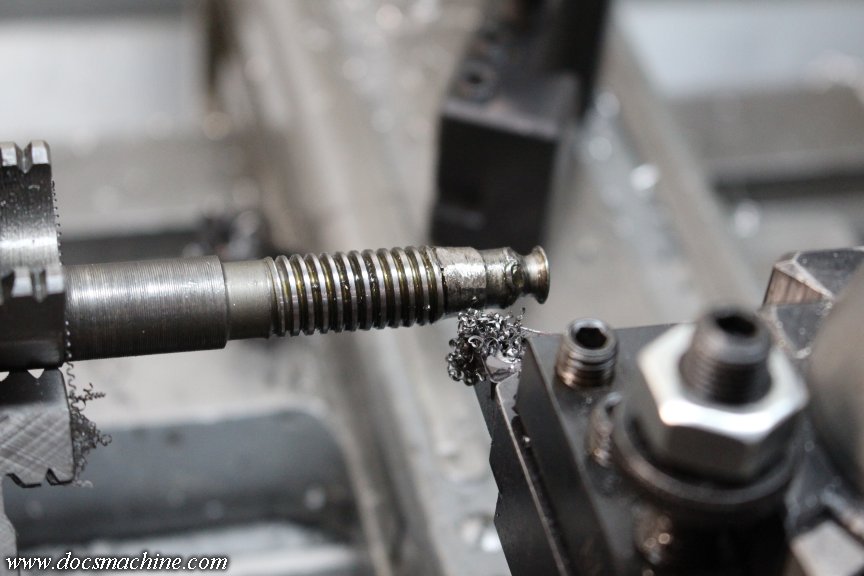
That got turned down into a close approximation of a new rod...
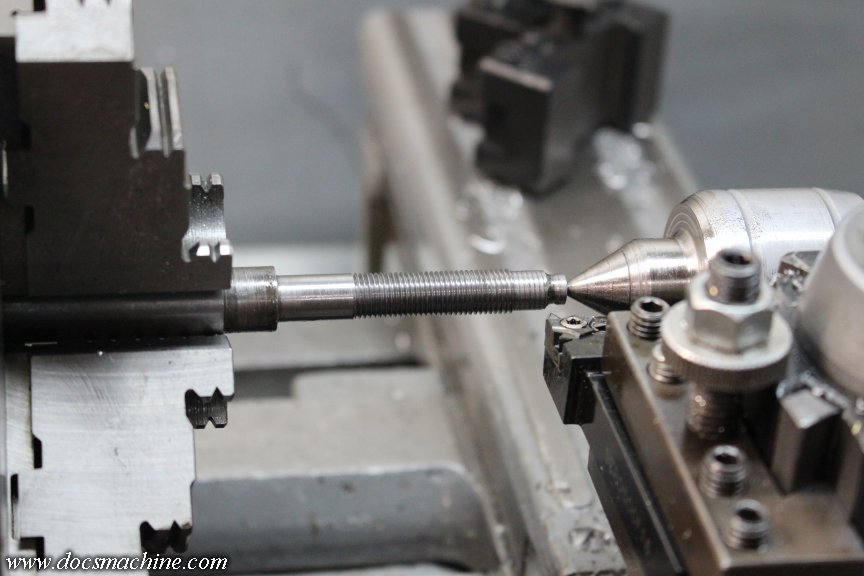
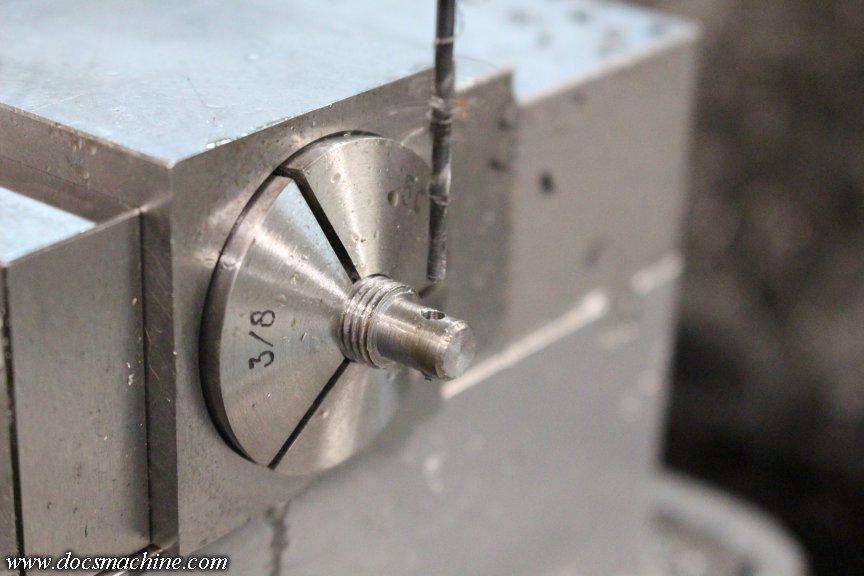
Measured and adjusted for length...
Drilled....
And flattened.
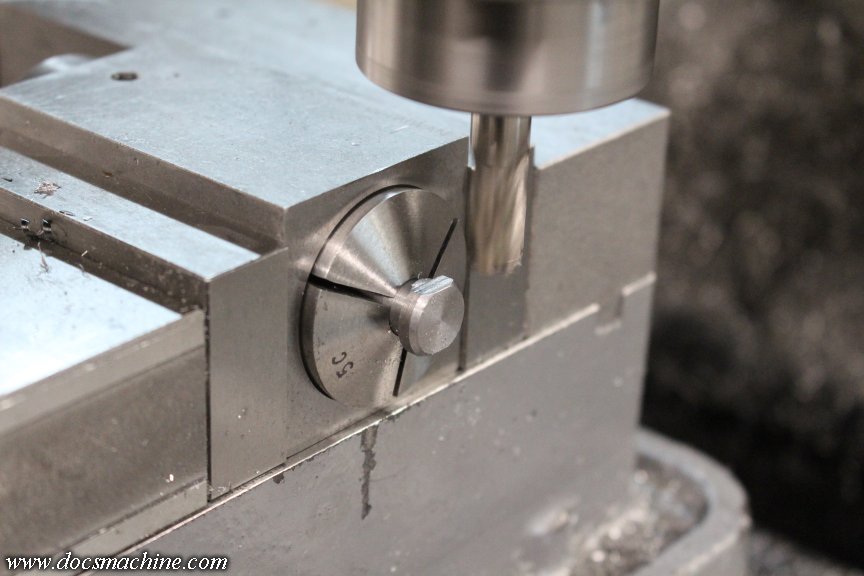
And it's just that easy.
That gets pressed back into place, given a thick aluminum washer to spread the load a little, and tightened into place with a Nylock. With the cable clipped in place and given a temporary bit of baling wire as a retainer (because of course I can't find my container of cotter pins) it moves smoothly and easily.
I still need to do a little more checking before I start drilling proper holes, and of course I have my other duties to attend to, so that's as far as I got this time.
Lots more to come.
Doc.
The key, so to speak, is this dimpled lump in the transmission tunnel.
Supposedly that's where the shifter cable goes through- drill right on the dimple, which is supposedly factory located for the workers to drill through, and that should locate the hole for the cable.
The shifter itself is supposed to mount to these dimples- the smaller ones- which were to be drilled out and fitted with screws.
But, getting out the shifter assembly and checking... if you line up the mounting spots, the cable wouldn't even be close. If you line up the cable, the other dimples are way off. And I can find nothing online that says anything about this.
Thing is, the shifter assembly has to be positioned correctly, since the whole console shell attaches in part to it. If the shifter is installed crooked or wonky, the console will be similarly wonky. And, I'm probably going to have to use the console itself to locate where to put the other two mounts, so really, the shifter assembly is the key here.
The first thing I did was dig out the cable and see how that attaches- I'll also have to crawl under the car and see how much clearance I have to the trans, since it looks like I'll have to drill for alignment to the assembly, not to the factory dimple.
And good thing I did, because the first thing i noticed was the connecting rod was half an inch too short for some reason.
And, the end of the cable wouldn't even fit the rod.
The cable end is nominally .250", while the end of the rod measures .263". Clearly something is wrong here, so back to the internet I go. Almost by accident, I ran across this photo, which showed I had a 1970 shift lever and a '71-'72 bracket.
After pondering some options, I naturally chose (controlled) violence, and popped the old rod out in the press.
Digging through my box of cut-off and scraps, I found a chunk of what was probably a good alloy steel- I think it was part of an old tap handle, that I got a number of years ago in a bucket of other such scrap.
That got turned down into a close approximation of a new rod...
Measured and adjusted for length...
Drilled....
And flattened.
And it's just that easy.
That gets pressed back into place, given a thick aluminum washer to spread the load a little, and tightened into place with a Nylock. With the cable clipped in place and given a temporary bit of baling wire as a retainer (because of course I can't find my container of cotter pins) it moves smoothly and easily.
I still need to do a little more checking before I start drilling proper holes, and of course I have my other duties to attend to, so that's as far as I got this time.
Lots more to come.
Doc.
Thread Starter
Unregistered Madman
Joined: Mar 2012
Posts: 55
From: Backwater, Alaska
-The pics are under the link I posted: Before, as of about 2011...

And as of about 2017:

It's been a long-term project. I got the car rolling in '11, streetable in '12, did the front suspension in '15, the rear suspension I think in '18, and the floorpans and interior in '25. I posted most of it in one shape or another to my own discussion board, the Tinker's Guild, and archived some of it to my website. Most is still on the board, but I'm working (slowly) to move it to the site.
-Not too many more frayed and threadbare. The base car was free, else it was going to the dump. That shiny red paint (which isn't so shiny anymore) was $57.10 in enamel and masking tape. The engine was a free 307 out of a trashed Delta 98. There's a lot of luck, baling wire and Bondo in that car.
It took me two years to save up for the front end, two more years to save up for the rear, I sold a bunch of books to pay for the transmission rebuild, etc.
Yeah, this is very much a budget build. Absolutely not any kind of "restoration"- she's a fun driver, for the 37-1/2 minutes of good weather we get a year.
Doc.
And as of about 2017:
It's been a long-term project. I got the car rolling in '11, streetable in '12, did the front suspension in '15, the rear suspension I think in '18, and the floorpans and interior in '25. I posted most of it in one shape or another to my own discussion board, the Tinker's Guild, and archived some of it to my website. Most is still on the board, but I'm working (slowly) to move it to the site.
Shoestring budget?
The base car was free, else it was going to the dump. That shiny red paint (which isn't so shiny anymore) was $57.10 in enamel and masking tape. The engine was a free 307 out of a trashed Delta 98. There's a lot of luck, baling wire and Bondo in that car.It took me two years to save up for the front end, two more years to save up for the rear, I sold a bunch of books to pay for the transmission rebuild, etc.
Yeah, this is very much a budget build. Absolutely not any kind of "restoration"- she's a fun driver, for the 37-1/2 minutes of good weather we get a year.
Doc.
Thread Starter
Unregistered Madman
Joined: Mar 2012
Posts: 55
From: Backwater, Alaska
(Reposted from May of '25)
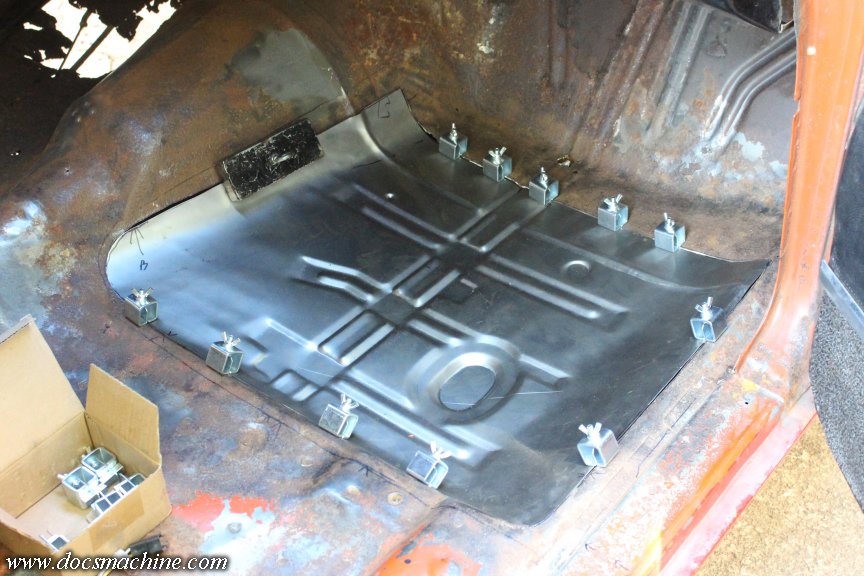
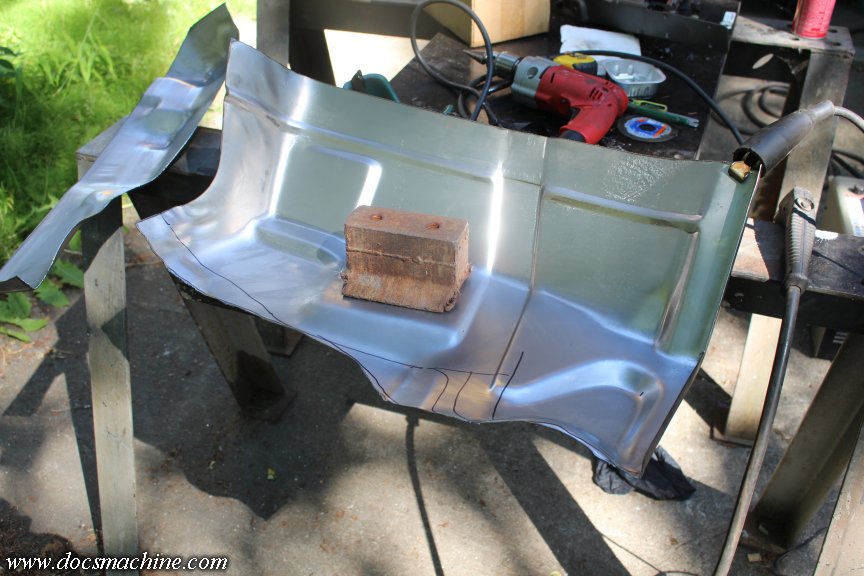
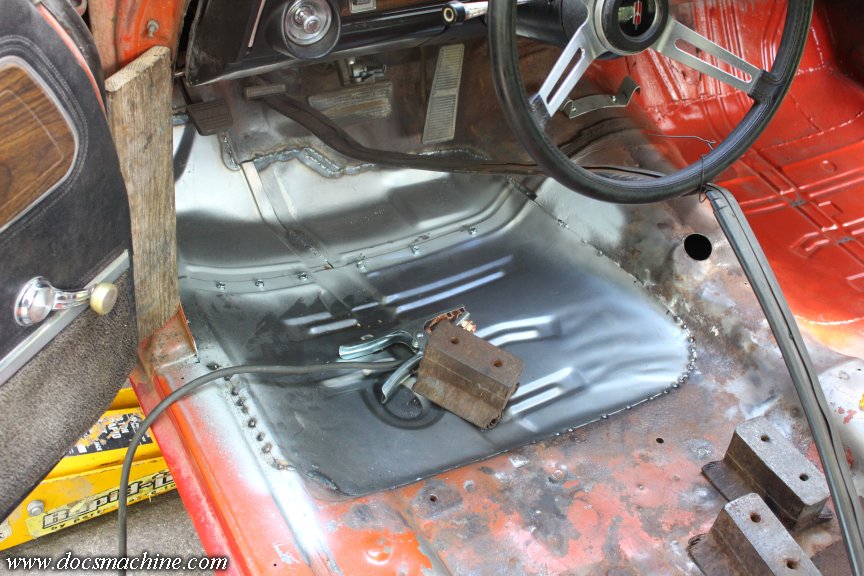
I decided to get the floorpans taken care of first. That's going to be the biggest part of this whole task, so let's get it out of the way. While the driver's side was worse, I decided to start on the passenger side- I wouldn't be so annoyed if I boogered something up.
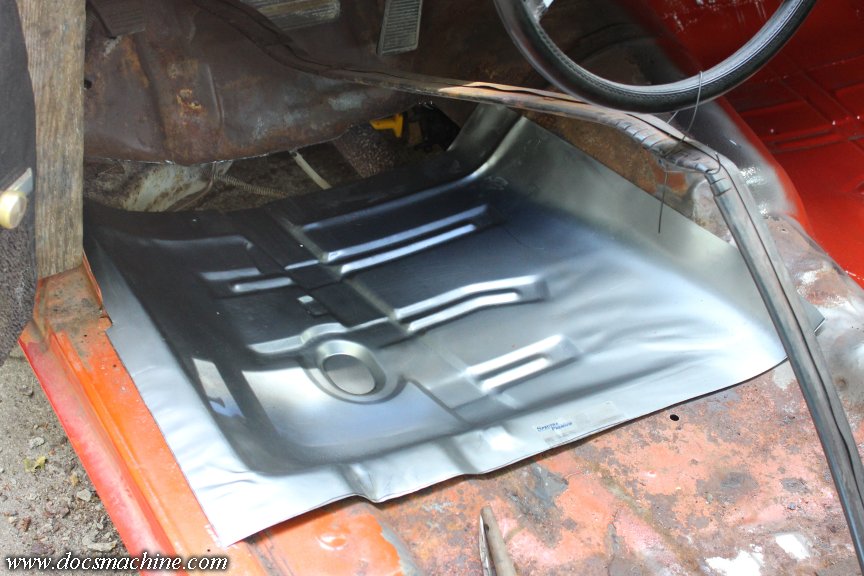
My floor pans had, of course, come in last week. They weren't the best I could find, but they were about the best I could afford- and, this particuler vendor actually had them in stock. (And didn't charge me almost $900 in shipping!)
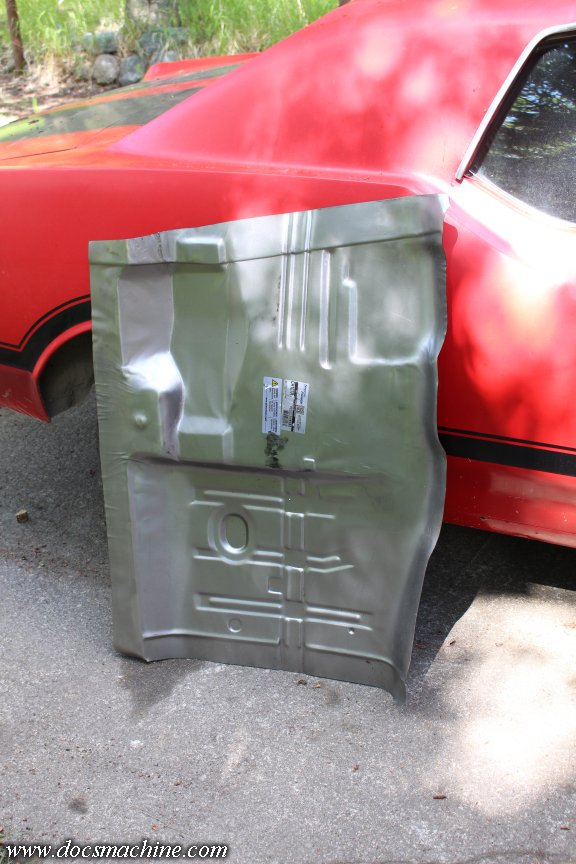
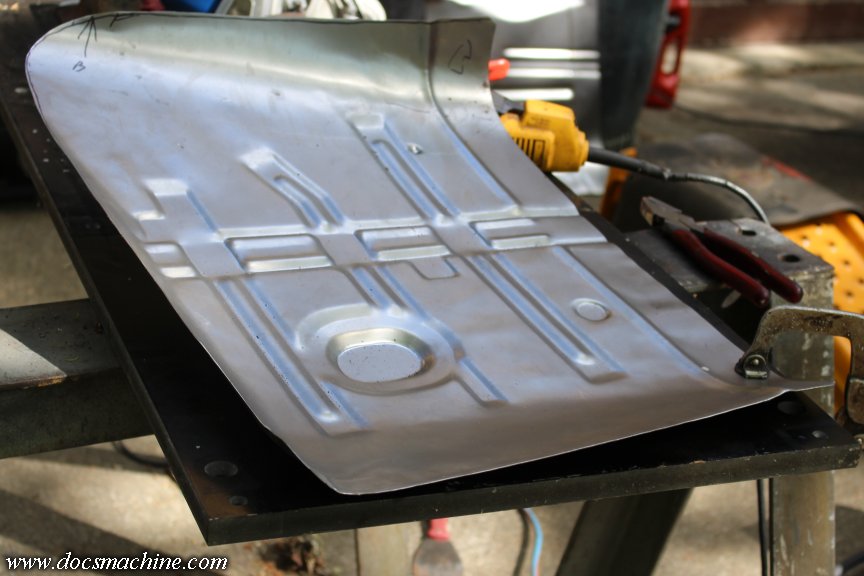
However, these were intended to go from seam to seam on the floor- twice as long as I needed:
So I sliced it down, and started doing a little preliminary trimming to see how it fit best.
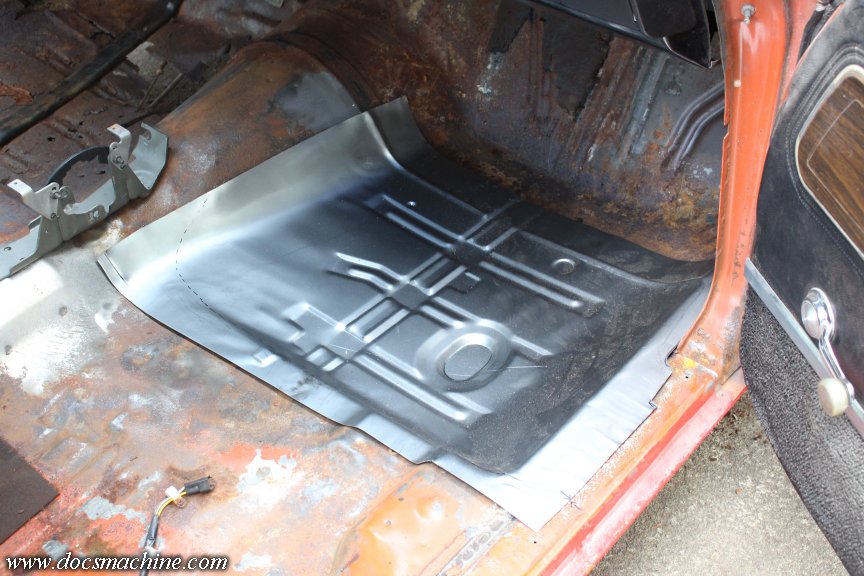
The drawback to this particular pan is that it doesn't go up the firewall. The rust extends up that way a bit, and moreso on the driver's side, so I'll have to do a little patching, there, unless I can find a replacement panel for that, too. (That I can afford.)
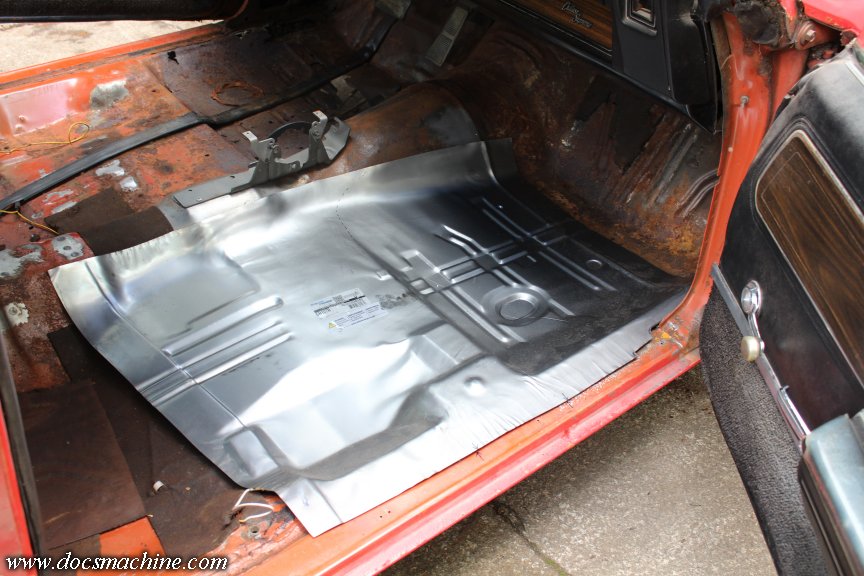
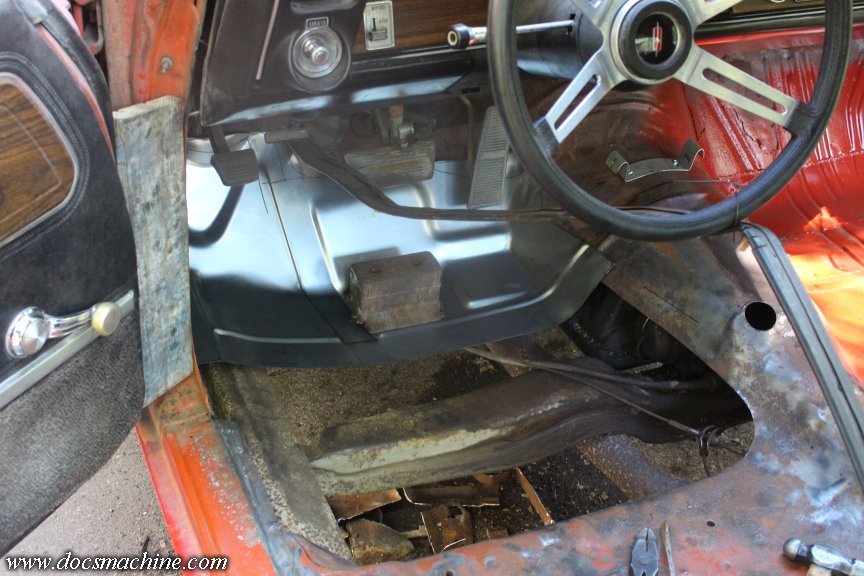
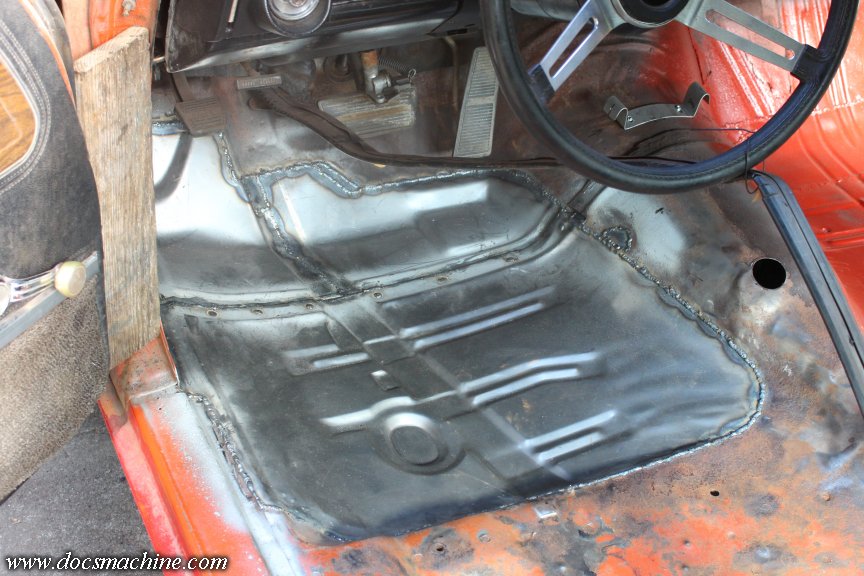
I couldn't show you everything, there was a LOT of cut-and-try going on. I was being slow and careful, so I didn't slice away too much. But, once I had it trimmed down to about where I thought I needed it, I marked out the perimeter, dug out the plaz, and lopped out the first piece.
After that, it was several hours of cut-and-try, trimming the hole open wider, and the new steel down to match it, again, going slow and careful. I used grinders, shears, two different kinds of nibblers, and the ubiquitous ball-peen to get things lined up.
After a while, I finally had it pretty close...
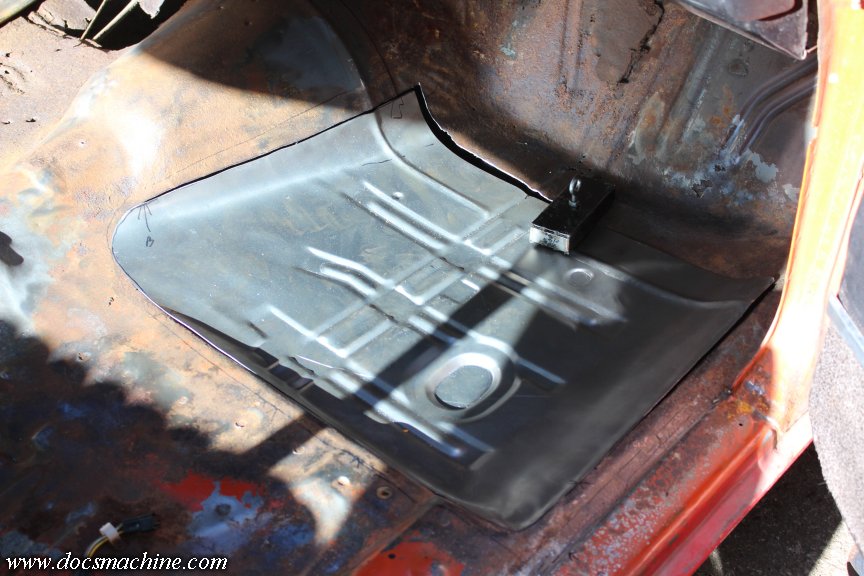
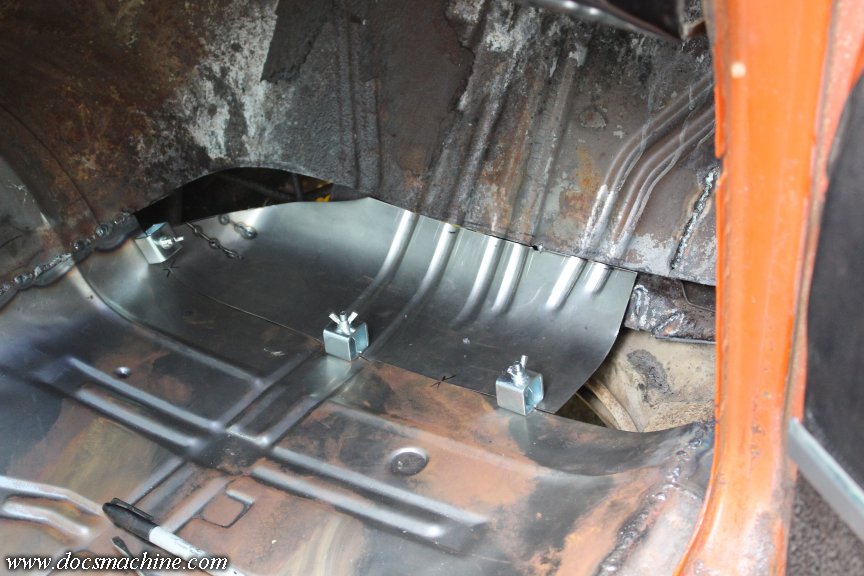
So I got out my shiny new box of eBay butt clamps, and got 'er pretty well locked into place.
The tranny tunnel seam is going to need a bit of hammer-and-dolly massaging, which I'll have to do once it's firmly tacked. Unfortunately, by the time I got to this point, it was too late to get the welder out and start tacking things, so I'll double-check the fit tomorrow, and seam it up then. (Minus the front edge- at least a third of which still needs to be patched.)
Doc.
I decided to get the floorpans taken care of first. That's going to be the biggest part of this whole task, so let's get it out of the way. While the driver's side was worse, I decided to start on the passenger side- I wouldn't be so annoyed if I boogered something up.
My floor pans had, of course, come in last week. They weren't the best I could find, but they were about the best I could afford- and, this particuler vendor actually had them in stock.
(And didn't charge me almost $900 in shipping!)However, these were intended to go from seam to seam on the floor- twice as long as I needed:
So I sliced it down, and started doing a little preliminary trimming to see how it fit best.
The drawback to this particular pan is that it doesn't go up the firewall. The rust extends up that way a bit, and moreso on the driver's side, so I'll have to do a little patching, there, unless I can find a replacement panel for that, too. (That I can afford.)
I couldn't show you everything, there was a LOT of cut-and-try going on. I was being slow and careful, so I didn't slice away too much. But, once I had it trimmed down to about where I thought I needed it, I marked out the perimeter, dug out the plaz, and lopped out the first piece.
After that, it was several hours of cut-and-try, trimming the hole open wider, and the new steel down to match it, again, going slow and careful. I used grinders, shears, two different kinds of nibblers, and the ubiquitous ball-peen to get things lined up.
After a while, I finally had it pretty close...
So I got out my shiny new box of eBay butt clamps, and got 'er pretty well locked into place.
The tranny tunnel seam is going to need a bit of hammer-and-dolly massaging, which I'll have to do once it's firmly tacked. Unfortunately, by the time I got to this point, it was too late to get the welder out and start tacking things, so I'll double-check the fit tomorrow, and seam it up then. (Minus the front edge- at least a third of which still needs to be patched.)
Doc.
Thread Starter
Unregistered Madman
Joined: Mar 2012
Posts: 55
From: Backwater, Alaska
(Reposted from May of '25)
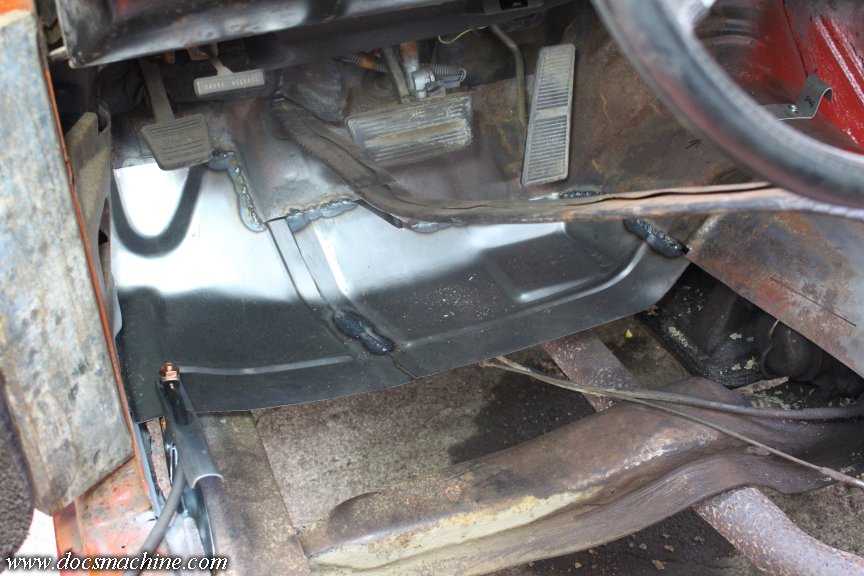
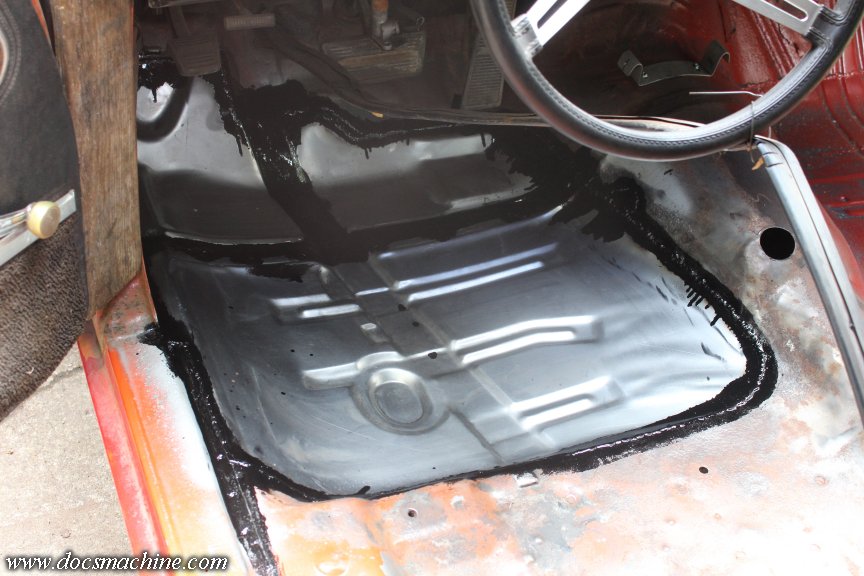
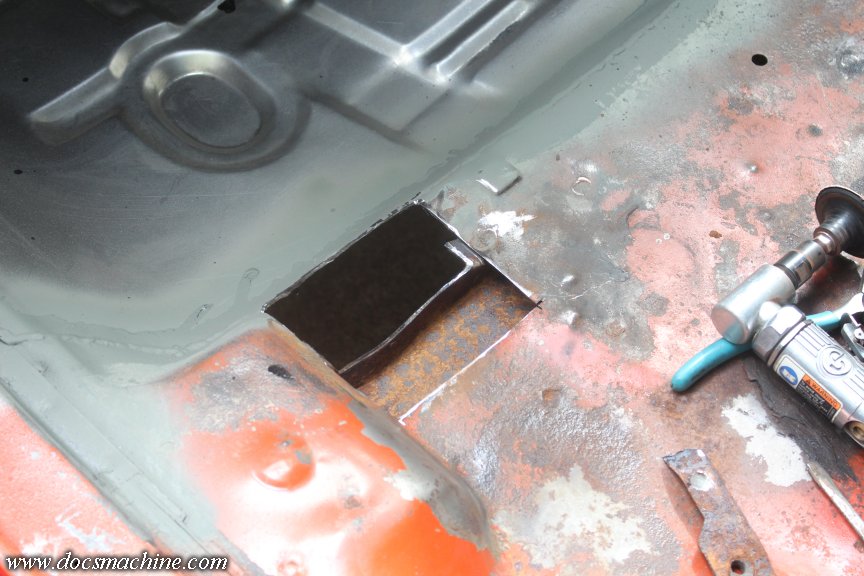
Before I started welding anything, I decided it'd be easier to patch the firewall portion first- or at least to form/fabricate the compound-curve piece that'll go in there, before the new floor is welded in place.
As such, I marked out kind of the bare minimum to slice away the rust, and cut that out.
No pressure.
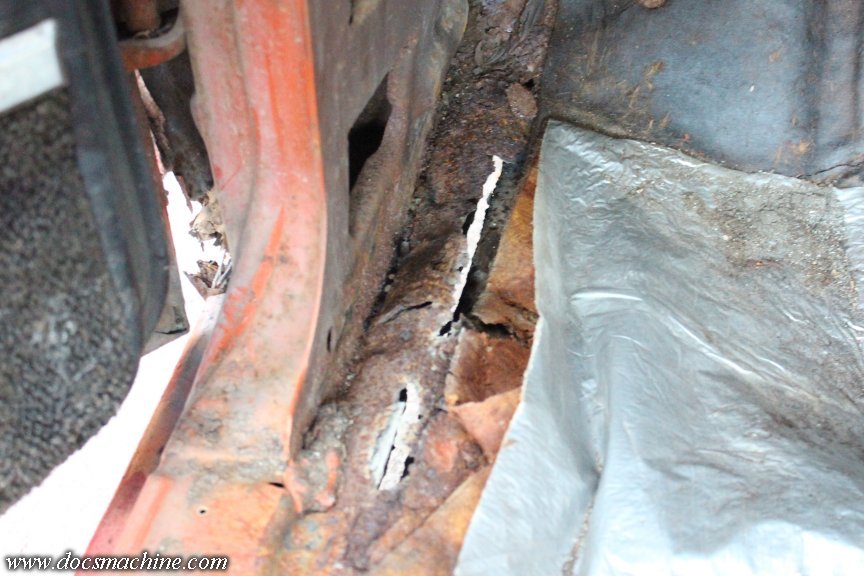
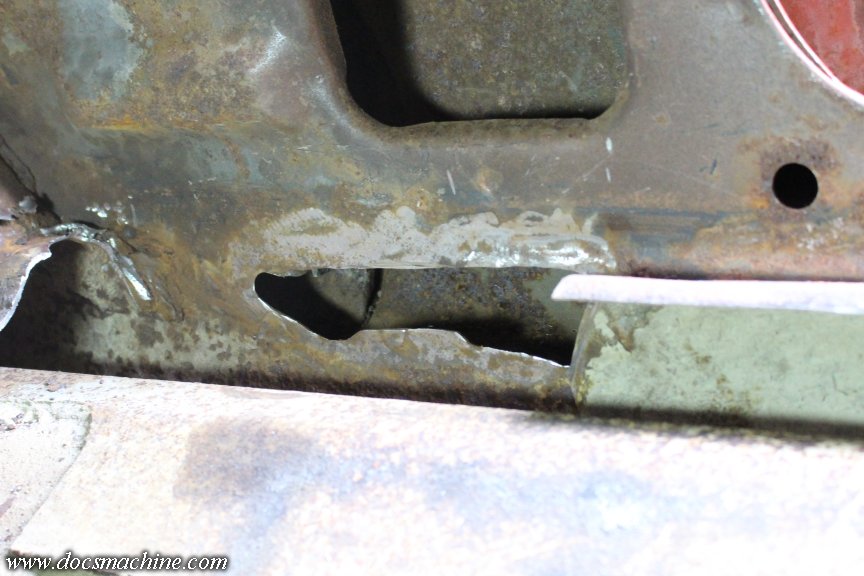
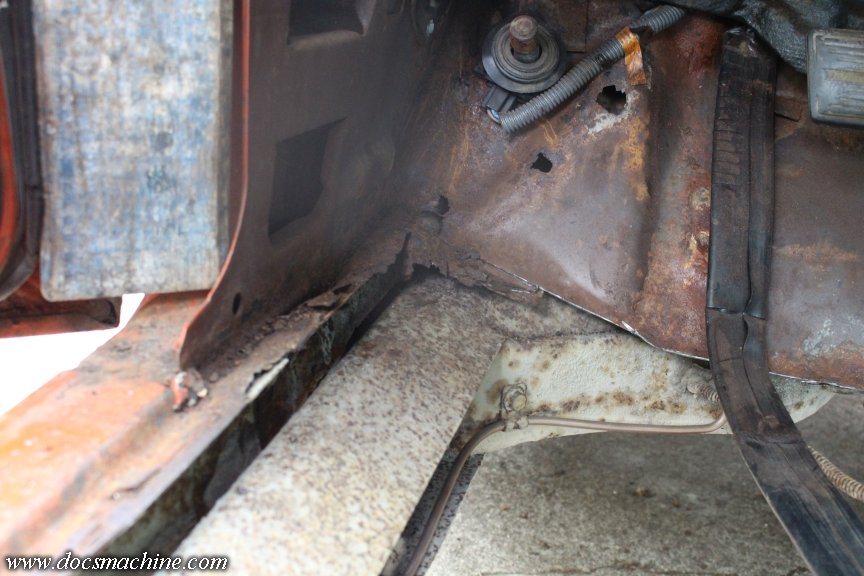
Unfortunately, as per universal standard when working on an old car, once one cuts some rust away, more rust appears. I was forced to cut out a section outboard of the new panel, which itself revealed significant holes in the base of the A-pillar.
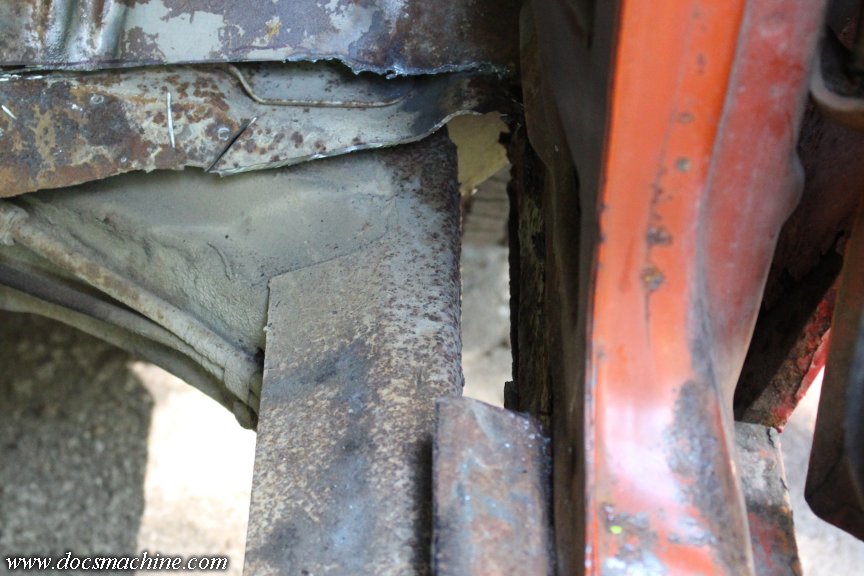
And therein lies a problem. It's hard to tell in the 2D photos, but those holes are more or less at the same level as the top of the frame- the rectangular bit the small tubes are bolted to. I can probably get in there with the plasma cutter and slice out those two holes, making a single hole to weld fresh metal back into.
But, the lower edge of that new hole is going to be below the top of the frame- and getting the tip of a MIG in there to weld it back up is going to be difficult.
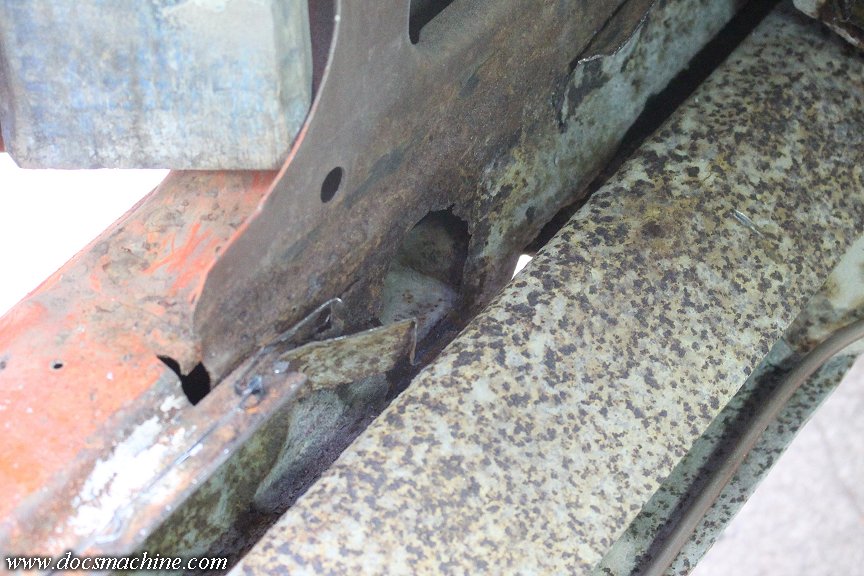
But, lacking other options, I did what I could to cut out those holes. I had to put a right-angle air fitting on my die-grinder cutoff wheel, and use both a finger belt sander and a die grinder with a carbide burr to clear out as much of the rust as I could.
The weird shape was to minimize how much solid metal I had to take- and that flat section at the bottom, in the middle, is at the level of the frame. That may be the lowest I'll be able to reach with the conventional MIG gun and cup.
I picked up a 2-pound roll of .035" flux-core- and yes, as it turns out, my machine does indeed have a setting for it- so at last resort, I may be able to reach in there with just the MIG tip, to get those lower seams.
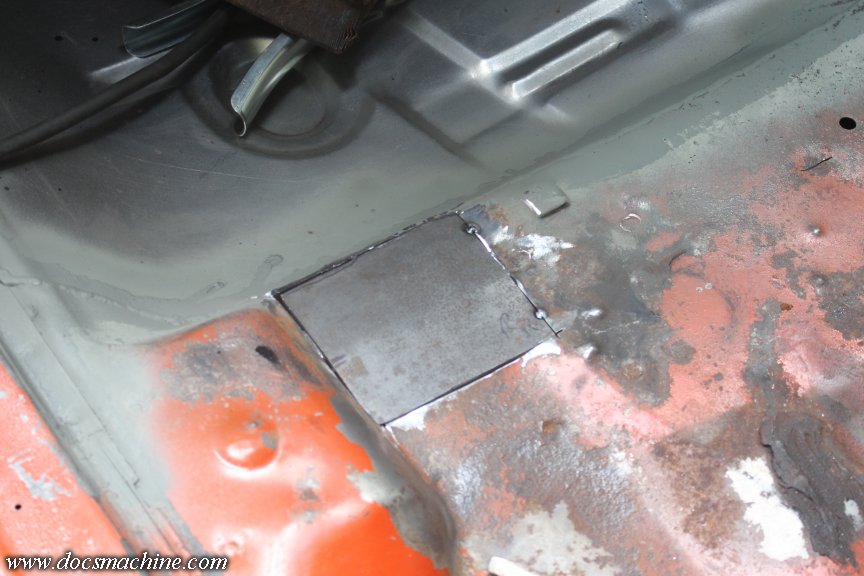
So, with that blown out, vacuumed out and cleaned as best I could (it doesn't connect to the upper opening, as it turns out) I spent a few careful minutes making a patch out of a chunk I'd cut off the new floorpan as I was trimming it down. I thought I made a decent fit.

But, before I sealed it up, I hosed some Ospho in there, and laving that to dry/cure.
You professional weldors and experienced auto-body types probably ought to avert your eyes at this point.
Got the funky A-pillar patch welded in...
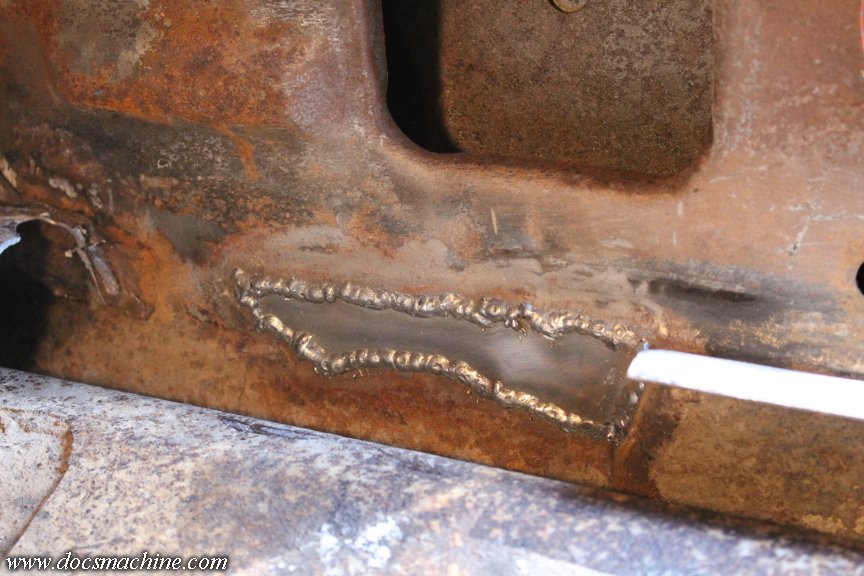
The right-hand seam was an attempt to join three edges at once, and unfortunately, I can't say I'm sure I managed to pull it off. Once things are fully welded and I'm in the sealing-and-painting stage, I'll do something like dribble some POR-15 in there, or hit it seam sealer, etc. Best I can do with the tools and time I have.
The weld itself doesn't look great, but is solid. As usual, it's not much more than a series of spot welds, plus a couple burn-throughs where the original metal was a bit thinner than expected.
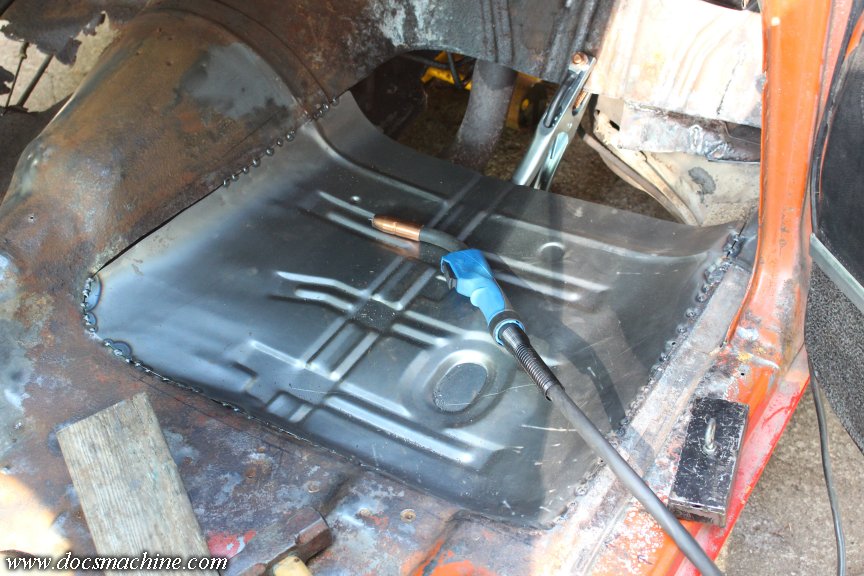
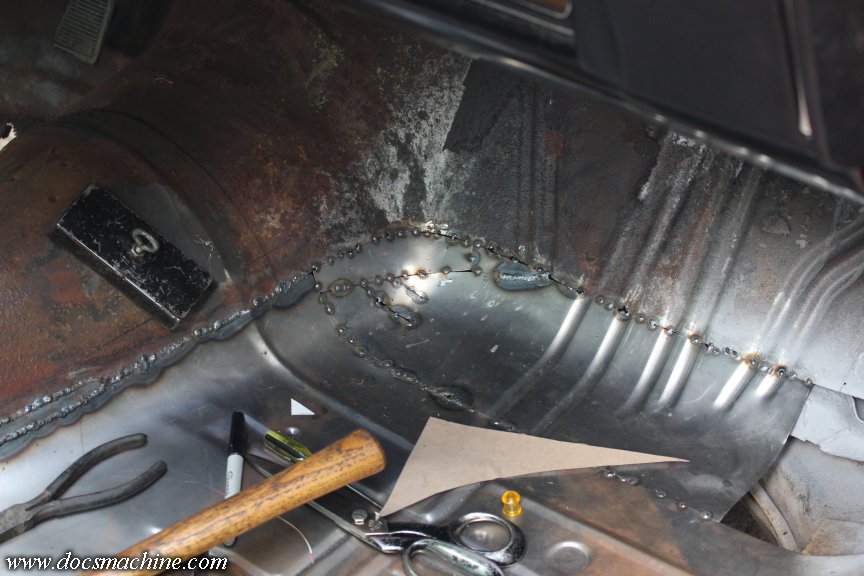
Anyway, after that, I formed a piece to start replacing the actual floor, and got that welded in...
And finally got the new pan tacked in and started welding up the seams.
That seam at the left obviously didn't come out as hoped, and rather than trying to gap-fill a 3/16" seam, I'll probably slice out a strip, opening it up to 1/2" or so, fit a new piece and weld that in. I could just overlap a 1/2" strip on the back- there's enough gunk and oil from the trans that it probably wouldn't rust, but I'll try the fitted strip.
I marked out a strip using a machinists' rule, sliced out the bulk of it with the cutting wheel, then rounded the ends with the rotary file.
Then, I cut out a strip of fresh 20 ga. and carefully fit it to that slot...
And welded it in.

I also finished up the rest of the pan seam. Again, the welds are ugly, but solid. Considering this is the first real sheetmetal work I've done in a decade, I'm not gonna complain- and as I said, this thing's a long way from a show car.
Since I still had some daylight left- that's a joke, this is summer in Alaska - I started trying to fit the toeboard area.
Keeping in mind I'm even less of a tinbasher than I am a weldor, it's... not bad. The compound curve absolutely did not come out how I expected, hence the weird cut-out. I may try again, or I may just use this one- the funky shape can be fitted and isn't too much of a curve. The right-hand end is going to be similarly weirdly curved, so I decided to do that end as a separate piece.
Doc.
Before I started welding anything, I decided it'd be easier to patch the firewall portion first- or at least to form/fabricate the compound-curve piece that'll go in there, before the new floor is welded in place.
As such, I marked out kind of the bare minimum to slice away the rust, and cut that out.
No pressure.
Unfortunately, as per universal standard when working on an old car, once one cuts some rust away, more rust appears. I was forced to cut out a section outboard of the new panel, which itself revealed significant holes in the base of the A-pillar.
And therein lies a problem. It's hard to tell in the 2D photos, but those holes are more or less at the same level as the top of the frame- the rectangular bit the small tubes are bolted to. I can probably get in there with the plasma cutter and slice out those two holes, making a single hole to weld fresh metal back into.
But, the lower edge of that new hole is going to be below the top of the frame- and getting the tip of a MIG in there to weld it back up is going to be difficult.
But, lacking other options, I did what I could to cut out those holes. I had to put a right-angle air fitting on my die-grinder cutoff wheel, and use both a finger belt sander and a die grinder with a carbide burr to clear out as much of the rust as I could.
The weird shape was to minimize how much solid metal I had to take- and that flat section at the bottom, in the middle, is at the level of the frame. That may be the lowest I'll be able to reach with the conventional MIG gun and cup.
I picked up a 2-pound roll of .035" flux-core- and yes, as it turns out, my machine does indeed have a setting for it- so at last resort, I may be able to reach in there with just the MIG tip, to get those lower seams.
So, with that blown out, vacuumed out and cleaned as best I could (it doesn't connect to the upper opening, as it turns out) I spent a few careful minutes making a patch out of a chunk I'd cut off the new floorpan as I was trimming it down. I thought I made a decent fit.
But, before I sealed it up, I hosed some Ospho in there, and laving that to dry/cure.
You professional weldors and experienced auto-body types probably ought to avert your eyes at this point.
Got the funky A-pillar patch welded in...
The right-hand seam was an attempt to join three edges at once, and unfortunately, I can't say I'm sure I managed to pull it off. Once things are fully welded and I'm in the sealing-and-painting stage, I'll do something like dribble some POR-15 in there, or hit it seam sealer, etc. Best I can do with the tools and time I have.
The weld itself doesn't look great, but is solid. As usual, it's not much more than a series of spot welds, plus a couple burn-throughs where the original metal was a bit thinner than expected.
Anyway, after that, I formed a piece to start replacing the actual floor, and got that welded in...
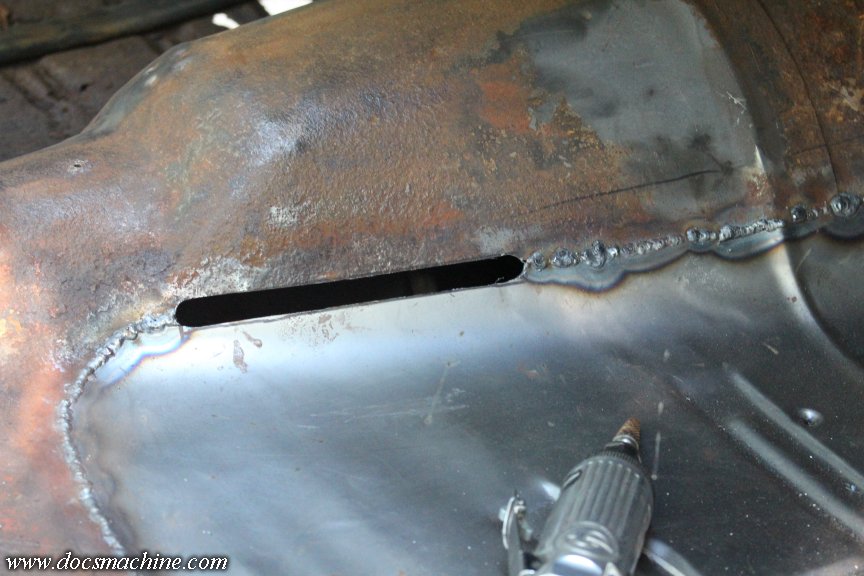
And finally got the new pan tacked in and started welding up the seams.
That seam at the left obviously didn't come out as hoped, and rather than trying to gap-fill a 3/16" seam, I'll probably slice out a strip, opening it up to 1/2" or so, fit a new piece and weld that in. I could just overlap a 1/2" strip on the back- there's enough gunk and oil from the trans that it probably wouldn't rust, but I'll try the fitted strip.
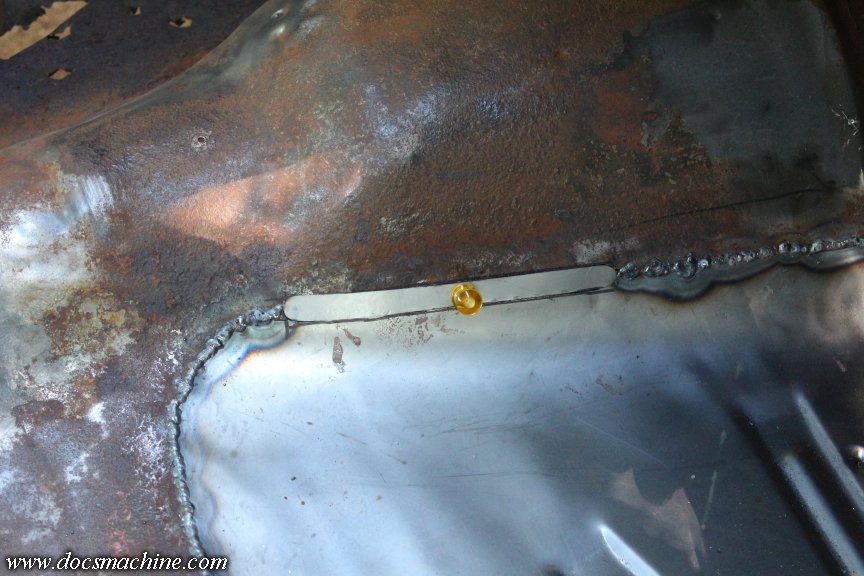
I marked out a strip using a machinists' rule, sliced out the bulk of it with the cutting wheel, then rounded the ends with the rotary file.
Then, I cut out a strip of fresh 20 ga. and carefully fit it to that slot...
And welded it in.
I also finished up the rest of the pan seam. Again, the welds are ugly, but solid. Considering this is the first real sheetmetal work I've done in a decade, I'm not gonna complain- and as I said, this thing's a long way from a show car.
Since I still had some daylight left- that's a joke, this is summer in Alaska
- I started trying to fit the toeboard area.Keeping in mind I'm even less of a tinbasher than I am a weldor, it's... not bad. The compound curve absolutely did not come out how I expected, hence the weird cut-out. I may try again, or I may just use this one- the funky shape can be fitted and isn't too much of a curve. The right-hand end is going to be similarly weirdly curved, so I decided to do that end as a separate piece.
Doc.
Thread Starter
Unregistered Madman
Joined: Mar 2012
Posts: 55
From: Backwater, Alaska
(Reposted from May of '25)
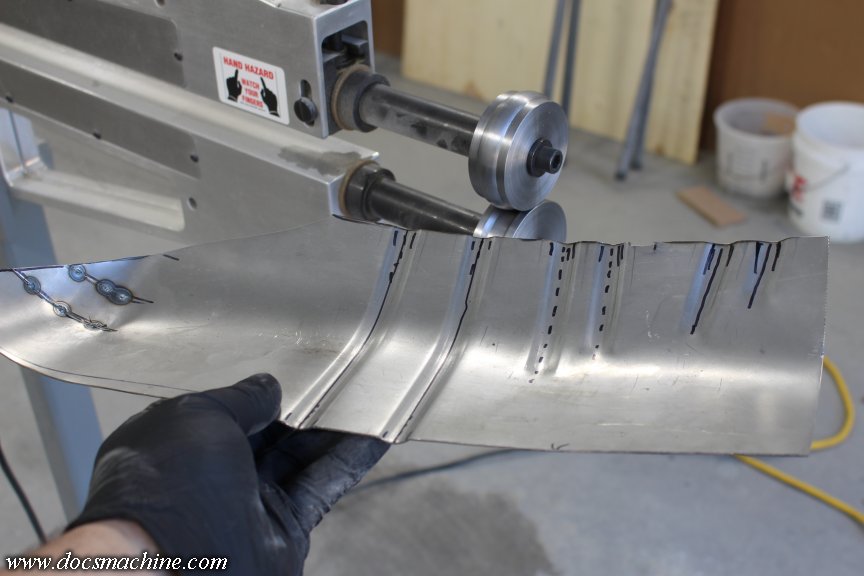
I wanted to add the ribs to the new section before I welded it in, and contacted a buddy with a bead roller. He had the roller but no steel dies. He had this:

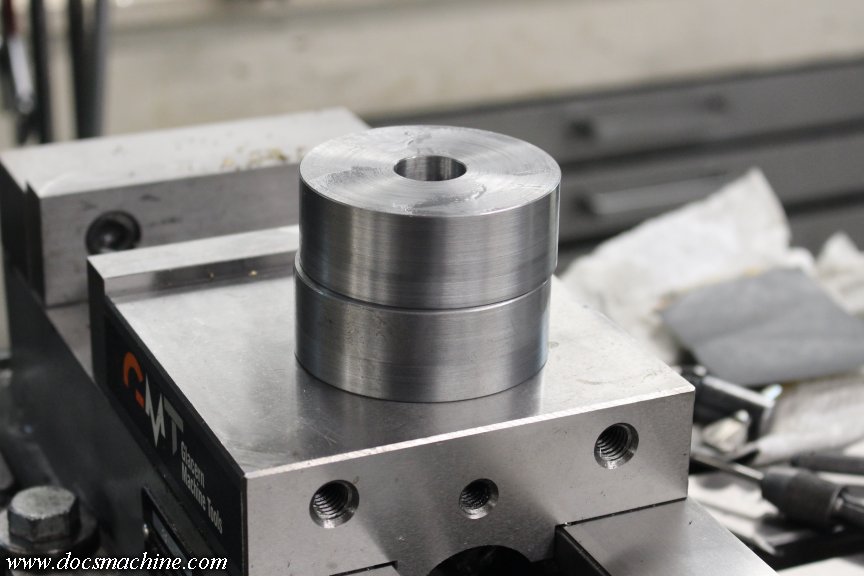
A Mittler Bros. power beadroller. Almost unused, but he only had the plastic dies for doing thin, decorative aluminum. He hadn't gotten around to buying some of the steel dies, in part being unsure which ones he wanted. So, after a little discussion, I took some measurements, borrowed a pair of the plastic dies, and went over to my favorite metal supplier. There, I had them chop me some 'coins' of 3" mild steel:
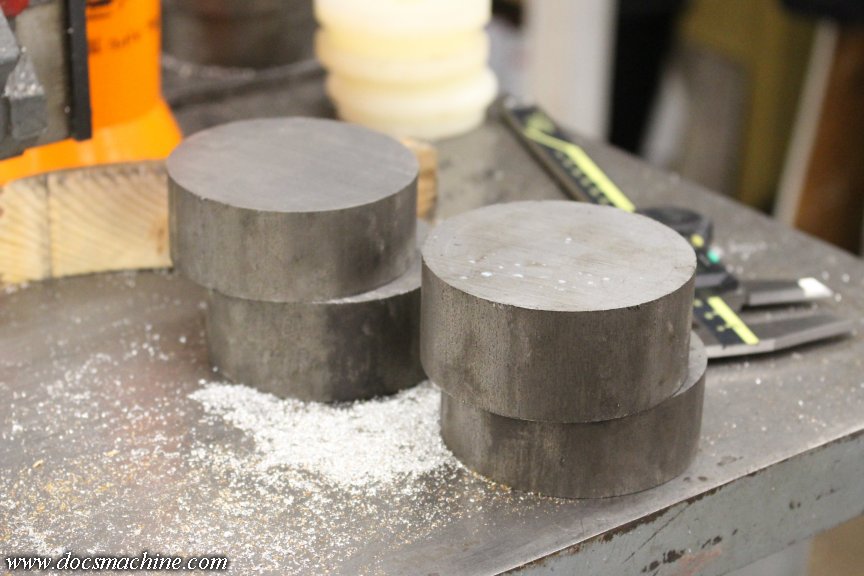
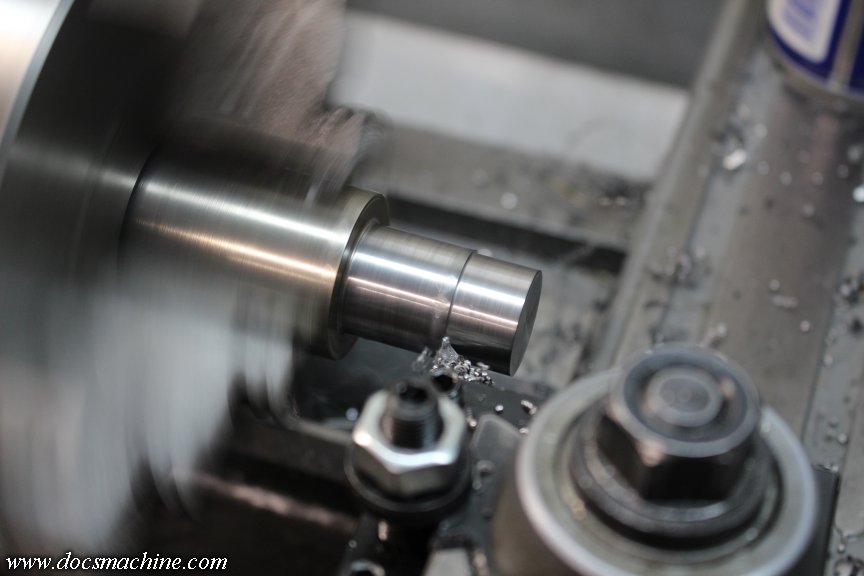
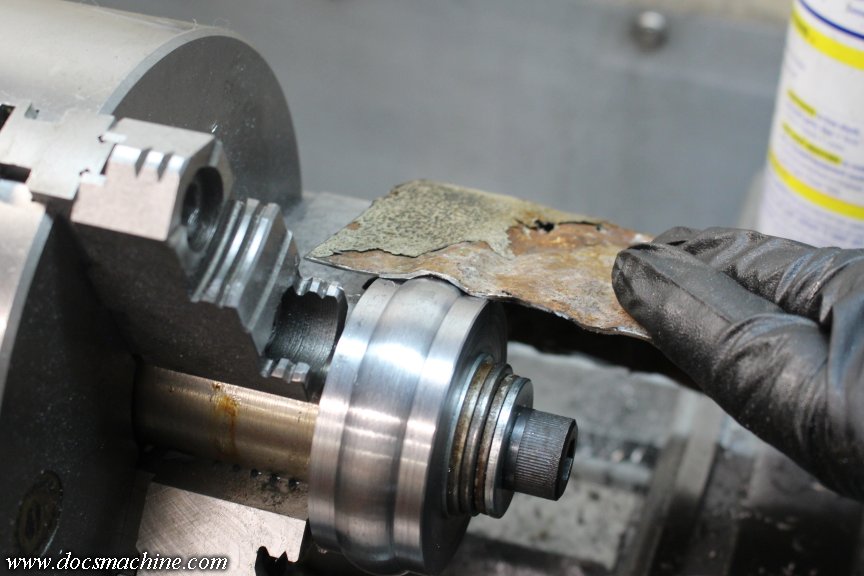
These, I plugged, in turn, to the big lathe and proceeded to whittle them down and rough-drill the bores.
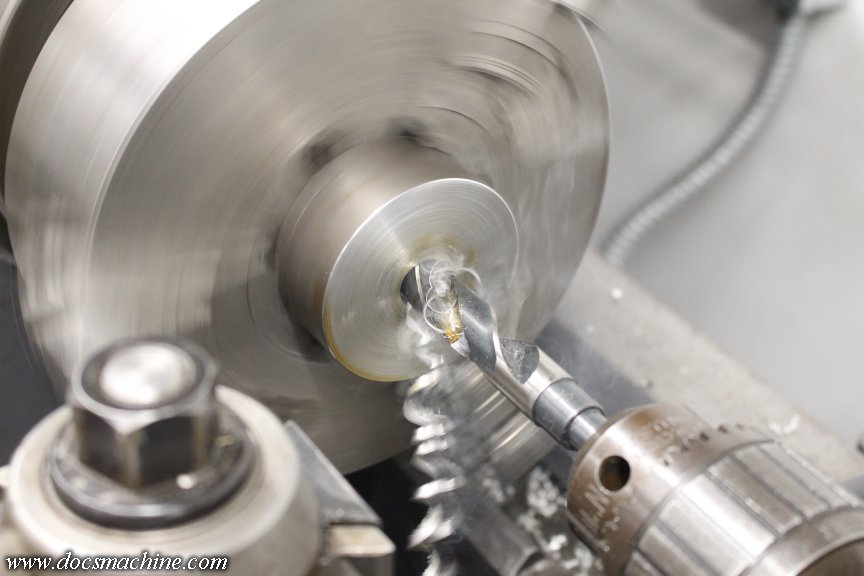
This machine is great for peeling metal off fast, but the giant negative-rake carbides I have for it aren't that much for a smooth surface finish. So I just used it to buzz the bulk off...
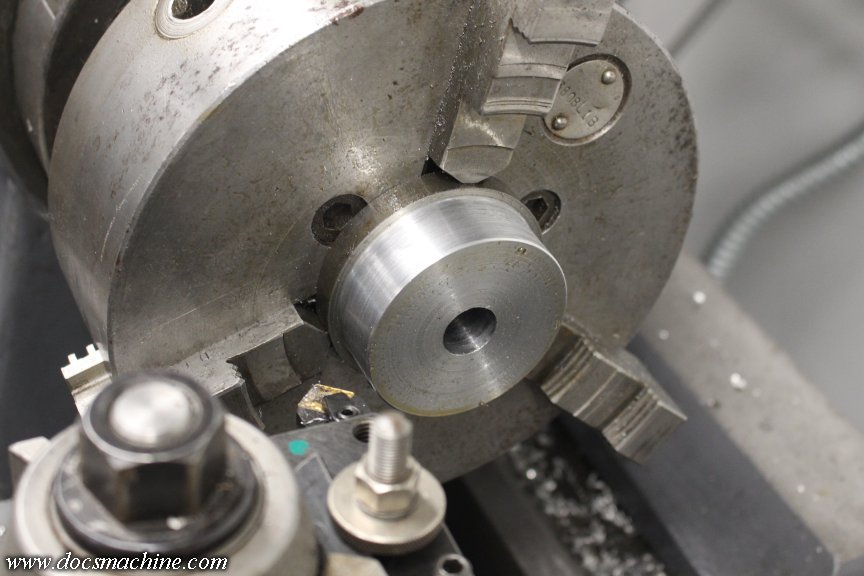
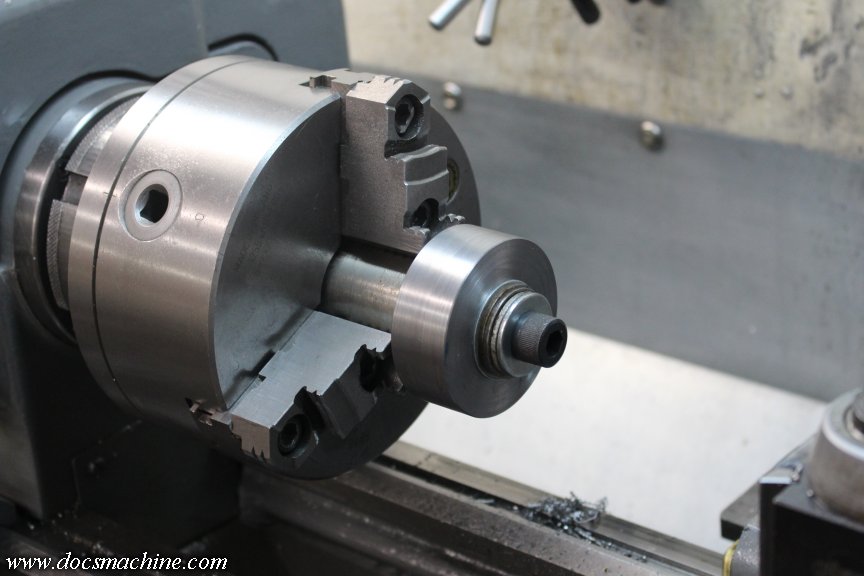
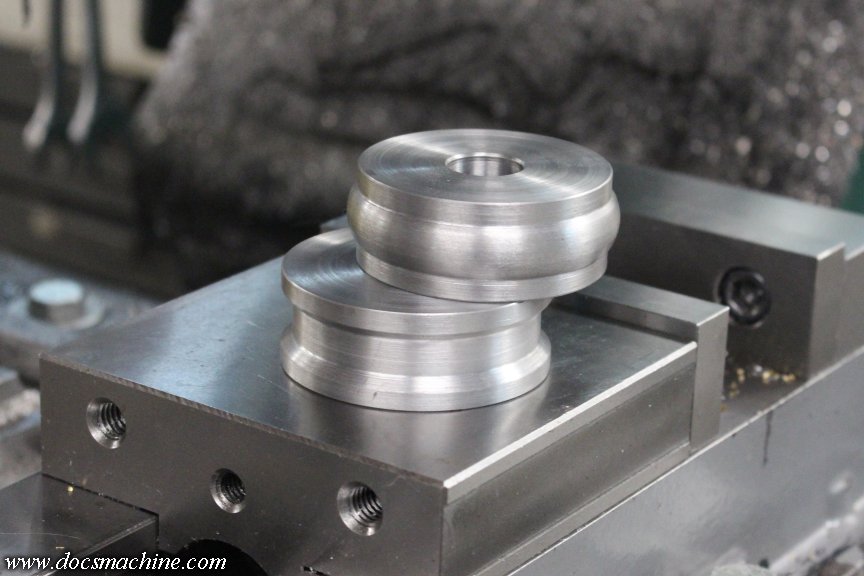
And then switched over to the smaller lathe. Since I was doing multiple parts and wanted to be able to flip the discs one side to the other and still keep my 'zero', I first swapped in some soft jaws, and bored a step in place.
I have like six sets of soft jaws, plus a whole second chuck with a set permanently mounted- they're that handy.
And that let me get the OD and thickness to spec- matching dimensions on the plastic wheels- as well as final-bore the centers.
Et Voil�!
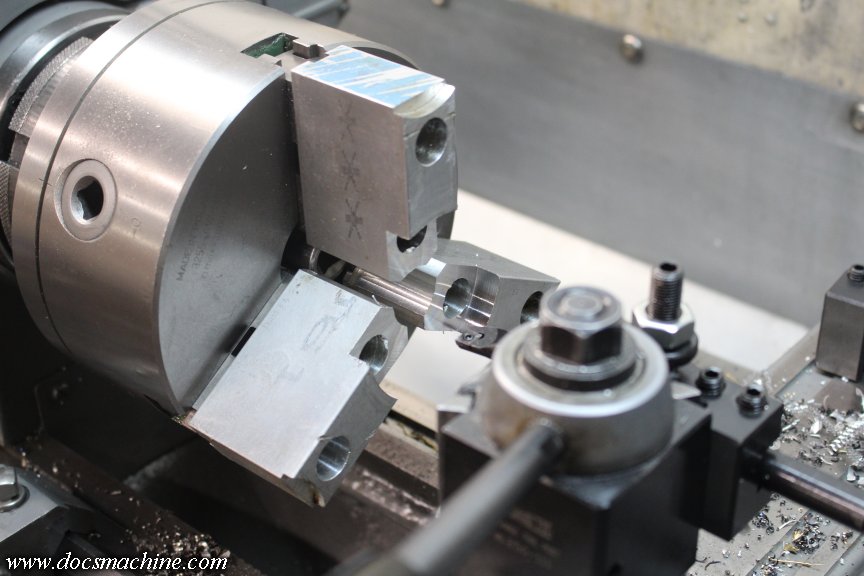
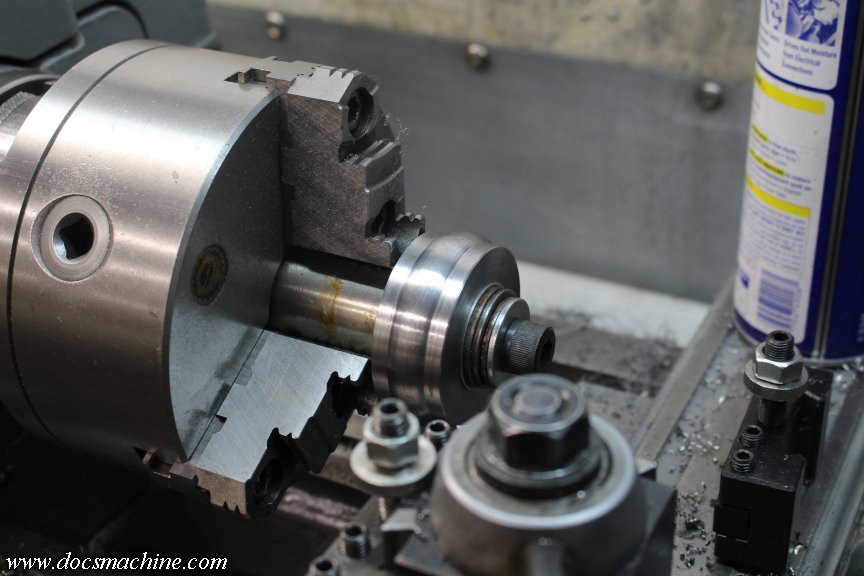
I then found a fair piece of some free-machining mystery metal, bandsawed off a chunk of that, and turned down an already-turned-down end, to the dimension of the beadroller's axles.
Drilled and tapped, with a few washers to take up the space, since I didn't have a short-enough bolt, it holds the blank discs nice and concentrically, so I can machine the face features.
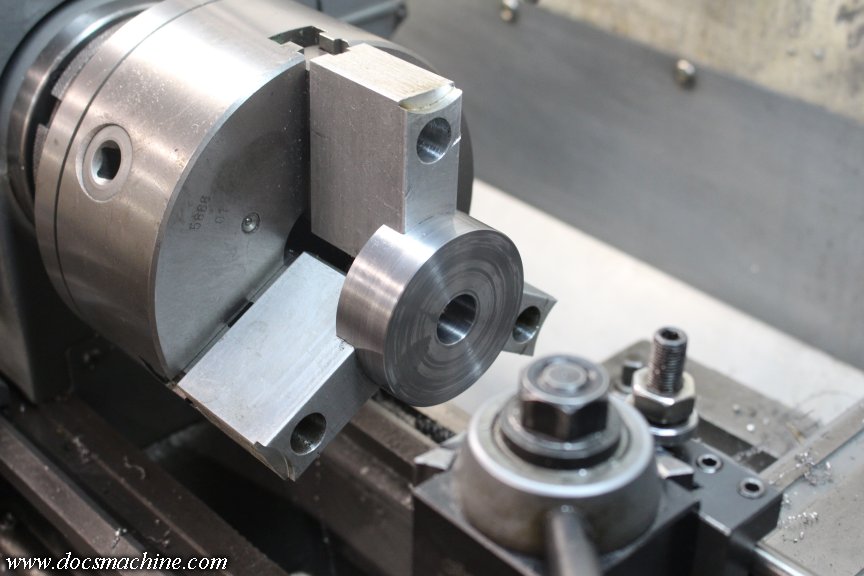
I didn't get any pictures of the Etch-A-Sketch cutting, but after a few minutes with a parting tool, a diamond-insert tool, a square-insert tool, and some deft filing, I got a profile I thought might work.
Comparing with a chunk of the old cut-out steel, I think it should give me a pretty close profile.
The trick I learned with the 'anvil' die is that the groove doesn't necessarily have to match. All you really need is the side flanges, to essentially hold the sheetmetal straight while the main die 'pushes'. So that was easy with the square tool:

Et Voil�, redux!
And, after another drive out to the buddy's shop, we mounted 'em up...
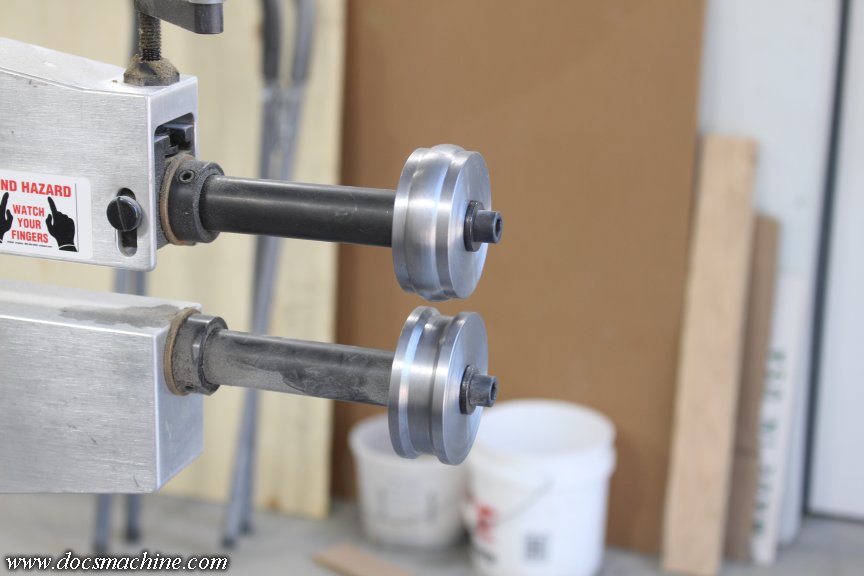
And gave it a try on some scrap.
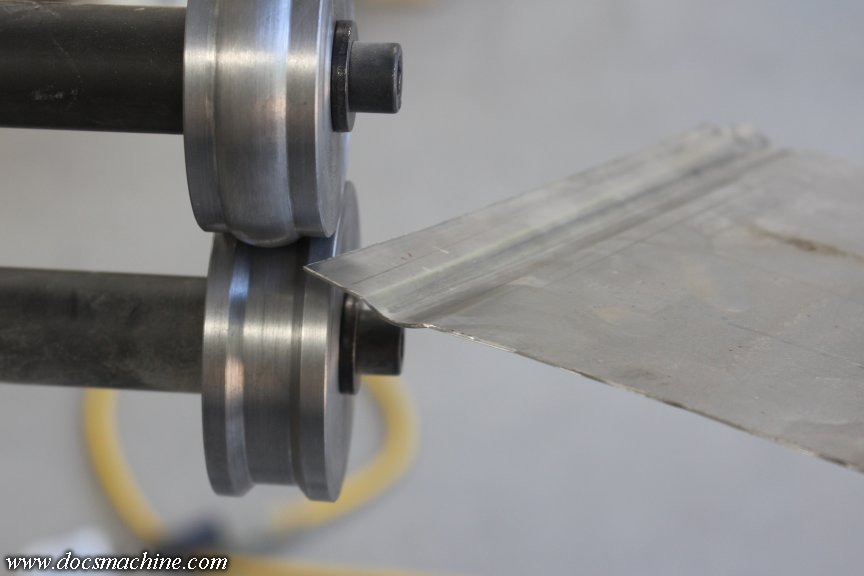
I neglected to bring along the old cut-off to compare, but it sure as heck looked pretty close!
So I got out that badly-fitted piece from the previous entry, and thanks to some witness marks I'd made, rolled in the features I wanted:
After I got home, a quick test-fit showed that the grooves were both very closely sized, and very closely positioned. Very much worth the effort- especially since the owner of the roller is going to buy three sets of custom dies from me.
Doc.
I wanted to add the ribs to the new section before I welded it in, and contacted a buddy with a bead roller. He had the roller but no steel dies. He had this:
A Mittler Bros. power beadroller. Almost unused, but he only had the plastic dies for doing thin, decorative aluminum. He hadn't gotten around to buying some of the steel dies, in part being unsure which ones he wanted. So, after a little discussion, I took some measurements, borrowed a pair of the plastic dies, and went over to my favorite metal supplier. There, I had them chop me some 'coins' of 3" mild steel:
These, I plugged, in turn, to the big lathe and proceeded to whittle them down and rough-drill the bores.
This machine is great for peeling metal off fast, but the giant negative-rake carbides I have for it aren't that much for a smooth surface finish. So I just used it to buzz the bulk off...
And then switched over to the smaller lathe. Since I was doing multiple parts and wanted to be able to flip the discs one side to the other and still keep my 'zero', I first swapped in some soft jaws, and bored a step in place.
I have like six sets of soft jaws, plus a whole second chuck with a set permanently mounted- they're that handy.
And that let me get the OD and thickness to spec- matching dimensions on the plastic wheels- as well as final-bore the centers.
Et Voil�!
I then found a fair piece of some free-machining mystery metal, bandsawed off a chunk of that, and turned down an already-turned-down end, to the dimension of the beadroller's axles.
Drilled and tapped, with a few washers to take up the space, since I didn't have a short-enough bolt, it holds the blank discs nice and concentrically, so I can machine the face features.
I didn't get any pictures of the Etch-A-Sketch cutting, but after a few minutes with a parting tool, a diamond-insert tool, a square-insert tool, and some deft filing, I got a profile I thought might work.
Comparing with a chunk of the old cut-out steel, I think it should give me a pretty close profile.
The trick I learned with the 'anvil' die is that the groove doesn't necessarily have to match. All you really need is the side flanges, to essentially hold the sheetmetal straight while the main die 'pushes'. So that was easy with the square tool:
Et Voil�, redux!
And, after another drive out to the buddy's shop, we mounted 'em up...
And gave it a try on some scrap.
I neglected to bring along the old cut-off to compare, but it sure as heck looked pretty close!
So I got out that badly-fitted piece from the previous entry, and thanks to some witness marks I'd made, rolled in the features I wanted:
After I got home, a quick test-fit showed that the grooves were both very closely sized, and very closely positioned. Very much worth the effort- especially since the owner of the roller is going to buy three sets of custom dies from me.
Doc.
Last edited by DocN; Apr 25, 2026 at 11:42 PM.
Thread Starter
Unregistered Madman
Joined: Mar 2012
Posts: 55
From: Backwater, Alaska
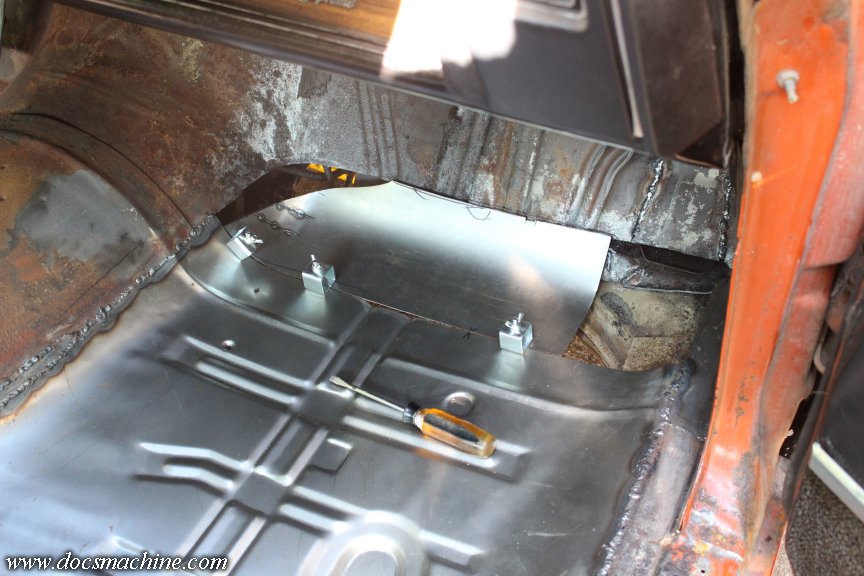
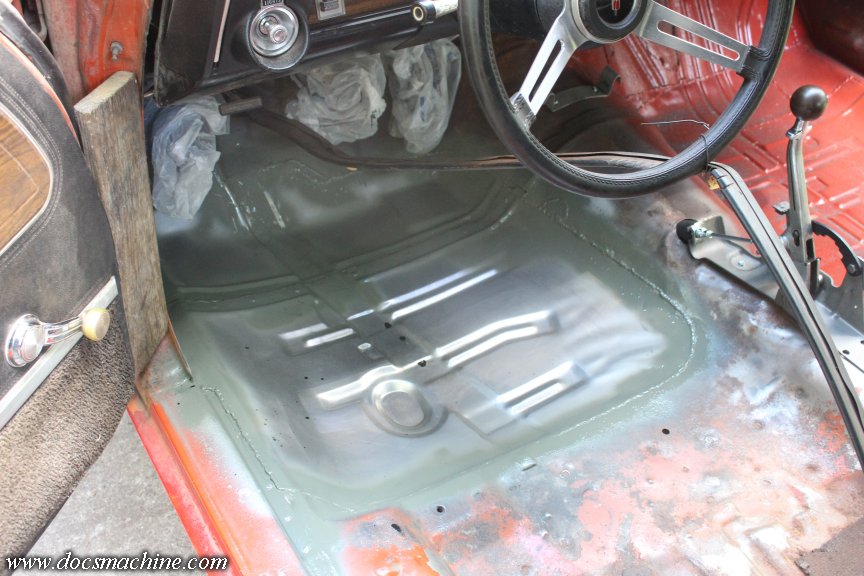
Once I had the features rolled, I again fitted it with the butt clamps...
A and after a bit more fettling, I got it tacked into place, and then fitted that weird section to close up the curve:
That all, of course, took a lot longer than those couple of pictures and few sentences suggest, and I can't say I'm particularly proud of the results, but hey. It's all gonna get covered over with sound deadener and fresh carpets anyway.
The last corner was going to be the tricky one, with a couple 'levels' and some compound curves.
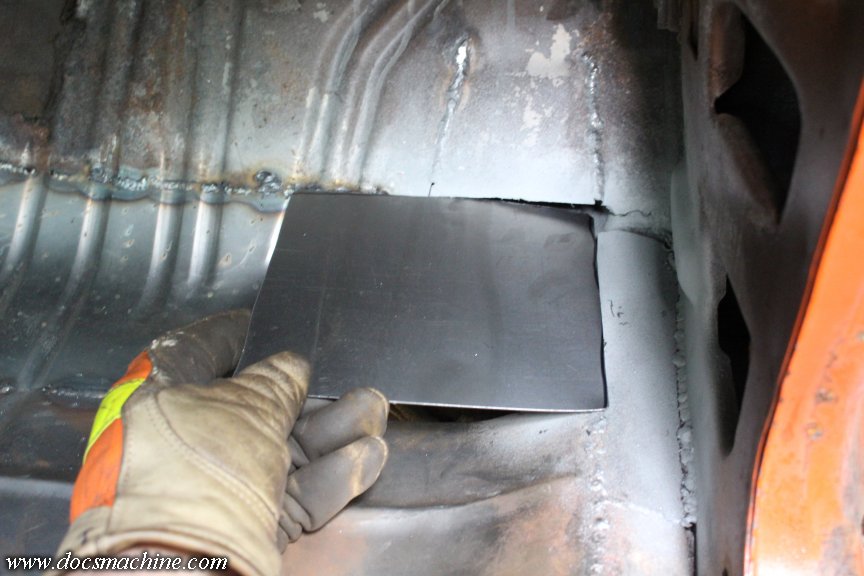
It was, I thought, time for some proper tin-bashing. Note I didn't say good tin-bashing, it's using the more or less proper techniques, just without a whole lot of skill, experience or finesse. I'm sure more than a few of you, who have an E-Wheel, a planishing hammer, two shotbags and a Ron Covell Signature Series Magic Hammer�, could have something like this fitted with five snips and a dozen blows, but I don't exactly do this kind of thing for a living.
So, I found a chunk of spare 4x4 beam, sawed it down to about three feet, and ratchet-strapped it to my outdoor vise stand. I then got out my bluntest ball-peen, bashed a divot in the end of the beam, and started whaling the tar out of that square blank.

I may not have a lot of experience, but I've at least done a little, and have a vague familiarity with the techniques.
Eventually, after a great deal of bashing, smacking and general manhandling, I managed to get it reasonably well fitted and tacked into place.
The photo makes it look both flatter and smoother than it actually is.
While I was fitting that, I'd periodically dive in and weld up some of the other seams, doing a few sections and then going back to the bashing, so nothing got too hot or warpy. I was having trouble seeing some of the seams, and tried a droplight- both incandescent and fluorescent- but the lens kept triggering on them, even just reflections. I'm assuming it was the 60Hz setting it off, but either way, it was a no-go.
After a minor bit of cursing, I found an LED headlamp and made an ad-hoc mount for my helmet.
That did the job nicely, though could have been brighter. Not sure when I may have last swapped batteries in it, but it worked, and I was able to see clearly enough to eventually finish up all the seams.
And that wraps up the passenger side! Again, the welds are ugly, but solid. I figure I'll smear a coat of POR-15 over the seams to help seal any pinholes, and once that's cured, hit it all with some etch primer and then a color coat.
Not looking forward to the driver's side, but that's gotta be done too!
Doc.
A and after a bit more fettling, I got it tacked into place, and then fitted that weird section to close up the curve:
That all, of course, took a lot longer than those couple of pictures and few sentences suggest, and I can't say I'm particularly proud of the results, but hey. It's all gonna get covered over with sound deadener and fresh carpets anyway.
The last corner was going to be the tricky one, with a couple 'levels' and some compound curves.
It was, I thought, time for some proper tin-bashing.
Note I didn't say good tin-bashing, it's using the more or less proper techniques, just without a whole lot of skill, experience or finesse. I'm sure more than a few of you, who have an E-Wheel, a planishing hammer, two shotbags and a Ron Covell Signature Series Magic Hammer�, could have something like this fitted with five snips and a dozen blows, but I don't exactly do this kind of thing for a living. So, I found a chunk of spare 4x4 beam, sawed it down to about three feet, and ratchet-strapped it to my outdoor vise stand. I then got out my bluntest ball-peen, bashed a divot in the end of the beam, and started whaling the tar out of that square blank.
I may not have a lot of experience, but I've at least done a little, and have a vague familiarity with the techniques.
Eventually, after a great deal of bashing, smacking and general manhandling, I managed to get it reasonably well fitted and tacked into place.
The photo makes it look both flatter and smoother than it actually is.
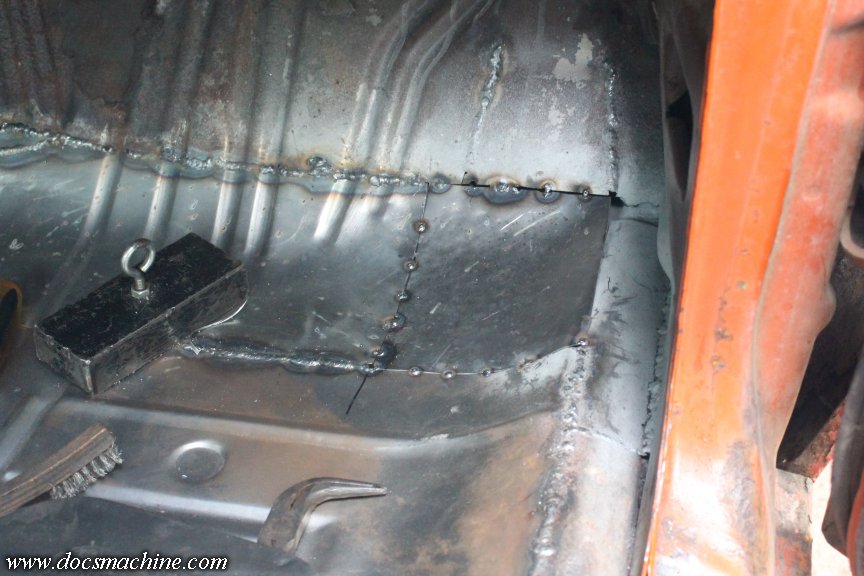
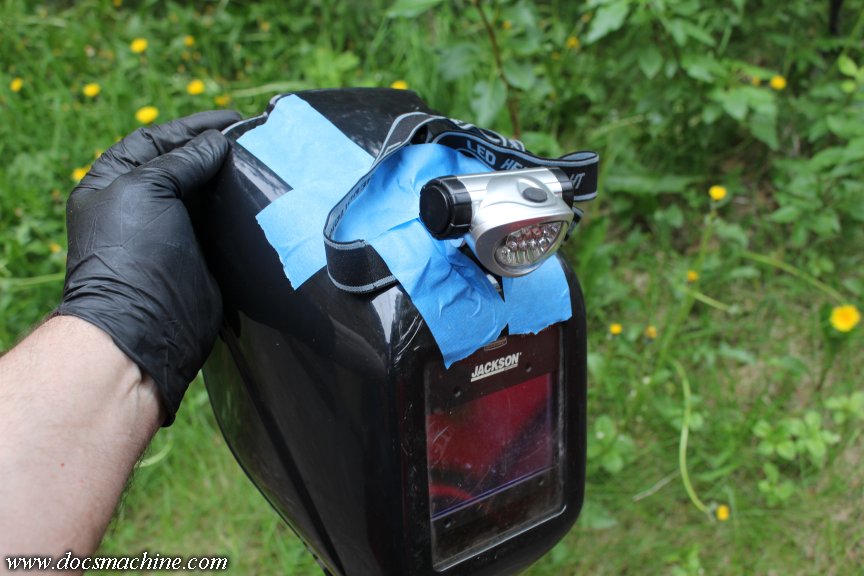
While I was fitting that, I'd periodically dive in and weld up some of the other seams, doing a few sections and then going back to the bashing, so nothing got too hot or warpy. I was having trouble seeing some of the seams, and tried a droplight- both incandescent and fluorescent- but the lens kept triggering on them, even just reflections. I'm assuming it was the 60Hz setting it off, but either way, it was a no-go.
After a minor bit of cursing, I found an LED headlamp and made an ad-hoc mount for my helmet.
That did the job nicely, though could have been brighter. Not sure when I may have last swapped batteries in it, but it worked, and I was able to see clearly enough to eventually finish up all the seams.
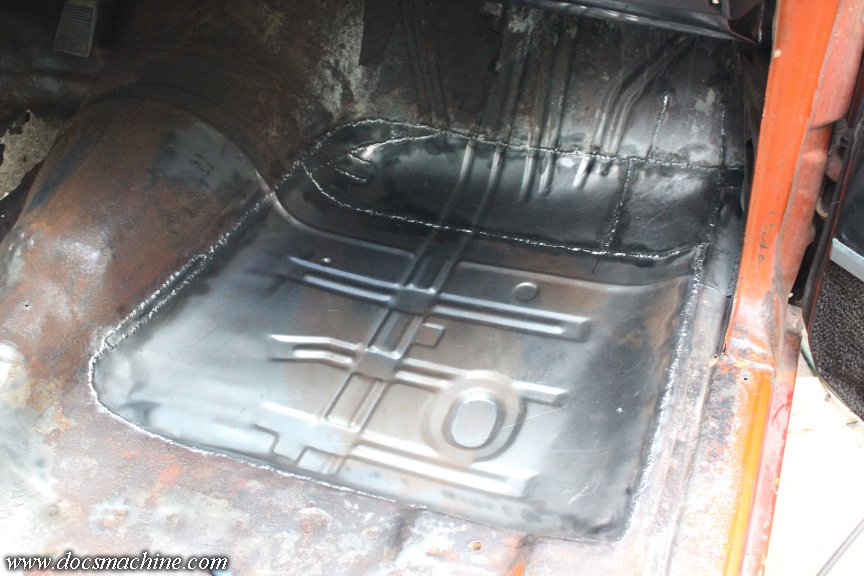
And that wraps up the passenger side! Again, the welds are ugly, but solid. I figure I'll smear a coat of POR-15 over the seams to help seal any pinholes, and once that's cured, hit it all with some etch primer and then a color coat.
Not looking forward to the driver's side, but that's gotta be done too!
Doc.
Thread Starter
Unregistered Madman
Joined: Mar 2012
Posts: 55
From: Backwater, Alaska
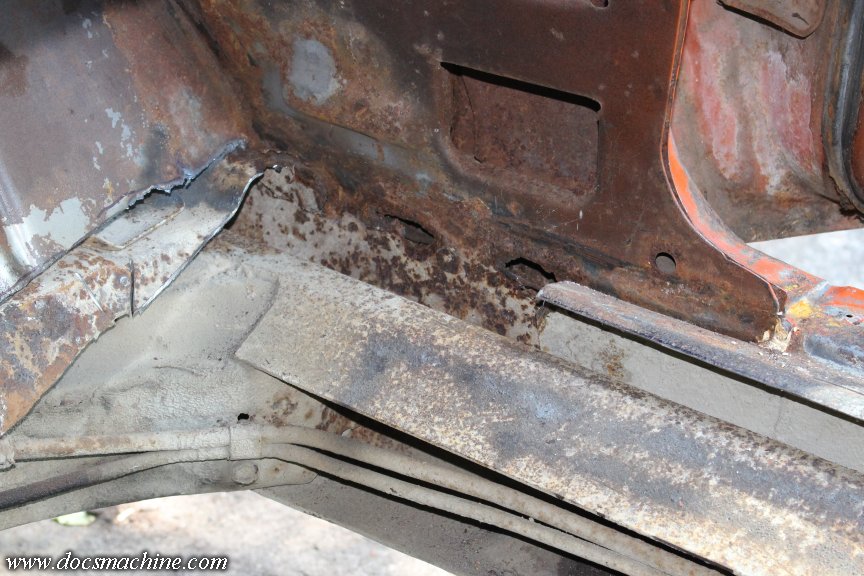
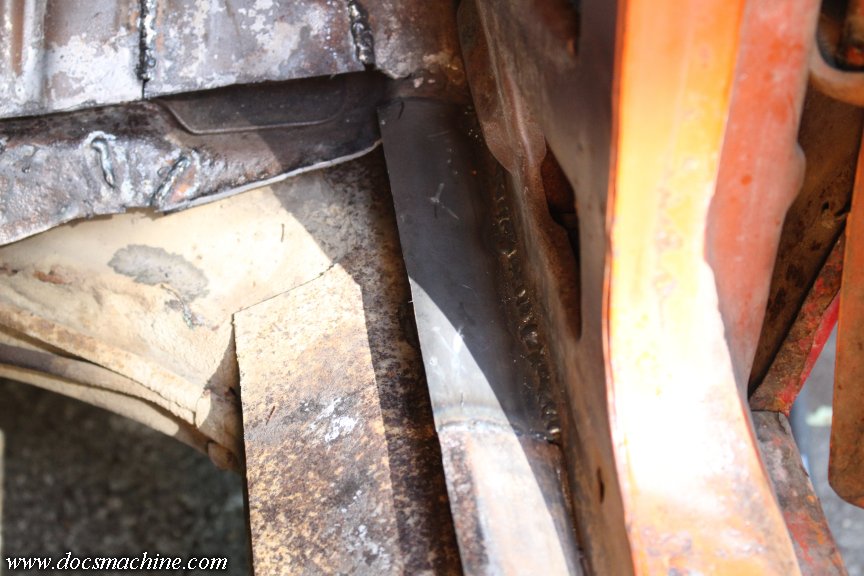
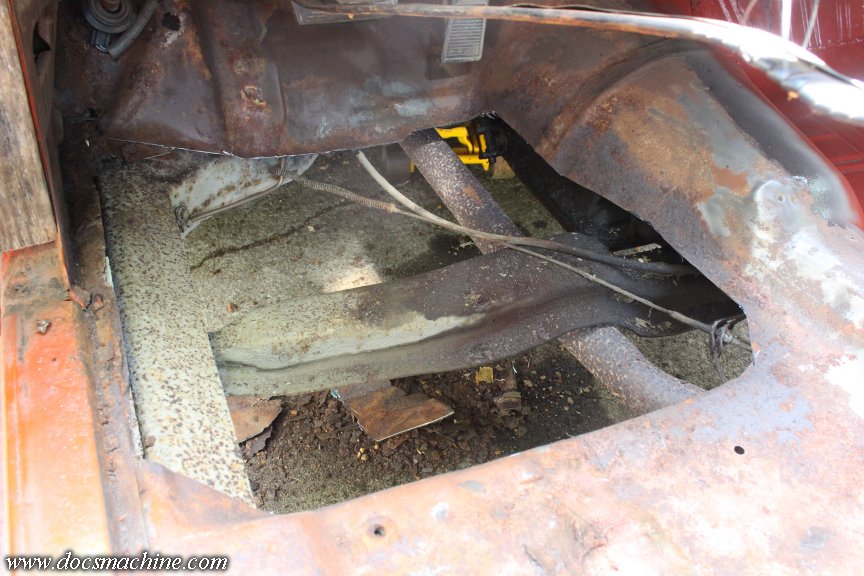
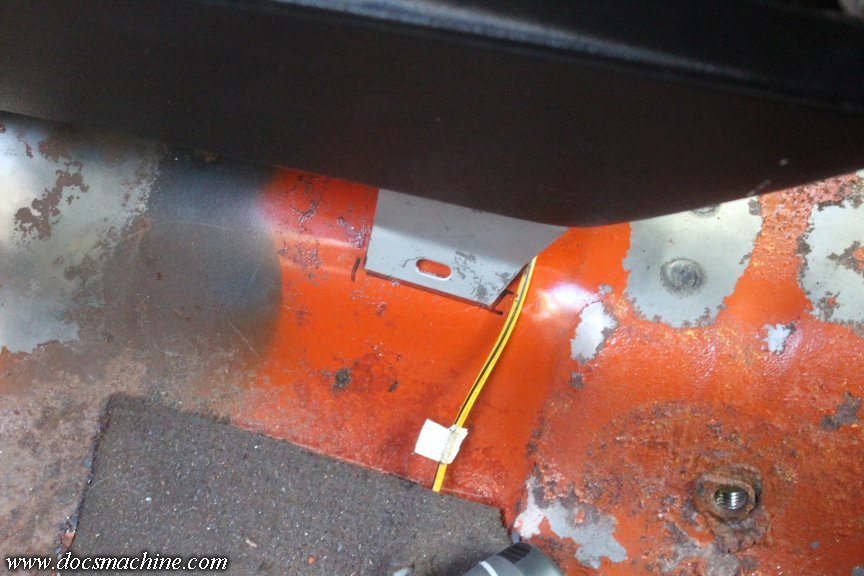
I'd wanted to get the driver's side floor pan cut out, so I could survey the inevitable A-pillar repairs, and with luck, get the new floor pan at least rough-fitted. A reminder of the carnage:

I wired the cable up and out of the way (those are the wires leading to the back for the taillights and such) and of course back when I first surveyed this side, all those little holes are where I stabbed a screwdriver through the steel- all too easily.
(And yes, I top-coated the passenger side with some basic red, to seal the primer.)
So, I got the cutting wheel back out and sliced out the bulk of the rotten stuff.
That's only a rough preliminary, quite a bit more is going to have to come out.
As expected, the toeboard was pretty rotten too, but luckily I found a supplier for a replacement panel. I won't have to fab this side (at least not much more than a small patch or two, maybe) but that panel won't be in 'til later in the week. I'm holding hope I don't have to patch the A-pillar, but I haven't excavated far enough to tell.
Before I cut too much, though, I trimmed down the new pan a bit, and started test-fitting it. This is about as far as I got, though...
I decided that, while the floor was wide open and the transmission so accessible, I could try fitting the shifter... and fell down the rabbit hole of trying to figure out where and how the mounts for it and the console go. More on that later, but suffice to say that I was unable to find anything definitive either online or in some official manuals, that so much as showed a picture of how the mounts went.
I have since pieced it together- it's simple enough, but I wanted to be better informed before I started drilling and welding.
Doc.
Thread Starter
Unregistered Madman
Joined: Mar 2012
Posts: 55
From: Backwater, Alaska
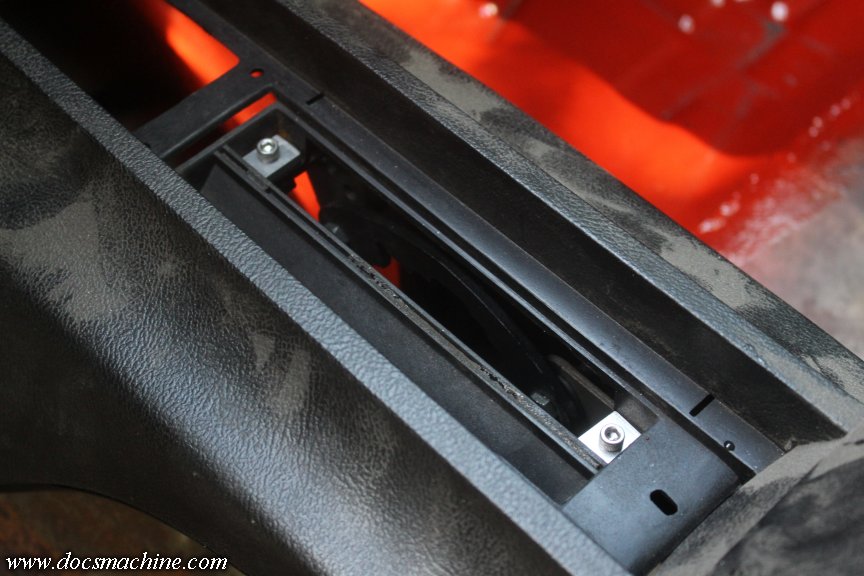
As I said, I wanted to fit the shifter while I had easy access to the transmission linkage, and to do that, I needed to fit the center console. It took me a little while to piece together how it needed to go- I remember reading some how-tos years ago, but I wasn't able to find those again.
This is not intended as such a how-to. This isn't a restoration, I'm "making do" at best.
I'd already rough-fitted the shifter a few weeks ago, and a test-fit for the console showed I was pretty close to the ballpark. There's three mounts, one at either end of the console (a big plastic casting) and the shifter in the middle. I only had the shifter, so that's where I started.
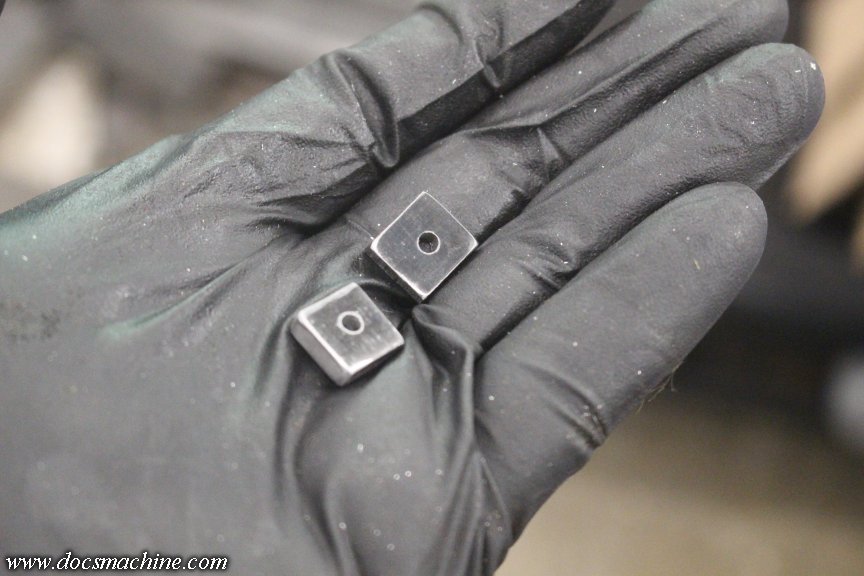
One thing I didn't like, was how fragile the two screw mounts were- in the various articles I'd read, it was pretty common for these tabs to be at least cracked, if not broken completely. Mine had one of the two holes chipped:
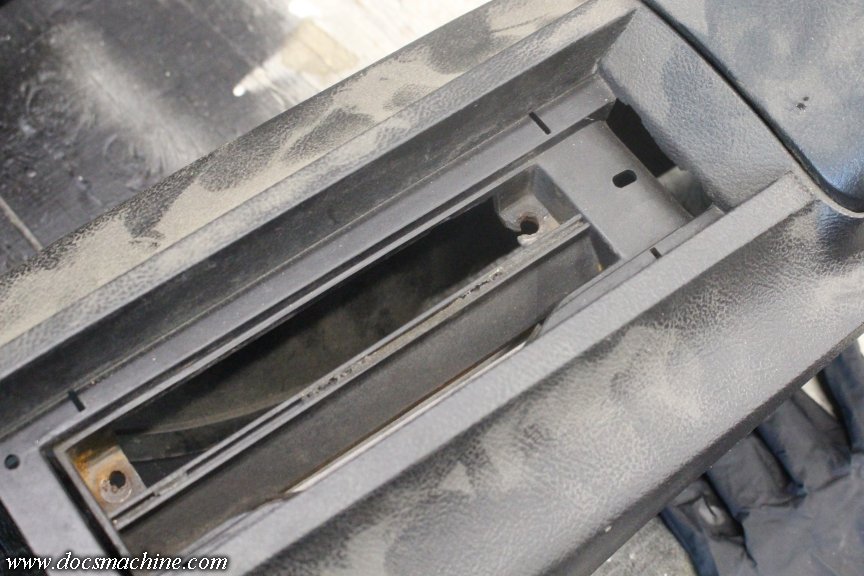
Those simply attached to these tabs on the shifter...
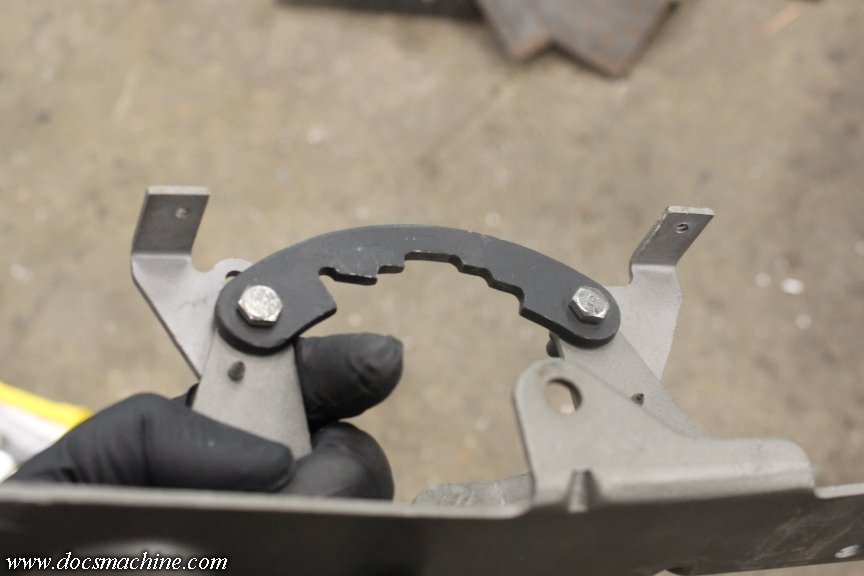
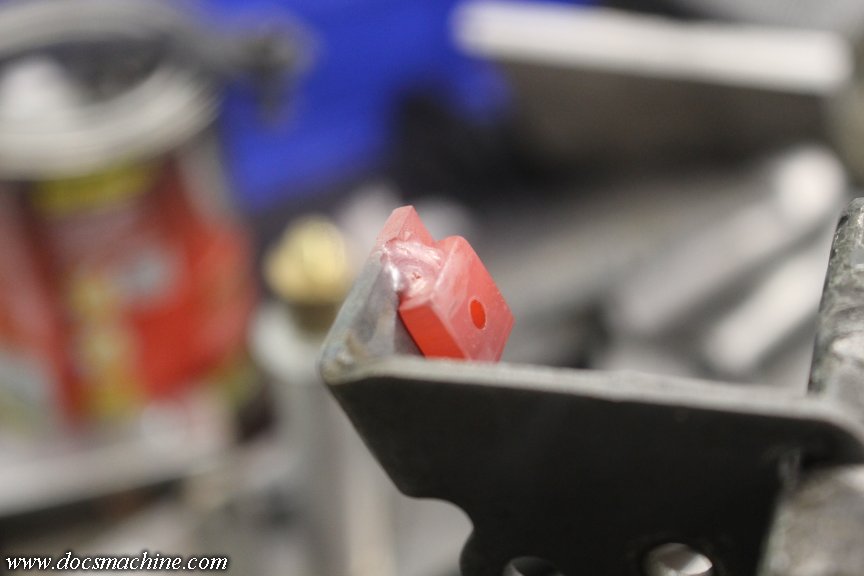
Without even a washer. So I popped those tabs off (they unbolt), then made these two little extra blocks:
Those I TIG welded to the tabs...
Then drilled through and tapped to 10-32.
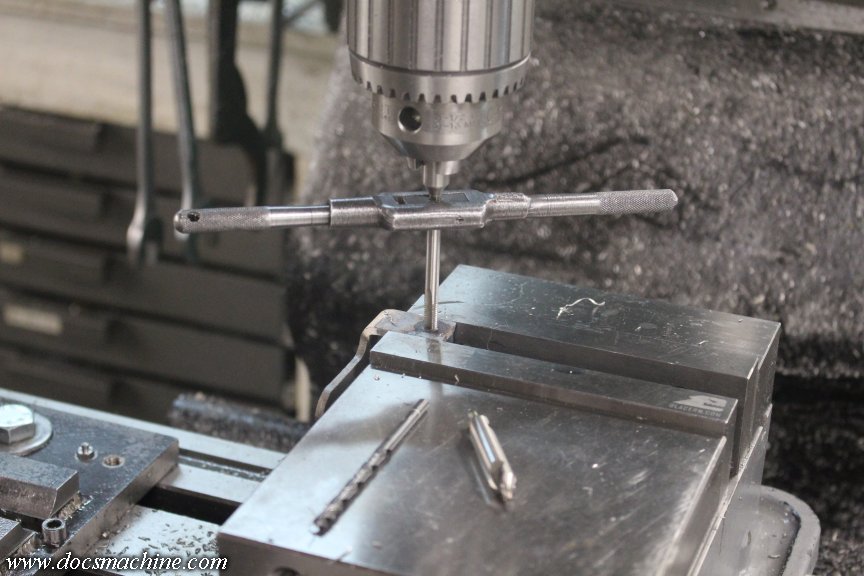
Big fan of machine screws rather than self-tappers.
With everything reassembled, I was able to very gingerly test-fit the console again, with the shifter assembly bolted down.
I made two thickish blocks of aluminum, drilled through, to spread the load on the plastic, and it's all held together with stainless machine screws.
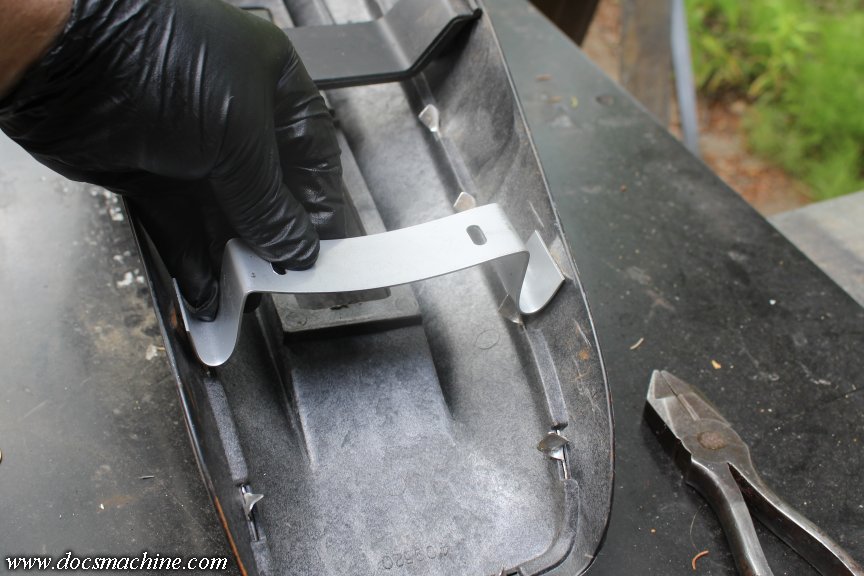
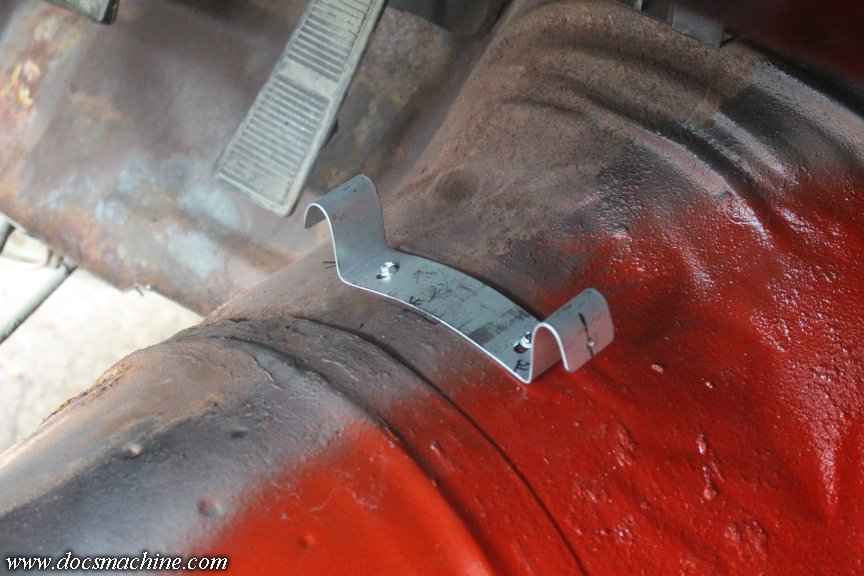
The rear mount is this folded sheetmetal piece...
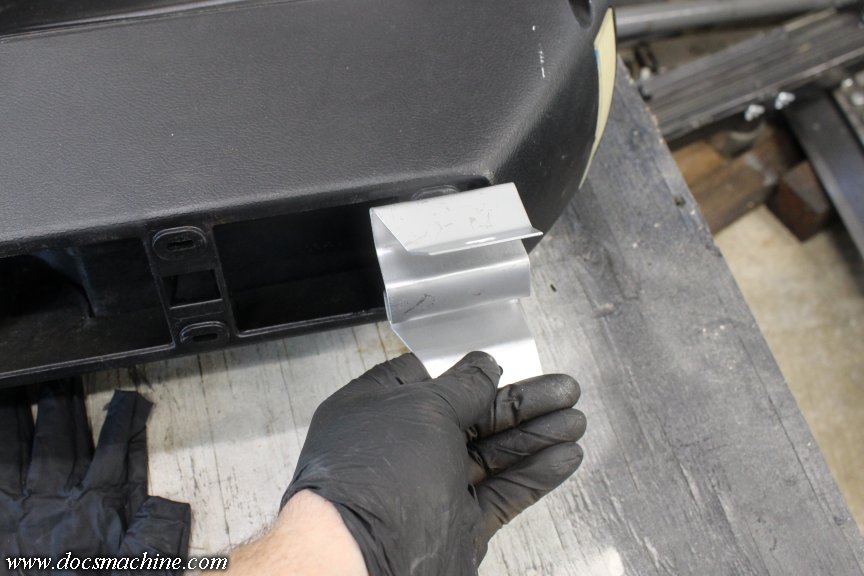
Which was only vaguely shaped like the factory mount, in the same way I'm vaguely shaped like Scarlett Johansson.
But, with some hammerwork and angry manhandling, I got it reasonably fitted to the console and floor.
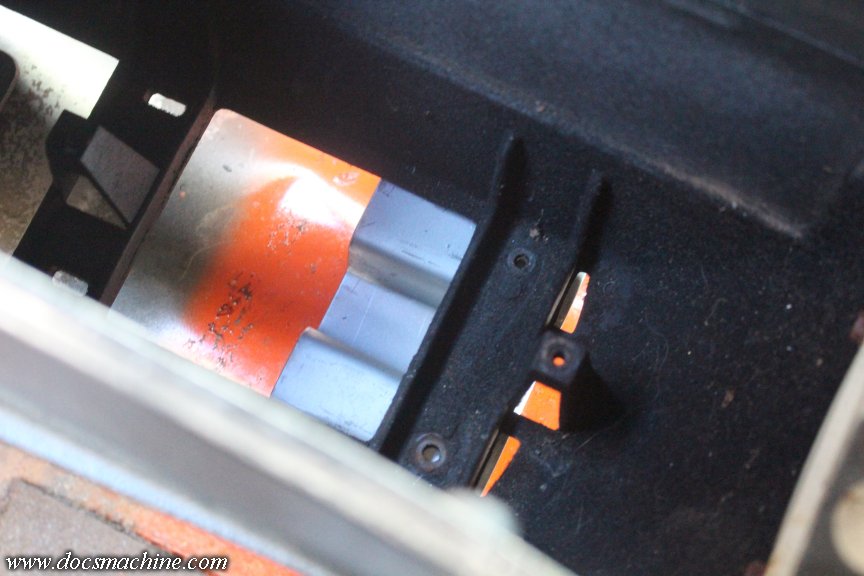
Marked where the 'legs' contacted the tunnel....
Ground off the paint and MIG'ed 'er in place.
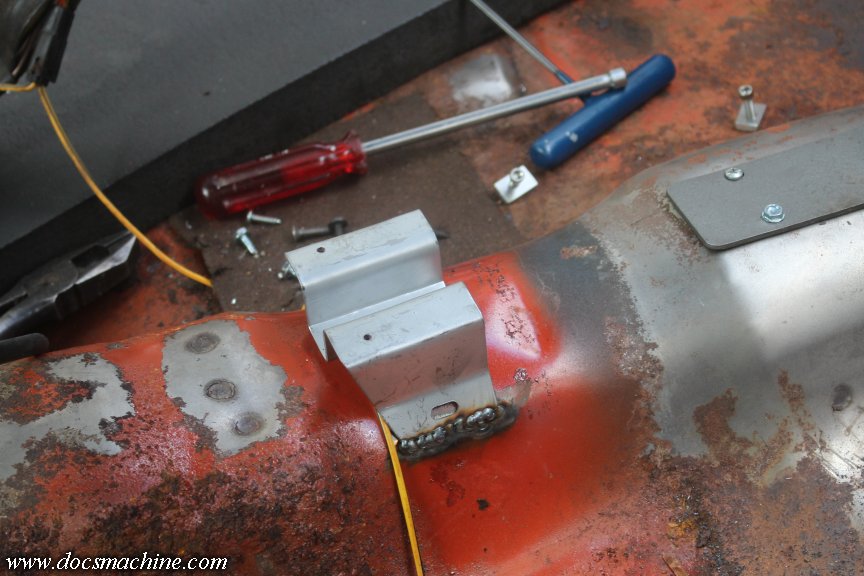
After being sure nothing had moved, I marked and drilled two holes, and ran a couple self-tappers in there.
I've seen a few vague references to an add-on brace that uses the other two holes shown here- the slotted ones. I have a picture, though none showing it actually mounted. While I'm working on the rest of the floor, I may add that in, too.
But for now, it was finally time for the front mount- this one was no better shaped out of the box than the rear. I found out just in the past couple of days, I could have gotten much better fitted ones- and for the same price- but I had to dig for those. These cheapies were posted everywhere. Live and learn, I guess.
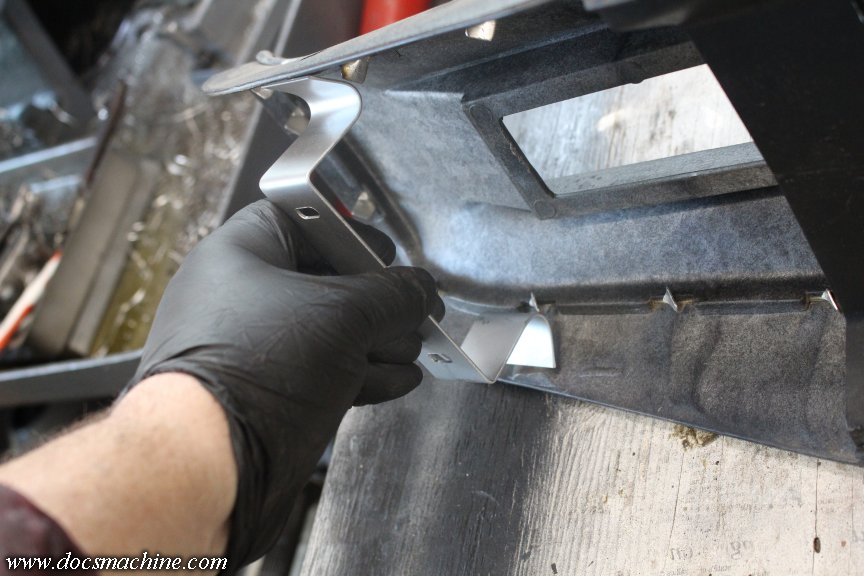
Again, not a restoration, all I wanted was the console mounted fairly solidly, and in about the right spot. So after a little tweaking, I had it pretty closely fitted both to the curvature of the tranny tunnel, and between the two mounting tabs on the nose of the console.
After bolting it all together for the umpty-'leventh time I got both the side holes and the mounting holes located and drilled.
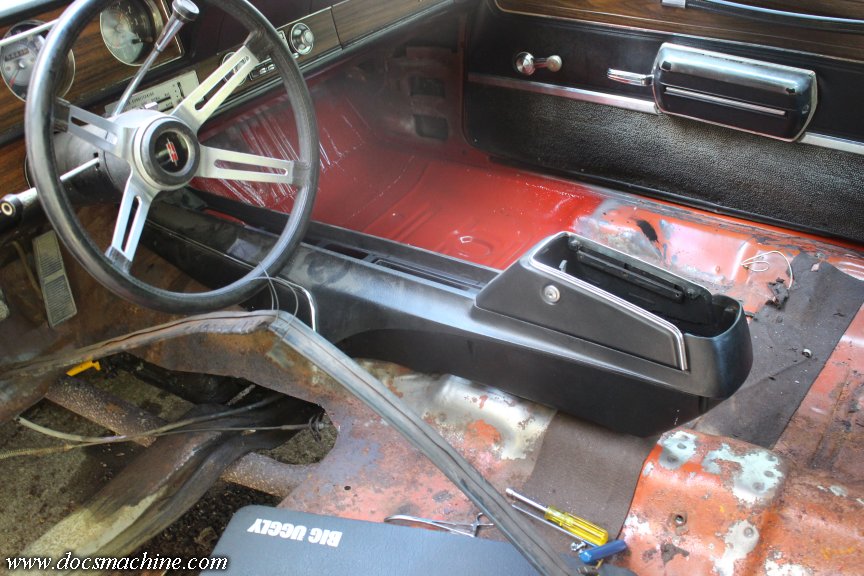
And there she is, all fully bolted down and surprisingly solid. (On it's own, it's kinda floppy.)
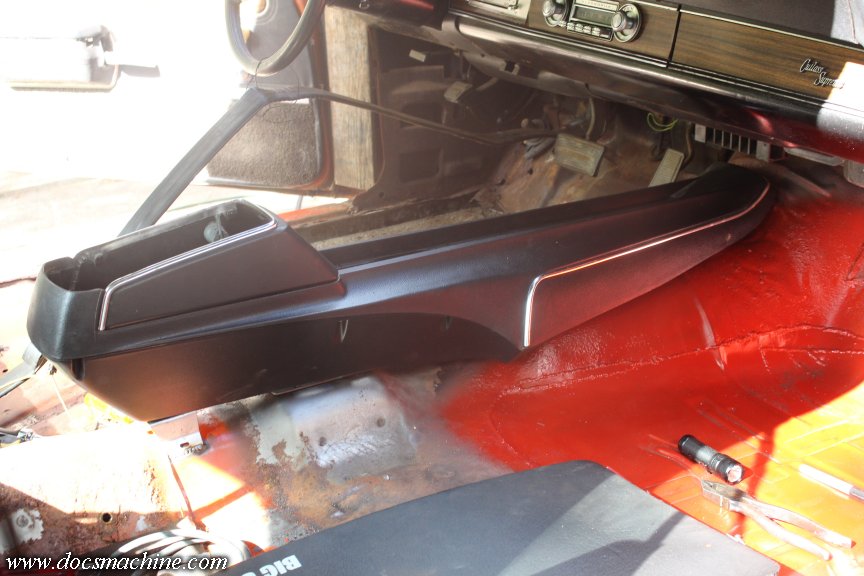
The sun kinda washed out the pic, but on the whole, I'm happy with the fit. There's plenty of clearance underneath for sound-deadener, padding and carpets, and with the shifter itself located, I can run the cable and linkage next. Progress!
Doc.
This is not intended as such a how-to. This isn't a restoration, I'm "making do" at best.
I'd already rough-fitted the shifter a few weeks ago, and a test-fit for the console showed I was pretty close to the ballpark. There's three mounts, one at either end of the console (a big plastic casting) and the shifter in the middle. I only had the shifter, so that's where I started.
One thing I didn't like, was how fragile the two screw mounts were- in the various articles I'd read, it was pretty common for these tabs to be at least cracked, if not broken completely. Mine had one of the two holes chipped:
Those simply attached to these tabs on the shifter...
Without even a washer. So I popped those tabs off (they unbolt), then made these two little extra blocks:
Those I TIG welded to the tabs...
Then drilled through and tapped to 10-32.
Big fan of machine screws rather than self-tappers.
With everything reassembled, I was able to very gingerly test-fit the console again, with the shifter assembly bolted down.
I made two thickish blocks of aluminum, drilled through, to spread the load on the plastic, and it's all held together with stainless machine screws.
The rear mount is this folded sheetmetal piece...
Which was only vaguely shaped like the factory mount, in the same way I'm vaguely shaped like Scarlett Johansson.
But, with some hammerwork and angry manhandling, I got it reasonably fitted to the console and floor.
Marked where the 'legs' contacted the tunnel....
Ground off the paint and MIG'ed 'er in place.
After being sure nothing had moved, I marked and drilled two holes, and ran a couple self-tappers in there.
I've seen a few vague references to an add-on brace that uses the other two holes shown here- the slotted ones. I have a picture, though none showing it actually mounted. While I'm working on the rest of the floor, I may add that in, too.
But for now, it was finally time for the front mount- this one was no better shaped out of the box than the rear. I found out just in the past couple of days, I could have gotten much better fitted ones- and for the same price- but I had to dig for those. These cheapies were posted everywhere. Live and learn, I guess.
Again, not a restoration, all I wanted was the console mounted fairly solidly, and in about the right spot. So after a little tweaking, I had it pretty closely fitted both to the curvature of the tranny tunnel, and between the two mounting tabs on the nose of the console.
After bolting it all together for the umpty-'leventh time I got both the side holes and the mounting holes located and drilled.
And there she is, all fully bolted down and surprisingly solid. (On it's own, it's kinda floppy.)
The sun kinda washed out the pic, but on the whole, I'm happy with the fit. There's plenty of clearance underneath for sound-deadener, padding and carpets, and with the shifter itself located, I can run the cable and linkage next. Progress!
Doc.
Thread Starter
Unregistered Madman
Joined: Mar 2012
Posts: 55
From: Backwater, Alaska
(Again, this is all being reposted from 2025.)
Finally had a chance to get back to it, and finished the excavations of the driver's side rust.
As noted, there was at least one major spot I couldn't repair- or really, even access- so I had to leave that spot alone. I'll get to it whenever I can pop the cab off the frame, and swap the body mounts. (As well as add some reinforcement to the frame- fun cars don't twist like an overcooked noodle in the corners. )
If I did have the cab already off, and fully stripped, the firewall panel would have been easy. A couple straightish cuts, a few measurements to be sure it's in the right place, weld.
But in this case, since I didn't want to strip out the wiring or the brake pedal, etc. I trimmed out the rust, and not much more.
I'd ordered a firewall patch panel, and initial fitting showed it was close, but unfortunately not an exact fit. I'm already a poor excuse for a tin-basher, and that didn't help. Not being able to trace around the cut opening meant I had to pretty painstakingly cut-and-try. Roughly 893 thousand times, at least according to my knees.
I was eventually forced to slice it in half in order to get it reasonably decently fitted. And even there I still made one good goof...
But, eventually I got it pieced in and fairly solidly, and could start fitting the main portion:

That was a little easier, as there was space under that portion I could reach to mark for cut lines. Still quite a lot of fiddly trimming and sneaking up to a fit. It sure ain't gonna impress any pros, but it's a lot more solid than the old metal.
And, after half a day of stitch welding, I finally had it all sealed up and solid.
We're not done yet, of course. The next big trick is I need to mount at least the driver's seat, and take the car over to somebody with a lift. Get it up where I can wire brush and grind the undersides of the new pans, and hit 'em with primer, paint and a good dose of undercoating.
After that, it's almost- but not quite- down to mostly just reassembly!
Doc.
Finally had a chance to get back to it, and finished the excavations of the driver's side rust.
As noted, there was at least one major spot I couldn't repair- or really, even access- so I had to leave that spot alone. I'll get to it whenever I can pop the cab off the frame, and swap the body mounts. (As well as add some reinforcement to the frame- fun cars don't twist like an overcooked noodle in the corners.
)If I did have the cab already off, and fully stripped, the firewall panel would have been easy. A couple straightish cuts, a few measurements to be sure it's in the right place, weld.
But in this case, since I didn't want to strip out the wiring or the brake pedal, etc. I trimmed out the rust, and not much more.
I'd ordered a firewall patch panel, and initial fitting showed it was close, but unfortunately not an exact fit. I'm already a poor excuse for a tin-basher, and that didn't help. Not being able to trace around the cut opening meant I had to pretty painstakingly cut-and-try. Roughly 893 thousand times, at least according to my knees.
I was eventually forced to slice it in half in order to get it reasonably decently fitted. And even there I still made one good goof...
But, eventually I got it pieced in and fairly solidly, and could start fitting the main portion:
That was a little easier, as there was space under that portion I could reach to mark for cut lines. Still quite a lot of fiddly trimming and sneaking up to a fit. It sure ain't gonna impress any pros, but it's a lot more solid than the old metal.
And, after half a day of stitch welding, I finally had it all sealed up and solid.
We're not done yet, of course. The next big trick is I need to mount at least the driver's seat, and take the car over to somebody with a lift. Get it up where I can wire brush and grind the undersides of the new pans, and hit 'em with primer, paint and a good dose of undercoating.
After that, it's almost- but not quite- down to mostly just reassembly!
Doc.

Thread Starter
Unregistered Madman
Joined: Mar 2012
Posts: 55
From: Backwater, Alaska
(Reposted from 2025)
Today started a smear of POR-15 on the new weld seams...
And followed by a top coat of etch primer, while the POR was still slightly tacky.
I'd gotten the new shifter cable in, and test-fitted the whole shifter assembly:

Along with the linkage underneath.
It all took a bit of fettling, but I got it all in and it's snugged and functional. Due to the slight angle of the cable coming into the shifter assembly, I took a bit over a quarter of an inch off that new pin I'd made for the shift lever, and that lined the cable up for a straighter shot.
The overall eye-to-eye length of the cable- fixed by the cable mounts at the trans and the shifter assembly- ended up being about 1/4" too long for some reason. Presumably a combination of everything from simple stacked tolerances, to a mix of new and used brackets and parts.
After some pondering, I simply lengthened the slot where the movable pin goes on the shift linkage- the actual bracket bolted to the transmission- and everything lines up nicely. Thinking I may tack-weld a spacer in that slot, to make the pin a little more secure....
With the floors done up- mostly- the last big fab project is the seats. That's kind of what started this mess- the old bench was broken, and the driver's back was at a bit of an angle. I could have fixed that, of course (though it would have required opening the upholstery, which I'm not qualified to do) but I also wanted to add the center console and floor shifter. And that means swapping to bucket seats.
Factory bucket seats are in some demand, and a little expensive to both buy and have shipped up. And with all he old junkyards having been long since crushed and sold to China, finding local ones would have been difficult and expensive too.
A number of years ago, I had access to a mid-90s Cutlass (the Quad-4 era) and before that got junked, I pulled the rather comfy bucket seats out specifically for this car. I knew the seat mounts were going to be wildly different, and they were a ratty well-worn grey cloth. So at some point back in 2017 or 2018, I took out a second mortgage on the one kidney I hadn't hocked yet, and had a local shop reupholster them in a good, modern black cloth and leatherette.
... And there they sat ever since, waiting for me to have the free time to take on the full floor fix. Since, if I was going to peel up the carpets to fit the new seats and console, I should fix the rust spots, too- which I knew was not going to be a trivial process.
I absolutely did not have time to do it this year, and point in fact, it's very badly screwed up my scheduling and several deadlines.
But, I've been waiting at least six years to do this. Had I not started... when would I?
Anyway, the pans are in (with an asterisk) and the shifter and console mostly ready to go. I'm still short the carpets, which were supposed to be in last week, but there's still work to be done, so I'm not panicking yet.
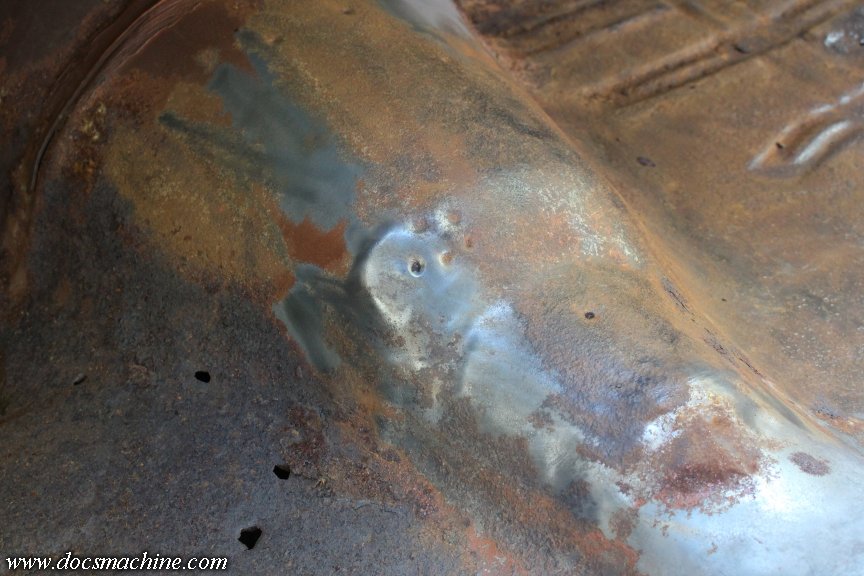
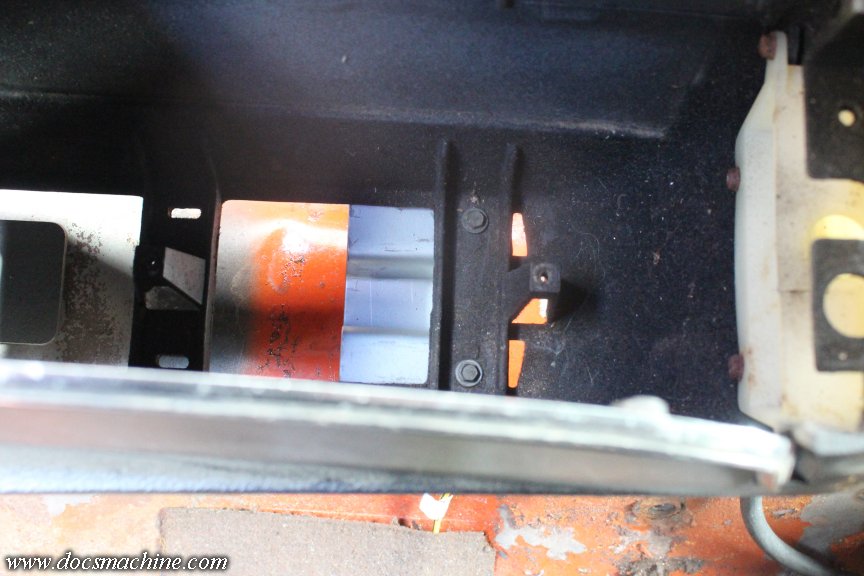
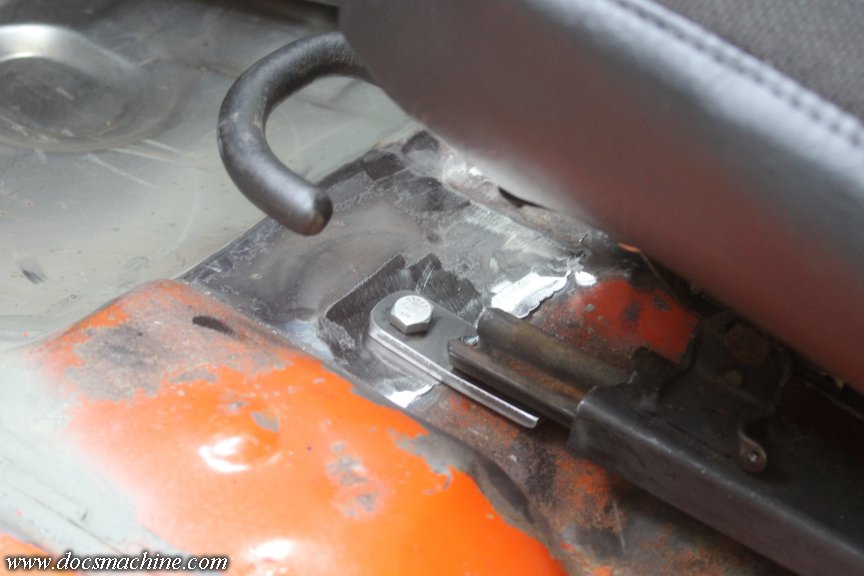
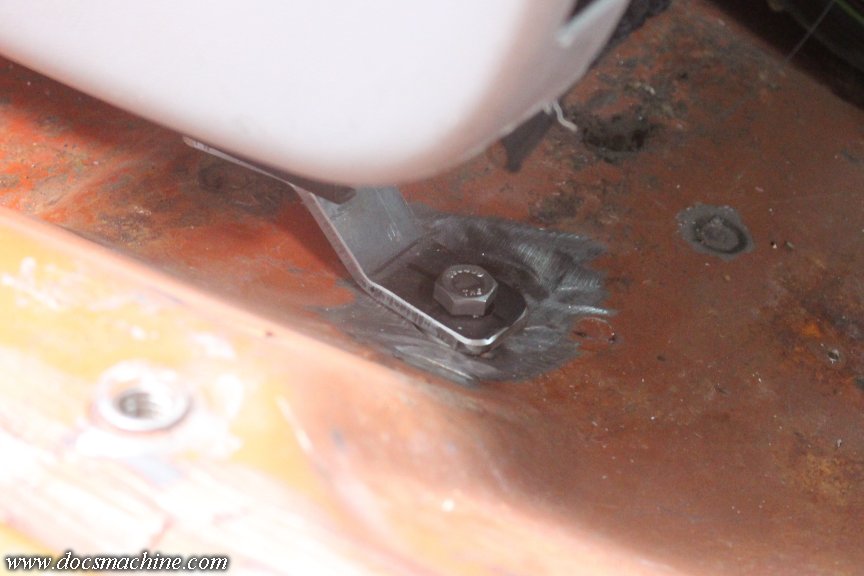
The first time I tried fitting the driver's seat, I didn't like how 'tall' it was. It felt like it was several inches higher than the factory bench seat, and while I wouldn't mind a little height, that felt like it was too much. After some analysis and a few weeks pondering while I worked on other things, this bit was partly the culprit:
Hard to see in a 2D picture, but right in the center of that photo is a raised boss, over an inch higher than the portion of the floor immediately below it. I thought if I could shave that down, it would both lower the whole seat an inch or so- which doesn't sound like much, but kind of is- and would "even out" the floor somewhat to make fabbing the mounts easier.
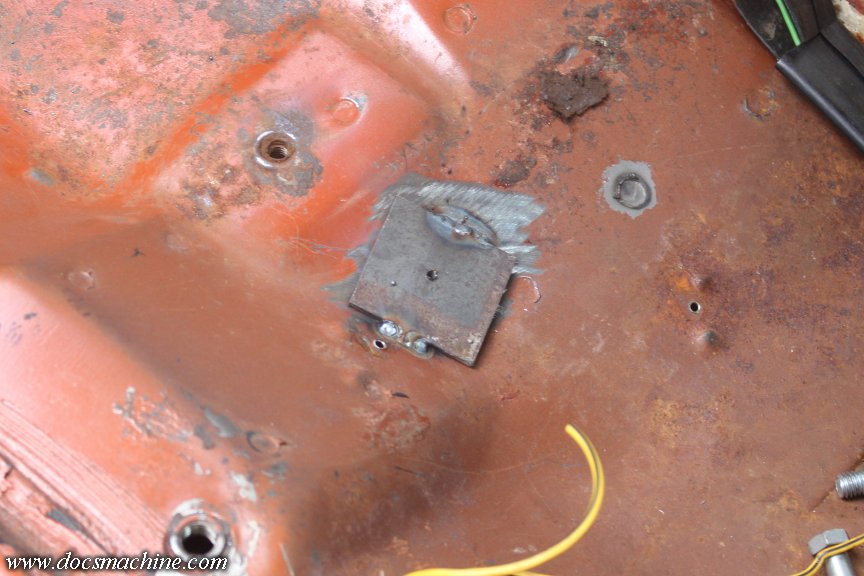
So, we slice it out, including some of the structure underneath.
Since it's part of that structure and a mount for the seat, I bandsawed out a chunk of 10ga, abused it a bit with hammers, and got it fitted into place.
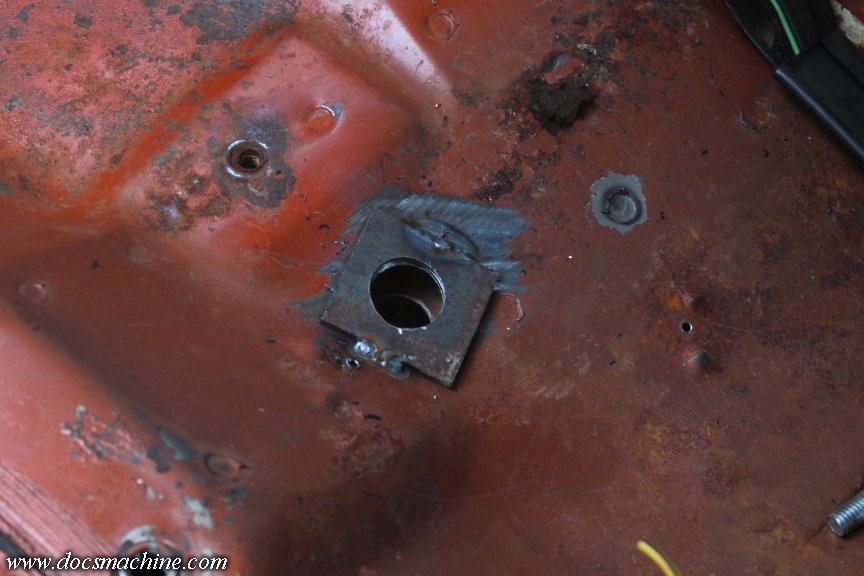
After welding and smoothing, I did a quick test-fit, found a likely location, and cut a 1" hole right about thar.
A piece if 1" hot-rolled out of the scrap bins heroically volunteered for the task, and with a few minutes on the lathe, quickly became a threaded boss.
This action would be repeated twice more.
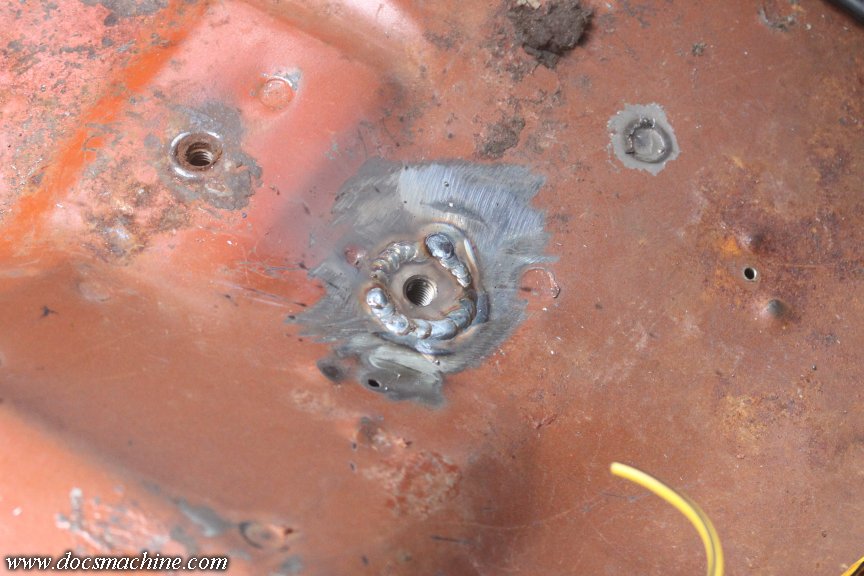
That got tapped lightly into place, and then similarly welded in and smoothed.
Which allowed a simple chunk of 1/4" flatbar to become the new rail mount.
For the outboard rear, I wanted to do the same thing, but I'd already drilled a 3/8" hole in the first attempt at mounting. Not only was it in slightly the wrong place, but the holesaw wouldn't guide on a 3/8" hole. To that end, I tacked on a chunk of the same 10 ga, with a 1/8" guide hole...
And holesawed through it, the floor, and the support channel underneath.
Those supports on the underside are part of the reason why I'm going with the welded-in threaded bosses. I can't just drill a hole and drop a bolt through- you tighten the bolt and it just squishes that channel. I had originally thought of welding in a tube, so you could drop in the bolt and tighten it with a nut on the underside without collapsing the channel... But really, if I'm going that far, why not put in a threaded boss, so you don't have to reach underneath to fit a nut?
Anyway, another boss, welded in...
Ground, smoothed and a new rear foot fabbed and fitted.
I'm not showing the 300 times I had the seat in and out, the 900 measurements I took to try and get it it true and square to a car that has no true and square datum anywhere, or the 85,000 deep-knee-bends it took to fit those tabs.
Anyway, after a full day of this, three welded in bosses (the fourth just goes through a single layer of floor, so will get a welded-on boss) and countless tweaks, adjustments and final-welds, the driver's seat is in and ready to use.
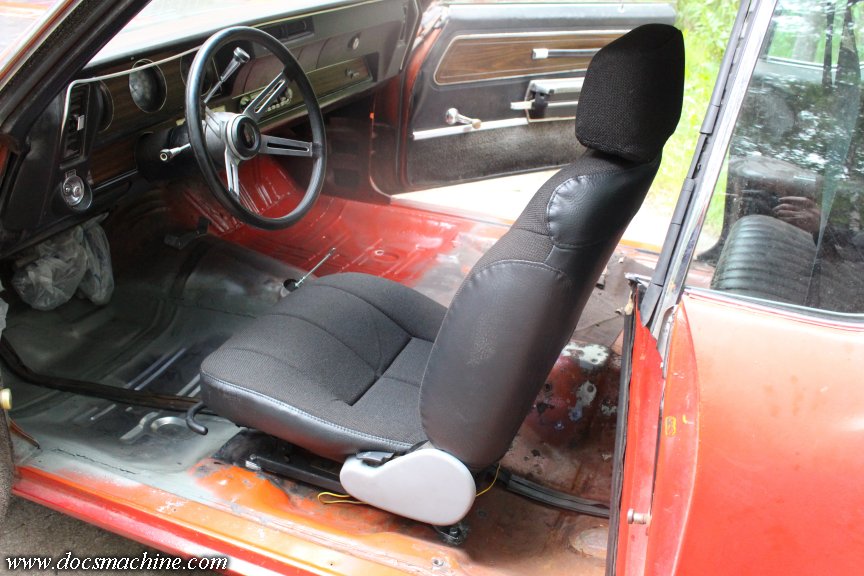
I threw in the old seatbelts, took the car down off the jackstands, and took it for a quick test drive. The seat height is, again, a touch higher than it was, but not annoyingly so, and I'm pretty sure I can get used to it.
At some point in the very near future, I hope to get it up on a lift and finish welding up those bosses and a few various seams from underneath, then of course hit everything with primer, paint and a good rubberized undercoating.
I still, of course, need to fit the passenger seat, but it has a much simpler set of rails (this one tilts as well as slides) so I may not need to knife out that raised boss. We'll see.
Oh, and I discovered a pretty big oopsie I hadn't even considered at any point along this whole process: The seats don't fold.
They're front seats out of a 4-door car- there's no reason for the backs to fold forward, so they don't. [Slaps forehead] I will not be able to carry more than the one passenger, and even putting large packages or groceries in back is going to be a trick. That's... not ideal, but I'm not sure what to do about it. I may have to dig into the seatback mechanism- which does allow it to tilt back, though I'm not sure how far- and see if it can't be modded, or maybe the passenger side will fold. I haven't verified yet.
Now, that's not a huge thing, again, this is a 'just for fun' car. I have a different "grocery getter", and have no kids to carry around- heck, in the fifteen-plus years I've had this thing, I've only had three people in it exactly once. But it was still a big forehead slapper, and if I do at some point need to fix it... well, it won't cheap OR easy.
Doc.
Today started a smear of POR-15 on the new weld seams...
And followed by a top coat of etch primer, while the POR was still slightly tacky.
I'd gotten the new shifter cable in, and test-fitted the whole shifter assembly:
Along with the linkage underneath.
It all took a bit of fettling, but I got it all in and it's snugged and functional. Due to the slight angle of the cable coming into the shifter assembly, I took a bit over a quarter of an inch off that new pin I'd made for the shift lever, and that lined the cable up for a straighter shot.
The overall eye-to-eye length of the cable- fixed by the cable mounts at the trans and the shifter assembly- ended up being about 1/4" too long for some reason. Presumably a combination of everything from simple stacked tolerances, to a mix of new and used brackets and parts.
After some pondering, I simply lengthened the slot where the movable pin goes on the shift linkage- the actual bracket bolted to the transmission- and everything lines up nicely. Thinking I may tack-weld a spacer in that slot, to make the pin a little more secure....
With the floors done up- mostly- the last big fab project is the seats. That's kind of what started this mess- the old bench was broken, and the driver's back was at a bit of an angle. I could have fixed that, of course (though it would have required opening the upholstery, which I'm not qualified to do) but I also wanted to add the center console and floor shifter. And that means swapping to bucket seats.
Factory bucket seats are in some demand, and a little expensive to both buy and have shipped up. And with all he old junkyards having been long since crushed and sold to China, finding local ones would have been difficult and expensive too.
A number of years ago, I had access to a mid-90s Cutlass (the Quad-4 era) and before that got junked, I pulled the rather comfy bucket seats out specifically for this car. I knew the seat mounts were going to be wildly different, and they were a ratty well-worn grey cloth. So at some point back in 2017 or 2018, I took out a second mortgage on the one kidney I hadn't hocked yet, and had a local shop reupholster them in a good, modern black cloth and leatherette.
... And there they sat ever since, waiting for me to have the free time to take on the full floor fix. Since, if I was going to peel up the carpets to fit the new seats and console, I should fix the rust spots, too- which I knew was not going to be a trivial process.
I absolutely did not have time to do it this year, and point in fact, it's very badly screwed up my scheduling and several deadlines.
But, I've been waiting at least six years to do this. Had I not started... when would I?
Anyway, the pans are in (with an asterisk) and the shifter and console mostly ready to go. I'm still short the carpets, which were supposed to be in last week, but there's still work to be done, so I'm not panicking yet.
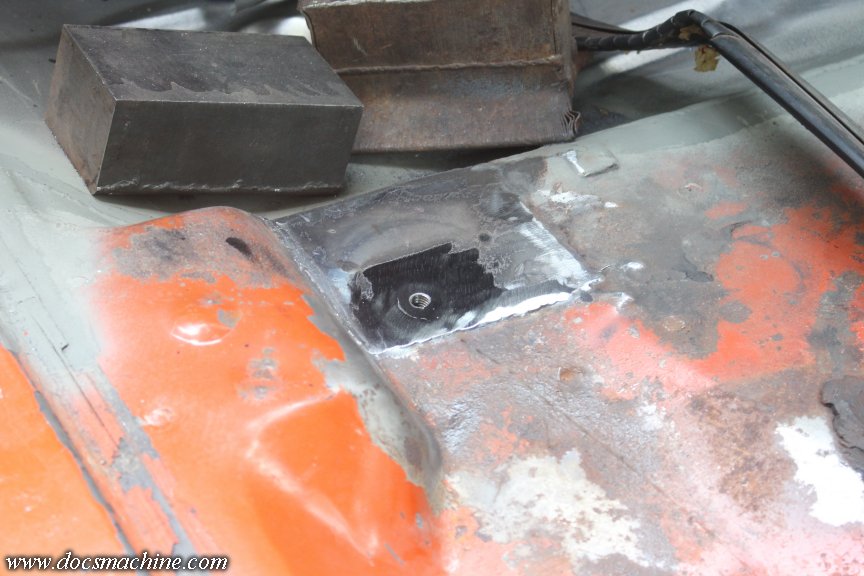
The first time I tried fitting the driver's seat, I didn't like how 'tall' it was. It felt like it was several inches higher than the factory bench seat, and while I wouldn't mind a little height, that felt like it was too much. After some analysis and a few weeks pondering while I worked on other things, this bit was partly the culprit:
Hard to see in a 2D picture, but right in the center of that photo is a raised boss, over an inch higher than the portion of the floor immediately below it. I thought if I could shave that down, it would both lower the whole seat an inch or so- which doesn't sound like much, but kind of is- and would "even out" the floor somewhat to make fabbing the mounts easier.
So, we slice it out, including some of the structure underneath.
Since it's part of that structure and a mount for the seat, I bandsawed out a chunk of 10ga, abused it a bit with hammers, and got it fitted into place.
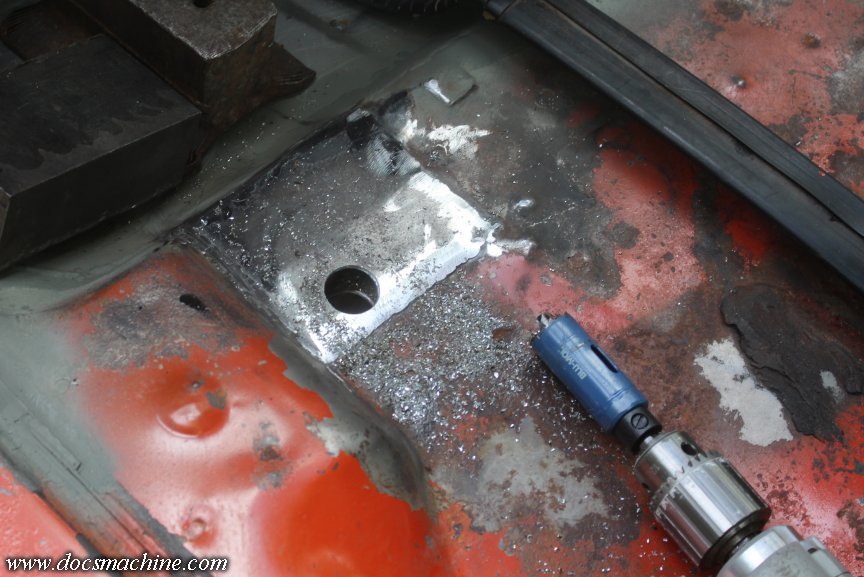
After welding and smoothing, I did a quick test-fit, found a likely location, and cut a 1" hole right about thar.
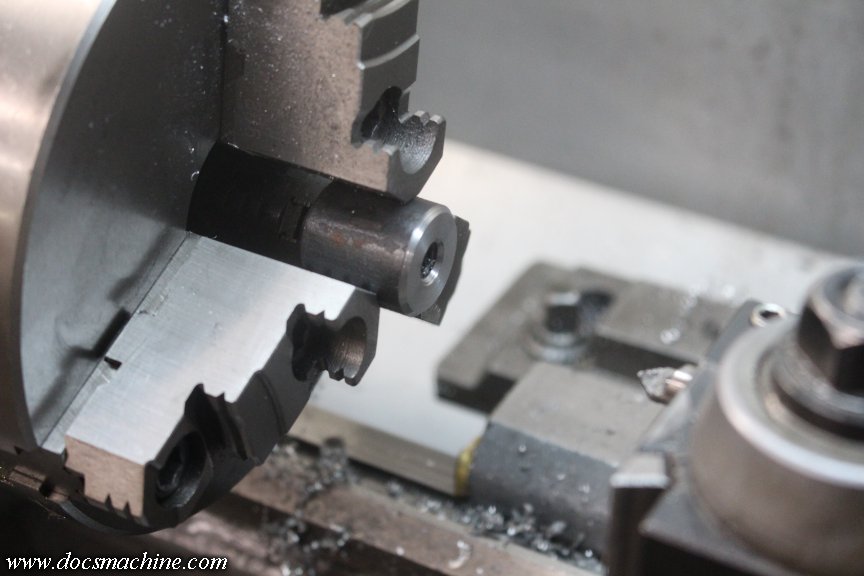
A piece if 1" hot-rolled out of the scrap bins heroically volunteered for the task, and with a few minutes on the lathe, quickly became a threaded boss.
This action would be repeated twice more.
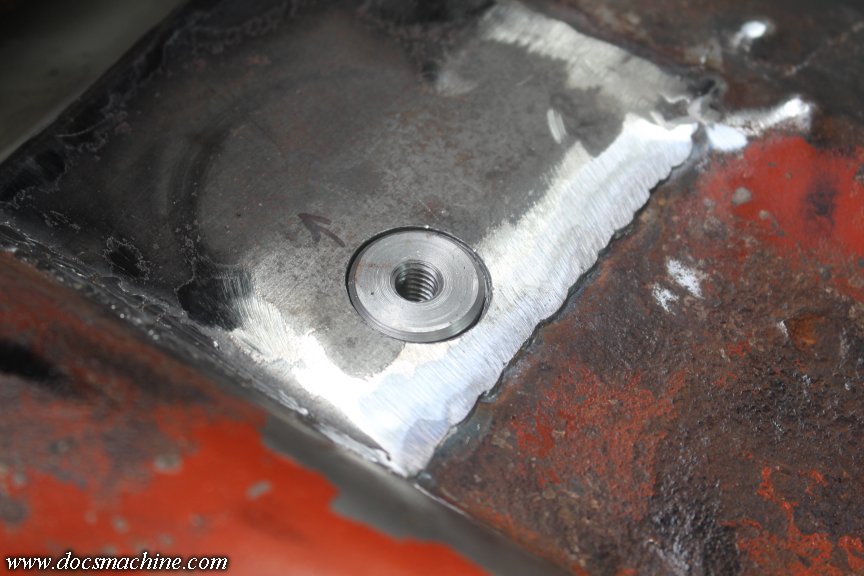
That got tapped lightly into place, and then similarly welded in and smoothed.
Which allowed a simple chunk of 1/4" flatbar to become the new rail mount.
For the outboard rear, I wanted to do the same thing, but I'd already drilled a 3/8" hole in the first attempt at mounting. Not only was it in slightly the wrong place, but the holesaw wouldn't guide on a 3/8" hole. To that end, I tacked on a chunk of the same 10 ga, with a 1/8" guide hole...
And holesawed through it, the floor, and the support channel underneath.
Those supports on the underside are part of the reason why I'm going with the welded-in threaded bosses. I can't just drill a hole and drop a bolt through- you tighten the bolt and it just squishes that channel. I had originally thought of welding in a tube, so you could drop in the bolt and tighten it with a nut on the underside without collapsing the channel... But really, if I'm going that far, why not put in a threaded boss, so you don't have to reach underneath to fit a nut?
Anyway, another boss, welded in...
Ground, smoothed and a new rear foot fabbed and fitted.
I'm not showing the 300 times I had the seat in and out, the 900 measurements I took to try and get it it true and square to a car that has no true and square datum anywhere, or the 85,000 deep-knee-bends it took to fit those tabs.
Anyway, after a full day of this, three welded in bosses (the fourth just goes through a single layer of floor, so will get a welded-on boss) and countless tweaks, adjustments and final-welds, the driver's seat is in and ready to use.
I threw in the old seatbelts, took the car down off the jackstands, and took it for a quick test drive. The seat height is, again, a touch higher than it was, but not annoyingly so, and I'm pretty sure I can get used to it.
At some point in the very near future, I hope to get it up on a lift and finish welding up those bosses and a few various seams from underneath, then of course hit everything with primer, paint and a good rubberized undercoating.
I still, of course, need to fit the passenger seat, but it has a much simpler set of rails (this one tilts as well as slides) so I may not need to knife out that raised boss. We'll see.
Oh, and I discovered a pretty big oopsie I hadn't even considered at any point along this whole process: The seats don't fold.
They're front seats out of a 4-door car- there's no reason for the backs to fold forward, so they don't. [Slaps forehead] I will not be able to carry more than the one passenger, and even putting large packages or groceries in back is going to be a trick. That's... not ideal, but I'm not sure what to do about it. I may have to dig into the seatback mechanism- which does allow it to tilt back, though I'm not sure how far- and see if it can't be modded, or maybe the passenger side will fold. I haven't verified yet.
Now, that's not a huge thing, again, this is a 'just for fun' car. I have a different "grocery getter", and have no kids to carry around- heck, in the fifteen-plus years I've had this thing, I've only had three people in it exactly once. But it was still a big forehead slapper, and if I do at some point need to fix it... well, it won't cheap OR easy.
Doc.
Thread Starter
Unregistered Madman
Joined: Mar 2012
Posts: 55
From: Backwater, Alaska
And, real quick like, since it got brought up in the other places I originally posted this work, this is NOT any kind of a restoration.
The car isn't worth restoring- it was a notchback 2bbl 350, column shift automatic with bench seats. The only real option it had was AC. It was a junker destined for the landfill when I got it, and I'm piecing it together on a frayed and knotted shoestring budget. It's a fun car, not a show car.
Although, spoiler alert, I did show it at the end of last summer.
Doc.
Thread Starter
Unregistered Madman
Joined: Mar 2012
Posts: 55
From: Backwater, Alaska
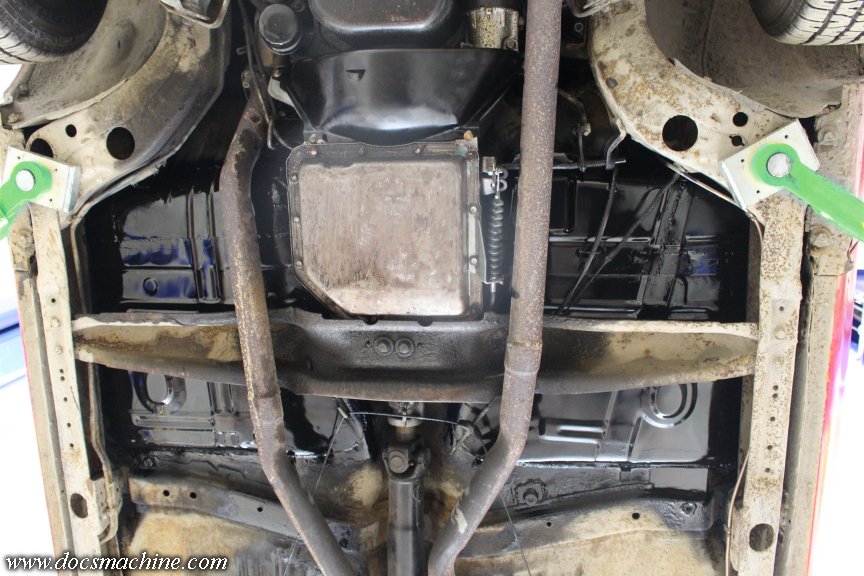
Weather and other scheduling issues finally managed to cooperate, so I ran the car out to a friend's where I could put it up on a lift.
I also hauled out my MIG, some air tools and other goodies. The idea, as I said, being to clean up the underside of the pans, shave all the MIG whiskers, finish weld the seat bosses, and paint everything.
The underside, along with most of the rest of the car, is nothing to write home about. As I've said, it's all been done on a tight budget, in my ever-dwindling spare time, with not a lot of skill, during our absurdly brief bouts of summer.
The biggest pity is that I'm having to do all this with the cab and frame in place. I don't have the time, space or equipment to remove the body- and that means, no matter how well I coat the underside, there's going to be spots of bare steel left exposed. Nothing I can do about that for the time being- as I said, I'd like to lift the body at some point, but that's not something one does on a whim.
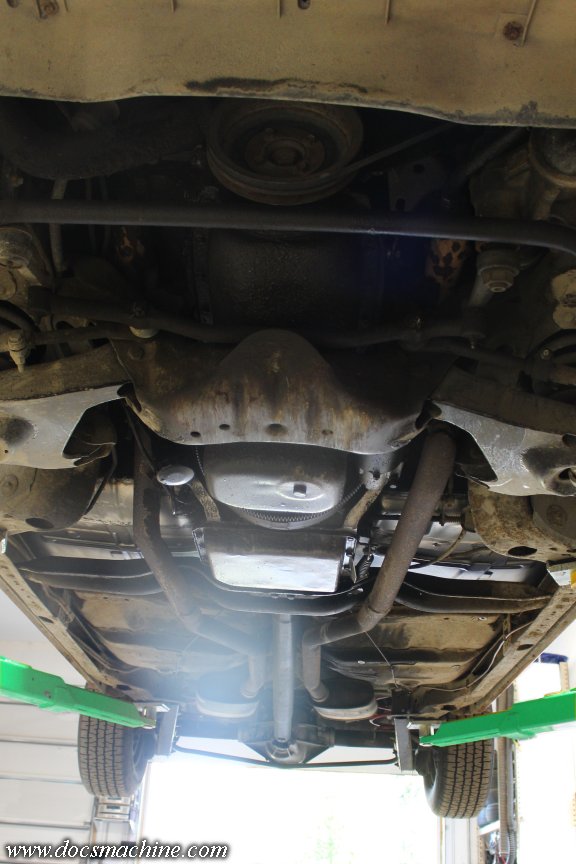
But, I wanted to take care of what I could- and this was what I was looking at:
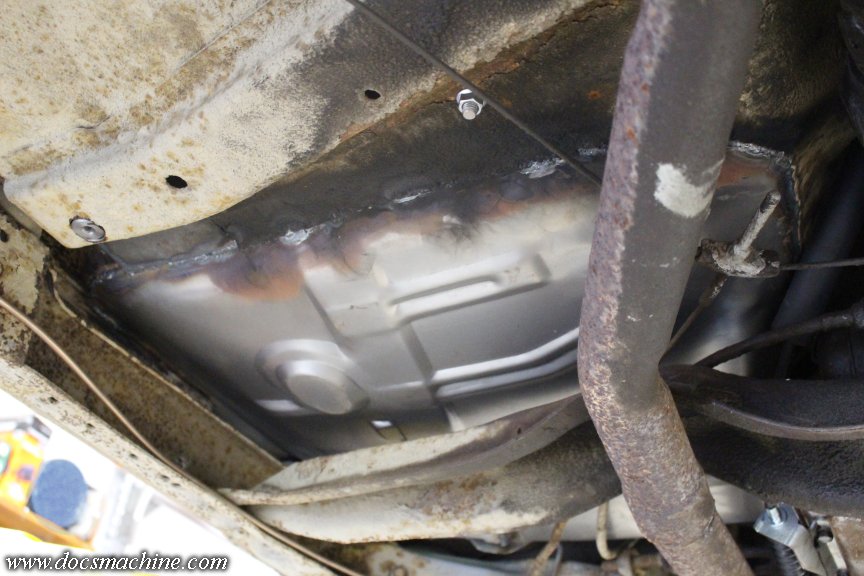
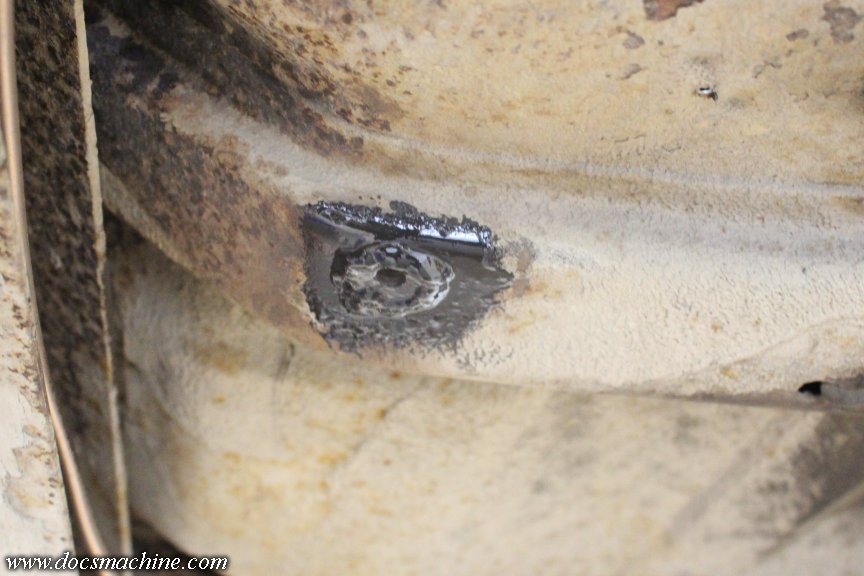
Lots of soot from the old undercoating that burned during the welding, plenty of MIG whiskers, , and the bottoms of the seat bosses that need to be welded. That plain nut on the right got replaced with a "puck" boss as above, since it only went through a single layer.
My lift time was limited, and I'd burn up a lot of that just waiting for the coatings to cure/dry, so I didn't get a whole lot of pictures. Suffice to say I used various wire brushes (manual and powered) grinders (air and electric) and scrapers to remove the soot, spatter and loose old undercoating. I got all the additional welding I needed to do, done, too. It wasn't the greatest, with everything so rusty, but they'll hold.
Ron Covell I ain't.
Anyway, once I had things clean- at least everything I could reach- I slathered the seams with more POR-15.
It's not the neatest job, but this isn't a show car.
While that was curing, I attended a few other things while I had it in the air. Somewhere between some previous owner and I, the transmission dust cover had been lost- and ones for Olds engines are harder to find than for the other GM engines, since Olds puts the starter on the opposite side.
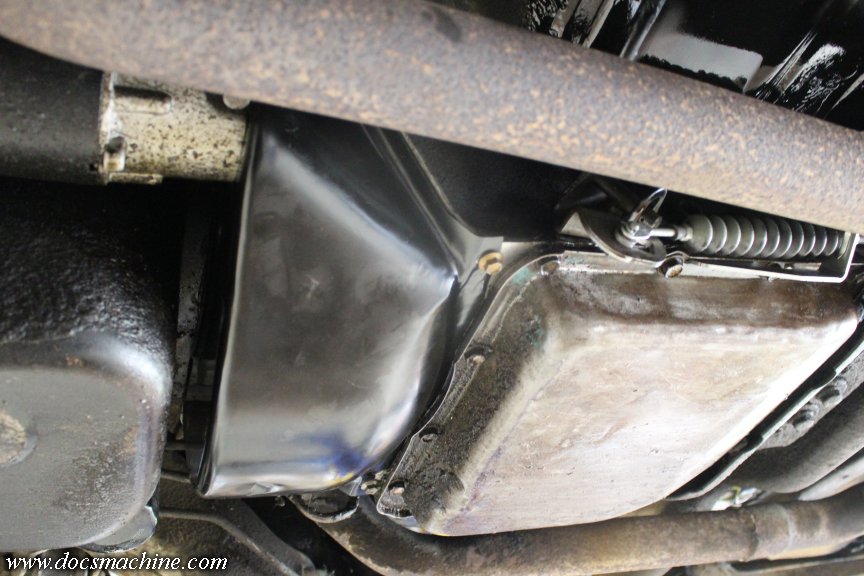
So since I was making an order anyway, I threw this reproduction one in with it. Had to tweak the fit a little, but I got 'er in place. I'd dug some extra bolts out of my stashes and brought them along.
Once the POR had gotten to the "just tacky" stage- perfect for the next coat to adhere- I covered that with etch primer, waited about 30 minutes for that to flash off, and topped that with regular gloss enamel.
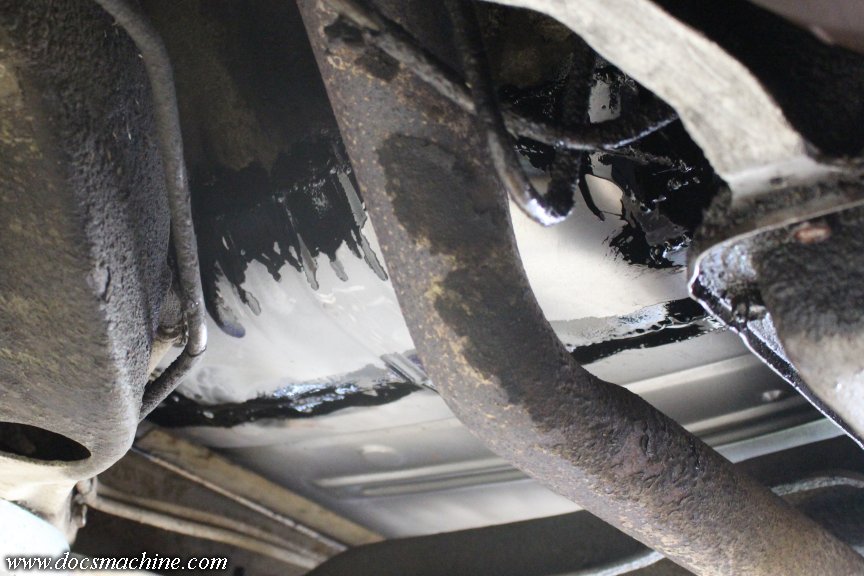
That one took an hour, so I lit out and got a burger- the first solid food I'd had by that point. When I came back, that last step was to hit everything I could reach with a rubberized undercoating.
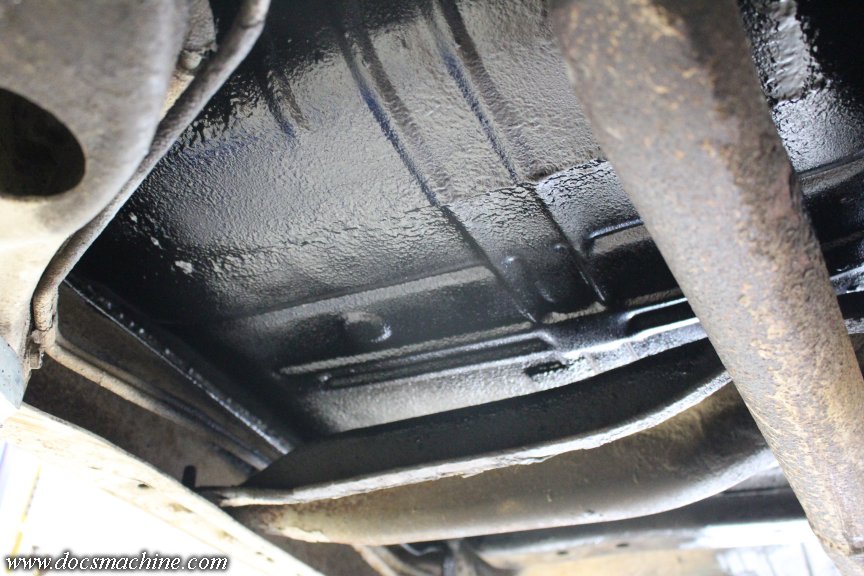
Actually, it was spray Flex-Seal, but several people have recommended it over other spray-can undercoatings, and I can say I like how it... well, sealed gaps and gave a nice thick, tough coating.
That I had to let dry/cure for a couple of hours too, before driving home- I didn't want a bunch of dirt and gravel getting embedded in it.
But, she's home now, and the underside is basically done. Friday's supposed to be rainy, but Saturday's supposed to be fairly clear. If I can get the interior floors wire brushed and painted... we're pretty much ready for carpets!
Doc.
I also hauled out my MIG, some air tools and other goodies. The idea, as I said, being to clean up the underside of the pans, shave all the MIG whiskers, finish weld the seat bosses, and paint everything.
The underside, along with most of the rest of the car, is nothing to write home about. As I've said, it's all been done on a tight budget, in my ever-dwindling spare time, with not a lot of skill, during our absurdly brief bouts of summer.
The biggest pity is that I'm having to do all this with the cab and frame in place. I don't have the time, space or equipment to remove the body- and that means, no matter how well I coat the underside, there's going to be spots of bare steel left exposed. Nothing I can do about that for the time being- as I said, I'd like to lift the body at some point, but that's not something one does on a whim.
But, I wanted to take care of what I could- and this was what I was looking at:
Lots of soot from the old undercoating that burned during the welding, plenty of MIG whiskers, , and the bottoms of the seat bosses that need to be welded. That plain nut on the right got replaced with a "puck" boss as above, since it only went through a single layer.
My lift time was limited, and I'd burn up a lot of that just waiting for the coatings to cure/dry, so I didn't get a whole lot of pictures. Suffice to say I used various wire brushes (manual and powered) grinders (air and electric) and scrapers to remove the soot, spatter and loose old undercoating. I got all the additional welding I needed to do, done, too. It wasn't the greatest, with everything so rusty, but they'll hold.
Ron Covell I ain't.
Anyway, once I had things clean- at least everything I could reach- I slathered the seams with more POR-15.
It's not the neatest job, but this isn't a show car.
While that was curing, I attended a few other things while I had it in the air. Somewhere between some previous owner and I, the transmission dust cover had been lost- and ones for Olds engines are harder to find than for the other GM engines, since Olds puts the starter on the opposite side.
So since I was making an order anyway, I threw this reproduction one in with it. Had to tweak the fit a little, but I got 'er in place. I'd dug some extra bolts out of my stashes and brought them along.
Once the POR had gotten to the "just tacky" stage- perfect for the next coat to adhere- I covered that with etch primer, waited about 30 minutes for that to flash off, and topped that with regular gloss enamel.
That one took an hour, so I lit out and got a burger- the first solid food I'd had by that point.
When I came back, that last step was to hit everything I could reach with a rubberized undercoating.Actually, it was spray Flex-Seal, but several people have recommended it over other spray-can undercoatings, and I can say I like how it... well, sealed gaps and gave a nice thick, tough coating.
That I had to let dry/cure for a couple of hours too, before driving home- I didn't want a bunch of dirt and gravel getting embedded in it.
But, she's home now, and the underside is basically done. Friday's supposed to be rainy, but Saturday's supposed to be fairly clear. If I can get the interior floors wire brushed and painted... we're pretty much ready for carpets!
Doc.
Thread Starter
Unregistered Madman
Joined: Mar 2012
Posts: 55
From: Backwater, Alaska
(Reposted from 2025.)
It is done Ladies and Gentlemen. The [fornicatory] floor is DONE!
After a rainy Friday and a lightly-damp Saturday- that was spent doing other work anyway- Sunday was clear and bright and warm. Probably one of the last few such days we'll have this year.
So I stripped the seats and seat-belts back out...
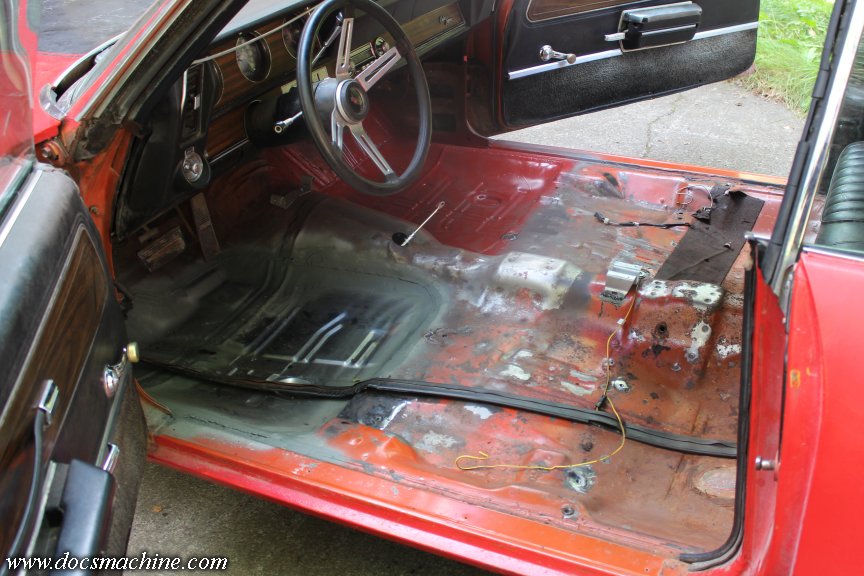
And took care of the last two welding tasks. The first was to add this little "outrigger" tab to the shifter assembly...
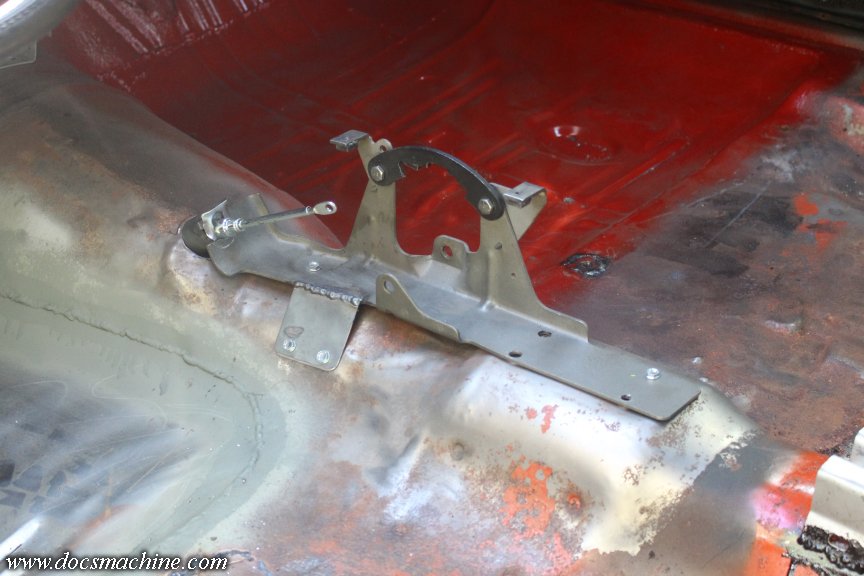
To help stabilize it against side-to-side rocking. The whole thing is pretty stable and solid once the console is bolted into place, but I liked the idea of a little extra support where it will get manhandled the most.
Then, I'd read of a... possibly optional...? second support for the rear of the console, and there was a slotted boss for it, so I fabbed and fitted one and tacked it in place. The 'factory' one appears to bolt to the back of the shifter assembly- I could have fitted such a thing, but this isn't a restoration, so this nice chunky hoop does just fine.
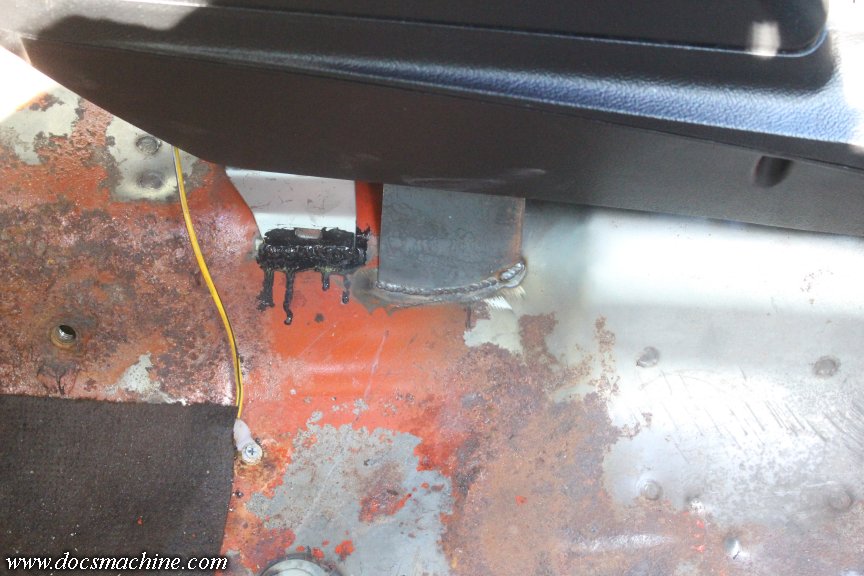
And that, I believe, concludes the fabrication for this part of the project. I stripped the console and shifter out again, scraped and vacuumed a couple of times, and then proceeded to wire-brush the bejeebers out of it.
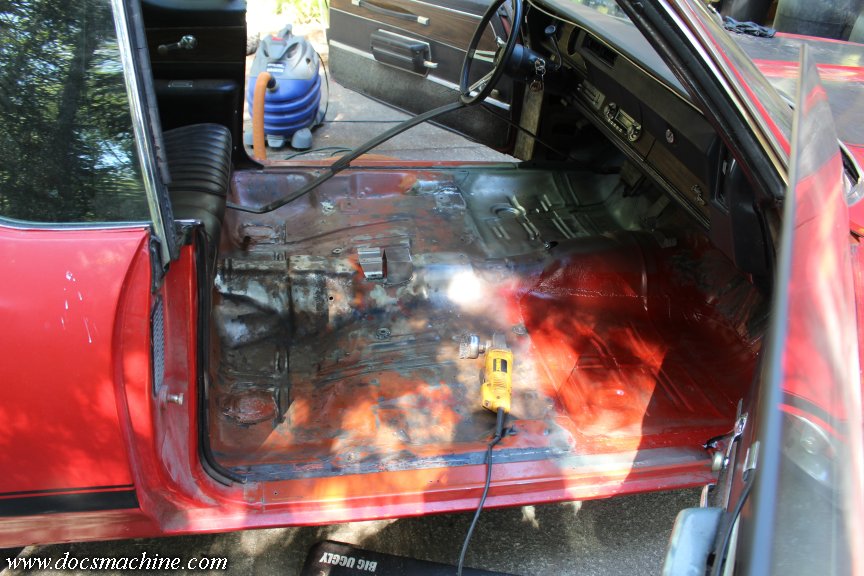
Old, dried-up bejeebers being particularly hard to remove.
After several more scrape/brush/vacuum cycles, and a dash of compressed air... it was finally time for paint!
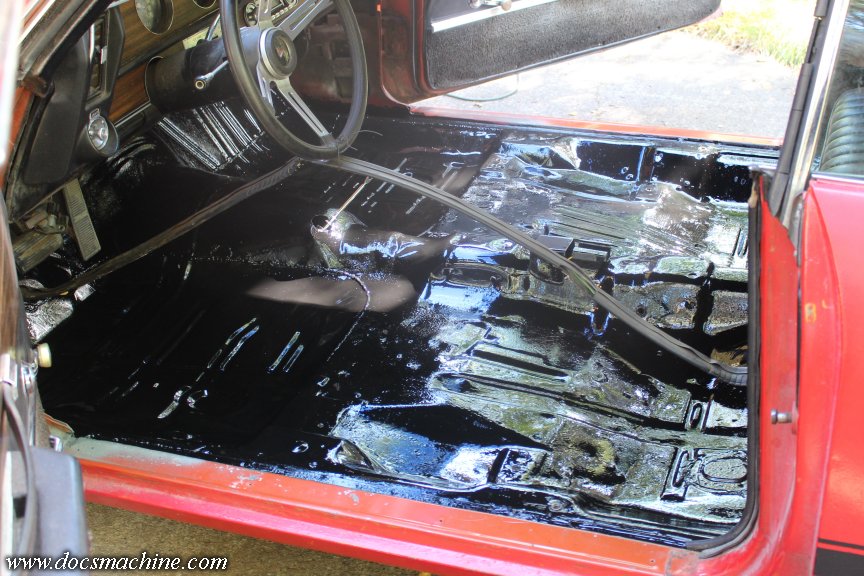
I do kind of wish I hadn't applied that red topcoat to the passenger side... I should have just left it in primer. I'd originally thought I was going to spraycan a top coat, but I still had 3/4s of that can of POR-15. And POR, if not directly exposed to UV, doesn't really need a topcoat, so I slathered the whole thing across the interior.
My carpets should be in Monday, and I already have the off-brand Dynamat stuff. This week is going to be pretty busy with other work, but with luck, all I should need to do is lay down the mat, slide the carpets into place (which will require a nontrivial amount of trimming and fitting, especially around my custom seats and whatnot) and damn near everything else just bolts into place.
That's supposed to be the plan, anyway.
Doc.
It is done Ladies and Gentlemen. The [fornicatory] floor is DONE!
After a rainy Friday and a lightly-damp Saturday- that was spent doing other work anyway- Sunday was clear and bright and warm. Probably one of the last few such days we'll have this year.
So I stripped the seats and seat-belts back out...
And took care of the last two welding tasks. The first was to add this little "outrigger" tab to the shifter assembly...
To help stabilize it against side-to-side rocking. The whole thing is pretty stable and solid once the console is bolted into place, but I liked the idea of a little extra support where it will get manhandled the most.
Then, I'd read of a... possibly optional...? second support for the rear of the console, and there was a slotted boss for it, so I fabbed and fitted one and tacked it in place. The 'factory' one appears to bolt to the back of the shifter assembly- I could have fitted such a thing, but this isn't a restoration, so this nice chunky hoop does just fine.
And that, I believe, concludes the fabrication for this part of the project. I stripped the console and shifter out again, scraped and vacuumed a couple of times, and then proceeded to wire-brush the bejeebers out of it.
Old, dried-up bejeebers being particularly hard to remove.
After several more scrape/brush/vacuum cycles, and a dash of compressed air... it was finally time for paint!
I do kind of wish I hadn't applied that red topcoat to the passenger side... I should have just left it in primer. I'd originally thought I was going to spraycan a top coat, but I still had 3/4s of that can of POR-15. And POR, if not directly exposed to UV, doesn't really need a topcoat, so I slathered the whole thing across the interior.
My carpets should be in Monday, and I already have the off-brand Dynamat stuff. This week is going to be pretty busy with other work, but with luck, all I should need to do is lay down the mat, slide the carpets into place (which will require a nontrivial amount of trimming and fitting, especially around my custom seats and whatnot) and damn near everything else just bolts into place.
That's supposed to be the plan, anyway.
Doc.
Thread Starter
Unregistered Madman
Joined: Mar 2012
Posts: 55
From: Backwater, Alaska
(Reposted from 2025.)
Just as I was getting ready to start tinkering this morning, a big brown van swung through and an oddly-dressed Santa Claus brought me my carpets!
It was- at least started out to be- a nice sunny day, so I laid out a tarp and unfurled them, as the instructions recommended:
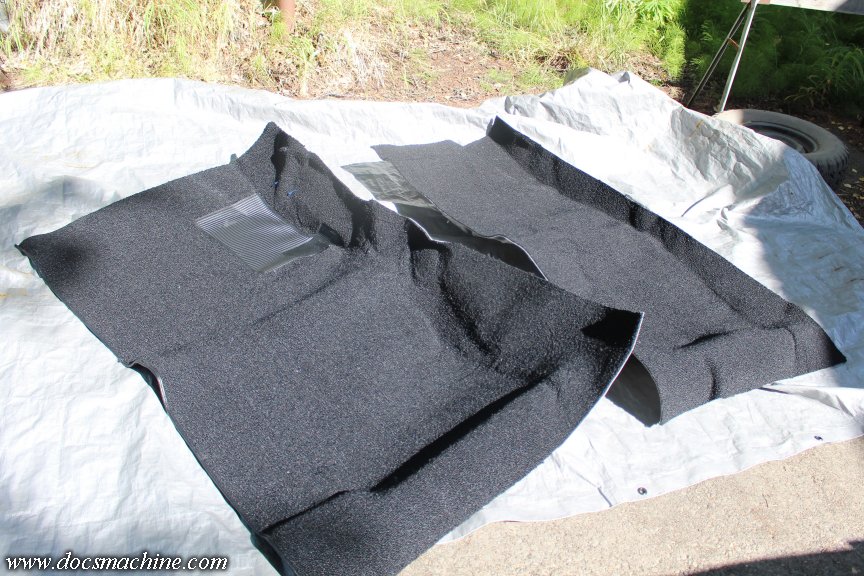
They're "molded", with a formed rubber backing, so the warmth let them come back to shape. Meanwhile I got out my box of off-brand not-Dynamat sound-dampening pads...
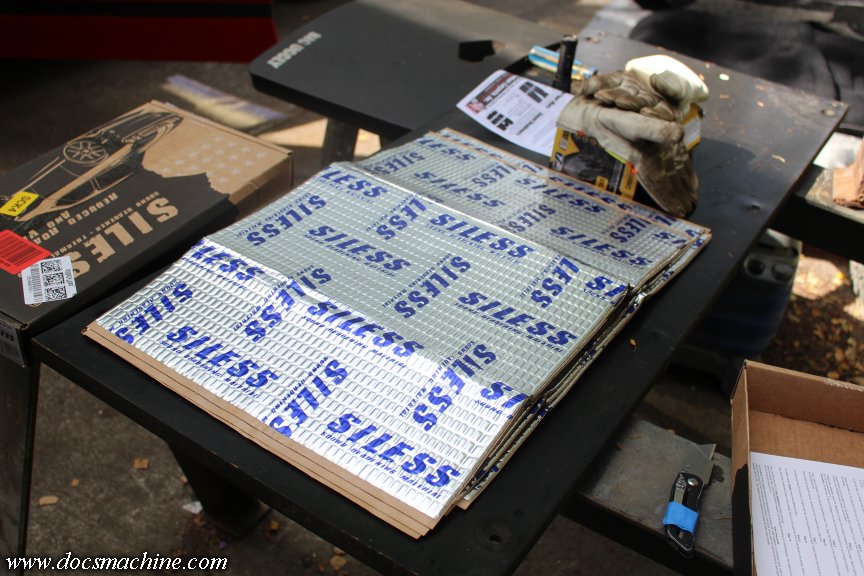
And as those instructions suggested, got out some thin cardboard to make patterns.

Application is simply peel-and-stick, but by golly, you better be really sure that's where you want it stuck, 'cus that's some good stickum on these things. Typical trick is to peel and stick just one corner, and make sure it's lined up, then pull the backing paper off and progressively stick it down.
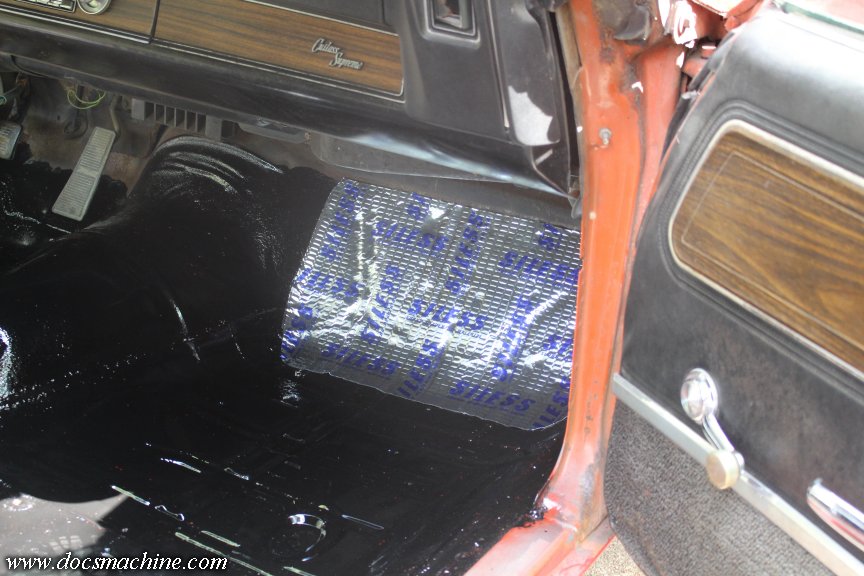
You're supposed to use a roller to make sure you have all the bubbles and whatnot out, but I didn't get one, and just made sure each piece was well pressed down.
The patterns definitely helped on some of the more complex surfaces, like under the seats where I of course didn't want to cover up the mounting holes:
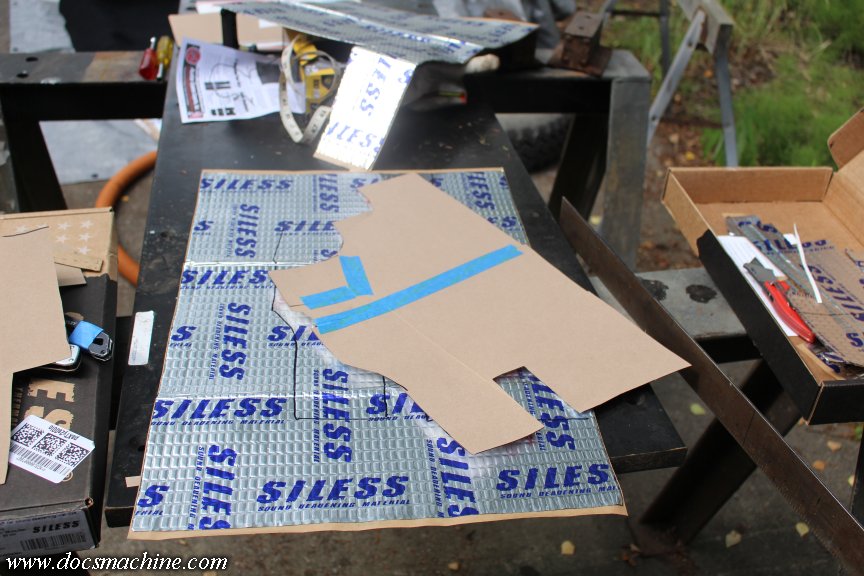
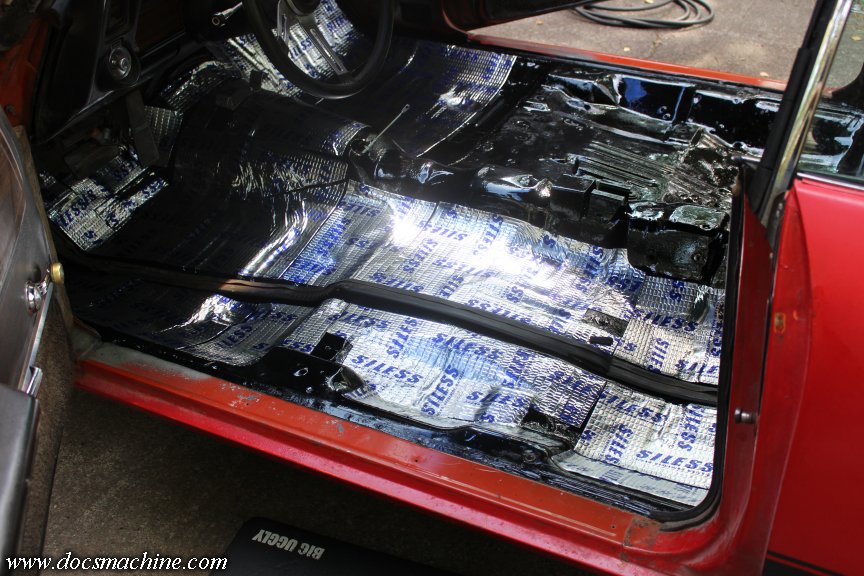
After an hour or two, I had most of the floor covered:
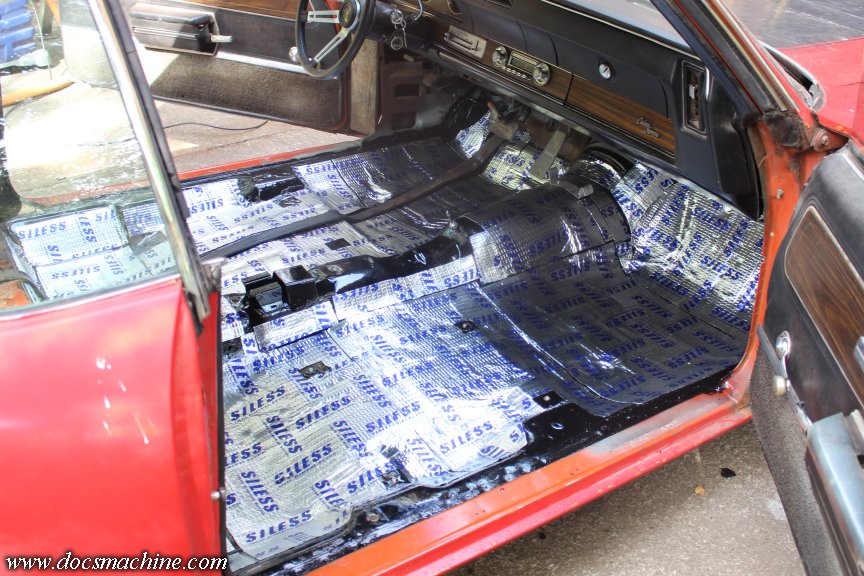
Advice says you don't need "full" coverage- this isn't a sealant or waterproofing. It's a soft butyl rubber material that dampens vibration kind of like putting a finger on a tuning fork. More coverage is better, I'm told, but you don't necessarily need to cover every single square inch.
And, to wrap things up for the day, I bolted down- hopefully for the last time- the shifter assembly mounting plate.
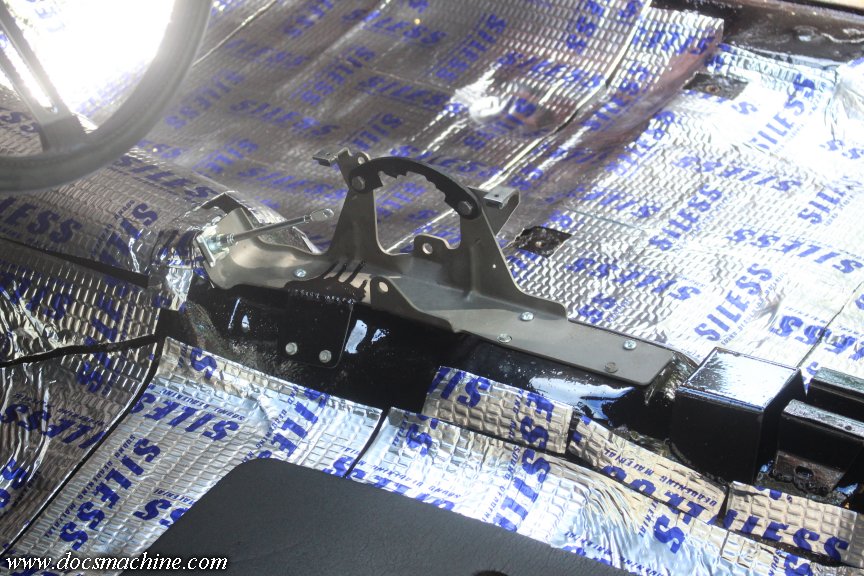
With all seven mounting screws and that extra side tab, she's solid as a rock. But, that was also all I had time for today- I have a huge backlog of other work that needs catching up on. Hoping to get some experienced help on the actual carpet install- the less chance of screwing up $400 in material, the better.
But, one way or the other, we're almost done, folks!
Doc.
Just as I was getting ready to start tinkering this morning, a big brown van swung through and an oddly-dressed Santa Claus brought me my carpets!
It was- at least started out to be- a nice sunny day, so I laid out a tarp and unfurled them, as the instructions recommended:
They're "molded", with a formed rubber backing, so the warmth let them come back to shape. Meanwhile I got out my box of off-brand not-Dynamat sound-dampening pads...
And as those instructions suggested, got out some thin cardboard to make patterns.
Application is simply peel-and-stick, but by golly, you better be really sure that's where you want it stuck, 'cus that's some good stickum on these things.
Typical trick is to peel and stick just one corner, and make sure it's lined up, then pull the backing paper off and progressively stick it down.You're supposed to use a roller to make sure you have all the bubbles and whatnot out, but I didn't get one, and just made sure each piece was well pressed down.
The patterns definitely helped on some of the more complex surfaces, like under the seats where I of course didn't want to cover up the mounting holes:
After an hour or two, I had most of the floor covered:
Advice says you don't need "full" coverage- this isn't a sealant or waterproofing. It's a soft butyl rubber material that dampens vibration kind of like putting a finger on a tuning fork. More coverage is better, I'm told, but you don't necessarily need to cover every single square inch.
And, to wrap things up for the day, I bolted down- hopefully for the last time- the shifter assembly mounting plate.
With all seven mounting screws and that extra side tab, she's solid as a rock. But, that was also all I had time for today- I have a huge backlog of other work that needs catching up on. Hoping to get some experienced help on the actual carpet install- the less chance of screwing up $400 in material, the better.
But, one way or the other, we're almost done, folks!
Doc.
Thread Starter
Unregistered Madman
Joined: Mar 2012
Posts: 55
From: Backwater, Alaska
By luck and no small amount of wheedling, I enlisted the services of an expert- at least a "more experienced than I am at installing automotive carpets"- and we were able to get them mostly laid out.
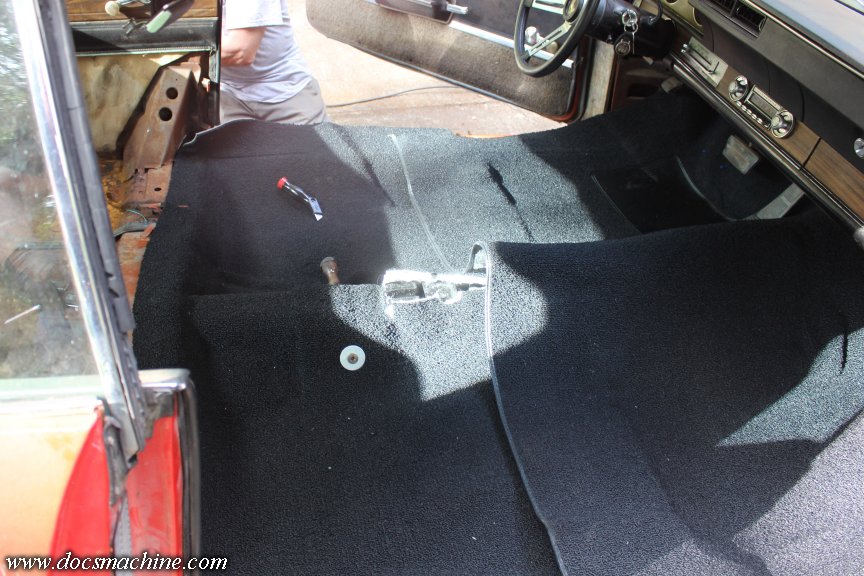
He had a trick for making the bolt holes for the seat and belt mounts. We found a chunk of some 3/8" steel rod in my scrap pile, and ground a stubby pencil point to it. He'd then find the bolt hole with a scratch awl- you can see the wood handle there in the center- heat up the spike with a propane torch, and melt out the hole.
Made a nice, clean, unfrayed hole. He said that any cutting method he'd tried, leaves free threads, that get wrapped up in the bolt as it's installed, and can fray out the hole.
I've seen people use the same idea making rivet or belt-buckle holes in nylon strapping, but I hadn't thought of using it here. (Hence part of why I wanted the expert. )
Took us a couple hours to trim and fit and manhandle things into place, and while it's not fully done yet, it's to the point where I can finish the fitting myself.
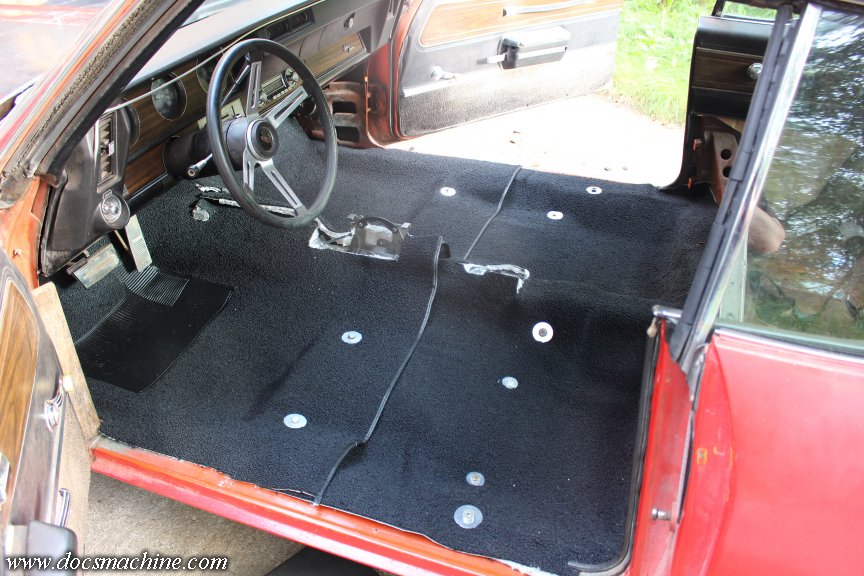
We had to pull the rear seat to get the carpets fitted, and I really kind of wish I'd done that earlier. I should have wire brushed and POR-15'ed that part, too.
No big, the whole interior will be coming apart again at some point, when it's finally time to do some paint-and-body. (If nothing else, the headliner has to come out to fix some waves in the roof, both doors need to be replaced- or heavily repaired, etc.) I scraped and vacuumed what I could, and then brushed it with Ospho. (A rust converter.)
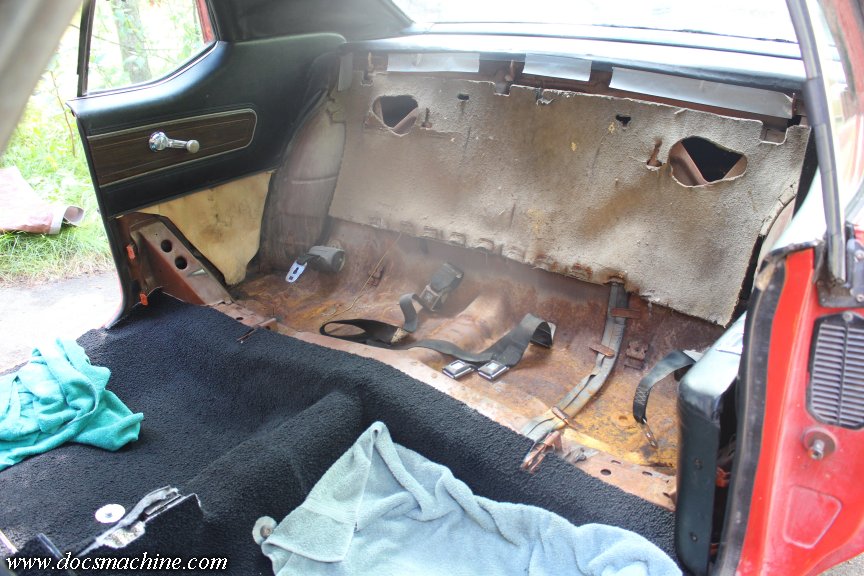
And, that gave me a chance, in the first time since I've owned this car, to give the parts a really good scrubbing.
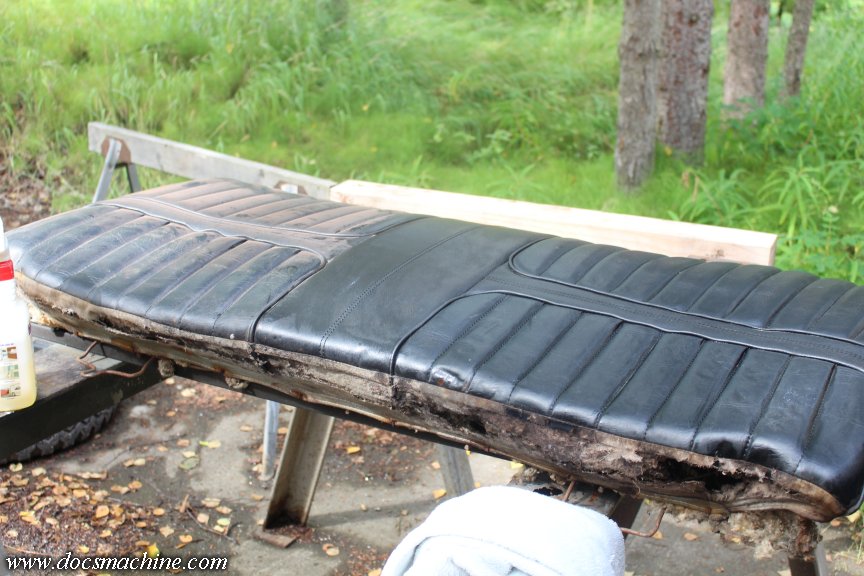
The cloth backing, as you can see, is badly rotted, but more or less holding, for now. That, too, will be taken care of later.
After some scrubbery, it all fit back together nicely.
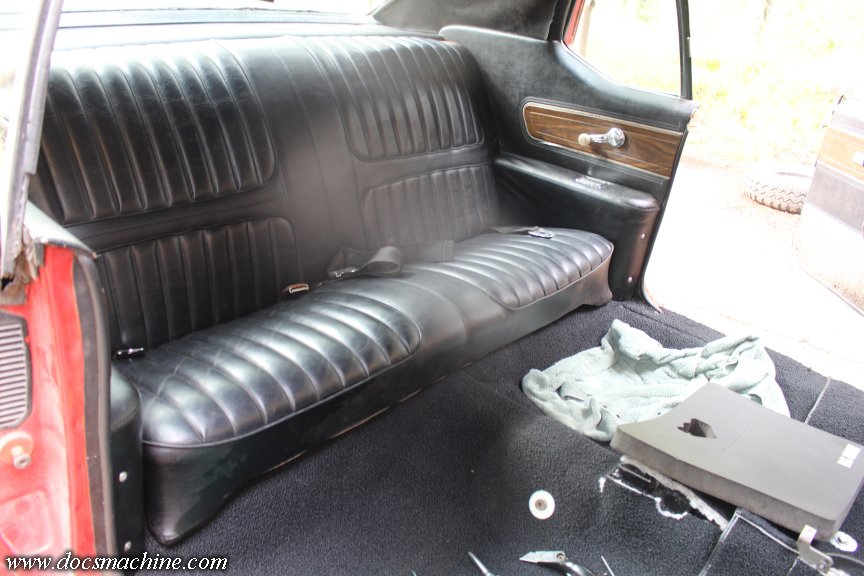
Up front, I cut the hole for the dimmer switch (floor mounted! Remember those? ) and got the grommet into place, and then scrubbed and reinstalled the kickpanels and toeboard.
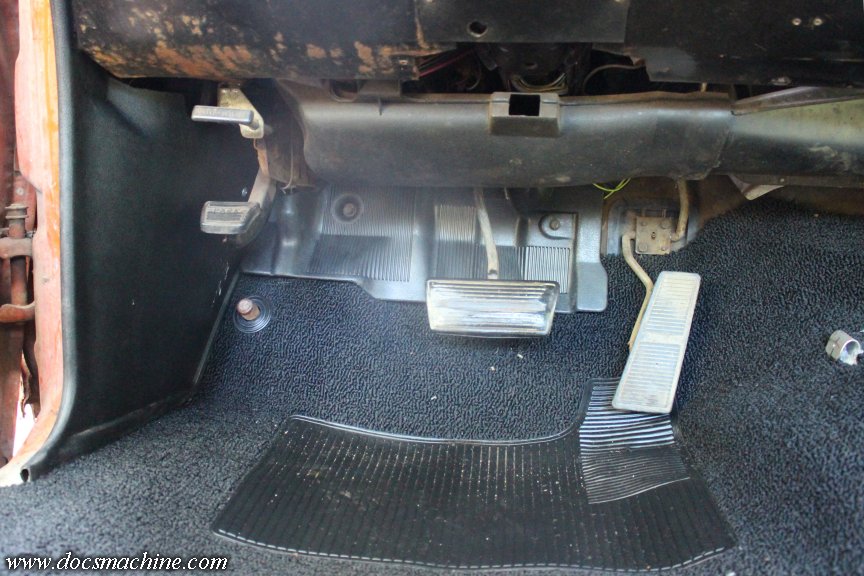
Finally- finally!- it was time to start final-fitting the console. I've only been wanting a console shift in this car for a bloody decade, and I've had this unit kicking about the shop since at least 2018!
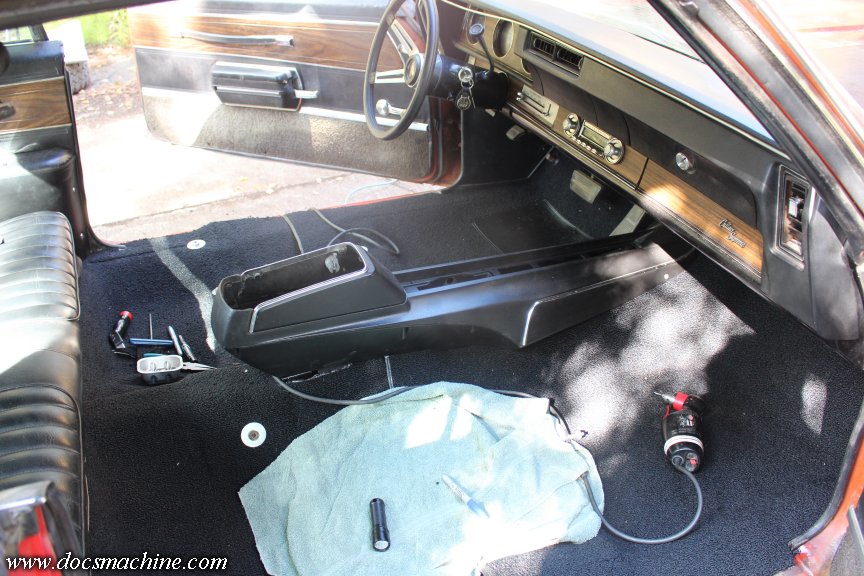
Had to do a little more trimming of the carpets, and I was kind of disappointed they didn't 'tuck under' at the back support, but that area will be hidden by the seats.
Trimming mostly done- I could have cut more, but that wasn't strictly necessary, and of course the extra acts like more sound deadening. I did dig out my roll of Kevlar thread and a heavy curved upholstery needle- got it with some other junk, and kept it because, hey, packrat! - and put in just a few basic stitches to keep the 'flaps' together.
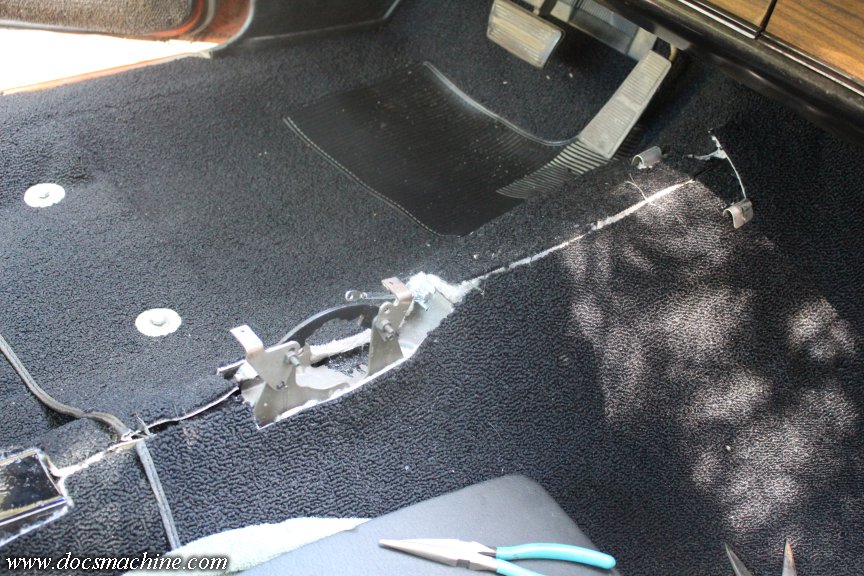
Just a few, there's no stress or strain on the seam, just enough to hold it shut.
With that, I was finally able to fully assemble the shift lever and get the various pins and linkages connected.
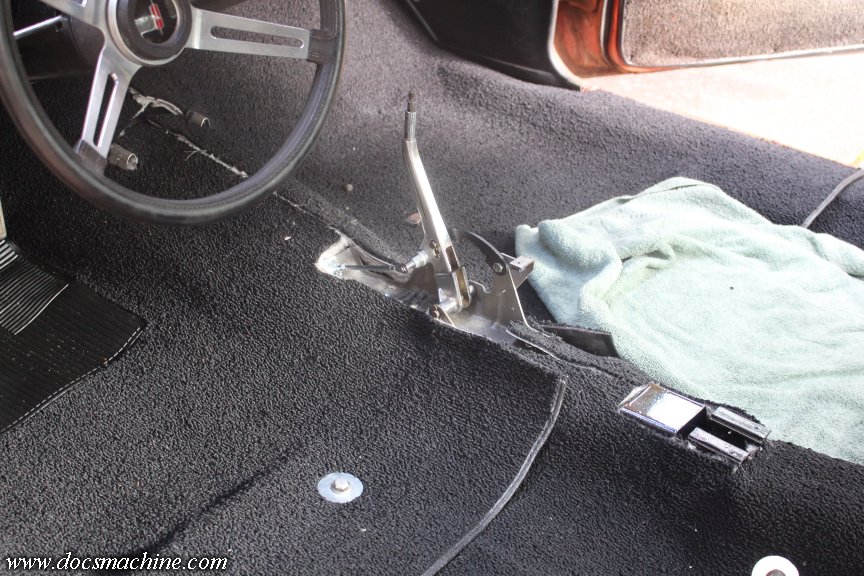
And, the last two things before final install of the console, were first, I ran the wiring harness...
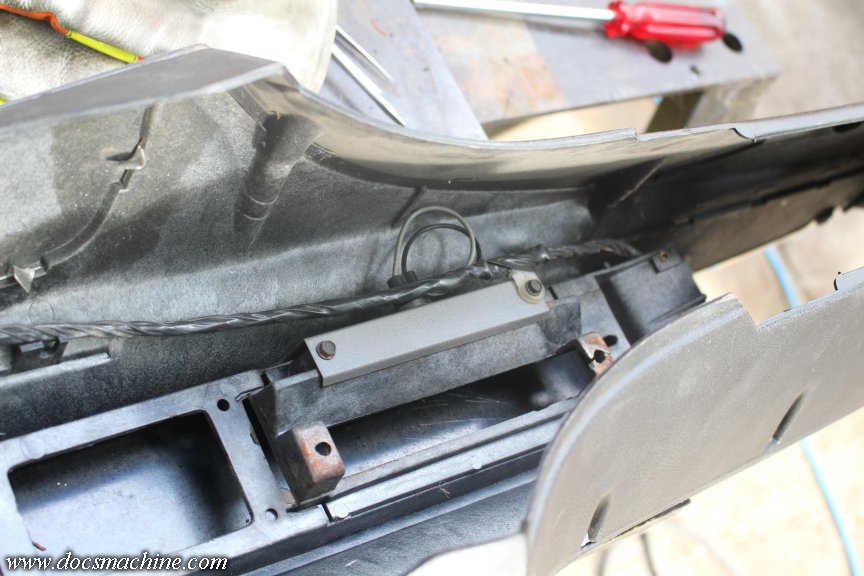
Which had three different types of bulbs: One courtesy light at the back, which comes on when the doors open, a light inside the glovebox that comes on when the lid opens, and a light for the shift indicator, that comes on with the dash lights.
Unfortunately, I needed an extension pigtail to connect that harness to the dash harness (there's a plug up by the dash clock.) I'd ordered one, for a '71-'72 Cutlass with an auto console, but what I got had a three-prong connector, and my harness has a four-prong plug. (Three bulbs and a ground, since the console is plastic.) I don't know if I got the wrong extension, or if I have the wrong harness. Maybe mine's for a '70 console? I dunno. I found a different one listed, but it has no photo... and costs $125.
No big, I can install the console now and I'll save adding the extension for when I do the gauges- which may be next year.
The other fix was a cracked cross support, which I superglued, and then added a glue-soaked cardboard patch over the top for a little reinforcement.
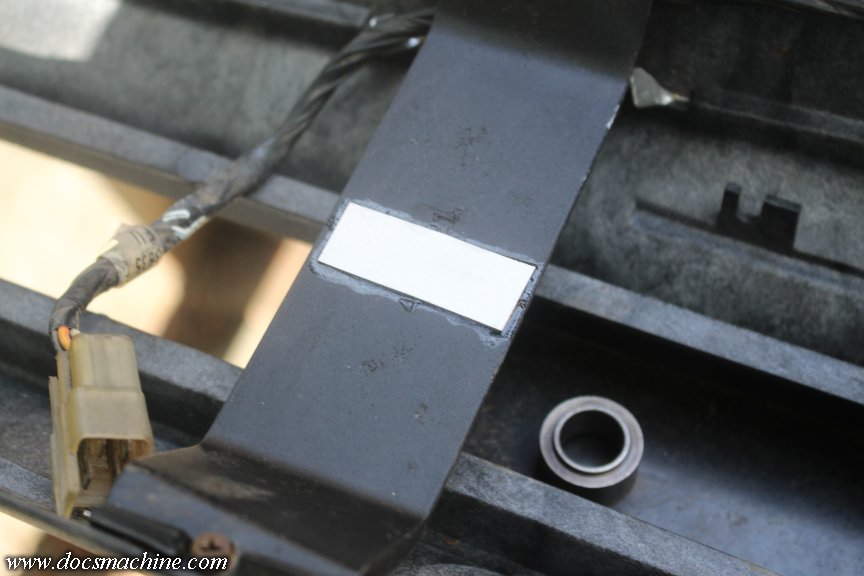
And finally, the top cover had the 'woodgrain' insert come loose. It's actually printed steel, and the contact cement the factory used 50 years ago gave up the ghost probably 30 years ago.
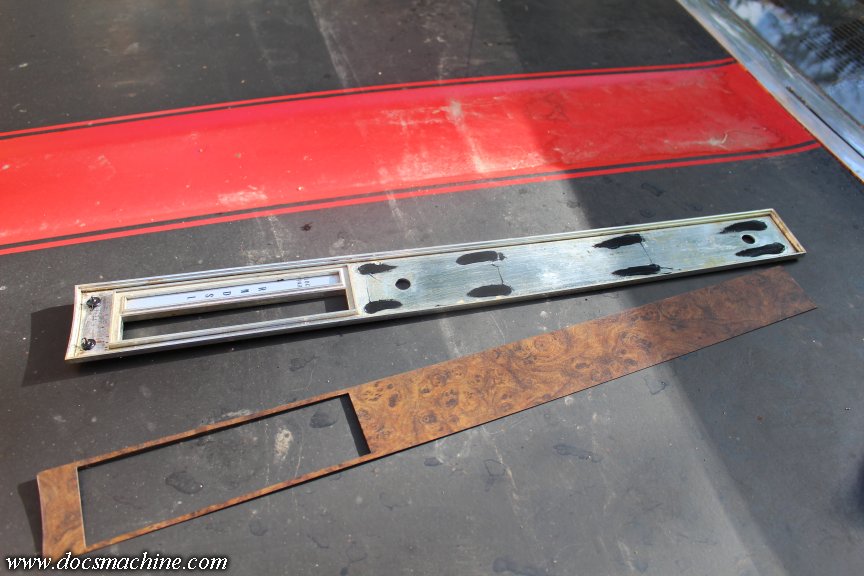
So I scraped off the old cement, cleaned both parts, and gave it a few dots of black RTV as a mild, flexible adhesive.
With the console installed, I gave the underside of the insert a few more dots, and glued it into place. The factory used strips of what appeared to be thin double-sided tape.
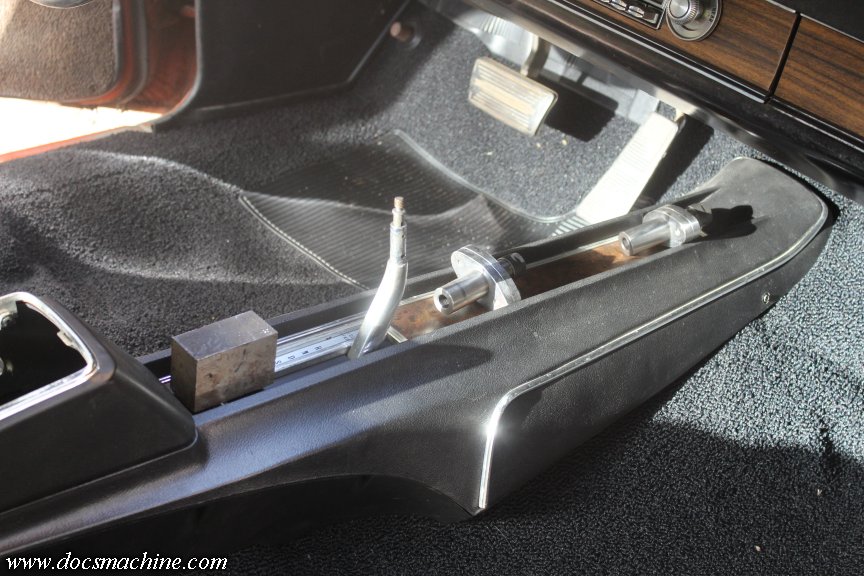
A few heavyish bits will hold it all down 'til the RTV cures. The silicone makes for a mildly flexible join, and is a mild enough adhesive that, if for some reason I need to take that insert out again, I can do it without having to, say, apply a lot of heat, or a lot of prybar force.
With the console shifter fully functional, the last step was to tap the pin out and remove the column shift lever.
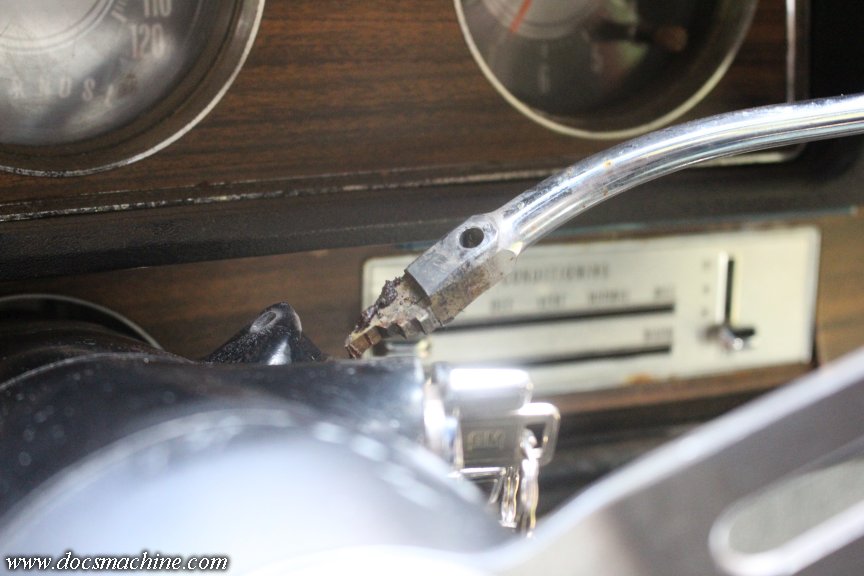
At some point I'll see if I can find a console-shift collar (which won't have that now-open boss) or take the existing one and do some bodywork to shave off said boss and close the hole.
And, a final beauty shot!
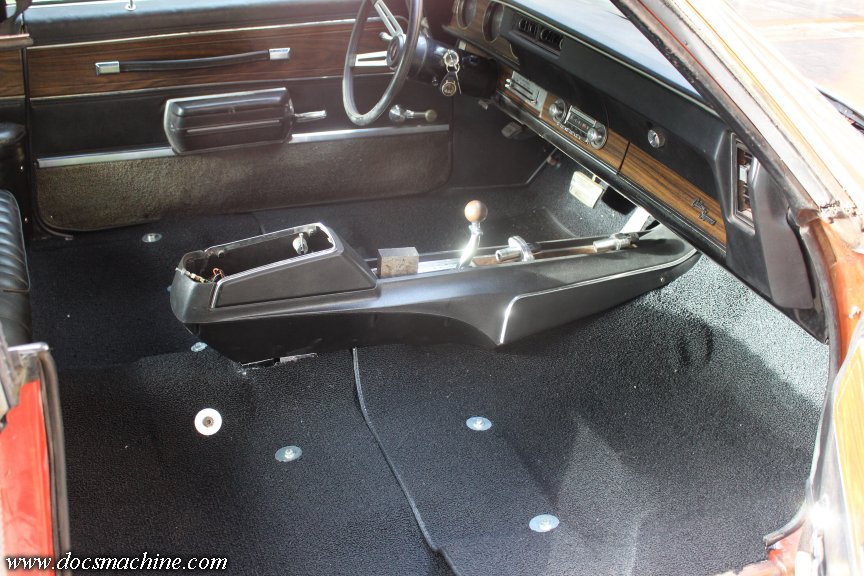
Still need to finish installing the console wiring, which includes reinstalling the storage box liner. And then, of course, the lid.
Next up, the seats!
Doc.
He had a trick for making the bolt holes for the seat and belt mounts. We found a chunk of some 3/8" steel rod in my scrap pile, and ground a stubby pencil point to it. He'd then find the bolt hole with a scratch awl- you can see the wood handle there in the center- heat up the spike with a propane torch, and melt out the hole.
Made a nice, clean, unfrayed hole. He said that any cutting method he'd tried, leaves free threads, that get wrapped up in the bolt as it's installed, and can fray out the hole.
I've seen people use the same idea making rivet or belt-buckle holes in nylon strapping, but I hadn't thought of using it here. (Hence part of why I wanted the expert.
)Took us a couple hours to trim and fit and manhandle things into place, and while it's not fully done yet, it's to the point where I can finish the fitting myself.
We had to pull the rear seat to get the carpets fitted, and I really kind of wish I'd done that earlier. I should have wire brushed and POR-15'ed that part, too.
No big, the whole interior will be coming apart again at some point, when it's finally time to do some paint-and-body. (If nothing else, the headliner has to come out to fix some waves in the roof, both doors need to be replaced- or heavily repaired, etc.) I scraped and vacuumed what I could, and then brushed it with Ospho. (A rust converter.)
And, that gave me a chance, in the first time since I've owned this car, to give the parts a really good scrubbing.
The cloth backing, as you can see, is badly rotted, but more or less holding, for now. That, too, will be taken care of later.
After some scrubbery, it all fit back together nicely.
Up front, I cut the hole for the dimmer switch (floor mounted! Remember those?
) and got the grommet into place, and then scrubbed and reinstalled the kickpanels and toeboard.Finally- finally!- it was time to start final-fitting the console. I've only been wanting a console shift in this car for a bloody decade, and I've had this unit kicking about the shop since at least 2018!
Had to do a little more trimming of the carpets, and I was kind of disappointed they didn't 'tuck under' at the back support, but that area will be hidden by the seats.
Trimming mostly done- I could have cut more, but that wasn't strictly necessary, and of course the extra acts like more sound deadening. I did dig out my roll of Kevlar thread and a heavy curved upholstery needle- got it with some other junk, and kept it because, hey, packrat!
- and put in just a few basic stitches to keep the 'flaps' together. Just a few, there's no stress or strain on the seam, just enough to hold it shut.
With that, I was finally able to fully assemble the shift lever and get the various pins and linkages connected.
And, the last two things before final install of the console, were first, I ran the wiring harness...
Which had three different types of bulbs: One courtesy light at the back, which comes on when the doors open, a light inside the glovebox that comes on when the lid opens, and a light for the shift indicator, that comes on with the dash lights.
Unfortunately, I needed an extension pigtail to connect that harness to the dash harness (there's a plug up by the dash clock.) I'd ordered one, for a '71-'72 Cutlass with an auto console, but what I got had a three-prong connector, and my harness has a four-prong plug. (Three bulbs and a ground, since the console is plastic.) I don't know if I got the wrong extension, or if I have the wrong harness. Maybe mine's for a '70 console? I dunno. I found a different one listed, but it has no photo... and costs $125.
No big, I can install the console now and I'll save adding the extension for when I do the gauges- which may be next year.
The other fix was a cracked cross support, which I superglued, and then added a glue-soaked cardboard patch over the top for a little reinforcement.
And finally, the top cover had the 'woodgrain' insert come loose. It's actually printed steel, and the contact cement the factory used 50 years ago gave up the ghost probably 30 years ago.
So I scraped off the old cement, cleaned both parts, and gave it a few dots of black RTV as a mild, flexible adhesive.
With the console installed, I gave the underside of the insert a few more dots, and glued it into place. The factory used strips of what appeared to be thin double-sided tape.
A few heavyish bits will hold it all down 'til the RTV cures. The silicone makes for a mildly flexible join, and is a mild enough adhesive that, if for some reason I need to take that insert out again, I can do it without having to, say, apply a lot of heat, or a lot of prybar force.
With the console shifter fully functional, the last step was to tap the pin out and remove the column shift lever.
At some point I'll see if I can find a console-shift collar (which won't have that now-open boss) or take the existing one and do some bodywork to shave off said boss and close the hole.
And, a final beauty shot!
Still need to finish installing the console wiring, which includes reinstalling the storage box liner. And then, of course, the lid.
Next up, the seats!
Doc.
Thread Starter
Unregistered Madman
Joined: Mar 2012
Posts: 55
From: Backwater, Alaska
(Reposted from 2025)
And it's DONE, Ladies and Gentlemen! After just over two months- the bulk of our wonderful Alaskan Summer- she's finally DONE!
Well, for certain definitions of the word, of course.
I set out to fix the floors, swap the bench for the buckets, install the console, and time permitting, toss in the gauge package. All of that save the gauges is now complete. I'm not entirely out of time, but this did cost me more- both time and cash- than I'd hoped, and I really need to get caught back up in the shop. I may still try for the gauges, but since that now includes re-tinkering with the console, that, too, will take longer than it ought.
We'll see. Best I can do these days.
Anyway, Saturday rained out on me, but today (Sunday) was much better, so first thing I did was test-fit the driver's seat.
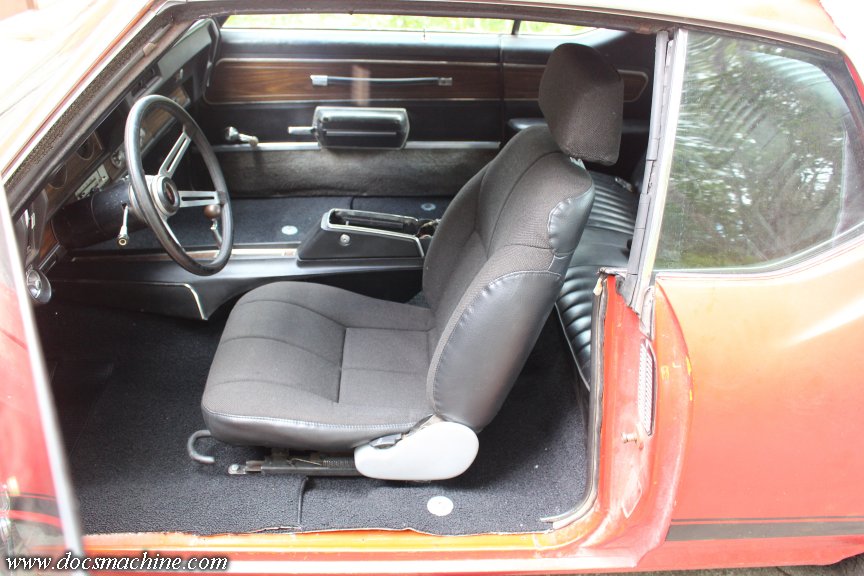
I'd considered trimming away the carpet from under the mounts- the thickness of them raises the seat about half an inch, and as I said earlier, even with them sitting flat on the steel, I thought it felt a tad high.
But, after a test-sit, I thought I could live with it, and, if necessary, I could always trim it later. So I hit the rails with a little satin black to hide things a bit, and to protect the bare welded brackets...

And removed the plastic covers from the seatback latches, and hit them with vinyl and carpet dye.
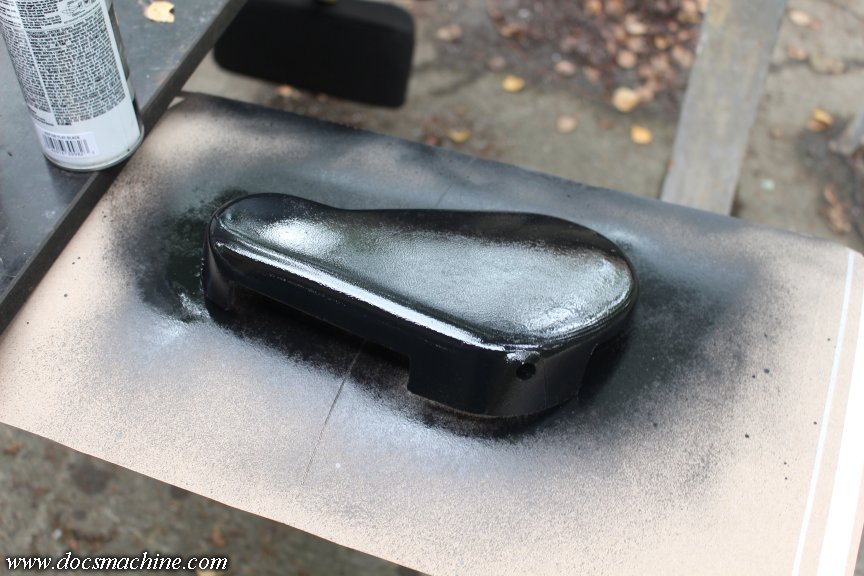
While I had that out, and was letting the seat mounts dry enough to install, I turned to the doors. I'd scrubbed the vinyl as best I could, but the carpet at the bottom had long since faded from the sun.
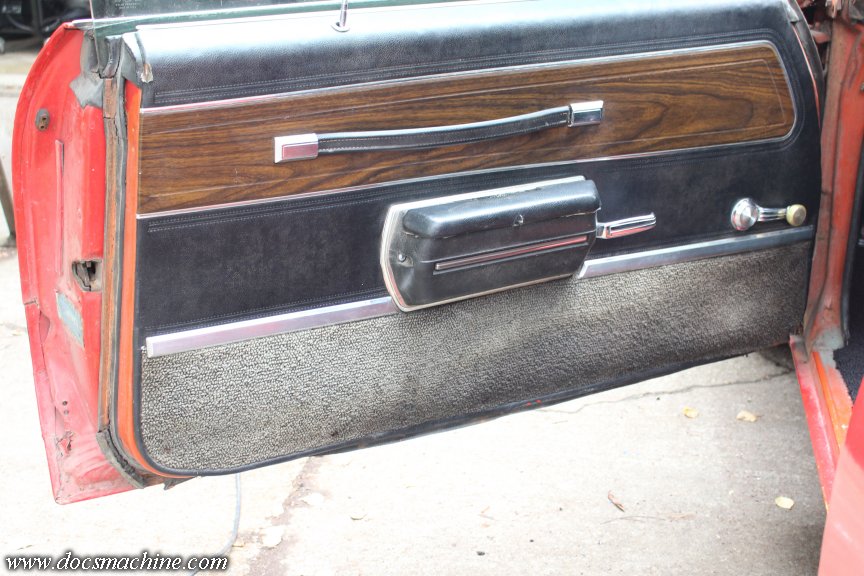
So I brushed and vacuumed the cloth as best I could, then masked it off...
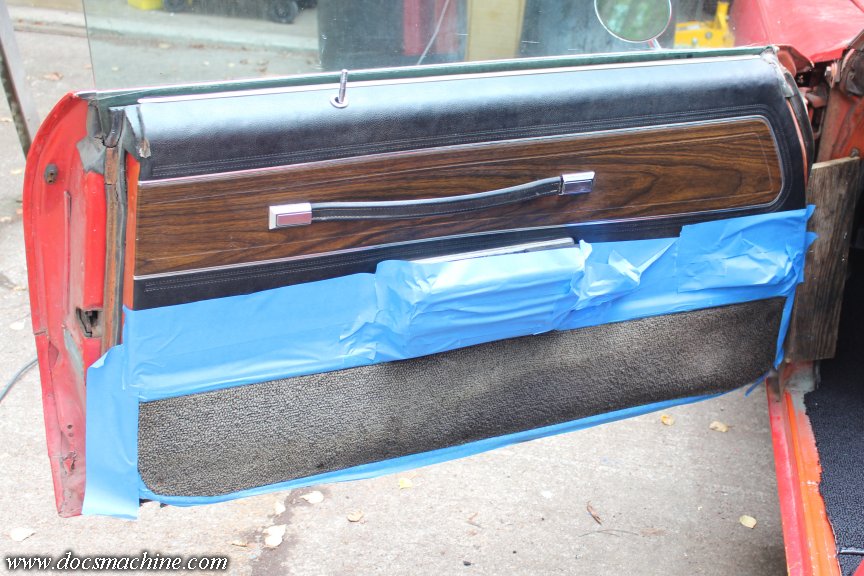
And sprayed that with the same dye.
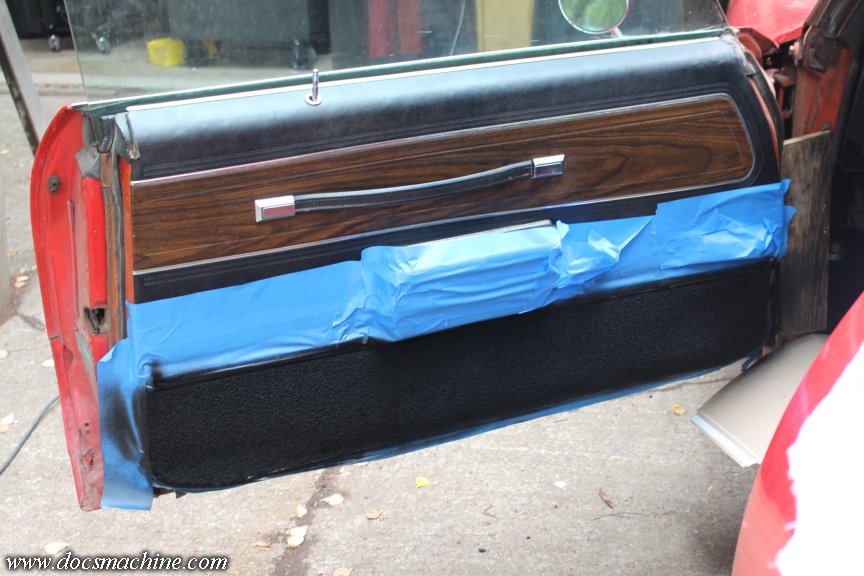
Still a long way from being a show car, but that made a definite improvement.
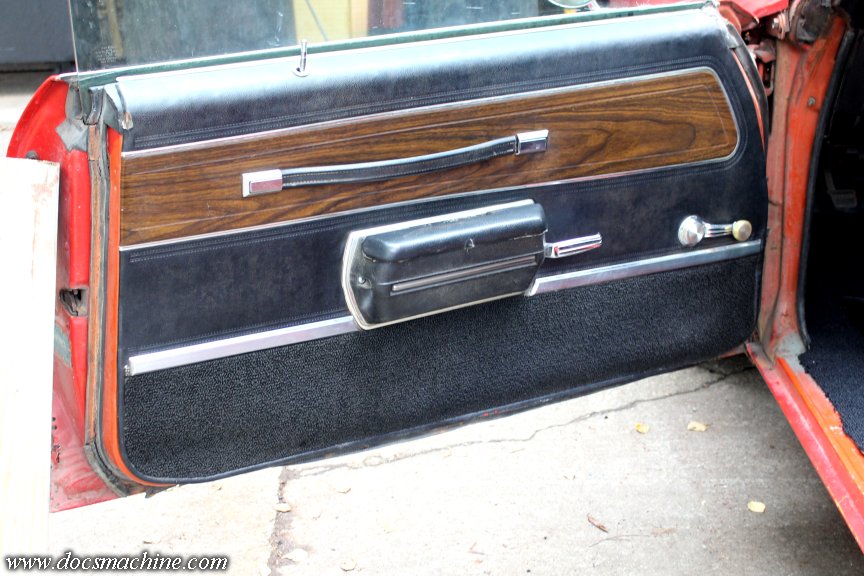
After a brief break while the various things dried, I first plunked in the passenger seat, and then figured out and installed the aftermarket retractable 3-point belts.
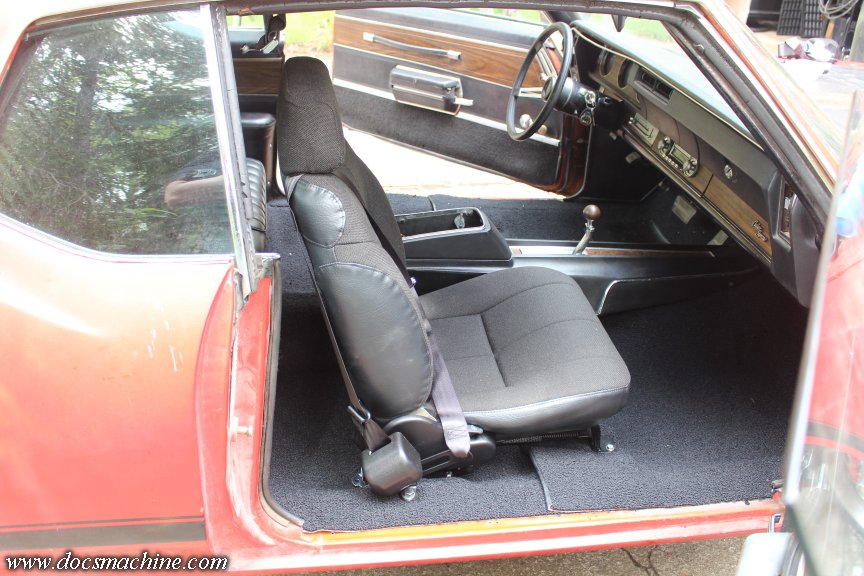
This car already had the optional 3-point, with the nonretractable shoulder belt, which between that and the old lap-belt retractor having rusted to death years ago, made it kind of a pain in the adze to use. These are much better. They'd never pass as stock in a judged show, but yeah, that's not particularly high on the list of importance right now.
Do it all again, and the driver's side is in.
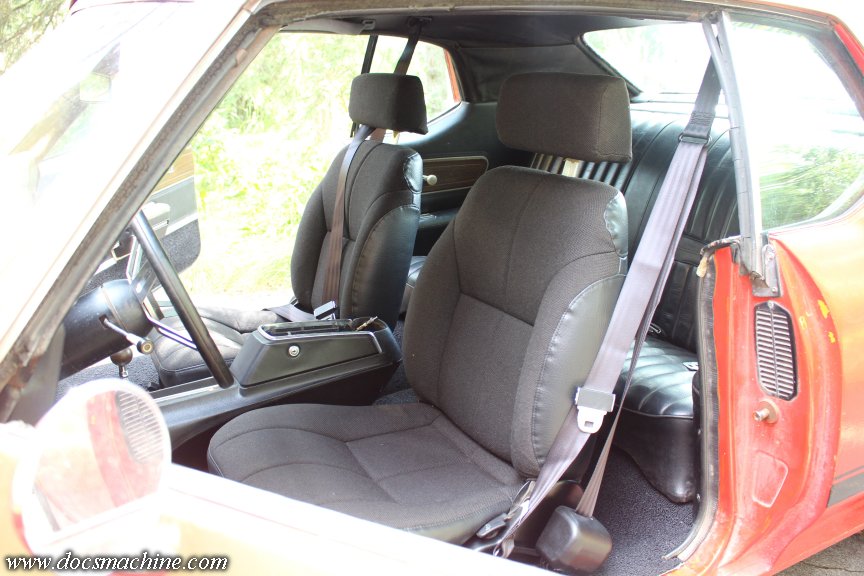
Getting down to the wire, I did a little more trimming of the edges of the carpets, and then scrubbed and installed the doorsills.
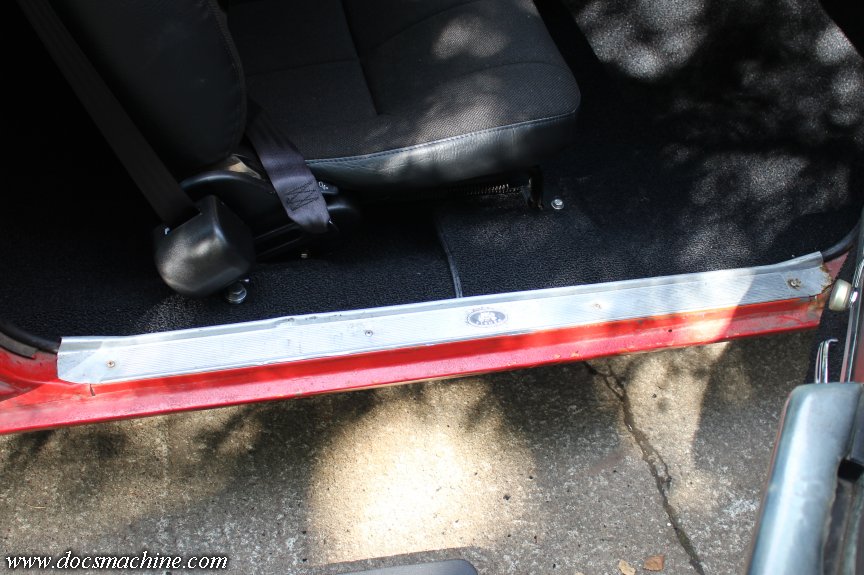
And finally, reinstalled the console glove-box lid! (I'd had that off to make it less awkward while fitting the mounts.)

Which largely completes the project, Ladies and Gents!
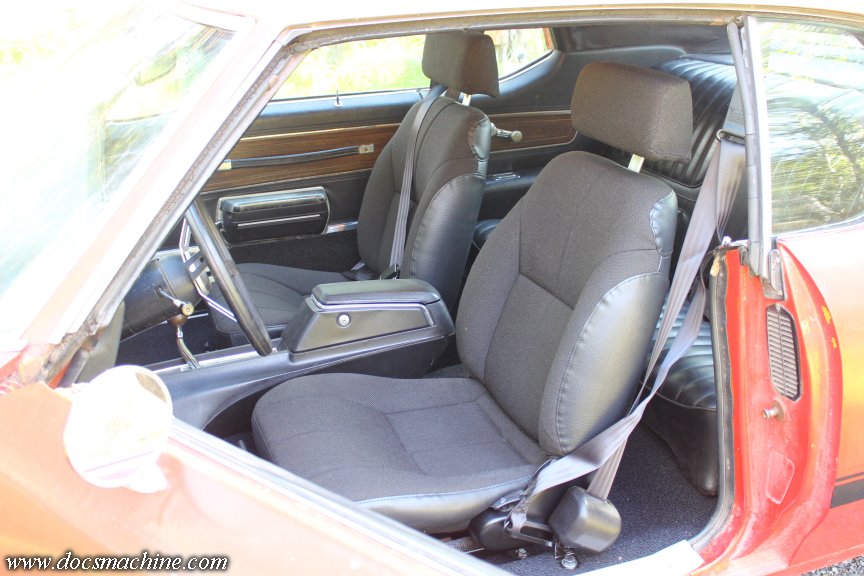
There's still plenty to do to the whole car, of course, but we're back up to 100% driveable. Which, of course, I did. It's notably quieter- or, perhaps more accurately, a lot less "tinny" and "rattly". It seems like there's less creaks & squeaks, and, for want of a better phrase, sounds more "solid".
I have a couple of bits of weatherstripping on the way- those strips on the quarter windows- which should mute a bit more of the road noise too. But on the whole, I'm very happy with how it all came out.
Doc.
And it's DONE, Ladies and Gentlemen! After just over two months- the bulk of our wonderful Alaskan Summer- she's finally DONE!
Well, for certain definitions of the word, of course.
I set out to fix the floors, swap the bench for the buckets, install the console, and time permitting, toss in the gauge package. All of that save the gauges is now complete. I'm not entirely out of time, but this did cost me more- both time and cash- than I'd hoped, and I really need to get caught back up in the shop. I may still try for the gauges, but since that now includes re-tinkering with the console, that, too, will take longer than it ought.
We'll see. Best I can do these days.
Anyway, Saturday rained out on me, but today (Sunday) was much better, so first thing I did was test-fit the driver's seat.
I'd considered trimming away the carpet from under the mounts- the thickness of them raises the seat about half an inch, and as I said earlier, even with them sitting flat on the steel, I thought it felt a tad high.
But, after a test-sit, I thought I could live with it, and, if necessary, I could always trim it later. So I hit the rails with a little satin black to hide things a bit, and to protect the bare welded brackets...
And removed the plastic covers from the seatback latches, and hit them with vinyl and carpet dye.
While I had that out, and was letting the seat mounts dry enough to install, I turned to the doors. I'd scrubbed the vinyl as best I could, but the carpet at the bottom had long since faded from the sun.
So I brushed and vacuumed the cloth as best I could, then masked it off...
And sprayed that with the same dye.
Still a long way from being a show car, but that made a definite improvement.
After a brief break while the various things dried, I first plunked in the passenger seat, and then figured out and installed the aftermarket retractable 3-point belts.
This car already had the optional 3-point, with the nonretractable shoulder belt, which between that and the old lap-belt retractor having rusted to death years ago, made it kind of a pain in the adze to use. These are much better. They'd never pass as stock in a judged show, but yeah, that's not particularly high on the list of importance right now.
Do it all again, and the driver's side is in.
Getting down to the wire, I did a little more trimming of the edges of the carpets, and then scrubbed and installed the doorsills.
And finally, reinstalled the console glove-box lid! (I'd had that off to make it less awkward while fitting the mounts.)
Which largely completes the project, Ladies and Gents!
There's still plenty to do to the whole car, of course, but we're back up to 100% driveable. Which, of course, I did. It's notably quieter- or, perhaps more accurately, a lot less "tinny" and "rattly". It seems like there's less creaks & squeaks, and, for want of a better phrase, sounds more "solid".
I have a couple of bits of weatherstripping on the way- those strips on the quarter windows- which should mute a bit more of the road noise too. But on the whole, I'm very happy with how it all came out.
Doc.
Thread Starter
Unregistered Madman
Joined: Mar 2012
Posts: 55
From: Backwater, Alaska
(Reposted from 2025)
This last part makes a clean sweep, Ladies and Gentlemen! The last bit (for the year) is finally complete: I have the full gauge package installed, and it works great!
I'd completed the day's shop chores- okay, I completed most of the day's chores- but the day, which started out dark and overcast, turned bright and shiny, and I had this box of parts taking up space on my worktable. And, of course, that ADD ferret gnawing at the back of my brain, as it always does, that won't let up 'til the job is finished.
It wasn't 'til after 3 in the afternoon that I even started, but I figured if it took too long, I'd do what I can and finish up tomorrow. Here's what I started with:
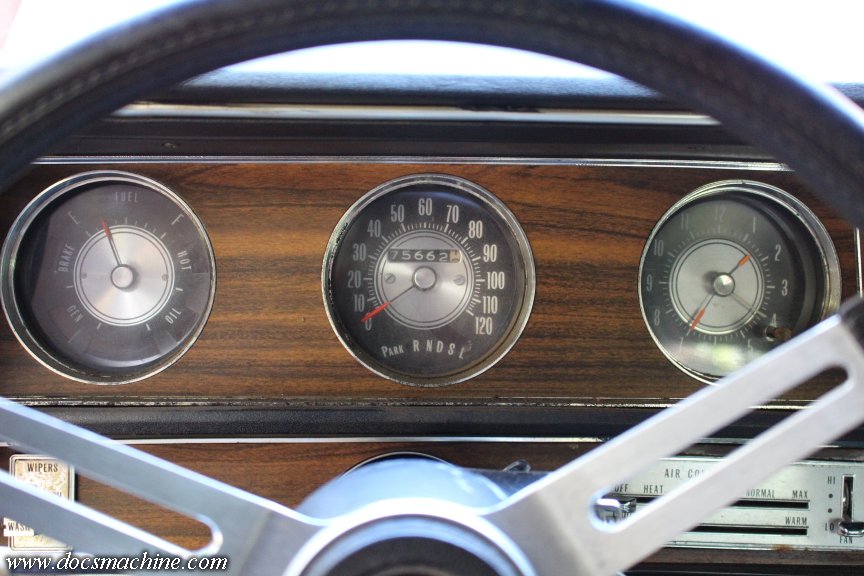
The left-hand gauge was gas-only, and had idiot lights for low oil pressure, high water temperature, low voltage and 'brake', which is an indicator if it senses an imbalance between the front and rear brake systems. Longtime readers will remember the issues that particular little switch gave me.
The speedo in the middle was fine, but with the conversion to the center console shifter, the PRNDSL was no longer necessary. It never worked anyway- I could never get the indicator needle assembly to cooperate.
And at the right was a typical clock- with an early 70's movement. Everyone I asked said they're easy to get working: You just throw the old one as far as you can, and then go buy a new one.
I'd bought the replacement "Rally Pack" kit and the installation package (wiring and senders) but set that part of the whole project aside- I could drive the car with the old gauges, of course, but I couldn't drive it with holes in the floor. With the rest done and summer winding down- believe it or not, some of the leaves are already starting to turn yellow- welcome to Alaska!- I decided, as I mentioned, to spend one of the last nice days we'll probably get in finishing it off.
Pop the surround off- screws rather than snaps in a car this old...
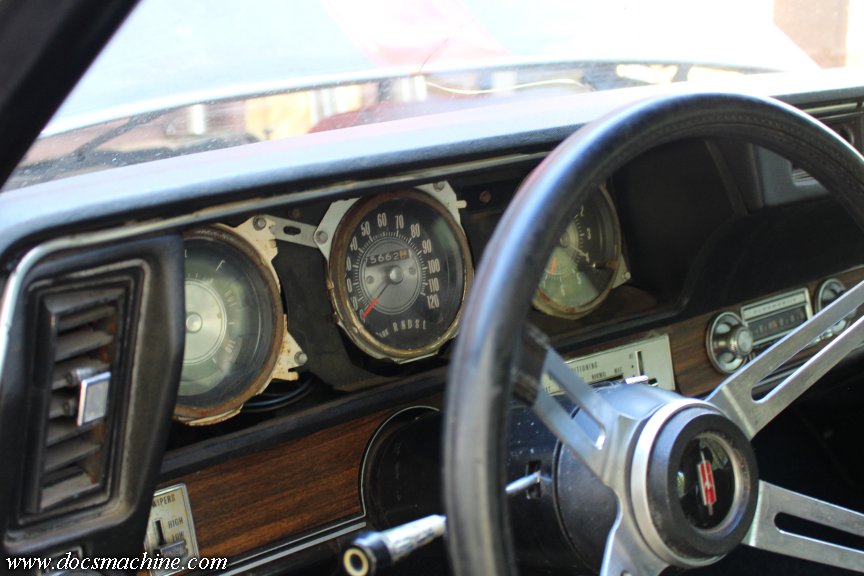
And then the individual gauge pods simply unbolt from the dash frame.

I started with the left one, as it seemed the more fiddly. That long plug? I had to depin all but one of the contacts and shift the wires around.
Like so:
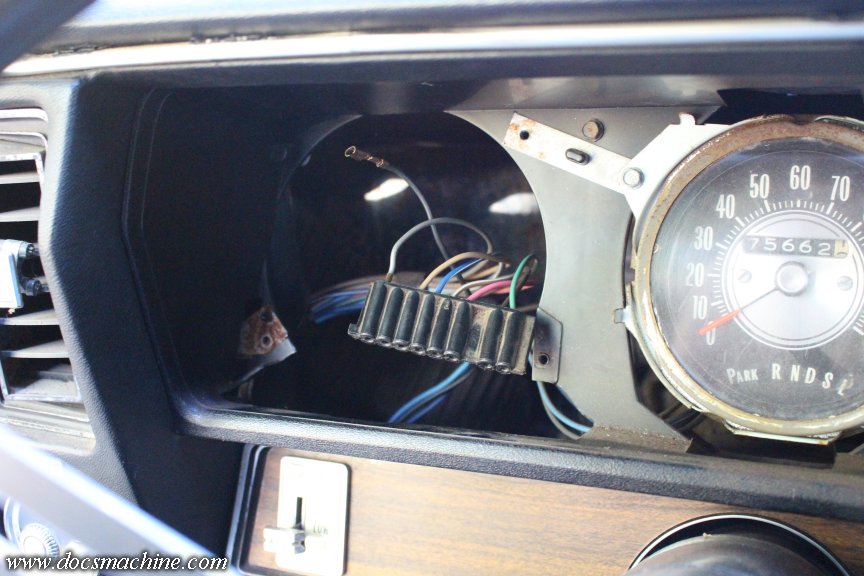
Here's a side-by-side comparison.
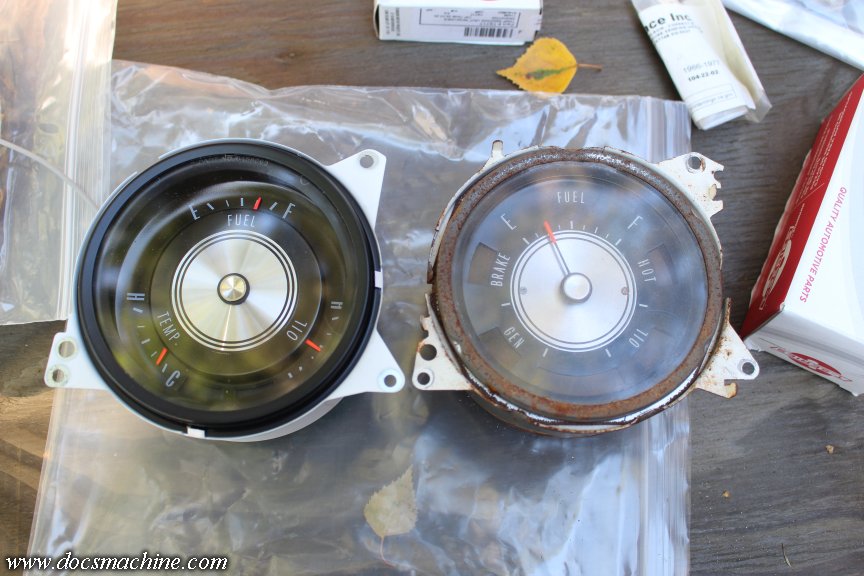
Most car guys like to have an actual moving indicator, something that shows "high, medium or low", and not just a light that comes on only after the engine overheats, or grenades from lack of oil. And in a car this old, with a used engine? Yeah, everything leaks. You watch your fluids like a hawk.
After the depin-repin, I then pulled the other two out:
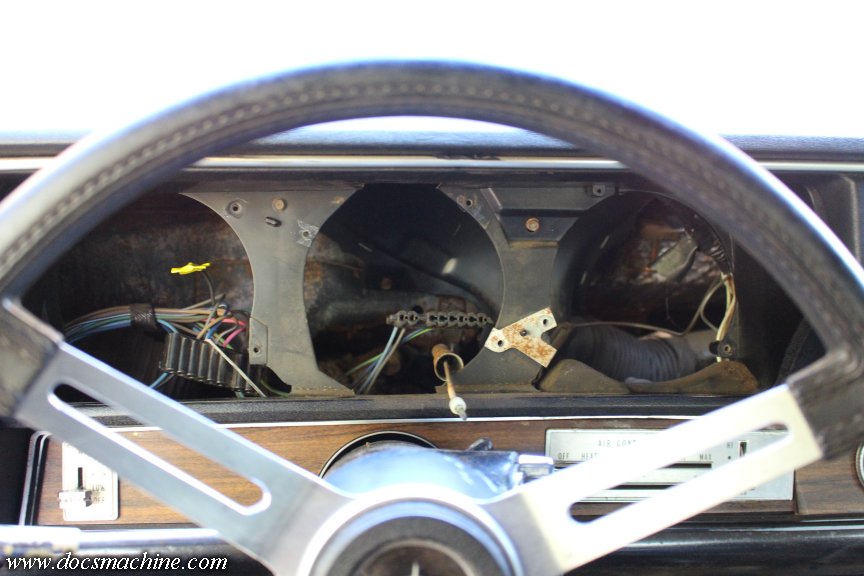
The next one up was the speedo. I'd bought a new faceplate that didn't have the PRNDSL quadrant on it- it was surprisingly inexpensive- and just had to swap it over. First the troublesome shift indicator mechanism came off...
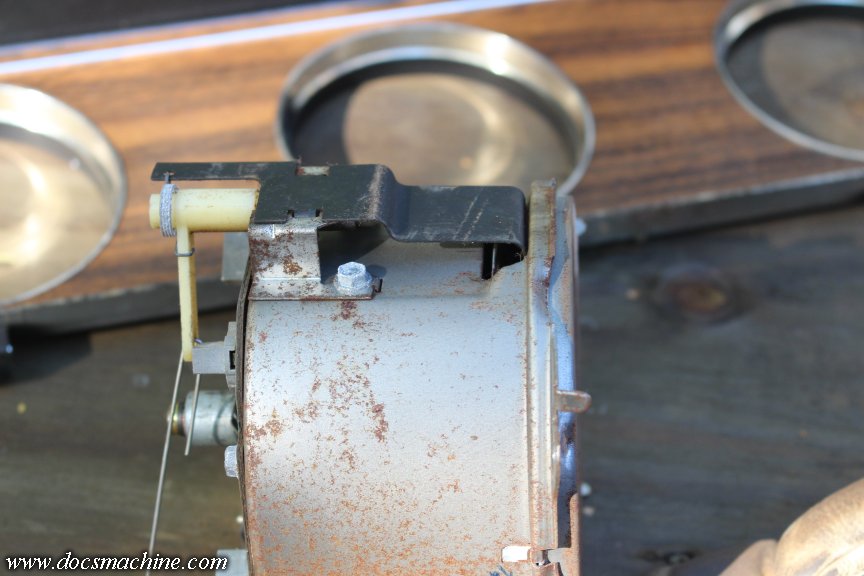
And, while I was at it, I replaced the burned-out left-hand turn indicator, which had been bugging me for a couple years now. I just stole a whole bulb and holder out of the now-abandoned idiot light pod.
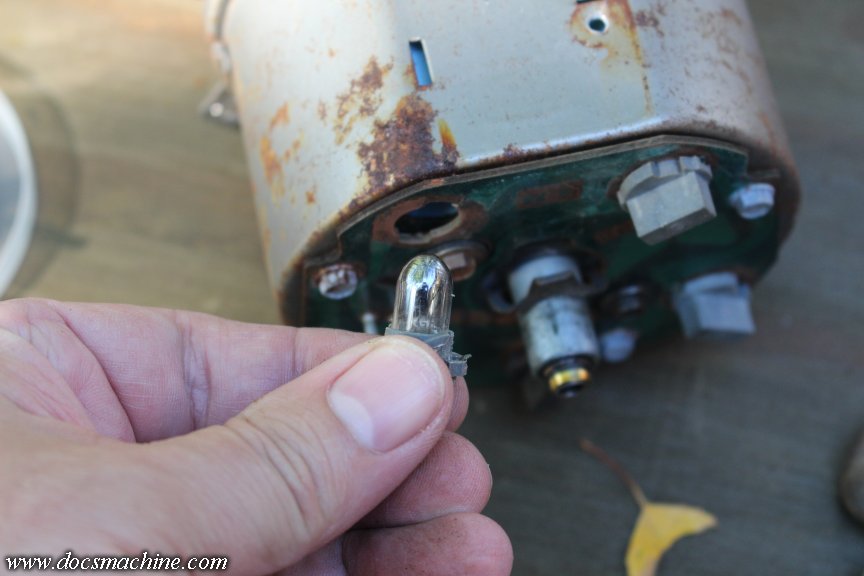
... Perfect time to roll back the odometer a bit, eh?
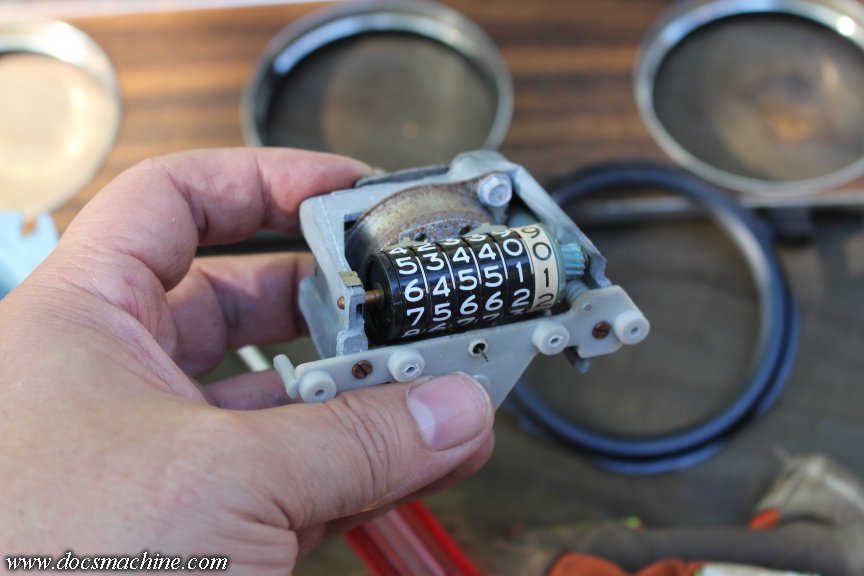
Anyone want to buy a Cutlass with only 27 miles on it? Only raced on Sundays by a little old lady from Poughkeepsie.
... Anyway, reassembled.
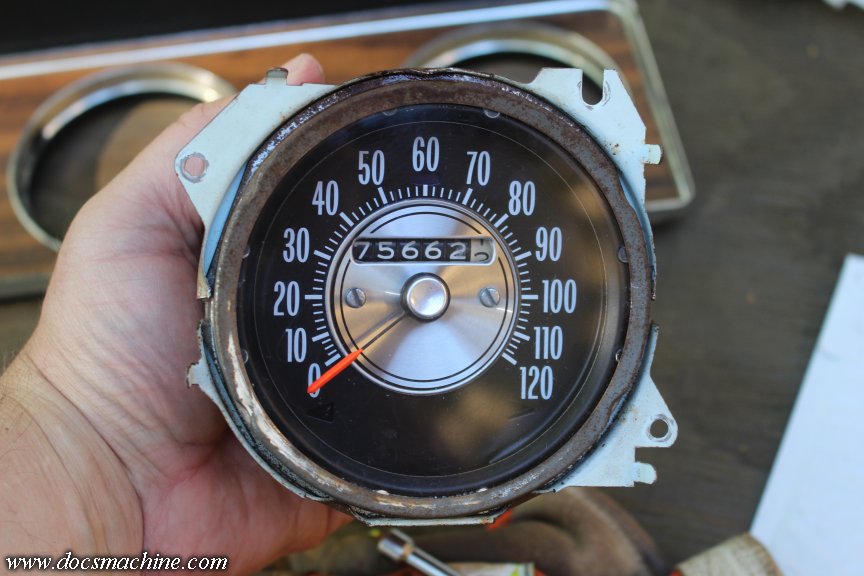
I also polished up the lens using some Mother's compound used for polishing headlights. Did a great job, even though I was just rubbing it by hand, not using the "power ball" thing.
And back in, with the cable lubed, and all and hooked up!
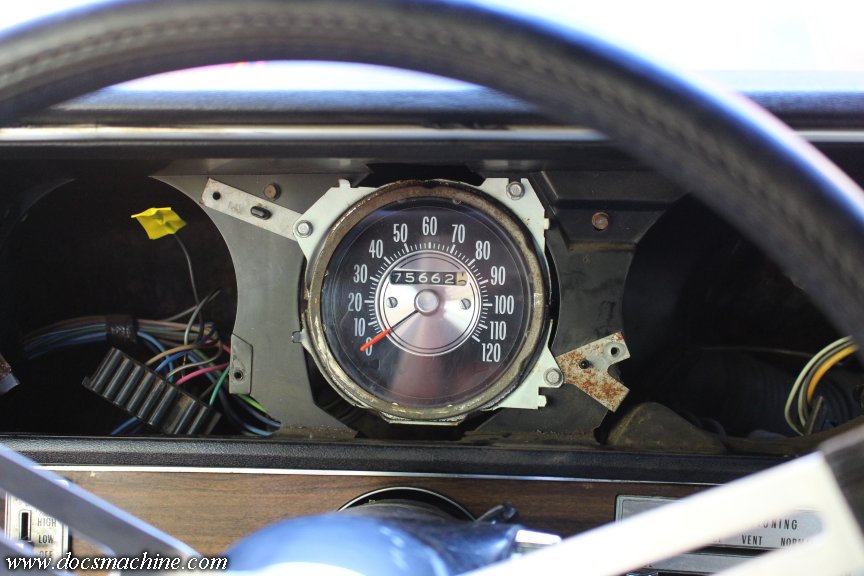
With that in, and no longer needing access to the back to hook up the cable, I plunked in the gauge pod.
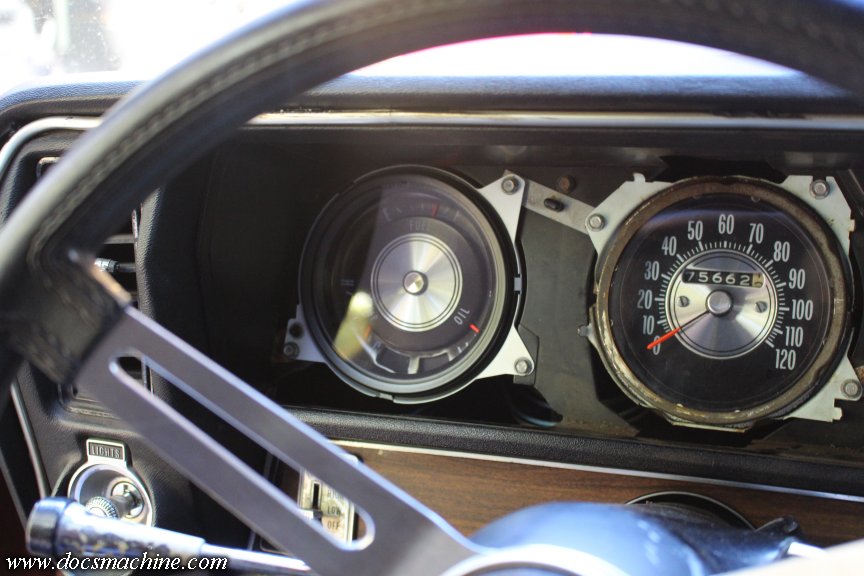
Finally, we get around to the aforementioned console harness. That snaps into place to an existing pigtail in the original wiring, which, as I've said, could only be accessed with the dash open.
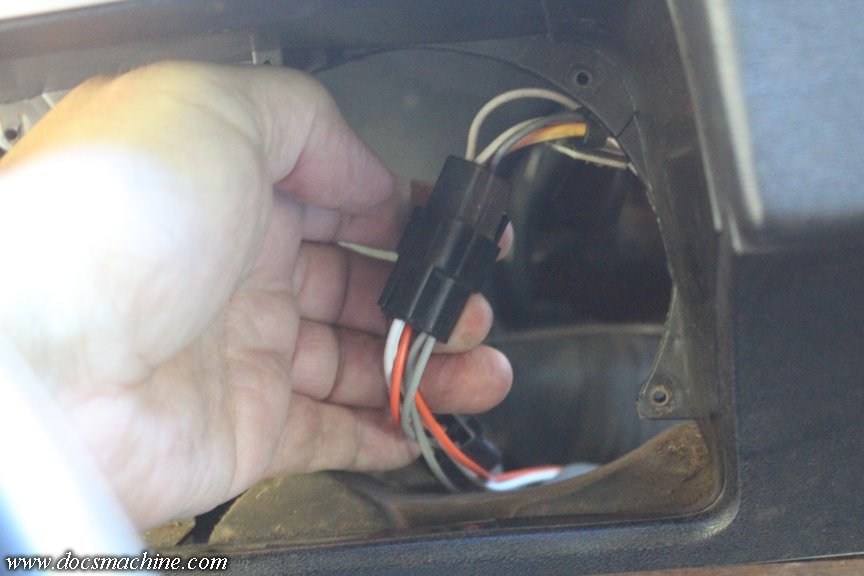
First minor snafu was in the installation package. The shielded tach signal cable was wrapped with a rubber band that had disintegrated- I wonder how long it was on the shelf.
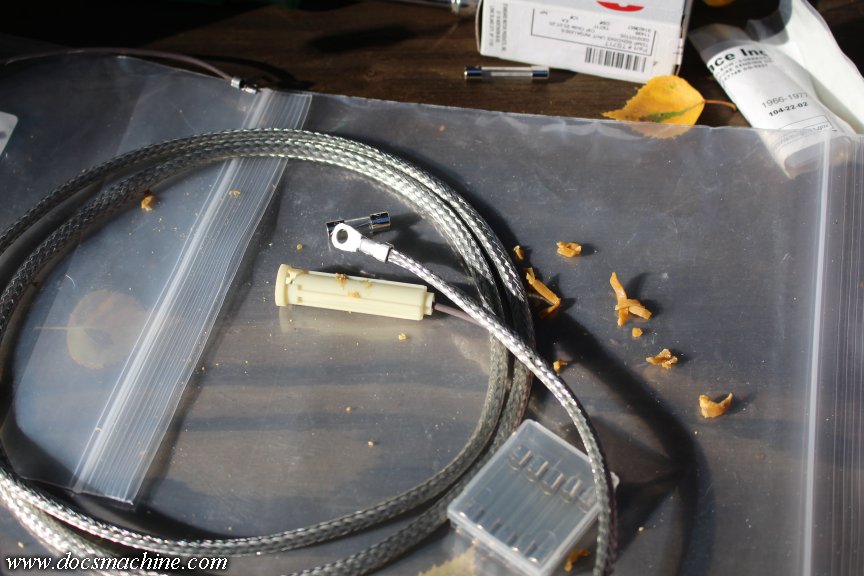
But worse, it was missing half the inline fuse holder. I dug through my stashes but couldn't find a similar one, so I had to jog up to the parts house and get one. Then I had to jog right back and get the right size fuse- I didn't have any short, one-amp glass ones.
The trick came when I needed to route the cable into the engine compartment. But, that was actually solved by something I'd completely forgotten about back when I first got this car on the road.
Originally, of course, the car had points ignition, with the usual starting circuit and resistance wire, etc. The engine I'd dropped in had a computer-controlled HEI, which I swapped out with a conventional vacuum HEI. So to get the car started, I just ran a jumper from a keyed-hot port on the fuse box to the distributor.
And promptly forgot about it.
So I took that wire, taped it to a new one (better quality, soldered terminals, etc.) and the tach line.
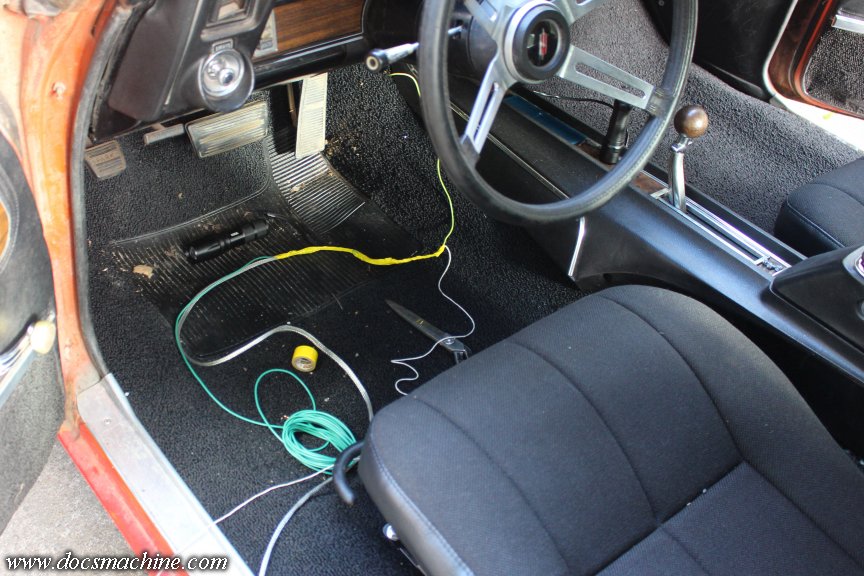
And simply used the old wire to pull the new ones through the grommet on the firewall.
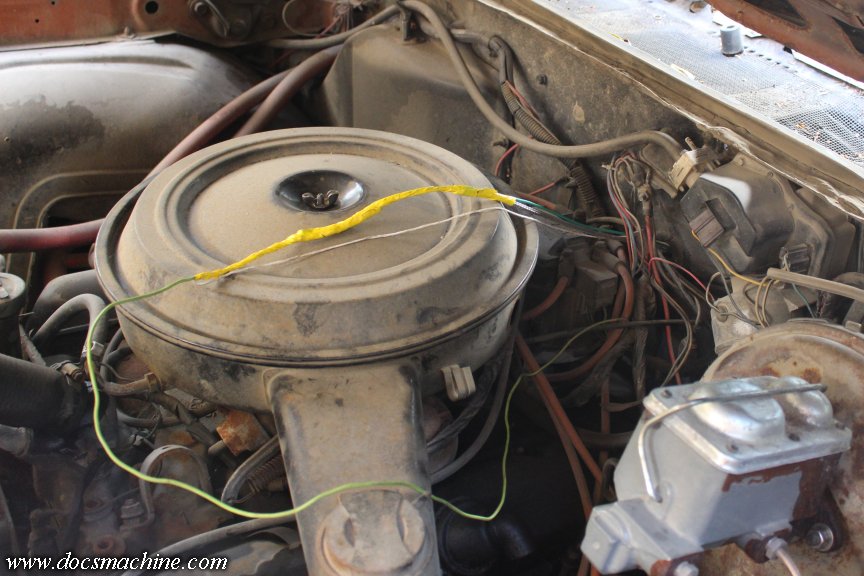
The new ignition wire still just taps off the keyed hot in the fusebox, but it's better wire and ends, And if/when I ever pop the body off, it'll get all new wire stem to stern- including a ton for the EFI.
Hooking up the rest of the tach pod required a bit more modding; I made a short pigtail- even the right color wire- to hook the clock power to the harness- which turned out to use a single bullet connector. The instrument lamps needed a pigtail to plug into that new console harness, which had a pigtail specifically for it.
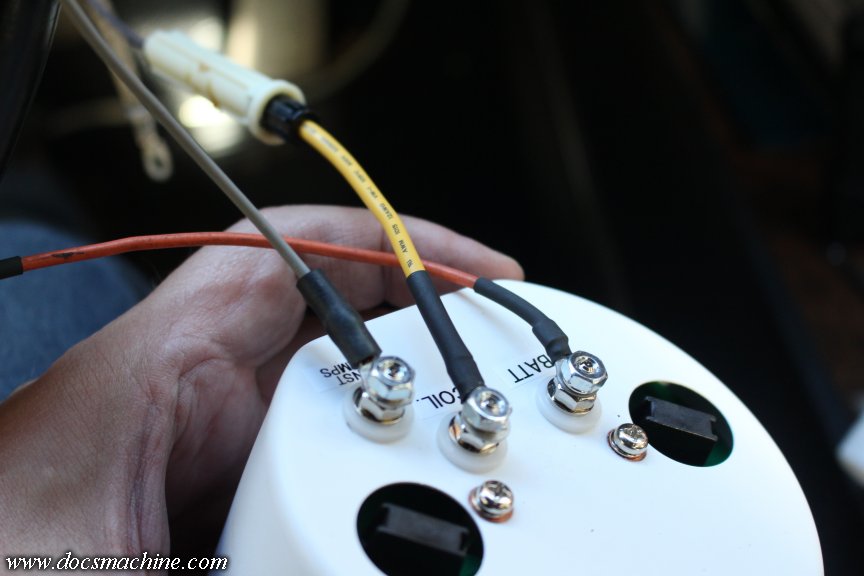
And then that, too, drops right into place.
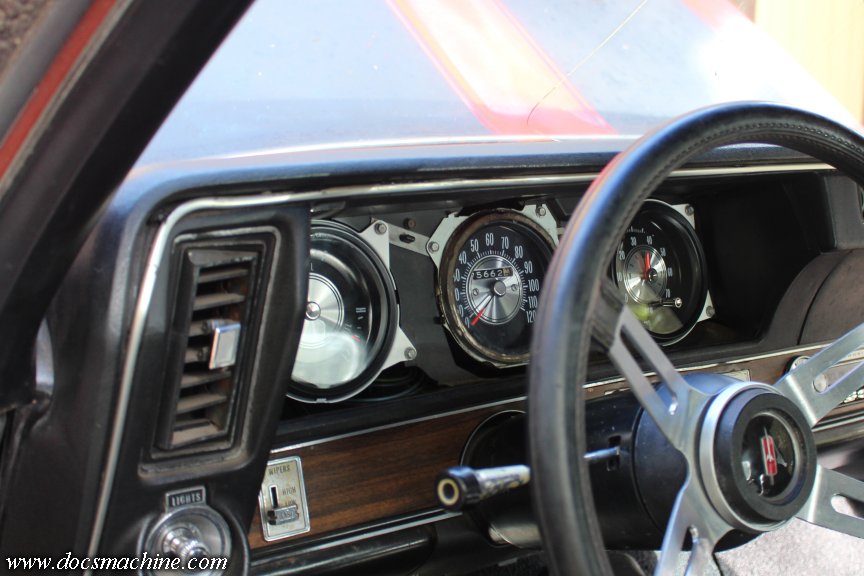
The last step was swapping out the senders on the engine from ones for idiot lights (which are basically just on-off switches) to ones for gauges, which of course have a sort of variable resistor in them. The longest part of that job was simply draining enough coolant so I could get the sender out without making a mess. (No pics, engine's nothing to write home about.)
Feeling oddly optimistic, I even put the dash surround back on.

I double checked everything, made sure the fluids were topped up, and gave it a try. Ladies and Gentlemen, everything worked. The clock was running (haven't set it yet) the tach was showing a correct 900 RPM at idle, the gas gauge was basically right where the old one had been, the oil was showing a healthy pressure (though I'll admit I've never put a known-good mechanical gauge on it) and the water showed dead cold.
I took 'er for a drive, got some petrol- and a really nice compliment at the station- and the gas then showed full, the water came up to right in the middle of the sweep, and the oil backed off to what's probably a more normal pressure (low middle) for an engine with this many miles on it. The turn signal indicator worked, of course, and all the dash lights!
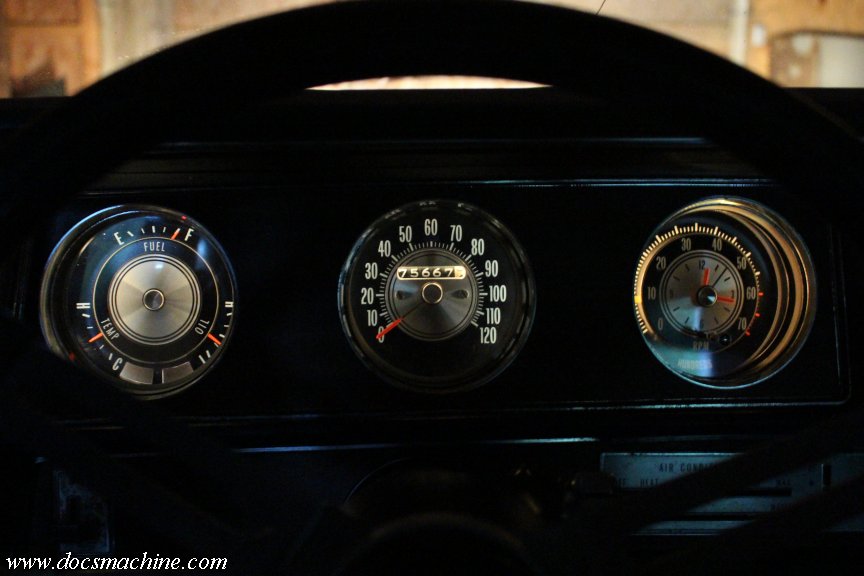
Yep, I'm finally, finally happy. Yeah, there's a lot still left to do on the whole car, of course- and no, I wasn't yet able to actually connect the harness to the console (I do have the right plug, though) but got done all I set out to do, back in late May, and that ferret is finally quiet again.
For the moment.
Doc.
This last part makes a clean sweep, Ladies and Gentlemen! The last bit (for the year) is finally complete: I have the full gauge package installed, and it works great!
I'd completed the day's shop chores- okay, I completed most of the day's chores- but the day, which started out dark and overcast, turned bright and shiny, and I had this box of parts taking up space on my worktable. And, of course, that ADD ferret gnawing at the back of my brain, as it always does, that won't let up 'til the job is finished.
It wasn't 'til after 3 in the afternoon that I even started, but I figured if it took too long, I'd do what I can and finish up tomorrow. Here's what I started with:
The left-hand gauge was gas-only, and had idiot lights for low oil pressure, high water temperature, low voltage and 'brake', which is an indicator if it senses an imbalance between the front and rear brake systems. Longtime readers will remember the issues that particular little switch gave me.
The speedo in the middle was fine, but with the conversion to the center console shifter, the PRNDSL was no longer necessary. It never worked anyway- I could never get the indicator needle assembly to cooperate.
And at the right was a typical clock- with an early 70's movement. Everyone I asked said they're easy to get working: You just throw the old one as far as you can, and then go buy a new one.
I'd bought the replacement "Rally Pack" kit and the installation package (wiring and senders) but set that part of the whole project aside- I could drive the car with the old gauges, of course, but I couldn't drive it with holes in the floor. With the rest done and summer winding down- believe it or not, some of the leaves are already starting to turn yellow- welcome to Alaska!- I decided, as I mentioned, to spend one of the last nice days we'll probably get in finishing it off.
Pop the surround off- screws rather than snaps in a car this old...
And then the individual gauge pods simply unbolt from the dash frame.
I started with the left one, as it seemed the more fiddly. That long plug? I had to depin all but one of the contacts and shift the wires around.
Like so:
Here's a side-by-side comparison.
Most car guys like to have an actual moving indicator, something that shows "high, medium or low", and not just a light that comes on only after the engine overheats, or grenades from lack of oil. And in a car this old, with a used engine? Yeah, everything leaks. You watch your fluids like a hawk.
After the depin-repin, I then pulled the other two out:
The next one up was the speedo. I'd bought a new faceplate that didn't have the PRNDSL quadrant on it- it was surprisingly inexpensive- and just had to swap it over. First the troublesome shift indicator mechanism came off...
And, while I was at it, I replaced the burned-out left-hand turn indicator, which had been bugging me for a couple years now. I just stole a whole bulb and holder out of the now-abandoned idiot light pod.
... Perfect time to roll back the odometer a bit, eh?
Anyone want to buy a Cutlass with only 27 miles on it? Only raced on Sundays by a little old lady from Poughkeepsie.
... Anyway, reassembled.
I also polished up the lens using some Mother's compound used for polishing headlights. Did a great job, even though I was just rubbing it by hand, not using the "power ball" thing.
And back in, with the cable lubed, and all and hooked up!
With that in, and no longer needing access to the back to hook up the cable, I plunked in the gauge pod.
Finally, we get around to the aforementioned console harness. That snaps into place to an existing pigtail in the original wiring, which, as I've said, could only be accessed with the dash open.
First minor snafu was in the installation package. The shielded tach signal cable was wrapped with a rubber band that had disintegrated- I wonder how long it was on the shelf.
But worse, it was missing half the inline fuse holder. I dug through my stashes but couldn't find a similar one, so I had to jog up to the parts house and get one. Then I had to jog right back and get the right size fuse- I didn't have any short, one-amp glass ones.
The trick came when I needed to route the cable into the engine compartment. But, that was actually solved by something I'd completely forgotten about back when I first got this car on the road.
Originally, of course, the car had points ignition, with the usual starting circuit and resistance wire, etc. The engine I'd dropped in had a computer-controlled HEI, which I swapped out with a conventional vacuum HEI. So to get the car started, I just ran a jumper from a keyed-hot port on the fuse box to the distributor.
And promptly forgot about it.
So I took that wire, taped it to a new one (better quality, soldered terminals, etc.) and the tach line.
And simply used the old wire to pull the new ones through the grommet on the firewall.
The new ignition wire still just taps off the keyed hot in the fusebox, but it's better wire and ends, And if/when I ever pop the body off, it'll get all new wire stem to stern- including a ton for the EFI.
Hooking up the rest of the tach pod required a bit more modding; I made a short pigtail- even the right color wire- to hook the clock power to the harness- which turned out to use a single bullet connector. The instrument lamps needed a pigtail to plug into that new console harness, which had a pigtail specifically for it.
And then that, too, drops right into place.
The last step was swapping out the senders on the engine from ones for idiot lights (which are basically just on-off switches) to ones for gauges, which of course have a sort of variable resistor in them. The longest part of that job was simply draining enough coolant so I could get the sender out without making a mess. (No pics, engine's nothing to write home about.)
Feeling oddly optimistic, I even put the dash surround back on.
I double checked everything, made sure the fluids were topped up, and gave it a try. Ladies and Gentlemen, everything worked. The clock was running (haven't set it yet) the tach was showing a correct 900 RPM at idle, the gas gauge was basically right where the old one had been, the oil was showing a healthy pressure (though I'll admit I've never put a known-good mechanical gauge on it) and the water showed dead cold.
I took 'er for a drive, got some petrol- and a really nice compliment at the station- and the gas then showed full, the water came up to right in the middle of the sweep, and the oil backed off to what's probably a more normal pressure (low middle) for an engine with this many miles on it. The turn signal indicator worked, of course, and all the dash lights!
Yep, I'm finally, finally happy. Yeah, there's a lot still left to do on the whole car, of course- and no, I wasn't yet able to actually connect the harness to the console (I do have the right plug, though) but got done all I set out to do, back in late May, and that ferret is finally quiet again.
For the moment.
Doc.
Thread Starter
Unregistered Madman
Joined: Mar 2012
Posts: 55
From: Backwater, Alaska
(Reposted from 2025)
All the weatherstripping in this fifty-plus-year-old beast has become rather perished. I don't have the time or funds to replace everything just yet- and likely won't bother 'til it comes time for all the paint and body- but one quick and easy fix were these quarter-window seals:
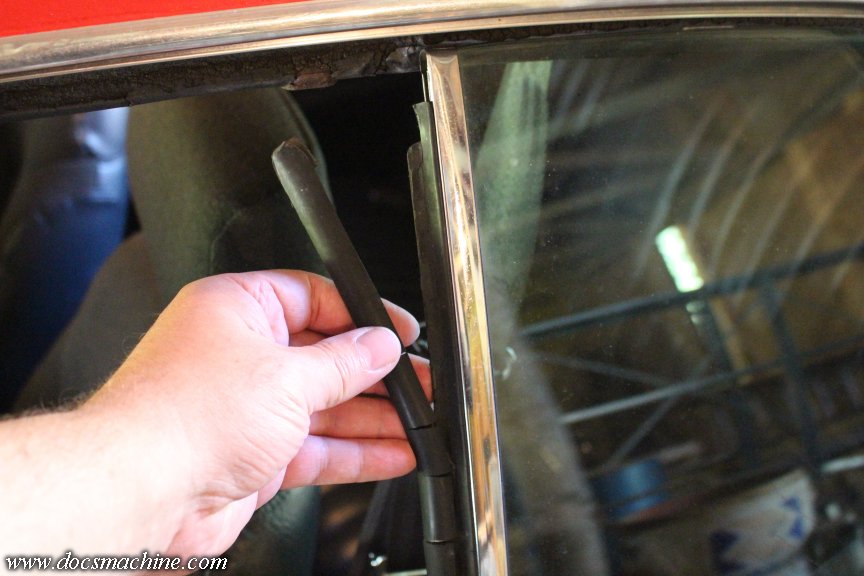
A set of repops was only about $30, and they just slide into the existing chrome channel.
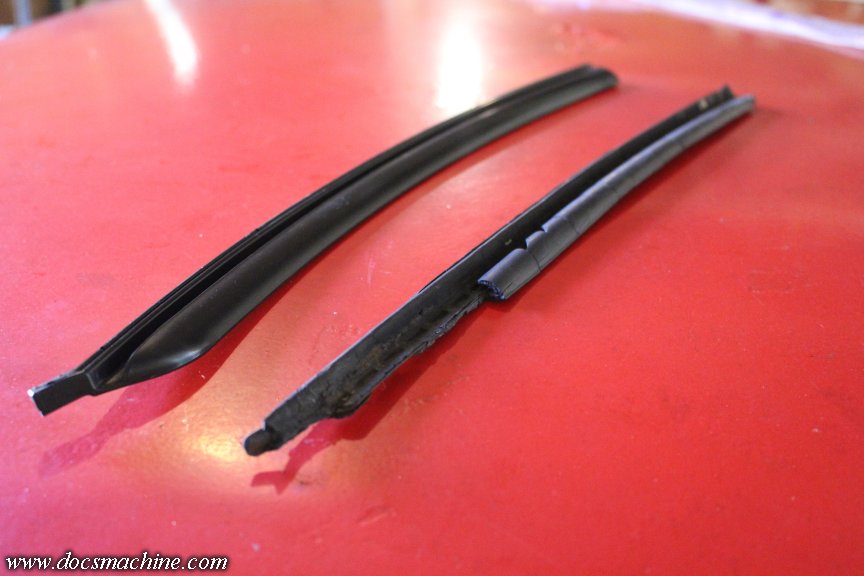
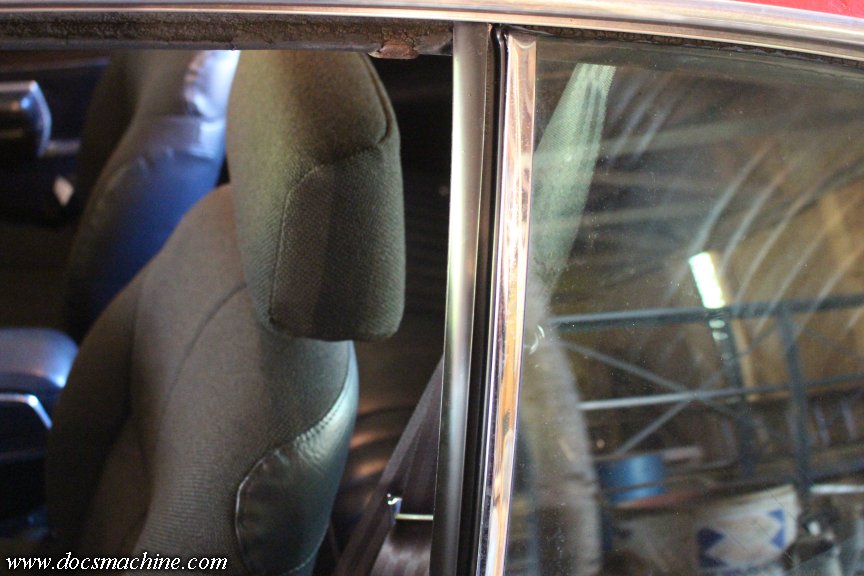
Took longer to clean the broken old bits out than slide the new ones in. Haven't taken it for a drive yet, but I expect it'll damp a touch more wind noise- and heck, even before, I was pretty happy with how quiet it already was. (Well, at least for a rumbly old quasi-musclecar with a pair of Sonic Turbos and tailpipes that end in front of the axle. )
Doc.
All the weatherstripping in this fifty-plus-year-old beast has become rather perished. I don't have the time or funds to replace everything just yet- and likely won't bother 'til it comes time for all the paint and body- but one quick and easy fix were these quarter-window seals:
A set of repops was only about $30, and they just slide into the existing chrome channel.
Took longer to clean the broken old bits out than slide the new ones in. Haven't taken it for a drive yet, but I expect it'll damp a touch more wind noise- and heck, even before, I was pretty happy with how quiet it already was.
(Well, at least for a rumbly old quasi-musclecar with a pair of Sonic Turbos and tailpipes that end in front of the axle. )Doc.
Thread Starter
Unregistered Madman
Joined: Mar 2012
Posts: 55
From: Backwater, Alaska
All of the above tool place over the summer of 2025. The after-action report was very positive. The floor- of course- under my feet felt more solid, the shifter- which was more fun to use- worked perfectly, the seats were very comfortable and more supportive than the old broken bench, and the retractable belts were so much better than the old- and broken- nonretractables. Noise and rattles noticeably reduced, and the interior- after a good scrubbing- is miles better than it used to be.
There were a few cons, though. The seats are definitely higher than the old bench. Not badly so, but I'm not a short guy, and now the rearview actually blocks part of my view of traffic. I'm going to have to make or modify a new arm for the mirror, raise it up about an inch. I also need to add some kind of bumper or strip of padding to the console box lid, as it rattles.
But, overall, I was happy enough with the results I actually entered it in the last local car show of the season, in the last weekend of August:
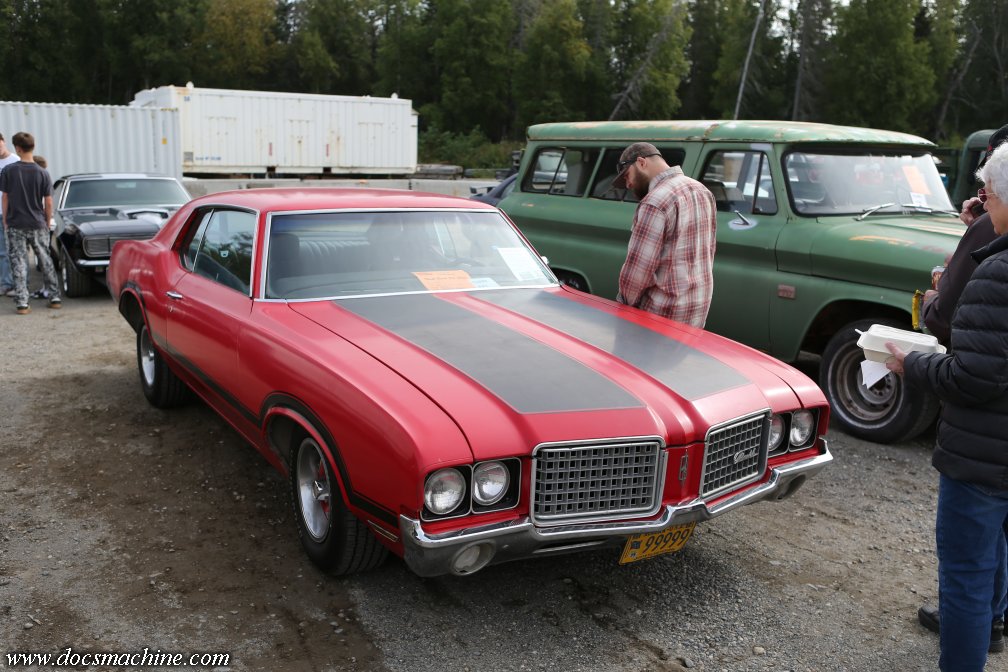
Yeah, it's got shitty paint, wavy quarters, a cracked windshield and a filthy ex-smogmonster 307 that's not worth opening the hood for, but it still got a little attention. It may not be the only '68-'72 in town, but it's the only one that actually gets driven.
But, our story doesn't end here!
Doc.
There were a few cons, though. The seats are definitely higher than the old bench. Not badly so, but I'm not a short guy, and now the rearview actually blocks part of my view of traffic. I'm going to have to make or modify a new arm for the mirror, raise it up about an inch. I also need to add some kind of bumper or strip of padding to the console box lid, as it rattles.
But, overall, I was happy enough with the results I actually entered it in the last local car show of the season, in the last weekend of August:
Yeah, it's got shitty paint, wavy quarters, a cracked windshield and a filthy ex-smogmonster 307 that's not worth opening the hood for, but it still got a little attention. It may not be the only '68-'72 in town, but it's the only one that actually gets driven.
But, our story doesn't end here!
Doc.
Thread Starter
Unregistered Madman
Joined: Mar 2012
Posts: 55
From: Backwater, Alaska
It's still 2025 as I originally posted it, and September in Alaaka, so I have decided on The Plan�.
The Plan is that I am going to try, over the course of the rapidly-oncoming winter, to rebuild the well-used 2004R transmission that came with the engine, and install it in the Cutlass. So that once the summer finally rolls back around, I can, for once, simply drive and enjoy it for the 12� nice days we get a year.
The drawbacks to the plan are well known: Funds, time and space.
Funds have always been, and will continue to be, an issue. I'll work around that as best I can. Same with time- assuming a fairly leisurely pace, using a few snatches of free time here and there, if I'm lucky I'll have it ready for summer.
Space, actually, might be the easiest of the three. Yeah, my shop is incredibly crowded... but that's because there's already a car in there, and has been for years. I don't wish to go into the details at the moment, but suffice to say it's become a bit of an albatross- BUT... if I evict it and put it into 'cold' storage... suddenly I have a work bay.
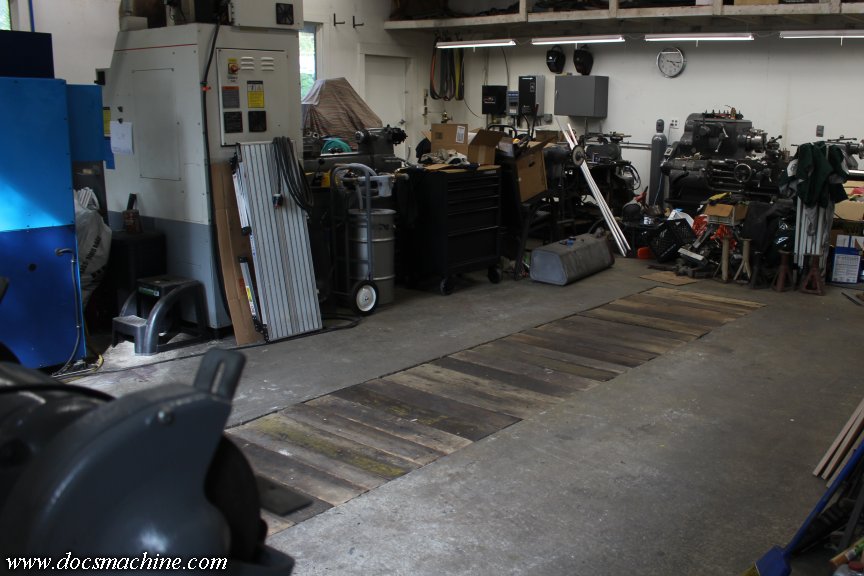
Although you can see how cluttered everything is, after having to move things from around- and stacked on top of- the other car. It's going to take me weeks to make some semblance of order out of that mess.
But, that gives me (barely) an open bay to bring the Doc-Rod in, where, with luck, I should be able to work on it over the course of the winter.
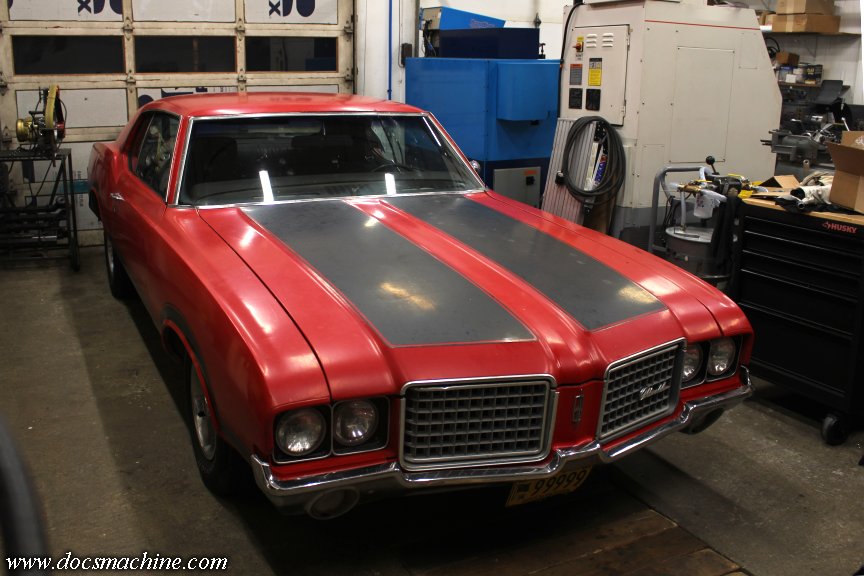
Better still, the car should remain driveable- or at least movable- save for during the actual trans swap, so theoretically, it can be backed out (and tarped if necessary) to give me an open bay for other work or projects. (Not that I can think of needing such, but suffice to say it hasn't even been an option for entirely too long.)
That done, I excavated the old trans itself out of storage, and brought it up front.
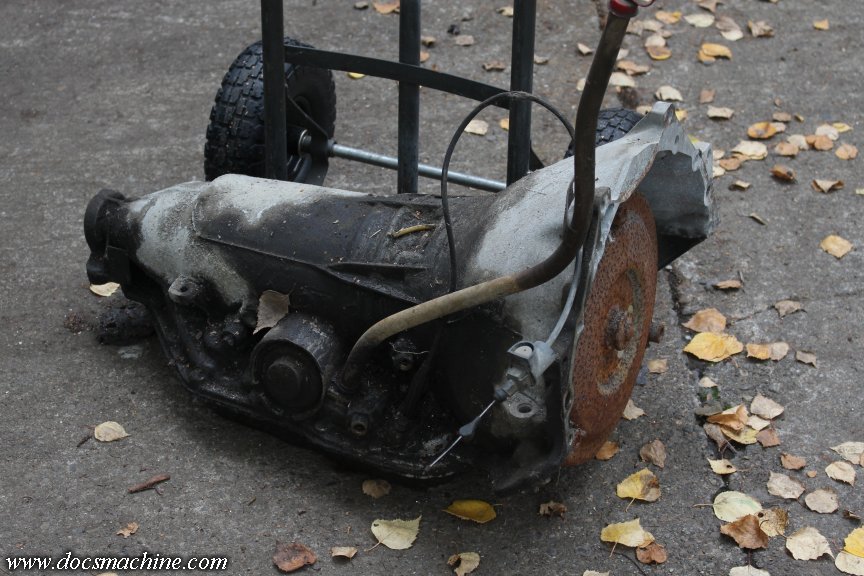
An '84 TurboHydraMatic 2004R, four-speed overdrive automatic transmission, out of the same Delta 88 or '98 I got the engine from.
I had boiled things down to two options- throw it back in more or less as-is (after a few basic seals and some fresh fluid) or rebuild it first. Both my laziness and my wallet said "as-is", but my slightly more pragmatic side said "you should probably rebuild it".
So, to start, I poured some of the oil out the tailshaft, to get a rough indication of the condition:
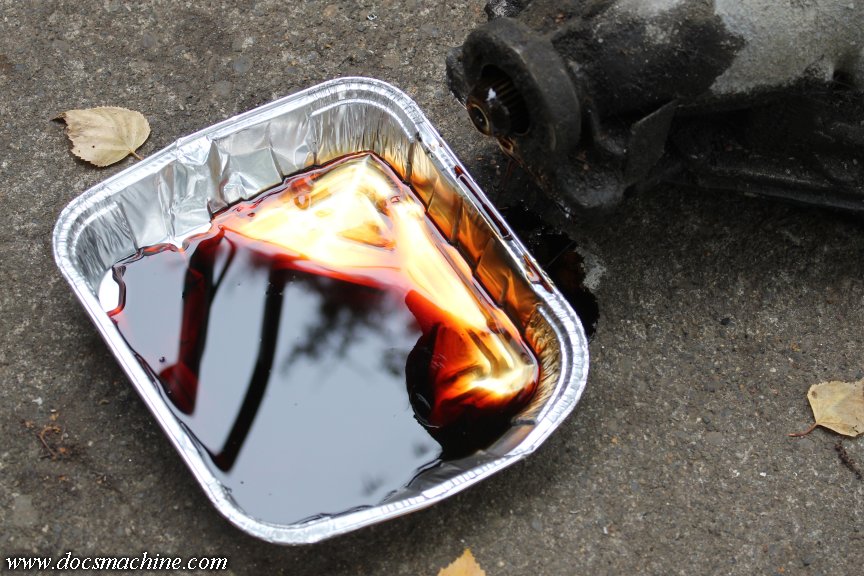
I'm not sure I've ever seen tranny fluid that black. On the plus side, it didn't smell burnt, like, at all. It just smelled like old oil. Next step, drop the pan off and have a look- any debris sitting in the pan gives a solid indicator of the health of an automatic like this. The only other auto I've rebuilt had glitter in the oil- sparkly flakes- along with bigger bits that basically said yeah, this tranny ain't long for the world. (And it wasn't. )
So, I bolted my BOP-C engine stand mount into the bell housing...
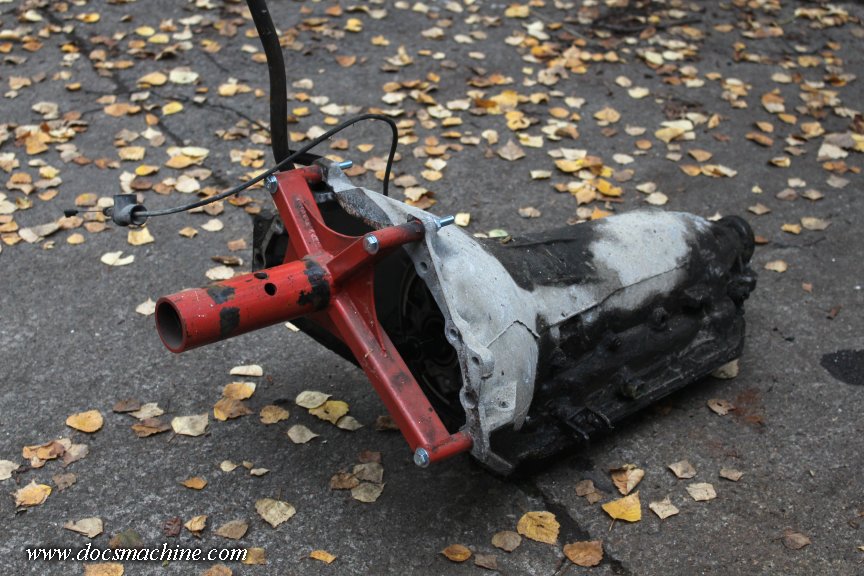
And slipped that into a spare engine stand.
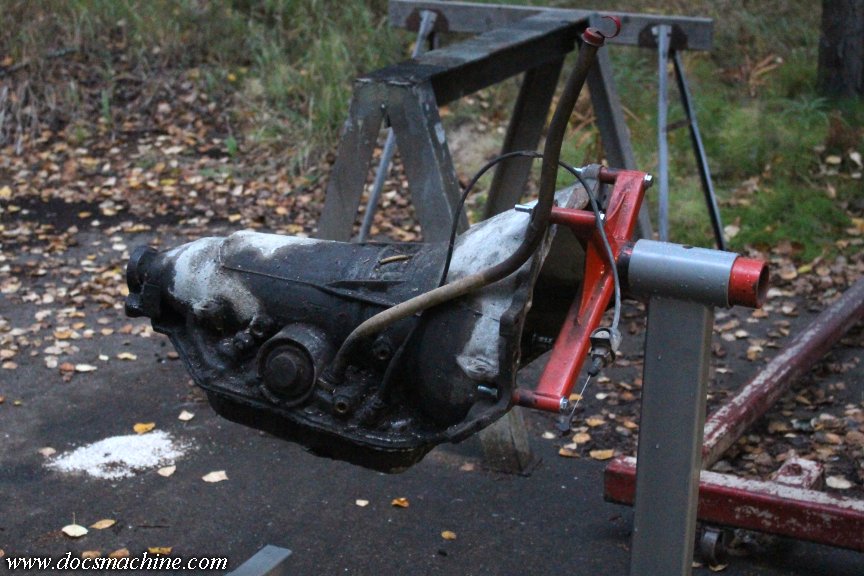
I won't be able to use that to rebuild it, since everything has to come out the front. I'll need a different mount for that, but for now, it'll hold it nicely to pull the pan.
Removing said pan, I was actually kind of surprised- it may not seem that way, but that's actually pretty clean.

There's some dirt visible in there, but that crumbled off the trans and gasket as I pulled it off. The important bits are the "silt", and what's stuck to the round magnet.
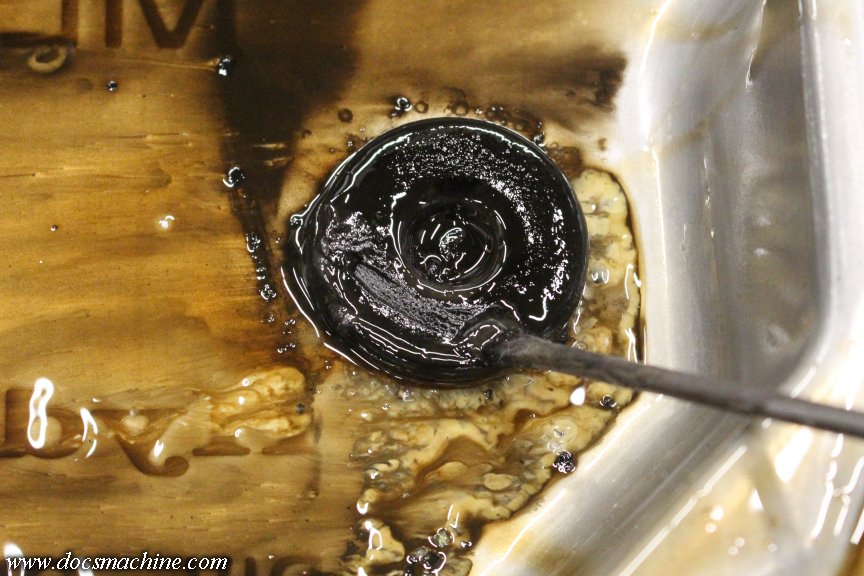
The magnet had a fuzz of extremely fine metal dust. No chunks or flakes, and about what I'd have expected from a transmission out of a forty-year-old automatic out of a land-barge sized car that had 124,000 miles on it.
Decanting most of the fluid, there was a nontrivial amount of nonmagnetic "silt".
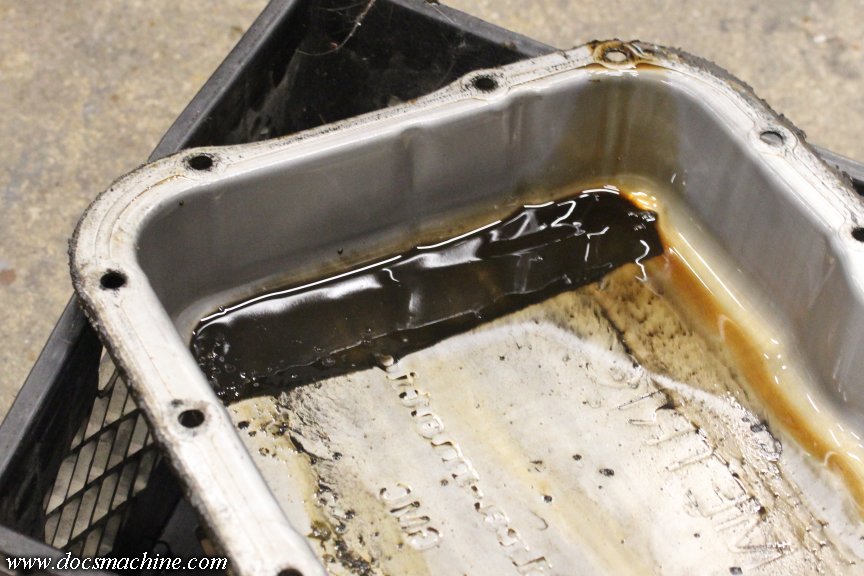
The magnetic stuff came off the steel clutch plates, and the 'silt' came off the fiber-lined clutch plates. To be honest, I'd wager I could have thrown a few seals at this thing (input shaft, output shaft, etc.) some fresh fluid (and probably a flush) and maybe even a new torque converter, and there's a strong chance I could have gotten at least a few thousand miles out of it.
BUT... at the same time I probably couldn't properly trust it, and I'd personally never have been entirely happy with it. So, we're going with Option Two, and I'll rebuild it over the course of the winter.
But, we still have a few things to do I was surprised to see how rusty the bottom of the pan was, so first I cleaned all the old oily mud off...
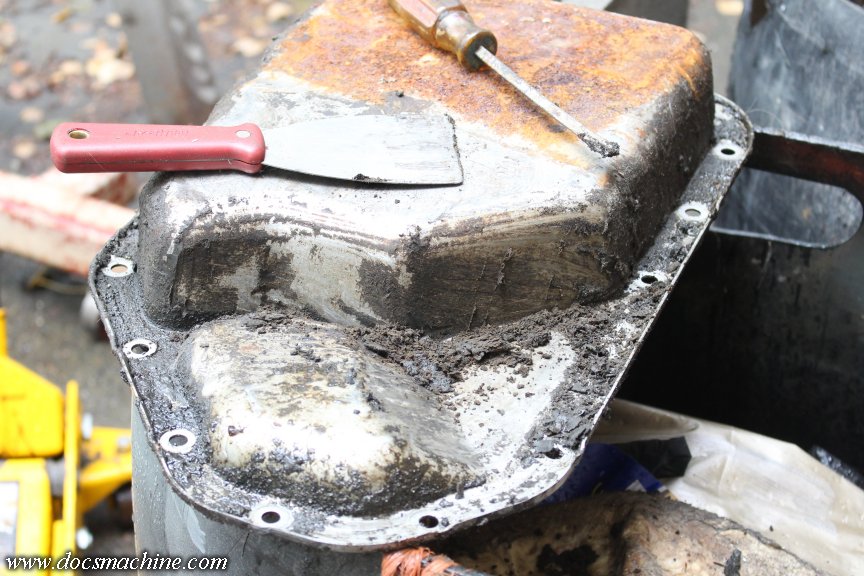
And wire brushed it a bit- I didn't like how pitted it was.
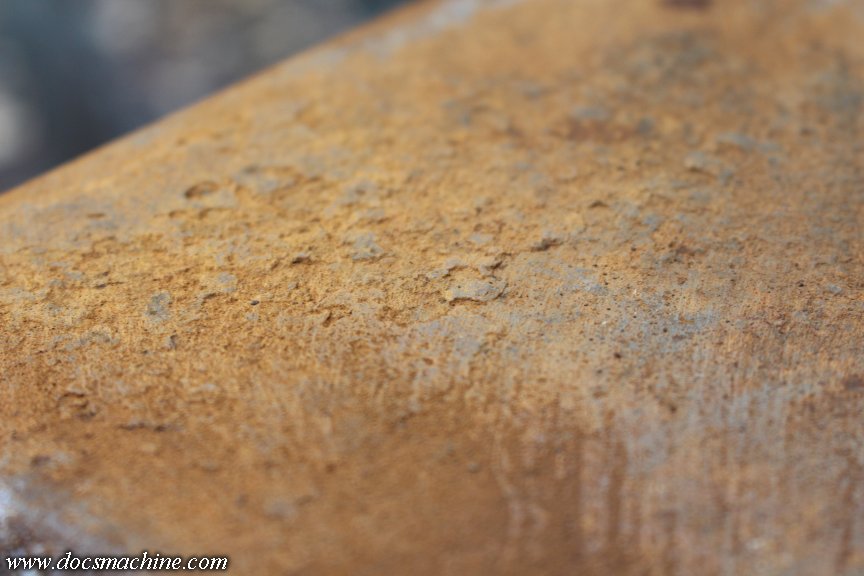
I eventually ran it through the bead-blaster, and it'll probably be okay, but there's some deep pits I don't really like. Looking on eBay... a used steel pan is $150! Hum... maybe I can use this one...
With that out of the way, I got out the pressure washer, some engine degreaser, a couple scrapers and some stiff brushes, and did what I could to clean up the case.

After an hour or more of scrub-and-rinse, and lots of fiddly little pickery, it's not too bad.
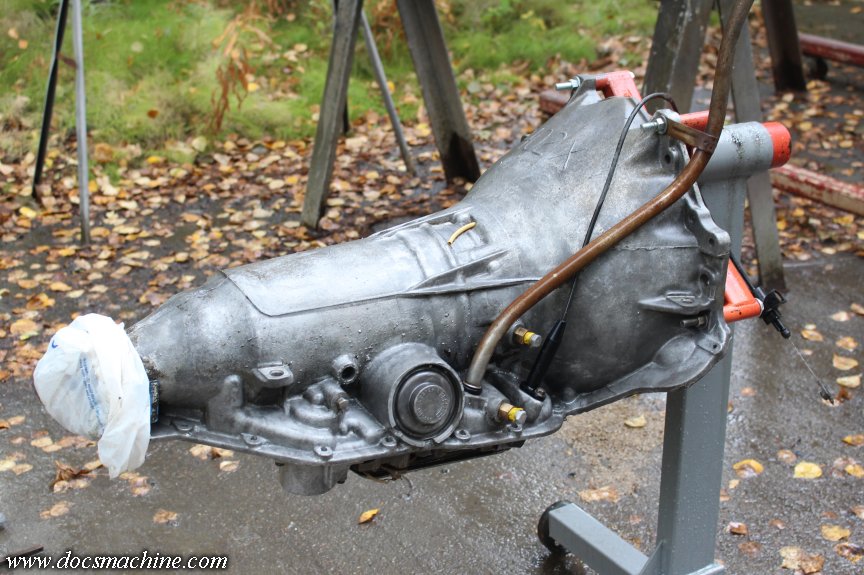
The casting had a few rough spots in places...
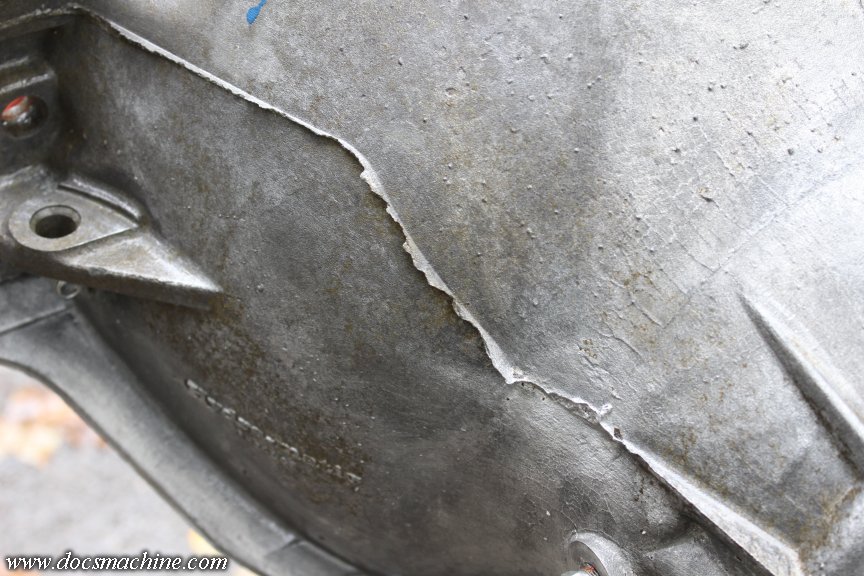
So I hit some of those with the air grinder and a Roloc disc.
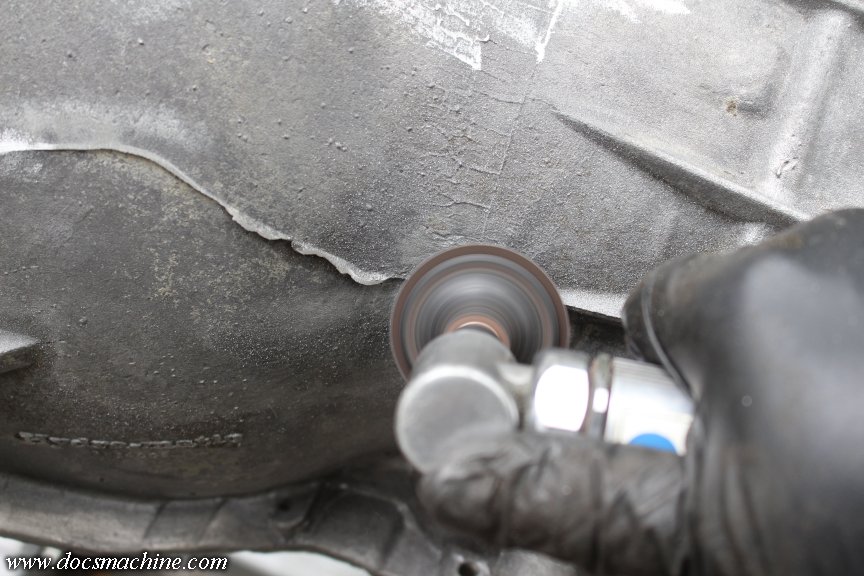
Not trying to smooth it up in preparation for polish or anything like that, just knocked a few of the sharp edges off.
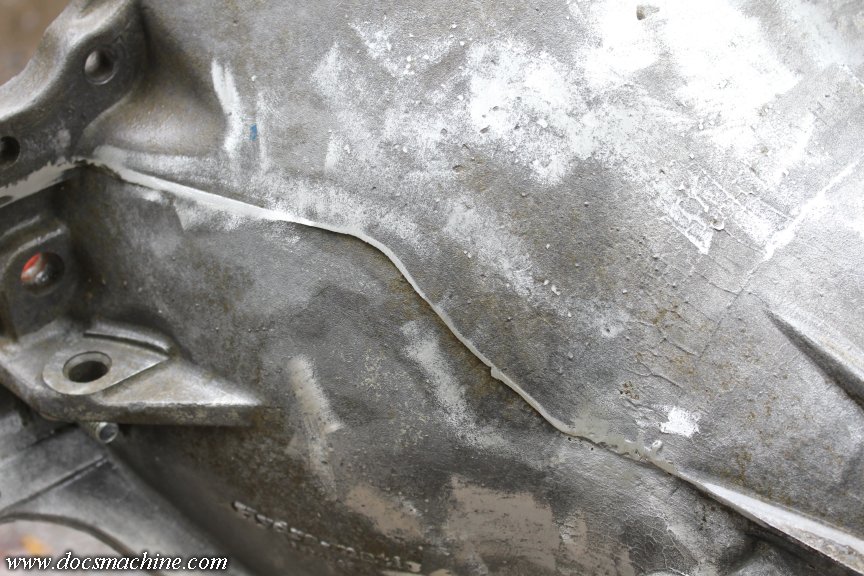
And that about does it. The output shaft end is still dirty, but I didn't want to be blowing water in there. I'll clean that bit by hand once it's apart.
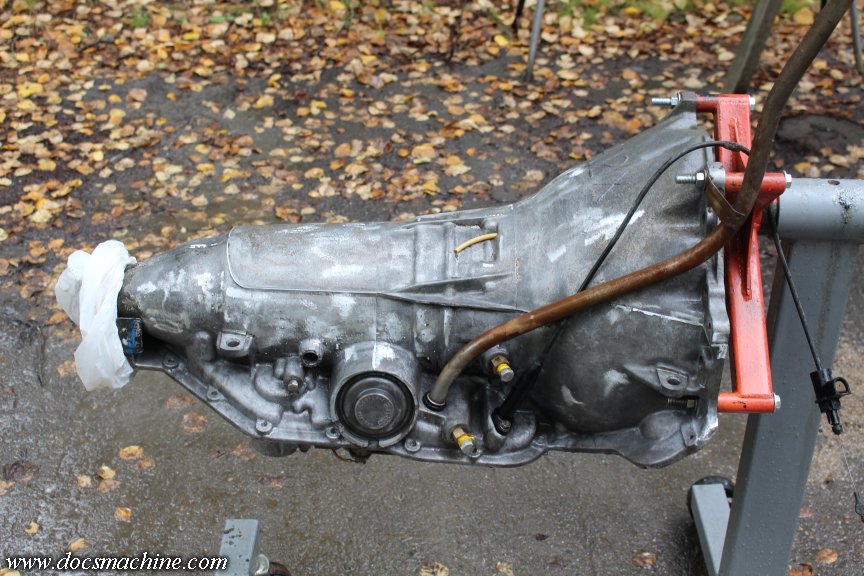
And finally, to keep it out of the rain, I brought it inside, to literally the one space left in the shop I could jam it into.
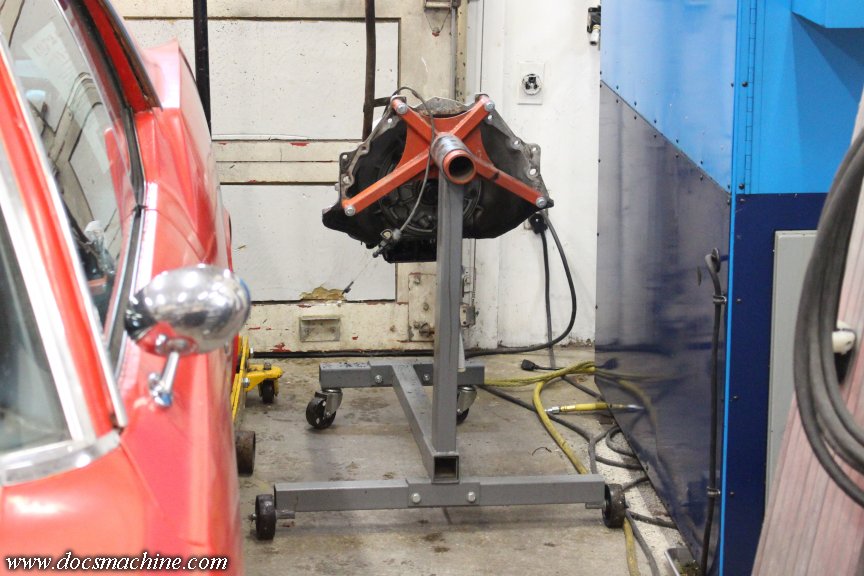
At some point when I can get more of the rest of the shop sorted out, it'll likely spend most of the winter on the big steel table. I don't like losing that much workspace, but it beats trying to do it outside.
Doc.
The Plan is that I am going to try, over the course of the rapidly-oncoming winter, to rebuild the well-used 2004R transmission that came with the engine, and install it in the Cutlass. So that once the summer finally rolls back around, I can, for once, simply drive and enjoy it for the 12� nice days we get a year.
The drawbacks to the plan are well known: Funds, time and space.
Funds have always been, and will continue to be, an issue. I'll work around that as best I can. Same with time- assuming a fairly leisurely pace, using a few snatches of free time here and there, if I'm lucky I'll have it ready for summer.
Space, actually, might be the easiest of the three. Yeah, my shop is incredibly crowded... but that's because there's already a car in there, and has been for years. I don't wish to go into the details at the moment, but suffice to say it's become a bit of an albatross- BUT... if I evict it and put it into 'cold' storage... suddenly I have a work bay.
Although you can see how cluttered everything is, after having to move things from around- and stacked on top of- the other car. It's going to take me weeks to make some semblance of order out of that mess.
But, that gives me (barely) an open bay to bring the Doc-Rod in, where, with luck, I should be able to work on it over the course of the winter.
Better still, the car should remain driveable- or at least movable- save for during the actual trans swap, so theoretically, it can be backed out (and tarped if necessary) to give me an open bay for other work or projects. (Not that I can think of needing such, but suffice to say it hasn't even been an option for entirely too long.)
That done, I excavated the old trans itself out of storage, and brought it up front.
An '84 TurboHydraMatic 2004R, four-speed overdrive automatic transmission, out of the same Delta 88 or '98 I got the engine from.
I had boiled things down to two options- throw it back in more or less as-is (after a few basic seals and some fresh fluid) or rebuild it first. Both my laziness and my wallet said "as-is", but my slightly more pragmatic side said "you should probably rebuild it".
So, to start, I poured some of the oil out the tailshaft, to get a rough indication of the condition:
I'm not sure I've ever seen tranny fluid that black. On the plus side, it didn't smell burnt, like, at all. It just smelled like old oil. Next step, drop the pan off and have a look- any debris sitting in the pan gives a solid indicator of the health of an automatic like this. The only other auto I've rebuilt had glitter in the oil- sparkly flakes- along with bigger bits that basically said yeah, this tranny ain't long for the world. (And it wasn't.
)So, I bolted my BOP-C engine stand mount into the bell housing...
And slipped that into a spare engine stand.
I won't be able to use that to rebuild it, since everything has to come out the front. I'll need a different mount for that, but for now, it'll hold it nicely to pull the pan.
Removing said pan, I was actually kind of surprised- it may not seem that way, but that's actually pretty clean.
There's some dirt visible in there, but that crumbled off the trans and gasket as I pulled it off. The important bits are the "silt", and what's stuck to the round magnet.
The magnet had a fuzz of extremely fine metal dust. No chunks or flakes, and about what I'd have expected from a transmission out of a forty-year-old automatic out of a land-barge sized car that had 124,000 miles on it.
Decanting most of the fluid, there was a nontrivial amount of nonmagnetic "silt".
The magnetic stuff came off the steel clutch plates, and the 'silt' came off the fiber-lined clutch plates. To be honest, I'd wager I could have thrown a few seals at this thing (input shaft, output shaft, etc.) some fresh fluid (and probably a flush) and maybe even a new torque converter, and there's a strong chance I could have gotten at least a few thousand miles out of it.
BUT... at the same time I probably couldn't properly trust it, and I'd personally never have been entirely happy with it. So, we're going with Option Two, and I'll rebuild it over the course of the winter.
But, we still have a few things to do I was surprised to see how rusty the bottom of the pan was, so first I cleaned all the old oily mud off...
And wire brushed it a bit- I didn't like how pitted it was.
I eventually ran it through the bead-blaster, and it'll probably be okay, but there's some deep pits I don't really like. Looking on eBay... a used steel pan is $150! Hum... maybe I can use this one...
With that out of the way, I got out the pressure washer, some engine degreaser, a couple scrapers and some stiff brushes, and did what I could to clean up the case.
After an hour or more of scrub-and-rinse, and lots of fiddly little pickery, it's not too bad.
The casting had a few rough spots in places...
So I hit some of those with the air grinder and a Roloc disc.
Not trying to smooth it up in preparation for polish or anything like that, just knocked a few of the sharp edges off.
And that about does it. The output shaft end is still dirty, but I didn't want to be blowing water in there. I'll clean that bit by hand once it's apart.
And finally, to keep it out of the rain, I brought it inside, to literally the one space left in the shop I could jam it into.
At some point when I can get more of the rest of the shop sorted out, it'll likely spend most of the winter on the big steel table. I don't like losing that much workspace, but it beats trying to do it outside.
Doc.
Thread Starter
Unregistered Madman
Joined: Mar 2012
Posts: 55
From: Backwater, Alaska
We are now caught up into 2026!
And after a busy holiday season (I have a machine shop wherein I manufacture a line of my own parts) I decided I didn't have the time or wherewithal to rebuild the transmission myself. I contacted a couple of the local shops, one of them agreed to handle a loose trans (some of them don't like it, since customers will misinstall it and blame the shop) so I had a quick sale to help cover the costs.
I got it back on January 28th, after just two weeks:
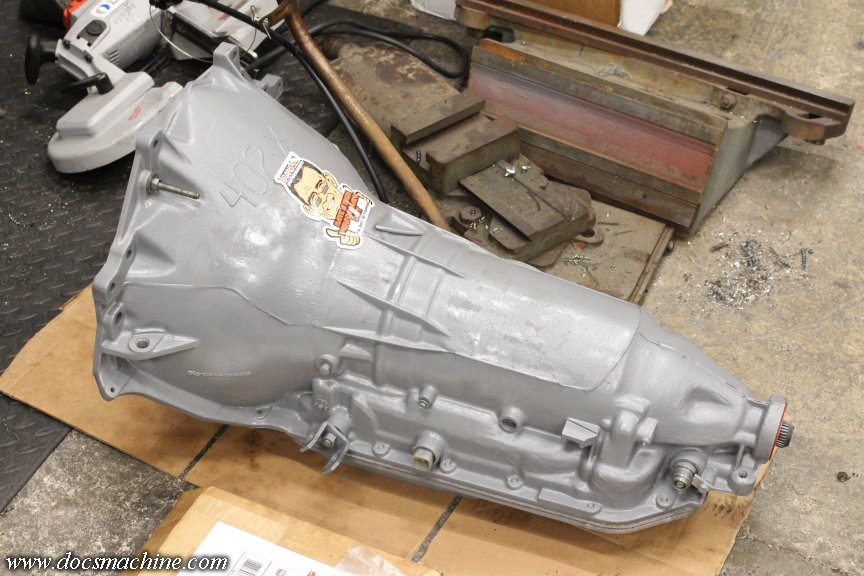
And it still waited 'til the beginning of April before I could start on the swap. Fortunately, I was able to shanghai some competent assistance help me wrangle the 250-pound 3-speed out and get the fresh 250-pound 4-speed back in.
Said help even had a cool hydraulic transmission jack, which made the whole project...well, not easy, but at least, not as bad as it could have been.
Not many pics, sorry. We were focused on the doing, not the documenting. (And, there's just so many times I can get up and down that ladder, and I get short-tempered when I'm tired.)
Anyway, a quick before:
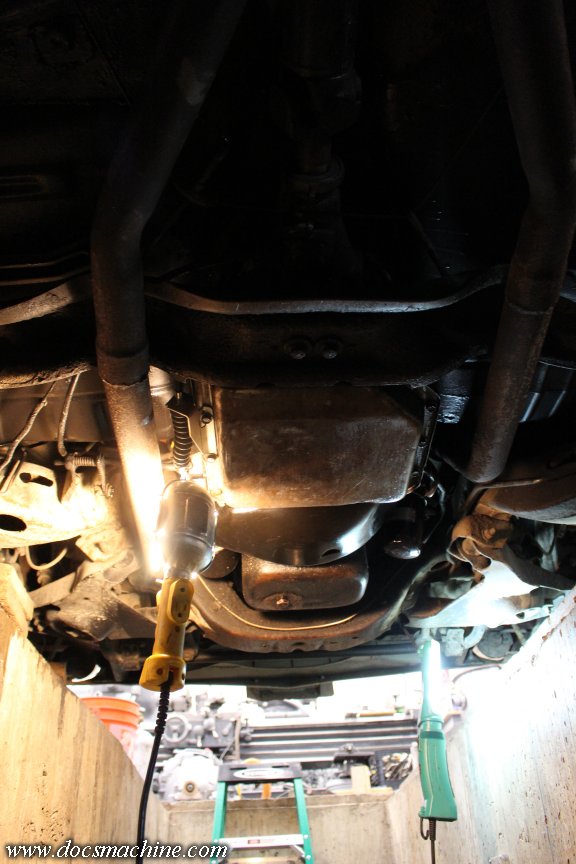
First thing to go was to get the exhaust out of the way...
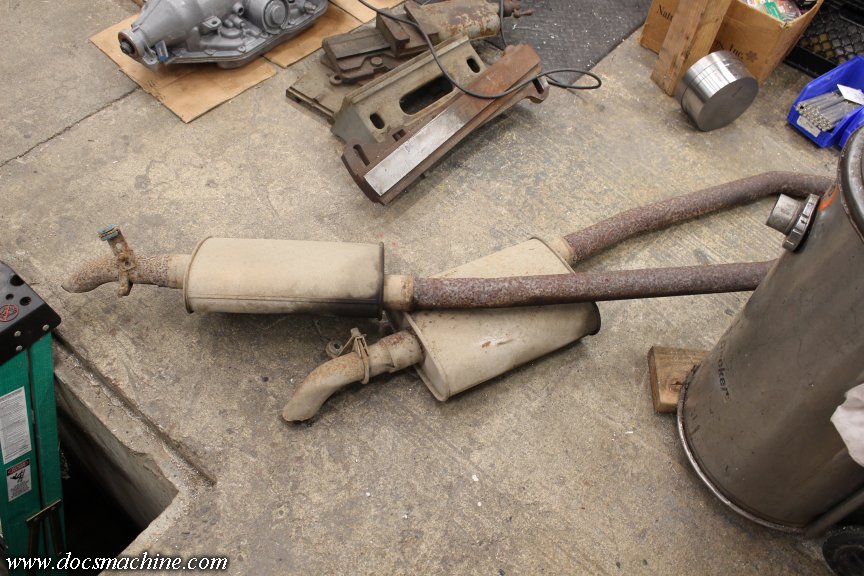
(That was nearly new when I got the car.) After that, drained the fluid out- what hadn't self-drained, anyway- and removed the driveshaft.
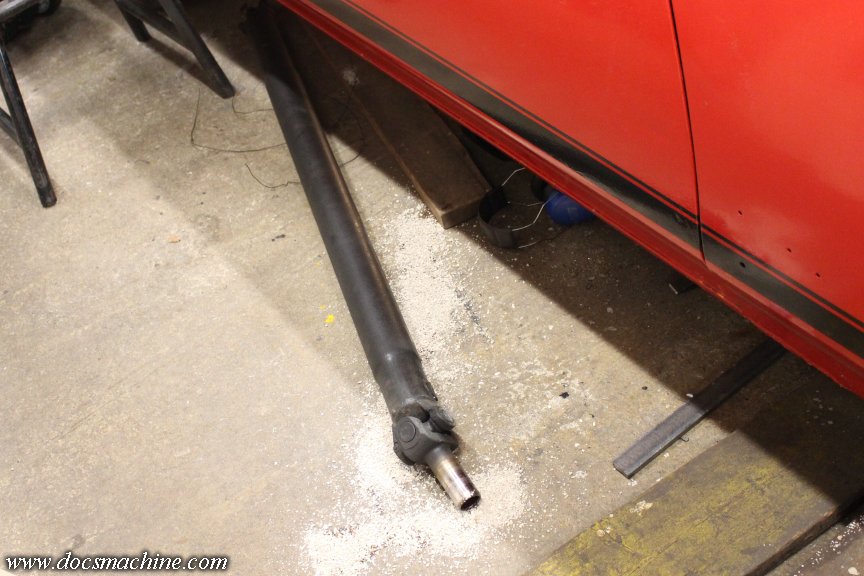
Not shown, I also disconnected the shifter, speedo cable, parking brake cable, starter and converter dust cover.
The crossmember proved a bit recalitrant to vacate the premises, so I was forced to get somewhat medieval on the bolts.
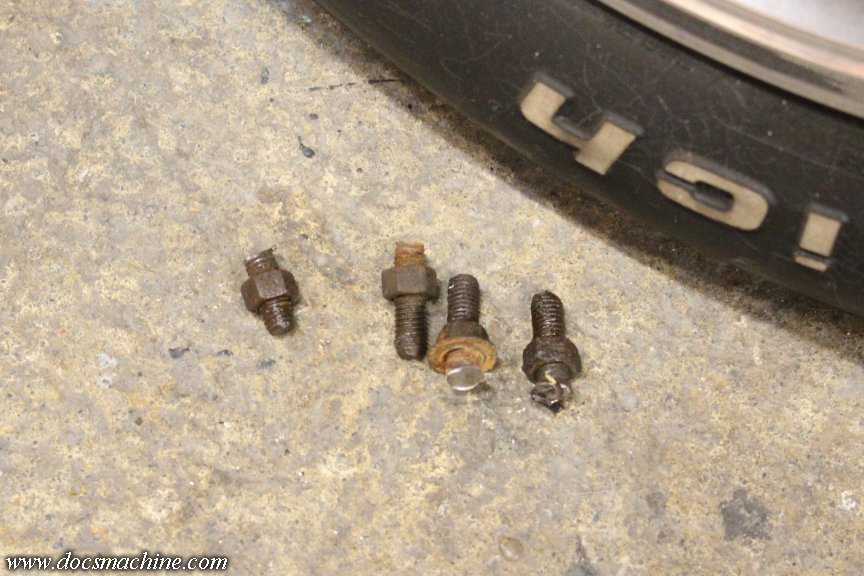
I ground the heads off- or at least as much of them as I could- and beat the remains out with a hammer.
Later, with the jack and help, the rest was disconnected (cooler lines, kickdown cable, flexplate bolts, etc.) the not-light jack lowered into the pit, rolled into place, and with not too much fuss, the trans separated and lowered.
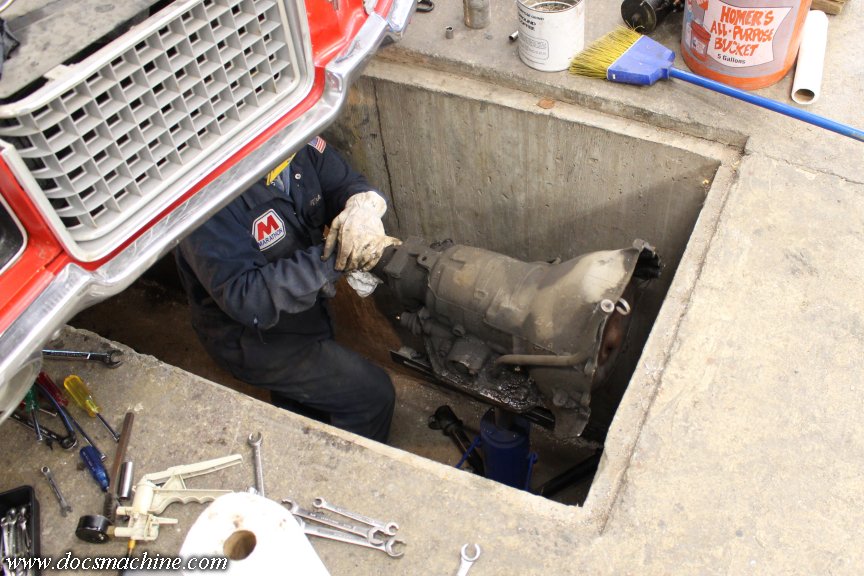
The jack raised it back up to floor level, the old slid off and the new slid on, and the process reversed. All we were able to do today was get the new one socked back into place, and the bellhousing bolts snugged.
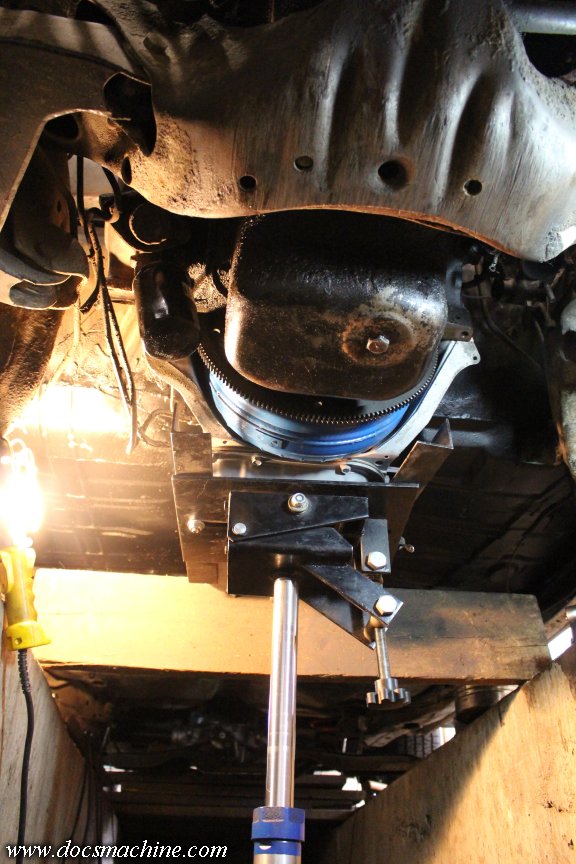
I want to clean off the crossmember before I put it back on, I'll need some fresh bolts, I have a new poly transmission mount coming, and so forth.
Doc.
And after a busy holiday season (I have a machine shop wherein I manufacture a line of my own parts) I decided I didn't have the time or wherewithal to rebuild the transmission myself. I contacted a couple of the local shops, one of them agreed to handle a loose trans (some of them don't like it, since customers will misinstall it and blame the shop) so I had a quick sale to help cover the costs.
I got it back on January 28th, after just two weeks:
And it still waited 'til the beginning of April before I could start on the swap. Fortunately, I was able to shanghai some competent assistance help me wrangle the 250-pound 3-speed out and get the fresh 250-pound 4-speed back in.
Said help even had a cool hydraulic transmission jack, which made the whole project...well, not easy, but at least, not as bad as it could have been.
Not many pics, sorry. We were focused on the doing, not the documenting. (And, there's just so many times I can get up and down that ladder, and I get short-tempered when I'm tired.)
Anyway, a quick before:
First thing to go was to get the exhaust out of the way...
(That was nearly new when I got the car.) After that, drained the fluid out- what hadn't self-drained, anyway- and removed the driveshaft.
Not shown, I also disconnected the shifter, speedo cable, parking brake cable, starter and converter dust cover.
The crossmember proved a bit recalitrant to vacate the premises, so I was forced to get somewhat medieval on the bolts.
I ground the heads off- or at least as much of them as I could- and beat the remains out with a hammer.
Later, with the jack and help, the rest was disconnected (cooler lines, kickdown cable, flexplate bolts, etc.) the not-light jack lowered into the pit, rolled into place, and with not too much fuss, the trans separated and lowered.
The jack raised it back up to floor level, the old slid off and the new slid on, and the process reversed. All we were able to do today was get the new one socked back into place, and the bellhousing bolts snugged.
I want to clean off the crossmember before I put it back on, I'll need some fresh bolts, I have a new poly transmission mount coming, and so forth.
Doc.
Thread Starter
Unregistered Madman
Joined: Mar 2012
Posts: 55
From: Backwater, Alaska
Wait... "good job"?!? Was that a compliment?
Most other boards I post this stuff to, half the replies are "here's how you could have done it better".
She'll never win any shows- if it was the only entry, it'd still come in second - but I'm having a lot of fun with it.
Doc.
Most other boards I post this stuff to, half the replies are "here's how you could have done it better".
She'll never win any shows- if it was the only entry, it'd still come in second
- but I'm having a lot of fun with it.Doc.
Registered User
Joined: Sep 2025
Posts: 41
Ha - hopefully I don't wreck any vibes with my positivity!
I know what you are saying though... I hardly even post online any more. It seems like most places have a group of bitter people that tell you that you are a dip***** unless you follow the other sheep.
I know what you are saying though... I hardly even post online any more. It seems like most places have a group of bitter people that tell you that you are a dip***** unless you follow the other sheep.
Thread Starter
Unregistered Madman
Joined: Mar 2012
Posts: 55
From: Backwater, Alaska
-Heck no. I was starting to wonder if anyone was even reading all this stuff.
-Yep, been there, done that, got the T-shirt. I've been told I'm wasting my time on an Olds engine, and that I should SBC/BBC/LS swap it, I've been told the 2004R will grenade behind anything stronger than a 2-barrel 350, and that I should go for a 4L80, etc. I've been told my floor metalwork is terrible (and they kind of have a point, there ) that my stripes are "wrong", and so on.
But, the one thing I've never been accused of is being normal.
Doc.
I was starting to wonder if anyone was even reading all this stuff.
I know what you are saying though... I hardly even post online any more. It seems like most places have a group of bitter people that tell you that you are a dip***** unless you follow the other sheep.
) that my stripes are "wrong", and so on. But, the one thing I've never been accused of is being normal.
Doc.
Registered User
Joined: Feb 2010
Posts: 1,745
From: Vancouver Island, Canada
Long time reader, first time poster... :-D
I've been enjoying looking at the progress you've made on the car. Not everyone has an unlimited budget, totally equipped shop and oozing with knowledge and skill. I find it more interesting and informative watching what can be done without being over done.
Keep it up!
I've been enjoying looking at the progress you've made on the car. Not everyone has an unlimited budget, totally equipped shop and oozing with knowledge and skill. I find it more interesting and informative watching what can be done without being over done.
Keep it up!
Thread Starter
Unregistered Madman
Joined: Mar 2012
Posts: 55
From: Backwater, Alaska
My new poly transmission mount came in, so while I was in town, I grabbed a few extra bolts. I figured if I could at least just get the crossmember and mount in, I can get the tranny-jack out of the way, and make it a little easier to move around down there.
So first I scraped about 20 pounds of road mung off the crossmember...
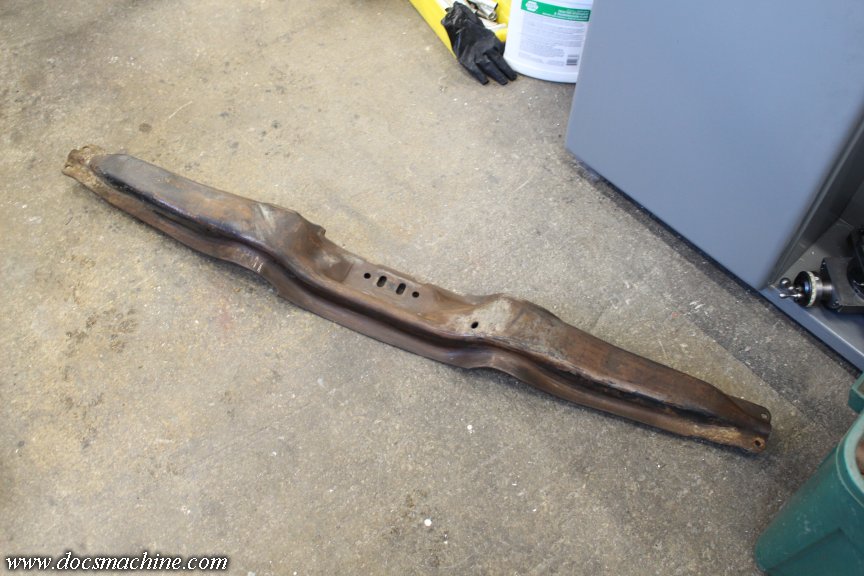
Slipped it back into place and lined up the holes, then bolted it down.
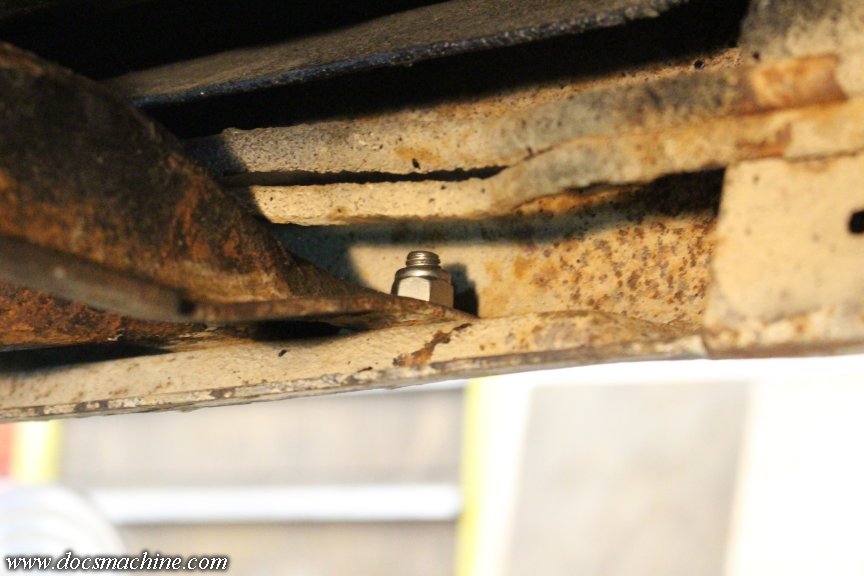
I went with stainless bolts and Nylocks- I know the SS isn't a high strength rating, but the lip of the frame supports all the weight, the bolts just hold it in place. Besides, I'm not exactly drag racing this thing.
All I had to do was slide it back one set of holes, use a sharp punch to line them up, and drop the bolts in.
One thing that did trip me up, though, were the bolts that hold the mount to the transmission body- they're metric. I couldn't use the bolts I'd taken off the 350, so I had to jog up to the hardware store and get some 10mm bolts.
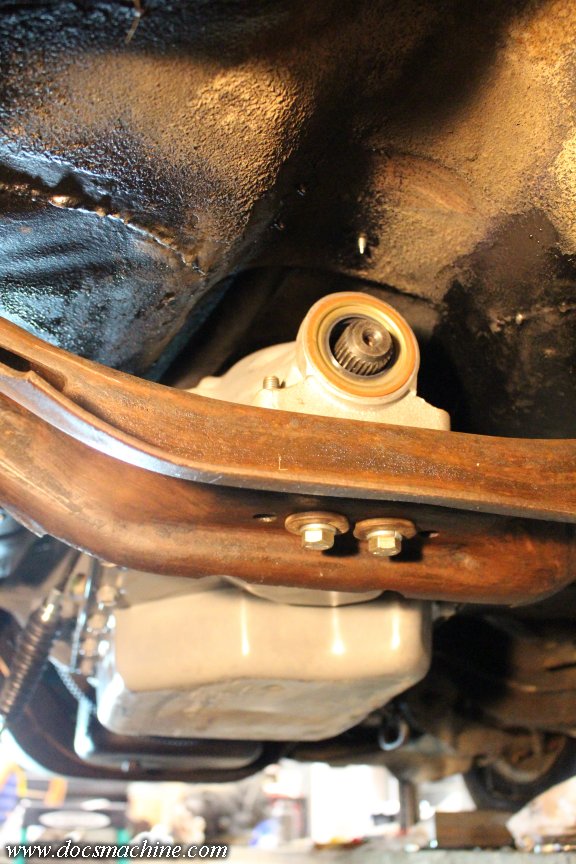
And one thing I noticed when I was checking, was that the driver's side bolt hole was partially stripped. Looked like somebody put a too-short bolt in and overtorqued it. So when I picked up some fresh bolts, I got one of them longer than the other- you can see it sticking out the top. That gave me more engagement to the good threads, so it wouldn't strip out again.
After that I was able to enlist help and winch the tranny jack back out of the hole, to get a little more room. Next, got the torque converter bolts cleaned up and reinstalled, with a little dab of blue Loctite...
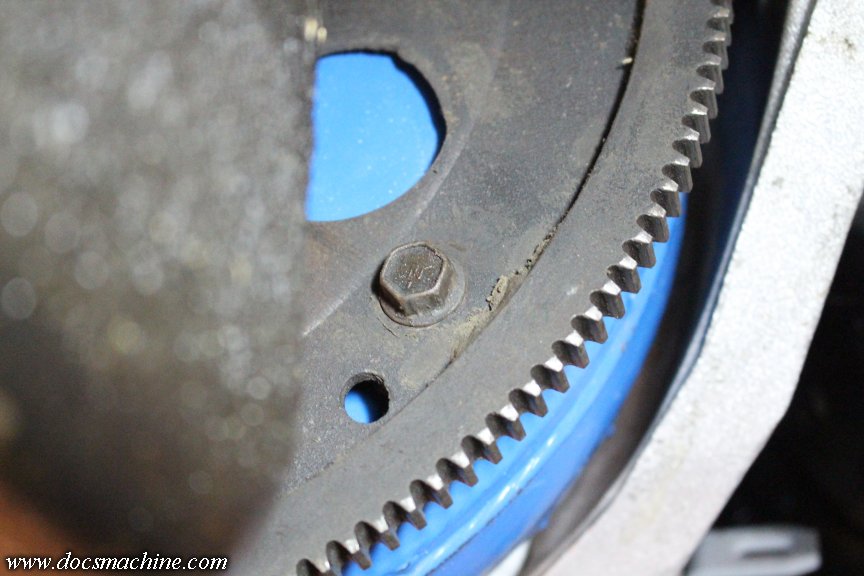
Wiped down the starter a bit, cleaned those bolts and got it mounted and wired...
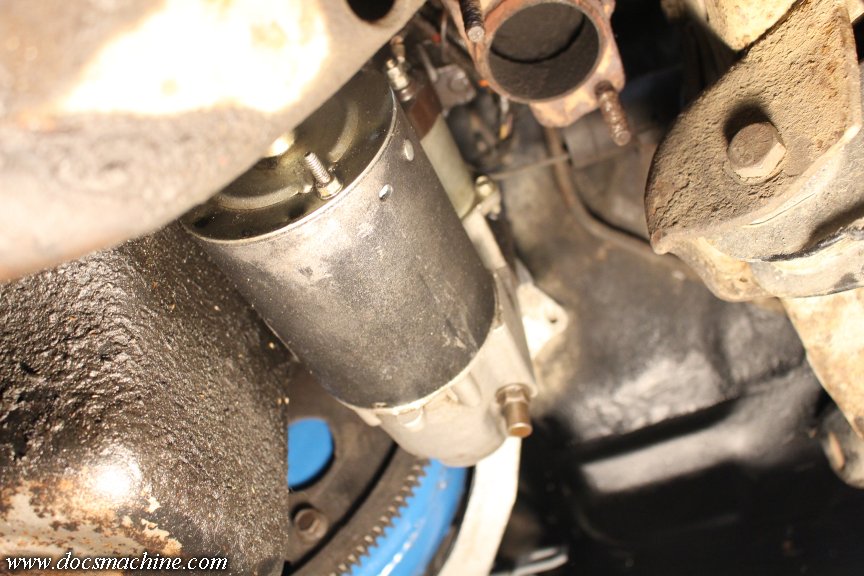
Cleaned off the end of the speedo cable and screwed that on...
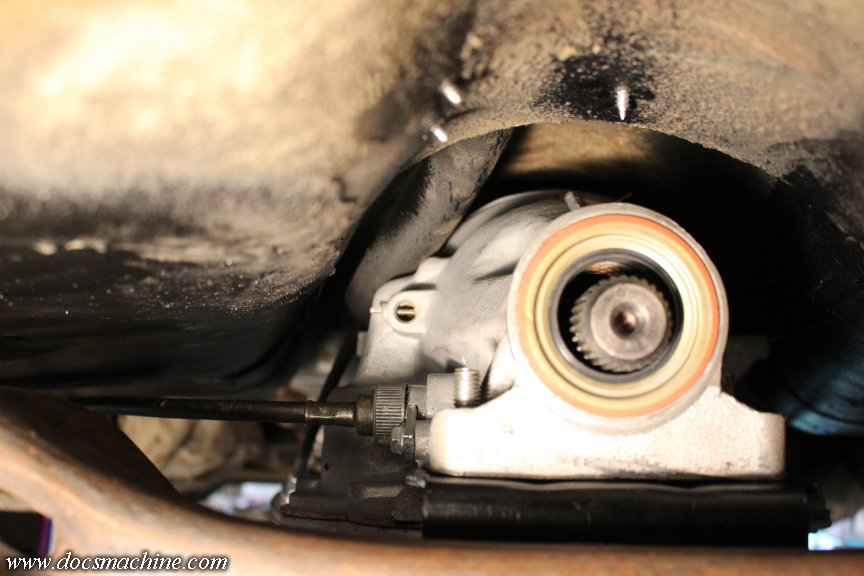
Then slipped the driveshaft back into place...
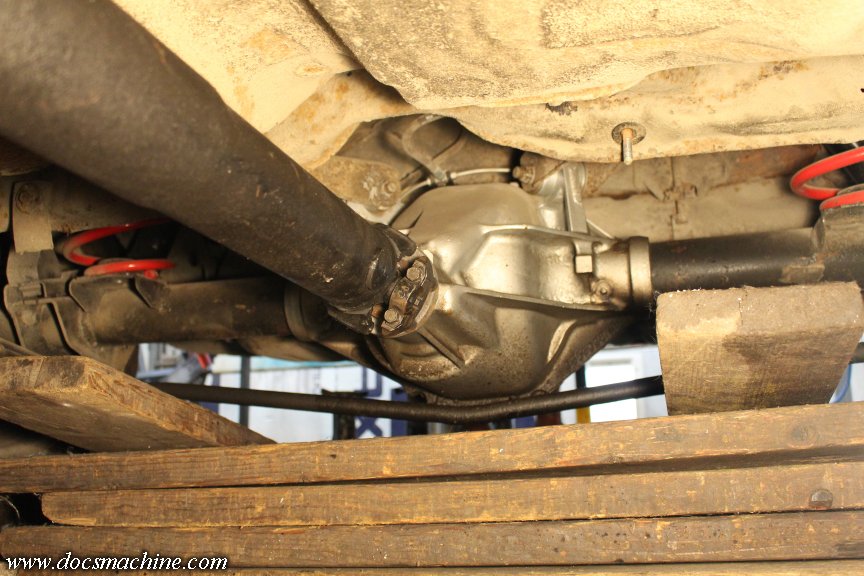
And found out my parking brake cables were in the wrong spot. When I was doing this, I hadn't read about that issue yet.
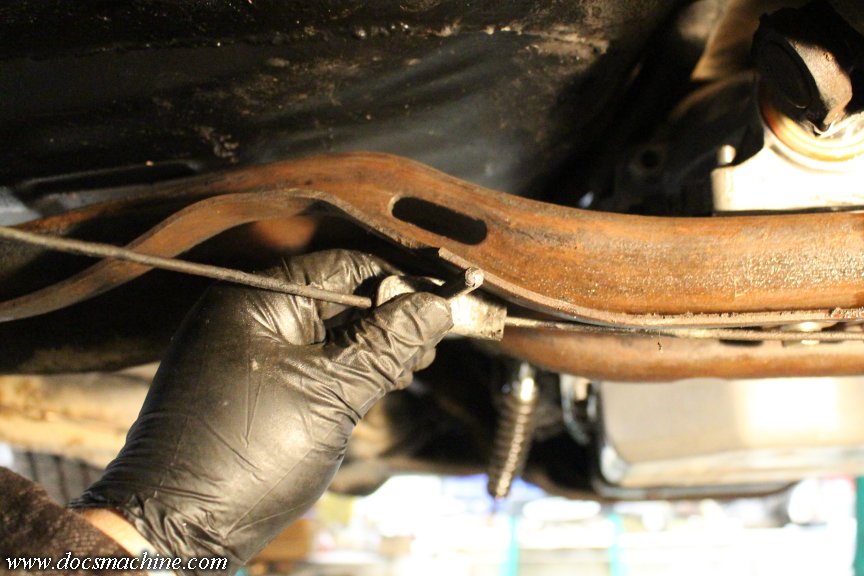
The cable from the pedal to the crossmember is going to have to be about 6-8" longer, and the rear loop that it pulls on, correspondingly shorter.
I may have a budget fix for that, although for the time being, since I hardly ever use the parking brake- automatic trans and it's pretty flat around here- easiest and quickest was to just disconnect the loose parts and set 'em aside.
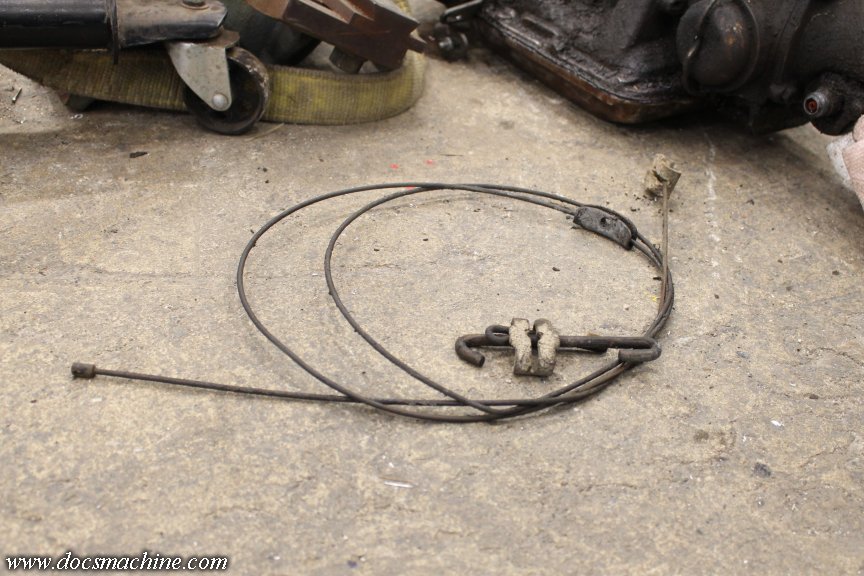
The last thing I wanted to do was mount the sheetmetal torque converter cover, but turns out the one from the T350 doesn't quite fit the T2004R. I may see if I can find the real thing, but I also think I can do a little strategic trimming and still use this one.
Doc.
So first I scraped about 20 pounds of road mung off the crossmember...
Slipped it back into place and lined up the holes, then bolted it down.
I went with stainless bolts and Nylocks- I know the SS isn't a high strength rating, but the lip of the frame supports all the weight, the bolts just hold it in place. Besides, I'm not exactly drag racing this thing.
All I had to do was slide it back one set of holes, use a sharp punch to line them up, and drop the bolts in.
One thing that did trip me up, though, were the bolts that hold the mount to the transmission body- they're metric. I couldn't use the bolts I'd taken off the 350, so I had to jog up to the hardware store and get some 10mm bolts.
And one thing I noticed when I was checking, was that the driver's side bolt hole was partially stripped. Looked like somebody put a too-short bolt in and overtorqued it. So when I picked up some fresh bolts, I got one of them longer than the other- you can see it sticking out the top. That gave me more engagement to the good threads, so it wouldn't strip out again.
After that I was able to enlist help and winch the tranny jack back out of the hole, to get a little more room. Next, got the torque converter bolts cleaned up and reinstalled, with a little dab of blue Loctite...
Wiped down the starter a bit, cleaned those bolts and got it mounted and wired...
Cleaned off the end of the speedo cable and screwed that on...
Then slipped the driveshaft back into place...
And found out my parking brake cables were in the wrong spot. When I was doing this, I hadn't read about that issue yet.
The cable from the pedal to the crossmember is going to have to be about 6-8" longer, and the rear loop that it pulls on, correspondingly shorter.
I may have a budget fix for that, although for the time being, since I hardly ever use the parking brake- automatic trans and it's pretty flat around here- easiest and quickest was to just disconnect the loose parts and set 'em aside.
The last thing I wanted to do was mount the sheetmetal torque converter cover, but turns out the one from the T350 doesn't quite fit the T2004R. I may see if I can find the real thing, but I also think I can do a little strategic trimming and still use this one.
Doc.
Thread Starter
Unregistered Madman
Joined: Mar 2012
Posts: 55
From: Backwater, Alaska
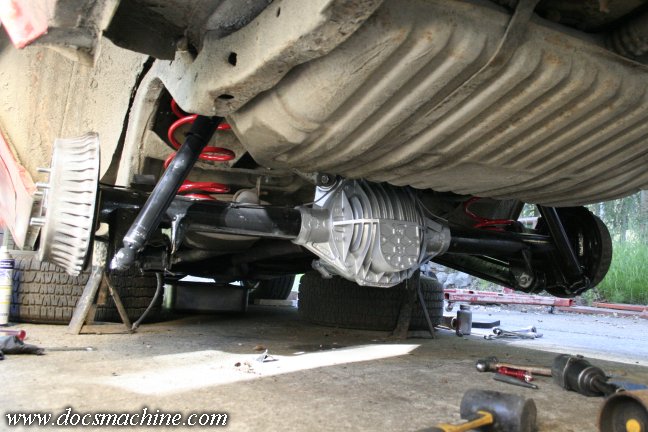
The diff originally came with I think 3.55 gears, but they were worn more than the shop which did the work- a very reputable local driveline and 4X4 shop- wanted to see, so I sprung for a set of 3.31s. I don't honestly recall how we came up with that number, but I did know I wanted to swap in an OD trans eventually, so that was part of the calculations. With the 2004R (which I'm just finishing up) I'll have a what, 2.25:1 final?
Never did check to see what the '84 D88 or D98 the engine and trans came out of had for a ratio, anyone know?
Doc.
Thread Starter
Unregistered Madman
Joined: Mar 2012
Posts: 55
From: Backwater, Alaska
Turning to the converter cover, that was easy enough to trim back, but when it came time to fit the bolts to make sure things fit... none of the bolts would screw in. I thought, oh yeah, this is a metric unit- remember the mount bolts?- but checked the threads against some similarly-sized metric screws, and none fit. You could see it was coarser than even 8mm 1.0, the coarsest in that size.
I double checked, and nope- they're 1/4"-20, just like the T350. Makes sense, there was a long transition period when cars had a mix of metric and imperial...
The part that caught me was- of course- all four of the holes had been damaged. Either lightly stripped or partially cross-threaded. So I just chased all of them, which was more or less straightforward, though I had to pull the oil filter to reach the last one.
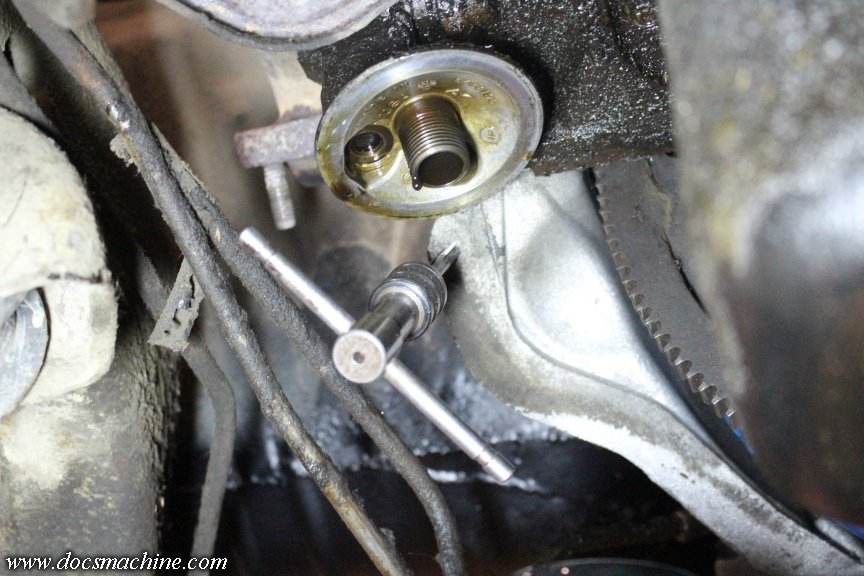
That let me finish up the trimming...
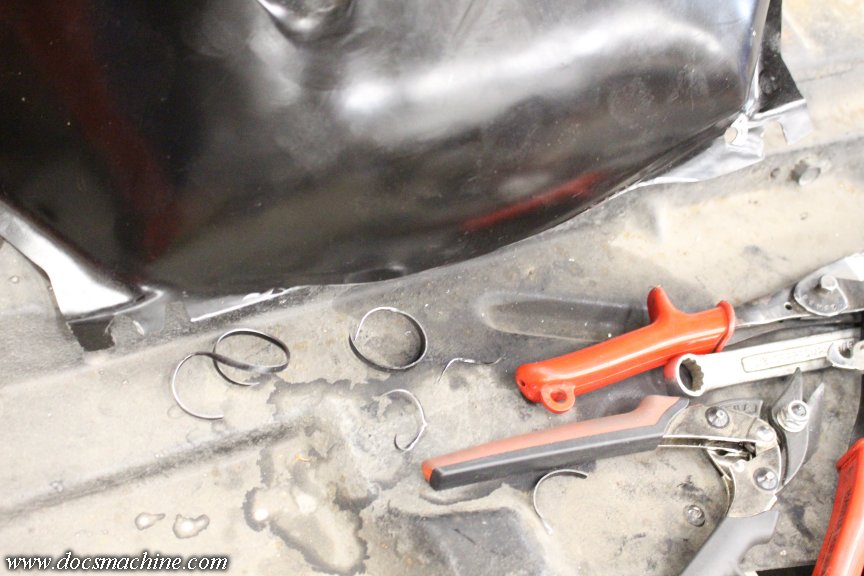
And finally get it fitted into place. I did have to re-punch one of the bottom holes, but the other three lined up nicely. There's a bit of flange sticking out I may still trim off, but it's ready to paint.
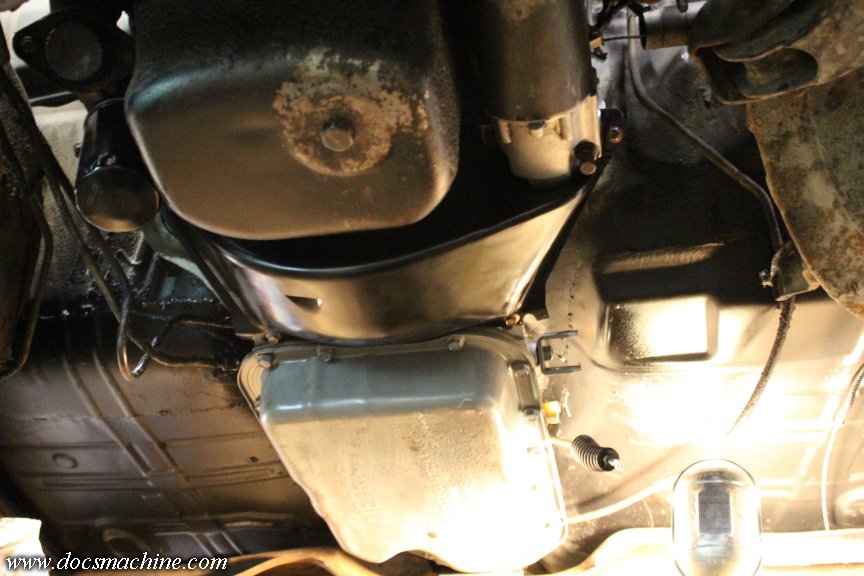
Degreased, hit with etch primer, and painted it the closest grey I had to whatever color they painted the transmission body.
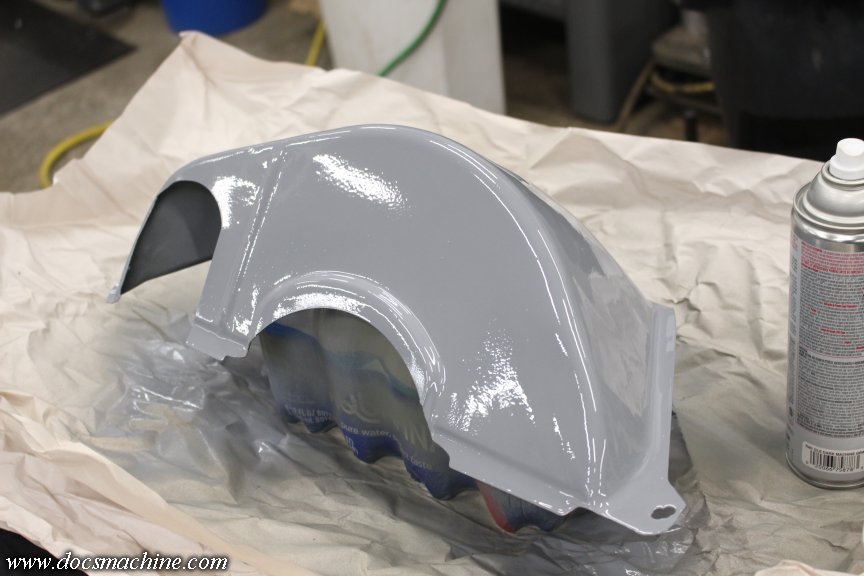
Now for the two cooler lines; the 200 has the connections in a slightly different spot than the 350- one line has enough give I could probably manhandle it into place, but the other is in no way, shape or form long enough.
I picked a likely spot and nipped off the two cooler lines 'bout thar.
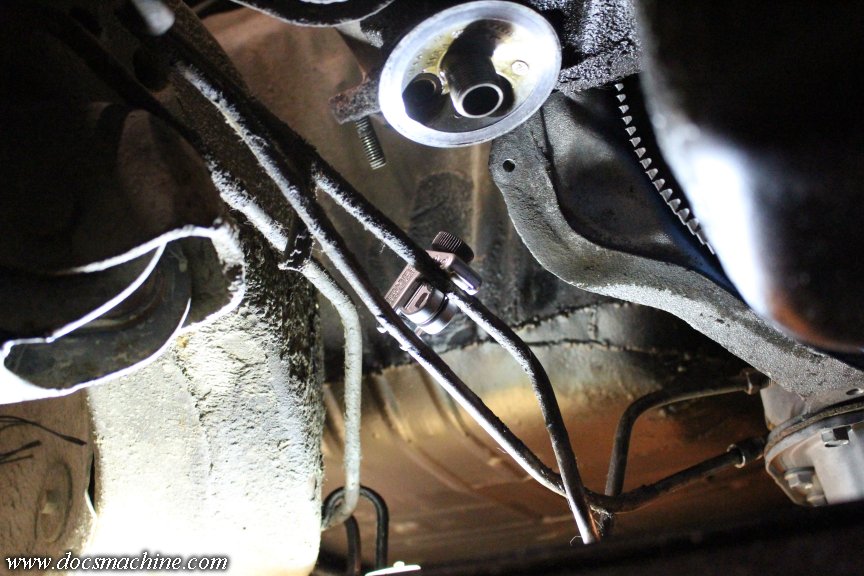
Cleaned off some of the scum and gunk, and deburred the cut edge.
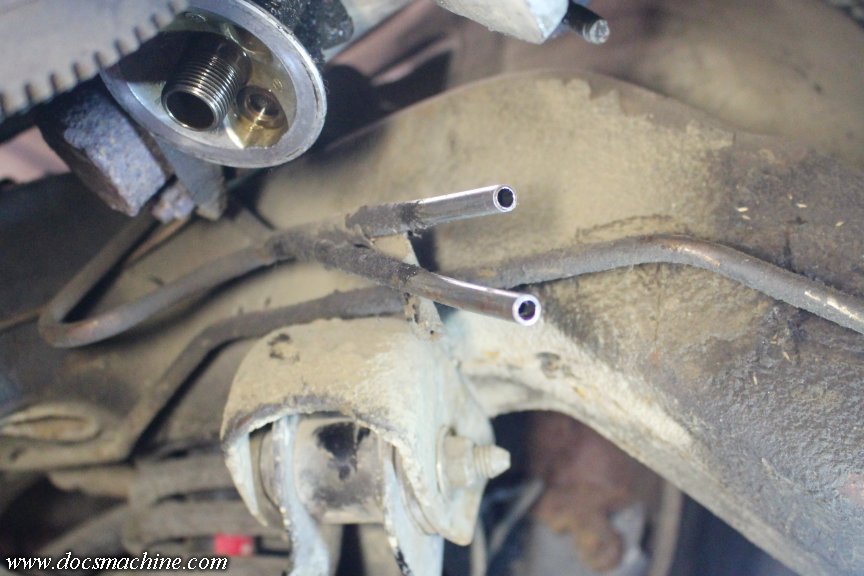
Then I cut the flares off the old lines, in order to reuse the flare nuts.
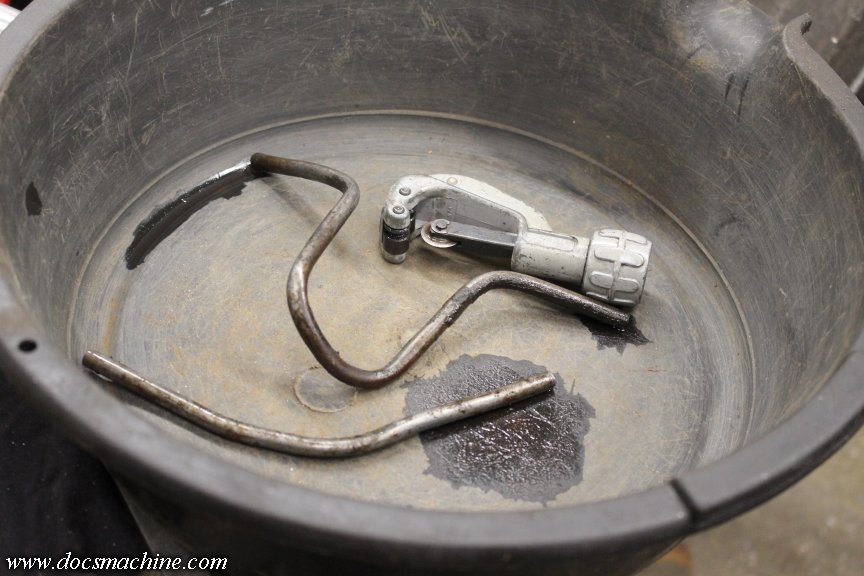
Those got cleaned up, slid into place and taped out of the way, then I got out my flaring kit and set it up.
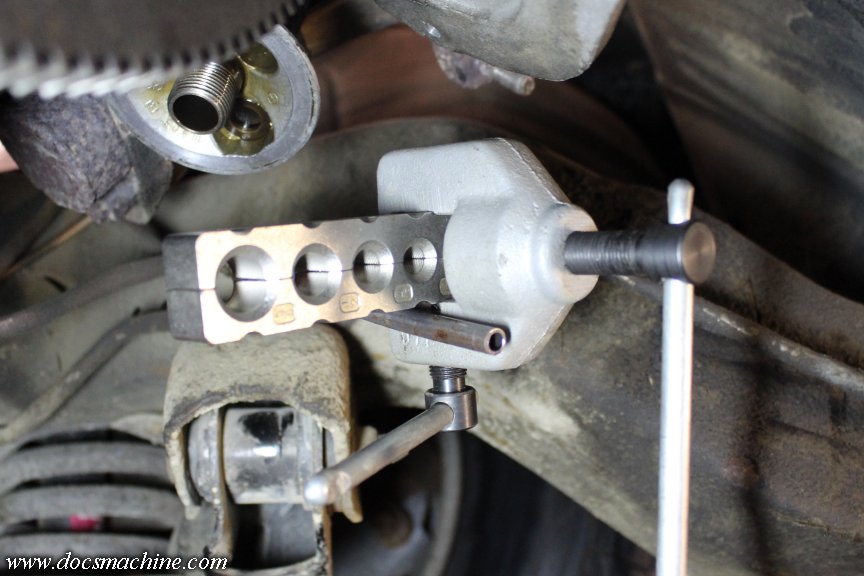
For those that have never done a double flare, you leave the tubing a little proud of the clamp, then drop the die in and squish it down.
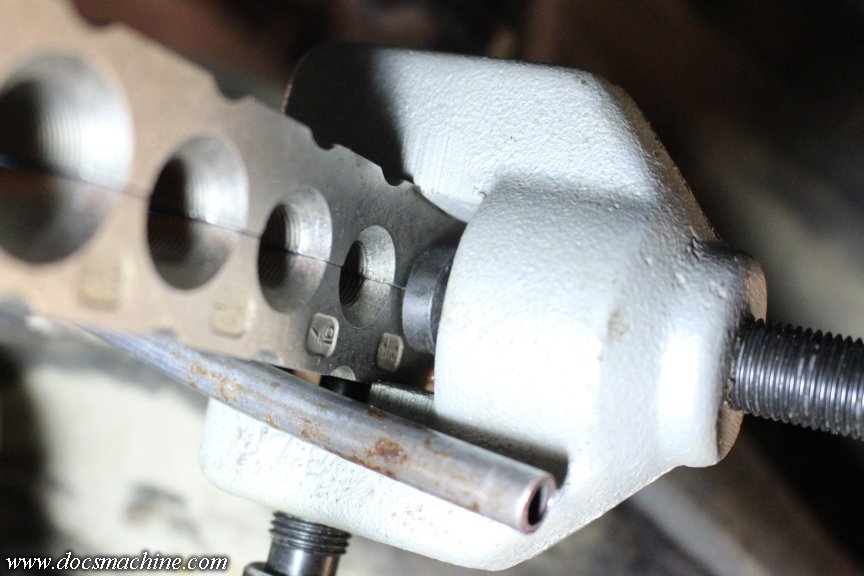
That forms a "balloon" at the end of the tube...
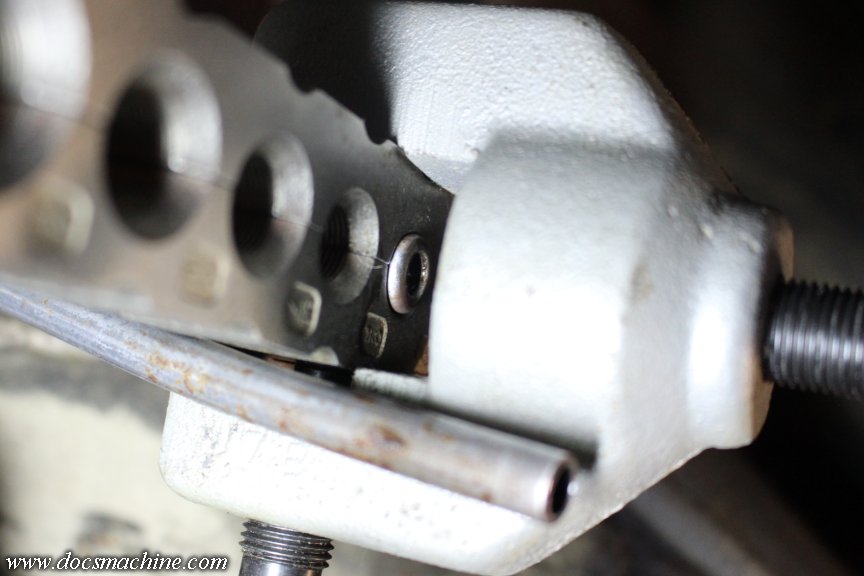
Which you then hit with the bare point, which folds the edge down, forming the double flare.
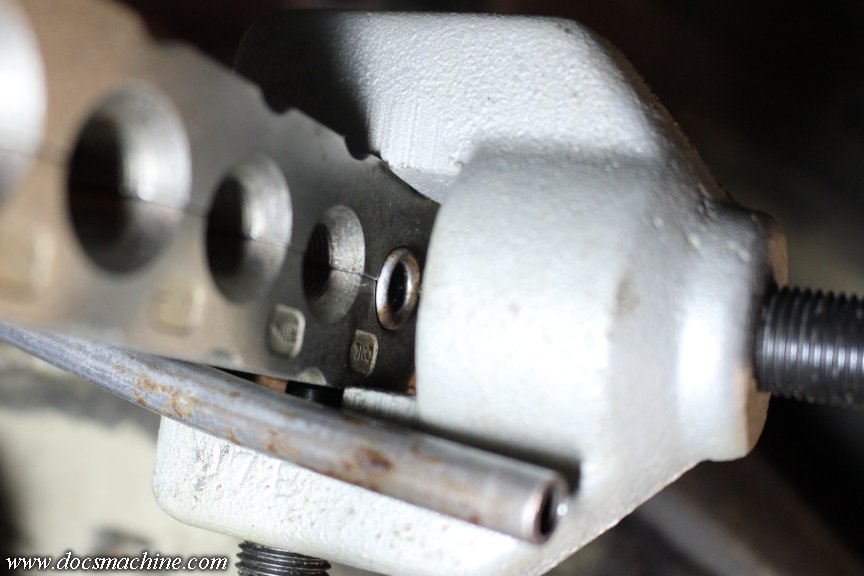
That makes for a much thicker and stronger flare, less likely to crack, and easier to get to seal.
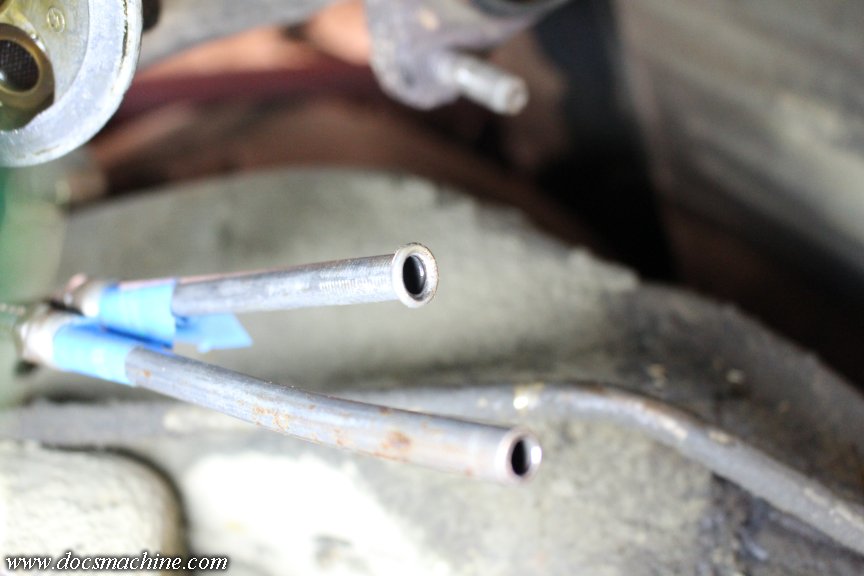
Untape and let the nuts slide into place...
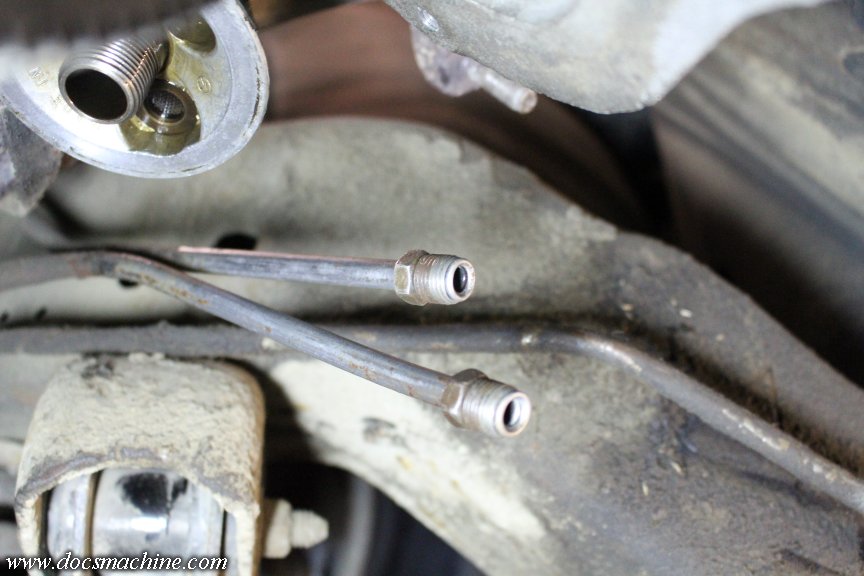
And add a pair of shiny new couplers.

Continued momentarily....
I double checked, and nope- they're 1/4"-20, just like the T350. Makes sense, there was a long transition period when cars had a mix of metric and imperial...
The part that caught me was- of course- all four of the holes had been damaged. Either lightly stripped or partially cross-threaded. So I just chased all of them, which was more or less straightforward, though I had to pull the oil filter to reach the last one.
That let me finish up the trimming...
And finally get it fitted into place. I did have to re-punch one of the bottom holes, but the other three lined up nicely. There's a bit of flange sticking out I may still trim off, but it's ready to paint.
Degreased, hit with etch primer, and painted it the closest grey I had to whatever color they painted the transmission body.
Now for the two cooler lines; the 200 has the connections in a slightly different spot than the 350- one line has enough give I could probably manhandle it into place, but the other is in no way, shape or form long enough.
I picked a likely spot and nipped off the two cooler lines 'bout thar.
Cleaned off some of the scum and gunk, and deburred the cut edge.
Then I cut the flares off the old lines, in order to reuse the flare nuts.
Those got cleaned up, slid into place and taped out of the way, then I got out my flaring kit and set it up.
For those that have never done a double flare, you leave the tubing a little proud of the clamp, then drop the die in and squish it down.
That forms a "balloon" at the end of the tube...
Which you then hit with the bare point, which folds the edge down, forming the double flare.
That makes for a much thicker and stronger flare, less likely to crack, and easier to get to seal.
Untape and let the nuts slide into place...
And add a pair of shiny new couplers.
Continued momentarily....
Thread Starter
Unregistered Madman
Joined: Mar 2012
Posts: 55
From: Backwater, Alaska
I then grabbed a hunk of aluminum TIG rod, and bent up a quick pattern for the first tube.
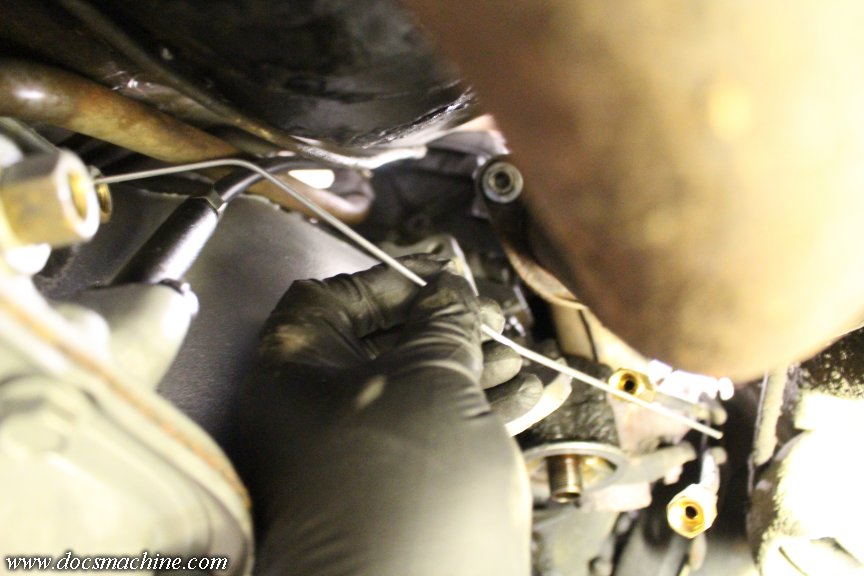
That got translated- more or less- to a chunk of preflared tubing from the local NAPA...
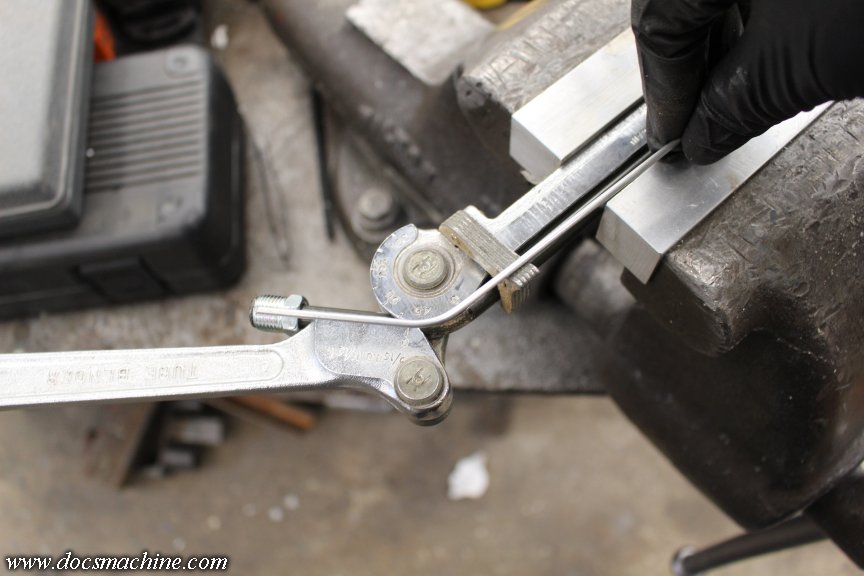
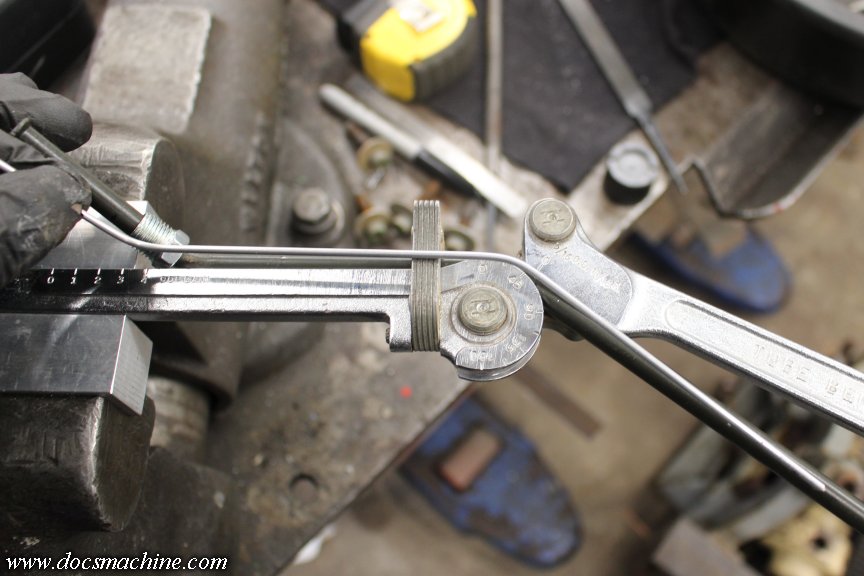
Fitted, cut to length, and reflared on the fresh end.
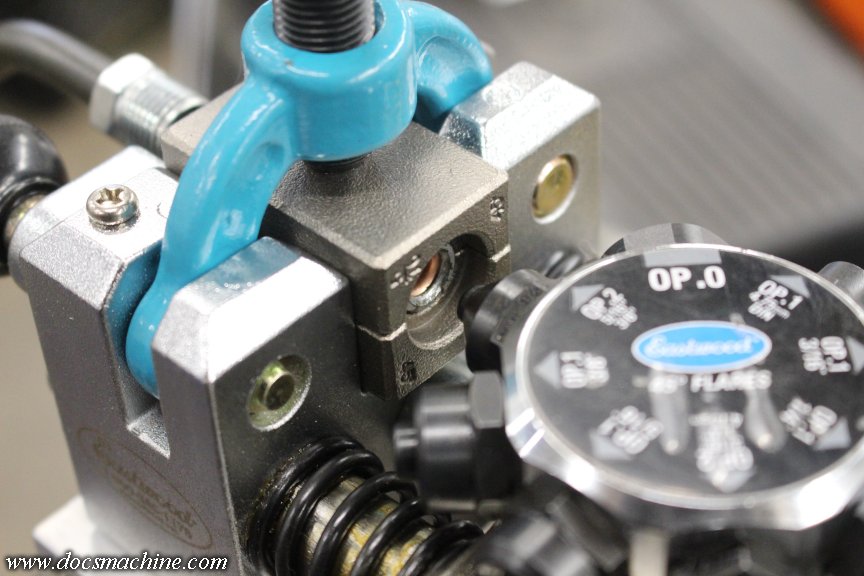
Et voil�! The Eastwood bench tool? Worth every penny.
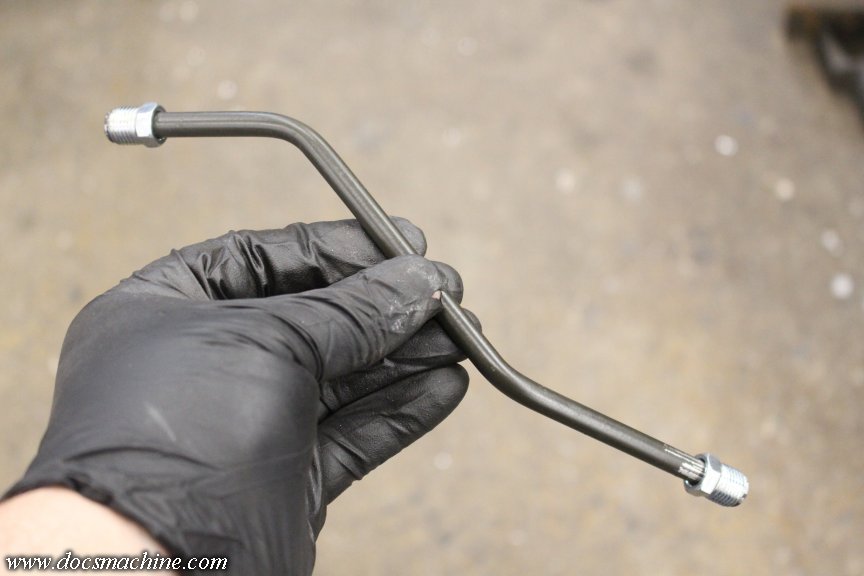
That gets snugged into place...
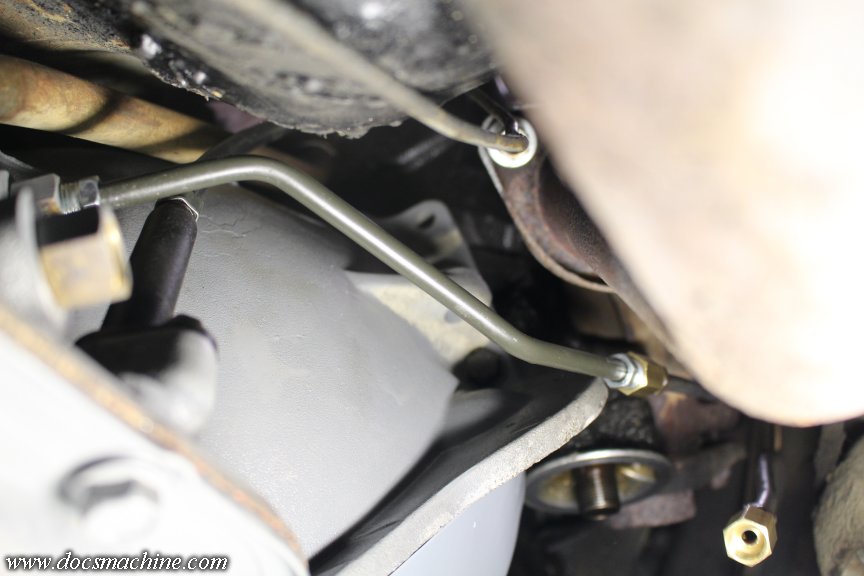
And the whole process repeated again for the lower tube.
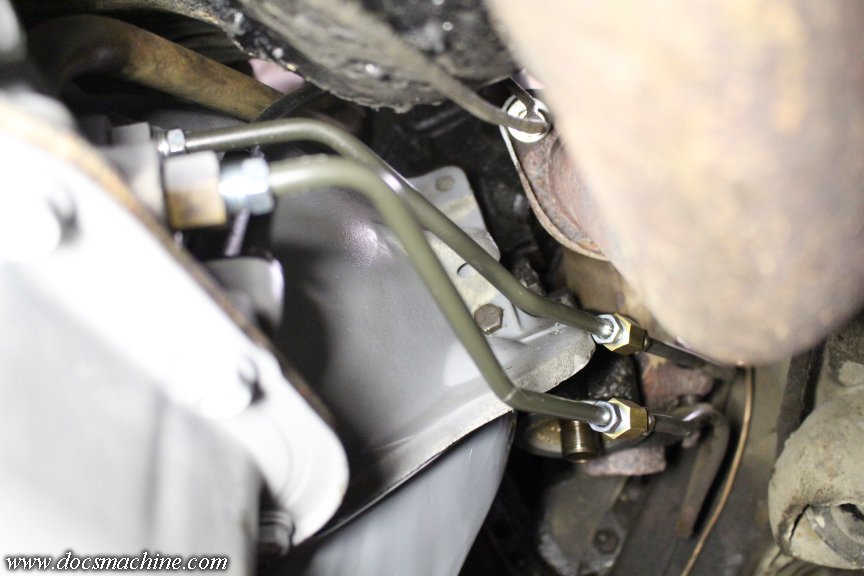
Once I was reasonably happy with the fit, everything gets tightened, then the oil filter unbagged, refilled with fresh oil, and screwed back into place.
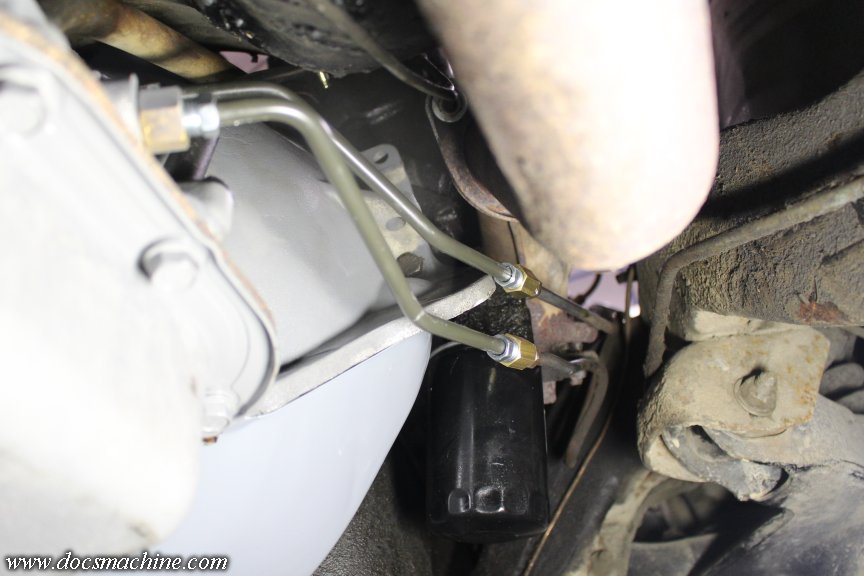
More to come!
Doc.
That got translated- more or less- to a chunk of preflared tubing from the local NAPA...
Fitted, cut to length, and reflared on the fresh end.
Et voil�! The Eastwood bench tool? Worth every penny.
That gets snugged into place...
And the whole process repeated again for the lower tube.
Once I was reasonably happy with the fit, everything gets tightened, then the oil filter unbagged, refilled with fresh oil, and screwed back into place.
More to come!
Doc.


